#gnuplotの使い方まとめ
- ページの最後に有用な画像を集めたので、それをみるのが速い
##グラフの線 line type
線のスタイルを指定するならlinetypoeコマンドでよい
plot inputfile linetype 1
- 追記 線のスタイルが思うように変わらないなら、点線間隔を指定するやり方もある。dashtypeコマンドを紹介する。
plot input witdh lines dt (10,5)
線,空白の比になっている。
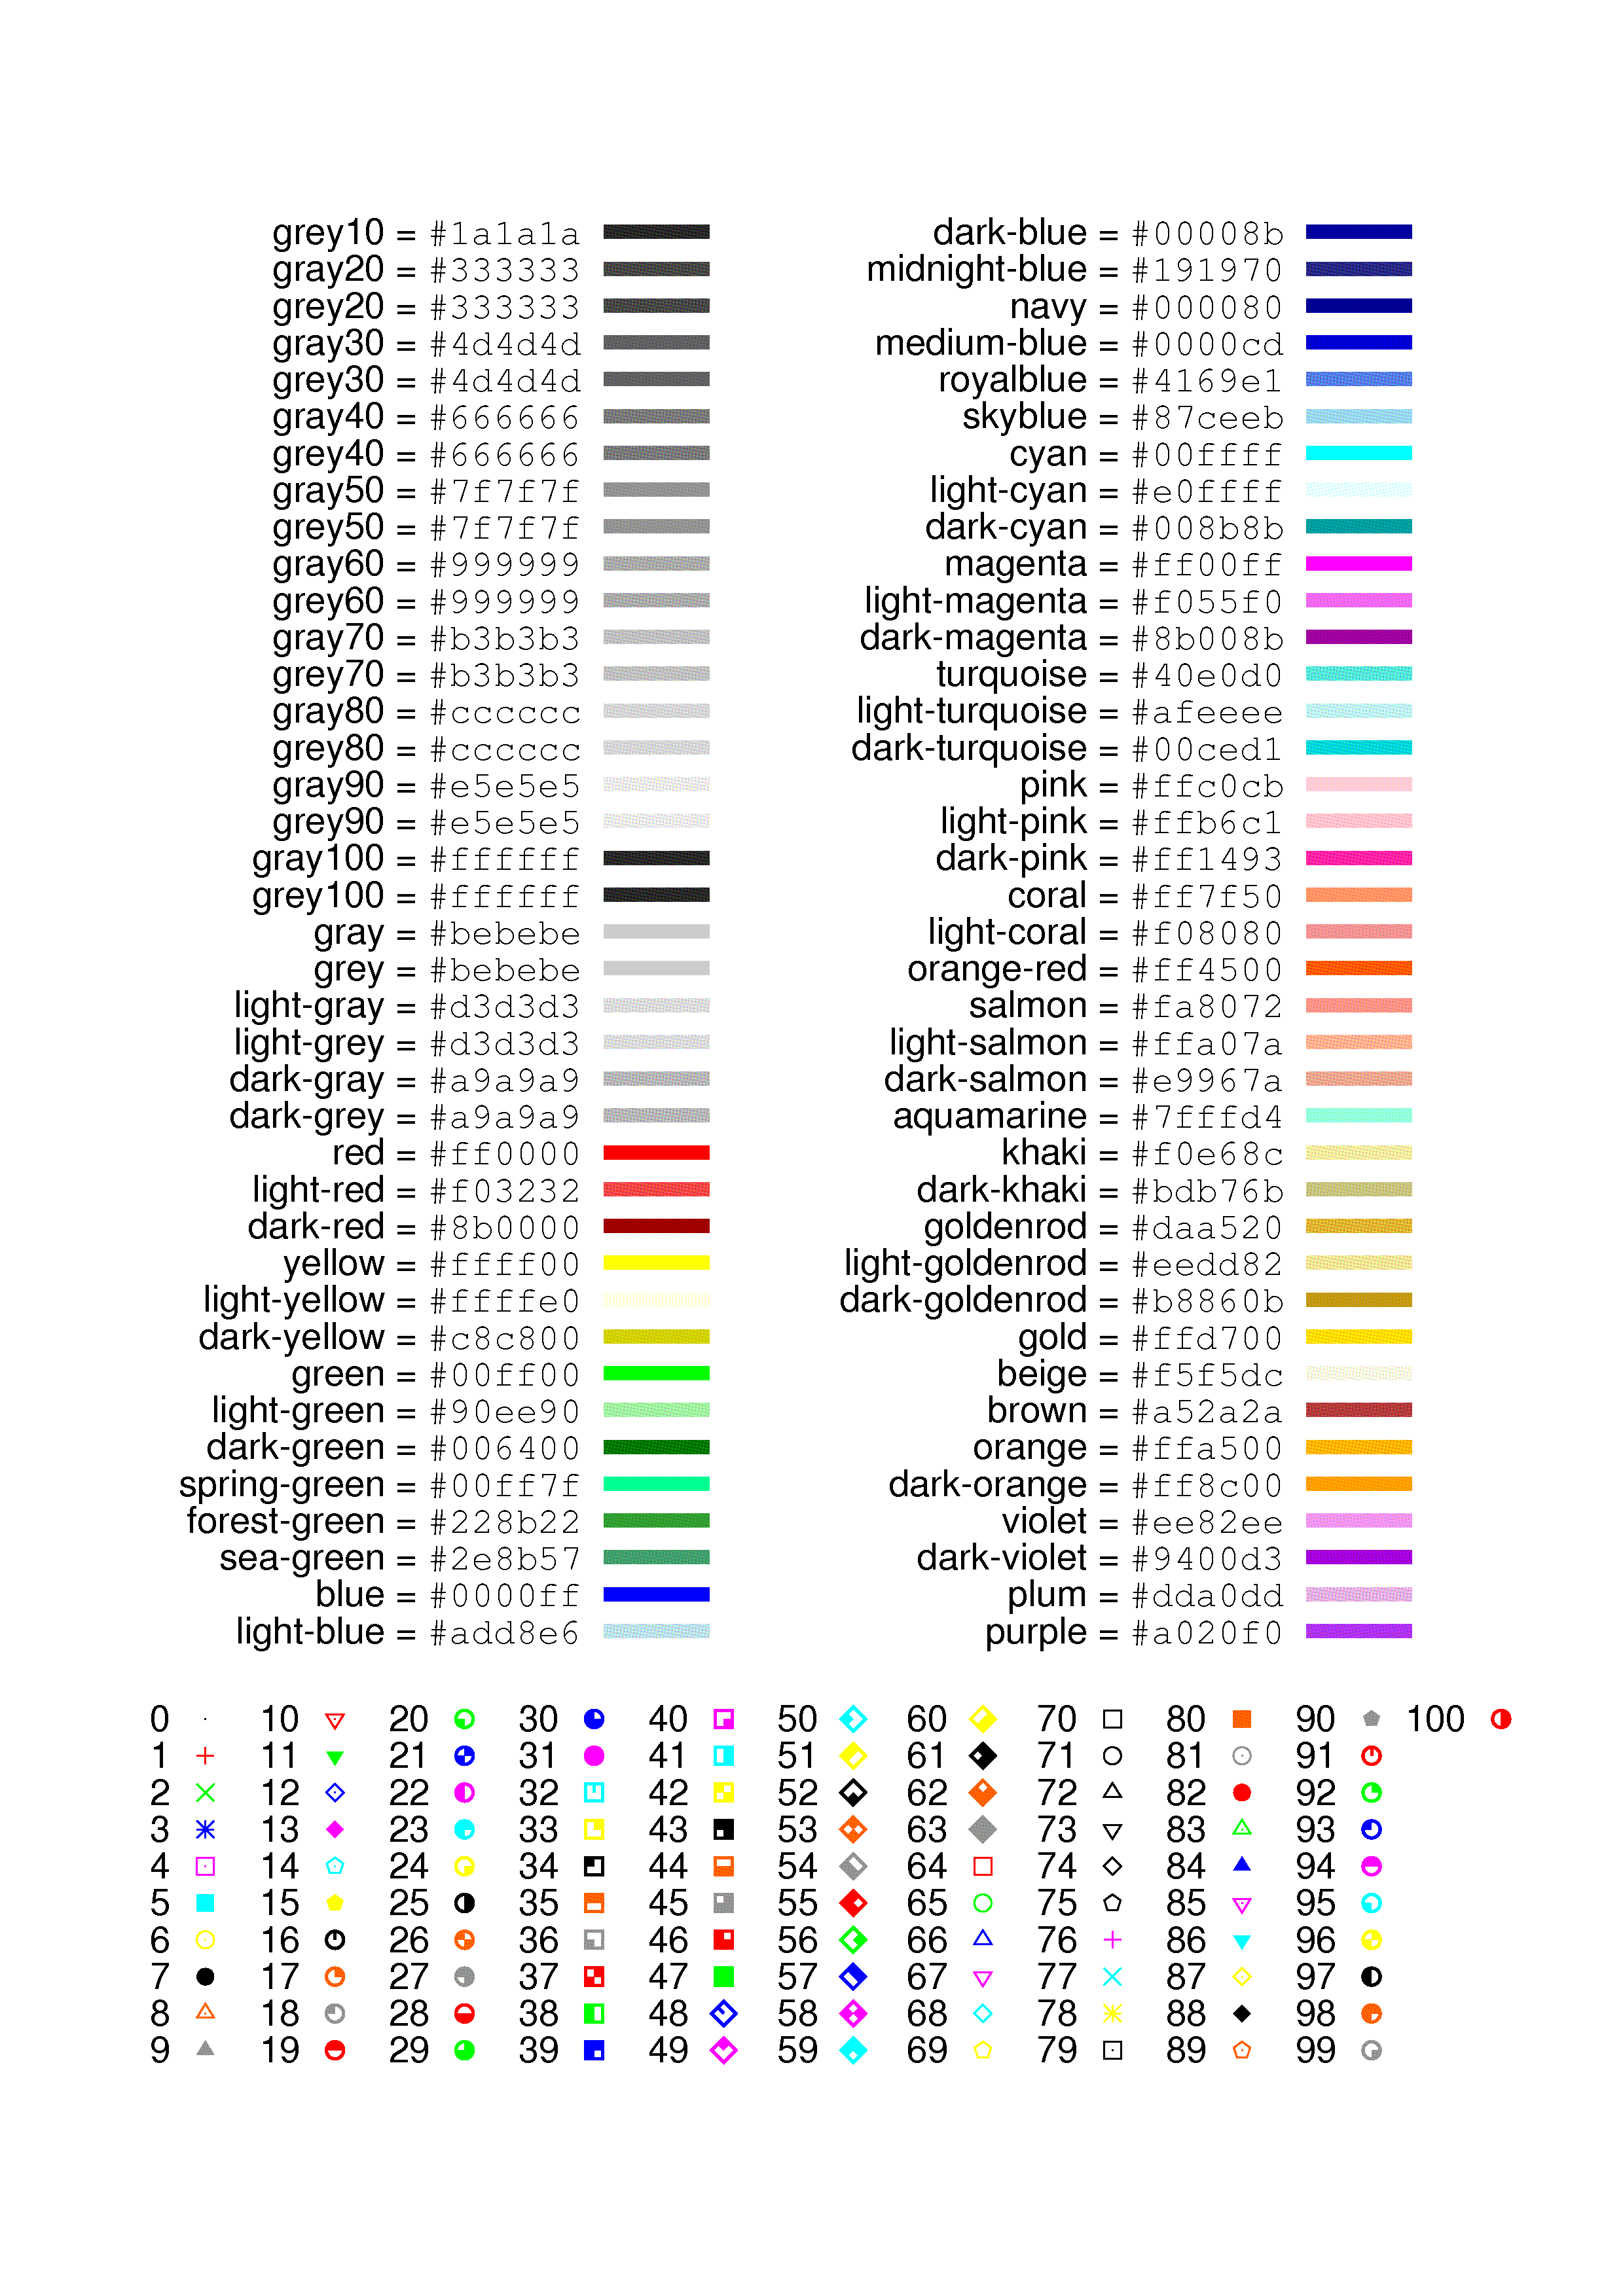
##点の種類 point type
点のスタイルを指定するならpointtypoeコマンドでよい
plot inputfile pointtype 1
##色の設定
- 使用できる色の一覧を出したいなら次を入力せよ
show colorname
- デフォルトのカラーを変更したい。
set colorsequence classic
-
色を指定するならlinecolorというコマンドでよい.カラーシークエンスと呼び、default、classic、podoから選べる。
classicは原色ふう。 -
高度な方法だが、パレットという方法で色を段階的に、もしくは規則的に変化させることができる。
set palette model HSV functions gray,1,1 # HSV color space
set palette model RGB rgbformulae 7,5,15  # traditional pm3d (black-blue-red-yellow)
set palette model RGB rgbformulae 35,13,10 #rainbow (blue-green-yellow-red)
set palette model RGB rgbformulae 30,31,32 # color printable on gray (black-blue-violet-yellow-white)

#上記から選ぶ

unset colorbox #カラーバーができるがコンターでなく不要
plot  sin(x) w l  lc palette ,\
      sin(x) w l  lc palette frac n/10.0 title sprintf("n=%d", n),\
plot inputfile linecolor "blue"
##フォントの設定
学術論文に使用するならフォントは
/Times-New-Roman:Italic=20
が無難だろう。
##軸の設定
- 範囲指定
いうまでもない - 対数グラフ
set logscale xy
###軸の間隔と補助目盛
0,10の範囲を1ずつ刻む
set xtics 0,1,10
目盛の間を10個の補助目盛をつける
set mxtics 10
- 第二軸
#マルチプロット
#少し高度な設定
##ダークトーンでplotする方法
##グラフにオブジェクトを挿入する
- 次のように文字を入力できる
set label 1 at graph   0.1,0.1 "hoge" #グラフ内正規化座標で指定
set label 2 at screen  0.1,0.1 "hage" #画面内内正規化座標で指定
set label 3 at first   0.1,0.1 "huge" #座標で位置を指定
set label 4 at second  0.1,0.1 "hige" #x2,y2座標で位置指定
- 矢印の入力はこんな感じ.位置指定はfirstと同じ。
set style arrow 1 size character 2,20  filled linewidth 1
set arrow 1 from 0,1 to 0,-2 arrowstyle 1
##3Dplot
##コンター図をつくる
##その他の小技
###凡例
blelow, left,rightなど
set key left
###グリッド表示
set grid lc rgb "black" linetype -1
###エラーバー
エラーバー用データを記述したファイルを用意してればつくれる
set hogehoge
###軸ラベルのオフセット
軸ラベルが軸に接近しすぎているor離れすぎているときに有効
set offset 1.0,1.0
###数値をn倍したい
gnuplot上で数値をn倍したいとき、using で選んだ変数にnをかけて記述すればよい。
n = 10
plot data u 1:3
plot data u 1:($3*n)
###gnuplotのバージョン管理
#サンプル画像
- 使用できる色の名前と色、および点は以下の通り。
- 線の種類は以下の通り
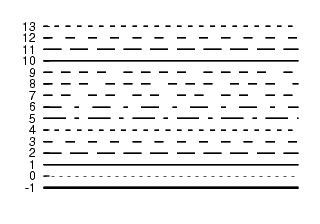
![dt]
(
https://ss.scphys.kyoto-u.ac.jp/person/yonezawa/contents/program/gnuplot/img/dashtype_006.png
)
- フォントサイズの参考
![size]
(
http://dsl4.eee.u-ryukyu.ac.jp/DOCS/gnuplot/img274.png
)
![font]
(
https://ss.scphys.kyoto-u.ac.jp/person/yonezawa/contents/program/gnuplot/img/enhanced_001.png
)
#サンプルコード
#gnuplotコードを書くシェルスクリプト
##テンプレ オーソドックスなplot
"a.txt" u 1:2 w linespoints lw 2.0 ti "No.1" ,\
"b.txt" u 1:2 w linespoints lw 2.0 ti "No.2"
set xlabel "{/Times-New-Roman:Italic=20 v }"
set ylabel "{/Times-Nes-Roman=20 x }"
set title "test plot "
set yrange[0:10]
set xrange[0:1000]
set logscale x
set grid
set size ratio 2.0/(1.0 + sqrt(5.0))
set xlabel offset 0.0,0.0
set ylabel offset 0.0,0.0
set key left tc font "Times,10"
replot
#save img
set term pngcairo size 640*2,480*2
set output "test.png"
replot
set term x11
次のようにして,シェルスクリプトとして描画実行させることができる.
フォントの指定は次のようにする.
#!/bin/bash

gnuplot <<- EOF
reset
p   "./check_x_A.txt" u 1:(\$3*0.2828) w lp lw 1.0 lc rgb "#000000" ti "Case A"
rep "./check_x_B.txt" u 1:(\$3*0.2828) w lp lw 1.0 lc rgb "#FF0000" ti "Case B"
set logscale y
set xlabel "X"
set ylabel "Y"
set xlabel font "Times, 22"
set ylabel font "Times, 22"
set tics font "Times, 18"
set key font "Times, 15"
set grid
set size ratio 2.0/3.23607
set key left
set size ratiot -1 #X/Y軸比率 等倍
#set size ratio 0.5 #X/Y軸比率 Y軸の方が2倍レンジが広い

replot

set term pngcairo size 648*2,480*2
set output "./comp/check_x.png"
replot
#set term x11

EOF
【補足】
セパレータについてcsvを読むならば,
set datafile separator " ,"
”タブ“or”,”がセパレータ
set datafile separator "\t ,"
【補足】線の色はあらかじめ宣言しておくことができる.
 set linetype 1 lc rgb "#E60012" lw 1
 set linetype 2 lc rgb "#F39800" lw 1
 set linetype 3 lc rgb "#FFF100" lw 1
 set linetype 4 lc rgb "#8FC31F" lw 1
 set linetype 5 lc rgb "#009944" lw 1
 set linetype 6 lc rgb "#009E96" lw 1
 set linetype 7 lc rgb "#00A0E9" lw 1
 set linetype 8 lc rgb "#0068B7" lw 1
 set linetype 9 lc rgb "#1D2088" lw 1
 set linetype 10 lc rgb "#920783" lw 1
 set linetype 11 lc rgb "#E4007F" lw 1
 set linetype 12 lc rgb "#E5004F" lw 1
【補足】ギリシア文字文字
アルファ α:{/Symbol a}
ベータ β:{/Symbol b}
カイ χ:{/Symbol c}
デルタ δ:{/Symbol d}
イプシロン ε:{/Symbol e}
ファイ φ:{/Symbol f}
ガンマ γ:{/Symbol g}
イータ η:{/Symbol h}
イオタ ι:{/Symbol i}
ファイ ϕ:{/Symbol j}
カッパ κ:{/Symbol k}
ラムダ λ:{/Symbol l}
ミュー μ:{/Symbol m}
ニュー ν:{/Symbol n}
オミクロン ο:{/Symbol o}
パイ π:{/Symbol p}
シータ θ:{/Symbol q}
シータ ϑ:{/Symbol J}
ロー ρ:{/Symbol r}
シグマ σ:{/Symbol s}
シグマ ς :{/Symbol V}
タウ τ:{/Symbol t}
ウプシロン υ:{/Symbol u}
パイ ϖ:{/Symbol v}
オメガ ω:{/Symbol w}
グザイ ξ:{/Symbol x}
プサイ ψ:{/Symbol y}
ゼータ ζ:{/Symbol z}
デルタ Δ:{/Symbol D}
ファイ Φ:{/Symbol F}
ガンマ Γ:{/Symbol G}
ラムダ Λ:{/Symbol L}
パイ Π:{/Symbol P}
シータ Θ:{/Symbol Q}
シグマ Σ:{/Symbol S}
ウプシロン Υ:{/Symbol U}
オメガ Ω:{/Symbol W}
グザイ Ξ:{/Symbol X}
プサイ Ψ:{/Symbol Y}
#参考文献