はじめに
- 前回に続き、AlexaとWatson(Conversation)の連携を解説する。
2. Alexa<->Watsonの対話を変換する(Node-RED)
-
さて、続いてIBM Cloudである。アカウント登録の詳細は割愛するが、Regionを聞かれたら米国南部か英国を選ぼう。フリーアカウントだとRegionは1つしか使えないが、Regionによって使える機能に若干差がある様で、米国南部か英国だと一通り揃っているためだ。Regionはアカウントのアップグレードをしない限り後から変更ができないので要注意だ。
-
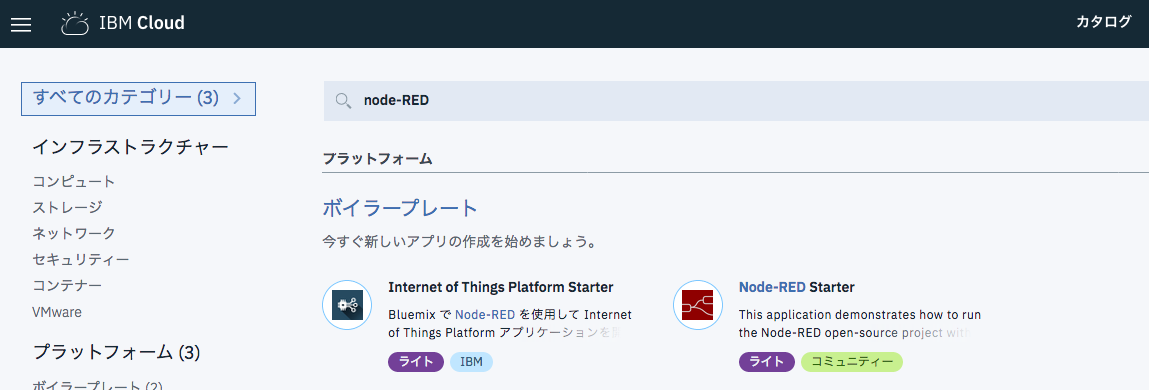
IBM Cloudに無事ログインできたら、カタログからNode-REDを探してみよう。
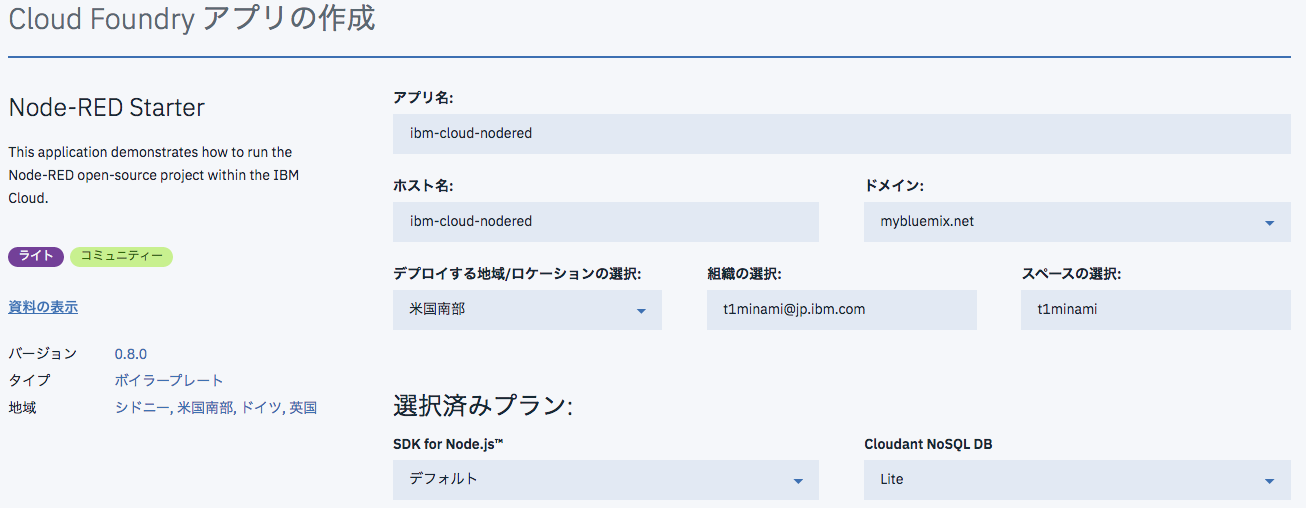
- 続いてアプリ名の設定だ。ここにはAlexa Skills Kit(ASK)のエンドポイントで設定したリソース名を指定しよう。"mybluemix.net"というドメイン名が勝手に追加されるので、指定するのは "ibm-cloud-nodered" までで良い。ほかは変更する必要はない。
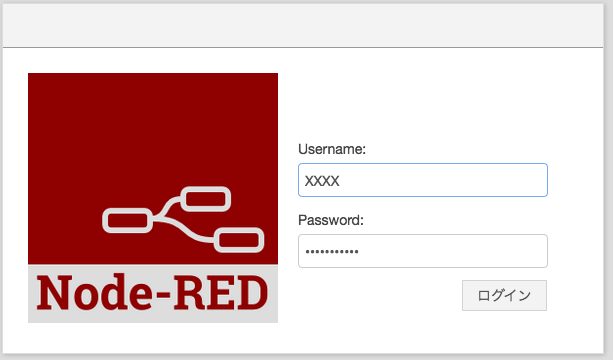
- Node-REDの環境が生成されるのをしばらく待つ。ステップを進めて次のNode-REDのログイン画面まで来たら、登録したユーザーID、パスワードでログインしよう。Node-REDの開発コンソールが立ち上がったらOKだ。
- これがNode-REDの開発コンソールだ。画面左側にある様々な機能のノードをドラッグ&ドロップして、ノードの間をフローでつないでいき、必要に応じてノードに設定やコーディングを加える、という流れでアプリを作っていく。
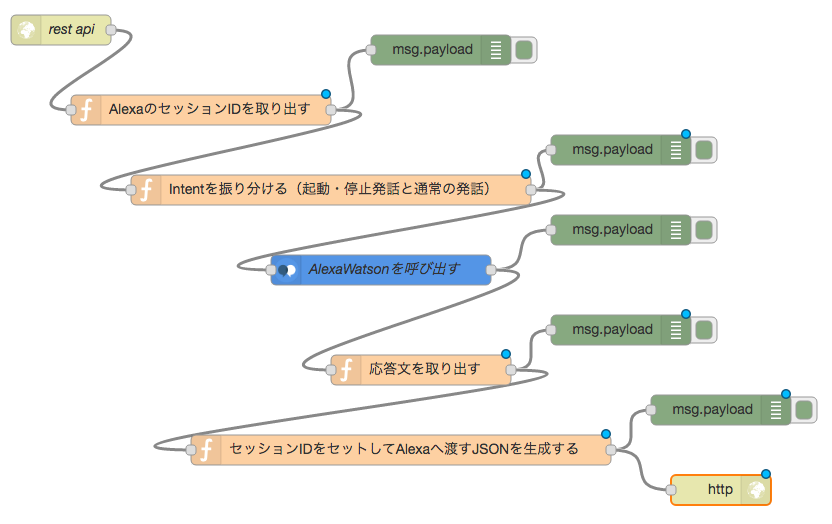
- 今回作成したフローの全体図はこれだ。少し冗長なところがあるが開発初心者のためお許し願いたい。
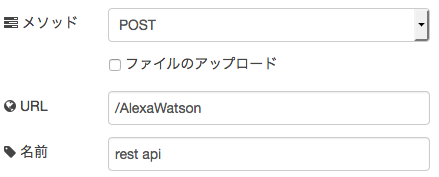
- 最初の"rest api"はHTTPノードである。これでAlexaからのRESTリクエストを受け付ける入り口を作る。メソッドはPOSTを指定し、ASK(Alexa Skills Kit)で指定したAlexaWatsonというリソース名を定義する。
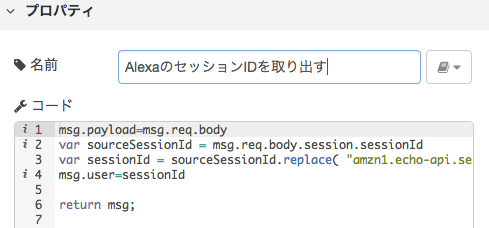
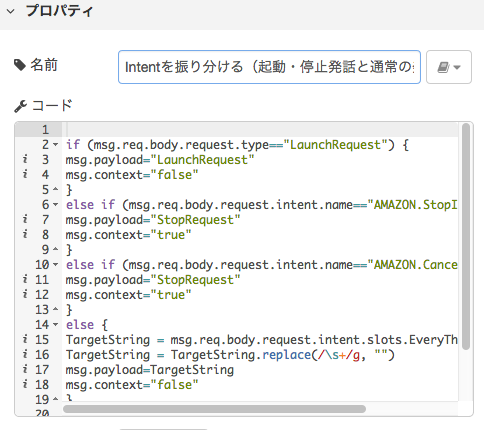
- 続いて、"AlexaのセッションIDを取り出す"と"Intentを振り分ける(起動・停止発話と通常の発話)"の処理には、functionというノードを使っている。ここにはnode.jsで任意のロジックを書くことができる。msg.payloadというのは、Node-REDのノードで扱うメッセージオブジェクトの名称だ。ここではAlexaからのPOSTリクエスト時に受け取ったメッセージを取り出して次に渡している。なおNode-REDで扱うメッセージオブジェクトの形式はJSONである。
- "Intentを振り分ける(起動・停止発話と通常の発話)"ところではいくつか条件分岐をさせている。Alexaからスキルの起動と停止(LaunchRequestとStopIntent/CancelIntent)が来た時はtrue/falseのフラグを立てて、この後に接続するWatsonに渡す様にしている。それ以外の場合は、最後のelseで来た発話のテキストをそのままWatsonに渡す。
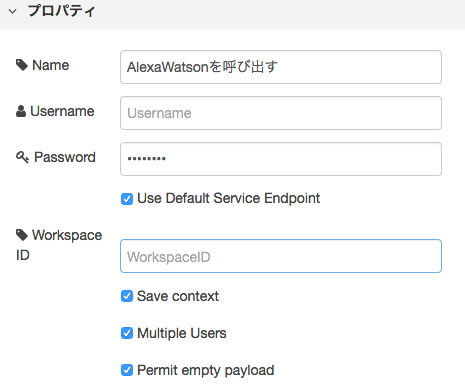
- 次の"AlexaWatsonを呼び出す"はNode-REDにプリセットされているWatson Conversationを呼び出すためのノードである。ここでは接続の設定をするのみである。Username、パスワード、WorkspaceIDは、Watson Conversationの手順で解説する。
-
"応答文を取り出す"、"セッションIDをセットしてAlexaへ渡すJSONを生成する"もfunctionノードである。Watson Conversationからの応答をAlexaが解読できるJSONフォーマットに変換するためのロジックを入れている。詳細はコードを参照されたい。
-
最後に、"http"とあるところにHTTP responseノードを配置している。今回ここには特別な設定はしていない。
-
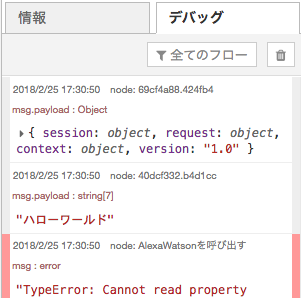
途中に、"msg.payload"というノードがくっついているが、これは各ノードが出力したJSONメッセージオブジェクトをプリントするためのノードである。意図した様なJSONが渡されているかを見ながらどこまでコードが正しく動いているかデバッグする際に使う。
- 画面右のデバッグタブに出力が出てくる。
- 以上で作成したNode-REDのコード(JSON形式)を添付する。
[
    {
        "id": "d7a5e7a3.de423",
        "type": "http response",
        "z": "ed64aa8f.fe08c",
        "name": "",
        "statusCode": "",
        "headers": {},
        "x": 750,
        "y": 520,
        "wires": []
    },
    {
        "id": "16ded655.3b1d72",
        "type": "function",
        "z": "ed64aa8f.fe08c",
        "name": "セッションIDをセットしてAlexaへ渡すJSONを生成する",
        "func": "var resobj = \n{\n//    \"body\": {\n\t\t\"version\": \"1.0\",\n\t\t\"response\": {\n\t\t\t\"outputSpeech\": {\n\t\t\t\t\"type\": \"SSML\",\n\t\t\t\t\"ssml\": \"\"\n\t\t\t},\n\t\t\t\"shouldEndSession\": \"\" //true\n\t\t},\n\t\t\"sessionAttributes\": {\n\t\t    \"string\": \"\"\n\t\t}\n//\t}\n}\n;\n\nresobj.response.outputSpeech.ssml = '<speak>' + msg.payload + '</speak>'\nresobj.sessionAttributes.string = 'amzn1.echo-api.session.' + msg.user\nresobj.response.shouldEndSession = msg.context\n\nmsg.payload = resobj;\n\nreturn msg;\n\n",
        "outputs": 1,
        "noerr": 0,
        "x": 430,
        "y": 480,
        "wires": [
            [
                "480c7ab0.20cf84",
                "d7a5e7a3.de423"
            ]
        ]
    },
    {
        "id": "7e0e404e.ecf868",
        "type": "function",
        "z": "ed64aa8f.fe08c",
        "name": "応答文を取り出す",
        "func": "\nmsg.payload = msg.payload.output.text[0];\n\nreturn msg;\n\n",
        "outputs": 1,
        "noerr": 0,
        "x": 450,
        "y": 400,
        "wires": [
            [
                "9a4ff280.4d035",
                "16ded655.3b1d72"
            ]
        ]
    },
    {
        "id": "480c7ab0.20cf84",
        "type": "debug",
        "z": "ed64aa8f.fe08c",
        "name": "",
        "active": true,
        "console": "false",
        "complete": "payload",
        "x": 750,
        "y": 440,
        "wires": []
    },
    {
        "id": "9191849a.8c7b4",
        "type": "watson-conversation-v1",
        "z": "ed64aa8f.fe08c",
        "name": "AlexaWatsonを呼び出す",
        "workspaceid": "XXXXXXX",
        "multiuser": true,
        "context": true,
        "empty-payload": true,
        "default-endpoint": true,
        "service-endpoint": "https://gateway.watsonplatform.net/conversation/api",
        "x": 410,
        "y": 300,
        "wires": [
            [
                "77dec5de.33335c",
                "7e0e404e.ecf868"
            ]
        ]
    },
    {
        "id": "9a4ff280.4d035",
        "type": "debug",
        "z": "ed64aa8f.fe08c",
        "name": "",
        "active": true,
        "console": "false",
        "complete": "payload",
        "x": 650,
        "y": 360,
        "wires": []
    },
    {
        "id": "88ea2b01.0b8f78",
        "type": "function",
        "z": "ed64aa8f.fe08c",
        "name": "Intentを振り分ける(起動・停止発話と通常の発話)",
        "func": "\nif (msg.req.body.request.type==\"LaunchRequest\") {\nmsg.payload=\"LaunchRequest\"\nmsg.context=\"false\"\n} \nelse if (msg.req.body.request.intent.name==\"AMAZON.StopIntent\") {\nmsg.payload=\"StopRequest\"\nmsg.context=\"true\"\n}\nelse if (msg.req.body.request.intent.name==\"AMAZON.CancelIntent\") {\nmsg.payload=\"StopRequest\"\nmsg.context=\"true\"\n}\nelse {\nTargetString = msg.req.body.request.intent.slots.EveryThingSlot.value\nTargetString = TargetString.replace(/\\s+/g, \"\")\nmsg.payload=TargetString\nmsg.context=\"false\"\n}\n\nreturn msg;\n",
        "outputs": 1,
        "noerr": 0,
        "x": 360,
        "y": 220,
        "wires": [
            [
                "40dcf332.b4d1cc",
                "9191849a.8c7b4"
            ]
        ]
    },
    {
        "id": "77dec5de.33335c",
        "type": "debug",
        "z": "ed64aa8f.fe08c",
        "name": "",
        "active": true,
        "console": "false",
        "complete": "payload",
        "x": 650,
        "y": 260,
        "wires": []
    },
    {
        "id": "40dcf332.b4d1cc",
        "type": "debug",
        "z": "ed64aa8f.fe08c",
        "name": "",
        "active": true,
        "console": "false",
        "complete": "payload",
        "x": 650,
        "y": 180,
        "wires": []
    },
    {
        "id": "41d82813.7f4ea8",
        "type": "function",
        "z": "ed64aa8f.fe08c",
        "name": "AlexaのセッションIDを取り出す",
        "func": "msg.payload=msg.req.body\nvar sourceSessionId = msg.req.body.session.sessionId\nvar sessionId = sourceSessionId.replace( \"amzn1.echo-api.session.\" , \"\" ) ;\nmsg.user=sessionId\n\nreturn msg;\n",
        "outputs": 1,
        "noerr": 0,
        "x": 230,
        "y": 140,
        "wires": [
            [
                "69cf4a88.424fb4",
                "88ea2b01.0b8f78"
            ]
        ]
    },
    {
        "id": "ca960160.456f68",
        "type": "http in",
        "z": "ed64aa8f.fe08c",
        "name": "rest api",
        "url": "/AlexaWatson",
        "method": "post",
        "upload": false,
        "swaggerDoc": "",
        "x": 90,
        "y": 60,
        "wires": [
            [
                "41d82813.7f4ea8"
            ]
        ]
    },
    {
        "id": "69cf4a88.424fb4",
        "type": "debug",
        "z": "ed64aa8f.fe08c",
        "name": "",
        "active": true,
        "console": "false",
        "complete": "payload",
        "x": 470,
        "y": 80,
        "wires": []
    }
]
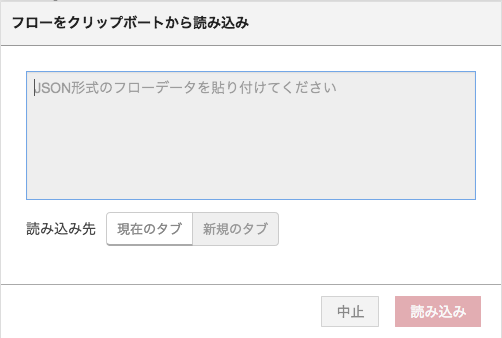
- このコードは、開発コンソール右上のメニューからクリップボードにコピペでそのままインポートすることができるので、お試しいただきたい。なお、Watson ConversationのUsername、WorkspaceID、パスワードはご自身のものを設定する必要があることは、ご承知おきを。
- パート3に続く
関連記事
- Amazon EchoとIBM Watsonを連携させてみた - パート1 -
- Amazon EchoとIBM Watsonを連携させてみた - パート3 -
- Amazon EchoとIBM Watsonを連携させてみた - パート4 -
以上
