概要
いろいろと理解しなければならないことが多いですが、まずは、できるだけシンプルな構成でAWS Cognitoの基礎を理解します。
jQueryは使わずにJavascriptのみです。
ただし、アカウントの属性には標準属性とカスタム属性を設定します。
今回説明する内容を踏まえて、実用ではAmplifyを使うと良いかと思っています。
画面遷移
まずはサインアップ画面
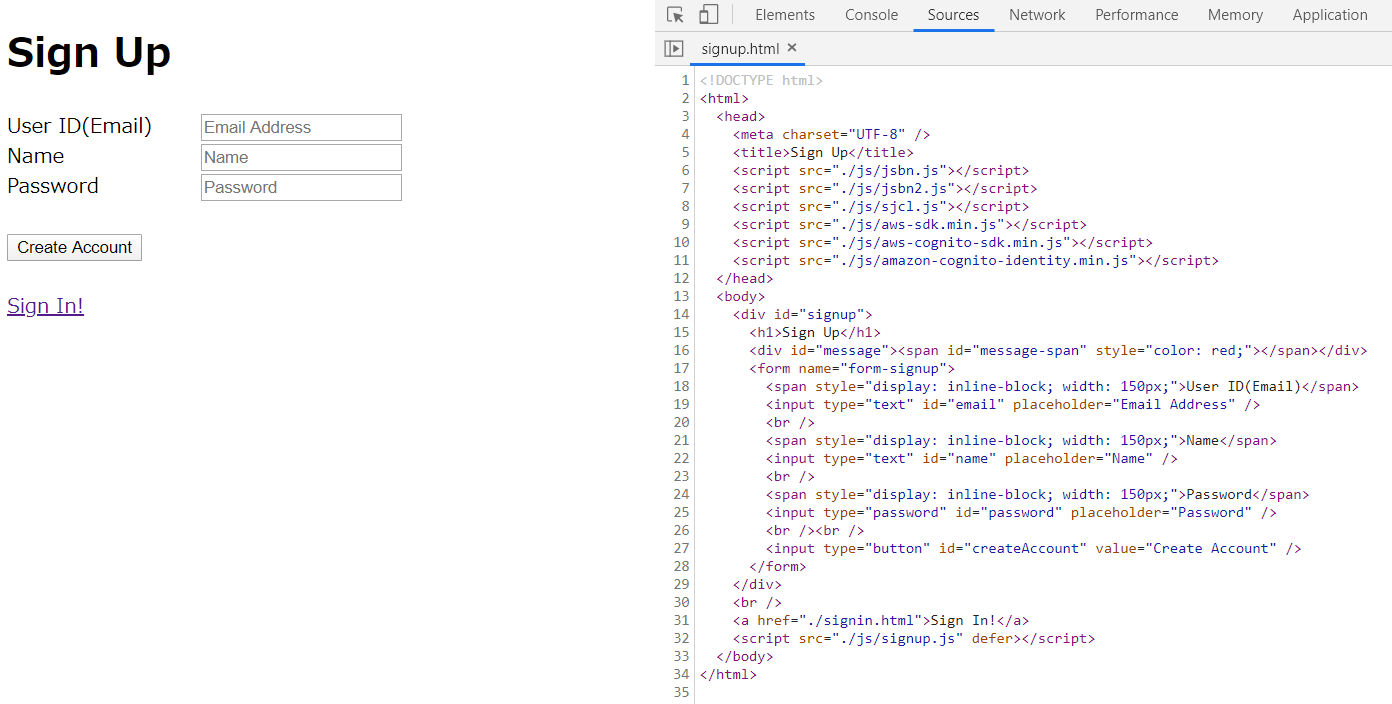
サインアップするとメールで検証リンクが配信されます。
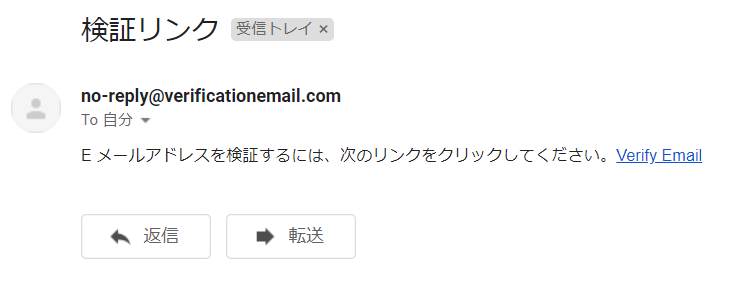
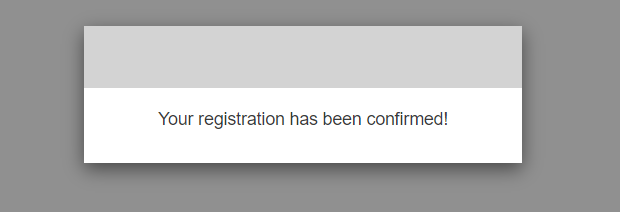
Verify Emailリンクをクリックすると検証が完了します。
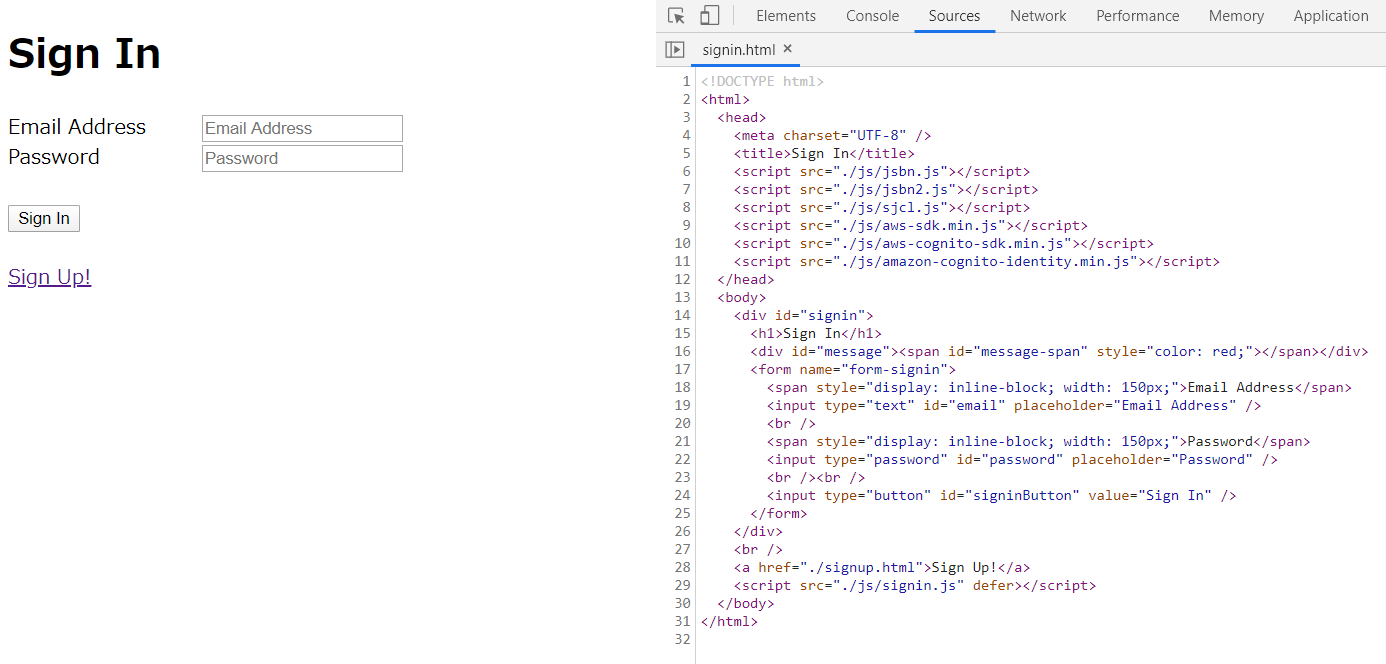
次にサインイン画面
最後に認証されたアカウントしか入ることのできない画面
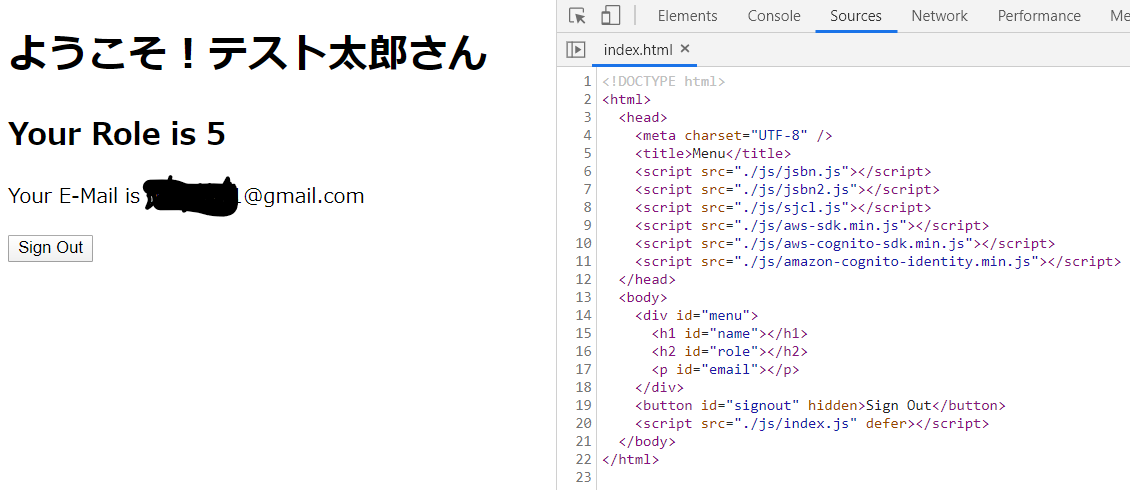
Sign Outをクリックするとサインアウトしてサインイン画面に遷移します。
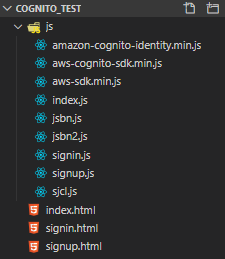
ファイル構成
jsフォルダへ準備するライブラリ
それぞれのREAD.MEをしっかり確認してください。
AWS Cognitoの設定
- AWSへサインイン
- Cognitoのコンソールへ
- リージョンを東京へ変更
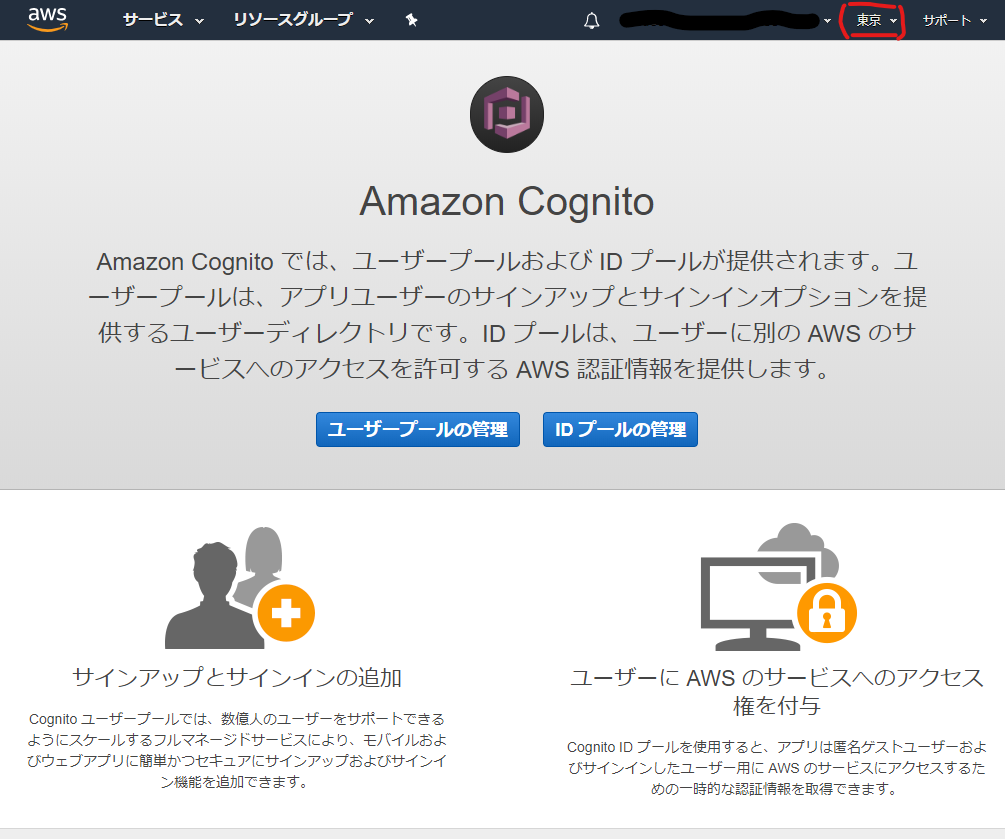
-
ユーザープールの管理をクリック -
ユーザープールを作成するをクリック
-
プール名へお好きな名前を付けてください。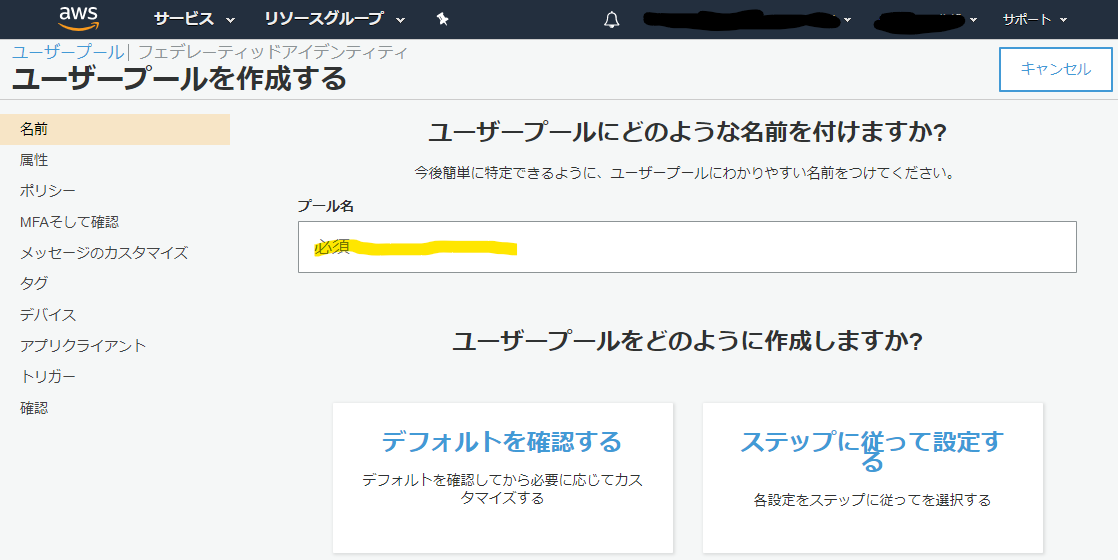
-
デフォルトを確認するをクリックすると↓の画面になります。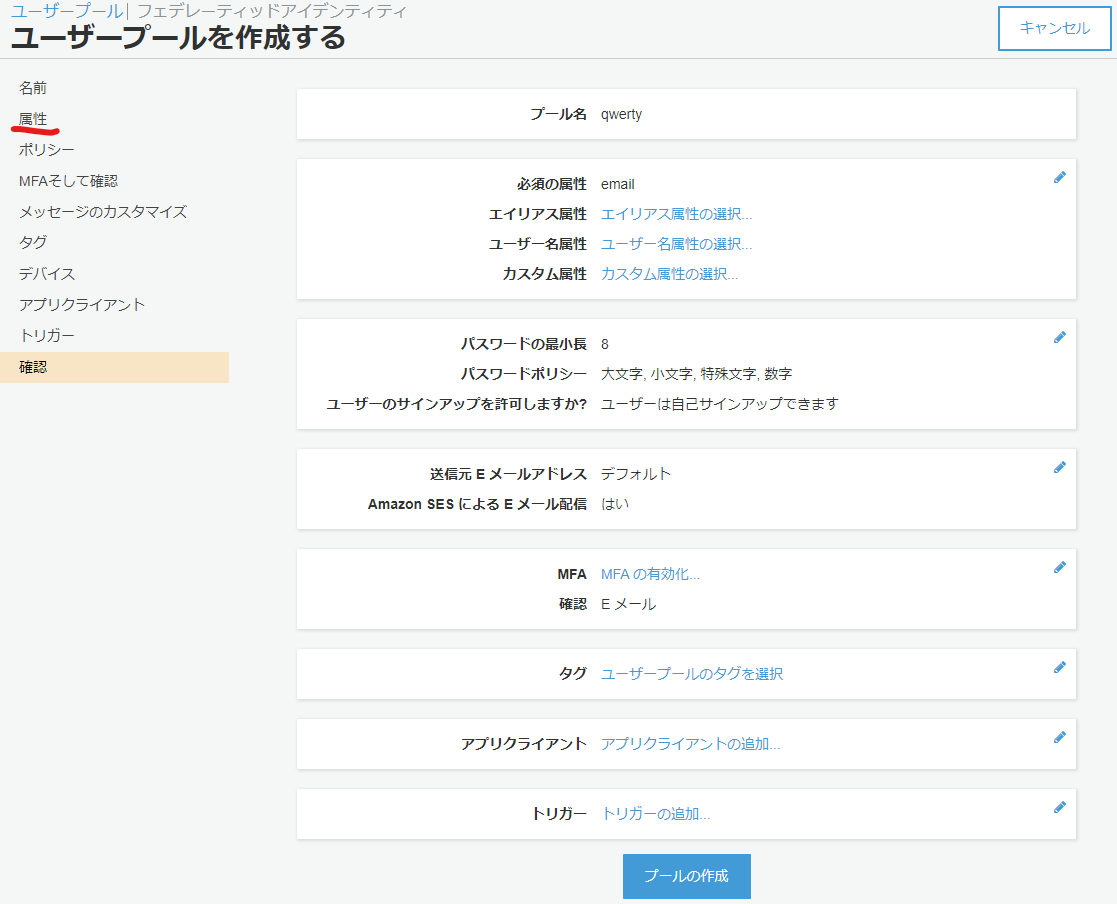
- サイドバーの
属性をクリック - 今回は↓のように設定します。
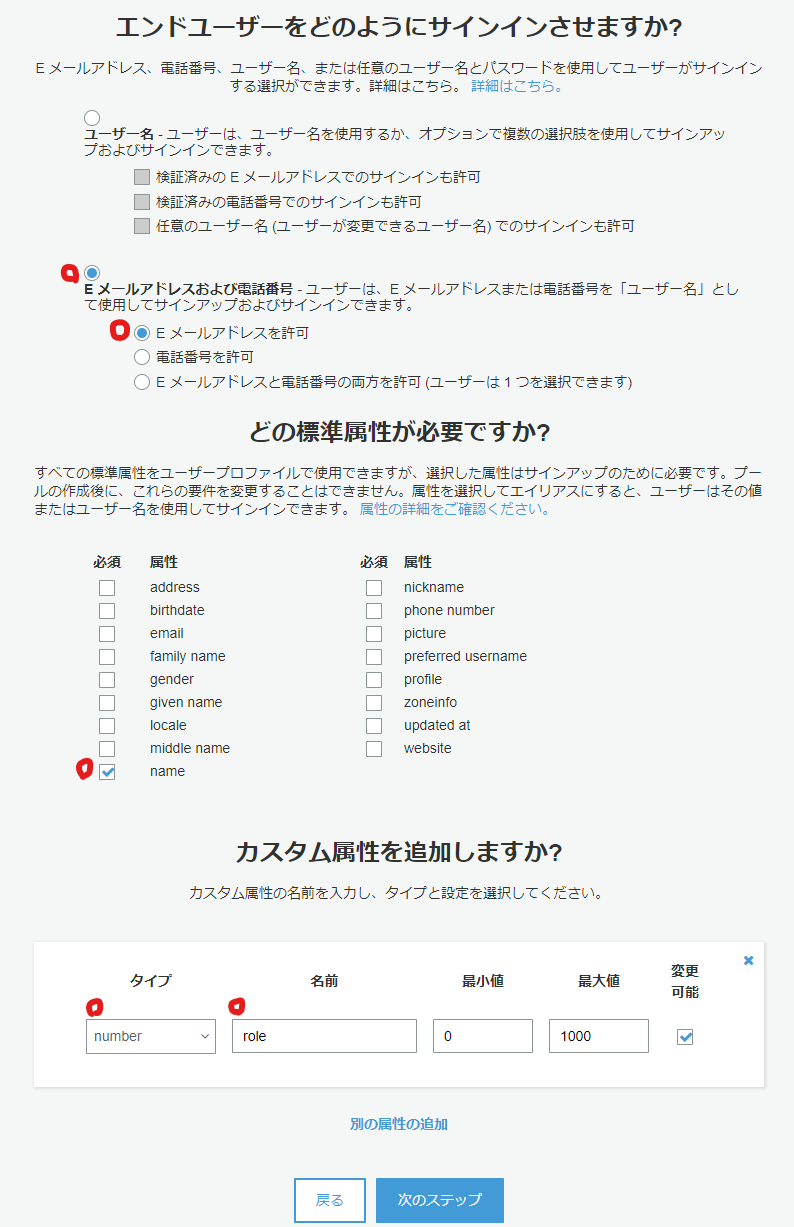
カスタム属性にはroleと入力しますが、自動でcustom:roleと変更されます。 -
次のステップをクリック - 「ポリシー」の設定
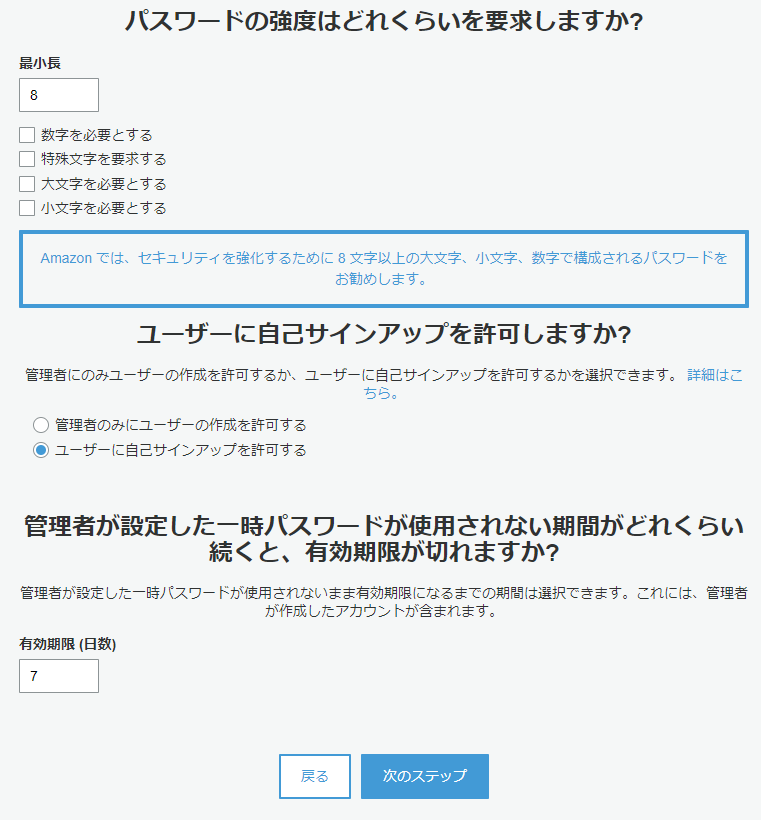
- 「MFAそして確認」の設定
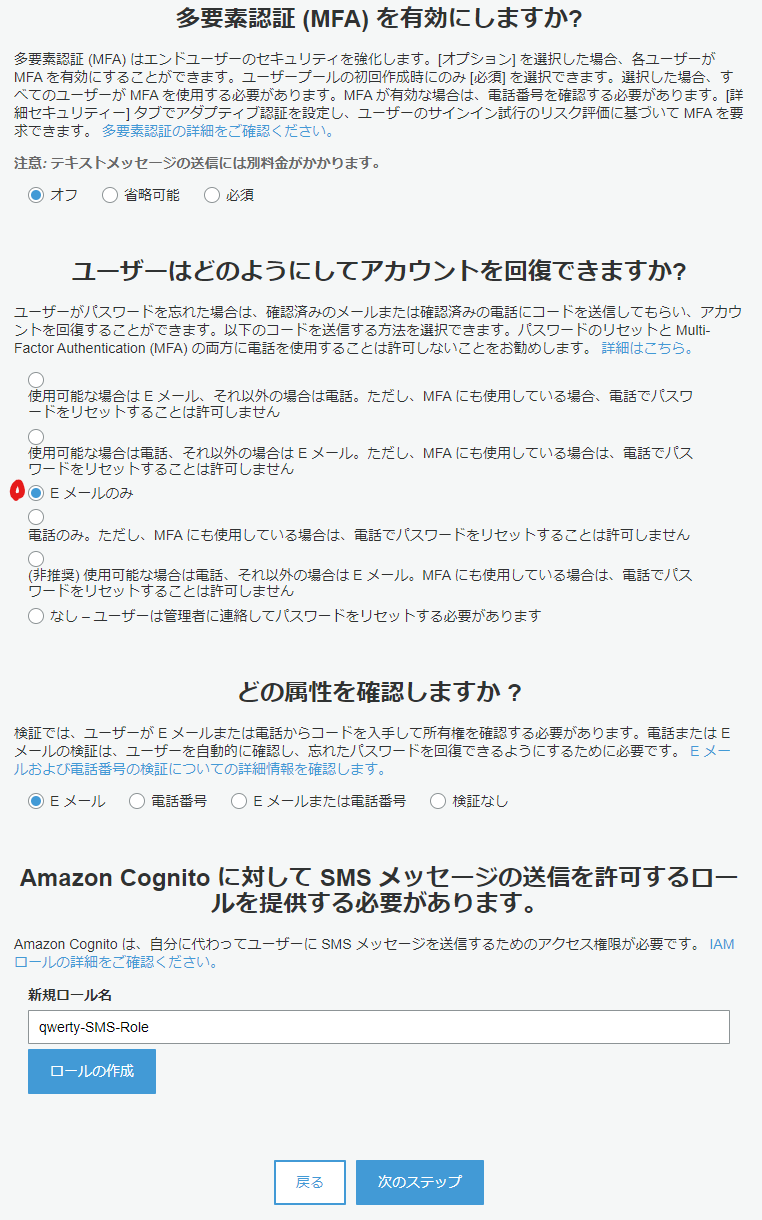
- 「メッセージのカスタマイズ」の設定
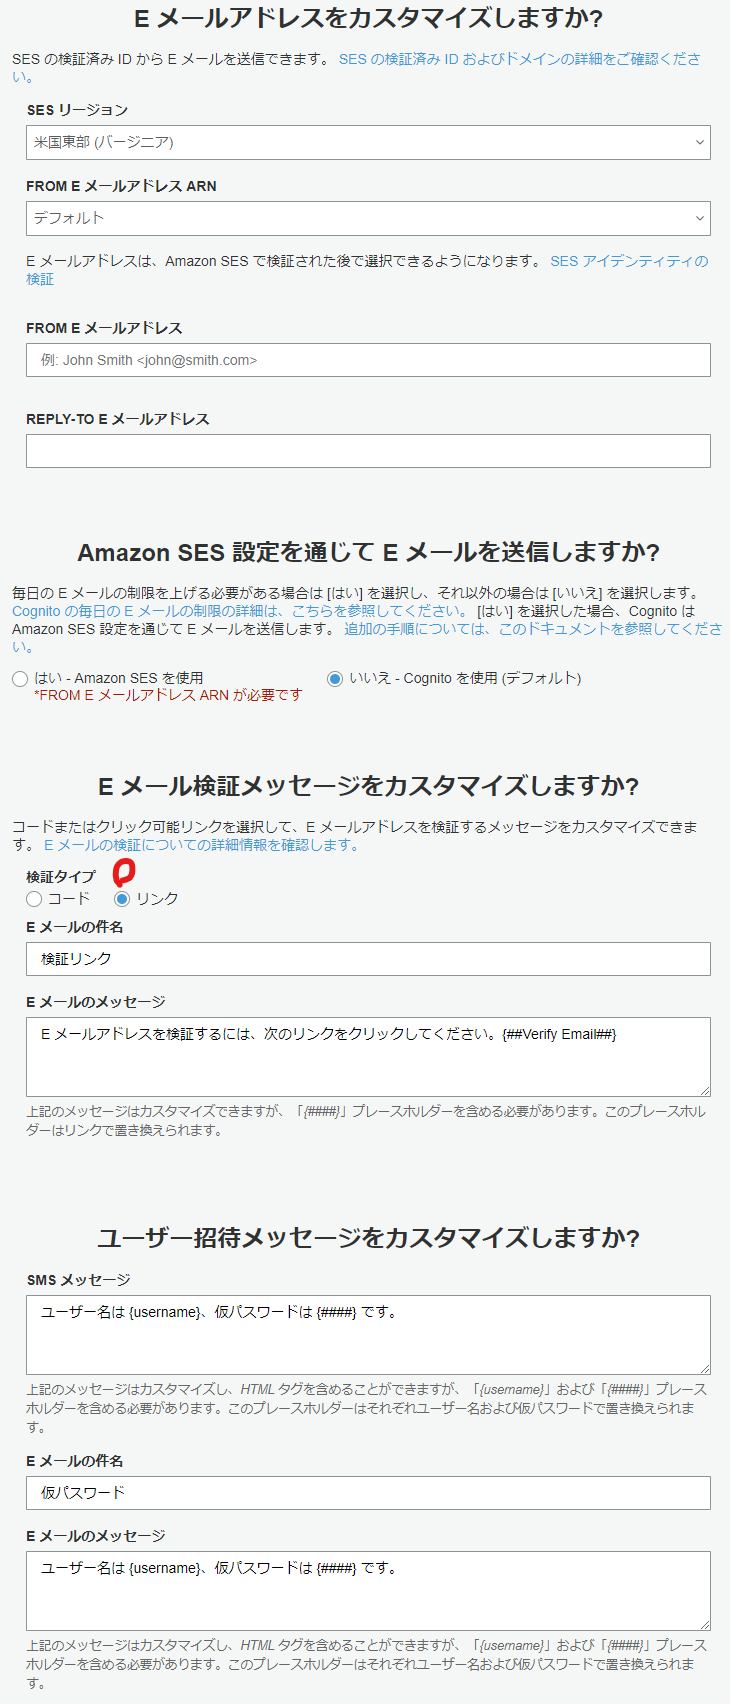
- 「アプリクライアント」の設定で
アプリクライアントの追加をクリック
- アプリクライアント名を入力し、
クライアントシークレットを作成のチェックを外す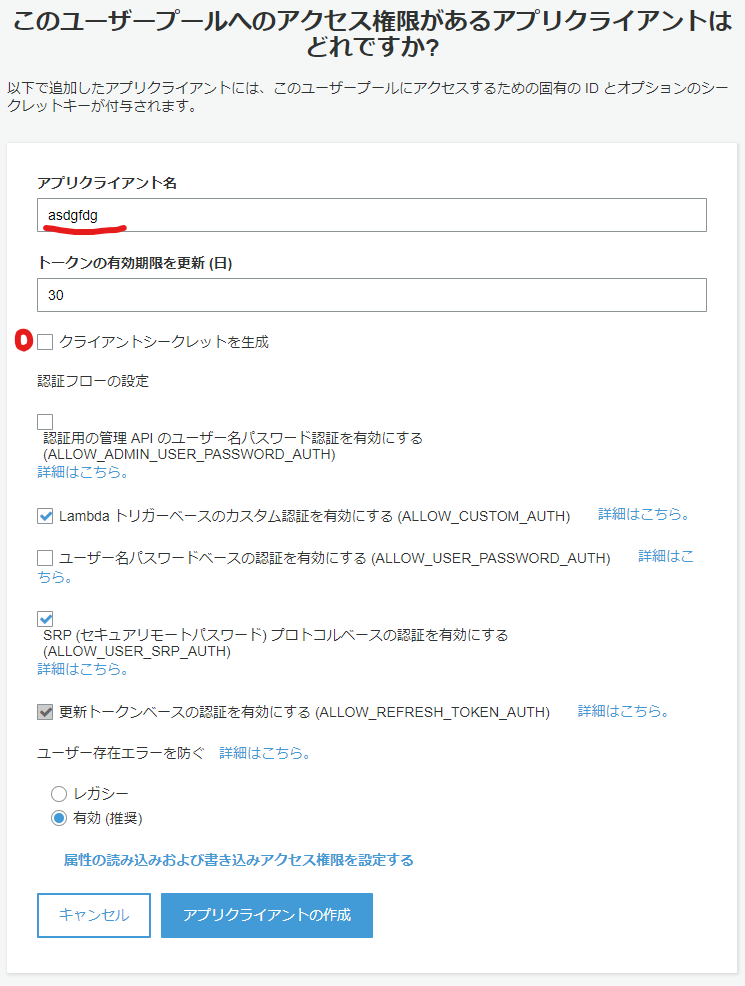
- サイドバーで「確認」をクリックすると↓が表示され、
プールの作成をクリック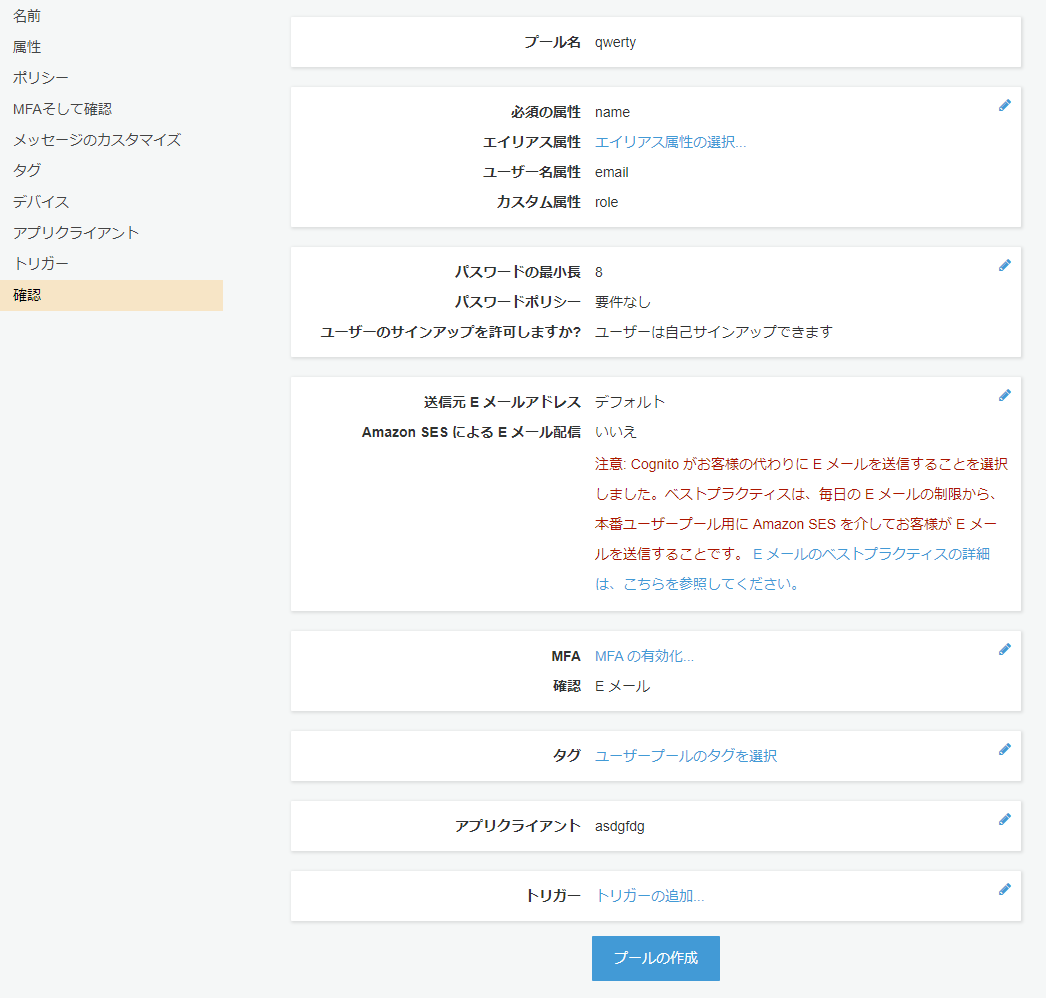
- プールIDが表示されるので、それをメモ
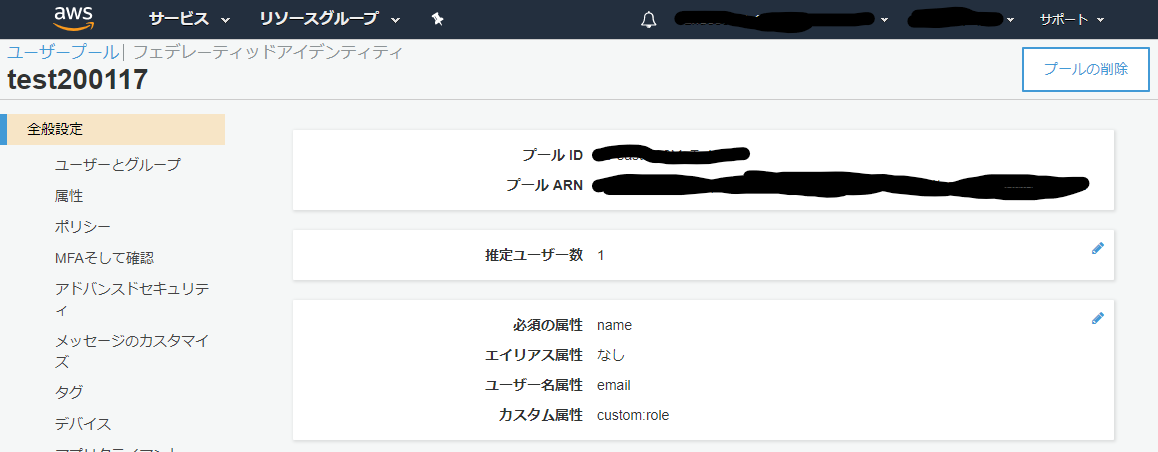
- サイドバーから「アプリクライアント」を選択すると
アプリクライアントIDが表示されるので、それをメモ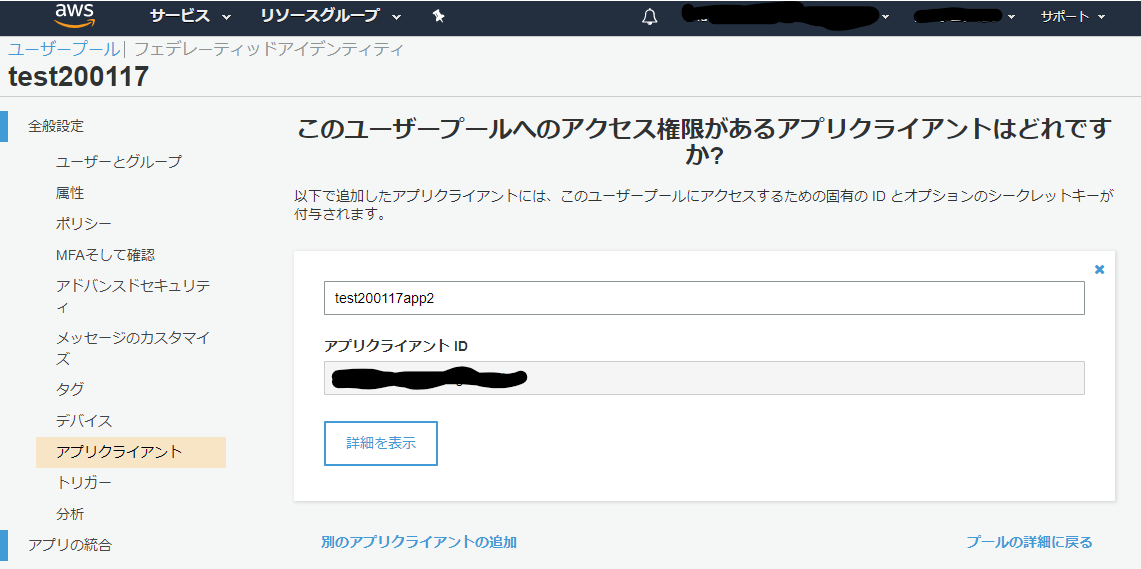
- サイドバーから「ドメイン名」を選択するとAmazon Cognito ドメインの作成ができるので好きな名前を入力してドメインを作成します。
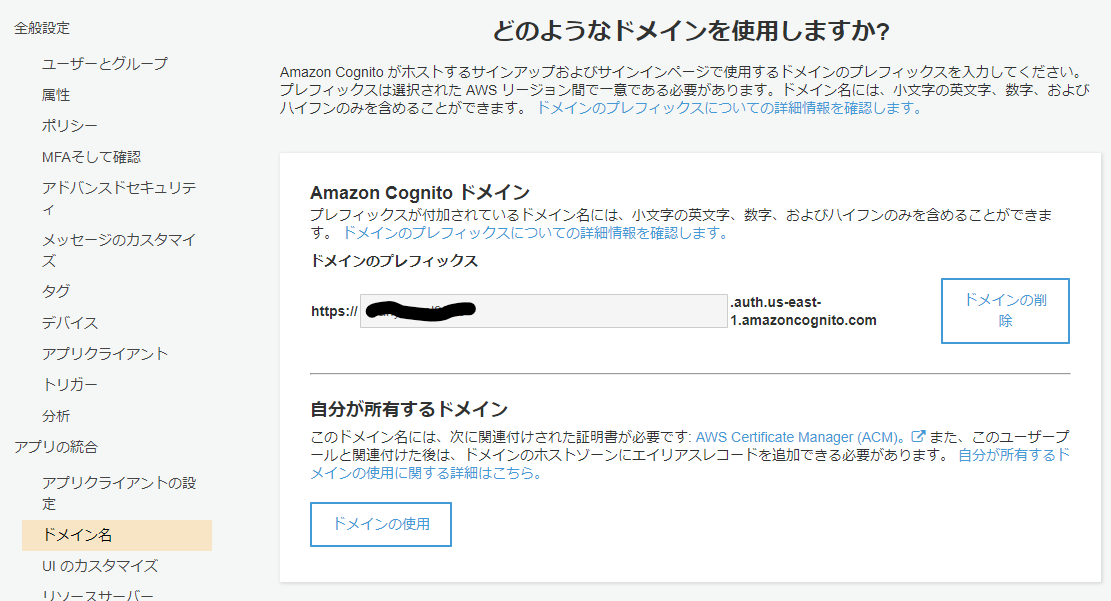
- これでユーザープールの設定が完了
フェデレーティッドアイデンティティの設定
- Cognitoコンソールの上部にある
フェデレーティッドアイデンティティをクリック
-
 をクリック
をクリック - 使用開始ウィザードでIDプール名に好きな名前を入力
-
認証されていないIDに対してアクセスを有効にするをチェック - 認証プロバイダーを展開し、Cognitoを選択
- メモしたユーザープールIDとアプリクライアントIDを入力
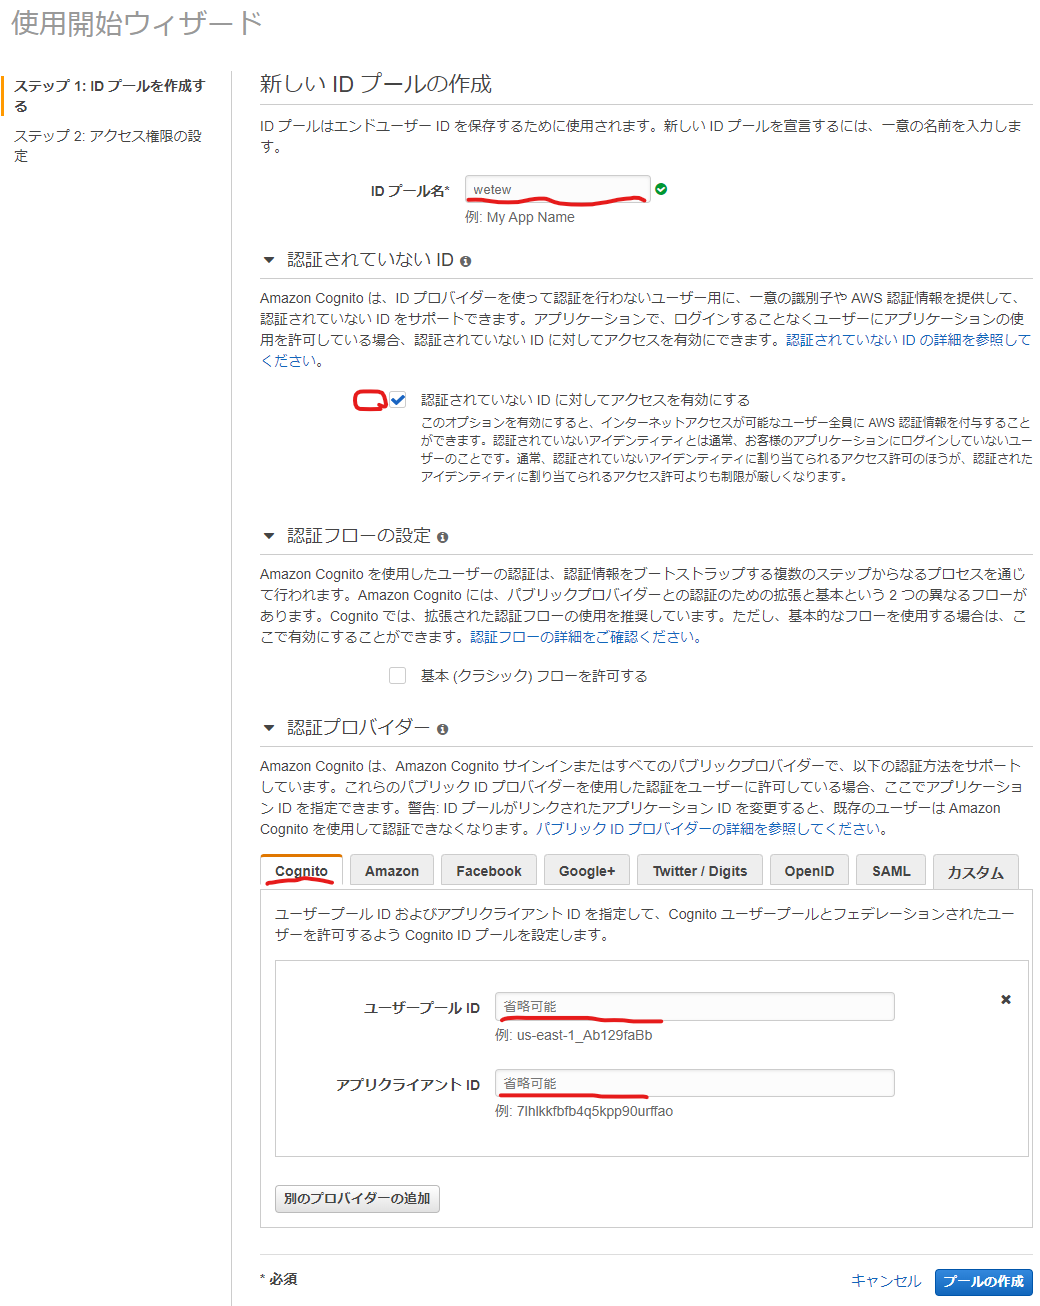
- プールの作成をクリック
- 次の画面ではデフォルトの内容を確認して、
許可をクリック - サイドバーでサンプルコードを選択し、プラットフォームを
Javascriptを選択。AWS認証情報の取得に表示されているコードをメモ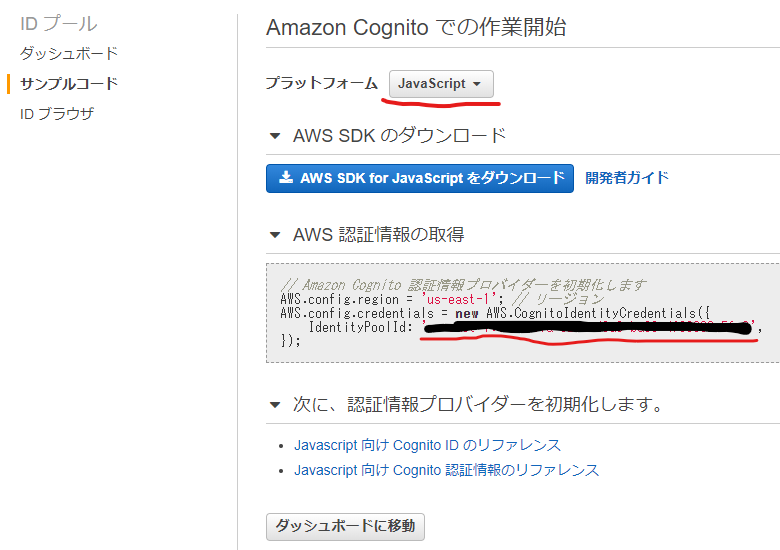
- これでCognitoの設定が完了
サインアップページの作成
<!DOCTYPE html>
<html>
  <head>
    <meta charset="UTF-8" />
    <title>Sign Up</title>
    <script src="./js/jsbn.js"></script>
    <script src="./js/jsbn2.js"></script>
    <script src="./js/sjcl.js"></script>
    <script src="./js/aws-sdk.min.js"></script>
    <script src="./js/aws-cognito-sdk.min.js"></script>
    <script src="./js/amazon-cognito-identity.min.js"></script>
  </head>
  <body>
    <div id="signup">
      <h1>Sign Up</h1>
      <div id="message"><span id="message-span" style="color: red;"></span></div>
      <form name="form-signup">
        <span style="display: inline-block; width: 150px;">User ID(Email)</span>
        <input type="text" id="email" placeholder="Email Address" />
        <br />
        <span style="display: inline-block; width: 150px;">Name</span>
        <input type="text" id="name" placeholder="Name" />
        <br />
        <span style="display: inline-block; width: 150px;">Password</span>
        <input type="password" id="password" placeholder="Password" />
        <br /><br />
        <input type="button" id="createAccount" value="Create Account" />
      </form>
    </div>
    <br />
    <a href="./signin.html">Sign In!</a>
    <script src="./js/signup.js" defer></script>
  </body>
</html>
サインアップの処理
これまでにメモしたユーザープールID、クライアントID、AWS認証情報を張り付けます。
(() => {
  // ユーザープールの設定
  const poolData = {
    UserPoolId: "us-east-1_xxxxxxxx",
    ClientId: "xxxxxxxxxxxxxxxxxxxxx"
  };
  const userPool = new AmazonCognitoIdentity.CognitoUserPool(poolData);

  const attributeList = [];

  // Amazon Cognito 認証情報プロバイダーを初期化します
  AWS.config.region = "us-east-1"; // リージョン
  AWS.config.credentials = new AWS.CognitoIdentityCredentials({
    IdentityPoolId: "us-east-1:xxxxxxxxxxxxxxxxxxxxxxxxxxxxxxxxxxx"
  });

  // 「Create Account」ボタン押下時
  const createAccountBtn = document.getElementById("createAccount");
  createAccountBtn.addEventListener("click", () => {
    /**
     * サインアップ処理。
     */
    const username = document.getElementById("email").value;
    const name = document.getElementById("name").value;
    const password = document.getElementById('password').value;

    // 何か1つでも未入力の項目がある場合、処理終了
    const message = document.getElementById("message-span");
    if (!username | !name | !password) {
      message.innerHTML = "未入力項目があります。";
      return false;
    }

    // ユーザ属性リストの生成
    const dataName = {
      Name: "name",
      Value: name
    };
    const dataRole = {
      Name: "custom:role",
      Value: "5"
    };
    const attributeName = new AmazonCognitoIdentity.CognitoUserAttribute(
      dataName
    );
    const attributeRole = new AmazonCognitoIdentity.CognitoUserAttribute(
      dataRole
    );

    attributeList.push(attributeName);
    attributeList.push(attributeRole);

    // サインアップ処理
    userPool.signUp(username, password, attributeList, null, (err, result) => {
      if (err) {
        message.innerHTML = err.message;
        return;
      } else {
        // サインアップ成功の場合、アクティベーション画面に遷移する
        alert(
          "登録したメールアドレスへアクティベーション用のリンクを送付しました。"
        );
        location.href = "signin.html";
      }
    });
  });
})();
サインインページの作成
<!DOCTYPE html>
<html>
  <head>
    <meta charset="UTF-8" />
    <title>Sign In</title>
    <script src="./js/jsbn.js"></script>
    <script src="./js/jsbn2.js"></script>
    <script src="./js/sjcl.js"></script>
    <script src="./js/aws-sdk.min.js"></script>
    <script src="./js/aws-cognito-sdk.min.js"></script>
    <script src="./js/amazon-cognito-identity.min.js"></script>
  </head>
  <body>
    <div id="signin">
      <h1>Sign In</h1>
      <div id="message"><span id="message-span" style="color: red;"></span></div>
      <form name="form-signin">
        <span style="display: inline-block; width: 150px;">Email Address</span>
        <input type="text" id="email" placeholder="Email Address" />
        <br />
        <span style="display: inline-block; width: 150px;">Password</span>
        <input type="password" id="password" placeholder="Password" />
        <br /><br />
        <input type="button" id="signinButton" value="Sign In" />
      </form>
    </div>
    <br />
    <a href="./signup.html">Sign Up!</a>
    <script src="./js/signin.js" defer></script>
  </body>
</html>
サインインの処理
これまでにメモしたユーザープールID、クライアントID、AWS認証情報を張り付けます。
(() => {
  // ユーザープールの設定
  const poolData = {
    UserPoolId: "us-east-1_xxxxxxxx",
    ClientId: "xxxxxxxxxxxxxxxxxxxxxxxxx"
  };
  const userPool = new AmazonCognitoIdentity.CognitoUserPool(poolData);

  // Amazon Cognito 認証情報プロバイダーを初期化します
  AWS.config.region = "us-east-1"; // リージョン
  AWS.config.credentials = new AWS.CognitoIdentityCredentials({
    IdentityPoolId: "us-east-1:xxxxxxxxxxxxxxxxxxxxxxxxxxxxxxxxxxx"
  });

  /**
   * サインイン処理
   */
  document.getElementById("signinButton").addEventListener("click", () => {
    const email = document.getElementById('email').value;
    const password = document.getElementById('password').value;

    // 何か1つでも未入力の項目がある場合、メッセージを表示して処理を中断
    const message = document.getElementById('message-span');
    if (!email | !password) {
      message.innerHTML = "All fields are required.";
      return false;
    }

    // 認証データの作成
    const authenticationData = {
      Username: email,
      Password: password
    };
    const authenticationDetails = new AmazonCognitoIdentity.AuthenticationDetails(
      authenticationData
    );

    const userData = {
      Username: email,
      Pool: userPool
    };
    const cognitoUser = new AmazonCognitoIdentity.CognitoUser(userData);

    // 認証処理
    cognitoUser.authenticateUser(authenticationDetails, {
      onSuccess: result => {
        const idToken = result.getIdToken().getJwtToken(); // IDトークン
        const accessToken = result.getAccessToken().getJwtToken(); // アクセストークン
        const refreshToken = result.getRefreshToken().getToken(); // 更新トークン

        console.log("idToken : " + idToken);
        console.log("accessToken : " + accessToken);
        console.log("refreshToken : " + refreshToken);

        // サインイン成功の場合、次の画面へ遷移
        location.href = "index.html";
      },

      onFailure: err => {
        // サインイン失敗の場合、エラーメッセージを画面に表示
        console.log(err);
        message.innerHTML = err.message;
      }
    });
  });
})();
認証完了で閲覧できるページの作成
<!DOCTYPE html>
<html>
  <head>
    <meta charset="UTF-8" />
    <title>Menu</title>
    <script src="./js/jsbn.js"></script>
    <script src="./js/jsbn2.js"></script>
    <script src="./js/sjcl.js"></script>
    <script src="./js/aws-sdk.min.js"></script>
    <script src="./js/aws-cognito-sdk.min.js"></script>
    <script src="./js/amazon-cognito-identity.min.js"></script>
  </head>
  <body>
    <div id="menu">
      <h1 id="name"></h1>
      <h2 id="role"></h2>
      <p id="email"></p>
    </div>
    <button id="signout" hidden>Sign Out</button>
    <script src="./js/index.js" defer></script>
  </body>
</html>
認証済みかチェックする処理
これまでにメモしたユーザープールID、クライアントID、AWS認証情報を張り付けます。
(() => {
  // ユーザープールの設定
  const poolData = {
    UserPoolId: "us-east-1_xxxxxxxxxx",
    ClientId: "xxxxxxxxxxxxxxxxxxxxxxxxxx"
  };
  const userPool = new AmazonCognitoIdentity.CognitoUserPool(poolData);
  const cognitoUser = userPool.getCurrentUser(); // 現在のユーザー

  const currentUserData = {}; // ユーザーの属性情報

  // Amazon Cognito 認証情報プロバイダーを初期化します
  AWS.config.region = "us-east-1"; // リージョン
  AWS.config.credentials = new AWS.CognitoIdentityCredentials({
    IdentityPoolId: "us-east-1:xxxxxxxxxxxxxxxxxxxxxxxxxxxxxxxxxxxx"
  });

  // 現在のユーザーの属性情報を取得・表示する
  // 現在のユーザー情報が取得できているか?
  if (cognitoUser != null) {
    cognitoUser.getSession((err, session) => {
      if (err) {
        console.log(err);
        location.href = "signin.html";
      } else {
        // ユーザの属性を取得
        cognitoUser.getUserAttributes((err, result) => {
          if (err) {
            location.href = "signin.html";
          }

          // 取得した属性情報を連想配列に格納
          for (i = 0; i < result.length; i++) {
            currentUserData[result[i].getName()] = result[i].getValue();
          }
          document.getElementById("name").innerHTML =
            "ようこそ!" + currentUserData["name"] + "さん";
          document.getElementById("role").innerHTML =
            "Your Role is " + currentUserData["custom:role"];
          document.getElementById("email").innerHTML =
            "Your E-Mail is " + currentUserData["email"];

          // サインアウト処理
          const signoutButton = document.getElementById("signout");
          signoutButton.addEventListener("click", event => {
            cognitoUser.signOut();
            location.reload();
          });
          signoutButton.hidden = false;
          console.log(currentUserData);
        });
      }
    });
  } else {
    location.href = "signin.html";
  }
})();
動作のテスト
一連の流れをブラウザでテスト
- サインアップ
- メールでアクティベート
- サインイン
- 認証情報の表示
- サインアウト
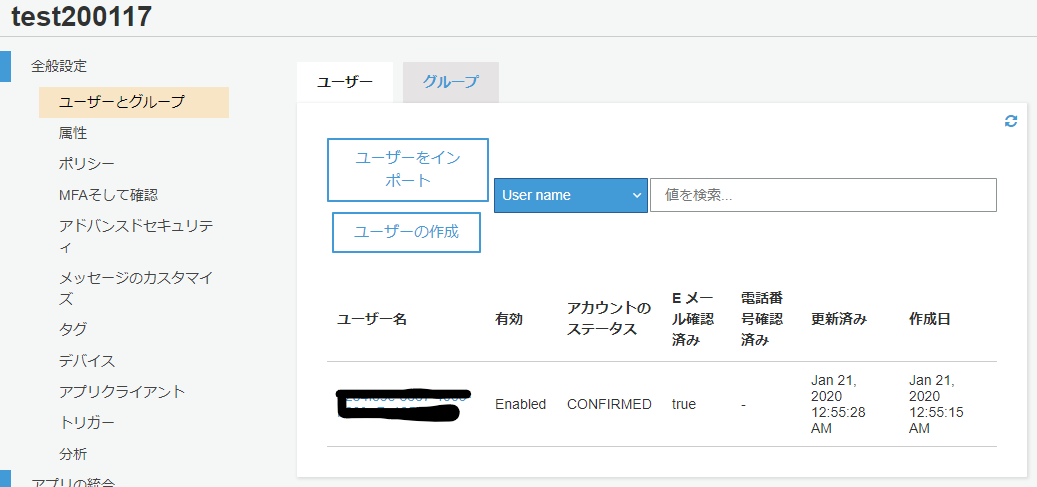
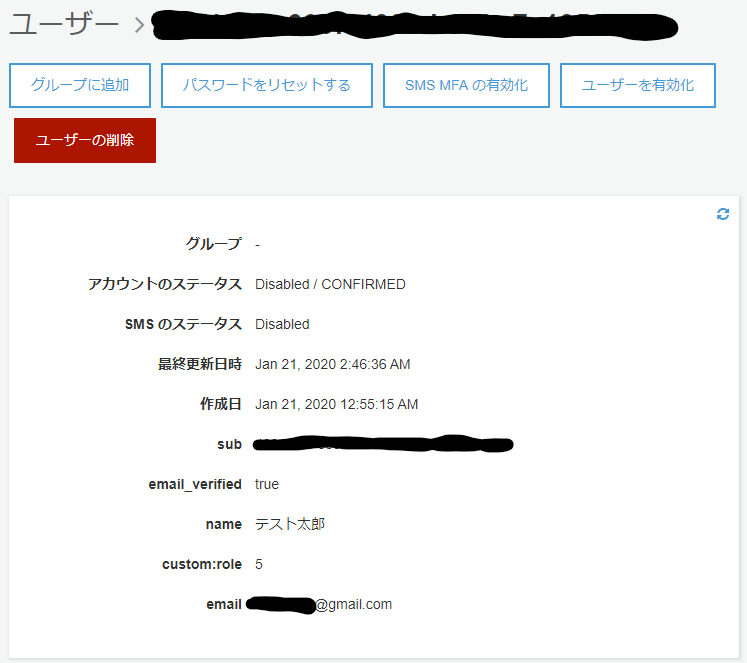
Cognitoのコンソールでユーザーの状況が確認できる
ユーザーを無効化したり、削除したり、詳細な操作ができる
最後に
他にもパスワードの変更や再設定など必要な機能があるかと思いますが、入門としてはシンプルに作成できたかと思います。
ここからJWTや認証・認可などへ広げていけば良いかと思います。
