Introduction
With this article, I want to share how we can use unvt/charites for vector tile style editing.
It can be used for ArcGIS Online and its vector tile style, MapLibre GL JS and Mapbox GL JS.
Targeted reader
Vector Tile style engineers who are interested in editing styles for ArcGIS Online, MapLibre GL JS and/or Mapbox GL JS. I am specifically writing this for one of my data visualization colleagues.
Materials used for this test
Because I cannot explain the process with our internal data, I am using public/open content.
ArcGIS Living Atlas
Now, ESRI releases a lot of vector tile for ArcGIS Online and others. I chose one of them.
- World Topographic Map: https://www.arcgis.com/home/item.html?id=7dc6cea0b1764a1f9af2e679f642f0f5
- Its style: https://www.arcgis.com/sharing/rest/content/items/7dc6cea0b1764a1f9af2e679f642f0f5/resources/styles/root.json?f=pjson
This map is designed to be used as a basemap layer or reference layer in a web map. You can add this layer to a web map and save as your own map.
Because this map is delivered as a vector tile layer, users can customize the map to change its content and symbology, including fonts. Users are able to turn on and off layers, change symbols for layers, switch to alternate local language (in some areas), and refine the treatment of disputed boundaries.
My sample map
I also prepared a simple style for my own data from NaturalEarth.
Style URL: https://ubukawa.github.io/vt-test/maps/test-simple.json
Practice
Starting Docker container (unvt/nanban) to use our tool unvt/charites
Our tool, unvt/charites, may work well on OSX, Ubuntu, but it might not work well in some envrionment such as arm64 (eg., M1 Mac) because some of NPM packages like sprite-zero uses mapnik. For windows users, using Docker would be easier.
docker run -it --rm -v ${PWD}:/data -p 8080:8080 unvt/nanban
cd /data
charites --version
Connect the port for Live Preview in localhost.

Importing existing style (json)
While many vector tile maps use style file in JSON format, out tool use easy to read/edit YAML file to work with style. You can import the existing style json (compatible for Mapbox/MapLibre Style Specification) for vector tile map.
import from local file
Run the following command.
charites convert input.json output.yml
from online (Easy example)
By using curl, a style.json can be converted into a series of yaml files.
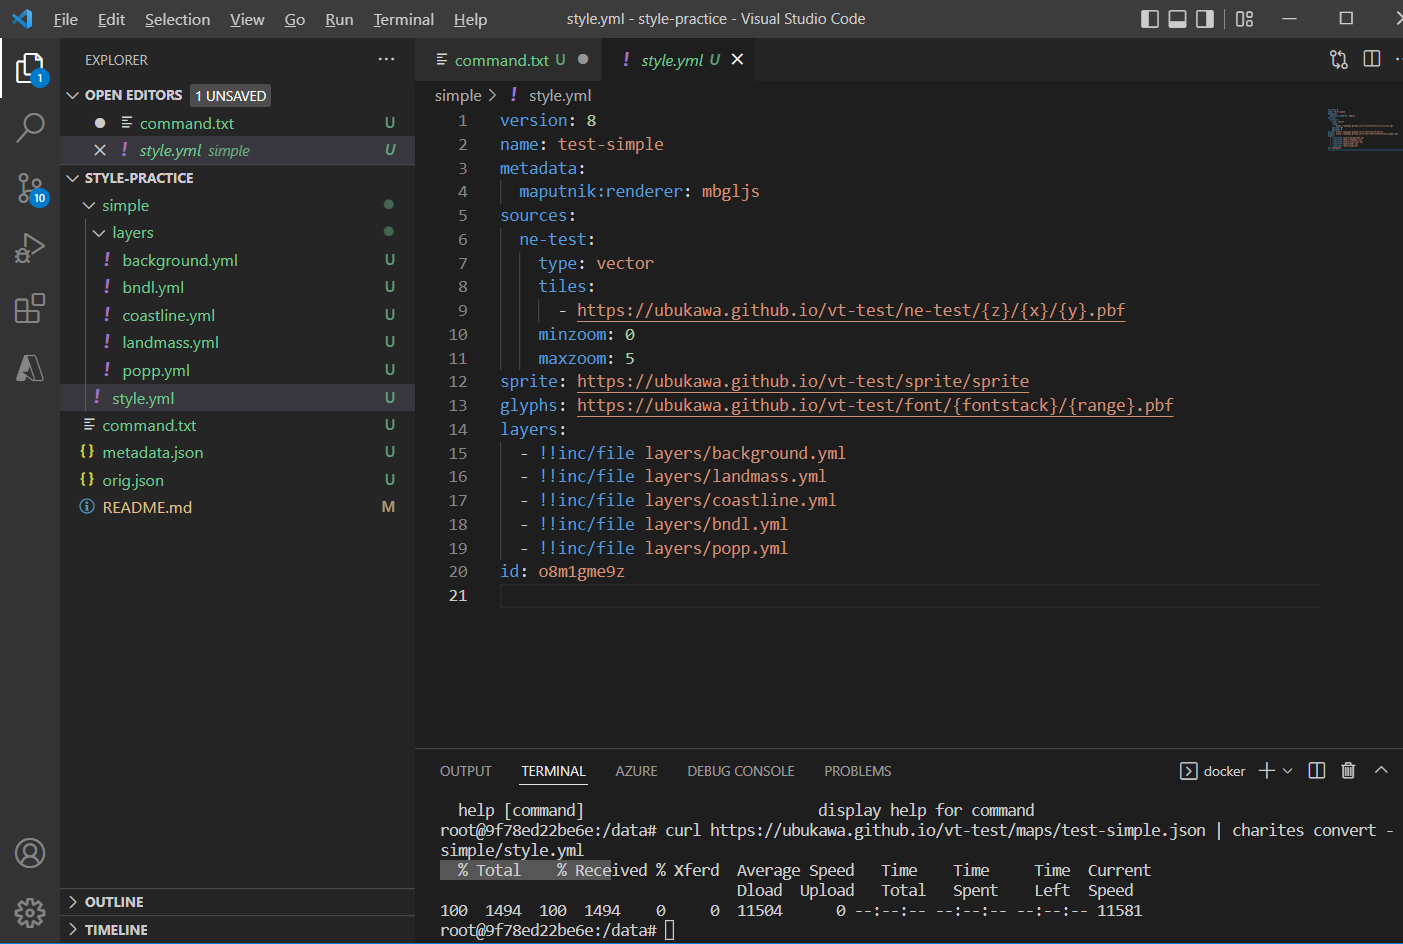
curl https://ubukawa.github.io/vt-test/maps/test-simple.json | charites convert - simple/style.yml
There are style layers under layers directory (see below figure).
from online (ESRI example)
If you do the same thing for ESRI's style....
curl https://www.arcgis.com/sharing/rest/content/items/7dc6cea0b1764a1f9af2e679f62f0f5/resources/styles/root.json?f=pjson | charites convert - esri/style.yml
It will fail because unvt/charites cannot treat "/" in the layer id, which will be the file name under "layers".
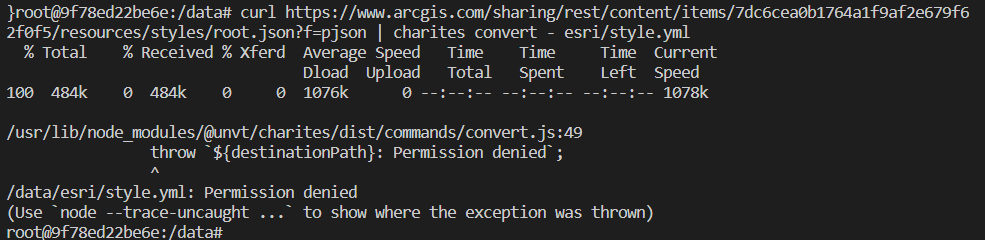
Please replace "/" in layer id.
Live preview
Once a style is imported, we can see the LivePreview with the following command.
charites serve simple/style.yml
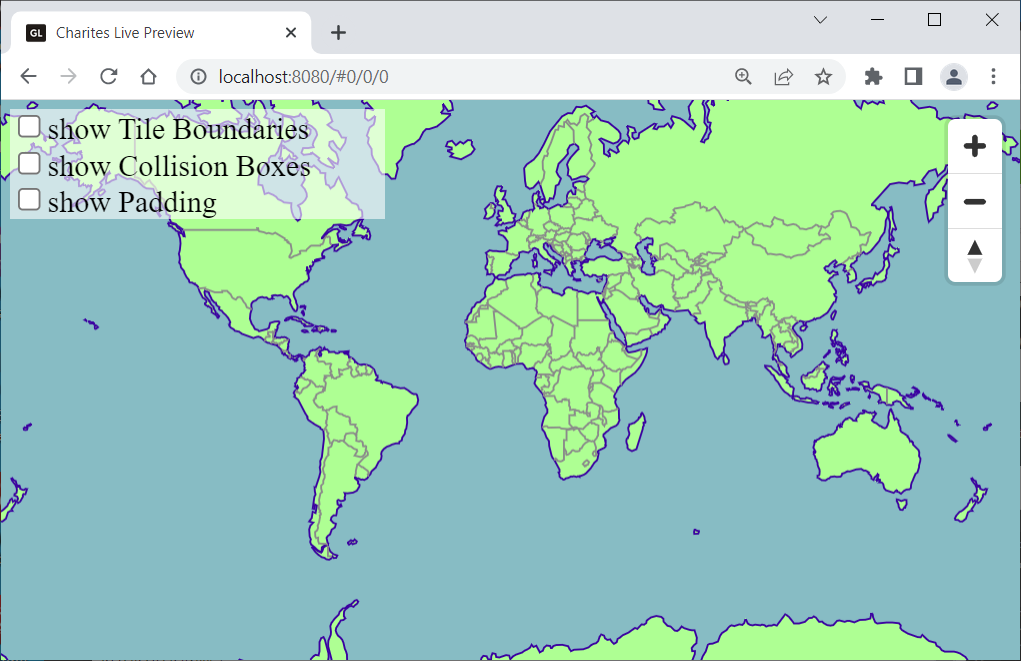
You can keep Live Preview while you are editing the style.
Create style file from the scratch
We can also start from the scratch. Let's try with ESRI's basemap.
Making a new directory for style, and initiate a style.
It is not necessary, but it would be a good idea to make a directory for your new style. Then, you can initiate a style.yml/
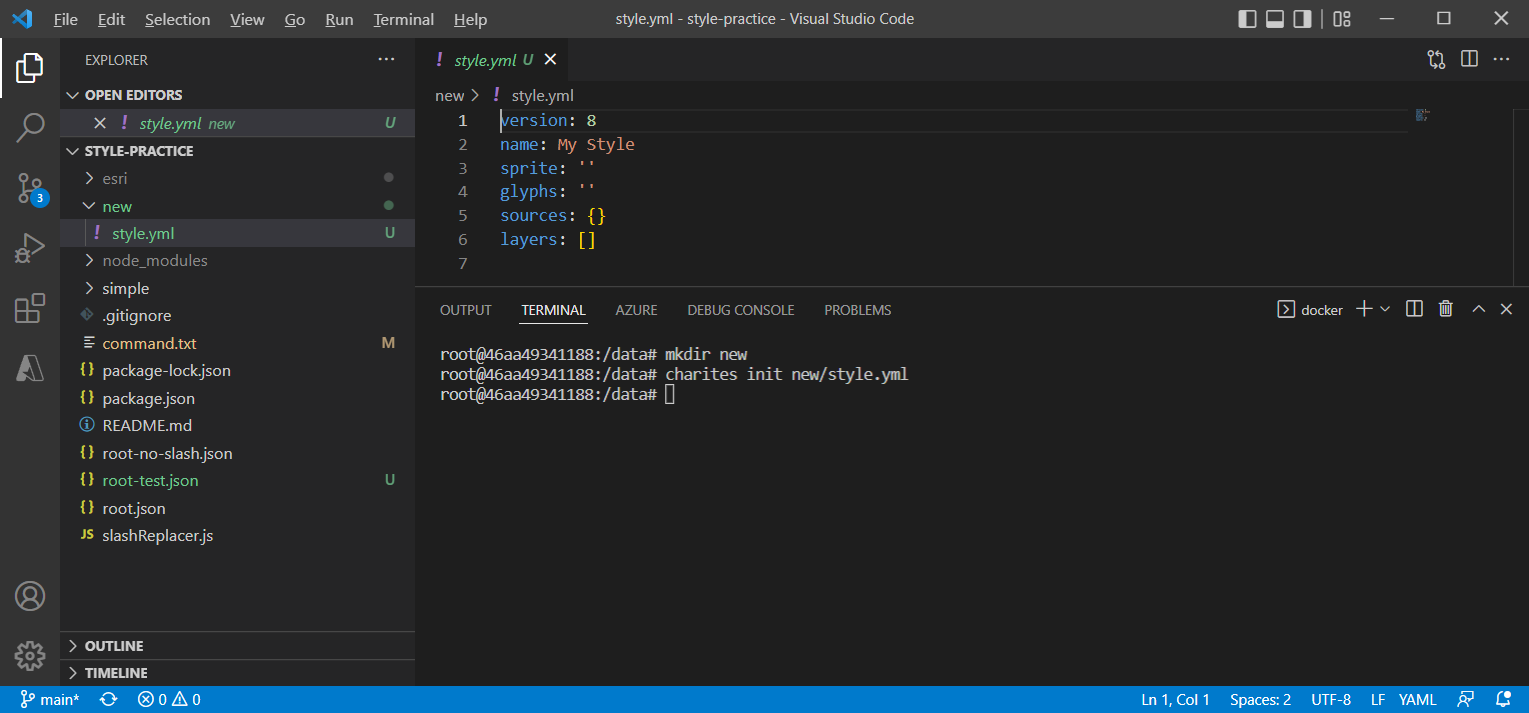
mkdir new
charites init new/style.yml
At first, style.yml is empty. (See below)
Adding style information
Referring to this ESRI basemap style (here), fill each element of style.yml as below.
Make sure that you specified the vector tile source as the tiles. You can figure out it by adding "tile/{z}/{y}/{x}.pbf" to the vector tile server URL. (You can learn these by checkin ArcGIS REST API.)
Under the layers, let's tentatively add background.yml and land.yml
version: 8
name: My Style
sprite: https://cdn.arcgis.com/sharing/rest/content/items/7dc6cea0b1764a1f9af2e679f642f0f5/resources/styles/../sprites/sprite
glyphs: https://basemaps.arcgis.com/arcgis/rest/services/World_Basemap_v2/VectorTileServer/resources/fonts/{fontstack}/{range}
sources:
  esri:
    type: vector
    tiles:  # for our tool, make sure that you use tiles
      - https://basemaps.arcgis.com/arcgis/rest/services/World_Basemap_v2/VectorTileServer/tile/{z}/{y}/{x}.pbf
layers: ## you can adde more layers here
  - !!inc/file layers/background.yml
  - !!inc/file layers/land.yml
Develop layer information
make a new directory "layers" in the same directory with style.yml, and make "background.yml" and "land.yaml" as below. (Please make sure that the location of layer files should be concordant with the list of layers in style.yml.)
id: background
type: background
maxzoom: 15
paint:
  background-color: rgb(135, 188, 196) #you can use rgba color, index color (like '#990000'), etc..
id: land
type: fill
source: esri
source-layer: Land
maxzoom: 15
paint:
  fill-color: rgb(174, 255, 147)
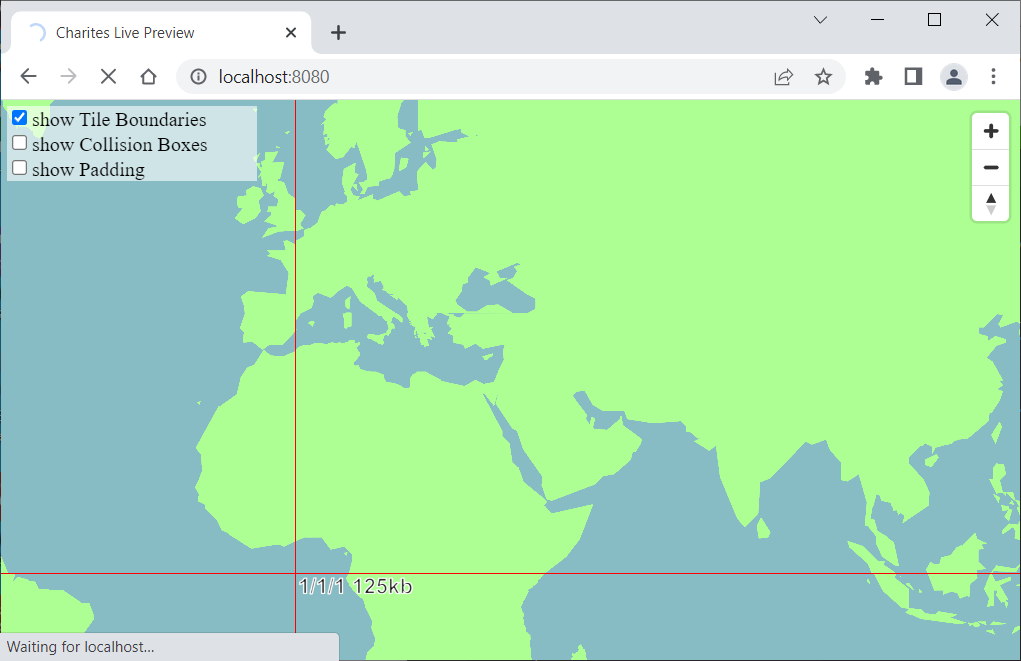
Now, the live preview (run charites serve new/style.yml) would be like this:
Filtering
If you know the data has some attribution for filtering, you can do filtering as below:
id: land
type: fill
source: esri
source-layer: Land
filter:
- '=='
- _symbol
- 0 #1 is ice 0 is non ice (See Green Land)
maxzoom: 15
paint:
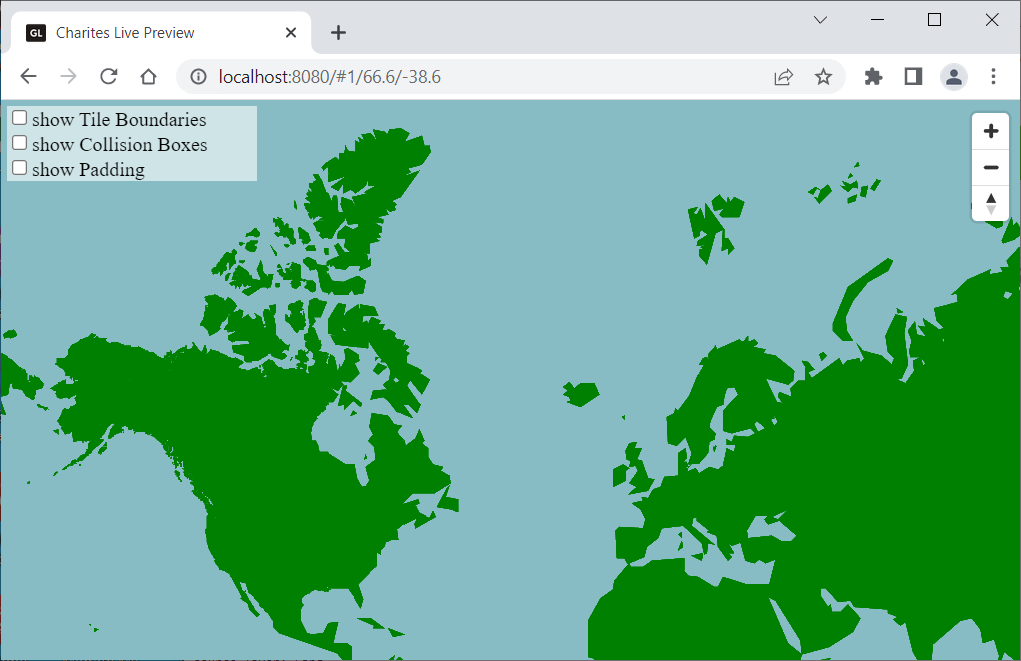
fill-color: green #rgb(174, 255, 147)
Greenland disappeared.
Then, let's add ice for Greenland as a different layer. Make a new yaml file under layers, and add one more layer in the style.yml. (Our tool can understand the name of color ("white"), but I am not sure if other libraries and/or ArcGIS Online understand it. Using index color or RGB color would be wise way.)
id: land(ice)
type: fill
source: esri
source-layer: Land
filter:
- '=='
- _symbol
- 1 #1 is ice 0 is non ice (See Green Land)
maxzoom: 15
paint:
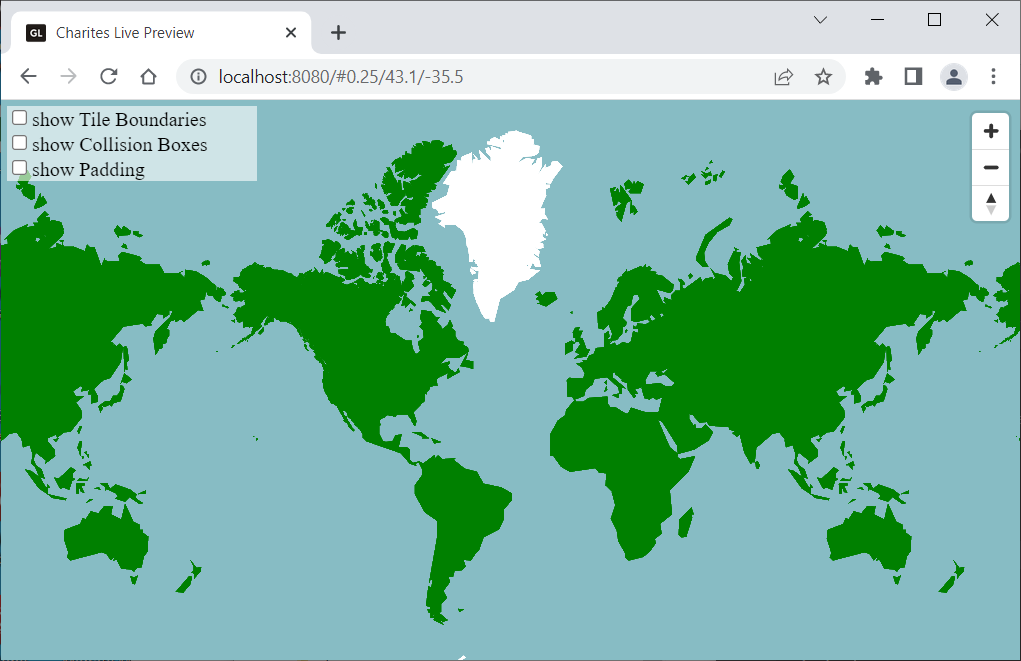
fill-color: white #rgb(174, 255, 147)
Now, your map looks like:
Advanced expression.
For ArcGIS online, I think "match" expression may not work, but for Mapbox GL JS and MapLibre, using "match" function would be easier to change the paint based on the attribution. Instead of using "land.yml" and "land(ice).yml" as we did in the previous chapter, we can make it with single file as below.
id: land-ice
type: fill
source: esri
source-layer: Land
filter: # filter is not needed..
  - 'in'
  - _symbol
  - 1 #1 is ice 0 is non ice (See Green Land)
  - 0
maxzoom: 15
paint:
  fill-color:
    - match
    - - get
      - _symbol
    - 1
    - '#FFFFFF' # index color
    - 0
    - green # color name
    - '#999999' #1 nor 0
Thus, by using this kind of technique, we can obtain the same map expression with less number of map layers.
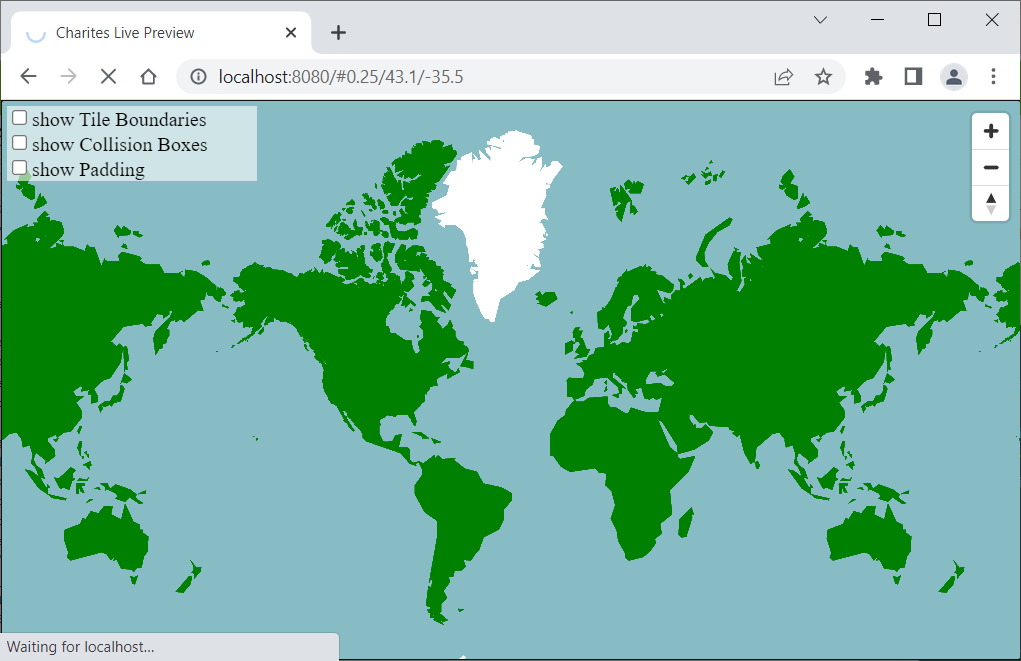
Match can be used for icon, fill-color, line-color, line-width, etc.
Export JSON file
Exporting JSON file
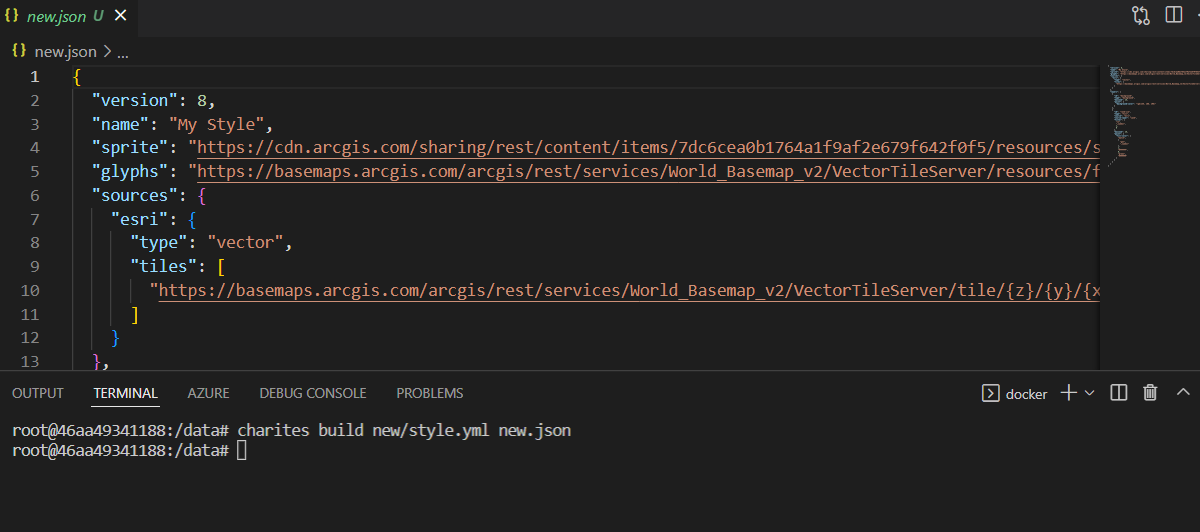
Once you edit the style, you can export it back to a JSON file. Quit the Live Preview and make JSON file with the following command:
charites build new/style.yml new.json
Adjusting the sources for ArcGIS Online (if necessary).
In order to use your developed style in ArcGIS Online, it would be necessary to adjust layer information. Please change from "tiles" to "url". You just need to change the property name, and delete the "/tile/{z}/{y}/{x}.pbf" to specify the server url.
Summary
Through these test, I hope you can understand how you can edit style information efficiently.