Arduinoの開発環境でJsonを扱うライブラリは何種類かあるようですが、私は「Prototyping Lab」でも出てきたので、ArduinoJsonライブラリを使用しています。
Jsonフォーマットのデータ構成をプログラムするのですが、データがネストしてくると確認が面倒になってきます。
ArduinoJson Assistantという公式ツールを使うと、このあたりの準備が簡単にできたので、ここにメモしておきます。
ArduinoJsonの基本的な使い方は公式サイトを参考にしてください。 → http://arduinojson.org/doc/
ArduinoJsonを使用する際に必要な準備は以下となりますが、ArduinoJson Assistantを使うことでコードが自動で生成できます。
ArduinoJsonの準備手順
- ヘッダインクルード
- JsonObject用のメモリー確保
- JsonObjectの作成(以下のどちらか)
- JsonファイルをパースしてObjectを作成する方法
- JsonObjectを作成して、要素を追加していく方法
以下のSample.Jsonファイルから、ArduinoJson Assitantを使用してコードを生成してみます。
{
  "sensor": "gps",
  "time": 1351824120,
  "data": [
    48.75608,
    2.302038
  ]
}
・まずはArduinoJson Assistantを開きます。
http://arduinojson.org/assistant/
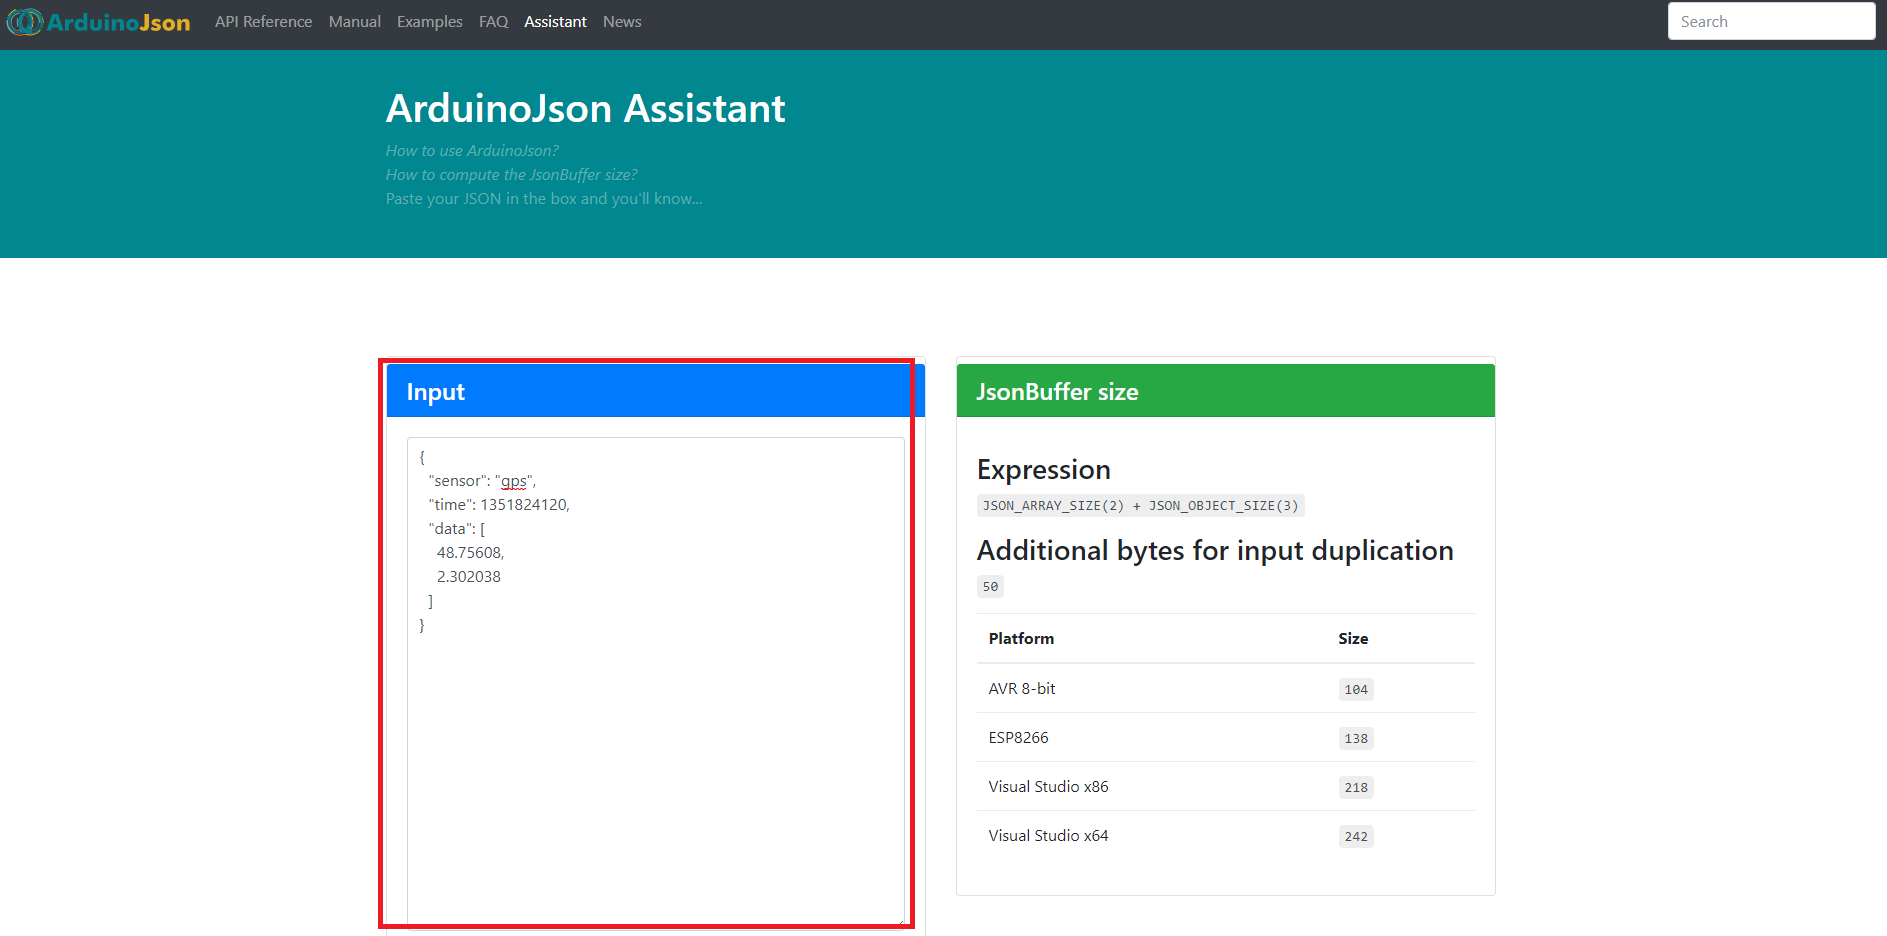
・開いたページの[Input]という欄に先ほどのJsonファイルをコピペします。(今回のデータは公式サンプルなので最初から入っています。)
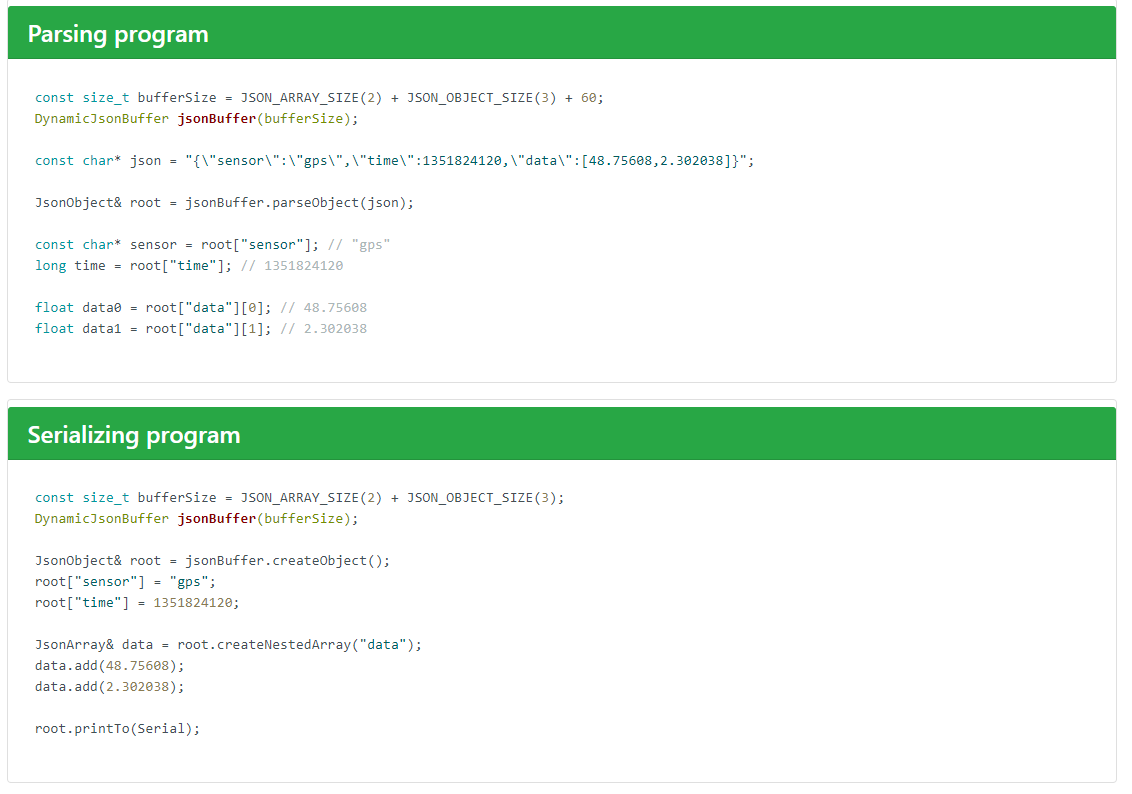
入力すると、[JsonBuffer size]、[Parsing program]、[Serializing program] の中に必要な情報が出てきます。
それぞれ
[JsonBuffer size] 確保すべきメモリー量
[Parsing program] JsonフォーマットからJsonObjectを生成するコード 最初に書いた手順の(3.1)に相当するコード
[Serializing program] JsonObjectから、データ構成を生成するコード 最初に書いた手順の(3.2)に相当するコード
ここで生成されたコードを組み込めば、ArduinoJsonでデータを扱う準備ができます。
データの構成ができたら、「API Reference」などを参考に、set(),get()等でデータを扱えます。
こういったツールで簡単にデータ構成を構築できるのはとても便利ですね。

