# 初めに
Spring Boot とAjax通信を使用したファイルのアップロード・ダウンロード方法について記載しています。
JavaはMavenとThymeleaf使用して作成しています。
JavaScriptはjQueryを使用した場合と普通のJavaScriptを使用した両方のパターンを記載しています。
今回作成するもの
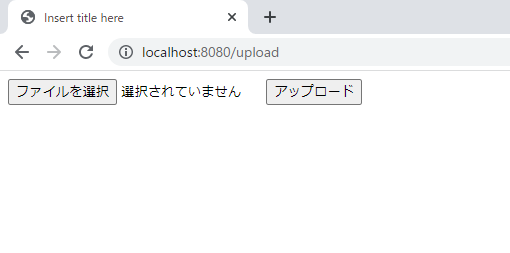
アップロード
\src\main\resources\uploadFile にファイルがアップロードされます。

ダウンロード
実装
| 実装方法 |
|---|
| フロントエンド側の実装 |
| バックエンド側の実装 |
注意事項
Thymeleaf を使用するため htmlは下記の src\main\resources\templates 配下に作成します。
Thymeleaf を使用するため Javascriptは下記の src\main\resources\static\js 配下に作成します。
Thymeleaf を使用するためhtmlタグが違います。注意してください。
<html xmlns:th="http://www.thymeleaf.org">
Thymeleaf を使用するためJavascriptの読み込み方が違います。注意してください。
<script th:src="@{/js/upload.js}"></script>
<script th:src="@{/js/download.js}"></script>
※レイアウト(CSS)は設定してないので見た目はよくないです。
jQuery は下記の CDN を使用しております。
フロントエンド側の実装
アップロード
アップロード画面のhtmlとJavascriptは以下のように実装します。
<!DOCTYPE html>
<html xmlns:th="http://www.thymeleaf.org">

<head>
	<meta charset="UTF-8">
	<title>Insert title here</title>
	<script src="https://code.jquery.com/jquery-3.6.3.js"
		integrity="sha256-nQLuAZGRRcILA+6dMBOvcRh5Pe310sBpanc6+QBmyVM=" crossorigin="anonymous"></script>
</head>

<body>

    <input type="file" id="file">
    <button type="button" id="btn">アップロード</button>

	<dialog>
		<p>アップロードしますか?</p>
		<button id="yes">はい</button>
		<button id="no">いいえ</button>
	</dialog>
    <script th:src="@{/js/upload.js}"></script>
</body>

</html>
let dialog = document.querySelector('dialog');
let btn = document.getElementById('btn');
let yes = document.getElementById('yes');
let no = document.getElementById('no');


btn.addEventListener('click', function() {
    // 開くボタンをクリックした場合の処理
    dialog.showModal();
}, false);

yes.addEventListener('click', function() {
    // はいボタンをクリックした場合の処理
    // 通常のJavascriptで実装
    sendDataXMLHttpRequest();
    // jQueryで実装
    //sendDatajQuery();
    dialog.close();

}, false);

no.addEventListener('click', function() {
    // いいえボタンをクリックした場合の処理
    dialog.close();
}, false);

/**
 * 普通のJavascriptで実装
 */
function sendDataXMLHttpRequest(){
    // ファイルを取得
    let file = document.getElementById('file').files[0];

    // フォームデータを設定
    let formdata = new FormData();
    formdata.append( "file", file);

    let xmlhttp = new XMLHttpRequest();

    xmlhttp.onload = function(){
        alert("成功");
    }

    xmlhttp.onerror = function(){
        alert("失敗");
    }

    xmlhttp.open("POST", "/uploadFile", true);
    xmlhttp.send(formdata);
}

/**
 * jQueryで実装
 */
function sendDatajQuery(){
    // ファイルを取得
    let file = $('#file')[0].files[0];

    // フォームデータを取得
    let formdata = new FormData();
    formdata.append( "file", file);

    // POSTでアップロード
	$.ajax({
          url  : "/uploadFile",
          type : "POST",
          data : formdata,
          cache       : false,
          contentType : false,
          processData : false,
          dataType    : "html"
      })
      .done(function(){
          alert("成功");
      })
      .fail(function(){
          alert("失敗");
      });
}
ダウンロード
ダウンロード画面のhtmlとJavascriptは以下のように実装します。
<!DOCTYPE html>
<html xmlns:th="http://www.thymeleaf.org">

<head>
	<meta charset="UTF-8">
	<title>Insert title here</title>
	<script src="https://code.jquery.com/jquery-3.6.3.js"
		integrity="sha256-nQLuAZGRRcILA+6dMBOvcRh5Pe310sBpanc6+QBmyVM=" crossorigin="anonymous"></script>
</head>

<body>

    <button type="button" id="btn">ダウンロード</button>

	<dialog>
		<p>ダウンロードしますか?</p>
		<button id="yes">はい</button>
		<button id="no">いいえ</button>
	</dialog>
	<script th:src="@{/js/download.js}"></script>
</body>

</html>
let dialog = document.querySelector('dialog');
let btn = document.getElementById('btn');
let yes = document.getElementById('yes');
let no = document.getElementById('no');


btn.addEventListener('click', function() {
	// 開くボタンをクリックした場合の処理
	dialog.showModal();
}, false);

yes.addEventListener('click', function() {
	// はいボタンをクリックした場合の処理
    // 通常のJavascriptで実装
	getDataXMLHttpRequest();
    // jQueryで実装
    // getDatajQuery();
	dialog.close();

}, false);

no.addEventListener('click', function() {
	// いいえボタンをクリックした場合の処理
	dialog.close();
}, false);

/**
 * 普通のJavascriptで実装
 */
function getDataXMLHttpRequest() {

	let xmlhttp = new XMLHttpRequest();

	xmlhttp.onload = function(data) {
		let filename = "";
		// サーバ側で設定したファイル名を正規表現で取得
		let disposition = xmlhttp.getResponseHeader('Content-Disposition');
		if (disposition && disposition.indexOf('attachment') !== -1) {
			let filenameRegex = /filename[^;=\n]*=((['"]).*?\2|[^;\n]*)/;
			let matches = filenameRegex.exec(disposition);
			if (matches != null && matches[1]) {
				filename = matches[1].replace(/['"]/g, '');
			}
		}
		let blob = new Blob([data.target.response]);
		let objURL = window.URL.createObjectURL(blob);
		// リンクを生成し、JavaScriptからクリック
		let a = document.createElement("a");
		document.body.appendChild(a);
		a.href = objURL;
		a.download = filename;
		a.click();
	}

	xmlhttp.onerror = function() {
		alert("失敗");
	}

	xmlhttp.open("POST", "/downloadFile", true);
	xmlhttp.send();
}

/**
 * jQueryで実装
 */
function getDatajQuery() {
	// POSTでアップロード
	$.ajax({
		url: "/downloadFile",
		type: "POST",
		cache: false,
		contentType: false,
		processData: false,
		dataType: "html"
	})
		.done(function(data) {
			let fileName = 'test.txt';
			let blob = new Blob([data]);
			let objURL = window.URL.createObjectURL(blob);
			// リンクを生成し、JavaScriptからクリック
			let a = document.createElement("a");
			document.body.appendChild(a);
			a.href = objURL;
			a.download = fileName;
			a.click();
		})
		.fail(function() {
			alert("失敗");
		});
}
※jQueryを使用した際のfile名の取得方法がわからなかったので直接指定しています。すみません・・・。
バックエンド側の実装
コントローラの実装
html表示の用のコントローラです。
package com.app.controllers;

import org.springframework.stereotype.Controller;
import org.springframework.web.bind.annotation.GetMapping;

@Controller
public class GamenController {
	/**
	 * upload.htmlを表示するコントローラ
	 * @return upload.html
	 */
	@GetMapping("/upload")
	public String upload() {
		return "upload";
	}

	/**
	 * download.htmlを表示するコントローラ
	 * @return upload.html
	 */
	@GetMapping("/download")
	public String download() {
		return "download";
	}
}
Api呼び出し用のコントローラです。
package com.app.controllers;

import org.springframework.beans.factory.annotation.Autowired;
import org.springframework.web.bind.annotation.PostMapping;
import org.springframework.web.bind.annotation.RequestParam;
import org.springframework.web.bind.annotation.RestController;
import org.springframework.web.multipart.MultipartFile;

import com.app.services.DownloadService;
import com.app.services.UploadService;

import jakarta.servlet.http.HttpServletResponse;

@RestController
public class UploadDownController {
	@Autowired
	UploadService uploadService;

	@Autowired
	DownloadService downloadService;

	/**
	 * ファイルアップロードAPI
	 * @param file アップロードしたファイル
	 */
	@PostMapping(value = "/uploadFile")
	public void uploadFile(@RequestParam("file") MultipartFile file) {
		uploadService.fileUpload(file);
	}

	/**
	 * ファイルアップロードAPI
	 * @param file アップロードしたファイル
	 */
	@PostMapping(value = "/downloadFile")
	public void downloadFile(HttpServletResponse response) {
		downloadService.fileDownload(response);
	}
}
アップロードサービスの実装
アップロードの実装方法です。
package com.app.services;

import org.springframework.web.multipart.MultipartFile;

public interface UploadService {
	/**
	 * ファイルアップロードサービス
	 *
	 * @param file アップロードしたファイル
	 */
	public void fileUpload(MultipartFile file);
}
package com.app.services;

import java.io.File;
import java.io.FileOutputStream;
import java.io.IOException;
import java.io.InputStream;
import java.io.OutputStream;

import org.springframework.stereotype.Service;
import org.springframework.web.multipart.MultipartFile;

@Service
public class UploadServiceImpl implements UploadService {

	/**
	 * ファイルをInputStreamに変換し、出力用ファイルオブジェクトを作成してOutputStreamに変換し
	 * InputStreamの内容を読み込んでOutputStreamに出力する。
	 * @param file アップロードしたファイル
	 */
	@Override
	public void fileUpload(MultipartFile file) {
		// 出力先パス+ファイル名を作成
		String path = "./src/main/resources/uploadFile/" + file.getOriginalFilename();

		// ファイルオブジェクトを作成
		File convFile = new File(path);

		try (InputStream inputStream = file.getInputStream();
				OutputStream outputStream = new FileOutputStream(convFile)) {
			int read = 0;
			byte[] bytes = new byte[1024];

			// InputStreamの内容を読み込んでOutputStreamに出力する。
			while ((read = inputStream.read(bytes)) != -1) {
				outputStream.write(bytes, 0, read);
			}
		} catch (IOException e) {
			// TODO 自動生成された catch ブロック
			e.printStackTrace();
		}
	}

}
ダウンロードサービスの実装
ダウンロードの実装方法です。
package com.app.services;

import jakarta.servlet.http.HttpServletResponse;

public interface DownloadService {
	/**
	 * ファイルダウンロード
	 * @param response レスポンスデータ(ファイルの情報)
	 */
	public void fileDownload(HttpServletResponse response);
}
package com.app.services;

import java.io.FileInputStream;
import java.io.IOException;
import java.io.InputStream;
import java.io.OutputStream;

import org.springframework.stereotype.Service;

import jakarta.servlet.http.HttpServletResponse;

@Service
public class DownloadServiceImpl implements DownloadService {

	/**
	 * InputStreamでダウンロードしたいファイルを読み込み、OutputStreamでresponseに書き込む
	 * @param response レスポンスデータ(ファイルの情報)
	 */
	@Override
	public void fileDownload(HttpServletResponse response) {
		try (InputStream inputStream = new FileInputStream("./src/main/resources/uploadFile/test.txt");
				OutputStream outputStream = response.getOutputStream();) {

			byte[] fileByteArray = inputStream.readAllBytes();

			response.setContentType("application/octet-stream");
			response.setHeader("Content-Disposition", "attachment; filename=test.txt");
			response.setContentLength(fileByteArray.length);

			outputStream.write(fileByteArray);
			outputStream.flush();
		} catch (IOException e) {
			e.printStackTrace();
		}
	}
}
以上です。
下記は今回作成したプロジェクトになります。
参考


