TL; DR
useEffect を意図的に無限ループさせてbrainf*ckインタープリターを走らせた
const [brain, setBrain] = useState(
    Brain.create("", new TextEncoder().encode(""))
);

useEffect(() => {
  setBrain((brain) => brain.next());
}, [brain]);
はじめに
React初心者なので、よくうっかり useEffect で自身が参照しているstateを更新してしまい、無限ループを起こしてしまいます。ハングするUI、空費されるメモリ...
// レンダリング→useEffectでstate更新(=component更新)→レンダリング→useEffectで...
const [num, setNum] = useState(0);
useEffect(() => {
    setNum(num => num+1);
}, [num]);
そこで今回は、悩みの種の無限ループを逆手にとって useEffect でbrainf*ckインタープリターを走らせてみました。
作ったもの
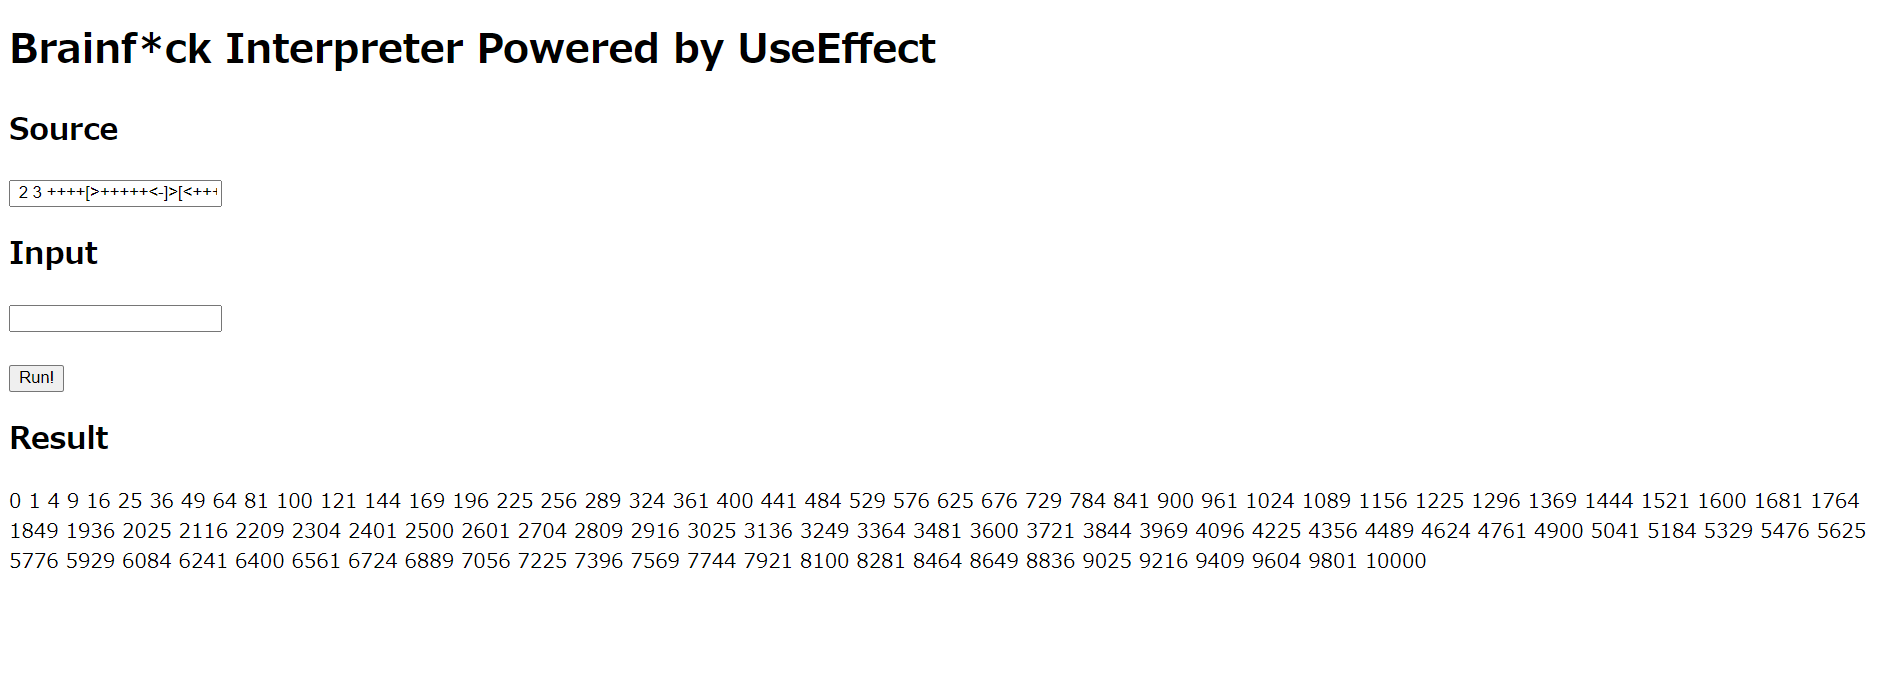
source にソースコードを入れると実行結果が result に出力されます。見た目は普通のUIインタープリターと変わりありません。
動作原理
仕組みは冒頭の無限ループのコードと同じです。インタープリターの状態をオブジェクト化し、useEffectの中で「現在のトークンを評価した直後の状態」をセットします。
useEffect(() => {
  setBrain((brain) => brain.next());
}, [brain]);
無限ループによって、結果的にソースコードのトークンを先頭から末尾まで評価した後の状態が得られます1。
useEffectの動作の仕組みについては、以下の記事が非常に参考になりました。
インタープリターの状態は、以下のオブジェクトで管理しています。入出力、メモリ、ソースコードとそれぞれのどの場所を今読んでいるかを保持しています。
export class Brain {
  private constructor(
    public readonly input: Uint8Array,
    public readonly inputCursor: number,
    public readonly output: Uint8Array,
    public readonly memory: Uint8Array,
    public readonly memoryCursor: number,
    public readonly source: string,
    public readonly sourceCursor: number
  ) {}

  public next(): Brain { // ソースコード上の次のトークンを評価
    if (this.sourceCursor >= this.source.length) {
      return this;
    }

    switch (this.source[this.sourceCursor]) {
      case "+":
        return this.add();
      case "-":
        return this.sub();
      case ">":
        return this.inc();
      case "<":
        return this.dec();
      case ",":
        return this.read();
      case ".":
        return this.write();
      case "[":
        return this.loop();
      case "]":
        return this.break();
    }

    return this.comment();
  }

  private add(): Brain { // +:今参照しているポインタの値をインクリメント
    return new Brain(
      this.input,
      this.inputCursor,
      this.output,
      updateUint8Array(this.memory, this.memoryCursor, (e) => e + 1),
      this.memoryCursor,
      this.source,
      this.sourceCursor + 1
    );
  }
}
// その他のメソッド...
特徴としては、内部の状態を変化させる代わりに 「評価後の状態」を新たに生成 して返しています。状態変化を useEffect に任せられるためこのような実装になりましたが、結果的にループも破壊的変更も無いメソッドになりました。Reactは、純粋関数型Brainf*ck処理系を実装するのにうってつけです
いろいろなソースコードを試してみる
せっかく作ったので色々なbrainf*ckソースコードを実行してみます。
こちらの記事でいろいろなサンプルコードが紹介されていたので一通り試してみました。
想定通りの結果が得られたので、インタープリターに目立ったバグは無さそうです。
とはいえ、レンダリングをステップ数分実行しているので、実行にはかなり時間がかかりました。
(上の例だと15万回ステップ、表示が終わるまで3分程度かかった)
1ステップずつ実行されるので、1文字ずつ出力される様子が目視できます。気長に待ちましょう。
おわりに
しょうもない記事に最後までお付き合いいただきありがとうございました。
今回の方法は、仕組み上言語処理系以外でもループが必要なアルゴリズムならなんでも使えます、ソートなりニュートン法なりお好きなものを useEffect で計算しましょう。 実行速度とチームからの微妙な視線については責任を負いかねますのでご了承ください。
(おまけ:過去の文法悪用シリーズ)
-
ソースコードを読み終わると
brainの状態が変わらなくなるため、無限ループは停止します。 ↩

