はじめに
Praatは音声分析ソフトですが、グラフ等を表示するためのデモ画面もついています。
図形表示だけでなくボタンやキー入力等もできるので、今回はPraat Scriptでゲームを作ってみたいと思います。
これまでのシリーズ一覧
- Praat Script基礎文法最速マスター2022
- Effective Praat Script
- 悪用厳禁?Praat Scriptの黒魔術、謎文法
- Praat Scriptでゲームを作ってみよう (当記事)
UI操作
基本的に、公式リファレンスのデモウィンドウの作り方を参考にしています。
図形を描く
まずは長方形を描いてみます。座標は数学のグラフ同様左下が原点です。
# デモ画面をリセット (clearinfo のUI版)
demo Erase all
# ビューポートを設定(100 x 100の範囲。ただしデフォルトだと外側のマージンが表示されてしまうので inner指定)
demo Select inner viewport: 0, 100, 0, 100

# 長方形(塗りつぶし)
# 引数: 色, x開始, x終了, y開始, y終了
demo Paint rectangle: "purple", 50%, 60%, 50%, 60%
実行するとデモ画面が表示されます。

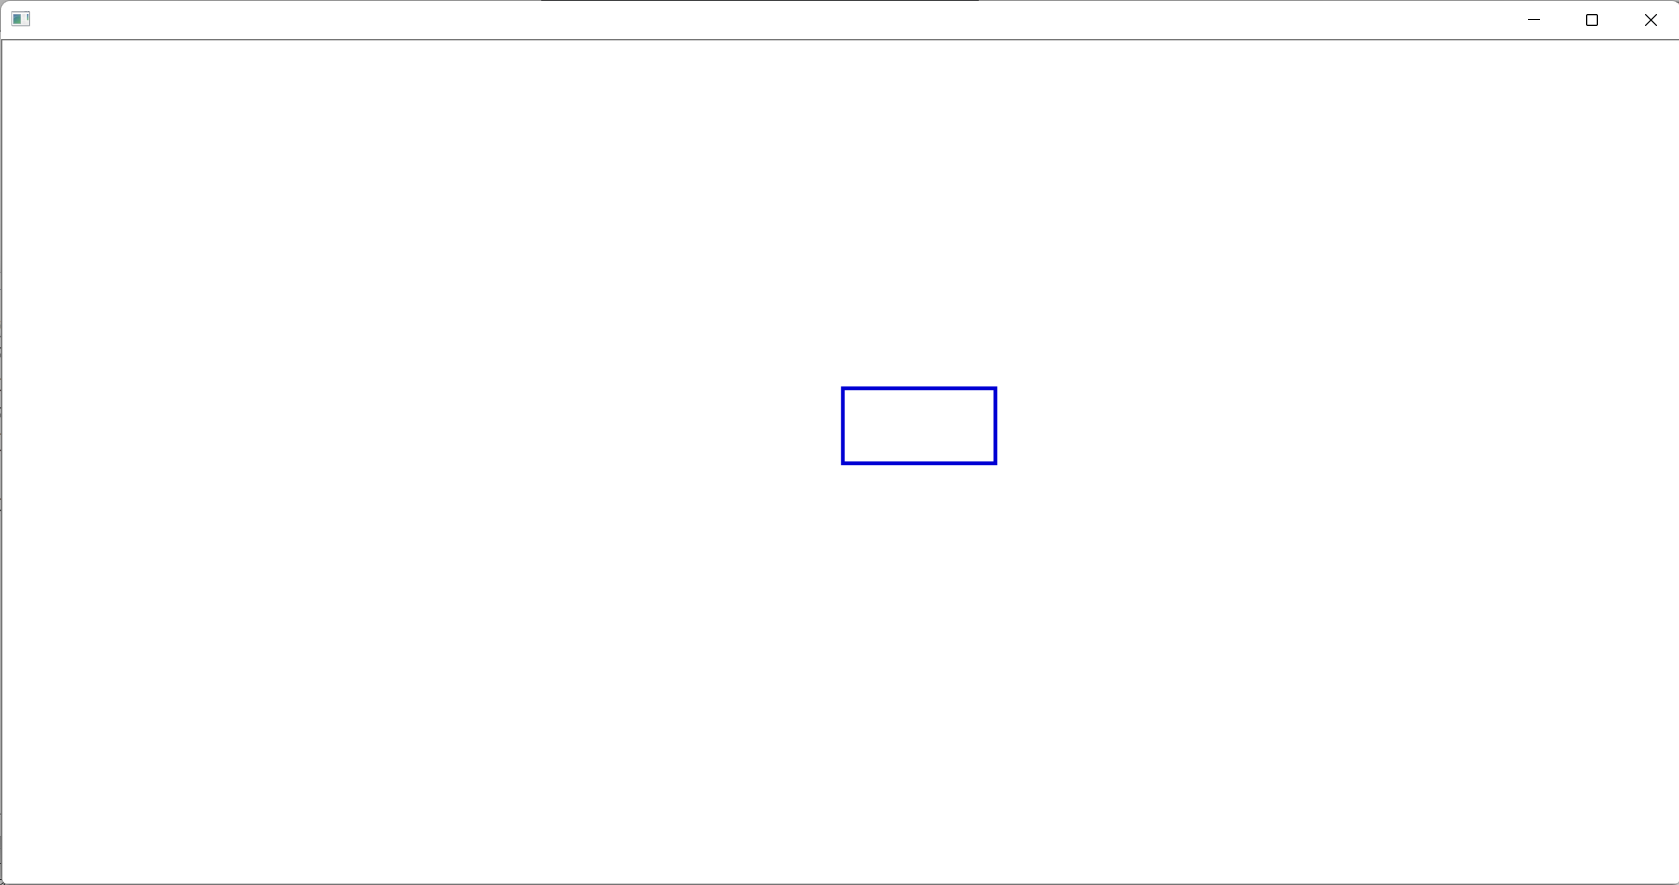
他にも、線や円などを描くことができます。
demo Erase all
demo Select inner viewport: 0, 100, 0, 100

# 枠だけの長方形
demo Draw rectangle: 50%, 60%, 50%, 60%

# 線(引数の順番が長方形と違うので注意!)
# 引数: 色, x開始, y開始, x終了, y終了
demo Draw line: 20%, 20%, 30%, 30%

# 円
# 引数: 色, x, y, 半径
demo Paint circle: "blue", 70%, 70%, 5%

線の書式はペンの設定で変えられます(デフォルトは黒の太さ1)。
# 線の幅を変更
demo Line width: 3
# 線の色を変更
demo Blue

demo Draw rectangle: 50%, 60%, 50%, 60%
文字を入れる
# 引数: x, 水平方向レイアウト, y, 垂直方法レイアウト, 文字列
demo Text: 40%, "left", 40%, "half", "Hello, world!"

実用上は、書式が指定できる text special の方が便利です。フォントは Times, Helvetica, Courier, Palatino から選べます。
(デフォルトは "Times", フォントサイズ10, 角度0度)
# 引数: x, 水平方向レイアウト, y, 垂直方法レイアウト, フォント, サイズ, 回転角度[度], 文字列
demo Text special: 40%, "left", 40%, "half", "Helvetica", 48, "30", "Hello, world!"

文字色はペンの色が反映されます。
demo Red
# 引数: x, 水平方向レイアウト, y, 垂直方法レイアウト, フォント, サイズ, 回転角度[度], 文字列
demo Text special: 40%, "left", 40%, "half", "Helvetica", 48, "0", "Hello, world!"

複雑な形の図形を描く
関数の描画を利用します。座標はビューポートと同じなので、 [0, 1] * [0, 1] の範囲のみ描画されます。
demo Erase all
demo Select inner viewport: 0, 100, 0, 100
# 引数: x開始, x終了, ステップ数(描画の点の数), 関数
demo Draw function: 0, 1, 1000, "4*(x-0.5)^2"

他の図形についても知りたい場合は、「Praat Picture」画面で「World」や「Pen」メニューをご覧ください。
引数についても、Paste Historyして頭に demo を付けることで確認できます。
図形を動かす
デモ画面では、既に描かれた図形を消すことはできません。図形を動かしたい場合は、いったん demo Erase all で画面を全消去してから再描画する必要があります。
demo Erase all
demo Select inner viewport: 0, 100, 0, 100

a = -1%
v = 0
y = 100%

# 図形を動かすたびに、画面をすべて再描画
while 1
    demo Erase all
    demo Select inner viewport: 0, 100, 0, 100
    demo Paint rectangle: "black", 0%, 100%, 0%, 100%
    demo Paint circle: "blue", 50%, y, 5%

    if y <= 5% && v < 0
	y = 5%
        v = -v
    endif

    v += a
    y += v

    pauseScript: "click to see next frame"
endwhile
(ちなみに、sleep を使うとなぜか画面が一面灰色になってしまいアニメーションには使えません...)
デモ画面のタイトルを表示
ウィンドウに好きなタイトルを付けられます。
demoWindowTitle: "my demo window"
クリックを検知してイベントを起こす
demoWaitForInput() は、デモ画面のイベントを待機します。クリックされたタイミングで、demoClicked()がtrueになります。
procedure drawCount: .cnt
    .text$ = "clicks: " + string$(cnt)
    demo Erase all
    demo Text special: 40%, "left", 40%, "half", "Times", 48, "0", .text$
endproc

demo Select inner viewport: 0, 100, 0, 100
cnt = 0
@drawCount: cnt

while demoWaitForInput()
    if demoClicked()
        cnt += 1
        @drawCount: cnt
    endif
endwhile

demoX() と demoY() を使えば、クリックされた座標も取得できます。
procedure drawPosition: .x, .y
    .text$ = "x: " + fixed$(.x, 2) + ", y: " + fixed$(.y, 2)
    demo Erase all
    demo Text special: 60%, "left", 90%, "half", "Times", 48, "0", .text$
endproc

demo Select inner viewport: 0, 100, 0, 100
@drawPosition: 0, 0

while demoWaitForInput()
    if demoClicked()
        @drawPosition: demoX(), demoY()
    endif
endwhile

キー入力を検知してイベントを起こす
クリック同様、キー入力も demoKeyPressed() で取得可能です。
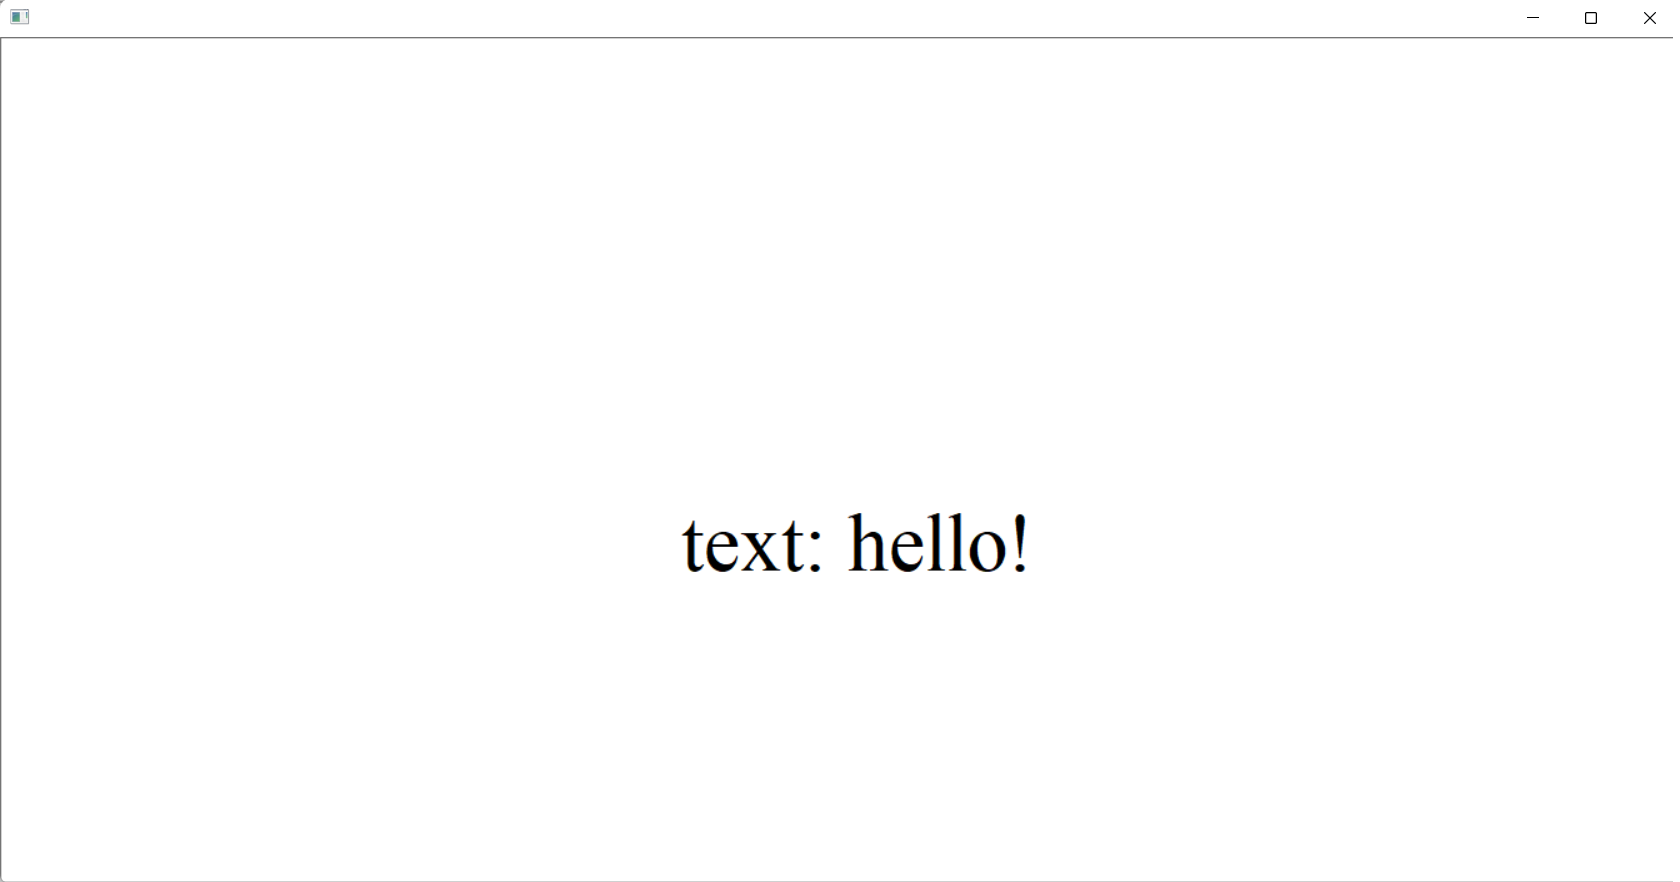
procedure drawText: .text$
	demo Erase all
	demo Text special: 40%, "left", 40%, "half", "Times", 48, "0", "text: " + .text$
endproc

demo Select inner viewport: 0, 100, 0, 100
text$ = ""
@drawText: text$

while demoWaitForInput()
	if demoKeyPressed()
		if unicode(demoKey$()) = 8
			# backspace だったら1文字削除
			text$ = left$(text$, length(text$)-1)
		else
			# そうでなければ入力文字を追記
			text$ += demoKey$()
		endif

		@drawText: text$
	endif
endwhile
応用例:ピアノを作ってみる
ここまでやってきたことの応用で、ピアノを作ってみたいと思います。なぜピアノかというと、Praatでは簡単に音を流せるからです1。

鍵盤をクリックすると音が出ます。
コード全文はこちらにあります。ダウンロードして遊んでみてください。
クリック判定
クリックの座標がキーの範囲内であればキーが押されたと判定しています。ただし鍵盤は重なり合っている(黒鍵が白鍵よりも前面にある) ので、レイヤーが最も前面のキーを選択するようにしています。
# キーの長方形の情報(描画とクリック判定に使用)
procedure keyboardRectangles:
    # rectangle: {xFrom, xTo, yFrom, yTo, layer}
    # NOTE: 黒鍵が白鍵と重なっているため、座標情報以外にレイヤー情報を持たせている
    .c#      = {10%, 20%, 10%, 70%, 0}
    .cSharp# = {17%, 23%, 30%, 70%, 1}
    .d#      = {20%, 30%, 10%, 70%, 0}
    .dSharp# = {27%, 33%, 30%, 70%, 1}
    .e#      = {30%, 40%, 10%, 70%, 0}
    .f#      = {40%, 50%, 10%, 70%, 0}
    .fSharp# = {47%, 53%, 30%, 70%, 1}
    .g#      = {50%, 60%, 10%, 70%, 0}
    .gSharp# = {57%, 63%, 30%, 70%, 1}
    .a#      = {60%, 70%, 10%, 70%, 0}
    .aSharp# = {67%, 73%, 30%, 70%, 1}
    .b#      = {70%, 80%, 10%, 70%, 0}
    .cHigh#  = {80%, 90%, 10%, 70%, 0}

    # ベクトルをまとめて行列の形で返す
    .return## = {c#, .cSharp#, .d#, .dSharp#, .e#, .f#, .fSharp#, .g#, .gSharp#, .a#, .aSharp#, .b#, .cHigh#}
endproc
# キー(長方形)一覧とクリックされた座標から、どのキーがクリックされたかを返す
procedure clickedRectangle: .rectangles##, .x, .y
    .found = -1 ; 見つかった長方形のインデックス (-1 は not found)
    .foundLayer = -1 ; 見つかった長方形のレイヤー

    for .i to numberOfRows(.rectangles##)
        @nth: .rectangles##, .i
        @includes: nth.return#, .x, .y

        if includes.return
            # 新しい長方形が既存のものより手前にあればそちらに交換
            .layer = .rectangles##[.i, 5]
            if .layer > .foundLayer
                .found = .i
                .foundLayer = .layer
            endif
        endif
    endfor

    .return = .found
endproc
音を流す
クリックされたキーに対応する音を流しています。音は Create sound as pure tone で生成した正弦波を使用しています。
procedure generateSound: .frequencyHz, .timeSec
    .name$ = "sound"
    .channels = 1 ; monoral
    .startSec = 0
    .endSec = .timeSec
    .samplingRateHz = 44100
    .amplitude = 0.2
    .fadeInDurationSec = 0.01
    .fadeOutDurationSec = 0.01

    # 音声オブジェクトを作成。戻り値はオブジェクトID
    .id = Create Sound as pure tone: .name$, .channels, .startSec, .endSec,
    ...                              .samplingRateHz, .frequencyHz, .amplitude,
    ...                              .fadeInDurationSec, .fadeOutDurationSec

    .return = .id
endproc
各キーの周波数はvectorで一括生成しています。
# 各キーの周波数を定義
procedure pianoFrequencies: .size
    .frequencies# = zero#(.size)
    # 周波数生成(C4(ト音記号の下のド)から .size 個)
    # A4 (ト音記号の真ん中のラ)が440Hz, 半音上がるごとに 2 ^ (1/12) 倍される
    .frequencies# ~ 440 * (2 ^ ((col - 10) / 12))

    .return# = .frequencies#
endproc
流すときは Play を使用します。同期処理だと音が流れている間画面が固まってしまうので、非同期処理にしています。
procedure handleClickEvent: .soundIDs#
    # どのキーがクリックされたか判定
    @keyboardRectangles:
    @clickedRectangle: keyboardRectangles.return##, demoX(), demoY()

    # -1 (見つからない)のときは何もしない
    if clickedRectangle.return == -1
        'endproc$'
    endif

    # クリックしたキーに対応する音声オブジェクトを選択
    selectObject: .soundIDs#[clickedRectangle.return]
    # (非同期で)再生
    asynchronous Play
endproc
おわりに
以上、Praat ScriptでUIを実装する方法の紹介でした。
Praat Scriptシリーズはこの記事で一旦終わりとしたいと思います。
社会人になってPraatをめっきり使わなくなってしまったので、記憶の断片が残っているうちに文書化しました。関数などかなり忘れてしまっていましたが、書いているうちに懐かしい気持ちがよみがえってきました。
ここまでお読みいただきありがとうございました!
-
言語やUIの話ばかりしていましたが、Praatは音声分析ソフトです。 ↩