前書き
いつからでしょうか![]() 、何か新しいサービスを試す際に、GoogleアカウントやGitHubアカウントを利用してログインするしかやらなくなった。
、何か新しいサービスを試す際に、GoogleアカウントやGitHubアカウントを利用してログインするしかやらなくなった。
ユーザーネームとパスワードを設定し![]() 、メール認証を済ませて初めて利用可能になるようなサービスは自分でも嫌なので、多くの人にとっても面倒でしょう、これからサービス作る際に、いっそう認証周り全部OAuthに任せようと思いました。
、メール認証を済ませて初めて利用可能になるようなサービスは自分でも嫌なので、多くの人にとっても面倒でしょう、これからサービス作る際に、いっそう認証周り全部OAuthに任せようと思いました。
いろいろ調べた結果、最終的にNextAuthに辿り着きました。
NextAuthとは
NextAuthとは何か?とChatGPTに尋ねたら、以下のような回答が返ってきました。

大まか合ってますが、現時点ではSvelteKit, SolidStartでも利用することができるらしいです。
NextAuthの使い方
NextAuthの使い方は非常にシンプルです、Next.js制のプロジェクトでは三つのステップで基本形ができます。
-
NextAuthインストール
npm install next-auth or yarn add next-auth
- 認証プロバイダーを設定する
認証プロバイダーを設定することによって、ユーザーがログインする方法を決められます。
たとえば、GitHub、Google、Facebook、TwitterなどのOAuthプロバイダーを使用できます。
次のように、pages/api/auth/[...nextauth].jsというファイルを作成して、認証プロバイダーとsecretを設定します。
secretの値は下記のコマンドで生成できます、セキュリティに関連する目的に使用されるため、設定しないとエラーになる可能性があります。
openssl rand -base64 32
import NextAuth from 'next-auth'
import GithubProvider from 'next-auth/providers/github';

export default NextAuth({
  providers: [
    GithubProvider({
      clientId: process.env.GITHUB_ID,
      clientSecret: process.env.GITHUB_SECRET,
    }),
  ],
 secret: process.env.SECRET,
})
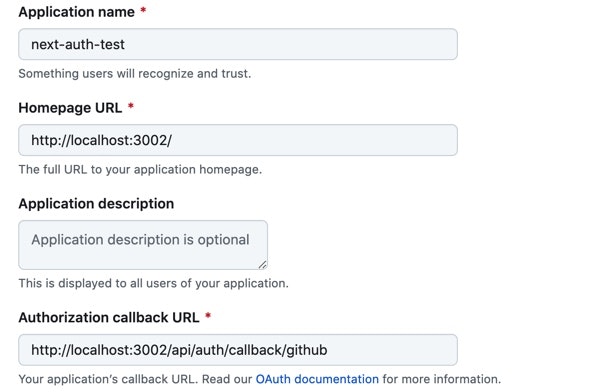
Githubのプロバイダを設定した場合、下記のURlにアクセスして、新規OAuth Appを作る必要がある、New OAuth Appから作れる。
https://github.com/settings/developers
Application name、Homepage URL とcallback URL 指定すればClient IDとClient secretsを取得できる。
Homepage URL指定したURLは.envに追加する、定義しなければhttp://localhost:3000/になる。
NEXTAUTH_URL=http://localhost:3002/
他のプロバイダ使用する場合も手順が大体同じ。
- 認証機能をアプリケーションに実装する
最後に、認証機能をアプリケーションに実装する必要があります。たとえば、ユーザーがログインしているかどうかを確認するために、useSessionというNext.jsのフックを使用できます。次のように、pages/index.jsというファイルにuseSessionをインポートして使用します。
import { SessionProvider } from "next-auth/react"

export default function App({
  Component, pageProps: { session, ...pageProps }
}) {
  return (
    <SessionProvider session={session}>
      <Component {...pageProps}/>
    </SessionProvider>
  )
}
ログインするためにsignInメソッドも用意されてます、プロバイダ指定してログインする場合、プロバイダー名をパラメーターとして渡すことができます、signIn('github')。
import { useSession, signIn, signOut } from "next-auth/react"

export default function Home() {
  const { data: session } = useSession()
  if(session) {
    return <>
      Signed in as {session.user.email} <br/>
      <button onClick={() => signOut()}>Sign out</button>
    </>
  }
  return <>
    Not signed in <br/>
    <button onClick={() => signIn()}>Sign in</button>
  </>
}
この状態でサーバーを立ち上げると、下記の画面が表示されます。

Sign inボタンをクリックすればgithub用のOAuthログイン画面が表示されます。
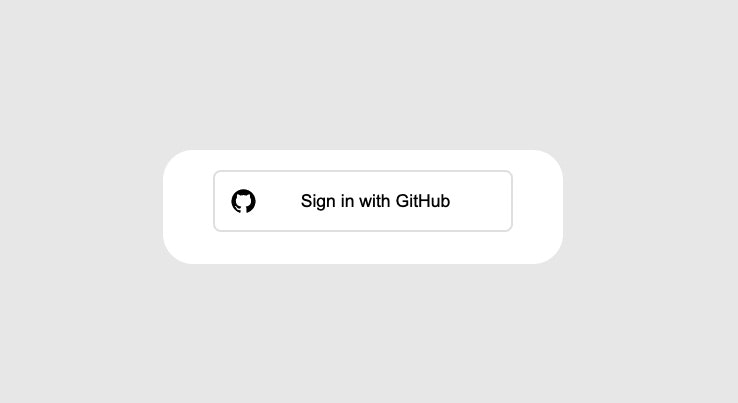
クリックすれば、githubのOAuthログイン画面にリダイレクトされて、許可すれば、ホームページにまたリダイレクトされます。
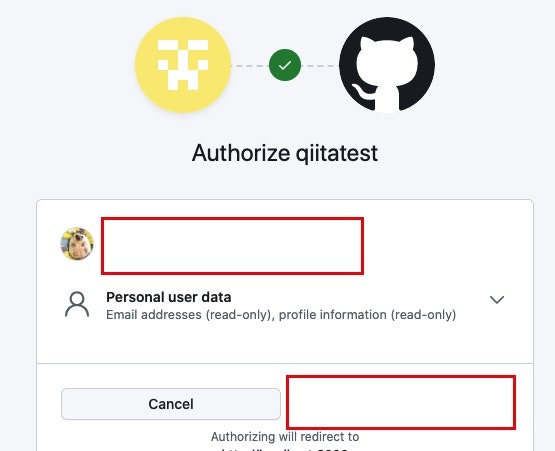
githubに登録されてメールアドレスが表示されることが確認できたら、実装完了です。

データベース使用する場合
先ほどのログインはセッションにユーザー情報を保存してましたが、データベースに保存することもできます。
その場合、NextAuthが期待するテーブル構造を用意してあげる必要があります。
詳細は公式ドキュメントを参照してください。
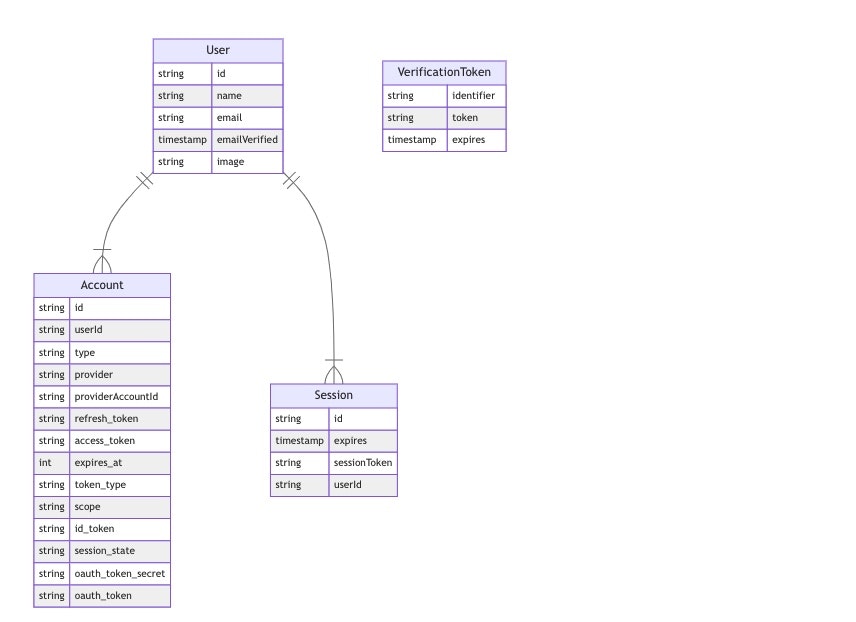
prisma使用する場合、モデルの定義は下記の記述になります。
model Account {
  id                 String  @id @default(cuid())
  userId             String
  type               String
  provider           String
  providerAccountId  String
  refresh_token      String?  @db.Text
  access_token       String?  @db.Text
  expires_at         Int?
  token_type         String?
  scope              String?
  id_token           String?  @db.Text
  session_state      String?
  oauth_token_secret String?
  oauth_token        String?

  user User @relation(fields: [userId], references: [id], onDelete: Cascade)

  @@unique([provider, providerAccountId])
}

model Session {
  id           String   @id @default(cuid())
  sessionToken String   @unique
  userId       String
  expires      DateTime
  user         User     @relation(fields: [userId], references: [id], onDelete: Cascade)
}

model User {
  id            String    @id @default(cuid())
  name          String?
  email         String?   @unique
  emailVerified DateTime?
  image         String?
  accounts      Account[]
  sessions      Session[]
}

model VerificationToken {
  identifier String
  token      String   @unique
  expires    DateTime

  @@unique([identifier, token])
}
