ユーザー認証を担うAWS サービスであるCognitoの環境を作り、SPAのAngularでCognitoで作成したユーザーでログインするまでを記す。
要件
- ユーザーは管理者が作成する(ユーザー自身がサインアップすることはない)
- ユーザーは管理者、事業者、一般ユーザーの三種
- 作成されるユーザーのユーザーID、パスワードはランダムに生成する
必要なサービス・環境
- Cognito
- ユーザープールを利用
- Pythonの実行環境
- 今回はlambdaから実行する
- Angular
Cognitoの設定
Webサービスにログインするユーザーを管理することができるユーザープールを作成する。
これは、Webサービスごとに用意する。
自分の今の理解(マサカリ待ってます)
- ユーザーがシステムにサインインしたり、ログインしたり、パスワードを変更したり、MFAなどをする機能を提供しています。
- 認証・認可のうちの認証の部分を担っています。
- このユーザープールには管理者ユーザーを含むシステムの利用者のユーザーデータが含まれます。ここにはユーザーのメールアドレス、電話番号、住所、性別、生年月日など、任意の属性情報も保持できます。
ユーザープールの作成
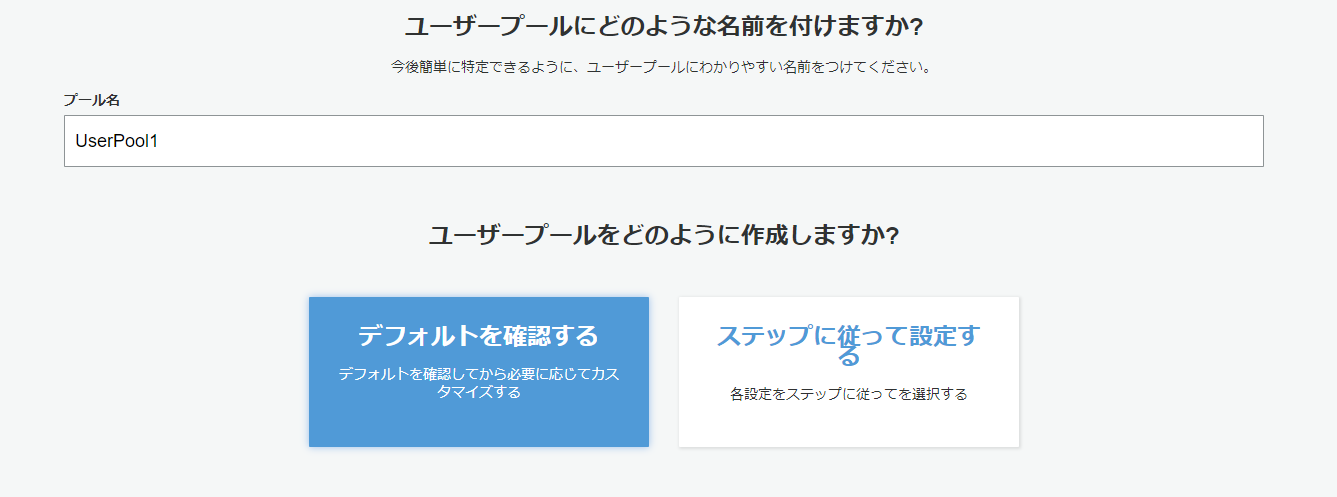
Cognitoのコンソール画面から、ユーザープールを作成するを押下。

ユーザープール名を指定し、今回はデフォルトを確認するを選択する。
※カスタマイズはデフォルト設定から変更するのが楽
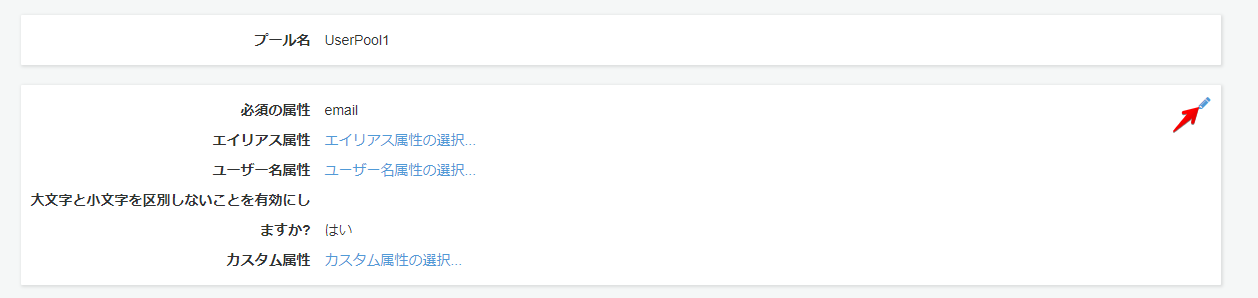
下記のように設定する。
メールアドレスは不要なので、チェックを外す。
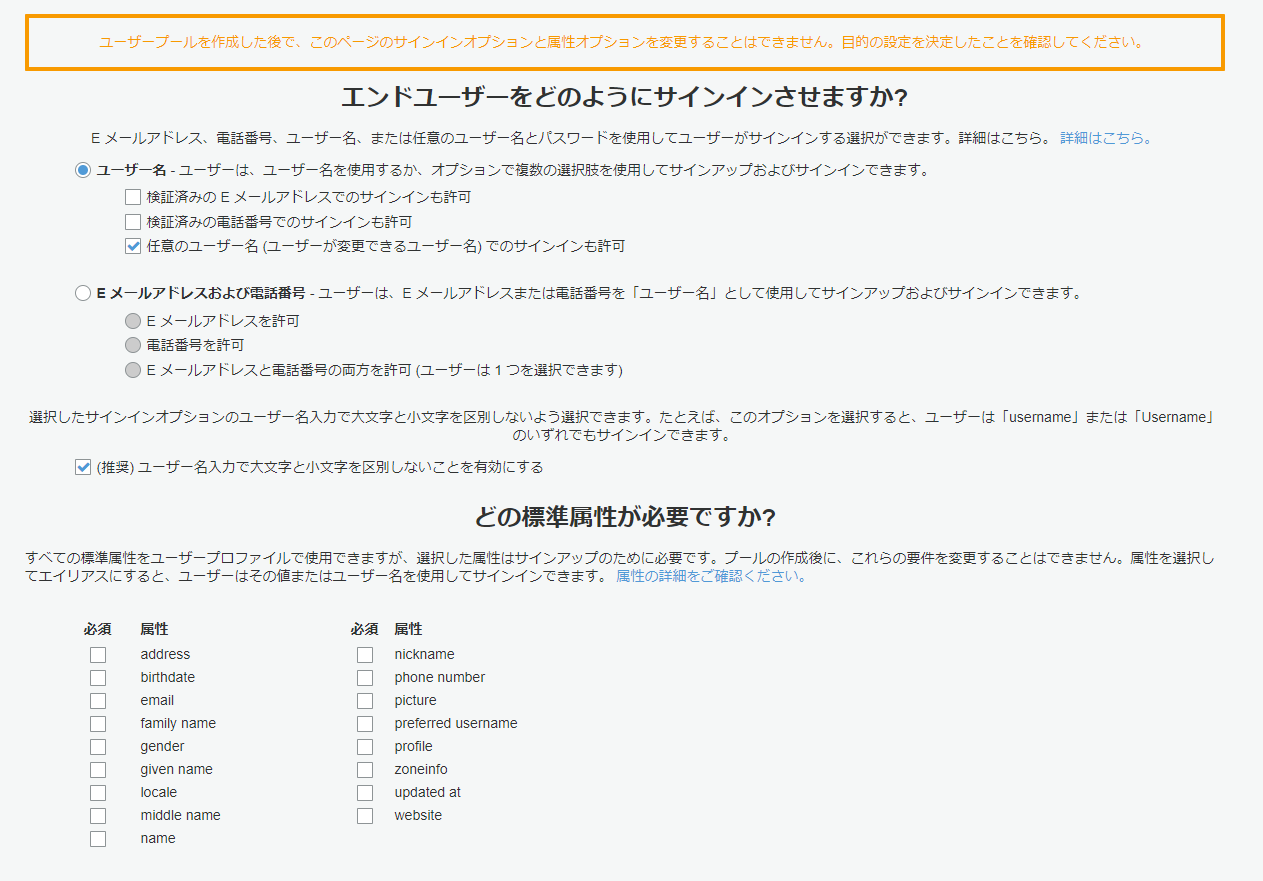
次のステップを押下し、次のステップへ。
パスワードの強度は任意のものを設定(開発時は覚えやすいように強度を下げておくとよいかも)
今回はユーザーがサインアップする想定はないので、管理者のみにユーザーの作成を許可するにチェックを入れる
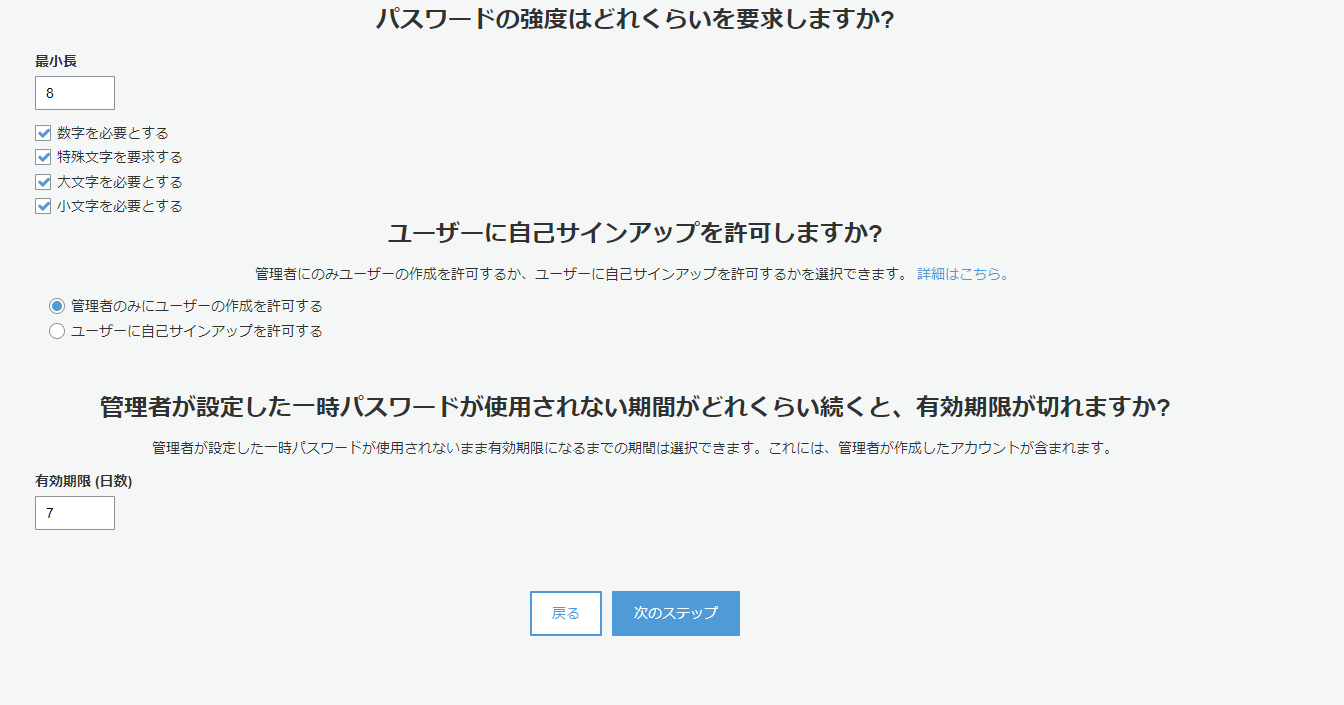
次のステップを押下し、次のステップへ。
MFA、パスワード復旧に関する要件は今回はないのでデフォルトのまま、次のステップへ
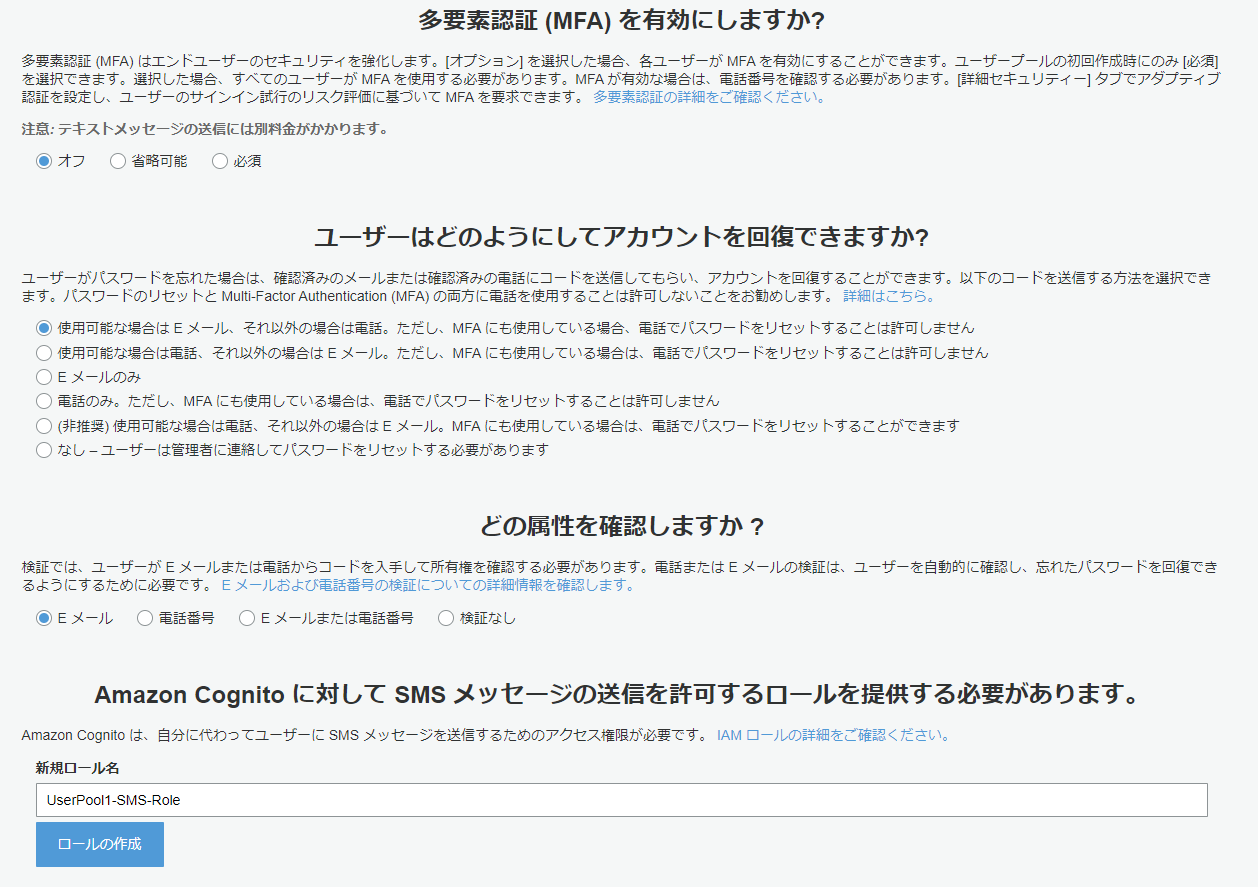
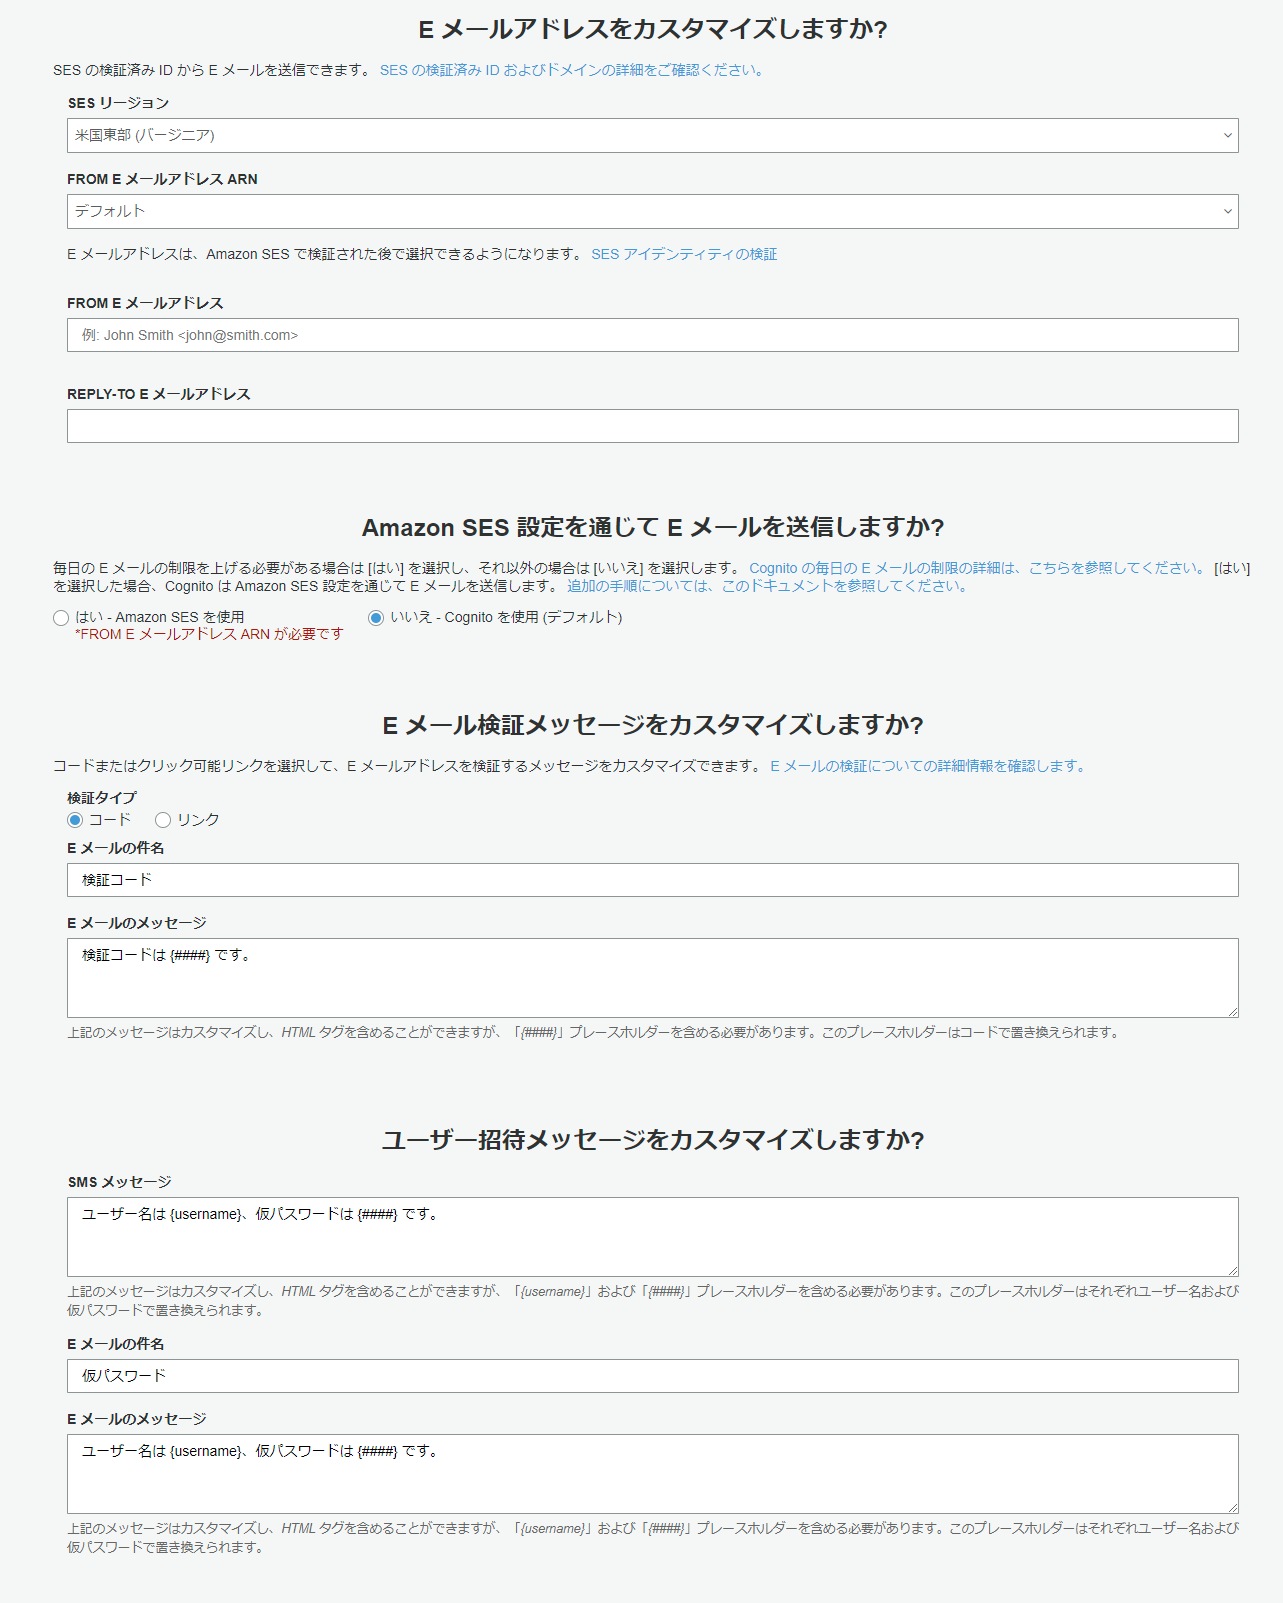
メールアドレスは不要なので、ここもデフォルトのまま、次のステップへ
タグは割愛します。
ユーザーのデバイス記憶はどのように使うかわからなかったのでとりあえず「いいえ」にしてます。
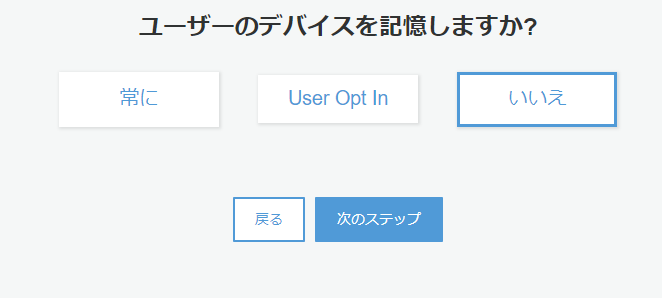
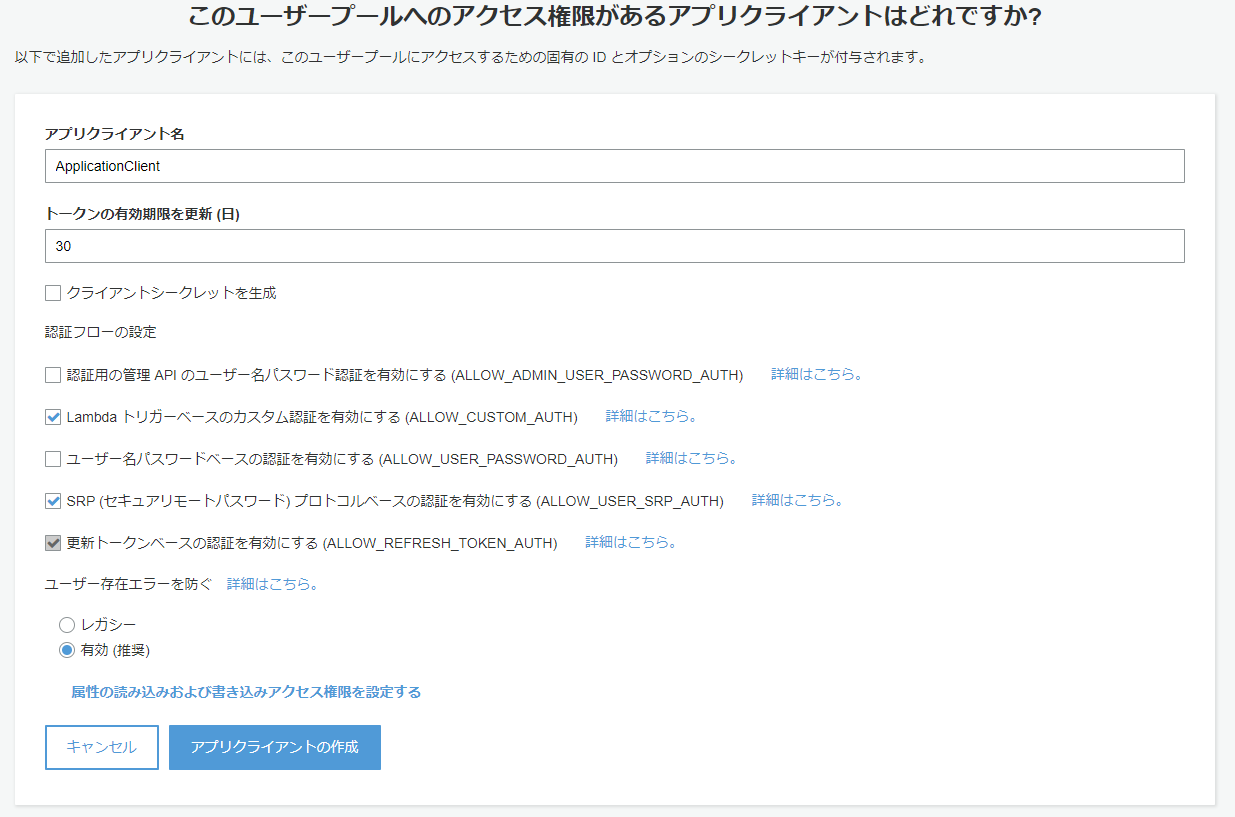
アプリクライアントを追加します。
ここでいうアプリクライアントは、SPAのことを指していると思って構いません。
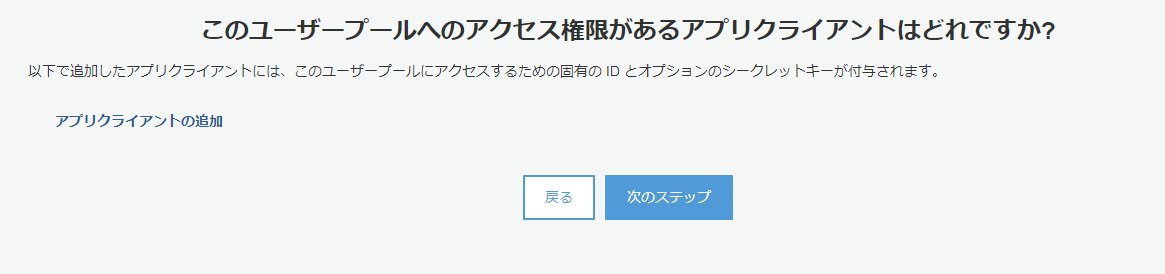
JavaScriptからはクライアントシークレットを扱えないのでチェックを外して作成し、次のステップへ
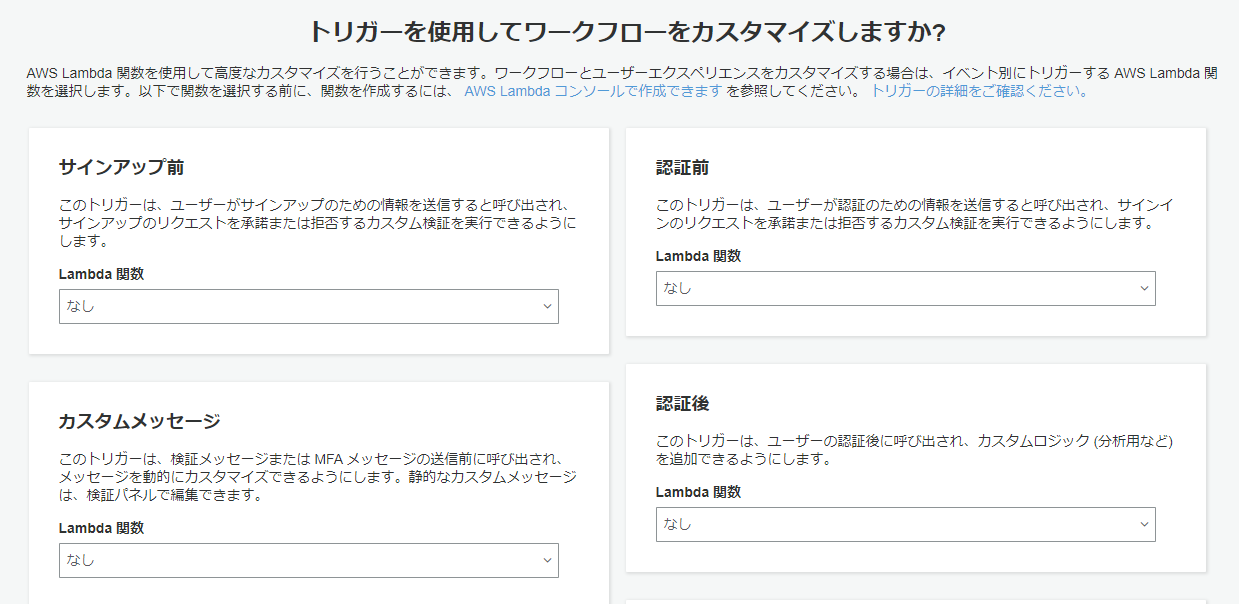
トリガーの設定は今回はすべてなしで。
ユーザーがログインしたとき等に任意のLambda関数を実行できるようです。
上記の設定でユーザープールを作成しました。
ユーザープールIDの確認方法
全般設定から確認できる

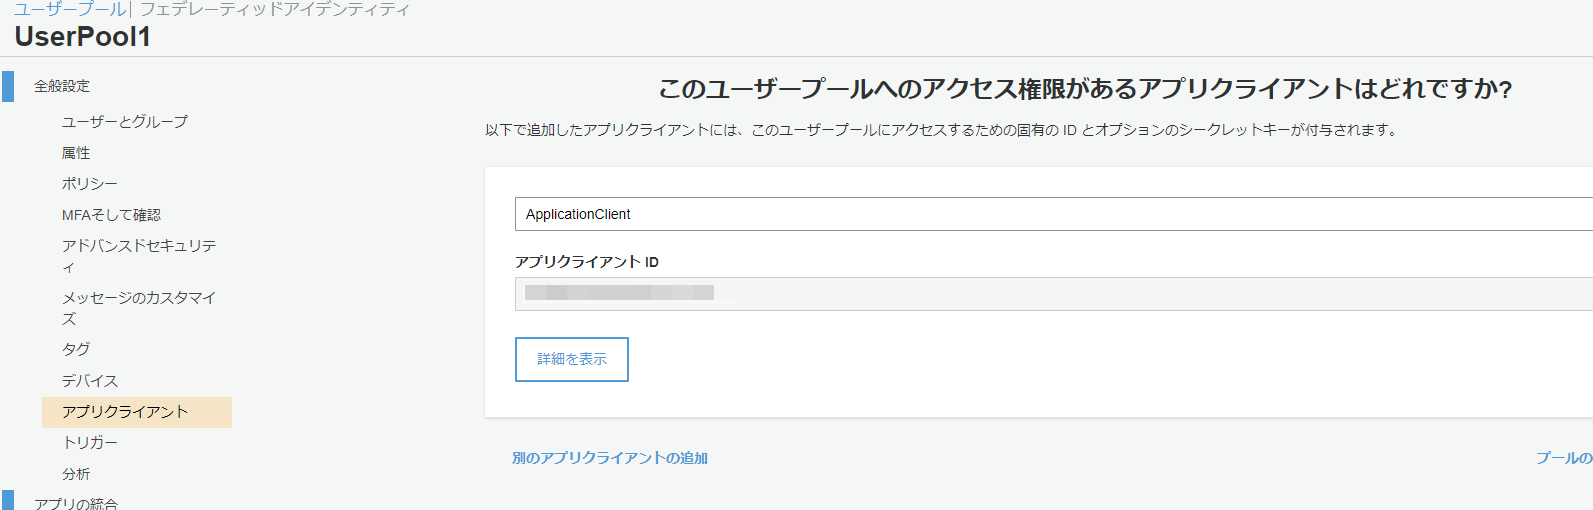
アプリクライアントIDの確認方法
アプリクライアントから確認できる
ユーザーグループの作成
ユーザーグループを作ります。
今回だとuser、admin、businessUserを作りました。
公式ドキュメントを参照してください(丸投げですみません)
ユーザープールにグループを追加する - Amazon Cognito
プログラムからユーザーを作成する
作成したユーザープールに、ユーザーを作成します。
実行環境はLambdaです。この関数を実行するとSPAからログインできるようになります。
eventには下記のbodyが渡ります。
{
    "userCount": 10,
    "userGroup": "businessUser"
}
コードは下記の通りです。
処理の概要
- 10人分のユーザーを作成(ユーザーID(8文字)、パスワード(12文字)はランダム)
- Cognitoのユーザーは作っただけでは無効ステータスなので、確認済みステータスにしてログイン状態にする
- 作成したユーザーをユーザーグループに追加する
- それぞれのユーザーID、パスワードをreturnします。
import random
import string
import secrets
import json

import boto3

aws_client = boto3.client('cognito-idp')

CLIENT_ID = "{ユーザープール作成時に作成したアプリクライアントID}"
USER_POOL_ID = "{ユーザープールID}"


def lambda_handler(event, context):
    group_name = event['userGroup']
    generated_users = []

    for user in range(json.loads(event['body'])['userCount']):
        user_id = ''.join(random.choices(
            string.ascii_letters + string.digits, k=8))
        passwd = pass_gen()

        # ユーザープールにユーザーを追加
        add_user(user_id, passwd=passwd)
        confirm_user(user_id)

        generated_users.append(
            {
                "userId": user_id,
                "password": passwd
            }
        )

        # グループにユーザーを追加
        add_user_to_group(user_id, group_name)

    return {
        "headers": {
            'Allow-Access-Origin': '*'
        },
        "body": json.dumps(
            {"generatedUsers": generated_users}
        )
    }


def add_user(user_id, passwd):
    response = aws_client.sign_up(
        ClientId=CLIENT_ID,
        Username=user_id,
        Password=passwd,
        UserAttributes=[],
        ValidationData=[]
    )

    # 認証完了
    return response


def add_user_to_group(user_id, group_name):
    response = aws_client.admin_add_user_to_group(
        UserPoolId=USER_POOL_ID,
        Username=user_id,
        GroupName=group_name
    )
    return response


def confirm_user(user_id):
    response = aws_client.admin_confirm_sign_up(
        UserPoolId=USER_POOL_ID,
        Username=user_id,
    )
    return response


def pass_gen(size=12):
    chars = string.ascii_uppercase + string.ascii_lowercase + string.digits
    # 記号を含める場合
    # chars += '%&$#()'

    return ''.join(secrets.choice(chars) for x in range(size))
IDトークン、アクセストークン、リフレッシュトークンについて
SPAでCognitoにサインインすると、IDトークン、アクセストークン、リフレッシュトークンの3つのトークンが払い出されます。
それぞれの役割は以下の通り。
それぞれjwt.ioでデコードすると、内容を確認できます。
| トークン名 | 種類 | 想定用途 |
|---|---|---|
| IDトークン | JWT | Cognito User Pools の ユーザー属性(例えばメールアドレスなど)も含めたトークン。認可時、ユーザーに関する情報をフルで取得したい場合はこちらを使う。API Gateway はこちらを採用。 |
| アクセストークン | JWT | Cognito User Pools の 最低限のユーザー情報を含めたトークン。認可時、必要なのがユーザー名程度であればこちらを採用する。 |
| リフレッシュトークン | 文字列 | IDトークンおよびアクセストークンを更新するために利用する。Cognito User Pools のクライアントSDKを利用している場合は、自動で更新されるため、特にこのトークンをアプリケーションから意識して使うことはない。 |
引用:
Amazon Cognito と仲良くなるために歴史と機能を整理したし、 Cognito User Pools と API Gateway の連携も試した | Developers.IO
SPAから作成したユーザーにログインする
参考:https://dev.classmethod.jp/articles/angular-cognito-api-gateway-loginpage/
今回はAngularを使ってログインします。
ログインページへのルーティングなどの説明はAngularの機能なので割愛します。
AngularからCognitoの機能を使うために、下記のライブラリをインストールします。
$ npm install amazon-cognito-identity-js
$ npm install aws-sdk
ディレクトリ構成
📦src
 ┣ 📂app
 ┃ ┣ 📂guard
 ┃ ┃ ┣ 📜cognito-guard.guard.spec.ts
 ┃ ┃ ┗ 📜cognito-guard.guard.ts
 ┃ ┣ 📂pages
 ┃ ┃ ┣ 📂change-password
 ┃ ┃ ┃ ┣ 📜change-password.component.html
 ┃ ┃ ┃ ┣ 📜change-password.component.scss
 ┃ ┃ ┃ ┣ 📜change-password.component.spec.ts
 ┃ ┃ ┃ ┗ 📜change-password.component.ts
 ┃ ┃ ┣ 📂login
 ┃ ┃ ┃ ┣ 📜login.component.html
 ┃ ┃ ┃ ┣ 📜login.component.scss
 ┃ ┃ ┃ ┣ 📜login.component.spec.ts
 ┃ ┃ ┃ ┗ 📜login.component.ts
 ┃ ┃ ┗ 📂top
 ┃ ┃ ┃ ┣ 📜top.component.html
 ┃ ┃ ┃ ┣ 📜top.component.scss
 ┃ ┃ ┃ ┣ 📜top.component.spec.ts
 ┃ ┃ ┃ ┗ 📜top.component.ts
 ┃ ┣ 📂services
 ┃ ┃ ┣ 📜cognito.service.spec.ts
 ┃ ┃ ┣ 📜cognito.service.ts
 ┃ ┃ ┣ 📜http-interceptor.service.spec.ts
 ┃ ┃ ┗ 📜http-interceptor.service.ts
 ┃ ┣ 📜app-routing.module.ts
 ┃ ┣ 📜app.component.html
 ┃ ┣ 📜app.component.scss
 ┃ ┣ 📜app.component.spec.ts
 ┃ ┣ 📜app.component.ts
 ┃ ┗ 📜app.module.ts
 ┣ 📂assets
 ┃ ┗ 📜.gitkeep
 ┣ 📂environments
 ┃ ┣ 📜environment.prod.ts
 ┃ ┗ 📜environment.ts
 ┣ 📜favicon.ico
 ┣ 📜index.html
 ┣ 📜main.ts
 ┣ 📜polyfills.ts
 ┣ 📜styles.scss
 ┗ 📜test.ts
cognito.service.ts
cognito認証の基幹になるサービスです。
| メソッド名 | 概要 |
|---|---|
| login() | ユーザープールにユーザーIDとパスワードで問い合わせ、認証されたらローカルストレージにアクセス、IDトークン、リフレッシュトークンを保存する |
| isAuthenticated() | ユーザーのログイン状態を取得する |
| getCurrentUserIdToken() | IDトークンを取得する |
| getCurrentAccessToken() | アクセストークンを取得する |
| changePassword() | パスワードを変更する |
| logout() | ログアウトする |
import { Injectable } from '@angular/core';

import {
  CognitoUserPool,
  CognitoUser,
  AuthenticationDetails
} from 'amazon-cognito-identity-js';
import * as AWS from 'aws-sdk';
import { environment } from 'src/environments/environment';

@Injectable({
  providedIn: 'root'
})
export class CognitoService {
  private userPool: CognitoUserPool;
  private poolData: any;
  public cognitoCreds: AWS.CognitoIdentityCredentials;

  constructor() {
    AWS.config.region = environment.region;
    this.poolData = { UserPoolId: environment.userPoolId, ClientId: environment.clientId };
    this.userPool = new CognitoUserPool(this.poolData);
  }

  // ログイン処理
  login(username: string, password: string): Promise<any> {
    const userData = {
      Username: username,
      Pool: this.userPool,
      Storage: localStorage
    };
    const cognitoUser = new CognitoUser(userData);
    const authenticationData = {
      Username: username,
      Password: password,
    };
    const authenticationDetails = new AuthenticationDetails(authenticationData);
    return new Promise((resolve, reject) => {
      cognitoUser.authenticateUser(authenticationDetails, {
        onSuccess(result) {
          console.log('id token + ' + result.getIdToken().getJwtToken());
          console.log('access token + ' + result.getAccessToken().getJwtToken());
          console.log('refresh token + ' + result.getRefreshToken().getToken());
          resolve(result);
        },
        onFailure(err) {
          console.log(err);
          reject(err);
        },
        newPasswordRequired(userAttributes, requiredAttributes) {
          delete userAttributes.email_verified;
          delete userAttributes.phone_number_verified;
          cognitoUser.completeNewPasswordChallenge('newPasswordHmkv', userAttributes, this);
        }
      });
    });
  }

  // ログイン済確認処理
  isAuthenticated(): Promise<any> {
    const cognitoUser = this.userPool.getCurrentUser();
    return new Promise((resolve, reject) => {
      if (cognitoUser === null) {
        resolve(false);
      }
      cognitoUser.getSession((err, session) => {
        if (err) {
          reject(err);
        } else {
          if (!session.isValid()) {
            reject(session);
          } else {
            resolve(session);
          }
        }
      });
    });
  }

  // IDトークン取得処理
  getCurrentUserIdToken(): any {
    const cognitoUser = this.userPool.getCurrentUser();
    if (cognitoUser != null) {
      return cognitoUser.getSession((err, session) => {
        if (err) {
          alert(err);
          return;
        } else {
          return session.idToken.jwtToken;
        }
      });
    }
  }

  // アクセストークン取得処理
  getCurrentAccessToken(): any {
    const cognitoUser = this.userPool.getCurrentUser();
    if (cognitoUser != null) {
      return cognitoUser.getSession((err, session) => {
        if (err) {
          alert(err);
          return;
        } else {
          return session.accessToken.jwtToken;
        }
      });
    }
  }

  // パスワード変更処理
  async changePassword(oldPw: string, newPw: string) {
    const cognitoUser = this.userPool.getCurrentUser();
    return new Promise<any>((resolve, err) => {
      cognitoUser.getSession(() => {
        cognitoUser.changePassword(oldPw, newPw, (error, result) => {
          resolve({ result, error });
        });
      });
    });
  }

  // ログアウト処理
  logout() {
    console.log('LogOut!');
    const currentUser = this.userPool.getCurrentUser();
    if (currentUser) {
      currentUser.signOut();
    }
  }
}
login.component.html
ログイン画面
<h2>ログイン</h2>

<div class="login">
    <form [formGroup]="loginForm" (ngSubmit)="onSubmitLogin(loginForm.value)">
        <label>ユーザーID: </label>
        <input formControlName="userId">
        <label>パスワード: </label>
        <input type="password" formControlName="password">
        <button type="submit">ログイン</button>
    </form>
</div>
login.coponent.ts
import { Component, OnInit } from '@angular/core';
import { FormGroup, FormBuilder, Validators } from '@angular/forms';
import { Router } from '@angular/router';
import { CognitoService } from 'src/app/services/cognito.service';

@Component({
  selector: 'app-login',
  templateUrl: './login.component.html',
  styleUrls: ['./login.component.scss']
})
export class LoginComponent implements OnInit {
  public loginForm: FormGroup;

  constructor(
    private fb: FormBuilder,
    private router: Router,
    private cognito: CognitoService
  ) {
    this.cognito.isAuthenticated()
      .then((res) => {
        return this.router.navigate(['/login']);
      })
      .catch((err) => {
        console.log(err);
      });
  }

  ngOnInit() {
    this.initForm();
  }

  initForm() {
    this.loginForm = this.fb.group({
      userId: ['', Validators.required],
      password: ['', Validators.required]
    });
  }

  // cognitoサービスのログイン処理を呼び出す
  onSubmitLogin(value: any) {
    const userId = value.userId;
    const password = value.password;
    this.cognito.login(userId, password)
      .then((result) => {
        alert('Login success!');
        // 任意のログイン後の処理(マイページへの遷移など)
      }).catch((err) => {
        console.log(err);
      });
  }
}
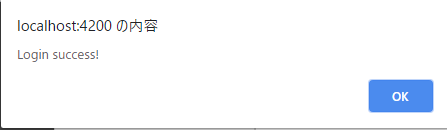
ログインできることを確認する
ログイン画面で、ここで作成したユーザーIDとパスワードを入力し、下記のようにダイアログが表示されればログインは成功です。
あとは、パスワード変更画面などを作り、cognitoサービスのchangePassword()を呼び出すことでパスワード変更も可能です。