バージョン
XCode: Version 11.3.1
参考
https://qiita.com/wai21/items/9b40192eb3ee07375016
こちらの記事を元にしています。
こんな人向け
・モーダルを作りたくてPresentationControllerでモーダルを作る記事を
いくつか見たけど作れなかった方
・ストーリーボードでレイアウトを作成したい方
こんなものが作れます
今回作成していくのは、PresentationControllerを使って
ViewControllerをモーダルのように表示させるものです。
なるべくやさしいことばと手順で説明していきます。
コードの実装から確認したい方は『4.コード実装』からご覧ください。
レイアウトは各々ストーリーボードから実装してください。
用意するもの
1.プロジェクトファイル
2.Swiftファイル
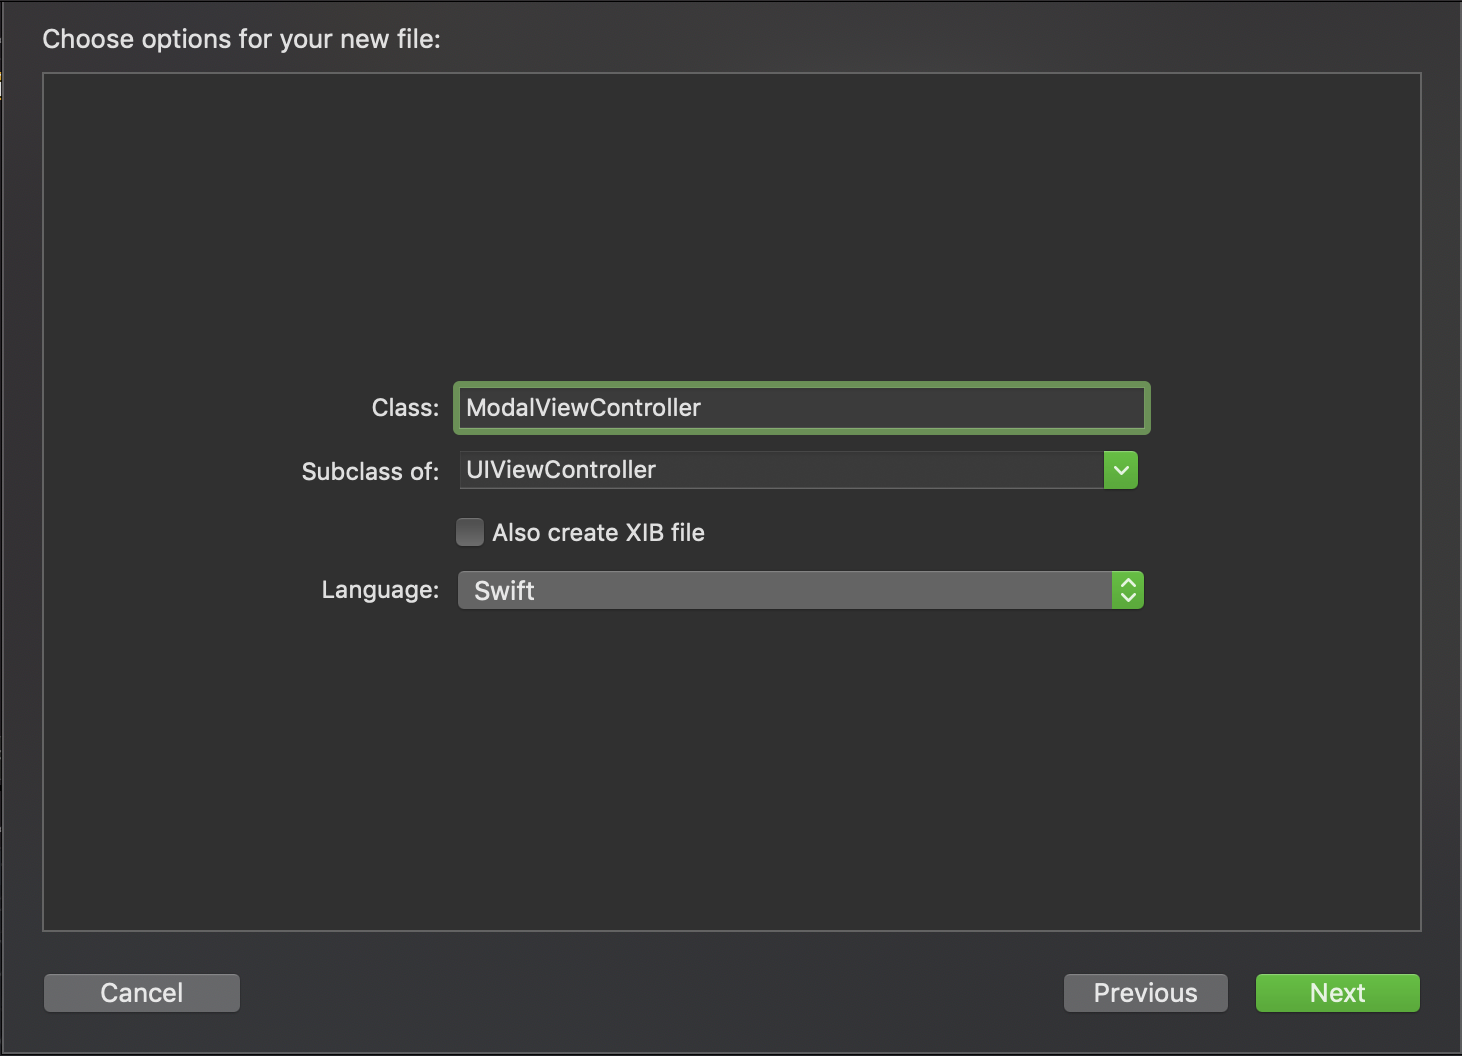
・ModalViewController.swift(UIViewControllerを継承)
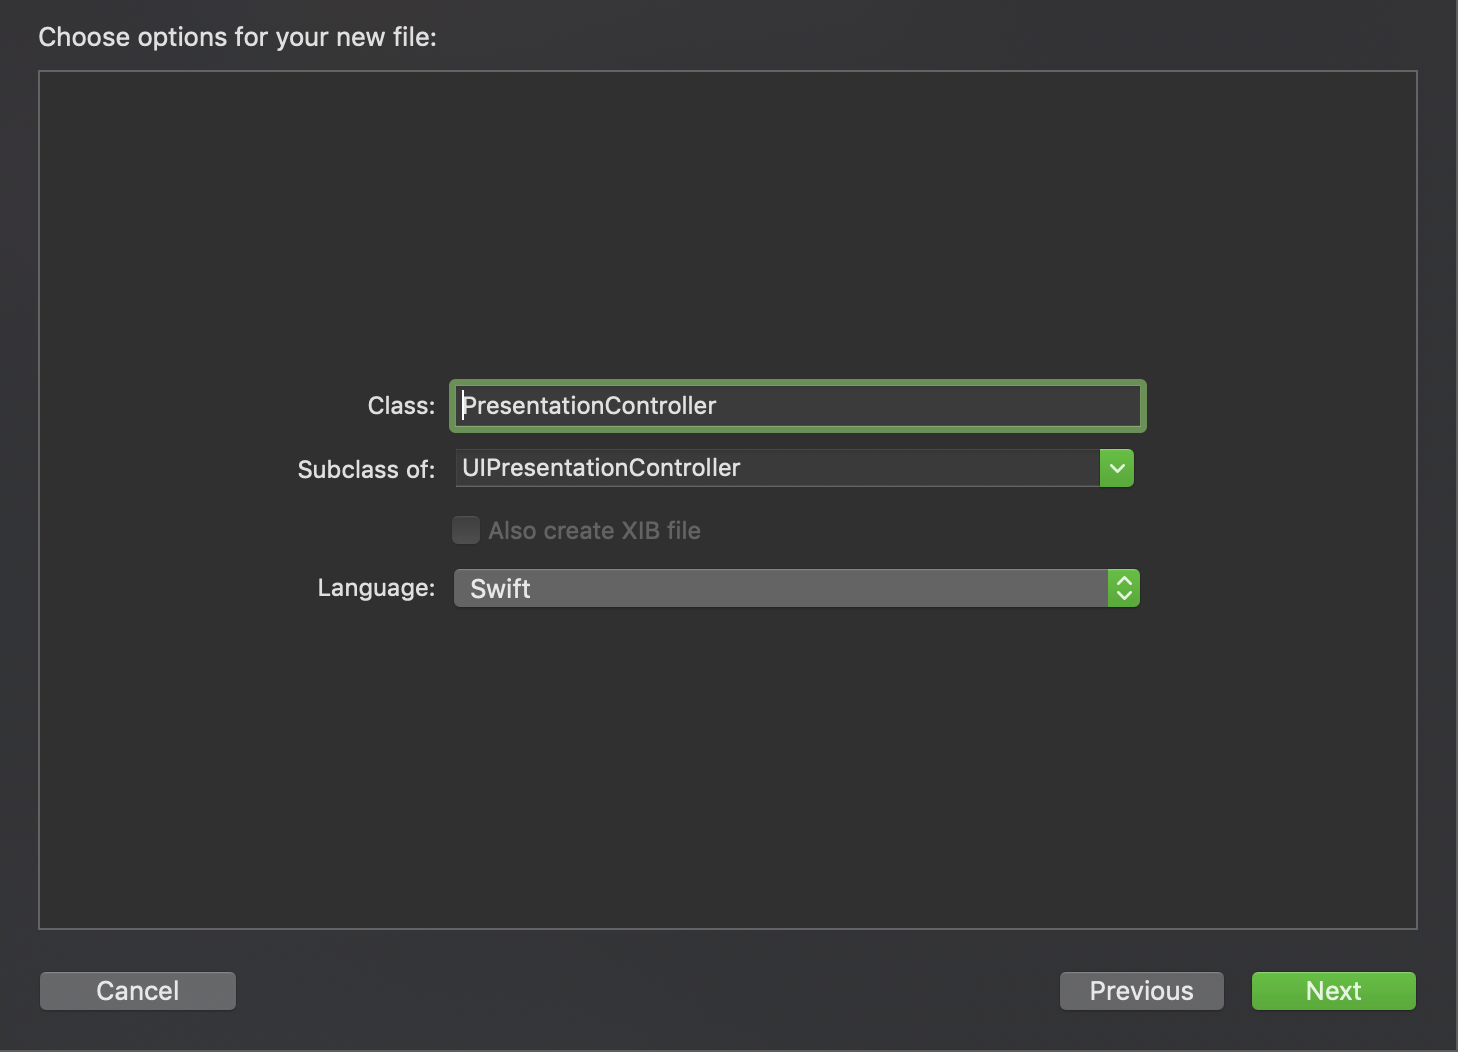
・PresentationController.swift(UIPresentationControllerを継承)
表示(プレゼン)のさせ方についての機能を提供してくれます。
3.StoryBoard
ViewController(ModalViewController.swiftと紐付け)
手順
1.プロジェクト作成
1.Create a new Xcode project
2.Single View App
3.User Interface を StoryBoardにする
4.Product Name は自由
2.ファイル作成
1.UIViewControllerを継承した"ModalViewController"を作成
2.UIPresentationControllerを継承した"PresentationController"を作成
3.StoryBoard編
表示させたいModal用のViewControllerを配置します。
Segueで繋ぐ必要はありません。
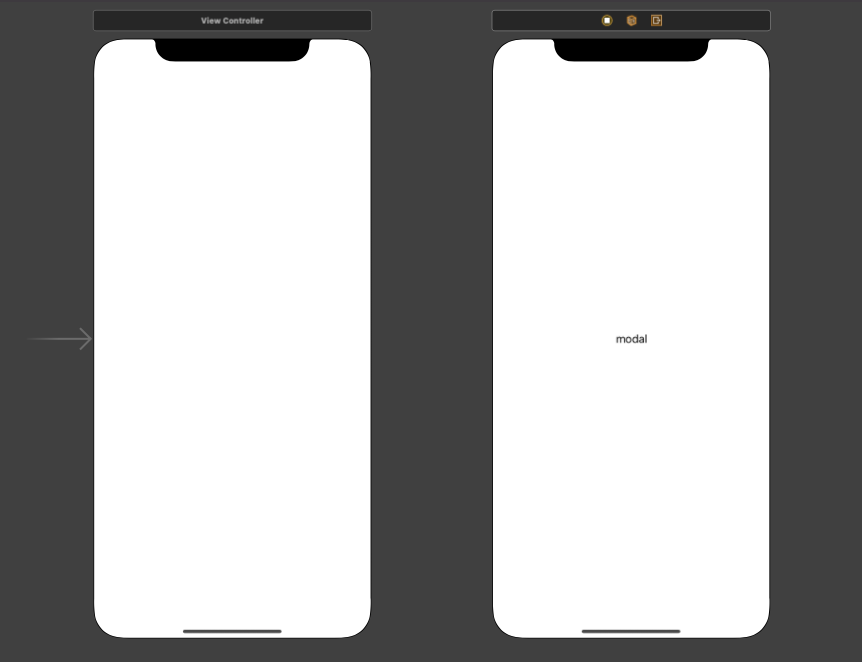
次に、配置したViewControllerをModalViewController.swiftと接続します。
わかりやすいように真ん中にLabelを配置して、文字をmodalとします。
また、Storyboard IDにもmodalを入れます。

4.コード実装
必要なものは揃ったので、コードを書いていきましょう。
・ViewController.swift(元からある)
・ModalViewController.swift
・PresentationController.swift
//ViewController.swift

import UIKit

class ViewController: UIViewController, UIViewControllerTransitioningDelegate {

    override func viewDidLoad() {
        super.viewDidLoad()
        // Do any additional setup after loading the view.
    }
    @IBAction func modalAction(_ sender: AnyObject) {
        let modalVC = self.storyboard?.instantiateViewController(withIdentifier: "modal")
        modalVC!.modalPresentationStyle = .custom
        modalVC!.transitioningDelegate = self
        present(modalVC!, animated: true, completion: nil)
    }

    func presentationController(forPresented presented: UIViewController, presenting: UIViewController?, source: UIViewController) -> UIPresentationController? {
        return PresentationController(presentedViewController: presented, presenting: presenting)
    }

}
ViewcontrollerにModalを表示するためのButtonを設置し、
modalActionとしてViewcontroller.swiftにIBAction接続します。
この時点でシュミレーターを起動し、ボタンを押すと
modalと表示されたModalViewControllerが出てきますね。
・ViewController.swift(元からある)
・ModalViewController.swift
・PresentationController.swift
//ModalViewController.swift
import UIKit

class ModalViewController: UIViewController {

    override func viewDidLoad() {
        super.viewDidLoad()
        // Do any additional setup after loading the view.
}
実際に表示されるモーダルと接続されたファイルです。
ポップアップ作成に必要なコードは特に無く、自分好みに実装していきます。
はじめにラベルを設置しているので、現時点ではそれが表示されます。
・ViewController.swift(元からある)
・ModalViewController.swift
・PresentationController.swift
//PresentationController.swift

import UIKit

class PresentationController: UIPresentationController {
    // 呼び出し元のView Controller の上に重ねるオーバレイView
    var overlayView = UIView()

    // 表示トランジション開始前に呼ばれる
    override func presentationTransitionWillBegin() {
        guard let containerView = containerView else {
            return
        }
        overlayView.frame = containerView.bounds
        overlayView.gestureRecognizers = [UITapGestureRecognizer(target: self, action: #selector(PresentationController.overlayViewDidTouch(_:)))]
        overlayView.backgroundColor = .black
        overlayView.alpha = 0.0
        containerView.insertSubview(overlayView, at: 0)

        // トランジションを実行
        presentedViewController.transitionCoordinator?.animate(alongsideTransition: {[weak self] context in
            self?.overlayView.alpha = 0.5
            }, completion:nil)
    }

    // 非表示トランジション開始前に呼ばれる
    override func dismissalTransitionWillBegin() {
        presentedViewController.transitionCoordinator?.animate(alongsideTransition: {[weak self] context in
            self?.overlayView.alpha = 0.0
            }, completion:nil)
    }

    // 非表示トランジション開始後に呼ばれる
    override func dismissalTransitionDidEnd(_ completed: Bool) {
        if completed {
            overlayView.removeFromSuperview()
        }
    }

    let margin = (x: CGFloat(40), y: CGFloat(220.0))
    // 子のコンテナサイズを返す
    override func size(forChildContentContainer container: UIContentContainer, withParentContainerSize parentSize: CGSize) -> CGSize {
        return CGSize(width: parentSize.width - margin.x, height: parentSize.height - margin.y)
    }

    // 呼び出し先のView Controllerのframeを返す
    override var frameOfPresentedViewInContainerView: CGRect {
        var presentedViewFrame = CGRect()
        let containerBounds = containerView!.bounds
        let childContentSize = size(forChildContentContainer: presentedViewController, withParentContainerSize: containerBounds.size)
        presentedViewFrame.size = childContentSize
        presentedViewFrame.origin.x = margin.x / 2.0
        presentedViewFrame.origin.y = margin.y / 2.0

        return presentedViewFrame
    }

    // レイアウト開始前に呼ばれる
    override func containerViewWillLayoutSubviews() {
        overlayView.frame = containerView!.bounds
        presentedView?.frame = frameOfPresentedViewInContainerView
        presentedView?.layer.cornerRadius = 10
        presentedView?.clipsToBounds = true
    }

    // レイアウト開始後に呼ばれる
    override func containerViewDidLayoutSubviews() {
    }

    // overlayViewをタップした時に呼ばれる
    @objc func overlayViewDidTouch(_ sender: UITapGestureRecognizer) {
        presentedViewController.dismiss(animated: true, completion: nil)
    }
}
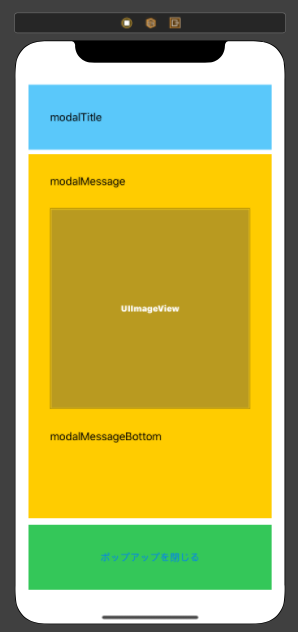
レイアウトのサンプル
・ViewController.swift(元からある)
・ModalViewController.swift
・PresentationController.swift
//  ModalViewController.swift

import UIKit

class ModalViewController: UIViewController {

    @IBOutlet weak var modalTitle: UILabel!
    @IBOutlet weak var modalMessage: UILabel!
    @IBOutlet weak var modalMessageBottom: UILabel!
    @IBOutlet weak var modalImage: UIImageView!
    @IBOutlet weak var modalButton: UIButton!

    var timerCount = 0
    override func viewDidLoad() {
        super.viewDidLoad()
        // Do any additional setup after loading the view.
        view.backgroundColor = .init(red: 255/255, green: 255/255, blue: 255/255, alpha: 1.0)
        modalImage.image = UIImage(named: "airpods")
        modalTitle.text = "ただいま画像を生成中です"
        modalTitle.textAlignment = .center
        modalMessage.text = "Airpodsのケースが発売されました!"
        modalMessage.textAlignment = .center
        modalMessageBottom.numberOfLines = 3
        modalMessageBottom.textAlignment = .center
        modalMessageBottom.text = "アプリの最初の画面のメニューの\n『AirPodsケースカバー』\nからケースを作成できます♪"
        modalButton.setTitle("ポップアップを閉じる", for: .normal)
        //scheduledTimerで一定間隔(1秒)でself.textUpdateを呼び出す
        Timer.scheduledTimer(timeInterval: 1.0, target: self, selector: #selector(self.textUpdate), userInfo: nil, repeats: true)

    }
    @objc func textUpdate(){

        if timerCount == 0{
            modalTitle.text = "ただいま画像を生成中です."
            timerCount += 1
        } else if timerCount == 1 {
            modalTitle.text = "ただいま画像を生成中です.."
            timerCount += 1
        } else if timerCount == 2 {
            modalTitle.text = "ただいま画像を生成中です..."
            timerCount += 1
        } else if timerCount == 3 {
            modalTitle.text = "ただいま画像を生成中です"
            timerCount -= 3
        }
    }

    @IBAction func closeActionButton(_ sender: Any) {
        dismiss(animated: true, completion: nil)
    }

}
おわりに
いかがでしたでしょうか。
参考にしたサイトとほとんど同じですが、
ストーリーボードでレイアウトを作成したい方は
こちらの記事の方が合っているかと思います。