タイトルにもある通り、画像を分類するアプリケーションを速攻で作っていきます。
速さが命! といういことでML.NET×WPFの組み合わせで作っていきます。
完成イメージ
sunipping toolの要領でデスクトップ内の指定箇所を切り取って、その切り取った箇所が犬なのか猫なのかを判別する動作を目指していきます。

開発環境
Windows11 22H2
Visual Studio 2022 17.4.4
ML.NET Model Builder 16.4.3.2307502
プロジェクト作成
まずは、Visual Studioで新しいプロジェクトを作成していきます。
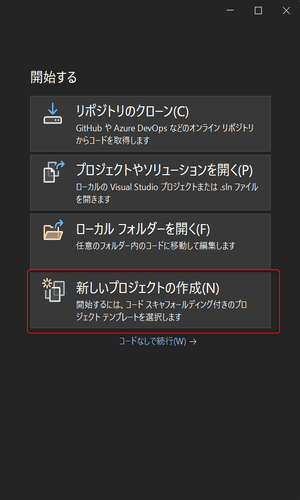
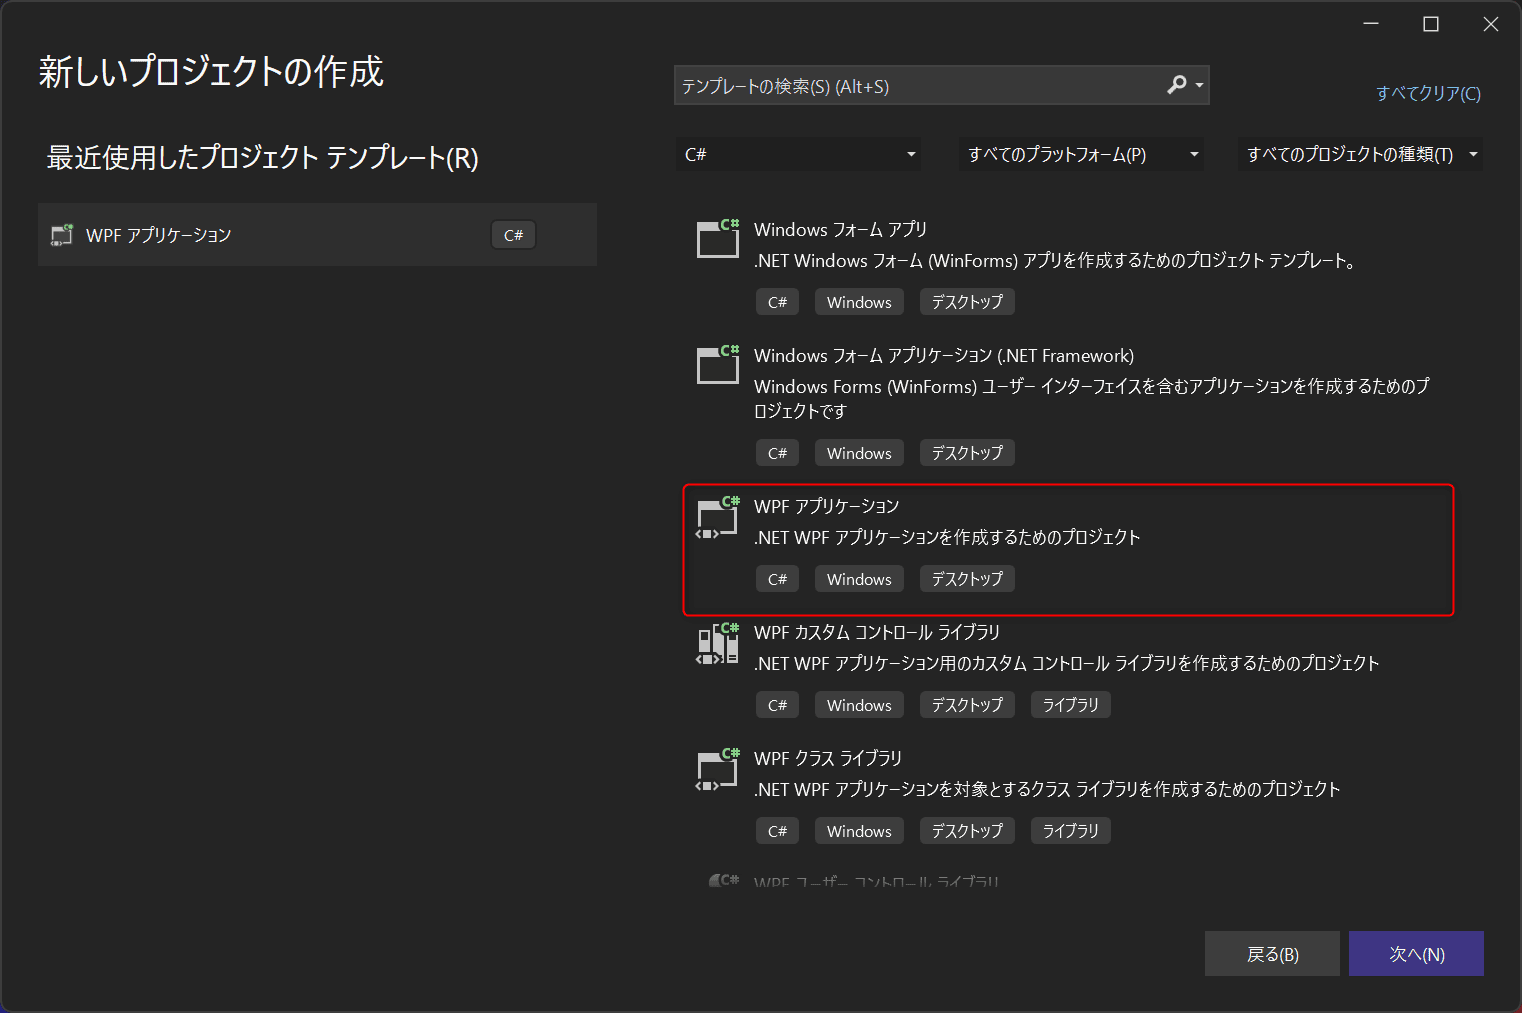
今回はWPFでアプリケーションを作成してきます。(本当はMAUIを使ってみたいけど。。)
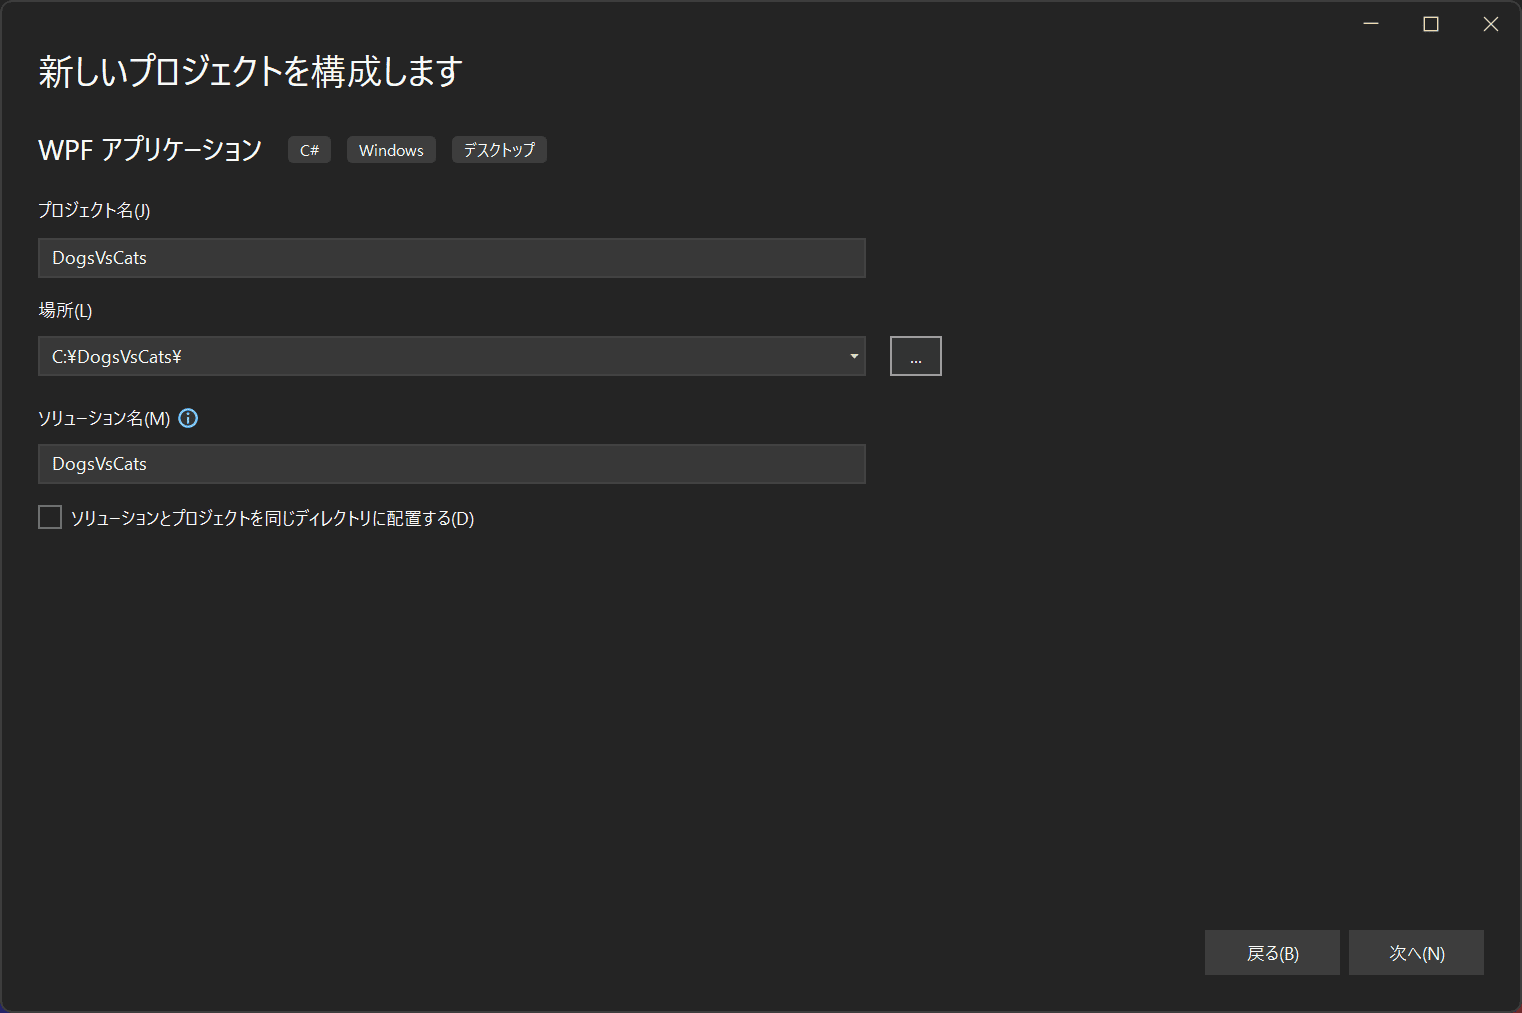
プロジェクト名は適当につけましょう。
フレームワークは.NET6を指定します。
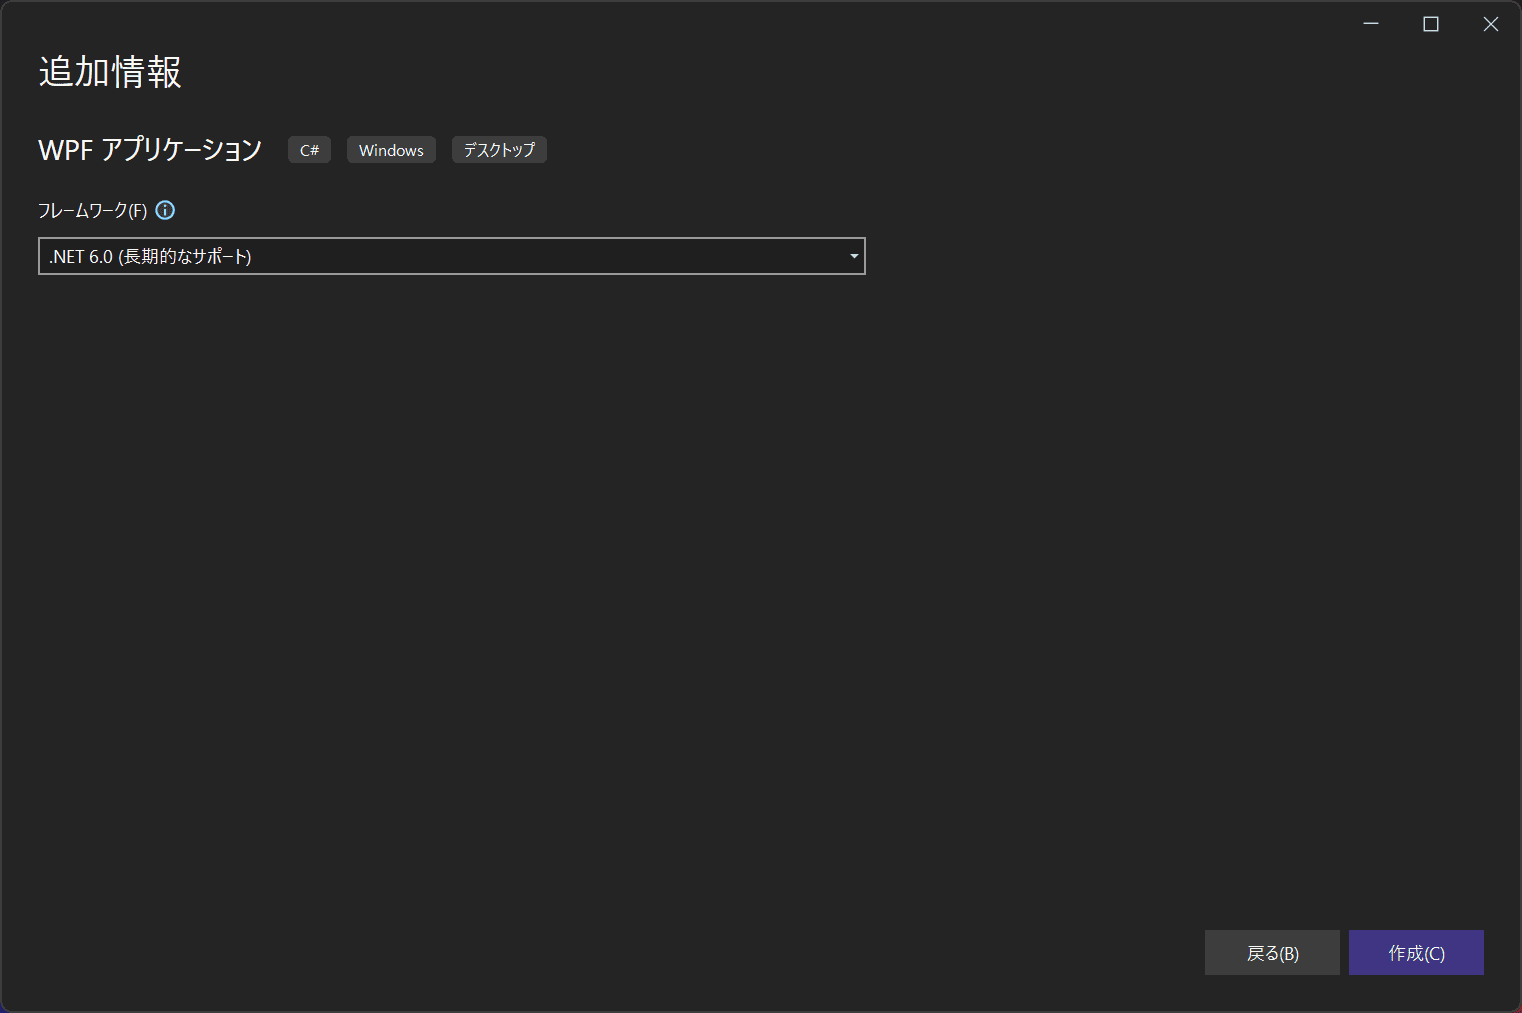
とりあえず、これでプロジェクトを作るところまではできました。
分類モデル作成
次に犬と猫を分類するモデルを作成します。
一から、犬と猫の画像をスクレイピングして集めるのは大変なのでKaggleのデータセットを用いましょう。
ダウンロードしたデータは適当な場所に保存しておきましょう。
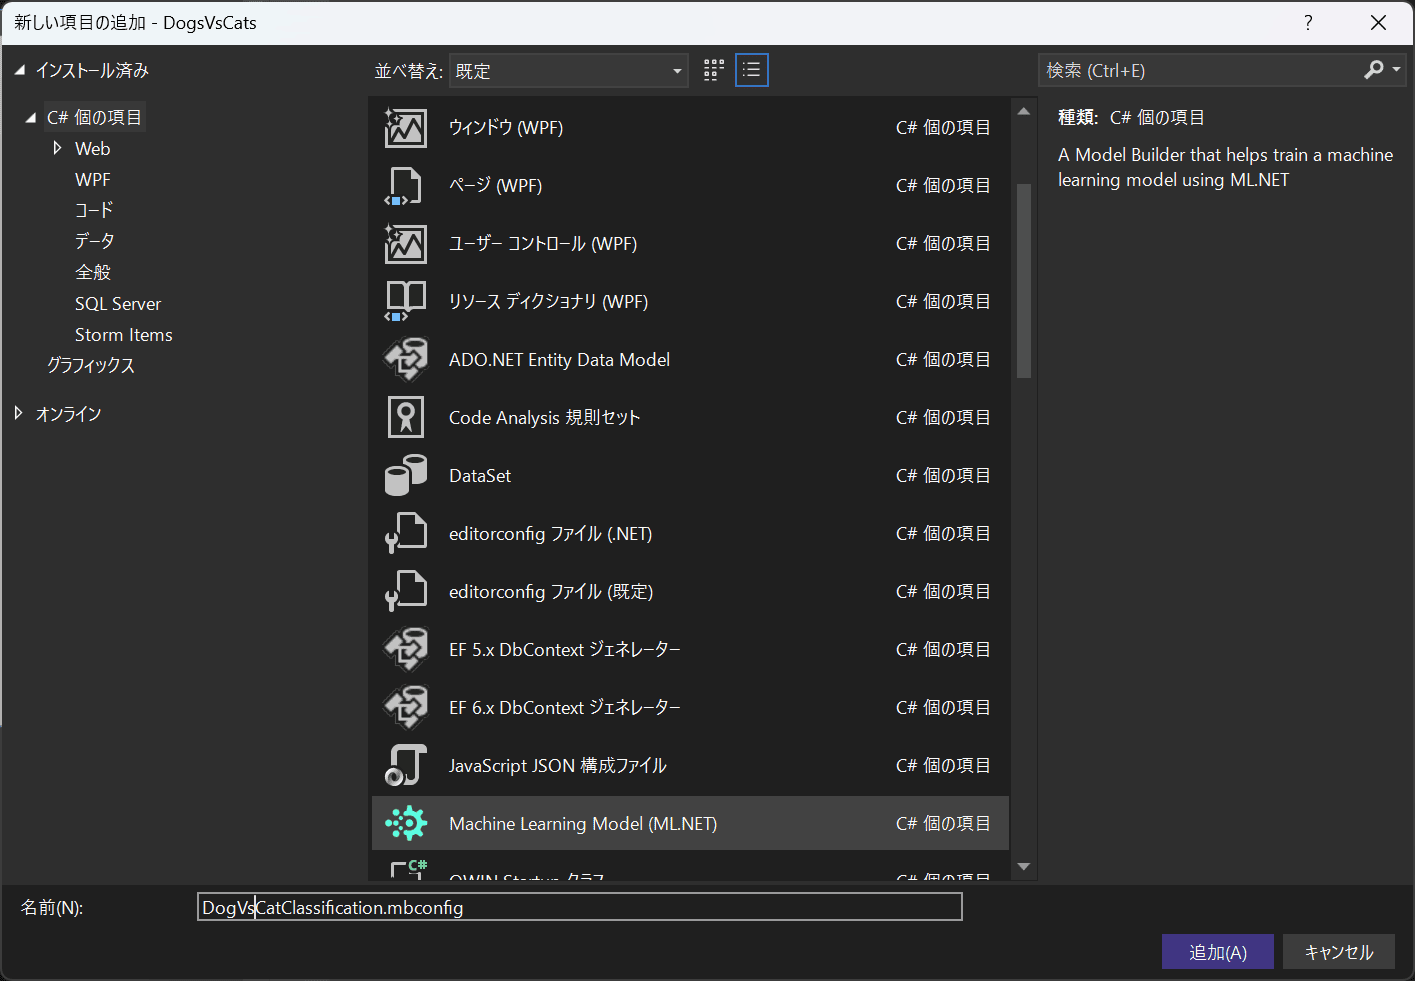
次に、ML.NET Model Bilderを新規追加します。

モデルの名前は適当につけましょう。
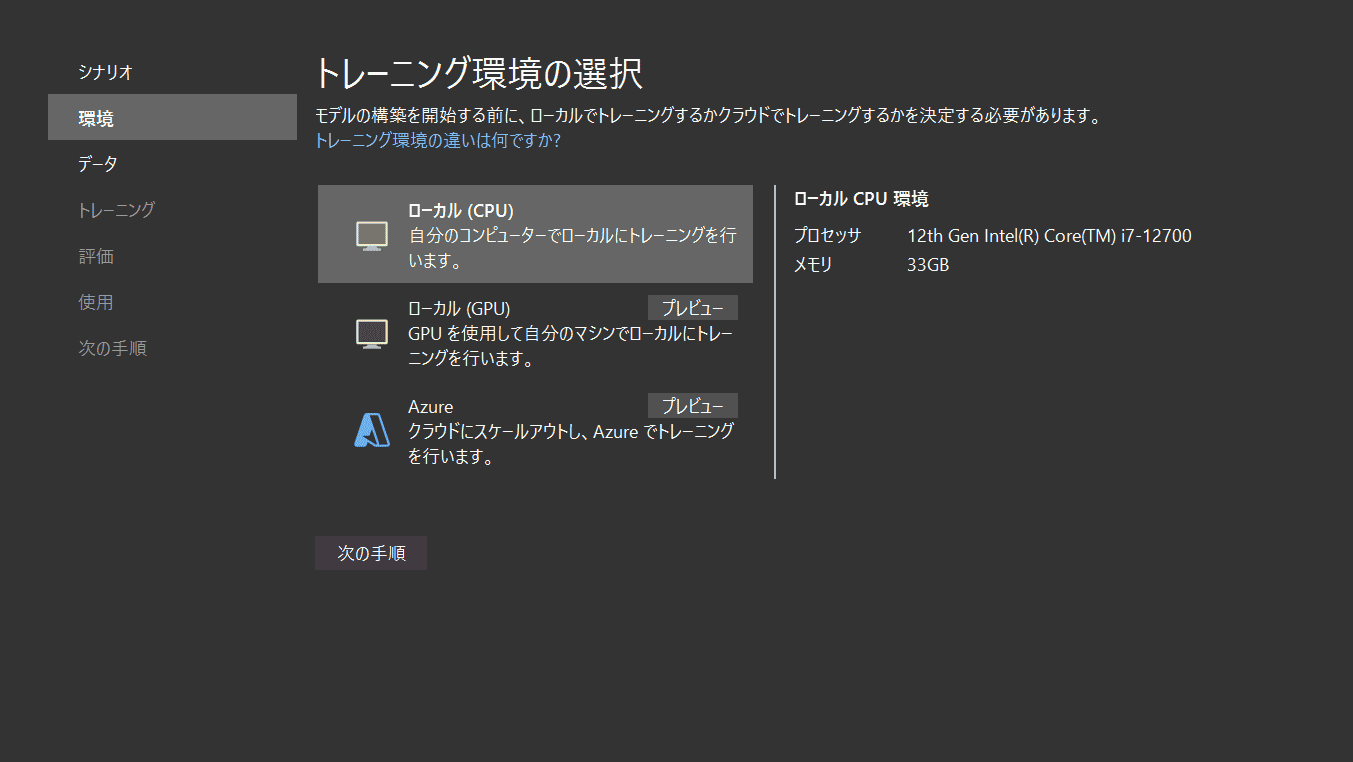
学習環境を選択します。3種類から選択することができます。強いGPUをお持ちの方は、ローカルGPUを選択して必要なものをインストールしてください。今回はそこまで重い学習はしないので、CPUでも問題ないです。
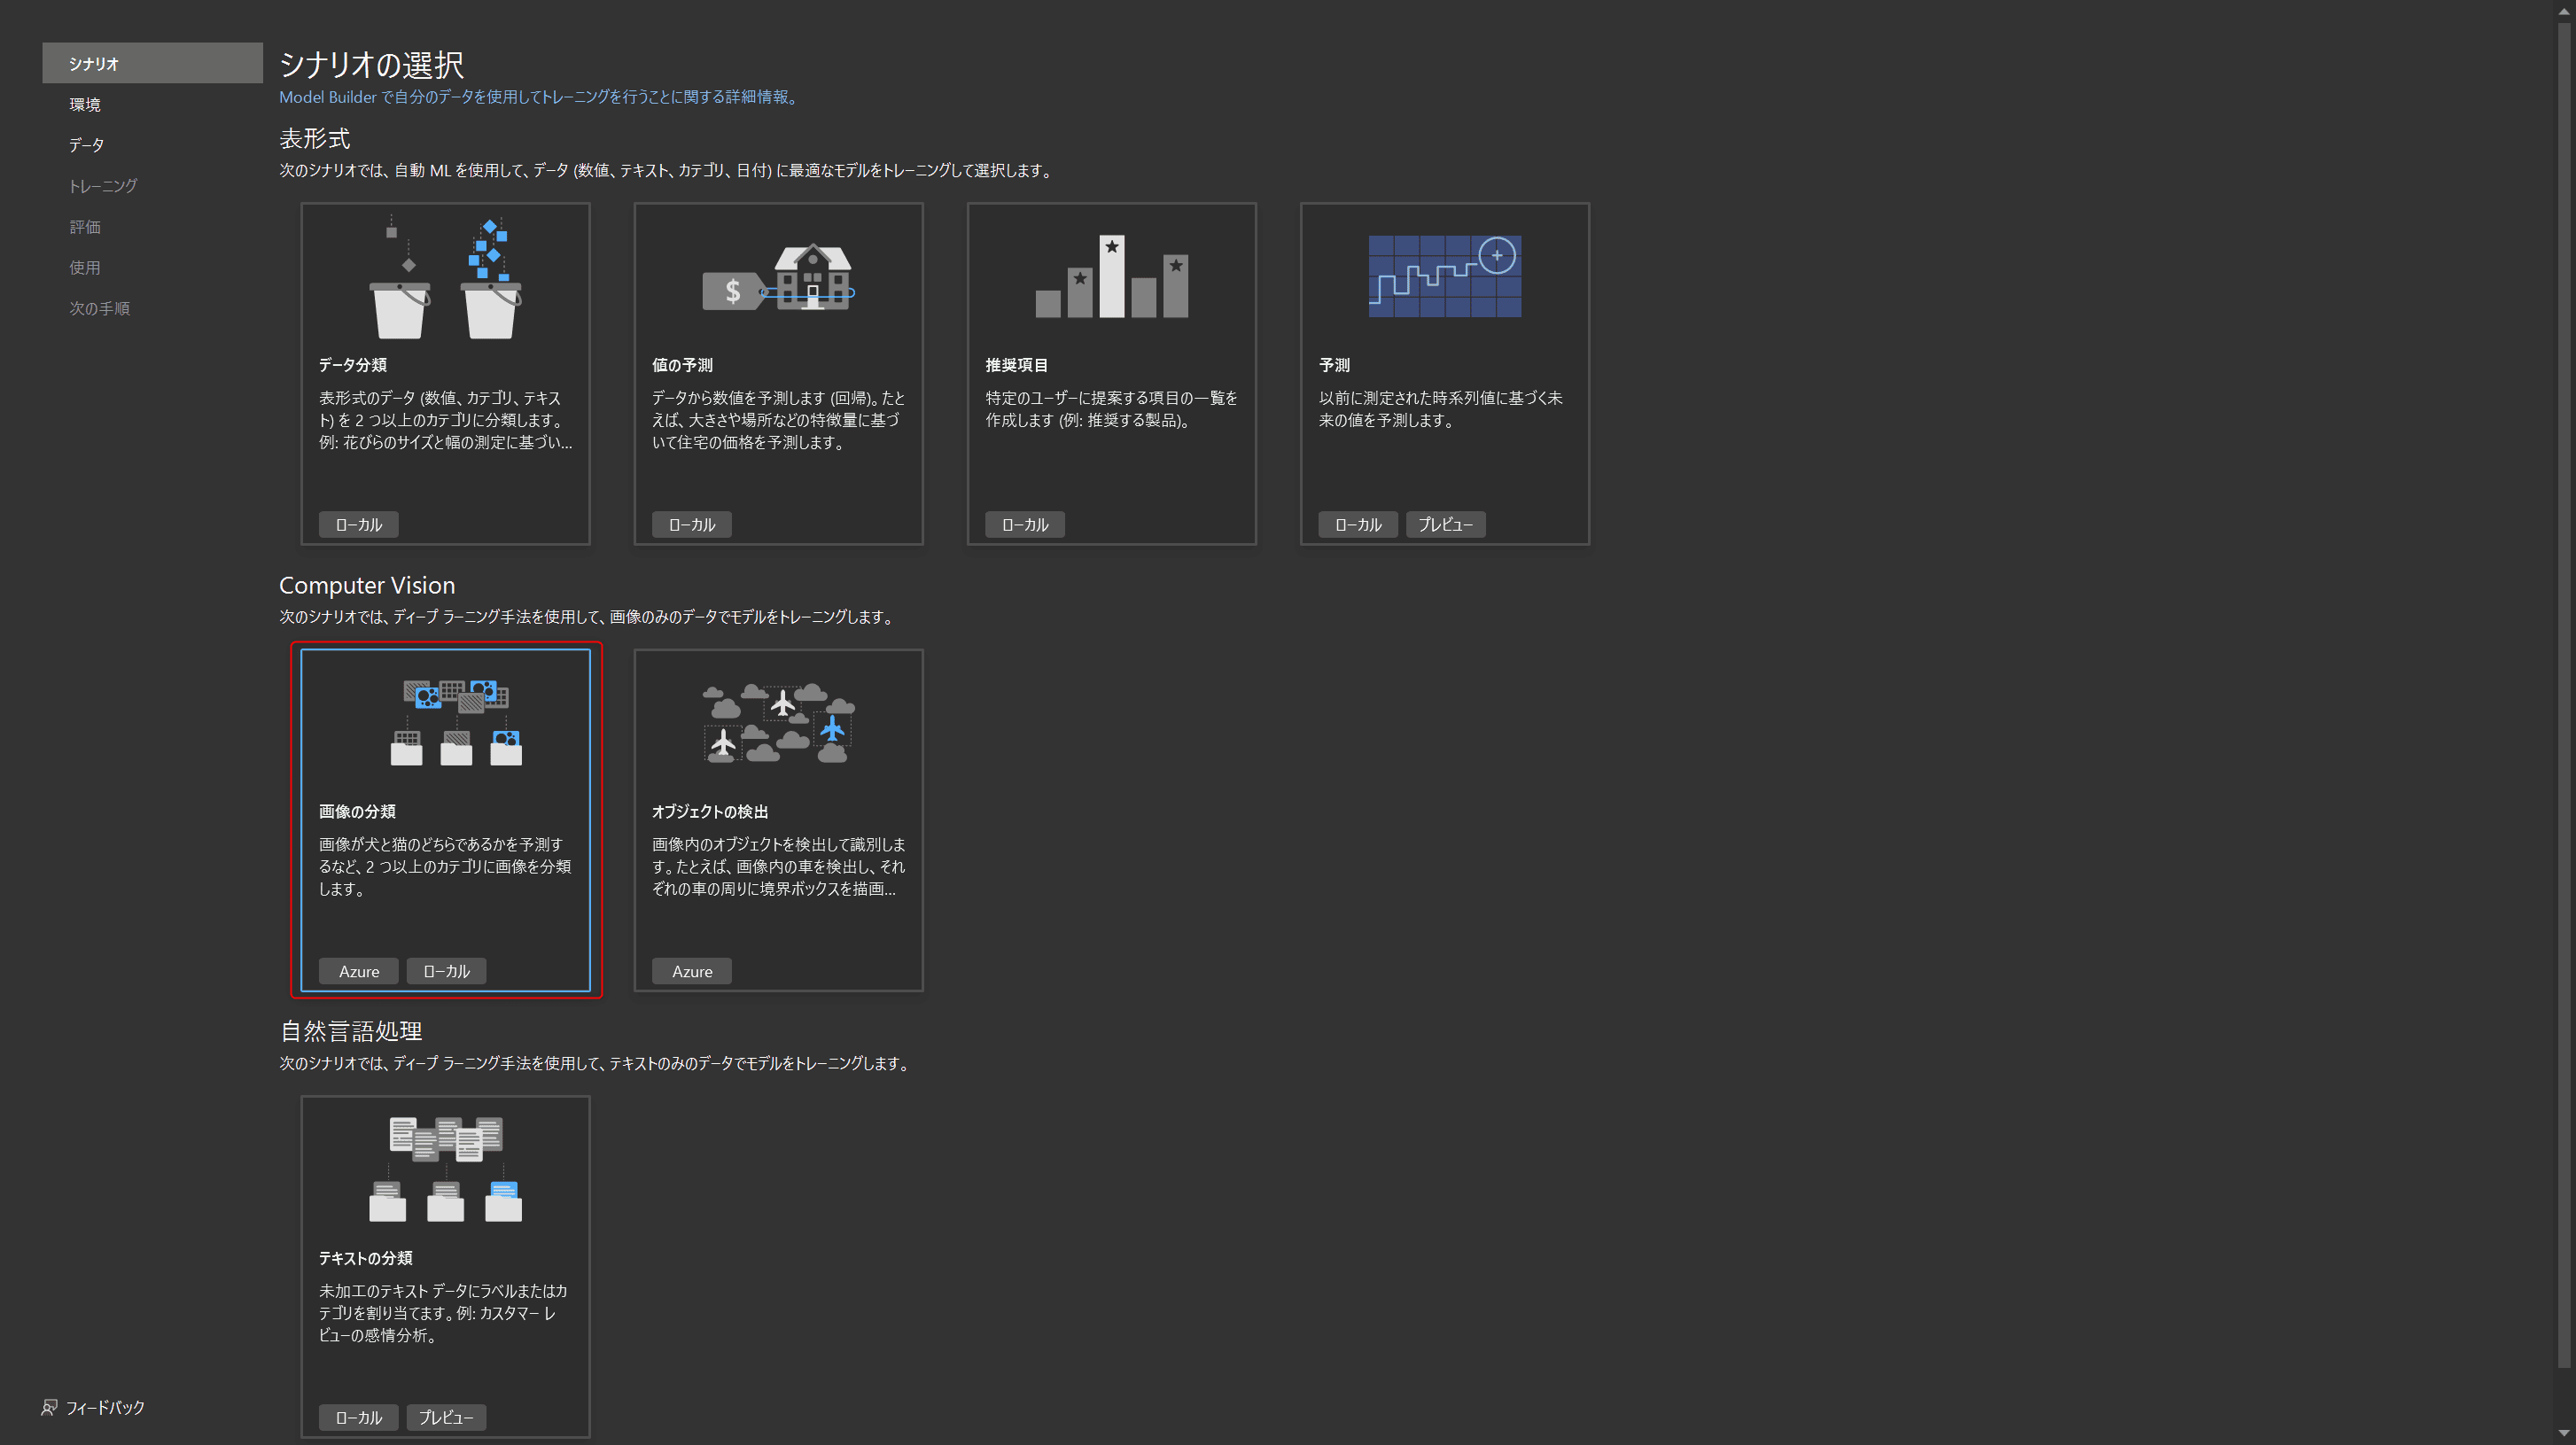
次にシナリオを選択します。今回は画像の分類を選択します。
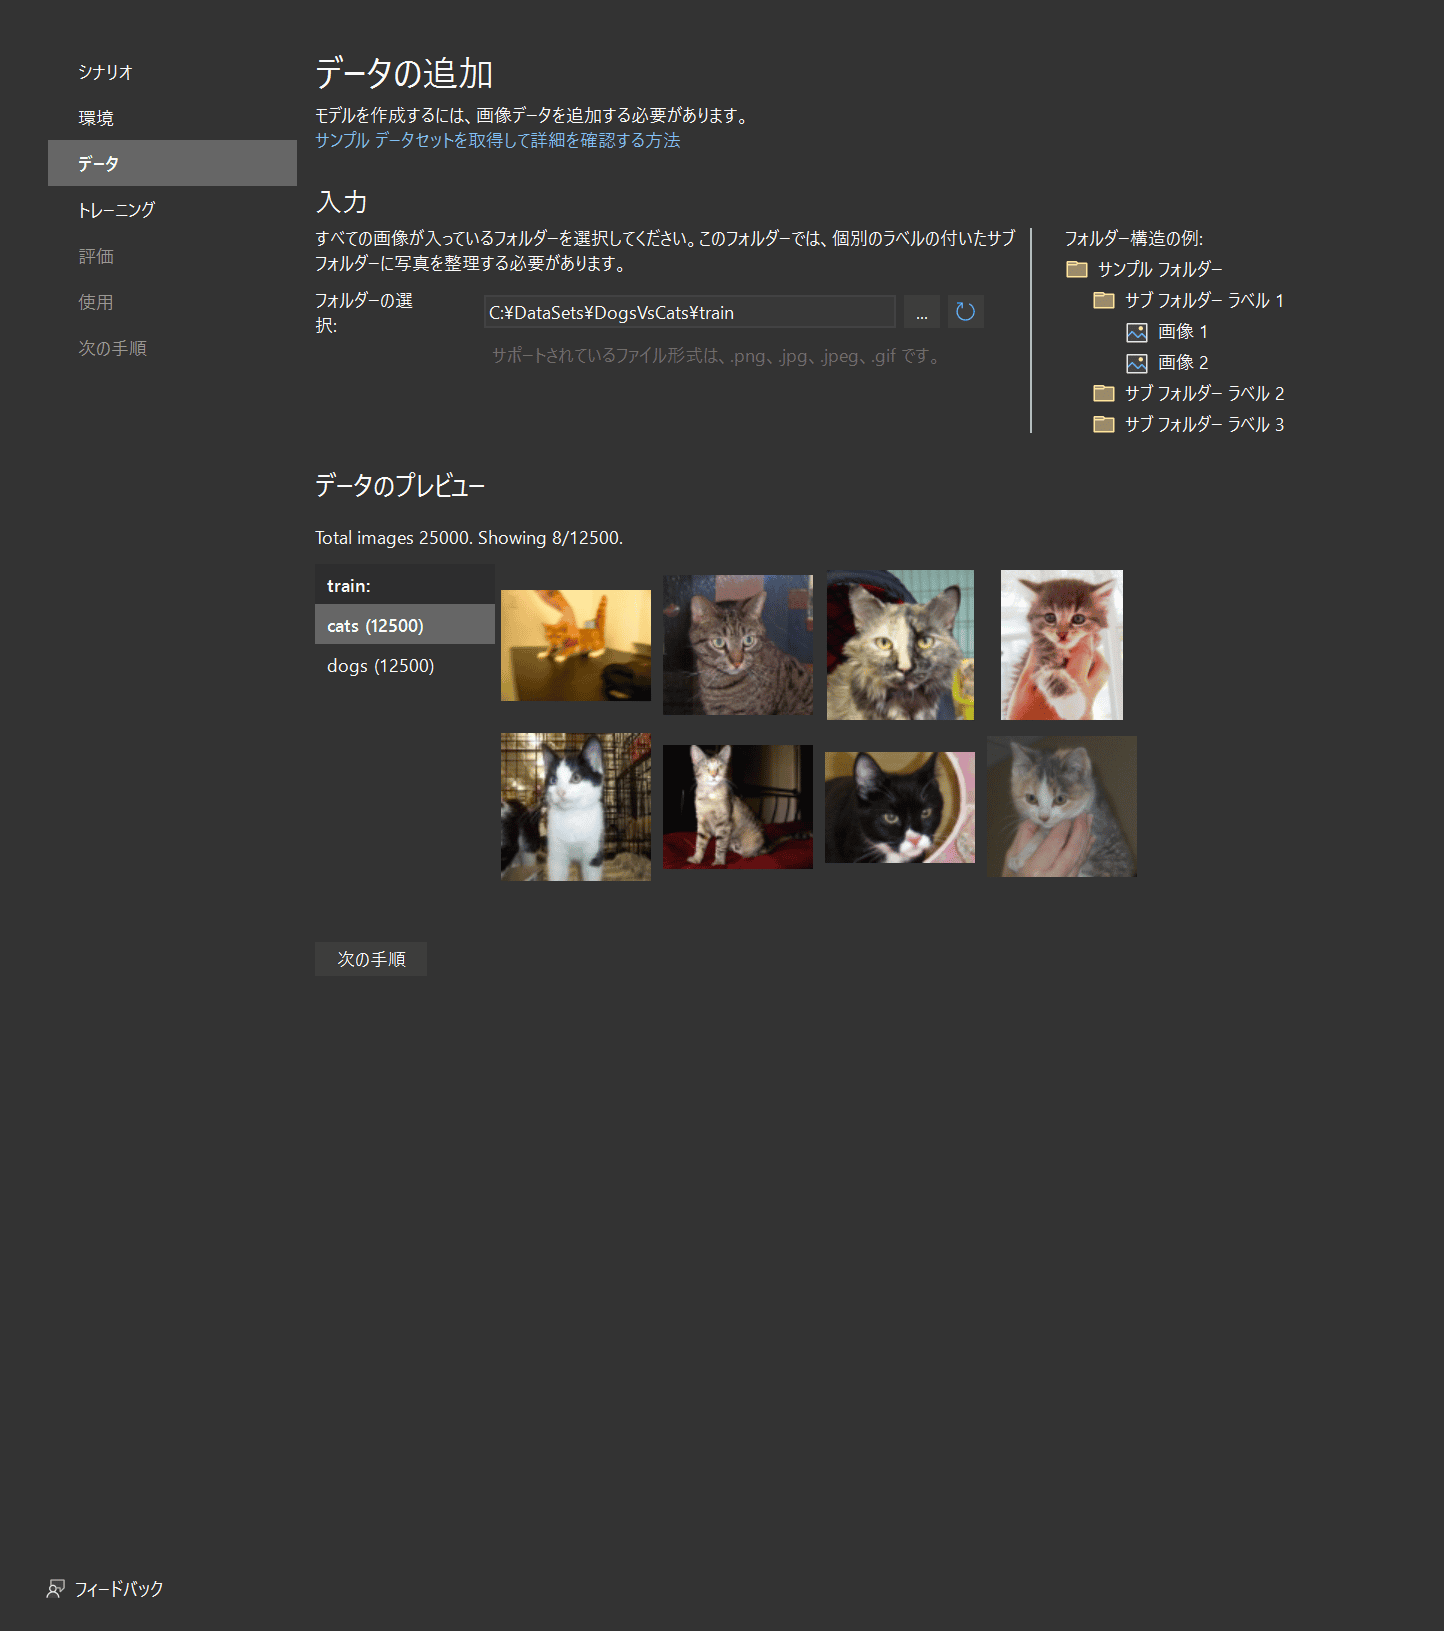
Kaggleのデータセットからダウンロードしてきた画像データを指定しましょう。
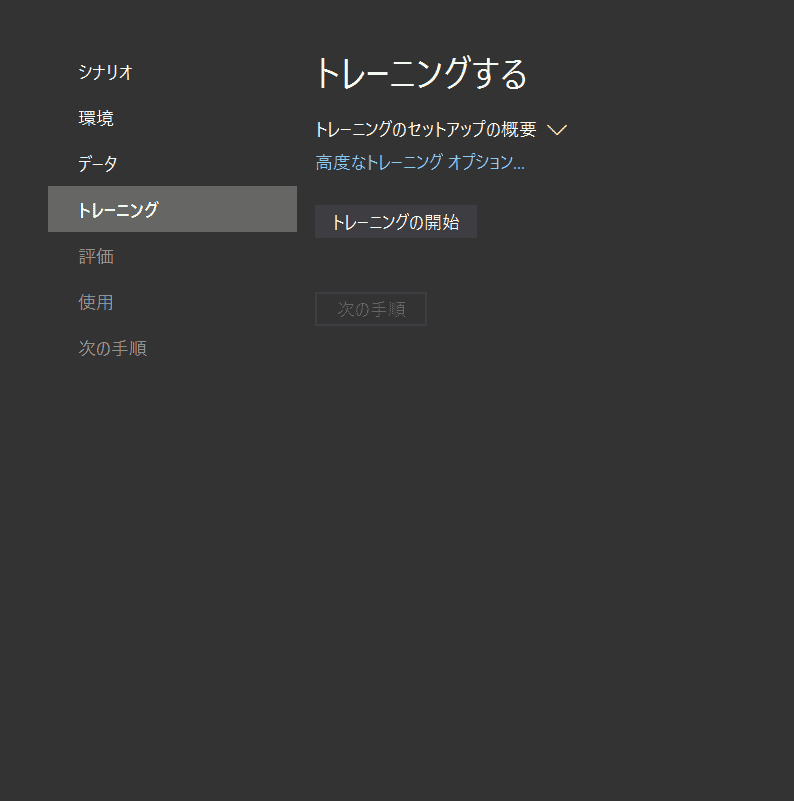
トレーニングの開始をクリックすると実際に学習が始まります。お使いの環境で変わりますが、学習に時間を要します。
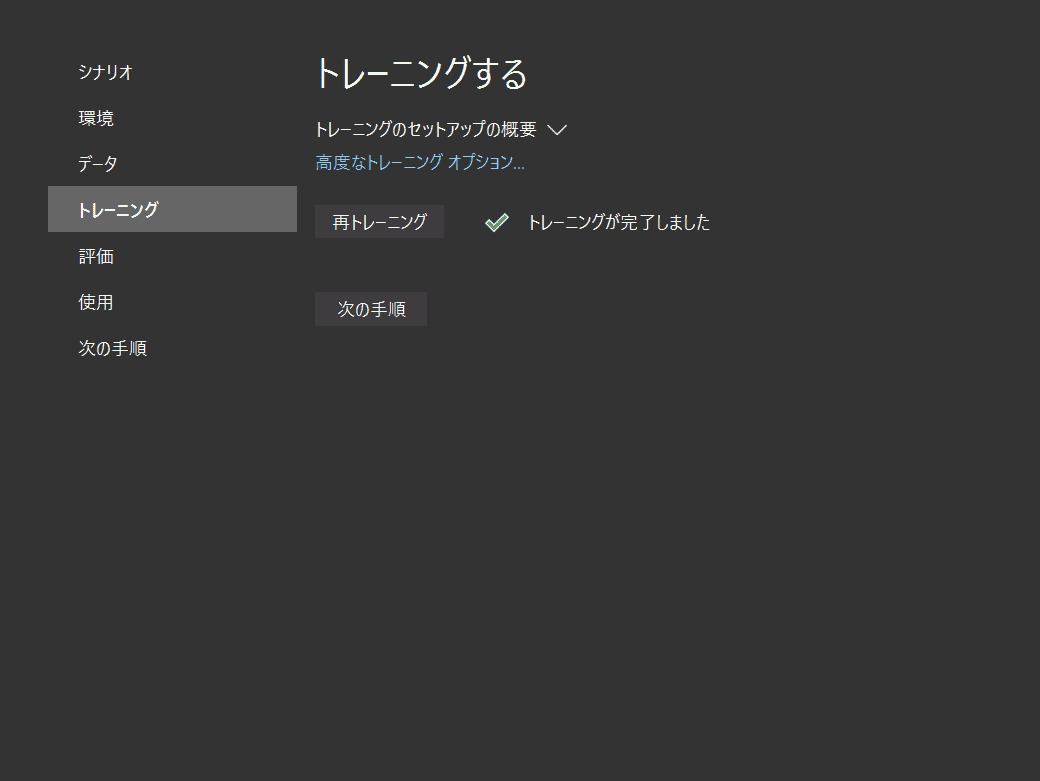
トレーニングが終了するとこのような表示になります。
試しに、test画像を読み込ませてみましょう。しっかりと、猫と判別しているようです。
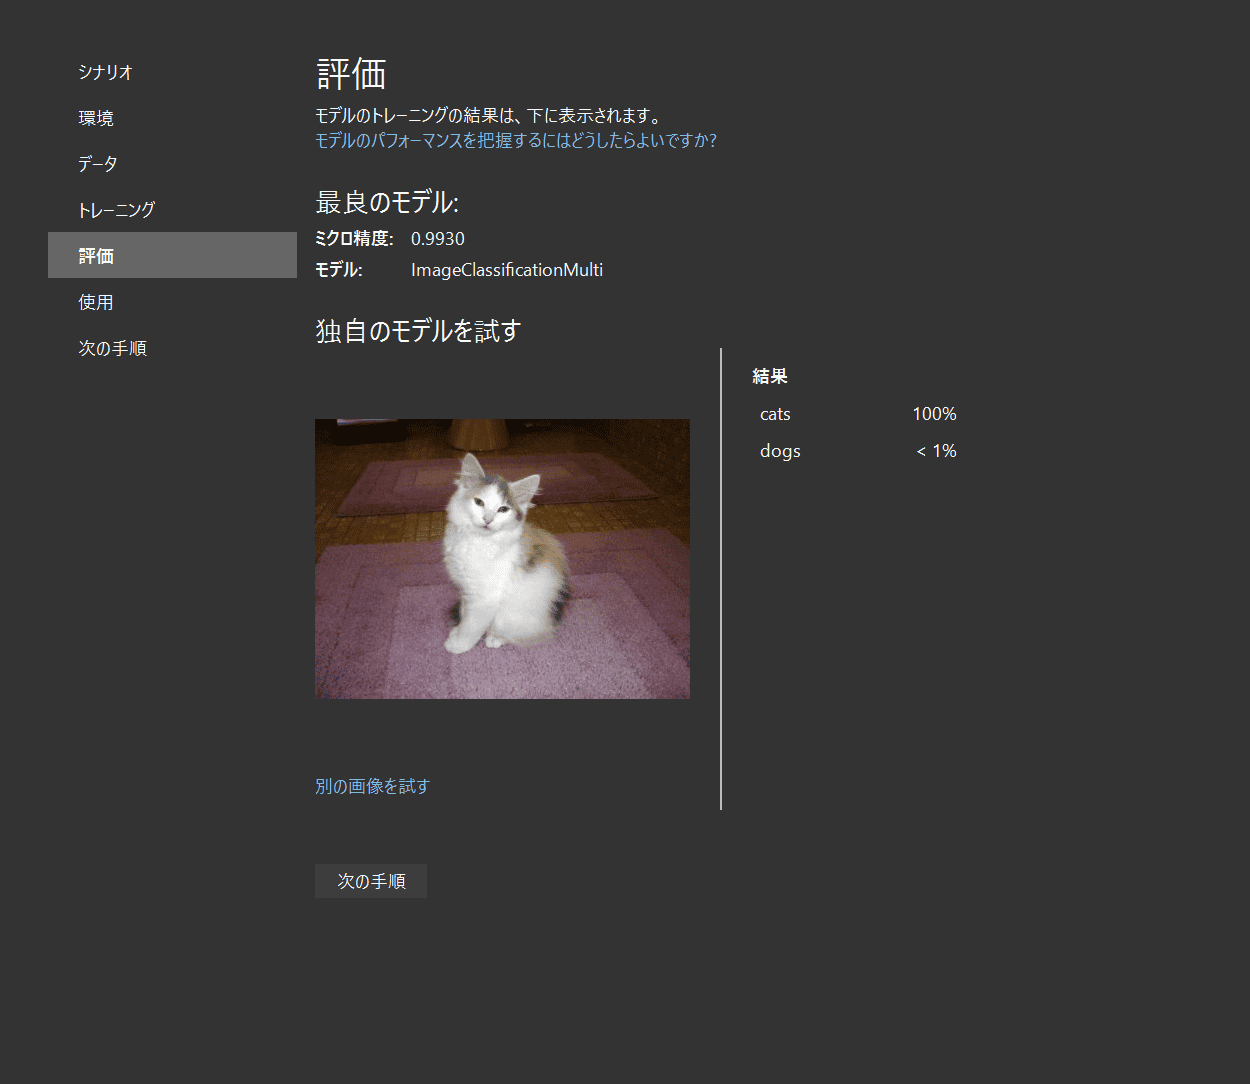
これで、犬と猫を分類するモデルを作成することができました。
UI作成
少しでもモダンな見た目になるように今回は「Material Design」を使います。
NuGet経由でMaterialDesignThemesとMaterialDesignThemes.MahAppsをインストールします。
app.xamlにMaterial Designのリソースを登録しておきます。
<Application x:Class="DogsVsCats.App"
             xmlns="http://schemas.microsoft.com/winfx/2006/xaml/presentation"
             xmlns:x="http://schemas.microsoft.com/winfx/2006/xaml"
             xmlns:local="clr-namespace:DogsVsCats"
             StartupUri="MainWindow.xaml">
    <Application.Resources>
        <ResourceDictionary>

            <ResourceDictionary.MergedDictionaries>

                <!--  MahApps  -->
                <ResourceDictionary Source="pack://application:,,,/MahApps.Metro;component/Styles/Controls.xaml" />
                <ResourceDictionary Source="pack://application:,,,/MahApps.Metro;component/Styles/Fonts.xaml" />
                <ResourceDictionary Source="pack://application:,,,/MahApps.Metro;component/Styles/Themes/Light.Violet.xaml" />

                <!--  Material Design  -->
                <ResourceDictionary Source="pack://application:,,,/MaterialDesignThemes.Wpf;component/Themes/MaterialDesignTheme.Light.xaml" />
                <ResourceDictionary Source="pack://application:,,,/MaterialDesignThemes.Wpf;component/Themes/MaterialDesignTheme.Defaults.xaml" />
                <ResourceDictionary Source="pack://application:,,,/MaterialDesignColors;component/Themes/Recommended/Primary/MaterialDesignColor.DeepPurple.xaml" />
                <ResourceDictionary Source="pack://application:,,,/MaterialDesignColors;component/Themes/Recommended/Accent/MaterialDesignColor.Lime.xaml" />

                <!--  Material Design: MahApps Compatibility  -->
                <ResourceDictionary Source="pack://application:,,,/MaterialDesignThemes.MahApps;component/Themes/MaterialDesignTheme.MahApps.Fonts.xaml" />
                <ResourceDictionary Source="pack://application:,,,/MaterialDesignThemes.MahApps;component/Themes/MaterialDesignTheme.MahApps.Flyout.xaml" />

            </ResourceDictionary.MergedDictionaries>

            <!--  MahApps Brushes  -->
            <SolidColorBrush x:Key="MahApps.Brushes.Highlight" Color="{DynamicResource Primary700}" />
            <SolidColorBrush x:Key="MahApps.Brushes.AccentBase" Color="{DynamicResource Primary600}" />
            <SolidColorBrush x:Key="MahApps.Brushes.Accent" Color="{DynamicResource Primary500}" />
            <SolidColorBrush x:Key="MahApps.Brushes.Accent2" Color="{DynamicResource Primary400}" />
            <SolidColorBrush x:Key="MahApps.Brushes.Accent3" Color="{DynamicResource Primary300}" />
            <SolidColorBrush x:Key="MahApps.Brushes.Accent4" Color="{DynamicResource Primary200}" />
            <SolidColorBrush x:Key="MahApps.Brushes.WindowTitle" Color="{DynamicResource Primary700}" />
            <SolidColorBrush x:Key="MahApps.Brushes.Selected.Foreground" Color="{DynamicResource Primary500Foreground}" />
            <LinearGradientBrush x:Key="MahApps.Brushes.Progress" StartPoint="1.002,0.5" EndPoint="0.001,0.5">
                <GradientStop Offset="0" Color="{DynamicResource Primary700}" />
                <GradientStop Offset="1" Color="{DynamicResource Primary300}" />
            </LinearGradientBrush>
            <SolidColorBrush x:Key="MahApps.Brushes.CheckmarkFill" Color="{DynamicResource Primary500}" />
            <SolidColorBrush x:Key="MahApps.Brushes.RightArrowFill" Color="{DynamicResource Primary500}" />
            <SolidColorBrush x:Key="MahApps.Brushes.IdealForeground" Color="{DynamicResource Primary500Foreground}" />
            <SolidColorBrush
                x:Key="MahApps.Brushes.IdealForegroundDisabled"
                Opacity="0.4"
                Color="{DynamicResource Primary500}" />

        </ResourceDictionary>
    </Application.Resources>
</Application>
MainWindowにはボタンとテキストボックスのみの配置しておきます。。
<Window x:Class="DogsVsCats.MainWindow"
        xmlns="http://schemas.microsoft.com/winfx/2006/xaml/presentation"
        xmlns:x="http://schemas.microsoft.com/winfx/2006/xaml"
        xmlns:d="http://schemas.microsoft.com/expression/blend/2008"
        xmlns:mc="http://schemas.openxmlformats.org/markup-compatibility/2006"
        xmlns:local="clr-namespace:DogsVsCats"
        xmlns:materialDesign="http://materialdesigninxaml.net/winfx/xaml/themes"
        mc:Ignorable="d"
        Title="" Height="160" Width="200">
    <Grid>
        <Grid.RowDefinitions>
            <RowDefinition Height="70"/>
            <RowDefinition Height="60"/>
        </Grid.RowDefinitions>
        <Button
            Grid.Row="0"
            Content="CAPTURE"
            Margin="10"
            IsEnabled="{Binding DataContext.ControlsEnabled,
            RelativeSource={RelativeSource FindAncestor,AncestorType=Window}}"
            Style="{StaticResource MaterialDesignPaperLightButton}"
            ToolTip="Resource name: MaterialDesignPaperLightButton" Click="Button_Click" />
        <TextBox
            Name="ResultTextBox"
            Margin="10"
            Grid.Row="1"
            VerticalAlignment="Top"
            materialDesign:HintAssist.Hint="判別結果"
            Style="{StaticResource MaterialDesignFloatingHintTextBox}" />
    </Grid>
</Window>
ロジック作成
実際の処理を書いていきます。
まずは、範囲指定した箇所を画像にする処理を書いていきます。
<Window x:Name="Hand" x:Class="DogsVsCats.TrimScreen"
        xmlns="http://schemas.microsoft.com/winfx/2006/xaml/presentation"
        xmlns:x="http://schemas.microsoft.com/winfx/2006/xaml"
        WindowStyle="None" Topmost="True"
        Margin="0" Padding="0" AllowsTransparency="True"
        Background="Transparent" ShowInTaskbar="False"
        Title="TrimScreen" Loaded="Window_Loaded" MouseLeftButtonDown="Hand_MouseLeftButtonDown" MouseLeftButtonUp="Hand_MouseLeftButtonUp">
    <Canvas Name="LayoutRoot" Background="Transparent" Margin="0" >
        <Path Stroke="Black" StrokeThickness="1" Fill="#BBFFFFFF"
              Margin="0"
              MouseLeftButtonDown="DrawingPath_MouseLeftButtonDown"
              MouseLeftButtonUp="DrawingPath_MouseLeftButtonUp"
              MouseMove="DrawingPath_MouseMove">
            <Path.Data>
                <CombinedGeometry x:Name="ScreenArea" GeometryCombineMode="Xor" />
            </Path.Data>
        </Path>
    </Canvas>
</Window>
using System;
using System.Reflection;
using System.Windows;
using System.Windows.Input;
using System.Windows.Media;
using System.Windows.Shapes;

namespace DogsVsCats
{
    /// <summary>
    /// TrimScreen.xaml の相互作用ロジック
    /// </summary>
    public partial class TrimScreen : Window
    {
        private Point _position;
        private bool _trimEnable = false;
        public bool ESC_Flg = false;

        /// <summary>
        /// コンストラクタ
        /// </summary>
        public TrimScreen()
        {
            InitializeComponent();
            this.PreviewKeyDown += new KeyEventHandler(HandleEsc);
        }

        /// <summary>
        /// Windowsロード時
        /// </summary>
        /// <param name="sender"></param>
        /// <param name="e"></param>
        private void Window_Loaded(object sender, RoutedEventArgs e)
        {
            // マルチモニターの全領域のサイズを取得
            this.Top = SystemParameters.VirtualScreenTop;
            this.Left = SystemParameters.VirtualScreenLeft;
            this.Width = SystemParameters.VirtualScreenWidth;
            this.Height = SystemParameters.VirtualScreenHeight;

            // ジオメトリサイズの設定
            this.ScreenArea.Geometry1 = new RectangleGeometry(new Rect(0.0, 0.0, this.Width, this.Height));
        }

        /// <summary>
        /// Escキーでキャプチャ処理終了イベントメソッド
        /// </summary>
        /// <param name="sender"></param>
        /// <param name="e"></param>
        private void HandleEsc(object sender, KeyEventArgs e)
        {
            if (e.Key == Key.Escape)
            {
                //EscキーフラグをTure
                ESC_Flg = true;
                this.Close();
            }
        }
        /// <summary>
        /// マウス左ボタン押下で開示座標の取得&マウスキャプチャ開始
        /// </summary>
        /// <param name="sender"></param>
        /// <param name="e"></param>
        private void Hand_MouseLeftButtonDown(object sender, MouseButtonEventArgs e)
        {
            var path = sender as Path;
            if (path == null) { return; }

            // 開始座標を取得
            var point = e.GetPosition(path);
            _position = point;

            // マウスキャプチャの設定
            _trimEnable = true;
            this.Cursor = Cursors.Cross;
            path.CaptureMouse();
        }

        /// <summary>
        /// マウス左ボタン押下解放で
        /// </summary>
        /// <param name="sender"></param>
        /// <param name="e"></param>
        private void Hand_MouseLeftButtonUp(object sender, MouseButtonEventArgs e)
        {
            var path = sender as Path;
            if (path == null) { return; }

            // 現在座標を取得
            var point = e.GetPosition(path);

            // マウスキャプチャの終了
            _trimEnable = false;
            this.Cursor = Cursors.Arrow;
            path.ReleaseMouseCapture();

            // 画面キャプチャ
            CaptureScreen(point);

            // アプリケーションの終了
            this.Close();
        }

        /// <summary>
        ///  //DrawingPathはパスを使って図形を書く MouseLeftButtonDownはこの要素の上にマウス ポインターがある状態でマウスの左ボタンが押されたときに発生します
        /// </summary>
        /// <param name="sender"></param>
        /// <param name="e"></param>
        private void DrawingPath_MouseLeftButtonDown(object sender, MouseButtonEventArgs e)
        {
            var path = sender as Path;
            if (path == null) { return; }

            // 開始座標を取得
            var point = e.GetPosition(path);
            _position = point;

            // マウスキャプチャの設定
            _trimEnable = true;
            this.Cursor = Cursors.Cross;
            path.CaptureMouse();
        }

        /// <summary>
        /// DrawingPathはパスを使って図形を書く MouseLeftButtonDownはこの要素の上にマウス ポインターがある状態でマウスの左ボタンが離されたときに発生します。
        /// </summary>
        /// <param name="sender"></param>
        /// <param name="e"></param>
        private void DrawingPath_MouseLeftButtonUp(object sender, MouseButtonEventArgs e)
        {
            var path = sender as Path;
            if (path == null) { return; }

            // 現在座標を取得
            var point = e.GetPosition(path);

            // マウスキャプチャの終了
            _trimEnable = false;
            this.Cursor = Cursors.Arrow;
            path.ReleaseMouseCapture();

            // 画面キャプチャ
            CaptureScreen(point);

            // アプリケーションの終了
            this.Close();
        }

        /// <summary>
        /// DrawingPathはパスを使って図形を書く MouseMoveはマウスがコントロール上を移動すると発生
        /// </summary>
        /// <param name="sender"></param>
        /// <param name="e"></param>
        private void DrawingPath_MouseMove(object sender, MouseEventArgs e)
        {
            if (!_trimEnable) { return; }

            var path = sender as Path;
            if (path == null) { return; }

            // 現在座標を取得
            var point = e.GetPosition(path);

            // キャプチャ領域枠の描画
            DrawStroke(point);
        }

        /// <summary>
        /// 指定されている画面領域を描写
        /// </summary>
        /// <param name="point"></param>
        private void DrawStroke(Point point)
        {
            // 矩形の描画
            var x = _position.X < point.X ? _position.X : point.X;
            var y = _position.Y < point.Y ? _position.Y : point.Y;
            var width = Math.Abs(point.X - _position.X);
            var height = Math.Abs(point.Y - _position.Y);
            this.ScreenArea.Geometry2 = new RectangleGeometry(new Rect(x, y, width, height));
        }

        /// <summary>
        /// 実際に範囲指定された領域をキャプチャ マウスの左ボタンを放されたときに実行
        /// </summary>
        /// <param name="point"></param>
        public void CaptureScreen(Point point)
        {
            // 座標変換
            var start = PointToScreen(_position);
            var end = PointToScreen(point);

            // キャプチャエリアの取得
            var x = start.X < end.X ? (int)start.X : (int)end.X;
            var y = start.Y < end.Y ? (int)start.Y : (int)end.Y;
            var width = (int)Math.Abs(end.X - start.X);
            var height = (int)Math.Abs(end.Y - start.Y);
            if (width == 0 || height == 0) { return; }

            // スクリーンイメージの取得
            using (var bmp = new System.Drawing.Bitmap(width, height, System.Drawing.Imaging.PixelFormat.Format24bppRgb))
            using (var graph = System.Drawing.Graphics.FromImage(bmp))
            {
                // 画面をコピーする
                graph.CopyFromScreen(new System.Drawing.Point(x, y), new System.Drawing.Point(), bmp.Size);

                // イメージの保存
                string exeFolder = System.IO.Path.GetDirectoryName(Assembly.GetExecutingAssembly().Location);
                try
                {
                    bmp.Save(System.IO.Path.ChangeExtension(System.IO.Path.Combine(exeFolder, "Trimimage"), "jpg"), System.Drawing.Imaging.ImageFormat.Png);
                    bmp.Dispose();
                }
                catch (System.Runtime.InteropServices.ExternalException)
                {
                    MessageBox.Show("上手くスクリーンショットが行えませんでした。\nもう一度お試し下さい。", "警告", MessageBoxButton.OK, System.Windows.MessageBoxImage.Warning);
                }
            }
        }
    }
}
次に切り取った画像を判別する処理を作っていきます。
using System.IO;
using System.Reflection;
using System.Windows;

namespace DogsVsCats
{
    /// <summary>
    /// Interaction logic for MainWindow.xaml
    /// </summary>
    public partial class MainWindow : Window
    {
        //Esc検知用
        public bool Esc_flg = false;

        public MainWindow()
        {
            InitializeComponent();
        }

        private void Button_Click(object sender, RoutedEventArgs e)
        {
            TrimScreen trimScreen = new TrimScreen();
            trimScreen.ShowDialog();//スクリーンショット処理開始
            Esc_flg = trimScreen.ESC_Flg;

            //Escキーフラグ検知で処理を行わない
            if (!Esc_flg)
            {
                string folder = System.IO.Path.GetDirectoryName(Assembly.GetExecutingAssembly().Location);
                var imageBytes = File.ReadAllBytes(folder + "\\TrimImage.jpg");
                DogVsCatClassfication.ModelInput sampleData = new DogVsCatClassfication.ModelInput()
                {
                    ImageSource = imageBytes,
                };

                //Load model and predict output
                var result = DogVsCatClassfication.Predict(sampleData);

                //判別結果 表示
                ResultTextBox.Text = result.PredictedLabel;
            }
        }
    }
}
完成
以上で完成です!お疲れ様でした。
今回は、判別時に予測比率によって出力を変更しませんでした。
そのためどんな箇所を切り取っても犬か猫と結果が表示されてしまいます。
閾値を設定して結果が適切になるようにする必要があります。
また、ビヘイビアに処理を直接書いていますが、本来であればMVVMに沿った設計をした方が良いですね。
コード一式