目的
- Swift スマホアプリ開発を行う際、『develop(作業用), debug(検証用), release(公開用)』 に環境を分けて実行する方法を紹介する
- 筆者の備忘録
流れ
下準備
プログラム実装
結果
下準備
① : 実行環境の受け皿を用意する
PROJECT > Info > Configurations > + > Duplicate "Debug" Configurationとして、「Develop」を追加


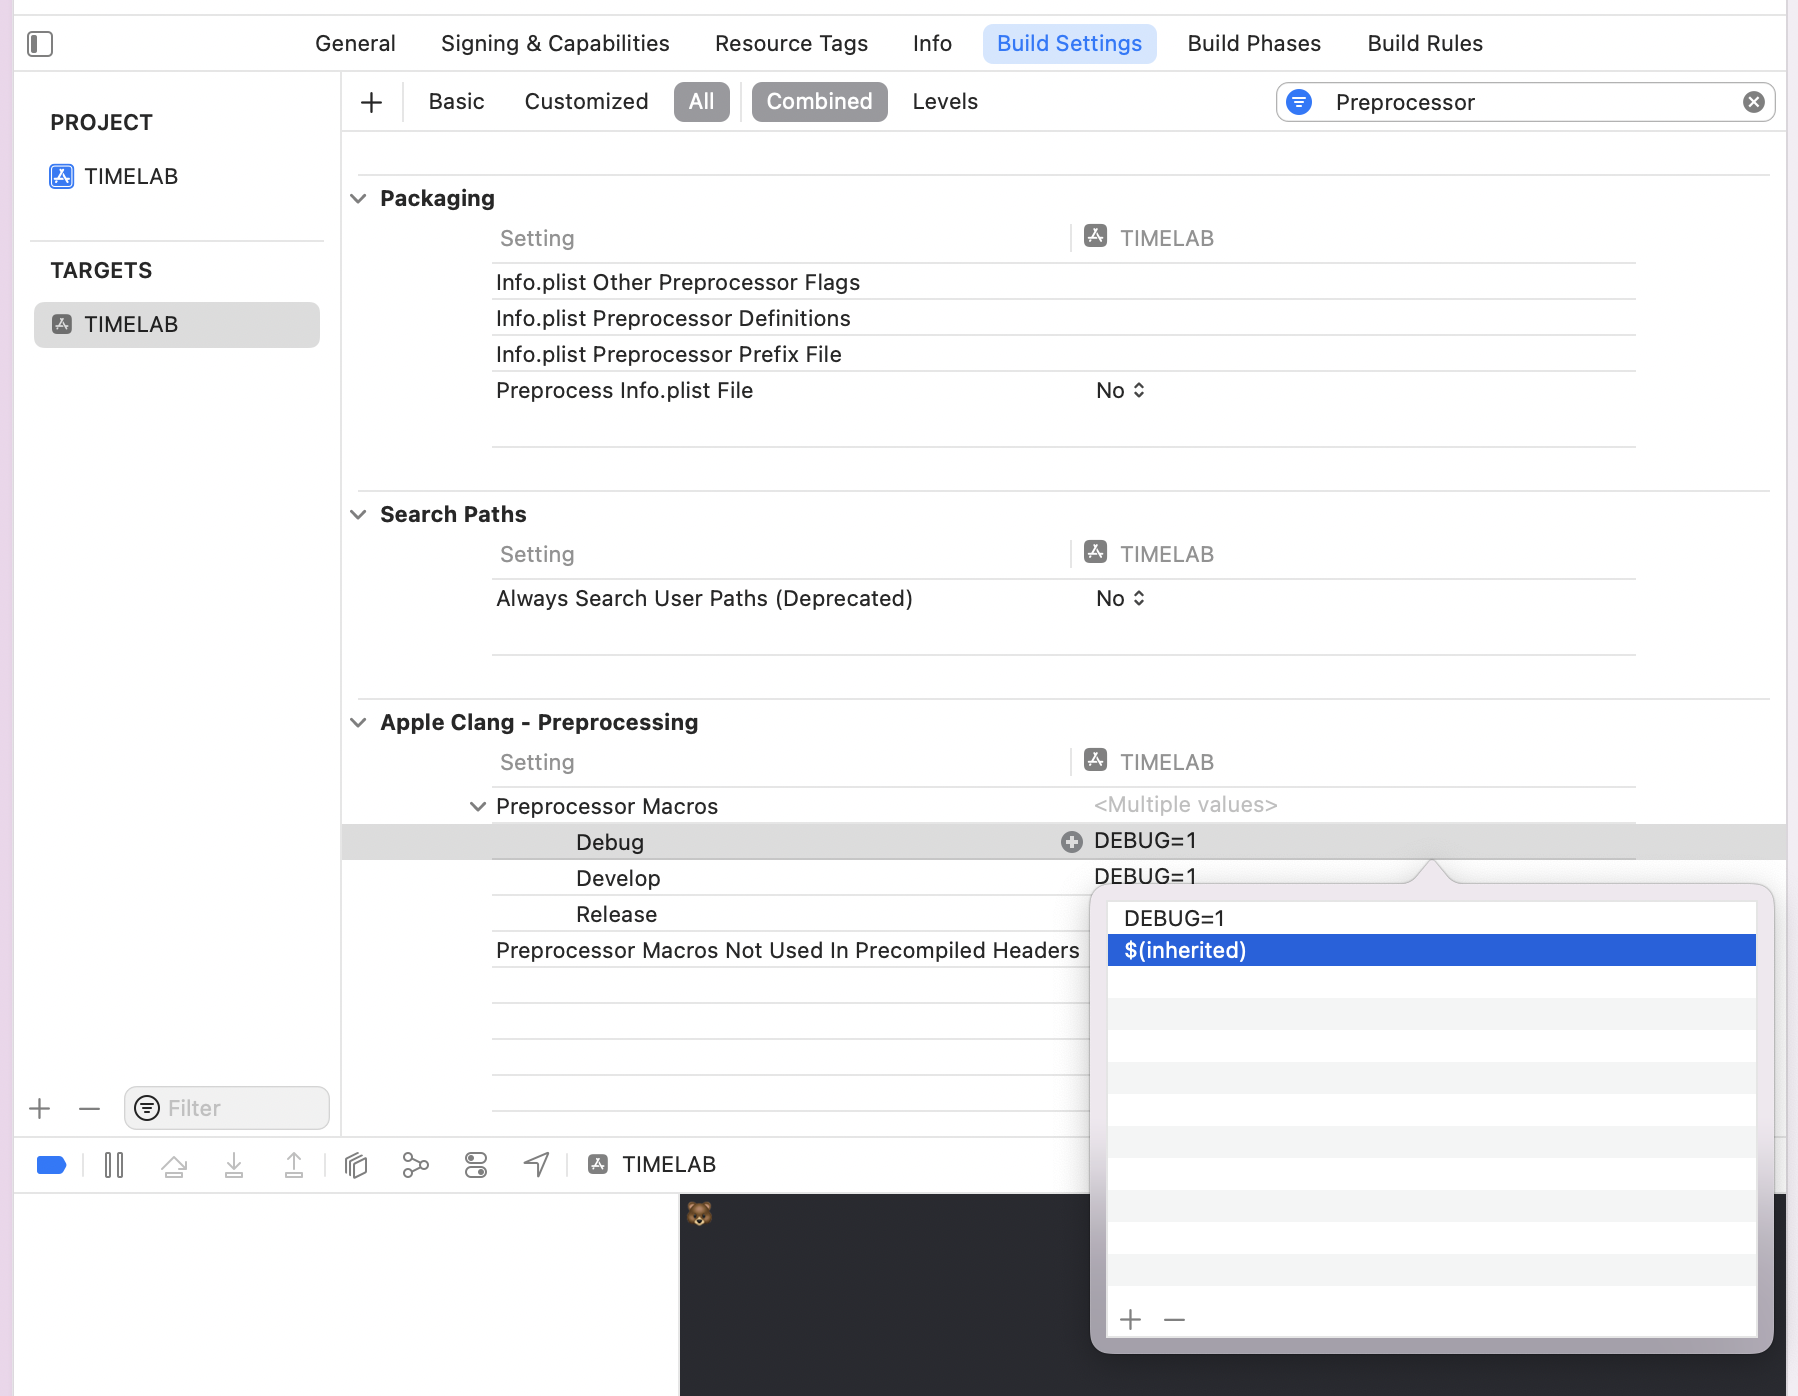
② : Apple Clang - Preprocessing を変更する
右側の項目をダブルクリック
「$(inherited)」 を削除する
「DEBUG=1」→「Debug」 (各自作成したい実行環境名が入ります)
👇 2枚目のようにしてください

③ : プログラムで変更可能にする
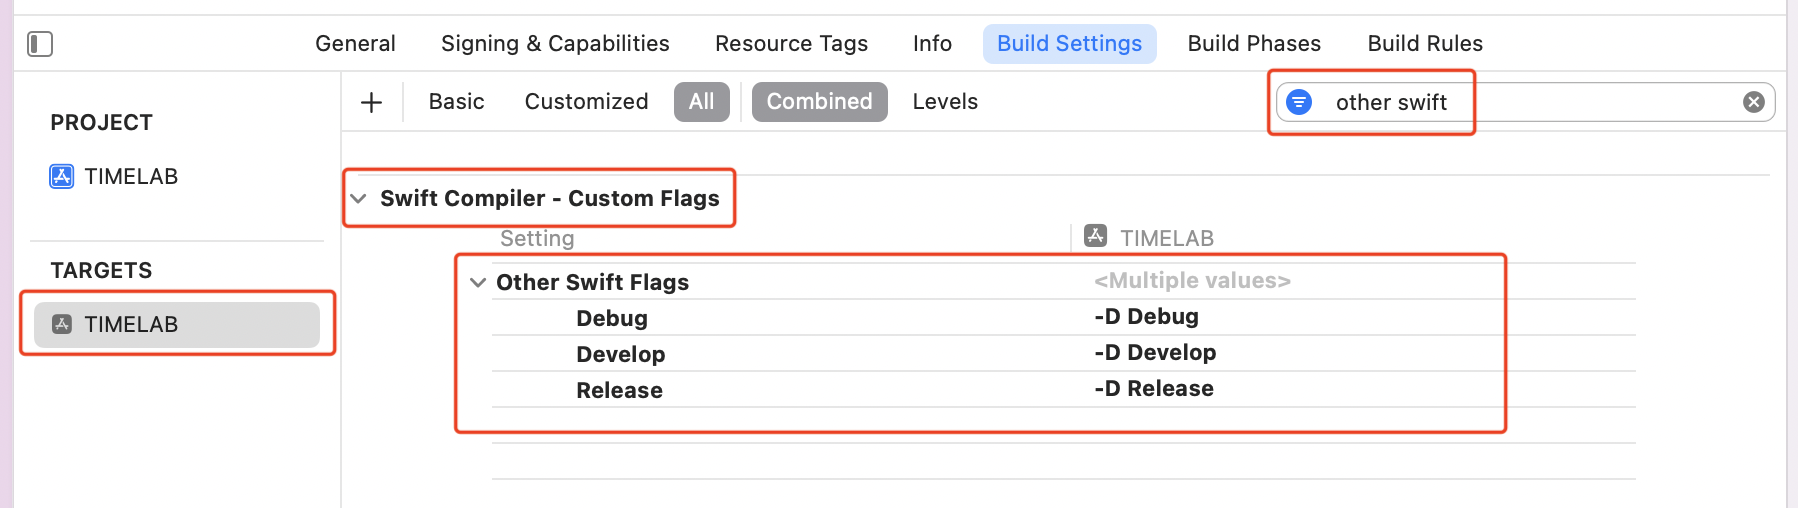
Build Setting > 「other swift」で検索 > Swift Compiler - Custom Flags > Other Swift Flags
画像のように、「-D 環境名」に変更していく
④ : 実行環境を作成する
Manage Schemes > 左下・・・ > Duplicate > 名前を指定 を行い、👇 4枚目の画像のような状態にする


⑤ : 実行環境を選択できるか確認
👇 2枚目のようになっていれば成功です!


プログラム実装
コードを実装
#if, #elseif, #else, #endif +実行環境名 で、実行環境の切り替え確認 を行う
ViewController.swift
import UIKit

class ViewController: UIViewController {

    override func viewDidLoad() {
        super.viewDidLoad()

        // 実行環境の確認
        #if Develop
            print("🐵")
        #elseif Debug
            print("🐥")
        #else
            print("🐻")
        #endif
    }
}
結果
実行環境を指定して実行!


参考サイト