概要
↓の構成で必要なファイルをFirebase Hostingにデプロイし、
Webページからアプリに飛ぶように対応したいと思います。
Android:  App Links
iOS: Universal Links
Hosting対象のURLは以下を想定して実装を行います。
(Firebase Hostingでデフォルトで設定されているドメインを使う想定です)
DEV環境: https://example-deeplink-dev.web.app
STG環境: https://example-deeplink-stg.web.app
また、DEV環境/STG環境用のFirebaseプロジェクトがある前提で
それぞれに登録したアプリに対応するようにしたいと思います。
DEV環境: com.example.deeplink.dev
STG環境: com.example.deeplink.stg
※ AndroidとiOSのAppIDは同じで登録している + Flavorの設定が終わっている前提です
その他
実際に作業しながら時系列バラバラでメモした内容なので、どこか手順抜けてたりするかもなので
お気づきの点あればご指摘頂けると助かります ![]()
Firebase Hosting準備 - 編
DeepLinkに対応する場合、AndroidもiOSもそれぞれ各OS用の関連付けファイルをWebページに設置する必要があります。
まずはその関連付けファイルをFirebase Hostingに設置できるように対応していきたいと思います。
ディレクトリ構成
.
├── assetlinks
│   ├── assetlinks-dev.json
│   └── assetlinks-stg.json
├── association
│   ├── apple-app-site-association-dev
│   └── apple-app-site-association-stg
├── firebase.json
├── package.json
├── public
│   ├── .well-known
│   │   └──.gitkeep
│   ├── 404.html
│   └── index.html
└── yarn.lock
firebase用のディレクトリを作成し、firebase-tools でHostingの初期化を行います。
次に Android用に assetlinks ディレクトリ、iOS用に association ディレクトリを作成しときます。
各ディレクトリとDEV/STG用の関連付けファイル一覧は以下になります。
| OS | 環境 | ファイルパス |
|---|---|---|
| Android | DEV | assetlinks/assetlinks-dev.json |
| Android | STG | assetlinks/assetlinks-stg.json |
| iOS | DEV | association/apple-app-site-association-dev |
| iOS | STG | association/apple-app-site-association-stg |
public ディレクトリ配下に各関連付けファイルを配置する為の .well-known も作成しときます。
デプロイ用のスクリプト
実際にFirebase Hostingにアップロードする際にはそれぞれの環境のAndorid/iOS用の関連付けファイルを
.well-known にリネームしてコピペし、アップロードする必要があります。
npm run xxxx 一発で完結出来るようにするために以下パッケージをインストールします。
yarn add -D cpx npm-run-all
次に package.json の scripts 箇所を以下に修正します。
  "scripts": {
    "hosting:develop": "run-s hosting:develop:*",
    "hosting:develop:assetlinks": "cpx assetlinks/assetlinks-dev.json public/.well-known",
    "hosting:develop:assetlinks-rename": "mv public/.well-known/assetlinks-dev.json public/.well-known/assetlinks.json",
    "hosting:develop:association": "cpx association/apple-app-site-association-dev public/.well-known",
    "hosting:develop:association-rename": "mv public/.well-known/apple-app-site-association-dev public/.well-known/apple-app-site-association",
    "hosting:develop:deploy": "firebase deploy --only hosting --project develop",
    "hosting:staging": "run-s hosting:staging:*",
    "hosting:staging:assetlinks": "cpx assetlinks/assetlinks-stg.json public/.well-known",
    "hosting:staging:assetlinks-rename": "mv public/.well-known/assetlinks-stg.json public/.well-known/assetlinks.json",
    "hosting:staging:association": "cpx association/apple-app-site-association-stg public/.well-known",
    "hosting:staging:association-rename": "mv public/.well-known/apple-app-site-association-stg public/.well-known/apple-app-site-association",
    "hosting:staging:deploy": "firebase deploy --only hosting --project staging"
  },
↑の設定で npm run hosting:develop と実施すると hosting:develop:xxxxx となっている箇所が上から実行されていきます。
※ リポジトリに含ませないように以下を .gitignore に設定しときます。
public/.well-known/assetlinks.json
public/.well-known/apple-app-site-association
Android側
作成する関連付けファイルは以下になります。
[{
  "relation": ["delegate_permission/common.handle_all_urls"],
  "target": {
    "namespace": "android_app",
    "package_name": "com.example.deeplink.dev",
    "sha256_cert_fingerprints":
    ["XX:XX:XX:XX:XX:XX:..."]
  }
}]
DEV環境の場合は package_name に com.example.deeplink.dev を設定し assetlinks-dev.json として保存、
STG環境の場合は package_name に com.example.deeplink.stg を設定し assetlinks-stg.json として保存します。
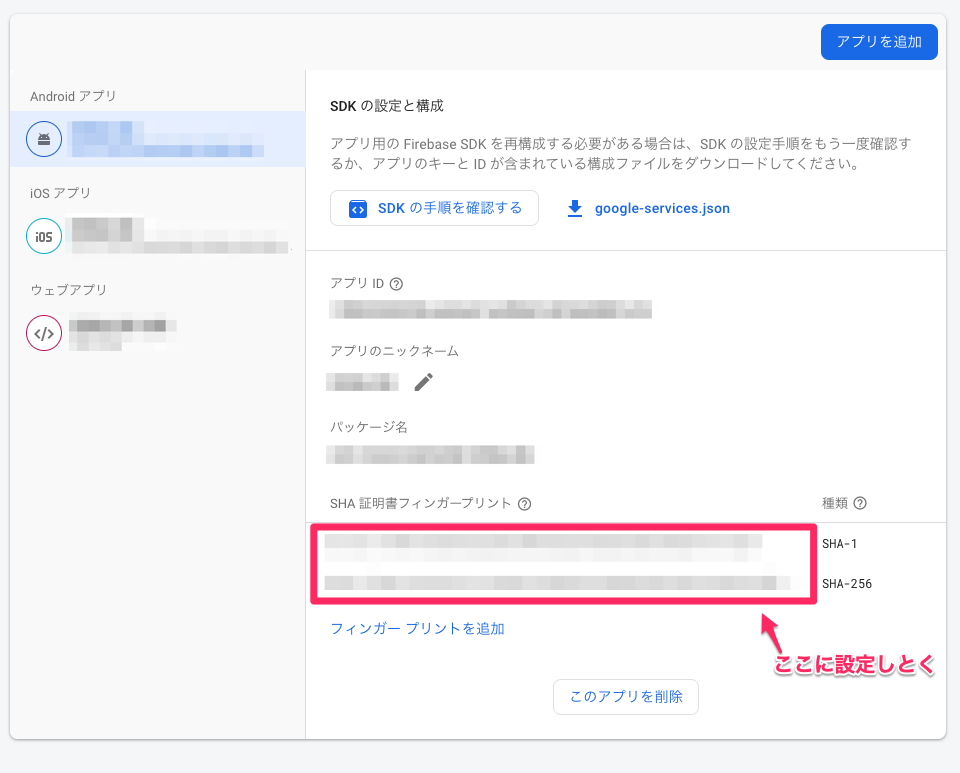
またSHA認証も設定しておく必要があるのでDEV/STG環境それぞれ keytool で入手 & 設定しときます。
https://developers.google.com/android/guides/client-auth
設定は上記の関連付けファイルとFirebaseコンソールの設定も必要になります。
↓Firebaseコンソール「設定」>「全般タブ」>「マイアプリ」から設定
iOS側
iOSアプリに関連づけを行うファイル(apple-app-site-association)をWeb上に配置する必要があります
Supporting Associated Domains | Apple Developer Documentation
まずは以下の関連づけファイルをDEV/STG環境毎に作成し、apple-app-site-association-dev, apple-app-site-association-stg として保存しときます。
XXXXXX にはApple Developer PortalでのTeamIDが入ります。
{
  "applinks": {
      "details": [
           {
             "appIDs": [ "XXXXXX.com.example.deeplink.dev" ],
             "components": [
               {
                  "/": "*",
                  "comment": "Matches any URL"
               }
             ]
           }
       ]
   }
}
上記のサンプルは全てのパスで反応する用な設定になっています。
設置するパスはルート / でも .well-known/ でもOKっぽいですが、今回は .well-known/ 配下に設置しようかと思います。
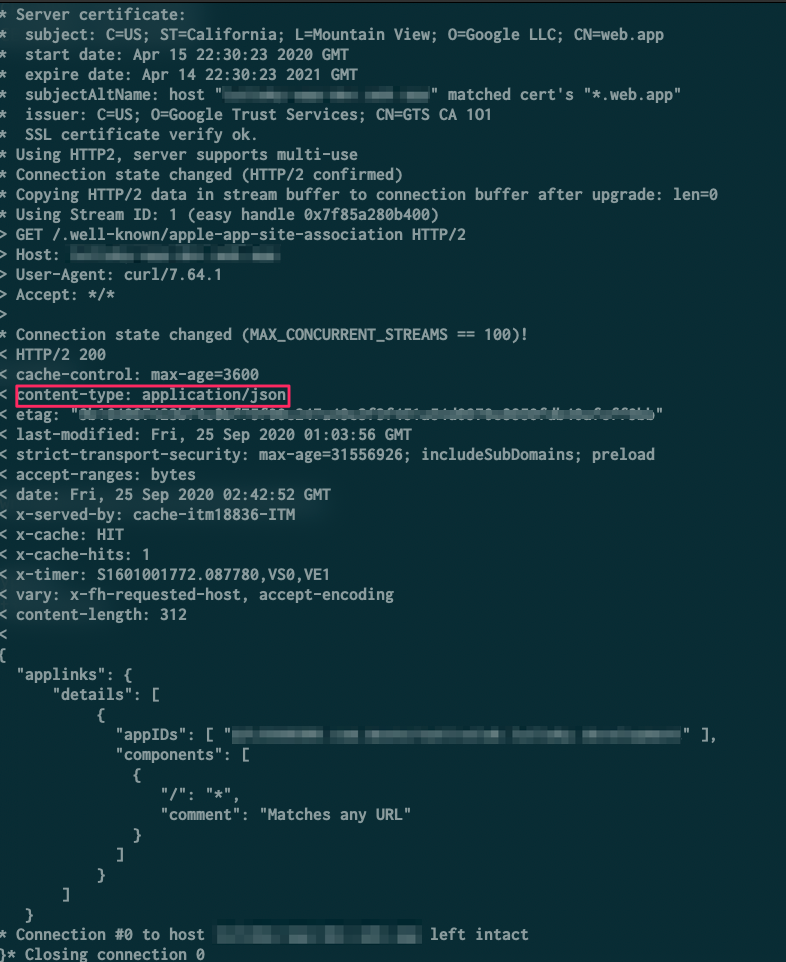
Firebase Hostingを使用する場合の content-type 対応
iOSの関連づけファイルを設置する際 content-type は application/json で設置する必要があります。
firebase.json で apple-app-site-association のヘッダーを修正します。
{
  "hosting": {
    "public": "public",
    "ignore": [
      "firebase.json",
      "**/.*",
      "**/node_modules/**"
    ],
    "rewrites": [
      {
        "source": "/",
        "destination": "/index.html"
      }
    ],
    "headers": [
      {
        "source": "/.well-known/apple-app-site-association",
        "headers": [
          {
            "key": "Content-Type",
            "value": "application/json"
          }
        ]
      }
    ]
  }
}
headers の部分を追加し、デプロイするとcontent-type が application/json になっています。
確認方法は curl -v https://xxxxxx/.well-known/apple-app-site-association で確認可能です。
Android準備 - 編
 環境構築
環境構築
AndroidStudioの「App Links Assistant」で作成も可能ですが、DEV環境/STG環境で設定を変える必要があるので
今回は直接設定していこうかと思います。
buildTypes と productFlavors の構成は以下のう想定で設定していきます。
android {
    ...
    buildTypes {
        debug {
            ...
        }
        release {
            ...
        }
    }

    flavorDimensions "environment"
    productFlavors {
        development {
            dimension "environment"
            applicationIdSuffix ".dev"
            versionNameSuffix ".dev"
        }
        staging {
            dimension "environment"
            applicationIdSuffix ".stg"
            versionNameSuffix ".stg"
        }
    }
}
AndroidManifestの作成
DEV環境: android/app/src/development/AndroidManifest.xml
STG環境: android/app/src/staging/AndroidManifest.xml
↓ android:host はDEV/STG環境に応じてURLを設定する必要があります。
DEV環境: example-deeplink-dev.web.app
STG環境: example-deeplink-stg.web.app
<manifest xmlns:android="http://schemas.android.com/apk/res/android"
    package="com.example.deeplink">
    <uses-permission android:name="android.permission.INTERNET"/>
    <application>
        <activity android:name=".MainActivity">
            <intent-filter android:autoVerify="true">
                <action android:name="android.intent.action.VIEW" />
                <category android:name="android.intent.category.DEFAULT" />
                <category android:name="android.intent.category.BROWSABLE" />
                <data android:scheme="https" android:host="example-deeplink-dev.web.app" />
            </intent-filter>
        </activity>
    </application>
</manifest>
 テスト
テスト
Digital Asset Links ファイルを確認
https://digitalassetlinks.googleapis.com/v1/statements:list?source.web.site=[https://domain.name:optional_port]&relation=delegate_permission/common.handle_all_urls
[https://domain.name:optional_port] の部分に用意したサイトのURLを設定
正常だと以下の用なレスポンスが返ってきます ![]()
{
  "statements": [
    {
      "source": {
        "web": {
          "site": "https://xxxxxxxx"
        }
      },
      "relation": "delegate_permission/common.handle_all_urls",
      "target": {
        "androidApp": {
          "packageName": "xxxxxxxxxxxxxx",
          "certificate": {
            "sha256Fingerprint": "xxxxxxxxxxxxxxxxxxxxxxxx"
          }
        }
      }
    }
  ],
  "maxAge": "3465.849881714s",
  "debugString": "********************* ERRORS *********************\nNone!\n********************* INFO MESSAGES *********************\n* Info: The following statements were considered when processing the request:\n\n---\n...
}
adb shellから起動させる
adb shell am start -W -a android.intent.action.VIEW -d "https://example-deeplink-dev.web.app"
 バッドノウハウ
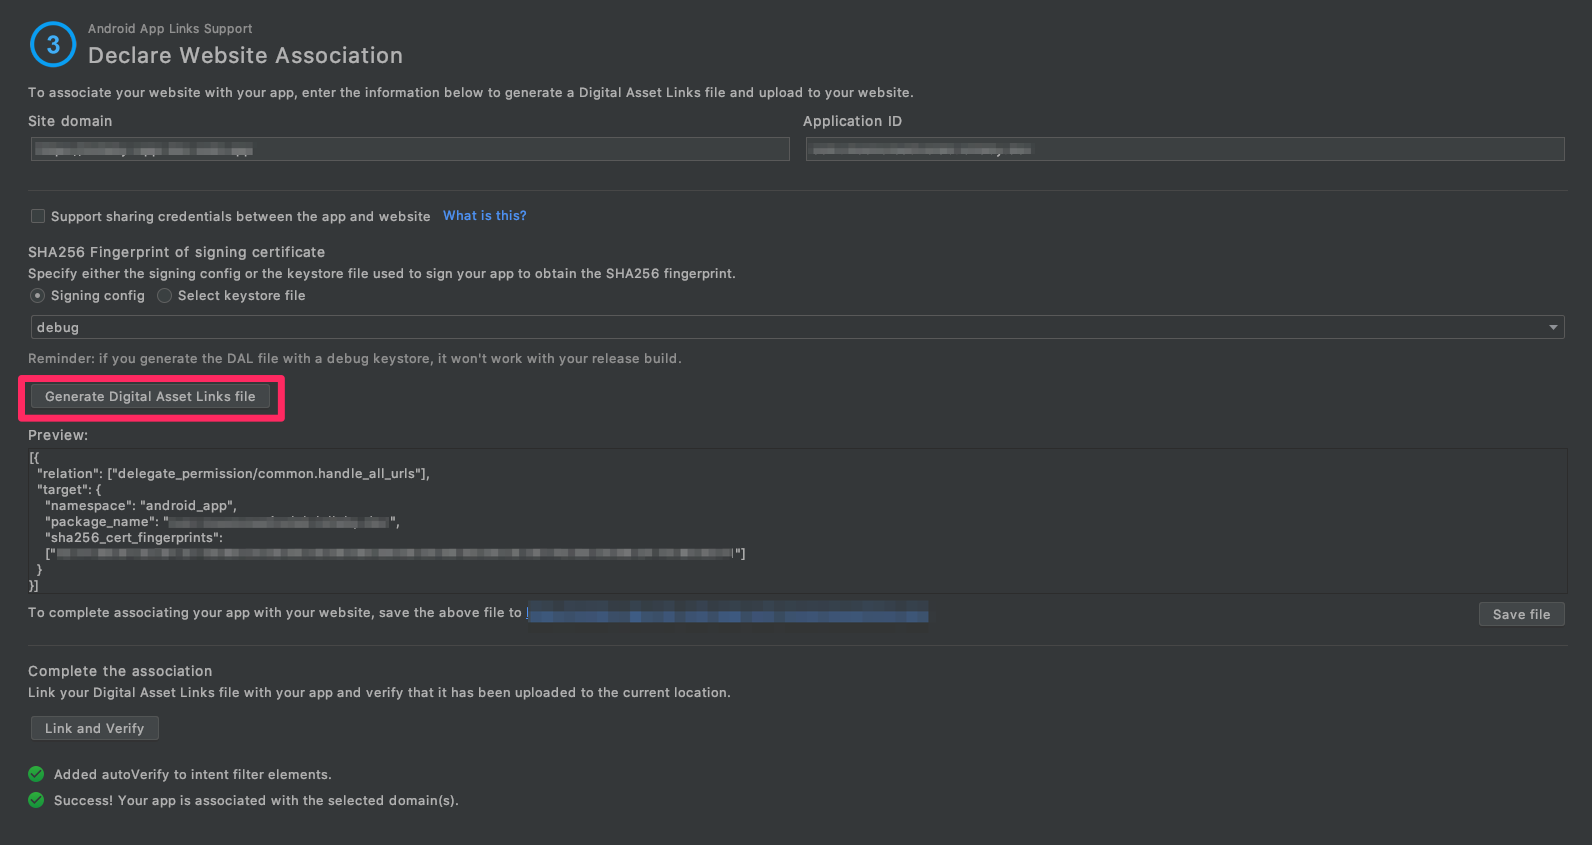
- Android側とFirebase Hosting側の準備は終わったが、AndroidStudioのApp Links Assistantで
we could not associate your app with the selected domainが発生する!

Associate Website でassetlinks.jsonを再度生成してアップして見たらうまくいきました
 参考になったURL
iOS準備 - 編
Universal Links - Apple Developer
環境構築
-
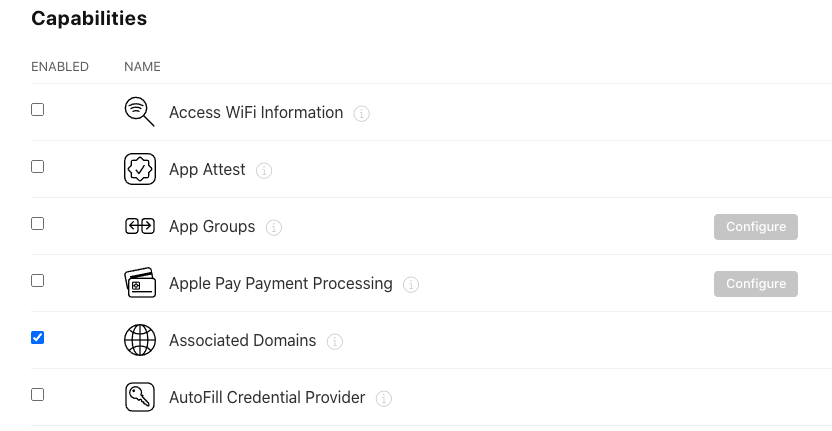
Apple Developer Portalでの設定
- 「Identifiers」>「対象のAppID」>「Capabilities」の「Associated Domains」にチェックを入れる
-
XcodeでAssociated Domainsの追加
- Xcodeを開いて、「Signin & Capabilities」で左上の「+ Capability」から「Associated Domains」を追加し、Domainsを設定します
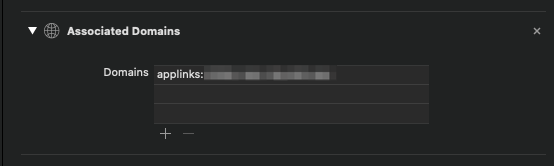
追加する値は
applinks:[ドメイン]になります。Firebase Hostingを使用していてドメインがtest-dev.web.appであれば
applinks:test-dev.web.appとして設定します。
今回の場合だとapplinks:example-deeplink-devになります。
テスト
-
App Search API Validation Tool
- Apple公式の関連付けファイルチェッカー
公式であるのはあるんですが、、
使い方は簡単で URL入力箇所に関連付けファイルを設置したURLを入力し、「Test URL」をクリックすれば
暫く経つと結果が表示されます。。。が
.well-known 配下に設置した場合は Error no apps associated with url が発生します
関連付けできてない事になってしまうので、今回の場合だとテストになりませんでした ><。
次回は素直に .well-known使わずにやってみたいと思います。。
バッドノウハウ
- UniversalLinksが動作しない
-
Objective-C - Universal Linkが実現できず困っています。|teratail
- ↑の
「Target Membership」にチェックを入れるを試してみる。 - 「Build Phases」>「Copy Bundle Resources」に該当のentitlementを追加してみる
- ↑の
-
Objective-C - Universal Linkが実現できず困っています。|teratail
参考URL
- URLスキーム・独自ディープリンク実装に代わる、Universal Links(iOS 9で導入)でより良いUXを実現 - Qiita
- Universal Linksを試してみました。関連づけファイル(apple-app-site-association)はS3に置きました。
- 【iOS】Universal Links と Custom URL Scheme についてのメモ
- HostingでUniversal Links対応する | 杏z学習帳
- iOSアプリのユニバーサルリンクの仕組み - lasciva blog
- UniversalLinks(ユニバーサルリンク)「apple-app-site-association」の書き方 パラメーター対応(iOS13以降) - Qiita
Flutter準備 - 編
Flutterの場合
今回は uni_links というパッケージを使います。
Platform Channelsを使って自前で実装しても良さそうかと思います ![]()
パッケージ導入し、↓Streamをlistenしときます
    // Webページからアプリへ戻ってきた際に呼ばれる
    getLinksStream().listen((String uri) async {
      if (uri.startsWith('https://example-deeplink') {
           // 何らかのハンドリング処理
      }
    });