イメージ
設定
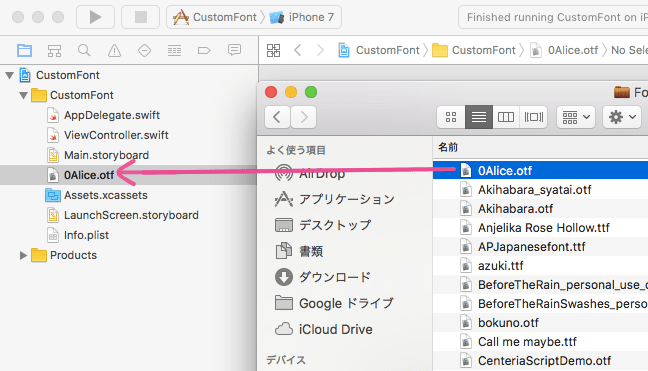
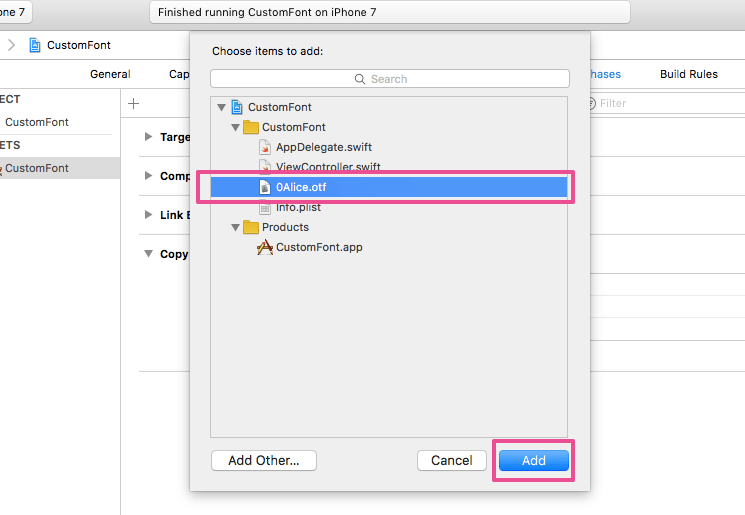
1. フォントファイルをXcodeのプロジェクトにドラッグ&ドロップで追加。
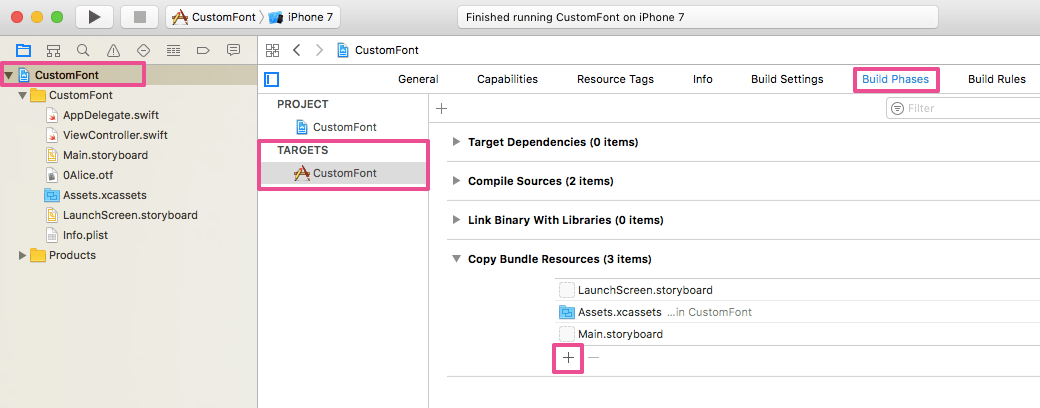
2. TARGETS → Build → Copy Bundle Resources → +ボタンから先程追加したフォントファイルを追加。
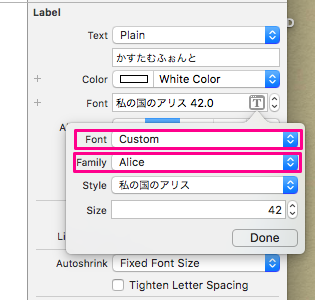
StoryBoardでフォントを指定する
Labelの設定で「Font」をCustomにして「Family」で追加したフォントを指定します。
コードでフォントを指定する
.swift
import UIKit
class ViewController: UIViewController {
override func viewDidLoad() {
super.viewDidLoad()
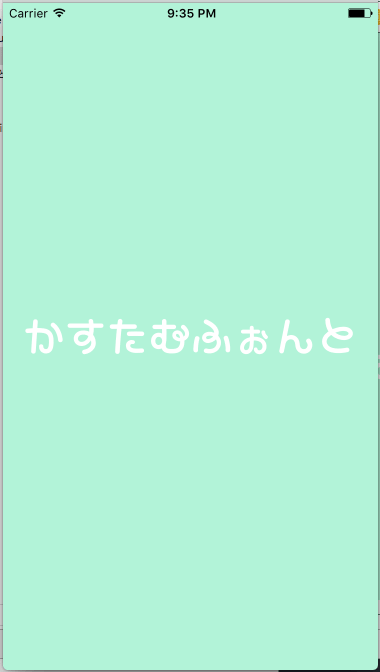
let customFont: UILabel = UILabel(frame: CGRect(x: 100, y: 100, width: 200, height: 100))
customFont.text = "かすたむふぉんと"
// UIFontのnameで追加したフォント名を指定します。
customFont.font = UIFont(name: "Alice", size: 50)
self.view.addSubview(customFont)
}
}
使用できるフォント
.ttf
.oft
以上の2種類になります。
.ttcも使えるとの情報もありましたが未確認です。
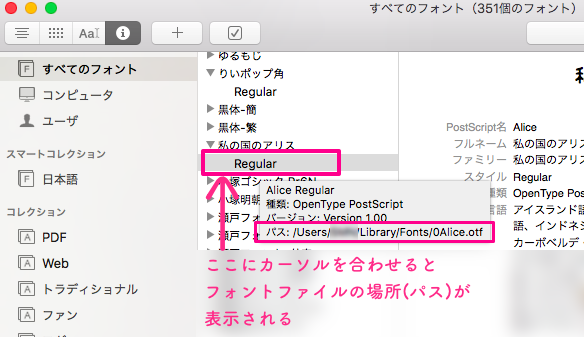
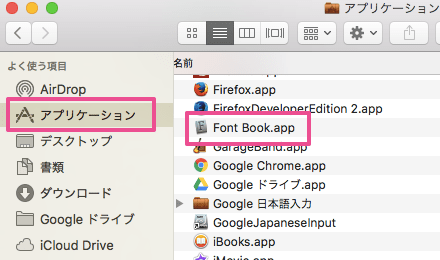
フォントファイルの場所の確認方法
まずアプリケーションからFont Bookを開きます。
該当のフォントを選択し、左上のiマークをクリック。右側の「場所」という項目がフォントがある場所になります。
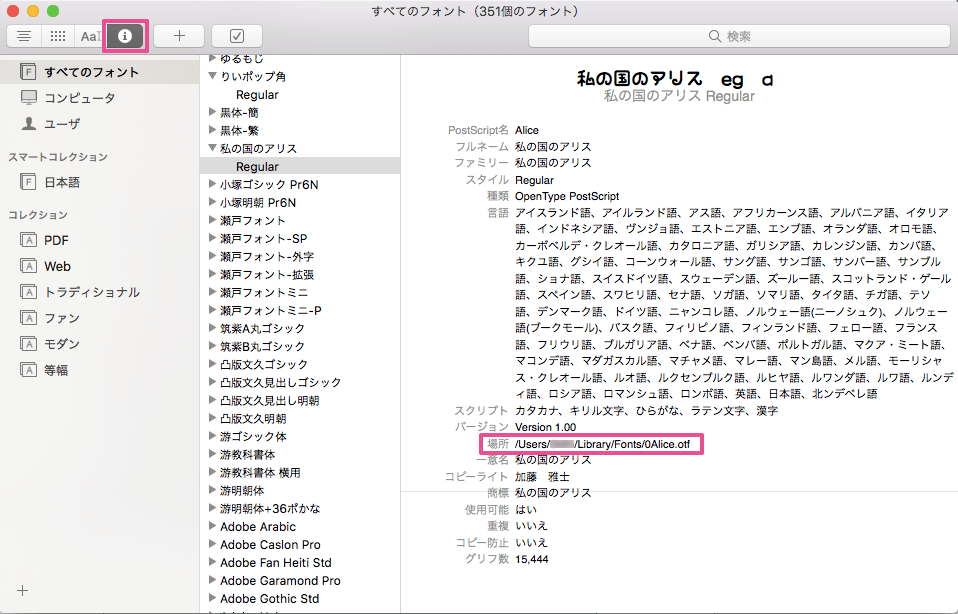
フォントによっては先程の「場所」という項目がない場合があります。
その場合はフォントの上にカーソルを合わせると「パス」という項目が出てきますので、そちらで確認することができます。