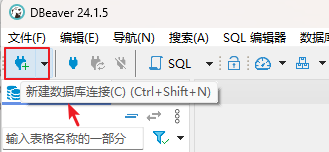
1.数据库准备
①在DBeaver中新建数据库-wiki-新建表-Test-插入数据
②连接mysql和DBeaver

2.集成Mybatis(持久层框架mapper)
①在pom文件中配置mybatis
maven仓库(找配置的网站):https://mvnrepository.com/
        <dependency>
			<groupId>org.mybatis.spring.boot</groupId>
			<artifactId>mybatis-spring-boot-starter</artifactId>
			<version>3.0.3</version>
		</dependency>
②集成mysql连接:
⭐在pom文件中添加依赖
        <dependency>
			<groupId>com.mysql</groupId>
			<artifactId>mysql-connector-j</artifactId>
			<version>9.0.0</version>
		</dependency>
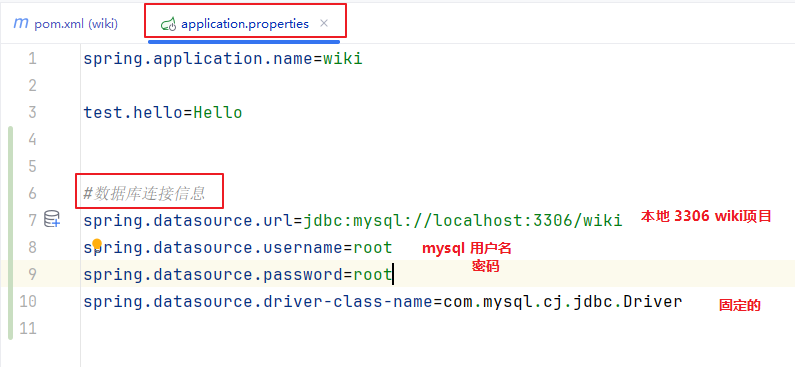
⭐在配置文件中配置数据库连接:连接springboot与mysql
3.三层结构
①新建pojo层-新建测试类Test(这一层实体类就是和数据库表一一映射)
②新建mapper层-新建接口Test(是接口,而不是类)
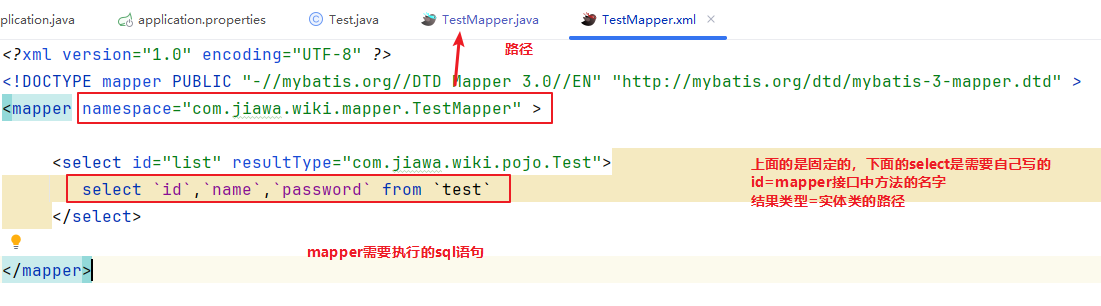
在resources---新建mapper包---TestMapper.xml(写sql语句)
③新建service层-新建特测试Test(加@Service注解:加上交给spring来管理了)
④新建controller层-新建测试类(写代码)
⑤postman中测试,是否跑的通
4.配置文件
①要让项目知道哪个是持久层:在启动类里面加注解:@MapperScan("com.jiawa.wiki.mapper")
②要让整个项目知道TestMapper.xml就是要执行的sql语句:
在application.properties配置文件中,配置相关路径
#配置mybatis所有Mapper.xml所在的路径
mybatis.mapper-locations=classpath:/mapper/**/*.xml
5.集成Mybatis官方代码生成器
在DBeaver中新建表-Demo-插入数据
①在pom文件中添加依赖mybatis generator:自动生成代码插件
<plugin>
				<groupId>org.mybatis.generator</groupId>
				<artifactId>mybatis-generator-maven-plugin</artifactId>
				<version>1.4.0</version>
				<configuration>
					<configurationFile>src/main/resources/generator/generator-config.xml</configurationFile>
					<overwrite>true</overwrite>
					<verbose>true</verbose>
				</configuration>
				<dependencies>
					<dependency>
						<groupId>mysql</groupId>
						<artifactId>mysql-connector-java</artifactId>
						<version>8.0.22</version>
					</dependency>
				</dependencies>
</plugin>
②在resource--新建generator包-- 新建文件generator-config.xml,在文件中添加以下:
<?xml version="1.0" encoding="UTF-8"?>
<!DOCTYPE generatorConfiguration
        PUBLIC "-//mybatis.org//DTD MyBatis Generator Configuration 1.0//EN"
        "http://mybatis.org/dtd/mybatis-generator-config_1_0.dtd">

<generatorConfiguration>
    <context id="Mysql" targetRuntime="MyBatis3" defaultModelType="flat">

        <!-- 自动检查关键字,为关键字增加反引号 -->
        <property name="autoDelimitKeywords" value="true"/>
        <property name="beginningDelimiter" value="`"/>
        <property name="endingDelimiter" value="`"/>

        <!--覆盖生成XML文件-->
        <plugin type="org.mybatis.generator.plugins.UnmergeableXmlMappersPlugin" />
        <!-- 生成的实体类添加toString()方法 -->
        <plugin type="org.mybatis.generator.plugins.ToStringPlugin"/>

        <!-- 不生成注释 -->
        <commentGenerator>
            <property name="suppressAllComments" value="true"/>
        </commentGenerator>

        <jdbcConnection driverClass="com.mysql.cj.jdbc.Driver"
                        connectionURL="jdbc:mysql://localhost:3306/wiki?serverTimezone=Asia/Tokyo"
                        userId="root"
                        password="root">
        </jdbcConnection>

        <!-- domain类的位置 -->
        <javaModelGenerator targetProject="src\main\java"
                            targetPackage="com.jiawa.wiki.pojo"/>

        <!-- mapper xml的位置 -->
        <sqlMapGenerator targetProject="src\main\resources"
                         targetPackage="mapper"/>

        <!-- mapper类的位置 -->
        <javaClientGenerator targetProject="src\main\java"
                             targetPackage="com.jiawa.wiki.mapper"
                             type="XMLMAPPER"/>

        <table tableName="demo" domainObjectName="Demo"/>
        <!--<table tableName="ebook"/>-->
        <!--<table tableName="category"/>-->
        <!--<table tableName="doc"/>-->
        <!--<table tableName="content"/>-->
        <!--<table tableName="user"/>-->
        <table tableName="ebook_snapshot"/>
    </context>
</generatorConfiguration>
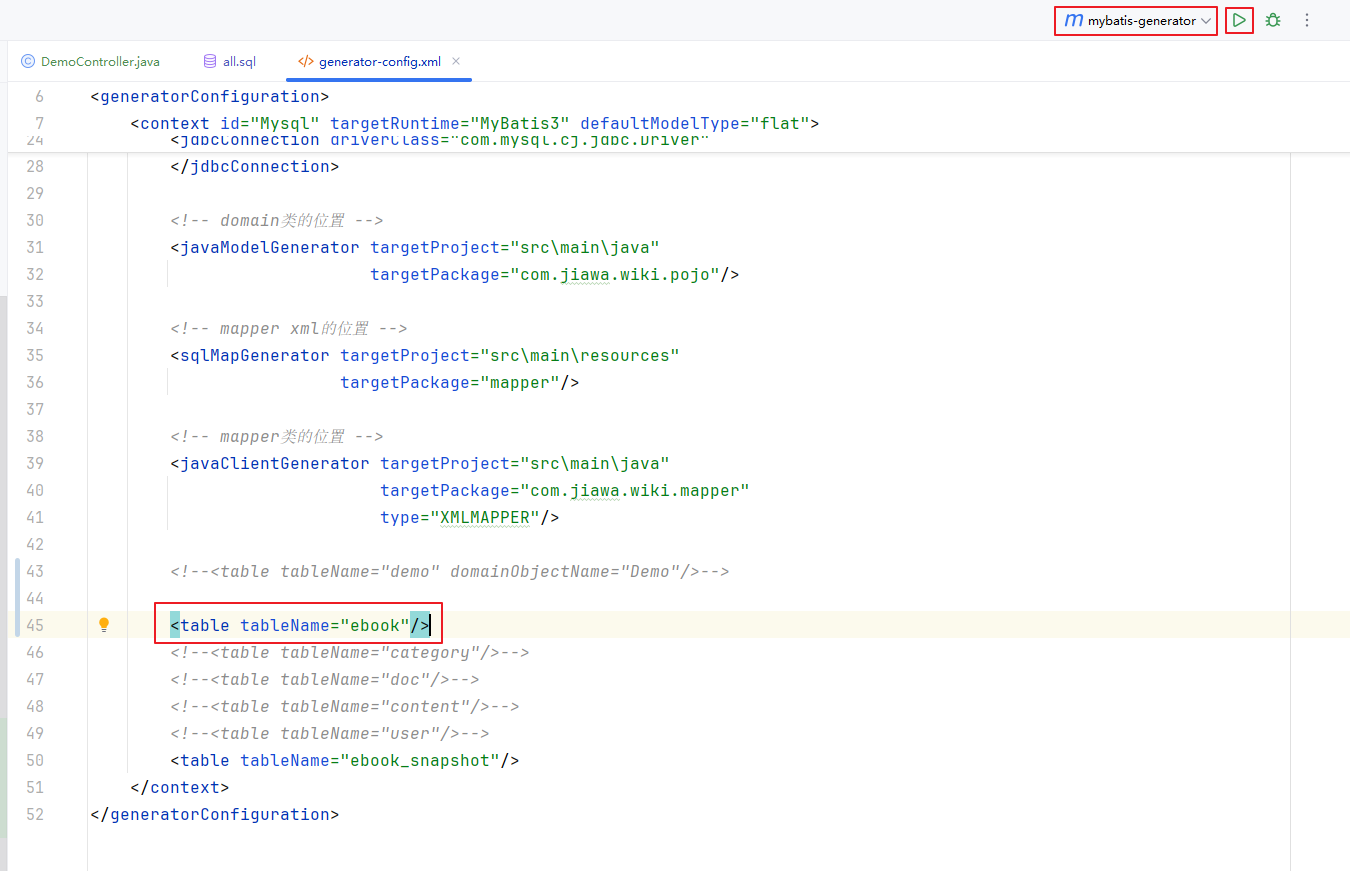
③配置代码生成器的启动命令(在generator-config.xml文件中)


④在generator-config.xml文件中:
<table tableName="demo" domainObjectName="Demo"/>
⑤启动会自动生成四个类
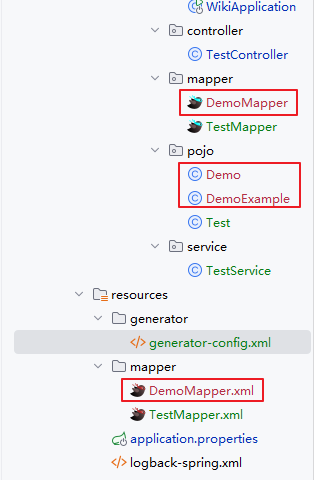
⑥四层结构:mapper层demo已经有了,直接从Service层开始(复制test 进行替换即可 ctrl+r:替换 点match:准确替换,而非模糊 ),写controller层,测试
6.电子书列表查询接口开发
①在DBeaver-建Ebook表-插入数据
②在generator-config.xml文件中,放开ebook表,生成四个ebook类
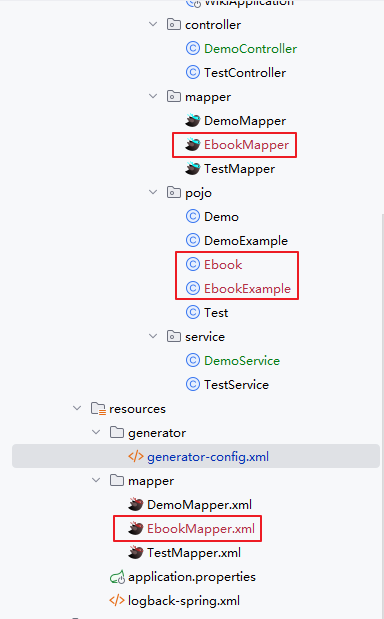
③mapper层ebook已经有了,直接从Service层开始(复制test 进行替换即可 ctrl+r:替换 点match:准确替换,而非模糊 ),写controller层,测试
7.统一返回值
①新建包resp-新建类CommonResp
package com.jiawa.wiki.resp;

public class CommonResp<T> {

    /**
     * 业务上的成功或失败
     */
    private boolean success = true;

    /**
     * 返回信息
     */
    private String message;

    /**
     * 返回泛型数据,自定义类型
     */
    private T content;

    public boolean getSuccess() {
        return success;
    }

    public void setSuccess(boolean success) {
        this.success = success;
    }

    public String getMessage() {
        return message;
    }

    public void setMessage(String message) {
        this.message = message;
    }

    public T getContent() {
        return content;
    }

    public void setContent(T content) {
        this.content = content;
    }

    @Override
    public String toString() {
        final StringBuffer sb = new StringBuffer("ResponseDto{");
        sb.append("success=").append(success);
        sb.append(", message='").append(message).append('\'');
        sb.append(", content=").append(content);
        sb.append('}');
        return sb.toString();
    }
}
②改造返回值

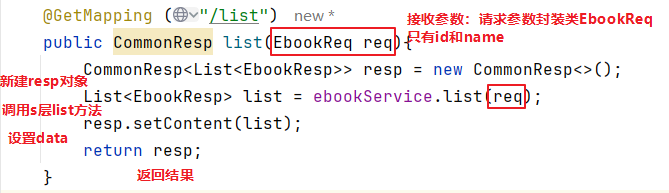
8.封装请求参数
根据名称模糊查询电子书(根据Id和name查询)
⭐请求参数封装:建包-req-建类-EbookReq(Id和name成员变量 get set方法 tostring方法)
⭐返回结果封装:建包-resp-建类-EbookResp
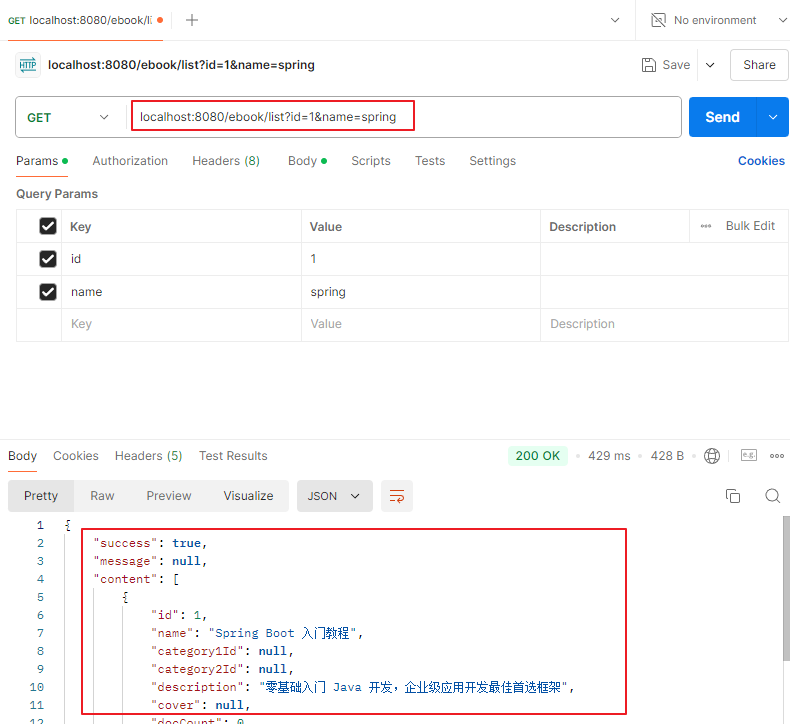
①在controller层EbookController填入参数
②在service层:模糊查询

③postman测试:参数传递
9.制作CopyUtil封装BeanUtils
①建包util--建类CopyUtil
②
⭐小技巧:
快速生成一个变量:Ctrl+Alt+V
快速生成循环框架:iter