
はじめに
こんにちは、Watanabe Jin(@Sicut_study)です。
普段はReactを使った実践的なハンズオンを投稿しています。

今回はApple Musicのようなかっこいい音楽プレイヤーを作成したいと思います。
実際にデプロイすればオンラインで音楽を聞くことができる実用的なものになっているので、ぜひハンズオンをして学んでみてください。
動画で解説
この記事よりももっと細かいところまで知りたい方は動画教材もあります。
もしReactやTypeScriptに不安がある方、やったことがない方は以下の動画をみてください!
対象者
- Reactを初めてやる
- HTMLの経験がある
- JavaScriptをもっと学びたい
- TypeScirptを学んでみたい
今回のハンズオンはReactの基本が学べるので、Reactを全くやったことがない人におすすめです。
1. Reactの環境構築
Reactとかっこいい画面を簡単に作れるコンポーネントライブラリShadcnが実行できる環境を用意します。
Node.jsが実行できる環境がお手元にない方は以下を参考にそれぞれのOSにあった方法でインストールしてください!
インストールができたことを以下の確認で確認してください
❯ node -v
v18.17.0
Reactのプロジェクトを構築します。
今回はViteを利用していきます。Viteは次世代のビルドツールで早くて無駄のない環境を提供してくれます。
❯ npm create vite
Need to install the following packages:
  create-vite@5.5.2
Ok to proceed? (y) y
✔ Project name: … music-player
✔ Select a framework: › React
✔ Select a variant: › TypeScript

$ cd music-player/
$ npm i
$ npm run dev
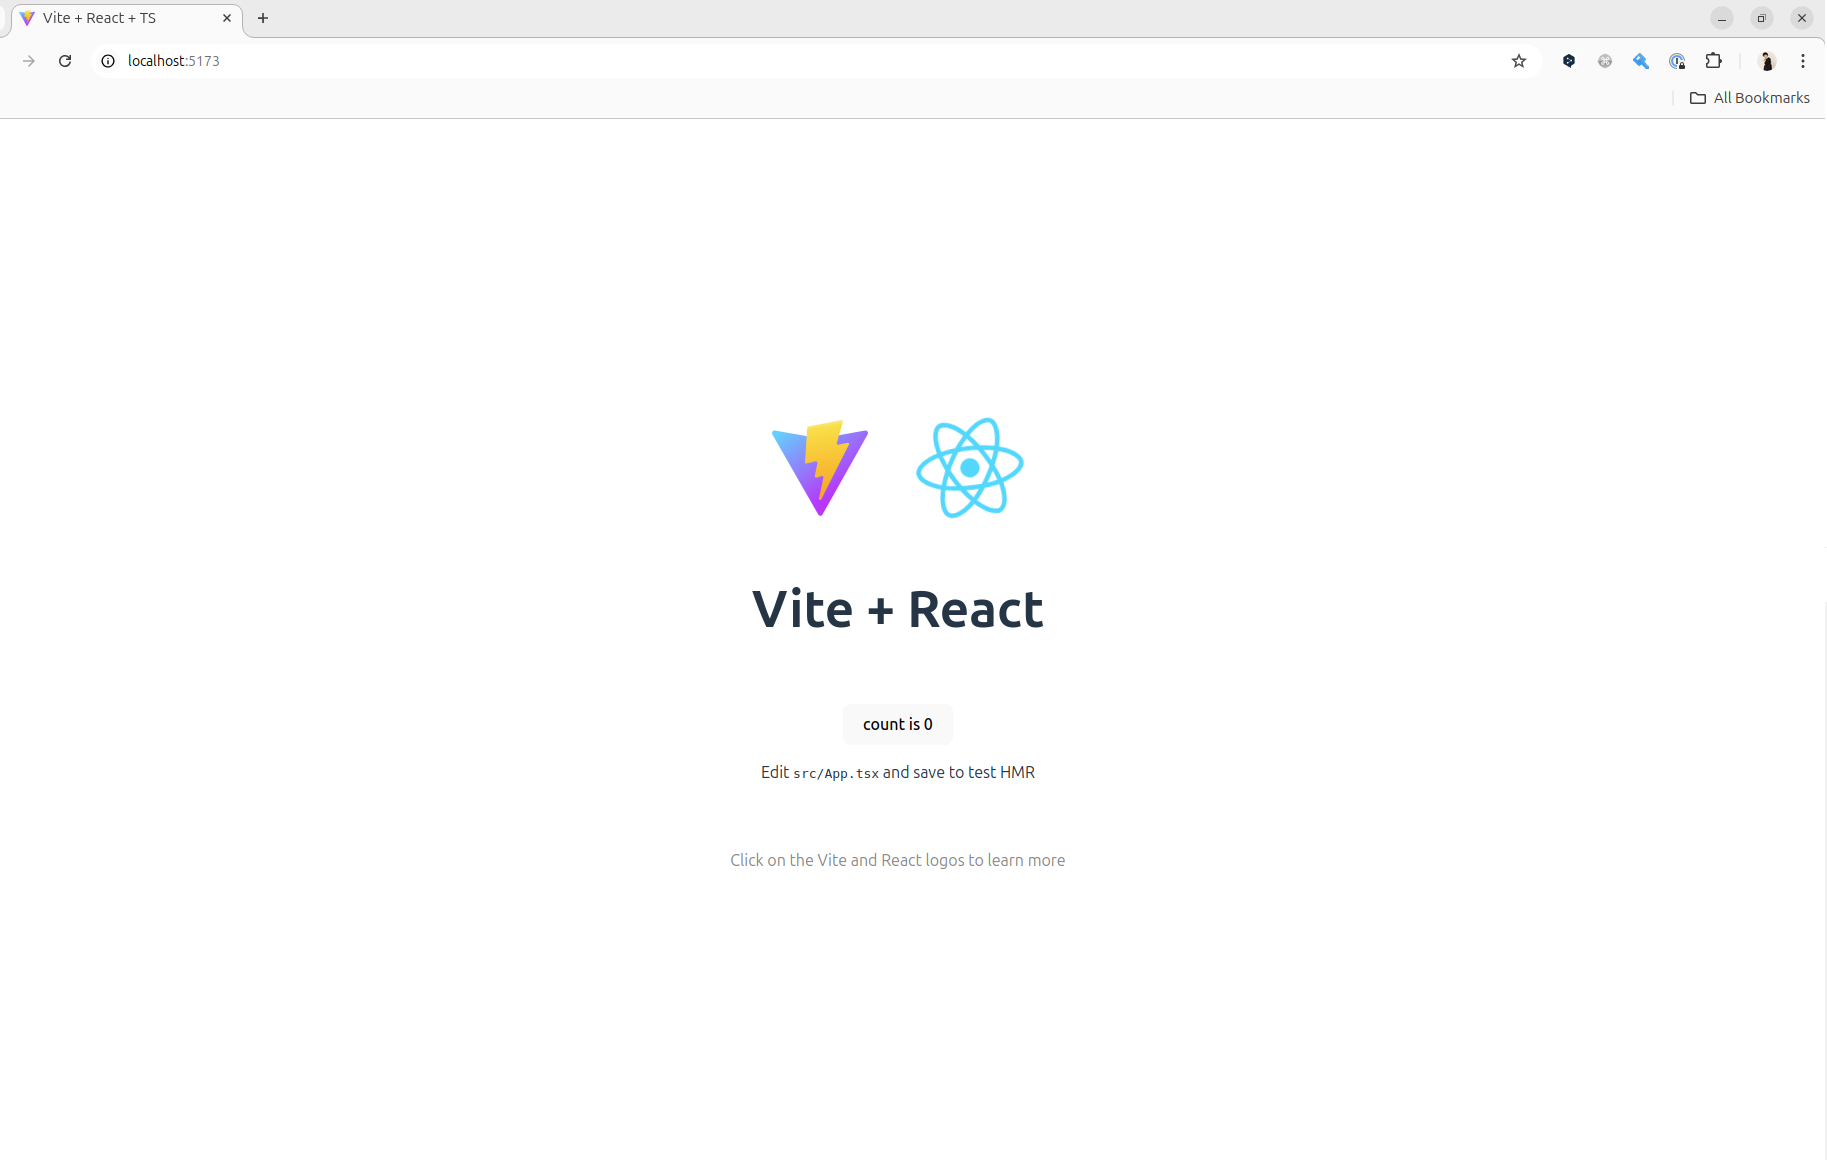
http://localhost:5173にアクセスして以下の画面が表示されればReact環境が無事できています。
次にShadcnを利用するために、Shadcnの内部で利用しているTailwindCSSを導入していきます。
$ npm install -D tailwindcss@3.4.13 postcss autoprefixer
$ npx tailwindcss init -p
プロジェクトをVSCodeで開いてtailwind.config.jsを以下に変えます
/** @type {import('tailwindcss').Config} */
module.exports = {
  content: [
    "./src/**/*.{js,jsx,ts,tsx}",
  ],
  theme: {
    extend: {},
  },
  plugins: [],
}
src/index.cssを変更します
@tailwind base;
@tailwind components;
@tailwind utilities;
src/App.tsxを変更してスタイルがあたるかをチェックします
function App() {
  return (
    <>
      <div>
        <button className="bg-blue-500 hover:bg-blue-700 text-white font-bold py-2 px-4 rounded">
          Button
        </button>
      </div>
    </>
  );
}

export default App;
一度サーバーを落としてnpm run devで起動したらボタンが表示されました

TailwindCSSが導入できたので、Shadcnを導入します。
tsconfig.jsonを以下に修正します。
{
  "files": [],
  "references": [
    { "path": "./tsconfig.app.json" },
    { "path": "./tsconfig.node.json" }
  ],
    "compilerOptions": {
    "baseUrl": ".",
    "paths": {
      "@/*": ["./src/*"]
    }
  }
}
tsconfig.app.jsonを修正します。
{
  "compilerOptions": {
    "target": "ES2020",
    "useDefineForClassFields": true,
    "lib": ["ES2020", "DOM", "DOM.Iterable"],
    "module": "ESNext",
    "skipLibCheck": true,

    /* Bundler mode */
    "moduleResolution": "bundler",
    "allowImportingTsExtensions": true,
    "isolatedModules": true,
    "moduleDetection": "force",
    "noEmit": true,
    "jsx": "react-jsx",

    /* Linting */
    "strict": true,
    "noUnusedLocals": true,
    "noUnusedParameters": true,
    "noFallthroughCasesInSwitch": true,
    "baseUrl": ".",
    "paths": {
      "@/*": [
        "./src/*"
      ]
    }
  },
  "include": ["src"]
}
次に以下を実行します。
$ npm i -D @types/node
そしてvite.config.tsを修正します。
import path from "path"
import react from "@vitejs/plugin-react"
import { defineConfig } from "vite"

export default defineConfig({
  plugins: [react()],
  resolve: {
    alias: {
      "@": path.resolve(__dirname, "./src"),
    },
  },
})
それでは準備ができたので実際にShadcnを初期化して入れていきます。
$ npx shadcn@latest init

Need to install the following packages:
shadcn@2.1.0
Ok to proceed? (y) y
✔ Preflight checks.
✔ Verifying framework. Found Vite.
✔ Validating Tailwind CSS.
✔ Validating import alias.
✔ Which style would you like to use? › New York
✔ Which color would you like to use as the base color? › Neutral
✔ Would you like to use CSS variables for theming? … no / yes
✔ Writing components.json.
✔ Checking registry.
✔ Updating tailwind.config.js
✔ Updating src/index.css
✔ Installing dependencies.
✔ Created 1 file:
  - src/lib/utils.ts

Success! Project initialization completed.
You may now add components.
試しにボタンコンポーネントをダウンロードしてきて、使ってみます。
$ npx shadcn@latest add button
import { Button } from "./components/ui/button";

function App() {
  return (
    <>
      <div>
        <Button>Click me</Button>
      </div>
    </>
  );
}

export default App;
画面を確認してみます。npm run devでサーバーを起動した状態で確認します。
環境構築がすべて終わりました。
2. 素材の用意
音源(mp3)とジャケット画像を用意する必要があるので準備していきます。
今回はYoutubeでおなじみのフリー音源である「魔王魂」から人気曲5つを使いたいと思います。
以下の素材をダウンロードして、ディレクトリのpublicに格納してください
音源は、「ダウンロード」をクリックして「mp3」を押すとダウンロードができます。
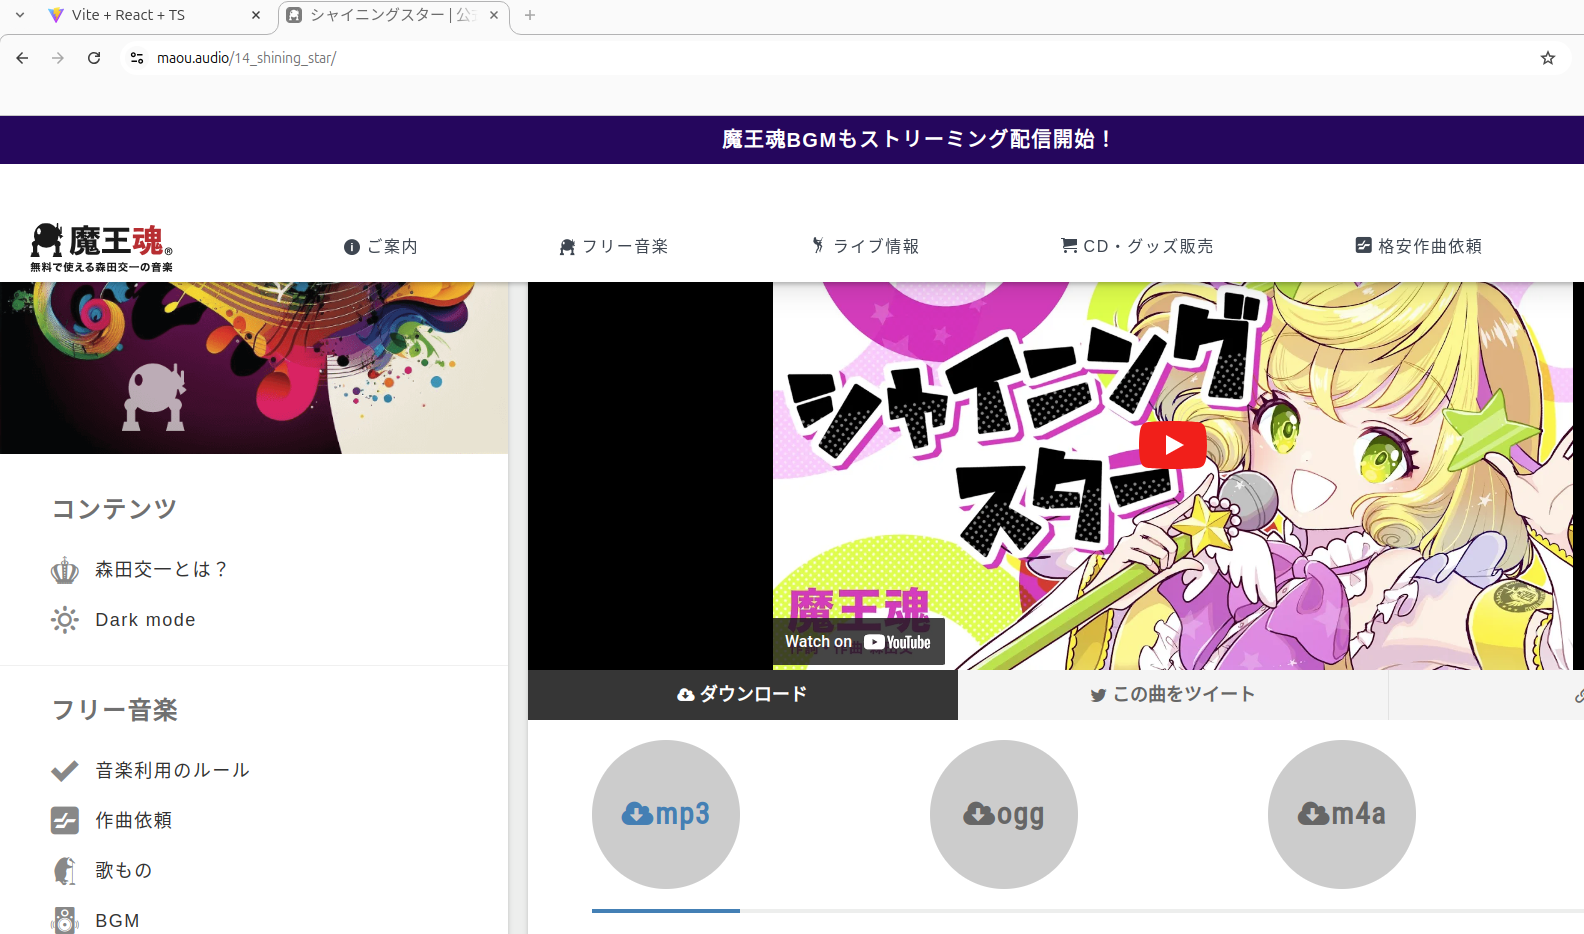
ジャケットはリンクから右クリックで画像を保存してください。
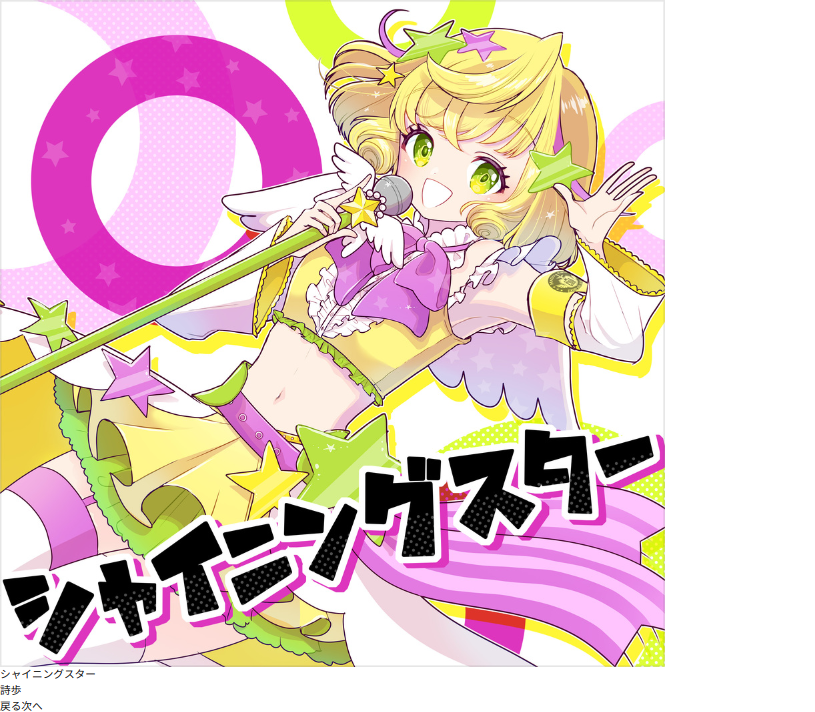
1. シャイニングスター
音源
ジャケット
2. 12345
音源
ジャケット
3. Burning Heart
音源
ジャケット
4. ハルジオン
音源
ジャケット
5. Bipolar Disorder Outside ver.
音源
ジャケット
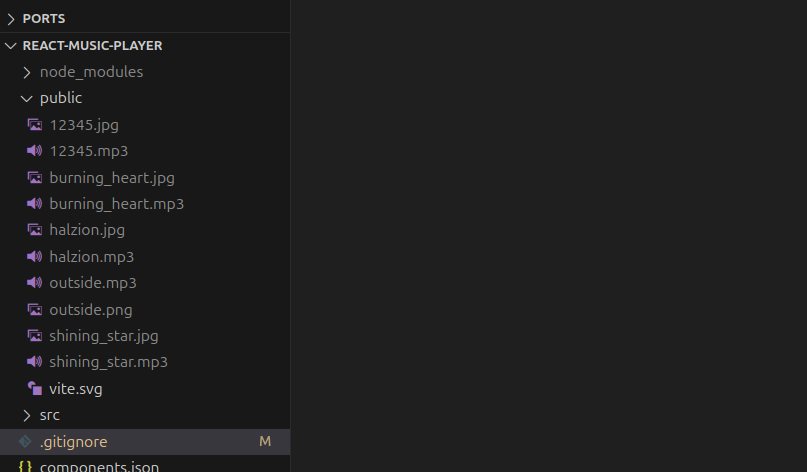
名前は分かりづらいので、曲名にしましょう。
最終的にはこのようになりました。
3. ジャケットを切り替える
まずはジャケットを切り替える実装をしていきましょう
import { useState } from "react";

type Song = {
  id: number;
  title: string;
  artist: string;
  coverUrl: string;
  musicUrl: string;
};

const songs: Song[] = [
  {
    id: 1,
    title: "シャイニングスター",
    artist: "詩歩",
    coverUrl: "/shining_star.jpg",
    musicUrl: "/shining_star.mp3",
  },
  {
    id: 2,
    title: "Burning Heart",
    artist: "KEI",
    coverUrl: "/burning_heart.jpg",
    musicUrl: "/burning-heart.mp3",
  },
  {
    id: 3,
    title: "12345",
    artist: "Mary",
    coverUrl: "/12345.jpg",
    musicUrl: "/12345.mp3",
  },
  {
    id: 4,
    title: "ハルジオン",
    artist: "KEI",
    coverUrl: "/halzion.jpg",
    musicUrl: "/halzion.mp3",
  },
  {
    id: 5,
    title: "Bipolar Disorder Outside ver.",
    artist: "森田交一",
    coverUrl: "/outside.png",
    musicUrl: "/outside.mp3",
  },
]

function App() {
  const [currentSongIndex, setCurrentSongIndex] = useState(0);
  const currentSong = songs[currentSongIndex];

  const handlePrevious = () => {
    setCurrentSongIndex(
      (prevIndex) => (prevIndex - 1 + songs.length) % songs.length
    );
  };

  const handleNext = () => {
    setCurrentSongIndex((prevIndex) => (prevIndex + 1) % songs.length);
  };

  return (
    <div>
      <div>
        <img src={currentSong.coverUrl} alt="Cover" />
      </div>
      <div>
        <h2>{currentSong.title}</h2>
        <p>{currentSong.artist}</p>
      </div>
      <div>
        <button onClick={handlePrevious}>戻る</button>
        <button onClick={handleNext}>次へ</button>
      </div>
    </div>
  );
}

export default App;
「次へ」「戻る」でジャケットを切り替えることができます。
今回はReactの肝になるuseStateを利用して画像変更をしているので、ここから解説していきます。
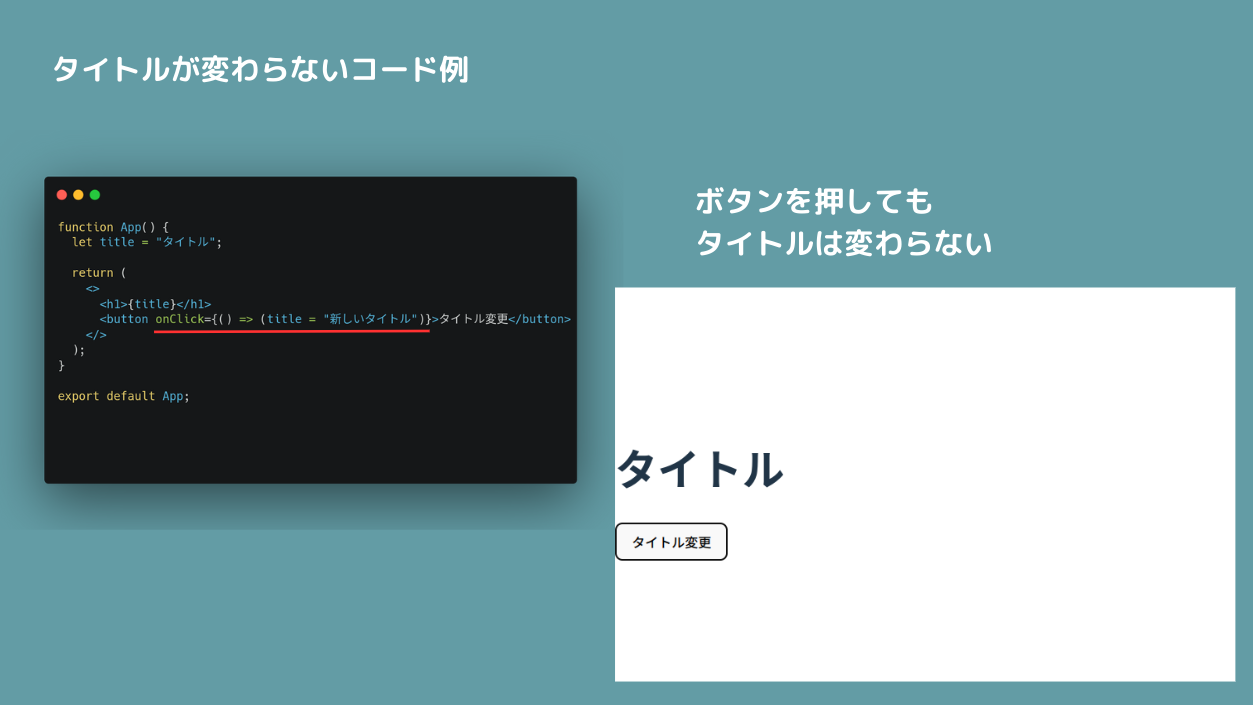
例えば、ボタンを押したらタイトルを切り替えるようなアプリを作ったとします。
ここでボタンのonClick(クリックしたら実行する関数)でタイトルの文字列を変更したとします。
ボタンをクリックしたときにtitleの値は新しいタイトルに変わるのですが、画面は変わらないのです。
ここで利用するのがStateになります。
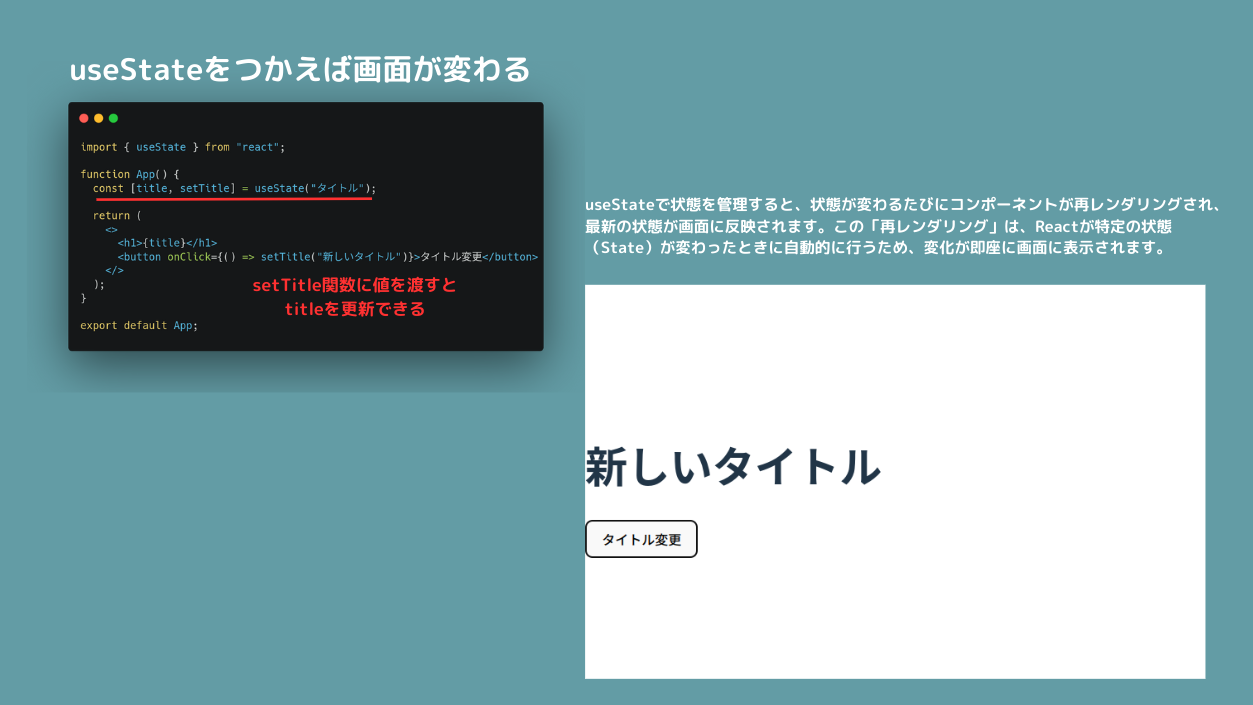
stateを利用することで値の変更をReactが検知してくれて、変更があったときに画面を再レンダリングしてくれます。これによりタイトルが変更されました。
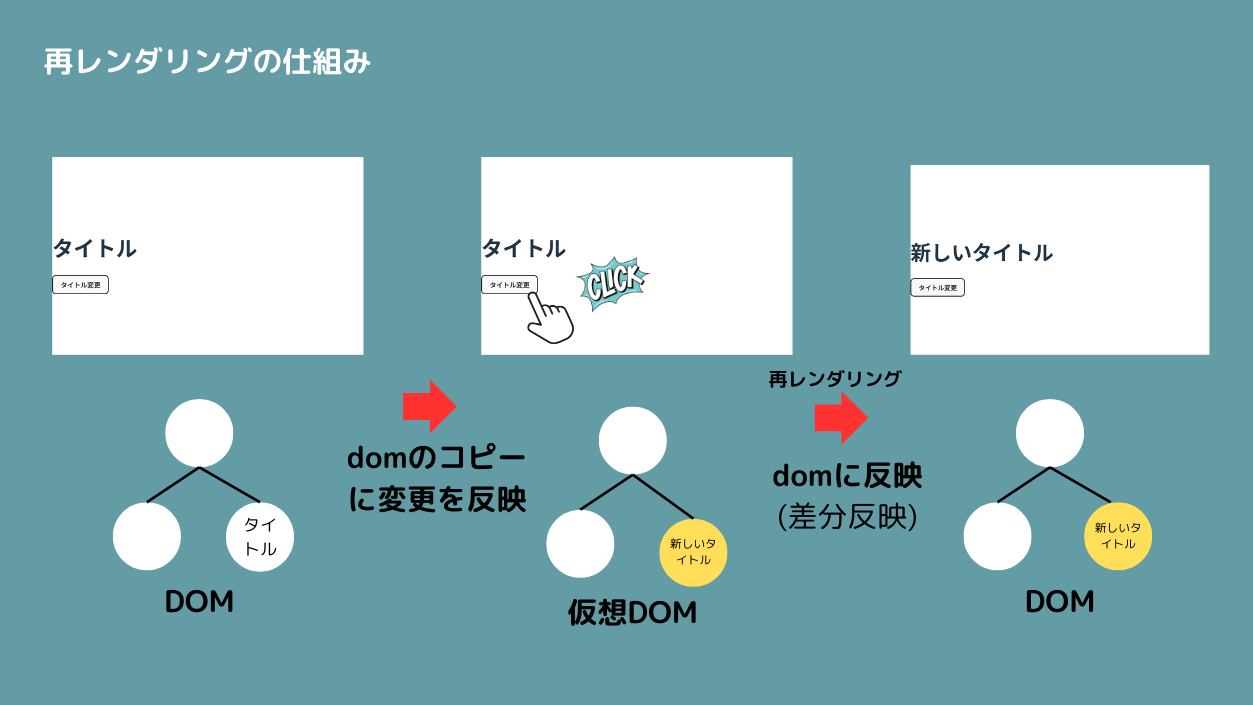
再レンダリングはこのような仕組みになっています。
実際に画面に表示されているのがDOMといい、Reactではstateで管理された値が変更されたら、その変更差分を仮想DOMと言われるDOMのコピーに対して変更を反映します。そのあとで実際のDOMに変更を反映するため再レンダリングされて画面が切り替わります。これはuseStateを利用することで実現できることなのです。
コードを解説していきます。
  const [currentSongIndex, setCurrentSongIndex] = useState(0);
  const currentSong = songs[currentSongIndex];
今回は現在のジャケットのIDをuseStateで管理できるようにしています。
このステートを変えることでジャケット画像を変更して再レンダリングで画面を更新することができます。
currentSongを使ってジャケット、タイトル、アーティストを画面に表示しています。
「次へ」「戻る」を押すと、currentSongIndexのステートが更新されるため、再描画が走り画面も切り替わるようになっています。
ボタンにはそれぞれクリックしたときのアクションがonClickで設定されています。
        <button onClick={handlePrevious}>戻る</button>
        <button onClick={handleNext}>次へ</button>
例えば、次へボタンを押したとすると以下の関数が実行されます。
  const handleNext = () => {
    setCurrentSongIndex((prevIndex) => (prevIndex + 1) % songs.length);
    setIsPlaying(false);
  };
例えば、1つ目のジャケットから次に進もうしたときには、
prevIndex : 0 (配列のインデックスは0からスタート)
prevIndex + 1 : 1
songs.length : 5
つまり、1 % 5で5で割ったときの余りである1となります。
それがcurrentSongIndexにセットされることで、currentSongはsongs[0]->songs[1]へと変わります。
曲を切り替えたら再生マークが表示されるようにIsPlayingもfalseへと変えます。
4. 音楽を再生する
次はcurrentSongの音楽を再生できるようにしていきます。
ここではaudioタグを利用することで再生をします。
import { useState, useRef } from "react";

type Song = {
  title: string;
  artist: string;
  coverUrl: string;
  musicUrl: string;
};

const songs: Song[] = [
  {
    title: "シャイニングスター",
    artist: "詩歩",
    coverUrl: "public/shining_star.jpg",
    musicUrl: "shining_star.mp3",
  },
  {
    title: "Burning Heart",
    artist: "KEI",
    coverUrl: "public/burning_heart.jpg",
    musicUrl: "burning_heart.mp3",
  },
  {
    title: "12345",
    artist: "Mary",
    coverUrl: "public/12345.jpg",
    musicUrl: "12345.mp3",
  },
  {
    title: "ハルジオン",
    artist: "KEI",
    coverUrl: "public/halzion.jpg",
    musicUrl: "halzion.mp3",
  },
  {
    title: "Bipolar Disorder Outside ver.",
    artist: "森田交一",
    coverUrl: "public/outside.png",
    musicUrl: "outside.mp3",
  },
];

function App() {
  const [currentSongIndex, setCurrentSongIndex] = useState(0);
  const [isPlaying, setIsPlaying] = useState(false);
  const audioRef = useRef<HTMLAudioElement>(null);
  const currentSong = songs[currentSongIndex];

  const handlePrevious = () => {
    setCurrentSongIndex(
      (prevIndex) => (prevIndex - 1 + songs.length) % songs.length
    );
    setIsPlaying(false);
  };

  const handleNext = () => {
    setCurrentSongIndex((prevIndex) => (prevIndex + 1) % songs.length);
    setIsPlaying(false);
  };

  const togglePlayPause = () => {
    if (!audioRef.current) return;

    if (isPlaying) {
      audioRef.current.pause();
    } else {
      audioRef.current.play();
    }
    setIsPlaying(!isPlaying);
  };

  return (
    <div>
      <div>
        <img
          src={currentSong.coverUrl}
          alt="Cover"
          style={{ width: "300px", height: "300px" }}
        />
      </div>
      <div>
        <h2>{currentSong.title}</h2>
        <p>{currentSong.artist}</p>
      </div>
      <div>
        <button onClick={handlePrevious}>戻る</button>
        <button onClick={togglePlayPause}>
          {isPlaying ? "一時停止" : "再生"}
        </button>
        <button onClick={handleNext}>次へ</button>
      </div>
      <audio ref={audioRef} src={currentSong.musicUrl} onEnded={handleNext} />
    </div>
  );
}

export default App;
こんな感じの音楽プレイヤーができました。裏ではしっかり音楽がかかっています。
React では、useRef を使って 要素を参照し、JavaScript での制御を行います。これにより、ボタンのクリックで音楽を再生・停止する機能を簡単に実装できます。
例えば、useRef を使って、以下のように音楽の再生と停止を行います。
const audioRef = useRef(null);

const playAudio = () => {
  audioRef.current.play();
};

return (
  <audio ref={audioRef} src="song.mp3" />
  <button onClick={playAudio}>再生</button>
);
useRefを使うことで、仮想DOMではなく実際のDOMの要素を操作することが可能です。
通常、Reactは仮想DOM(virtual DOM)という仕組みを使って効率的にUIを更新していますが、特定のシナリオでは、実際のDOMに直接アクセスし操作する必要がある場合があります。今回の音楽再生はuseRefを利用します。
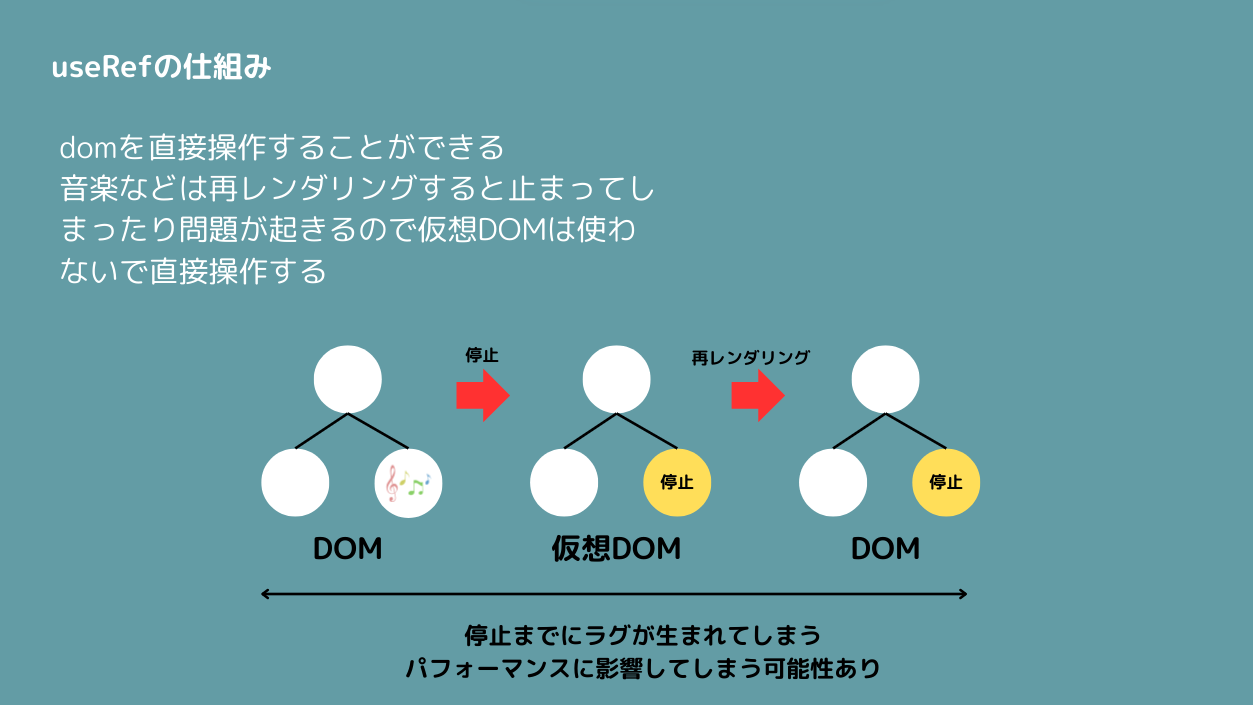
音楽などリアルタイム性が求められるものは再レンダリングで影響を受けてパフォーマンス低下になる恐れがあるため、直接DOMを操作することが一般的です。
const [isPlaying, setIsPlaying] = useState(false);
新しく再生されているかどうかを判断するステートを追加しました。
ボタンをクリックすることで、trueならfalse、falseならtrueに切り替えます。
  const togglePlayPause = () => {
    if (!audioRef.current) return;

    if (isPlaying) {
      audioRef.current.pause();
    } else {
      audioRef.current.play();
    }
    setIsPlaying(!isPlaying);
  };
audioタグのonEmdedに関数を渡すことで曲が終了したらhandleNextを実行することができます。これにより曲が終わったら自動で次の曲になります。
<audio ref={audioRef} src={currentSong.musicUrl} onEnded={handleNext} />
スタイルを当てていく
ここからはShadcnとTailwindCSSを使ってかっこいいスタイルに仕上げていきます。
まずは今回必要なコンポーネントをすべてインストールします。
$ npx shadcn add card
$ npx shadcn add slider
ボタンは先程入れているものがあるのでそちらを利用します。
import { useState, useRef } from "react";
import { Button } from "@/components/ui/button";
import { Card, CardContent } from "@/components/ui/card";
import { Pause, Play, SkipBack, SkipForward, Volume2 } from "lucide-react";
import { Slider } from "./components/ui/slider";

type Song = {
  title: string;
  artist: string;
  coverUrl: string;
  musicUrl: string;
};

const songs: Song[] = [
  {
    title: "シャイニングスター",
    artist: "詩歩",
    coverUrl: "public/shining_star.jpg",
    musicUrl: "shining_star.mp3",
  },
  {
    title: "Burning Heart",
    artist: "KEI",
    coverUrl: "public/burning_heart.jpg",
    musicUrl: "burning_heart.mp3",
  },
  {
    title: "12345",
    artist: "Mary",
    coverUrl: "public/12345.jpg",
    musicUrl: "12345.mp3",
  },
  {
    title: "ハルジオン",
    artist: "KEI",
    coverUrl: "public/halzion.jpg",
    musicUrl: "halzion.mp3",
  },
  {
    title: "Bipolar Disorder Outside ver.",
    artist: "森田交一",
    coverUrl: "public/outside.png",
    musicUrl: "outside.mp3",
  },
];

function App() {
  const [currentSongIndex, setCurrentSongIndex] = useState(0);
  const [isPlaying, setIsPlaying] = useState(false);
  const [volume, setVolume] = useState(50);
  const audioRef = useRef<HTMLAudioElement>(null);
  const currentSong = songs[currentSongIndex];

  const handlePrevious = () => {
    setCurrentSongIndex(
      (prevIndex) => (prevIndex - 1 + songs.length) % songs.length
    );
    setIsPlaying(false);
  };

  const handleNext = () => {
    setCurrentSongIndex((prevIndex) => (prevIndex + 1) % songs.length);
    setIsPlaying(false);
  };

  const togglePlayPause = () => {
    if (!audioRef.current) return;

    if (isPlaying) {
      audioRef.current.pause();
    } else {
      audioRef.current.play();
    }
    setIsPlaying(!isPlaying);
  };

  const handleVolumeChange = (value: number[]) => {
    setVolume(value[0]);
    if (audioRef.current) {
      audioRef.current.volume = value[0] / 100;
    }
  };

  return (
    <div className="flex items-center justify-center min-h-screen bg-gradient-to-br from-blue-900 to-gray-900">
      <Card className="w-full max-w-md bg-gradient-to-br from-gray-900 to-gray-800 text-white shadow-xl">
        <CardContent className="p-6">
          <div className="relative aspect-square mb-6 overflow-hidden rounded-lg shadow-2xl">
            <img
              src={currentSong.coverUrl}
              alt="Cover"
              className="w-full h-full object-cover transition-transform duration-500 ease-out hover:scale-110"
            />
          </div>
          <div className="text-center mb-6">
            <h2 className="text-2xl font-bold text-white mb-1">
              {currentSong.title}
            </h2>
            <p className="text-gray-400">{currentSong.artist}</p>
          </div>
          <div className="flex justify-between items-center mb-6">
            <Button
              variant="ghost"
              size="icon"
              onClick={handlePrevious}
              className="text-white hover:text-gray-300 transition-colors"
            >
              <SkipBack className="h-6 w-6" />
            </Button>
            <Button
              variant="ghost"
              size="icon"
              onClick={togglePlayPause}
              className="text-white hover:text-gray-300 transition-colors"
            >
              {isPlaying ? (
                <Pause className="h-8 w-8" />
              ) : (
                <Play className="h-8 w-8" />
              )}
            </Button>
            <Button
              variant="ghost"
              size="icon"
              onClick={handleNext}
              className="text-white hover:text-gray-300 transition-colors"
            >
              <SkipForward className="h-6 w-6" />
            </Button>
          </div>
          <div className="mt-6 flex items-center">
            <Volume2 className="h-4 w-4 text-gray-400 mr-2" />
            <Slider
              value={[volume]}
              max={100}
              step={1}
              className="w-full"
              onValueChange={handleVolumeChange}
            />
          </div>
          <audio
            ref={audioRef}
            src={currentSong.musicUrl}
            onEnded={handleNext}
          />
        </CardContent>
      </Card>
    </div>
  );
}

export default App;
このようなデザインになったら正しくスタイルが当てられています。
ここで追加の機能として音量調整機能を実装したので解説します。
まずは音量を管理するステートを作りました。
const [volume, setVolume] = useState(50) // 初期音量を50%に設定
volume状態で現在の音量値をパーセンテージ(0~100)で管理します。初期値は50%に設定されています。
音量の変更イベントは以下のようになっています。
const handleVolumeChange = (value: number[]) => {
  setVolume(value[0]) // スライダーの値をvolume状態に反映
  if (audioRef.current) {
    audioRef.current.volume = value[0] / 100 // 0~1に変換しaudio要素のvolumeに設定
  }
}
SliderのonValueChangeイベントで呼び出され、スライダーが変更されるたびにこの関数が実行されます。
setVolume(value[0])でスライダーの値がvolume状態に反映されます。
audioRef.current.volume = value[0] / 100でスライダー値を0~1の範囲に変換し、audio要素のvolumeプロパティに設定されます。これにより、音量が即座に反映されます。
<Slider
  value={[volume]}
  max={100}
  step={1}
  className="w-full"
  onValueChange={handleVolumeChange}
/>
onValueChange={handleVolumeChange}によりスライダーが変更されるたびに音量が更新されます。
おわりに
今回はReactの基本的な機能を利用して音楽プレイヤーを作成しました。
Stateをしっかりと使いこなせれば簡単にアプリを作成することができます。
今回の内容は動画で更に詳しく解説していますので、合わせてご利用ください。
他にも多くのハンズオンを投稿していますのでステップアップとしてぜひやってみてください。
現役エンジニア専門のプログラミングコーチングを運営しています。
Reactを専門に自由に扱えるようになるので効率よく学びたい方はぜひカウンセリングでお待ちしております。
ここまで読んでいただけた方はいいねとストックよろしくお願いします。
@Sicut_study をフォローいただけるととてもうれしく思います。
また明日の記事でお会いしましょう!
JISOUのメンバー募集中!
プログラミングコーチングJISOUでは、新たなメンバーを募集しています。
実践的なカリキュラムで、あなたのエンジニアとしてのキャリアを最短で飛躍させましょう!
興味のある方は、ぜひホームページからお気軽にカウンセリングをお申し込みください!
▼▼▼