
はじめに
こんにちは、Watanabe Jin(@Sicut_study)です。
ReactのフレームワークというとNext.jsが最初に浮かぶ人も多いのではないでしょうか?そこから様々なフレームワークが開発されて、RemixはWeb標準でステートを使わない思想からNext.js一強時代にメスをいれることになりました。
私自身もRemix(React Router)を選択するケースが増えましたが、やはりNext.jsにあるキャッシュ周りやAPIなどはRemixにないメリットだと思っています。Next.jsは便利なものが揃っている分、機能を使いこなすようなプロジェクトは少なく、十徳ナイフのようなイメージがあります。

Next.jsは機能が多くて使いこなせず、機能の多さがビルドの遅さにつながっているというデメリットがあるので私が扱うようなプロジェクトで採用しづらいです。
https://www.docswell.com/s/ashphy/KM1NQ6-you-dont-need-nextjs
そんな中、2025年1月に新たなフレームワークが誕生しました!
@lazarv/react-serverというフレームワークでViteをベースにしてReact Server Component(RSC)が使えるフレームワークです。Next.jsのよく使う機能は一通り揃っているので、シンプルに利用することが可能です。
(デメリットはreact-serverという検索性の悪い名前くらい)
今回はreact-serverを利用して世界初のチュートリアルをやっていきます。このチュートリアルを最後まで行うとQiitaのような技術記事投稿サイトを作ることができます。
動画教材も用意しています
こちらの教材にはより詳しく解説した動画もセットでご用意しています。
テキスト教材でわからない細かい箇所があれば動画も活用ください
対象者
- 新しいフレームワークが気になる人
- Next.jsを始めたいと思っている人
- SSR/SSGなどレンダリング戦略を知りたい人
- JavaScriptからステップアップしたい人
- 実践的なアプリを開発して学びたい人
- モダンな技術を利用したい人
このチュートリアルはHTMLと基本的なJavaScriptがわかる方で2時間程度で行うことができます。
@lazarv/react-serverとは?
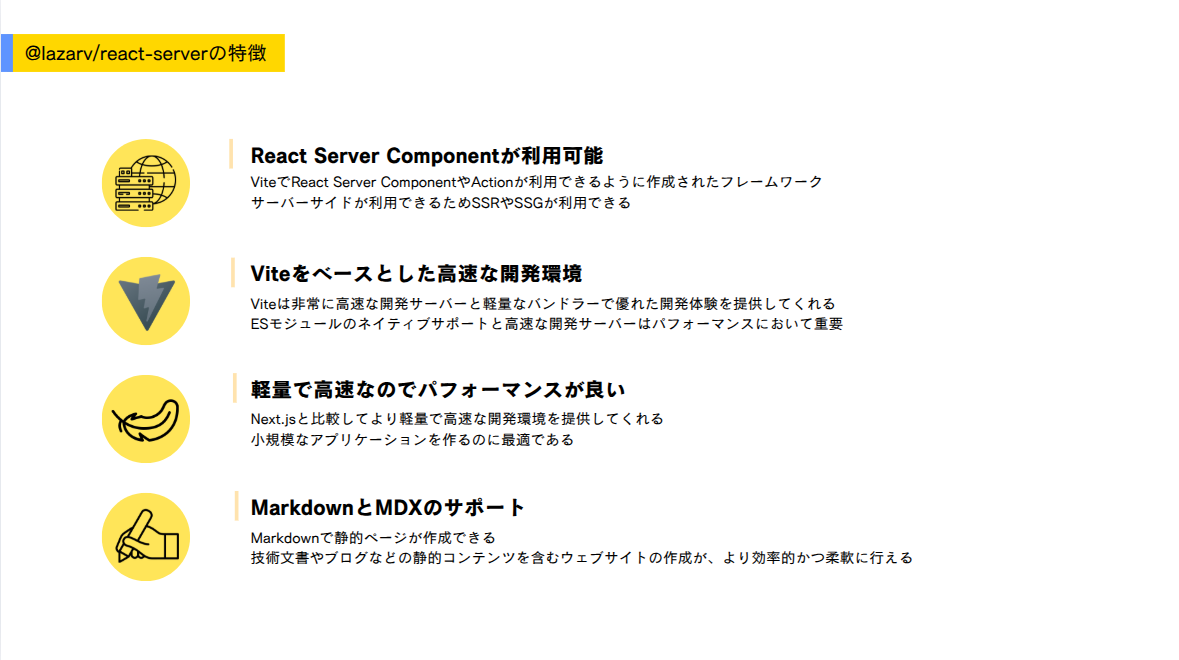
@lazarv/react-serverはViteベースのReact Server Component(RSC)が扱えるフレームワークです。Viteで動くので軽量/高速な開発が可能です。
これまでNext.jsが選択されるケースが多かったのですが、Next.jsをフルに活用できるプロジェクトはなかなか少ない印象です。そんな中でRSCやAction、API Route、Revalidateなど必要なものだけを用意しているのがreact-serverです。
またreact-serverはMDX(Markdown)で静的ファイルを作成できたり、マイクロフロントエンドに特化した機能があるなどユニークな機能も備わっています。これもReact19が公開された恩恵が大きいように思えます。
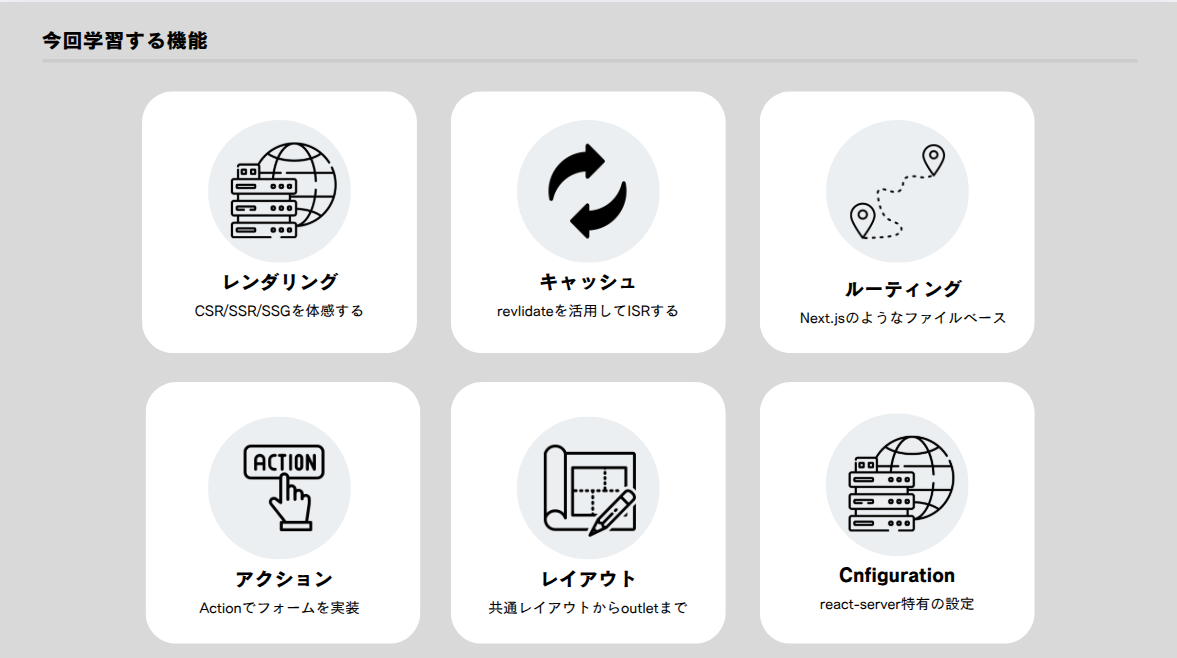
今回はreact-serverの機能の中で主要な機能をチュートリアルの中で学びます。
レンダリング戦略について
チュートリアルをやる前にそれぞれのレンダリング方式に関して理解しておくとよりスムーズに理解ができるので解説してきます。
レンダリングにはよく利用される方法が5つあります。状況によって使い分けることによってユーザビリティの高いアプリケーションを構築できます。
1. クライアントサイドレンダリング(CSR)

クライアントサイドレンダリングはReactのコードをクライアント(あなたのブラウザ)で処理してHTMLのファイルを生成するレンダリング方式のことを指します。
Reactはフレームワーク(Next.jsやreact-server)を利用しないとクライアントサイドでレンダリングが行われてます。
クライアントで処理することでユーザー操作に対して素早く反応ができます。しかし、初期画面表示がクライアントのHTML生成が終わらないと表示されないため遅くなることがあります。
2. サーバーサイドレンダリング(SSR)
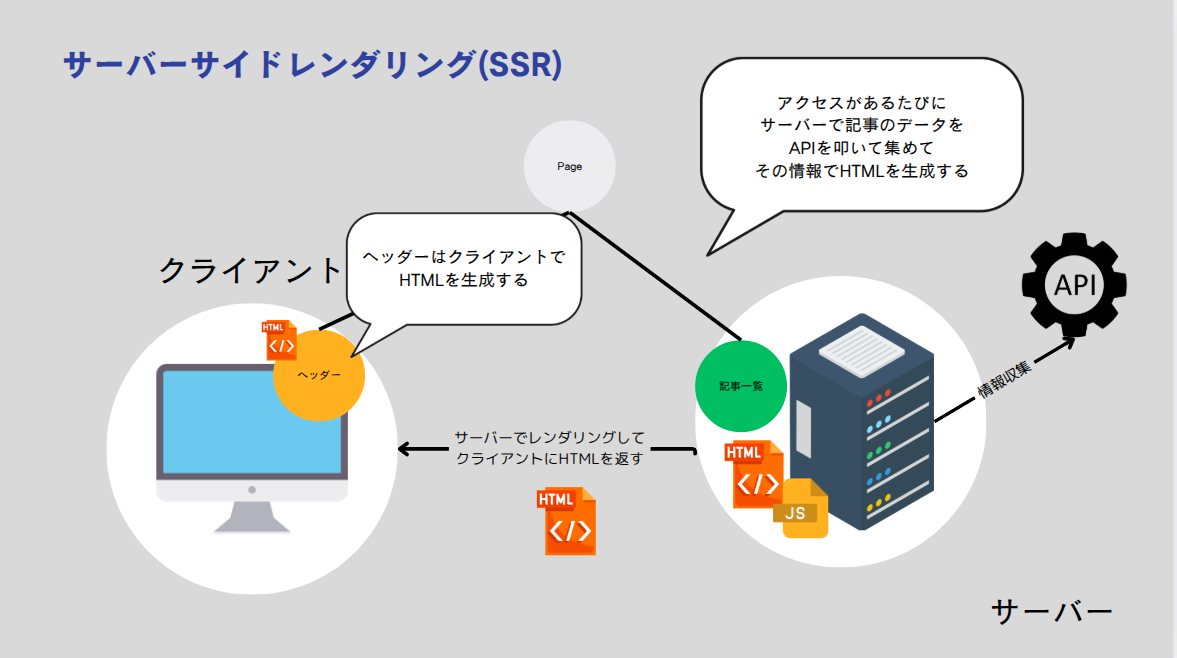
サーバーサイドレンダリング(SSR)は、Reactをサーバー側で処理をしてHTMLを生成して完成したものをクライアントに返して表示するレンダリング方法になります。
Next.jsを利用するのはこのサーバー側での処理を行えるというのが大きいです。
例えば1つの画面の中でも「記事一覧」の部分は記事取得のためにAPIを叩く必要があるので、その部分のコンポーネントだけをサーバーコンポーネントとしてサーバー側で処理することも可能です。(クライアントで処理されるコンポーネントはクライアントコンポーネントといいます)
巷ではNext.jsが一強ですが、それはSSRができることが大きいです。
SSRをすることで初期画面表示が早く、SEO対策(検索上位にサイトを表示する)やセキュリティ対策ができるようになります。欠点はWebサーバーを別途建てる必要があります。
3. SSG(StaticSiteGeneration)

SSRに似ているのですが、ビルド時に1度だけしかHTMLを生成しないという特徴があります。アクセスするたびにサーバー側でAPIを叩く必要がなくなるので、素早くHTMLを返すことができます。
SSRよりも初期画面が早く表示されてサーバー負荷も少ないです。1度しか生成されないのでリアルタイム性は失われてしまいます。(例えば記事アプリの記事一覧をSSGにすると新しい投稿が増えても反映されないです)
4. ISR(Incremental Static Regeneration)

SSR+SSGのような仕組みでビルド時にHTMLを生成して、それ以降はアクセスがあるたびにキャッシュ(revalidate)をチェックして期限が切れたら再度新しいHTMLをビルドして返します。
SSGのリアルテイム性が失われる欠点を補ったレンダリング方法です。
5. PPR (Partial Pre-Rendering)
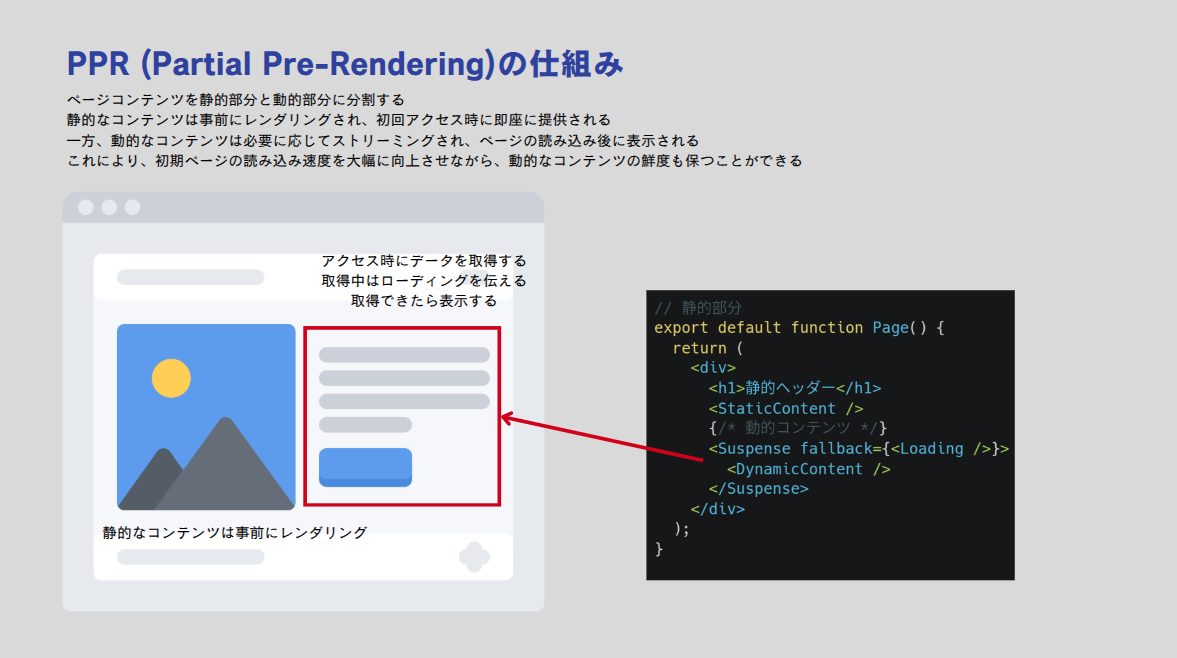
CSRとSSGを合わせたような方法で、動的なコンテンツと静的なコンテンツを分割して同じページで表示するレンダリング方法です。最初に静的なコンテンツを表示しておくことで初期画面を素早く表示できます。そのあとで動的なコンテンツ(投稿部分)などをサーバーサイドで取得してHTMLを生成して表示します。
Convexとは?
最後に今回DBとして利用するConvexについても紹介しておきます。
世の中にはsupabaseやFirebaseなどのBaaSがありますが、ConvexはそれらのBaaSとは違ったメリットがあります。

とくにTypeScriptとの相性が良いのがConvexが最近好まれている理由だと思います。私自身も最近はConvexを利用することが増えました。
それでは解説は終わりましたのでアプリを開発していきましょう!
1. 環境構築
まずはNode.jsが入っているかを確認します。
$ node -v
v22.4.0
もしNodeが入っていない場合は公式サイトからインストールしてください。インストールの方法はたくさん記事で紹介されているので参考にしてみてください。
react-serverはViteで高速に動作できるのが1つのメリットなのでViteでTypeScriptの環境構築を行います。
$ npm create vite
✔ Project name: … tech-article-app
✔ Select a framework: › Vanilla // reactは選択しないので注意
✔ Select a variant: › TypeScript

$ cd tech-article-app
これで純粋なTypeScript環境ができたのでここにreact-serverを追加します。
$ npm i @lazarv/react-server@v0.0.0-experimental-44033c0-20250123-2c156f57
次にNext.jsライクにするためファイルベースルーティングの設定をします。
$ touch react-server.config.mjs
VSCodeを開いて編集してきます。
export default {
  root: "src/app",
};
src/app以降でファイルベースのルーティングを使えるようにしました
それでは実際にページを作成してみましょう
$ rm -rf src
$ mkdir src
$ mkdir src/app
$ touch src/app/page.tsx
export default function Home() {
  return <div>Home</div>;
}
src/appの直下にpage.tsxを作ると/にアクセスしたときに表示されます。
page.tsxという名前にしないと表示されないので注意してください。
次に起動時のコマンドも変更します。
{
  "name": "tech-article-app",
  "private": true,
  "version": "0.0.0",
  "type": "module",
  "scripts": {
    "dev": "react-server", // 修正
    "build": "react-server build", // 修正
    "start": "react-server start" // 修正
  },
  "devDependencies": {
    "typescript": "^5.2.2",
    "vite": "^5.3.4"
  },
  "dependencies": {
    "@lazarv/react-server": "^0.0.0-experimental-80aadca-20250205-e2641483"
  }
}
それではサーバーを起動して確認してみましょう
$ npm run dev
http://localhost:3000をブラウザで開きます。
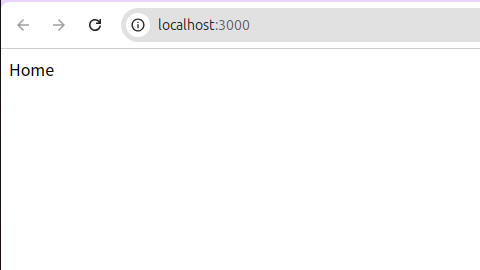
しっかりと画面が表示できました。
VSCodeをみるとエラーが出力されています。これはtsconfig.jsonの設定を修正すると治ります。
{
  "compilerOptions": {
    "jsx": "react-jsx", // 追加
    "target": "ES2020",
    "useDefineForClassFields": true,
    "module": "ESNext",
    "lib": ["ES2020", "DOM", "DOM.Iterable"],
    "skipLibCheck": true,

    /* Bundler mode */
    "moduleResolution": "bundler",
    "allowImportingTsExtensions": true,
    "isolatedModules": true,
    "moduleDetection": "force",
    "noEmit": true,

    /* Linting */
    "strict": true,
    "noUnusedLocals": true,
    "noUnusedParameters": true,
    "noFallthroughCasesInSwitch": true,
    "noUncheckedSideEffectImports": true
  },
  "include": ["src"]
}
次にリッチなUIを作るためにTailwindCSSを導入します。
ここではTailwind V3を追加します。最新版ではうまく動作ができなかった箇所がありました。
$ npm install -D tailwindcss@3.4.13 postcss autoprefixer
$ npx tailwindcss init -p
TailwindCSSの設定をしていきます。
/** @type {import('tailwindcss').Config} */
export default {
  content: ["./src/**/*.{js,jsx,ts,tsx}"], // 修正
  theme: {
    extend: {},
  },
  plugins: [],
};
$ touch src/app/global.css
@tailwind base;
@tailwind components;
@tailwind utilities;
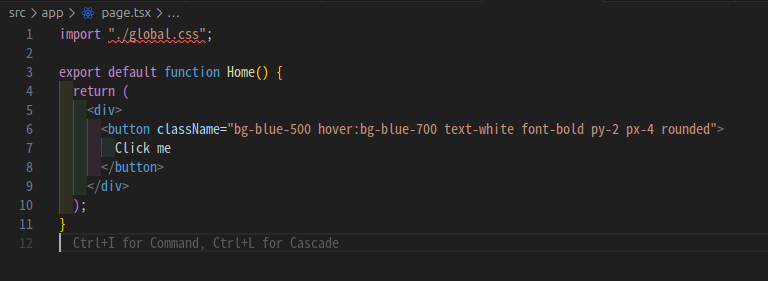
import "./global.css";

export default function Home() {
  return (
    <div>
      <button className="bg-blue-500 hover:bg-blue-700 text-white font-bold py-2 px-4 rounded">
        Click me
      </button>
    </div>
  );
}
CSSをインポートしてTailwindCSSを利用してボタンを追加しました。
しかしVSCodeではエラーが表示されてしまいます。
このエラーはvite-env.d.tsを作ると解決できます。
$ touch src/vite-env.d.ts
/// <reference types="vite/client" />
サーバーを再起動して確認しましょう
$ npm run dev
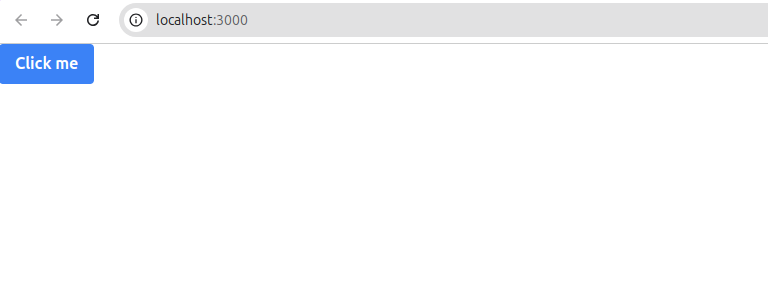
ボタンが正しく表示されたので環境構築は完了です。
2. ルーティングをしよう
今回はこのような技術記事アプリを作成します。
必要なページは5つです。
| ページ名 | ルーティング | レンダリング方式 |
|---|---|---|
| トップページ | localhost:3000 | CSR+SSR |
| 記事一覧ページ | localhost:3000/blogs | CSR |
| 人気記事ページ | localhost:3000/popular | ISR |
| 記事詳細ページ | localhost:3000/articles/{id} | CSR |
| 記事執筆ページ | localhost:3000/editor | CSR |
まずはルーティングの設定をして各ページを作成してきます。
現在はトップページのみできているので、記事一覧ページ作成します。
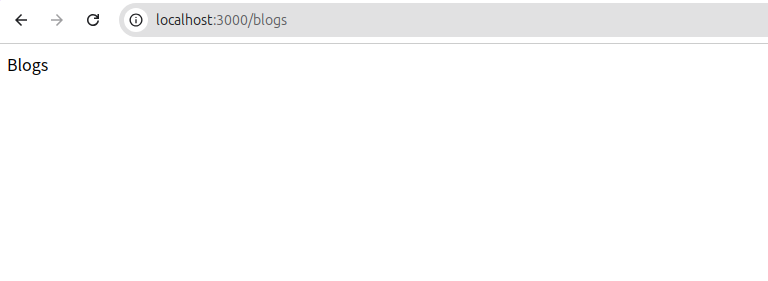
$ mkdir src/app/blogs
$ touch src/app/blogs/page.tsx
blogsディレクトリにpage.tsxを作ると/blogsを作れます。
ディレクトリ構成とパスが対応するのがファイルベースルーティングになります。
function page() {
  return <div>Blogs</div>;
}

export default page;
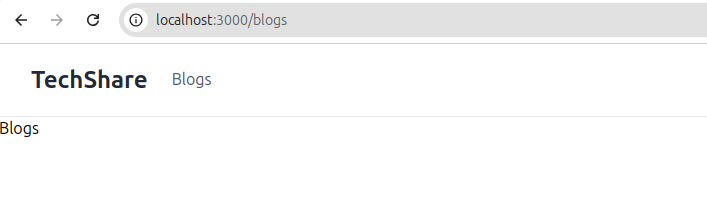
http://localhost:3000/blogsにアクセスすると確認ができました。
この流れでどんどん作成していきます。
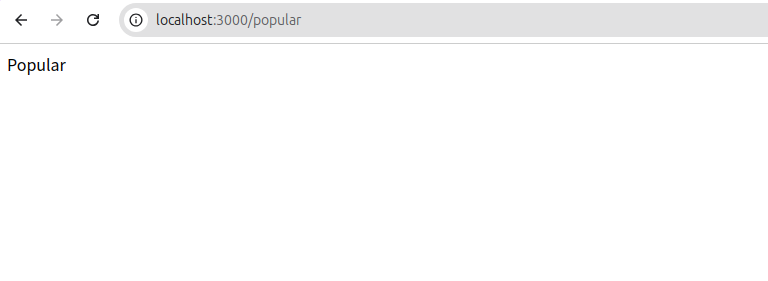
$ mkdir src/app/popular
$ touch src/app/popular/page.tsx
function page() {
  return <div>Popular</div>;
}

export default page;
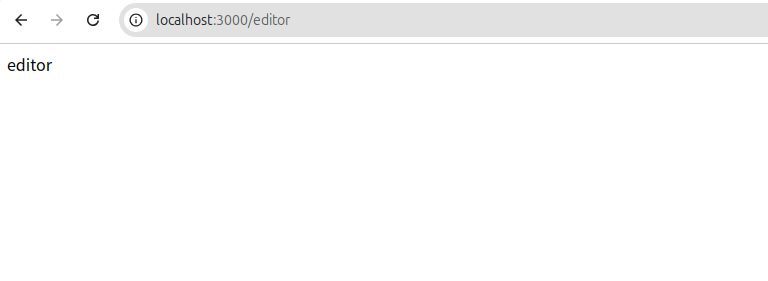
$ mkdir src/app/editor
$ touch src/app/editor/page.tsx
function page() {
  return <div>editor</div>;
}

export default page;
記事詳細ページは注意が必要です。
localhost:3000/articles/{id}という形で記事に振られているidを指定してルーティングする必要があります。つまりidは動的です。
動的ルーティングには[id]というディレクトリを作る必要があります。
$ mkdir src/app/articles
$ mkdir src/app/articles/\[id\]
$ touch src/app/articles/\[id\]/page.tsx
function page() {
  return <div>article</div>;
}

export default page;
今回は適当にidを指定してhttp://localhost:3000/articles/hogeにアクセスしてみます。
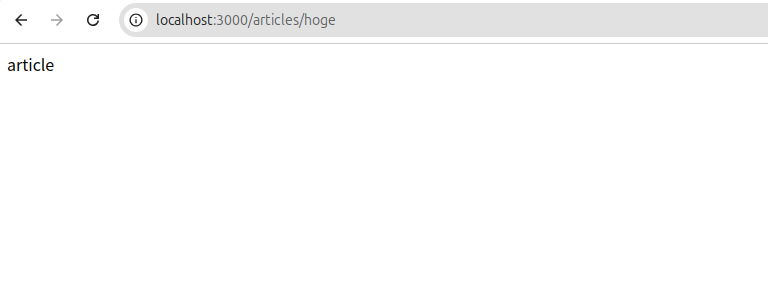
ルーティングの設定が無事できました。
3. 共通レイアウトを作成しよう
まずはじめにすべてのページで共通に使うヘッダーとフッターをLayoutを利用して作成しましょう
$ touch src/app/(root).layout.tsx
$ mkdir src/components
$ touch src/components/Header.tsx
$ touch src/components/Footer.tsx

// アイコンを表示するためにインストール
$ npm i lucide-react --legacy-peer-deps
import { Link } from "@lazarv/react-server/navigation";
import { PenTool } from "lucide-react";

export default function Header() {

  return (
    <header className="bg-white border-b border-gray-200">
      <div className="px-8 py-4 flex items-center justify-between">
        <div className="flex items-center space-x-6">
          <Link to="/">
            <div className="text-2xl font-bold text-gray-800">TechShare</div>
          </Link>
        </div>
        <div className="flex items-center space-x-6">
          <Link to="/editor">
            <div className="bg-teal-600 text-white px-4 py-2 rounded-md flex items-center hover:bg-teal-700 transition duration-300 ease-in-out">
              <PenTool size={20} className="mr-2" />
              Write
            </div>
          </Link>
          <div className="w-10 h-10 bg-gray-200 rounded-full flex items-center justify-center text-gray-600 font-bold hover:bg-gray-300 transition-colors duration-300">
            U
          </div>
        </div>
      </div>
    </header>
  );
}
export const Footer = () => {
  return (
    <footer className="w-full py-4 bg-white border-t max-h-24">
      <div className="container mx-auto px-4">
        <div className="flex flex-col items-center justify-between gap-2 md:flex-row">
          <p className="text-sm text-gray-600">
            2025 TechShare. All rights reserved.
          </p>
        </div>
        <div className="mt-2 text-center">
          <p className="text-sm text-gray-600">
            Empowering developers to share knowledge
          </p>
        </div>
      </div>
    </footer>
  );
};
import { Footer } from "../components/Footer";
import Header from "../components/Header";
import "./global.css";
export default function RootLayout({ children }: React.PropsWithChildren<{}>) {
  return (
    <html lang="ja">
      <body>
        <div className="flex flex-col min-h-screen">
          <Header />
          <main className="flex-grow">{children}</main>
          <Footer />
        </div>
      </body>
    </html>
  );
}
(root).layout.tsxと(root)がはいっていますが、これはわかりやすくするためにつけている名前です。ファイルベースルーティングにはファイル名自体に意味があるので情報を追加するにはこのようにする必要があります。
またComponentsディレクトリはscr/appにおいてしまうとルーティングに利用されてしまうかもなのでsrcの外に作りました。
export default function RootLayout({
  children,
}: React.PropsWithChildren<{
RootLayoutとすることですべてに共通するレイアウトを作成することができます。
またTailwindCSSはすべてのページで利用するのでレイアウトの中でCSSをインポートするようにしました。
レイアウトの中ではヘッダーとフッターのコンポーネントを表示しています。
{children}の部分にアクセスページに対応するpage.tsxの内容が埋め込まれます。
        <div className="flex flex-col min-h-screen">
          <Header />
          <main className="flex-grow">{children}</main>
          <Footer />
        </div>
HeaderではLinkというタグを利用しています。このタグを利用することでreact-serverでパフォーマンスよくページ遷移することができます。(toに遷移先のパスを書きます)
          <Link to="/">
            <div className="text-2xl font-bold text-gray-800">TechShare</div>
          </Link>
それではトップページにアクセスしてみましょう
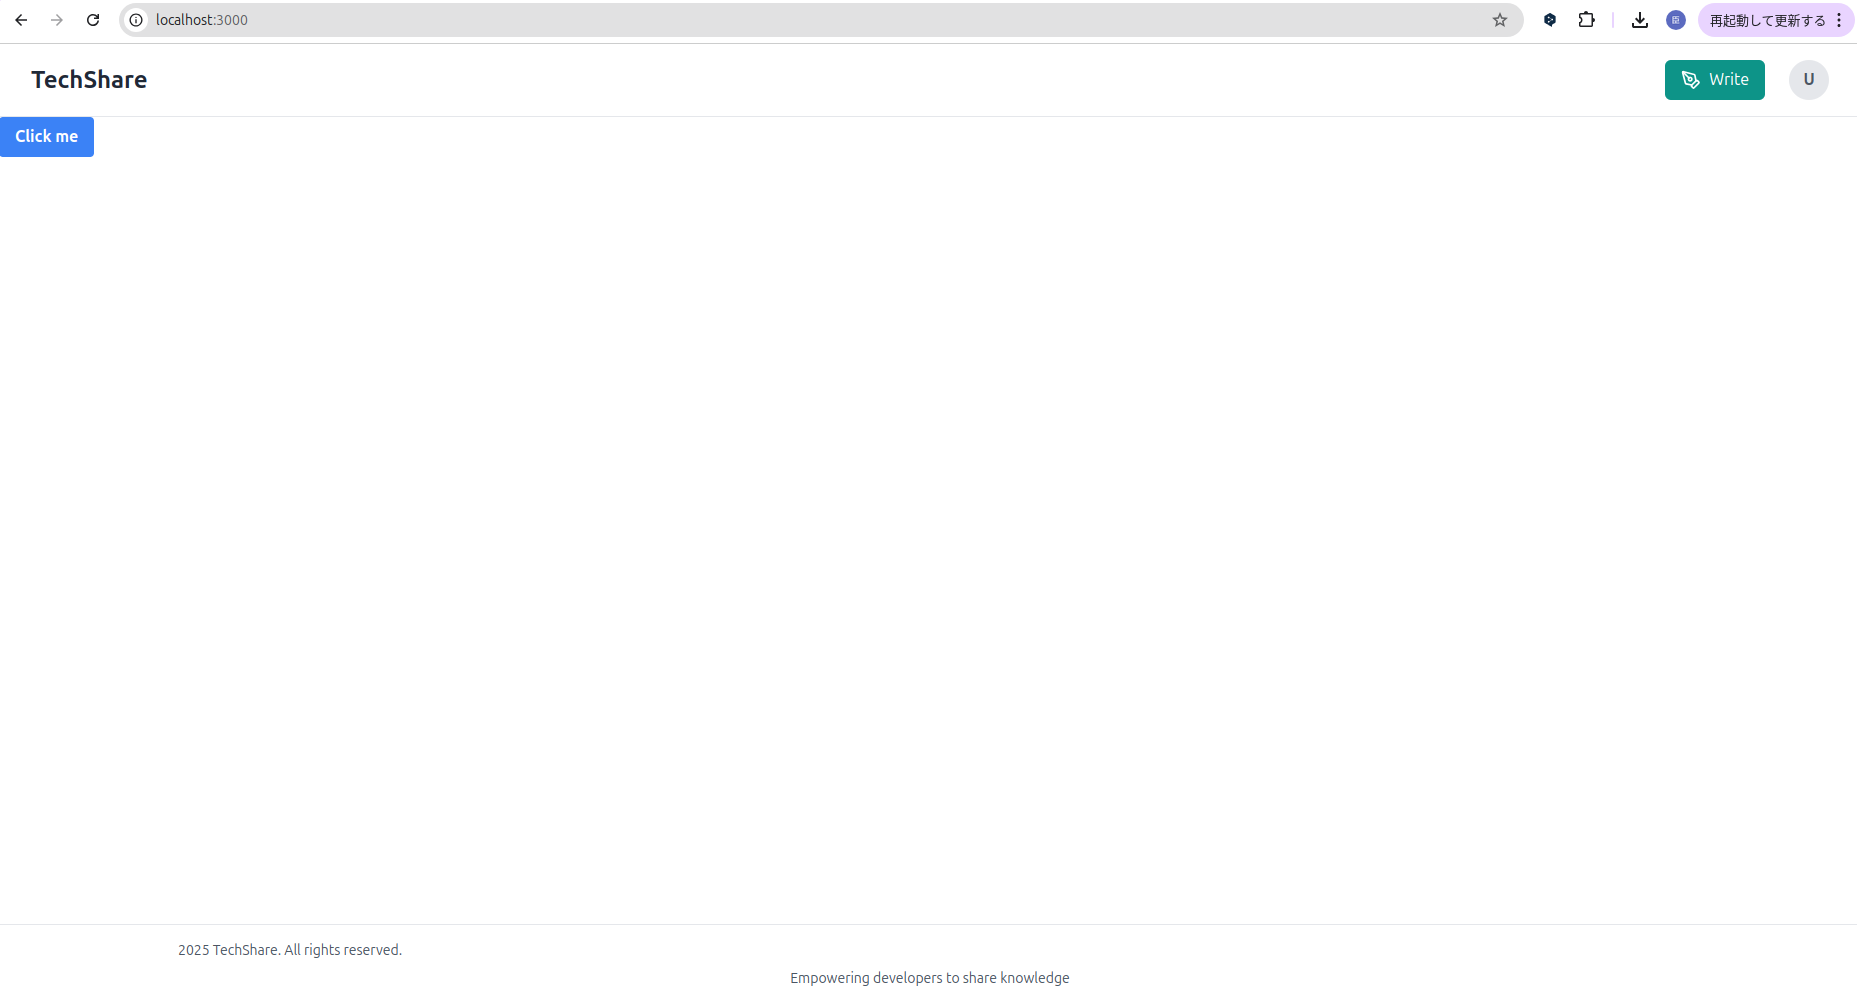
ボタンがchildrenのところに埋め込まれているのがわかります。
ここで今回のアプリには直接的には関係ないですが、今後活用できそうなOutletを試しに使ってみましょう。
Outletを使うことでレイアウトの一部をそれぞれのページでカスタマイズすることが可能です。例えば今回はヘッダーでどのページを表示しているかわかるようにしてみます。
import { Link } from "@lazarv/react-server/navigation";
import { PenTool } from "lucide-react";
import { ReactNode } from "react"; // 追加

// propsを追加
export default function Header(props: { pageName: ReactNode | null }) {
 // 追加
  const { pageName } = props;

  return (
    <header className="bg-white border-b border-gray-200">
      <div className="px-8 py-4 flex items-center justify-between">
        <div className="flex items-center space-x-6">
          <Link to="/">
            <div className="text-2xl font-bold text-gray-800">TechShare</div>
          </Link>
          {/* 追加 */}
          {pageName}
        </div>
        <div className="flex items-center space-x-6">
          <Link to="/editor">
            <div className="bg-teal-600 text-white px-4 py-2 rounded-md flex items-center hover:bg-teal-700 transition duration-300 ease-in-out">
              <PenTool size={20} className="mr-2" />
              Write
            </div>
          </Link>
          <div className="w-10 h-10 bg-gray-200 rounded-full flex items-center justify-center text-gray-600 font-bold hover:bg-gray-300 transition-colors duration-300">
            U
          </div>
        </div>
      </div>
    </header>
  );
}
$ mkdir src/app/@pageName
$ touch src/app/@pageName/(root).page.tsx
export default function PageName() {
  return <div>Home</div>;
}
import { Footer } from "../components/Footer";
import Header from "../components/Header";
import "./global.css";
export default function RootLayout({
  pageName,
  children,
}: React.PropsWithChildren<{
  pageName: React.ReactNode;
}>) {
  return (
    <html lang="ja">
      <body>
        <div className="flex flex-col min-h-screen">
          <Header pageName={pageName} />
          <main className="flex-grow">{children}</main>
          <Footer />
        </div>
      </body>
    </html>
  );
}
では実際に画面を確認します。
サーバーは再起動してください。
もしここでnpm run devが起動しなくなったらpackage.jsonに以下を追加してください
"overrides": {
  "react": "0.0.0-experimental-9ff42a87-20250130",
  "react-dom": "0.0.0-experimental-9ff42a87-20250130"
}
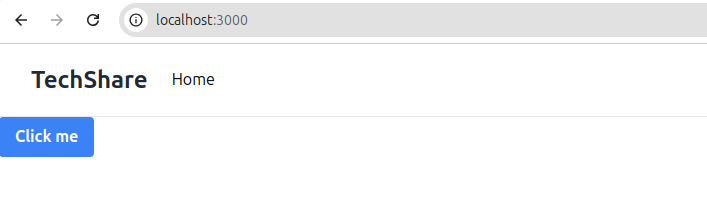
Homeという文字が表示されました。今回は/だったので
export default function RootLayout({
  pageName,
  children,
}: React.PropsWithChildren<{
  pageName: React.ReactNode;
}>) {
この部分でpageNameつまりsrc/app/@pageNameのpage.tsxを取得しようとします。そしてHeaderコンポーネントに渡して埋め込みをしました。
<Header pageName={pageName} />
それでは/blogsでも同じことをしてみましょう
$ mkdir src/app/blogs/@pageName
$ touch src/app/blogs/@pageName/(blogsPageName).page.tsx
export default function PageName() {
  return <div className="text-lg font-medium text-gray-600">Blogs</div>;
}
4. 記事を取得する
次に記事データをConvexから取得して表示するまでを行います。
Convexのアカウントがない方はアカウント作成まで行ってください
プロジェクトは作成しなくて大丈夫です。
コマンドラインからConvexでプロジェクトを作成します。
別ターミナルを開いて行いましょう
$ npm i convex
$ npx convex dev
? What would you like to configure? create a new project
? Project name: tech-article
? Use cloud or local dev deployment? For more see
https://docs.convex.dev/cli/local-deployments cloud deployment
✔ Created project tech-article, manage it at https://dashboard.convex.dev/t/watanabe-jin/tech-article
✔ Provisioned a dev deployment and saved its:
    name as CONVEX_DEPLOYMENT to .env.local
    URL as VITE_CONVEX_URL to .env.local
するとプロジェクトが作成されます。
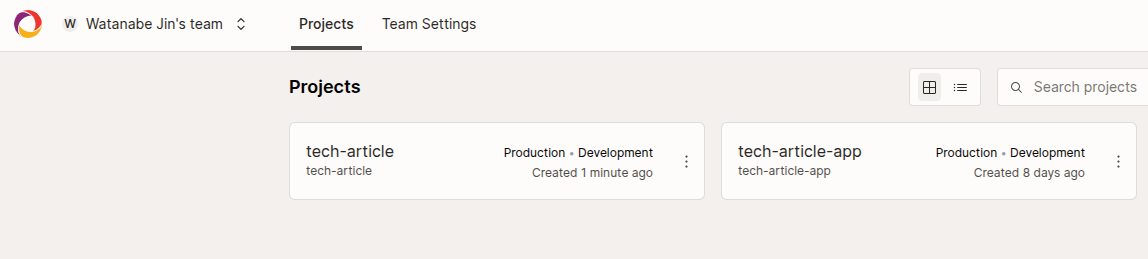
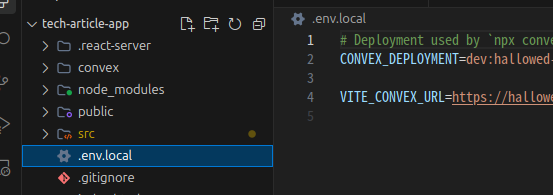
またVSCodeをみるとconvexディレクトリと.env.localが作成されています。
.env.localをみてみるとConvexの接続情報が追加されているはずです
それでは最初にConvexの設定をしていきましょう。
$ touch src/app/ConvexClientProvider.tsx
"use client";
import { ConvexProvider, ConvexReactClient } from "convex/react";

const convex = new ConvexReactClient(import.meta.env.VITE_CONVEX_URL!);

export default function ConvexClientProvider({
  children,
}: {
  children: React.ReactNode;
}) {
  return <ConvexProvider client={convex}>{children}</ConvexProvider>;
}
ConvexProviderを設定するのですがこれはクライアントサイドで実行する必要があるためuse clientをつけてクライアントサイドでレンダリングするようにしています。
Reactは基本サーバーサイドでレンダリングされるためクライアントサイドレンダリングはuse clientが必要です。
やっていることはドキュメントどおりに設定しているだけです。
記事投稿アプリはすべてのページでConvexを利用するのでレイアウトでConvexClientProviderを設定しましょう
import "./global.css";
import Header from "../components/Header";
import { Footer } from "../components/Footer";
import ConvexClientProvider from "./ConvexClientProvider";

export default function RootLayout({
  pageName,
  children,
}: React.PropsWithChildren<{
  pageName: React.ReactNode;
}>) {
  return (
    <html lang="ja">
      <body>
        <ConvexClientProvider>
          <div className="flex flex-col min-h-screen">
            <Header pageName={pageName} />
            <main className="flex-grow">{children}</main>
            <Footer />
          </div>
        </ConvexClientProvider>
      </body>
    </html>
  );
}
ConvexClientProviderでchildrenを囲んであげることで、Convexクライアントを囲んでいる範囲(すべてのページ)で利用することが可能です。
ここについてはこのあと詳しく解説します。
use clientのConvexClientProviderで囲んだらその下はすべてクライアントコンポーネントになってしまうのでは?と思う方もいるかもしれません。実はchildrenであればその下でサーバーコンポーネントは利用できます。
次にConvexのDBにテーブルを追加しましょう
$ touch convex/schema.ts
Convexではconvexディレクトリにschema.tsを作るとnpx convex devでサーバーを起動している間であれば勝手に同期してConvexにテーブルを作成してくれます。
import { defineSchema, defineTable } from "convex/server";
import { v } from "convex/values";

export default defineSchema({
  articles: defineTable({
    title: v.string(),
    description: v.string(),
    author: v.string(),
    viewCount: v.number(),
  }),
});
今回は記事の持っている要素として
- title: 記事のタイトル
- description : 記事の内容
- author : 著者
- viewCount : 閲覧数
をテーブルに定義しました。Convexではこれらに加えてデフォルトで「id」と「作成日」を追加してくれます。
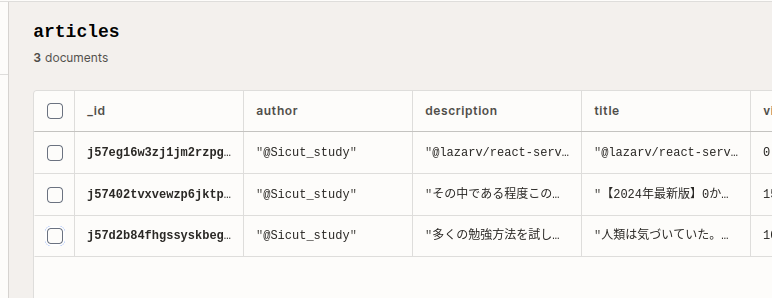
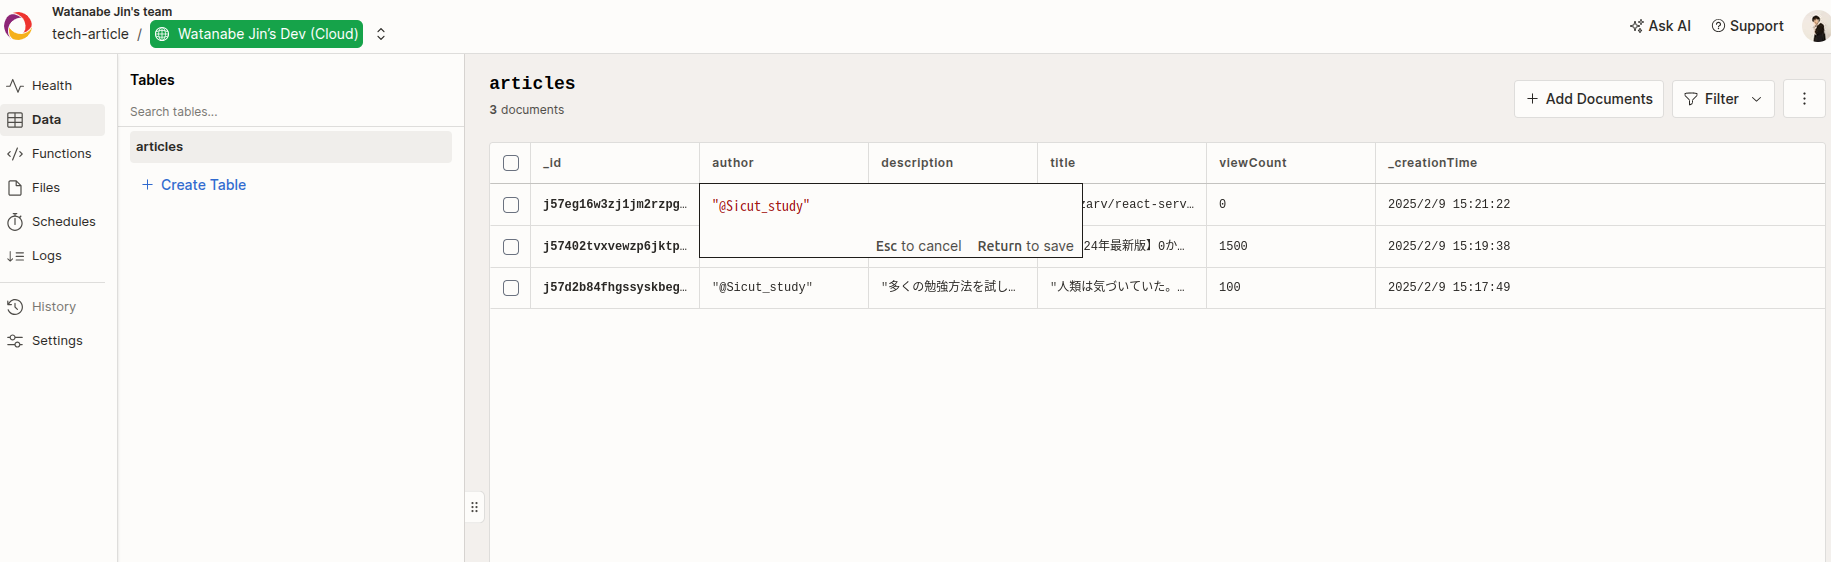
実際にConvexをみてみましょう。作成したプロジェクトをクリックして、左メニューからDataを選択するとarticlesテーブルが作成されています。
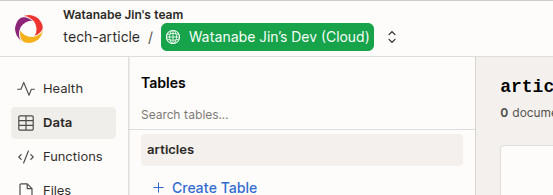
もし作成されていない場合はnpx convex devでサーバーが起動していない可能性があります。
テストデータをいくつか作成しましょう。
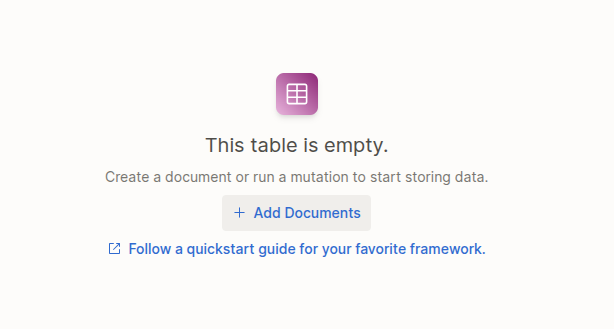
「Add Documents」をクリックして以下の内容を貼り付けて「Save」をクリック
[
  {
    author: "@Sicut_study",
    description: "多くの勉強方法を試してきて、最後にたどり着いたのが問題駆動プログラミング法という学習方法でした世の中では独学大全という本がベストセラーになるなど、学習内容ではなく、「勉強方法」を学びたいという人はとても増えています。",
    title: "人類は気づいていた。この勉強の仕方が1番早いということを。",
    viewCount: 100,
  },
]
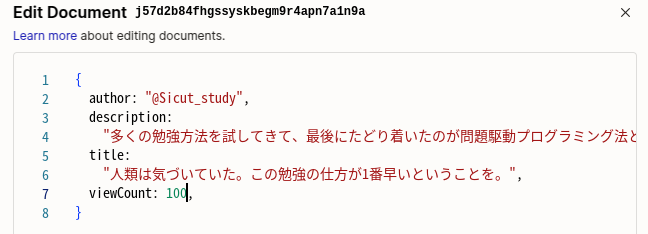
データが追加されました!

この流れで残り2つのデータも追加してください
[
  {
    author: "@Sicut_study",
    description: "その中である程度この流れで学習をすすめていけば1-2ヶ月程度でReactで自由にサービスを作れるレベルに再現性をもってレベルアップすることができると確信がもてたので、",
    title: "【2024年最新版】0からReactを勉強するならこのロードマップに従え!",
    viewCount: 1500,
  },
]
[
  {
    author: "@Sicut_study",
    description: "@lazarv/react-serverというNext.jsに変わるフレームワークがでたので試したのですが、困ったのでまとめます",
    title:
      "@lazarv/react-serverでnode:internal/event_target:1090 process.nextTick(() => { throw err; });エラーが出る",
    viewCount: 0,
  },
]
3つのデータが保存できていたら準備完了です。
次にConvexから記事データを取得する関数を作成しましょう
$ touch convex/articles.ts
import { query } from "./_generated/server";

export const get = query({
  args: {},
  handler: async (ctx) => {
    const articles = await ctx.db.query("articles").collect();

    const sortedArticles = articles.sort(
      (a, b) => b._creationTime - a._creationTime
    );

    return sortedArticles.map((article) => {
      return {
        id: article._id,
        title: article.title,
        description: article.description,
        author: article.author,
        createdAt: article._creationTime,
        viewCount: article.viewCount,
      };
    });
  },
});
getという関数を作成しました。
export const get = query({
  args: {},
  handler: async (ctx) => {
queryというConvexの関数を利用していますが、これはGETリクエストだから利用していると考えてください。POST,PATCH,PUT,DELETEなど更新系のメソッドの場合はmutationを使います。後ほど出てきますので覚えておいてください。
queryではargs(引数)とhandler(実際の処理部分)を書きます。
今回は記事をすべて取得するのでargsはなしですが、例えば特定のidの記事を取得する場合などは設定する必要があります。
handlerにはctxという引数をとっています。これこそがConvexClientProviderで囲んだ理由になります。囲んでいる範囲ではctxを受け取ることが可能で、ctxを使うことでDB操作をかんたんに行うことが可能です。
const articles = await ctx.db.query("articles").collect();
データをすべて取得したら作成日順にソートをして返却します。
    const sortedArticles = articles.sort(
      (a, b) => b._creationTime - a._creationTime
    );

    return sortedArticles.map((article) => {
      return {
        id: article._id,
        title: article.title,
        description: article.description,
        author: article.author,
        createdAt: article._creationTime,
        viewCount: article.viewCount,
      };
    });
getを呼ぶと以下のような形でオブジェクトが返ってきます。
// 例
[
  {
    "id": "article_12345",
    "title": "Next.jsの基礎を学ぼう",
    "description": "Next.jsのルーティングやデータフェッチングについて解説します",
    "author": "山田太郎",
    "createdAt": 1707456789000,
    "viewCount": 542
  },
  {
    "id": "article_12346",
    "title": "TypeScriptで型安全なコーディング",
    "description": "TypeScriptの基本的な型システムについて説明します",
    "author": "鈴木花子",
    "createdAt": 1707456689000,
    "viewCount": 321
  }
]
Convexはタイプセーフに開発できると説明しましたが実際にDBからデータを取得している部分にホバーをするとDBの型をみることができます。
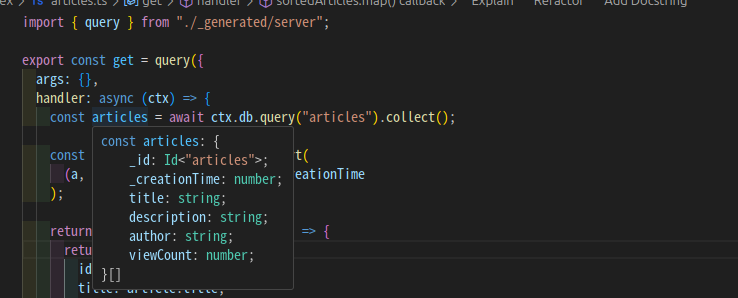
DBの型がわかることで補完なども効いています。
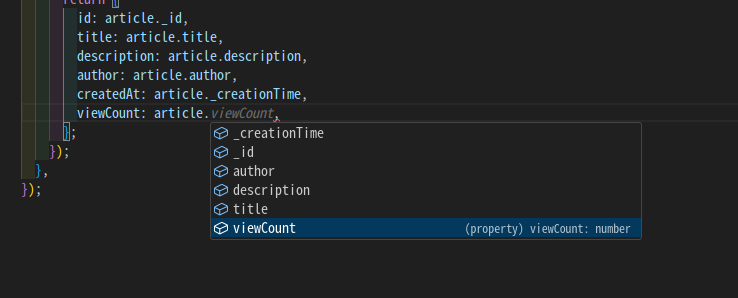
これがConvexを使う威力です。いま関数を書きましたがこの返却する型もConvexサーバーを起動していれば自動で型情報が生成されるのでクライアント側でも型安全に利用することが可能です。
それではトップページで実際にデータを取得して表示してみましょう
まずはドメインを作成しましょう
$ mkdir src/domain
$ touch src/domain/Article.ts
export class Article {
  constructor(
    public id: string,
    public title: string,
    public description: string,
    public author: string,
    public createdAt: number,
    public viewCount: number
  ) {}
}
Convexから取得したデータはこのクラスに変換して使っていこうと思います。たとえばConvexから必要のないデータ(例えばいいね数)が返ってきてもこのアプリでは不要なので、使うものだけをクラスに設定することで私達のアプリをドメインとして表現しています。(likeがあったら実装者はコードをみていいね機能があるに違いないと誤解します)
"use client";

import { useQuery } from "convex/react";
import "./global.css";
import { api } from "../../convex/_generated/api";
import { useEffect, useState } from "react";
import { Article } from "../domain/Article";

export default function Home() {
  const articlesData = useQuery(api.articles.get);
  const [articles, setArticles] = useState<Article[]>([]);

  useEffect(() => {
    if (!articlesData) return;
    const articleList = articlesData.map((article) => {
      return new Article(
        article.id,
        article.title,
        article.description,
        article.author,
        article.createdAt,
        article.viewCount
      );
    });
    setArticles(articleList);
  }, [articlesData]);

  return (
    <div>
      {articles.map((article) => {
        return (
          <div key={article.id}>
            <h1>{article.title}</h1>
            <p>{article.description}</p>
            <p>{article.author}</p>
            <p>{article.createdAt}</p>
            <p>{article.viewCount}</p>
          </div>
        );
      })}
    </div>
  );
}
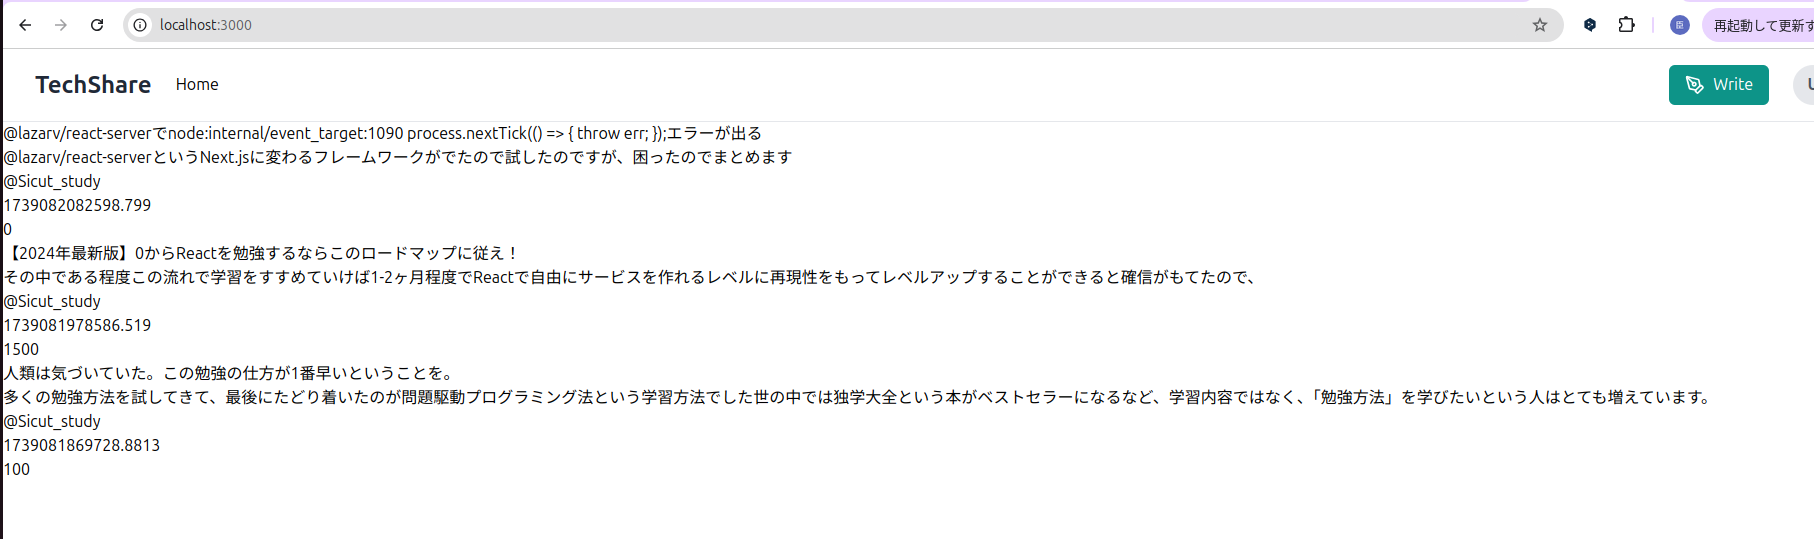
記事が表示できました。
const articlesData = useQuery(api.articles.get);
ConvexはuseQueryを使って先程作ったgetを呼び出すことが可能です。(mutationならuseMutationを使います)
  useEffect(() => {
    if (!articlesData) return;
    const articleList = articlesData.map((article) => {
      return new Article(
        article.id,
        article.title,
        article.description,
        article.author,
        article.createdAt,
        article.viewCount
      );
    });
    setArticles(articleList);
  }, [articlesData]);
useEffectでartilesDataを監視します。articleDataが取得できるとuseEffectが実行されて私達のドメインであるArticleクラスになってステートに保存されます。
useQueryはuseがついているためクライアントサイドでのみ利用できるHooksです。なのでuse clientをつける必要があります。
"use client";

import { useQuery } from "convex/react";
もしここでエラーが出た場合は/blogsにアクセスしてみるとなおる可能性があります。たまに最初の1回だけConvexProviderが正しく読み込まれないことがありました
ここまででConvexの初期設定とデータ取得ができたので次はトップページ作成をしていきましょう。
5. トップページの実装
トップページでは最新記事と人気記事が表示されています。
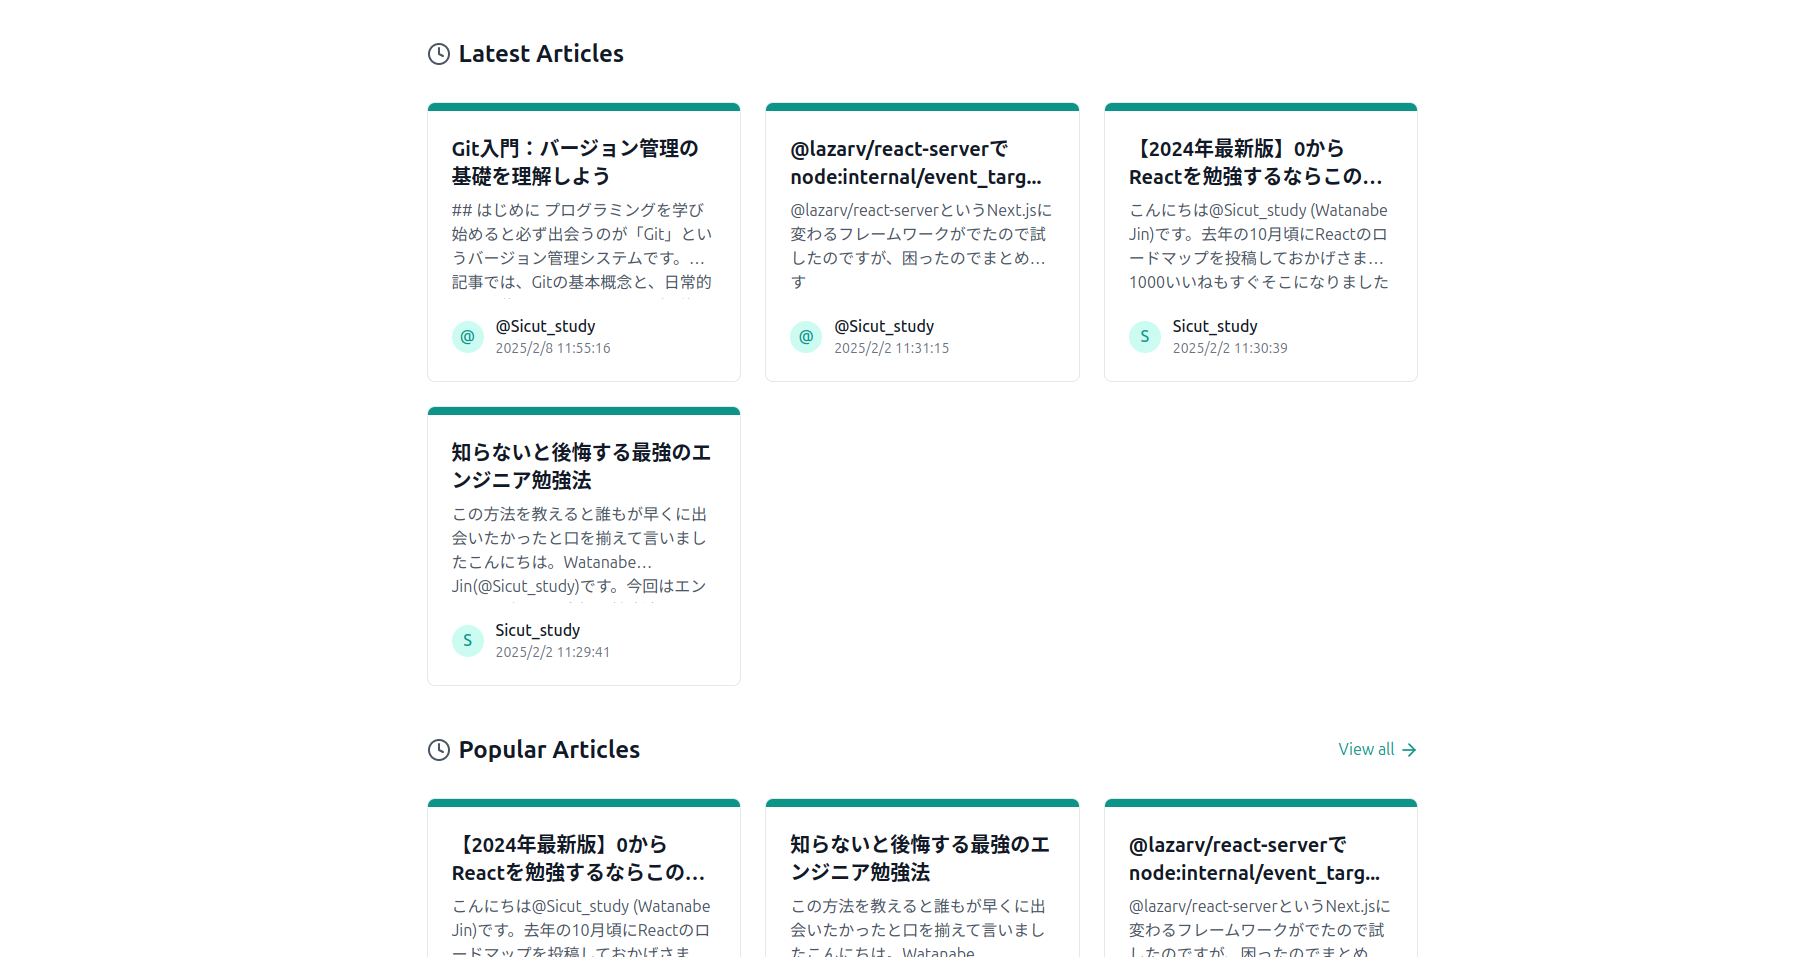
最新記事は表示できるようになっているので、人気記事をviewCountの多い順でデータをソートして表示できるようにします。
先程書いたコードを修正して、最新記事一覧はクライアントサイドレンダリング(CSR)、人気記事はサーバーサイドレンダリング(SSR)で実装してみましょう。
最新記事一覧と人気記事一覧でコンポーネントを分けます。
$ touch src/components/ArticleCard.tsx
$ touch src/components/LatestArticleList.tsx
$ touch src/components/PopularArticleList.tsx
今回記事のカードコンポーネントはページで共通して利用するのでコンポーネント化しておきます。
"use client";

import { Link } from "@lazarv/react-server/navigation";
import { Article } from "../domain/Article";

type Props = {
  article: Article;
};

export const truncateText = (text: string, maxLength: number) => {
  if (text.length <= maxLength) return text;
  return text.slice(0, maxLength) + "...";
};

export default function ArticleCard(props: Props) {
  const { article } = props;
  const truncatedTitle = truncateText(article.title, 45);
  const truncatedDescription = truncateText(article.description, 100);

  return (
    <Link to={`/articles/${article.id}`}>
      <div className="border border-gray-200 rounded-lg overflow-hidden hover:shadow-lg transition duration-300 cursor-pointer w-full h-[280px]">
        <div className="h-2 bg-teal-600"></div>
        <div className="p-6 h-[calc(280px-8px)] flex flex-col">
          <h3 className="text-xl font-bold text-gray-900 mb-2 line-clamp-2">
            {truncatedTitle}
          </h3>
          <p className="text-gray-600 mb-4 line-clamp-3 flex-grow">
            {truncatedDescription}
          </p>
          <div className="flex items-center mt-auto">
            <div className="w-8 h-8 rounded-full bg-teal-100 flex items-center justify-center text-teal-600 font-medium mr-3">
              {article.author.charAt(0)}
            </div>
            <div>
              <div className="font-medium text-gray-900">{article.author}</div>
              <div className="text-sm text-gray-500">
                {new Date(article.createdAt).toLocaleString()}
              </div>
            </div>
          </div>
        </div>
      </div>
    </Link>
  );
}
記事のタイトルや内容が長い場合にレイアウトが崩れてしまうので文字数を制限する実装をしました
  const truncatedTitle = truncateText(article.title, 45);
  const truncatedDescription = truncateText(article.description, 100);
このコンポーネントはpropsとしてArticleクラスを受け取ります。
export default function ArticleCard(props: Props) {
  const { article } = props;
カードをクリックするとカードのidで詳細ページへと遷移します。
  return (
    <Link to={`/articles/${article.id}`}>
      (省略)
    </Link>
次に最新記事一覧をクライアントサイドレンダリングで実装します。
"use client";

import { api } from "../../convex/_generated/api";
import { useQuery } from "convex/react";
import ArticleCard from "./ArticleCard";
import { useEffect, useState } from "react";
import { Article } from "../domain/Article";

export const LatestArticleList = () => {
  const articlesData = useQuery(api.articles.get);
  const [articles, setArticles] = useState<Article[]>([]);

  useEffect(() => {
    if (!articlesData) return;

    const articles = articlesData?.map((a) => {
      return new Article(
        a.id,
        a.title,
        a.description,
        a.author,
        a.createdAt,
        a.viewCount
      );
    });
    setArticles(articles);
  }, [articlesData]);

  return (
    <div className="grid grid-cols-1 md:grid-cols-2 lg:grid-cols-3 gap-6">
      {articles.map((article) => (
        <span key={article.id}>
          <ArticleCard article={article} />
        </span>
      ))}
    </div>
  );
};
先程の実装とほとんど変わらないです。ArticleCardコンポーネントを利用するようになりました。
      {articles.map((article) => (
        <span key={article.id}>
          <ArticleCard article={article} />
        </span>
      ))}
次にサーバーサイドレンダリングをする人気記事一覧です。
最初にConvexからviewCountでソートした記事を返す関数を作成しましょう
import { v } from "convex/values"; // 追加
import { query } from "./_generated/server";

export const get = query({
  args: {},
  handler: async (ctx) => {
    const articles = await ctx.db.query("articles").collect();

    const sortedArticles = articles.sort(
      (a, b) => b._creationTime - a._creationTime
    );

    return sortedArticles.map((article) => {
      return {
        id: article._id,
        title: article.title,
        description: article.description,
        author: article.author,
        createdAt: article._creationTime,
        viewCount: article.viewCount,
      };
    });
  },
});

// 追加
export const getPopular = query({
  args: {
    limit: v.optional(v.number()),
  },
  handler: async (ctx, args) => {
    const { limit } = args;
    const articles = await ctx.db.query("articles").collect();

    const sortedArticles = articles
      .sort((a, b) => b.viewCount - a.viewCount)
      .slice(0, limit ?? 10);
    return sortedArticles.map((article) => {
      return {
        id: article._id,
        title: article.title,
        description: article.description,
        author: article.author,
        createdAt: article._creationTime,
        viewCount: article.viewCount,
      };
    });
  },
});
今回はlimitを引数に受け取るように設定しました。トップページでは記事の数を制限して表示するようにしてレイアウトが崩れないようにしようと思います。
export const getPopular = query({
  args: {
    limit: v.optional(v.number()),
  },
Convexの引数はConvex世界のドメインに変換しないといけないためvというところから型を使っています。
人気記事はviewCountでソートを行います。
    const sortedArticles = articles
      .sort((a, b) => b.viewCount - a.viewCount
      .slice(0, limit ?? 10);
サーバーサイドレンダリングの場合、最新記事一覧のようにuseQueryを利用することはできません(useQueryはクライアントサイドのみ)
そこでAPI Routeを使って最新記事を返すAPIを作成してその中で先ほど作成したgetPopularを実行して記事を返すようにします。こうすることでuseQueryを使わなくても記事取得ができます。
$ mkdir src/app/api
$ mkdir src/app/api/systems
$ touch src/app/api/systems/GET.ping.server.ts
export default async function GetPosts() {
  return new Response(JSON.stringify("pong"));
}
実際にAPIが作れているかをCurlコマンドで確かめます。
$ curl localhost:3000/api/systems/ping
"pong"
APIもファイルベースルーティングになっており、[http method].xxx.server.tsというファイルで作成します。
今回はGET.ping.server.tsなので、GET /pingで叩きました。
APIの作り方がわかったので人気記事を返すAPIを作成しましょう
$ mkdir src/app/api/articles
$ touch src/app/api/articles/GET.popular.server.ts
import { ConvexClient } from "convex/browser";
import { api } from "../../../../convex/_generated/api";

const convexUrl = import.meta.env.VITE_CONVEX_URL;
if (!convexUrl) {
  throw new Error("VITE_CONVEX_URL is not defined");
}

const client = new ConvexClient(convexUrl);

export default async function GetPopular(request: Request) {
  const url = new URL(request.url);
  const limit = url.searchParams.get("limit")
    ? Number(url.searchParams.get("limit"))
    : 20;
  const articles = await client.query(api.articles.getPopular, {
    limit,
  });
  return new Response(JSON.stringify(articles));
}
APIではもちろんConvexの設定はしていないのでクライアントを用意します。
const convexUrl = import.meta.env.VITE_CONVEX_URL;
if (!convexUrl) {
  throw new Error("VITE_CONVEX_URL is not defined");
}

const client = new ConvexClient(convexUrl);
import.meta.envでViteは環境変数を.env.localから取得しています。
今回のAPIはリミットをクエリに含められるようにします。たとえばhttp://localhost:3000/api/articles/popular?limit=100としたら100件記事を取得するようにしたいです。
トップページでは記事すべて表示してしまうと大変なので制限できるようにします。
export default async function GetPopular(request: Request) {
  const url = new URL(request.url);
  const limit = url.searchParams.get("limit")
    ? Number(url.searchParams.get("limit"))
    : 20;
URLからlimitの数を取得する実装です。もし指定されていない場合はデフォルトである20件を返すようにしました。
  const articles = await client.query(api.articles.getPopular, {
    limit,
  });
  return new Response(JSON.stringify(articles));
あとは先ほどと同じようにデータを取得するのですが、queryの引数にlimitを指定することで数を制限することができます。
  const articles = await client.query(api.articles.getPopular, {
    limit: limit
  });
とも書くことは可能ですが同じ名前の場合は省略が可能です。
取得したデータはそのままAPIのレスポンスとして返すようにしています。
$ curl localhost:3000/api/articles/popular

[{"author":"@Sicut_study","createdAt":1739081978586.519,"description":"その中である程度この流れで学習をすすめていけば1-2ヶ月程度でReactで自由にサービスを作れるレベルに再現性をもってレベルアップすることができると確信がもてたので、","id":"j57402tvxvewzp6jktpcpwnv9s7a0hyt","title":"【2024年最新版】0からReactを勉強するならこのロードマップに従え!","viewCount":1500},{"author":"@Sicut_study","createdAt":1739081869728.8813,"description":"多くの勉強方法を試してきて、最後にたどり着いたのが問題駆動プログラミング法という学習方法でした世の中では独学大全という本がベストセラーになるなど、学習内容ではなく、「勉強方法」を学びたいという人はとても増えています。","id":"j57d2b84fhgssyskbegm9r4apn7a1n9a","title":"人類は気づいていた。この勉強の仕方が1番早いということを。","viewCount":100},{"author":"@Sicut_study","createdAt":1739082082598.799,"description":"@lazarv/react-serverというNext.jsに変わるフレームワークがでたので試したのですが、困ったのでまとめます","id":"j57eg16w3zj1jm2rzpgtqx1x057a1n7t","title":"@lazarv/react-serverでnode:internal/event_target:1090 process.nextTick(() => { throw err; });エラーが出る","viewCount":0}]
では、このAPIを使ってSSRでデータを取得して表示してみましょう
import ArticleCard from "./ArticleCard";

type ArticlePros = {
  id: string;
  title: string;
  description: string;
  author: string;
  createdAt: number;
  viewCount: number;
};

type Props = {
  articles: ArticlePros[];
};

export const PopularArticleList = (props: Props) => {
  const { articles } = props;
  return (
    <div className="grid grid-cols-1 md:grid-cols-2 lg:grid-cols-3 gap-6">
      {articles.map((article, index) => (
        <span key={index}>
          <ArticleCard article={article} />
        </span>
      ))}
    </div>
  );
};
articlesを受け取って表示するようにしました
export const PopularArticleList = (props: Props) => {
  const { articles } = props;
次にトップページのほうでarticlesをSSRで取得してPopularArticleListに渡します。
import { Link } from "@lazarv/react-server/navigation";
import { ArrowRight, Clock } from "lucide-react";
import { LatestArticleList } from "../components/LatestArticleList";
import { PopularArticleList } from "../components/PopularArticleList";

type ArticleJson = {
  id: string;
  title: string;
  description: string;
  author: string;
  createdAt: number;
  viewCount: number;
};

const getArticles = async () => {
  const response = await fetch(
    "http://localhost:3000/api/articles/popular?limit=10"
  );
  const data = await response.json();
  return data;
};

export default async function Home() {
  const articles = (await getArticles()) as ArticleJson[];

  return (
    <div className="max-w-5xl mx-auto px-4 py-12">
      <div className="text-center mb-16">
        <h1 className="text-4xl font-bold text-gray-900 mb-4">
          Welcome to TechShare
        </h1>
        <p className="text-xl text-gray-600 mb-8">
          Discover and share valuable insights in technology.
        </p>
        <Link
          to="/editor"
          className="inline-flex items-center bg-teal-600 text-white px-6 py-3 rounded-md hover:bg-teal-700 transition duration-300"
        >
          Start Writing <ArrowRight className="ml-2" size={20} />
        </Link>
      </div>

      <div className="mb-12">
        <div className="flex items-center mb-8">
          <Clock size={24} className="text-gray-600 mr-2" />
          <h2 className="text-2xl font-bold text-gray-900">Latest Articles</h2>
        </div>
        <LatestArticleList />
      </div>
      <div className="mb-12">
        <div className="flex items-center justify-between mb-8">
          <div className="flex items-center">
            <Clock size={24} className="text-gray-600 mr-2" />
            <h2 className="text-2xl font-bold text-gray-900">
              Popular Articles
            </h2>
          </div>
          <Link
            to="/popular"
            className="inline-flex items-center text-teal-600 hover:text-teal-700"
          >
            View all
            <ArrowRight className="w-5 h-5 ml-1" />
          </Link>
        </div>
        <PopularArticleList articles={articles} />
      </div>
    </div>
  );
}
作成したAPIを叩いてjsonを返す関数を作ります。
const getArticles = async () => {
  const response = await fetch(
    "http://localhost:3000/api/articles/popular?limit=10"
  );

  const data = await response.json();
  return data;
};
今回は最新記事がCSRで人気記事はSSRを表示します。
import { Suspense } from "react";
(省略)
        <Suspense fallback={<div>Loading...</div>}>
          <PopularArticleList articles={articles} />
        </Suspense>
動的の部分はロード中(データ取得完了まで)は非同期処理が完了するまでサスペンド状態になるのでSuspenseを使って囲んでおきます。こうすることでロード中はローディングの文字が表示されます。
const articlesData = (await getArticles()) as ArticleJson[];
ArticleContentではgetArticlesを叩いてデータを取得して表示をしています。
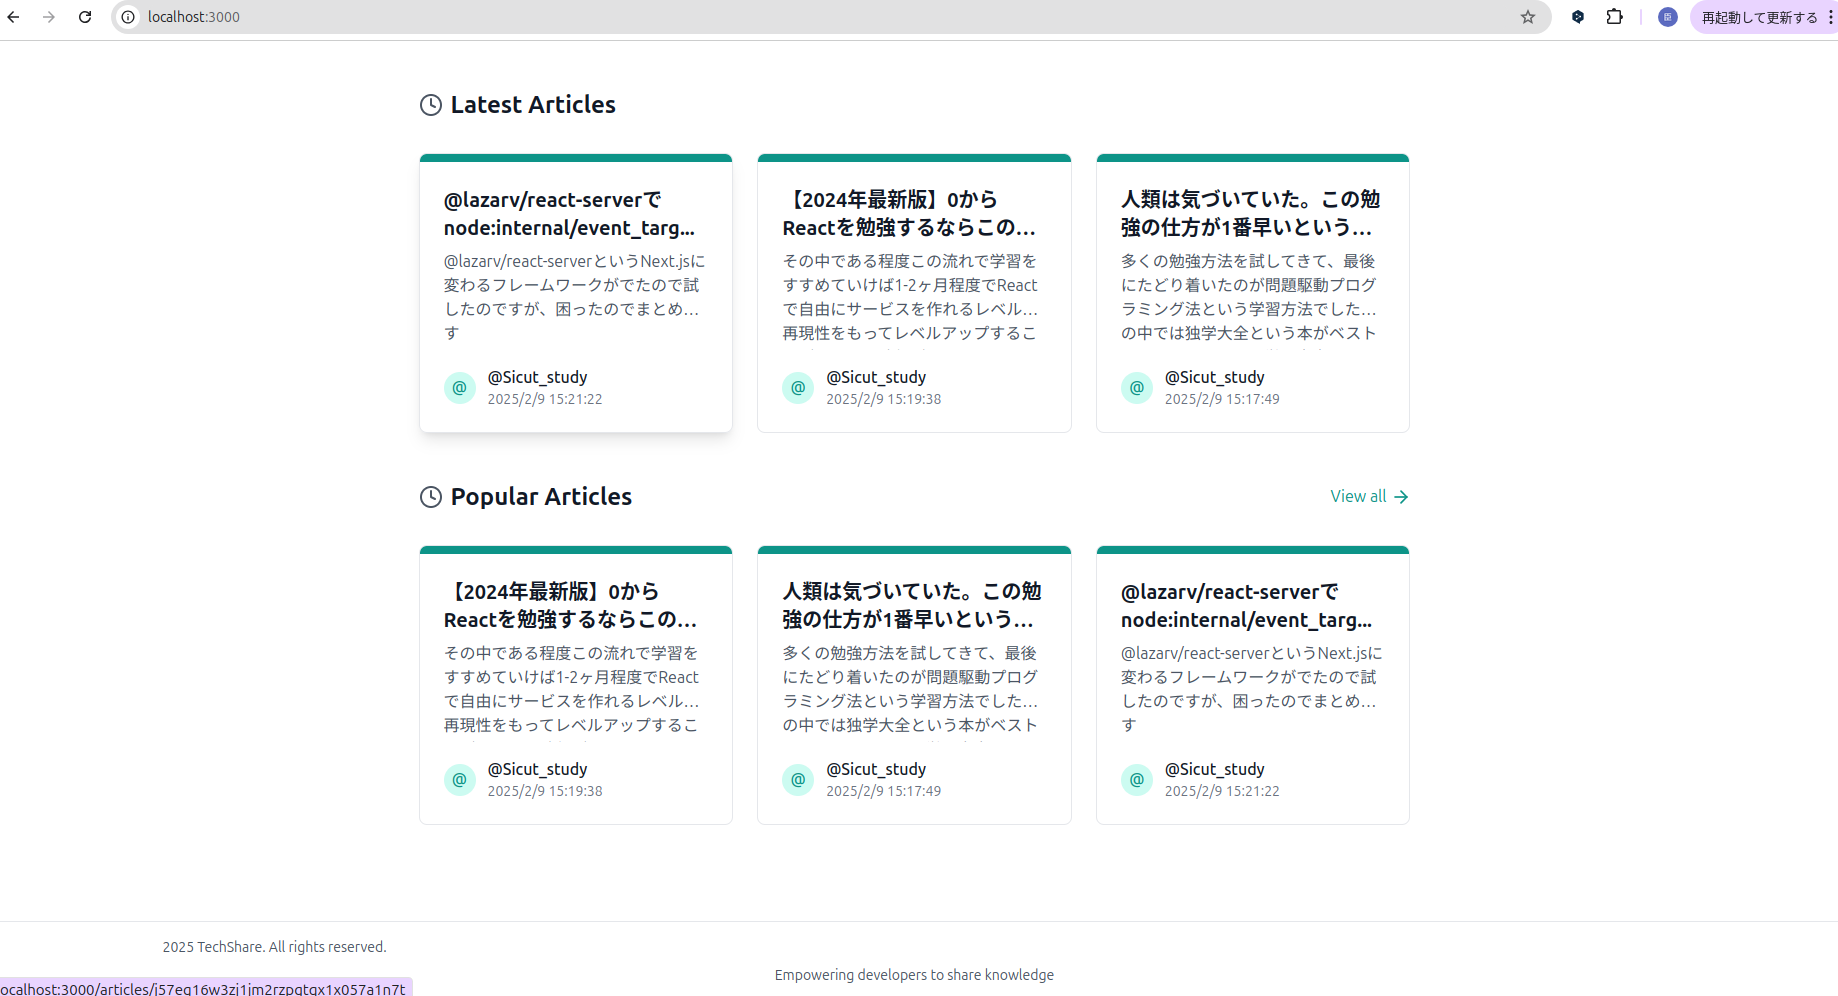
しっかりデータが表示されていていい感じになりました。
また表示速度をみるとCSRの最新記事のほうが表示速度が遅いことがわかります。
そこまで重い処理ではないためクライアントサイドのほうが速度が負けていそうです。このような違いがクライアントとサーバーで起きます。
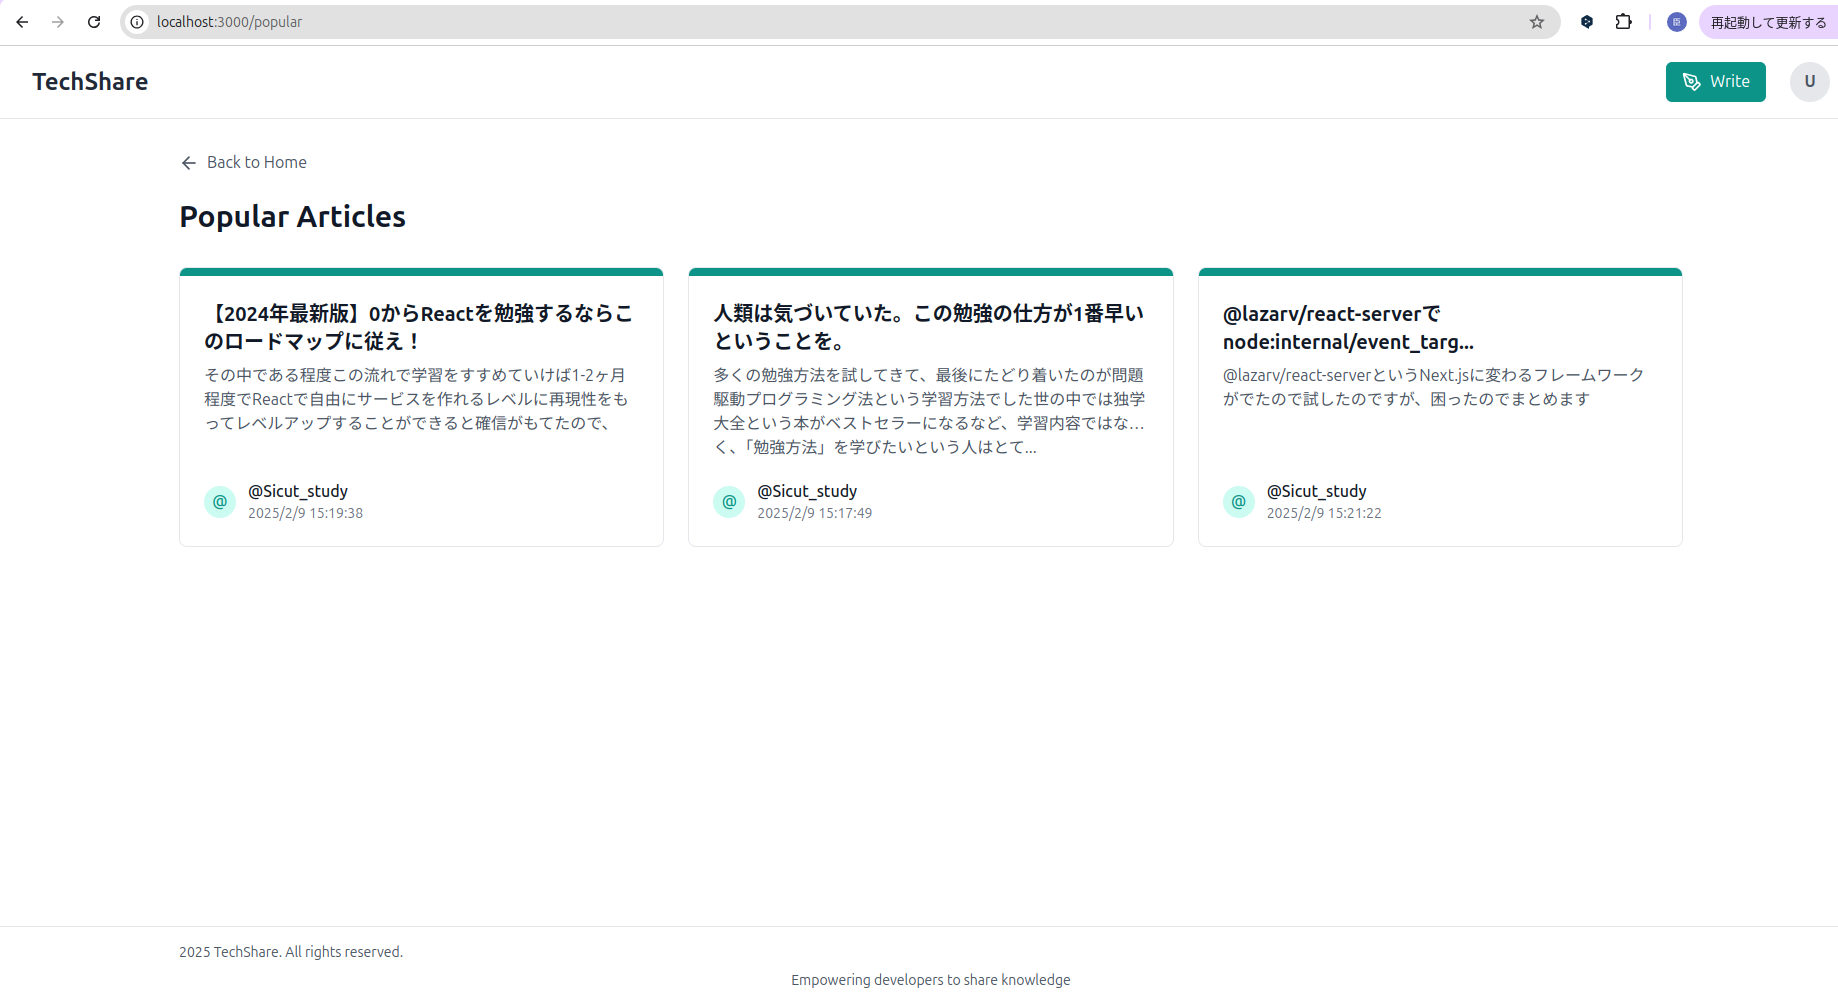
6. 人気記事一覧をSSGにする
次に/popularの人気記事一覧をSSGで実装していきます。
import { ArrowLeft } from "lucide-react";
import { Link } from "@lazarv/react-server/navigation";
import { PopularArticleList } from "../../components/PopularArticleList";
import { Suspense } from "react";

type ArticleJson = {
  id: string;
  title: string;
  description: string;
  author: string;
  createdAt: number;
  viewCount: number;
};

const getArticles = async () => {
  const response = await fetch(
    "http://localhost:3000/api/articles/popular?limit=50"
  );
  const data = await response.json();
  return data;
};

export default async function Popular() {
  const articles = (await getArticles()) as ArticleJson[];

  if (!articles) return null;

  return (
    <div className="container mx-auto px-4 py-8">
      <div className="flex justify-between items-center mb-6">
        <Link
          to="/"
          className="flex items-center text-gray-600 hover:text-gray-900"
        >
          <ArrowLeft className="w-5 h-5 mr-2" />
          Back to Home
        </Link>
      </div>
      <div className="mb-12">
        <h1 className="text-3xl font-bold text-gray-900 mb-8">
          Popular Articles
        </h1>
        <Suspense fallback={<div>Loading...</div>}>
          <PopularArticleList articles={articles} />
        </Suspense>
      </div>
    </div>
  );
}
やっていることはほとんど変わりません。fetchのlimitを50にしたくらいです。
  const response = await fetch(
    "http://localhost:3000/api/articles/popular?limit=50"
  );
ではSSGの設定をしていきます。SSGをするページをreact-server.config.mjsに追加します。
export default {
  root: "src/app",
  export(paths) {
    return [...paths, { path: "/popular" }];
  },
};
こうすることでビルド時に/popularはSSR扱いとなります。
では実際にビルドしてみましょう。ここでの注意はnpm run devをターミナルでした状態で別のターミナルでnpm run buildをしてください。
$ npm run build // 別のターミナルで

✔ Build completed successfully in 6.67s!
SSGは実際にビルドのタイミングでAPIを叩いて静的ページを作成しています。
つまりAPIを実際に叩かないといけないのでAPI(サーバー)が起動している状態でなければエラーになります。
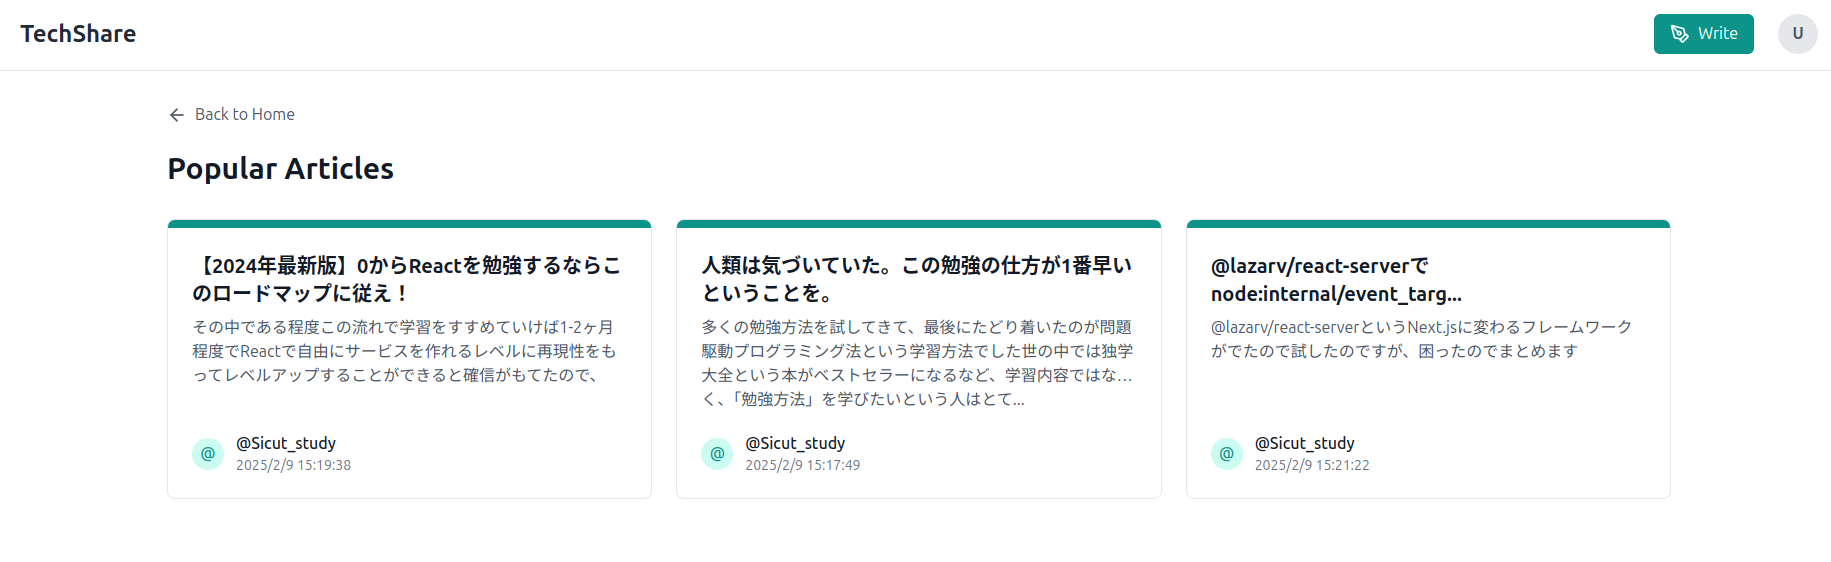
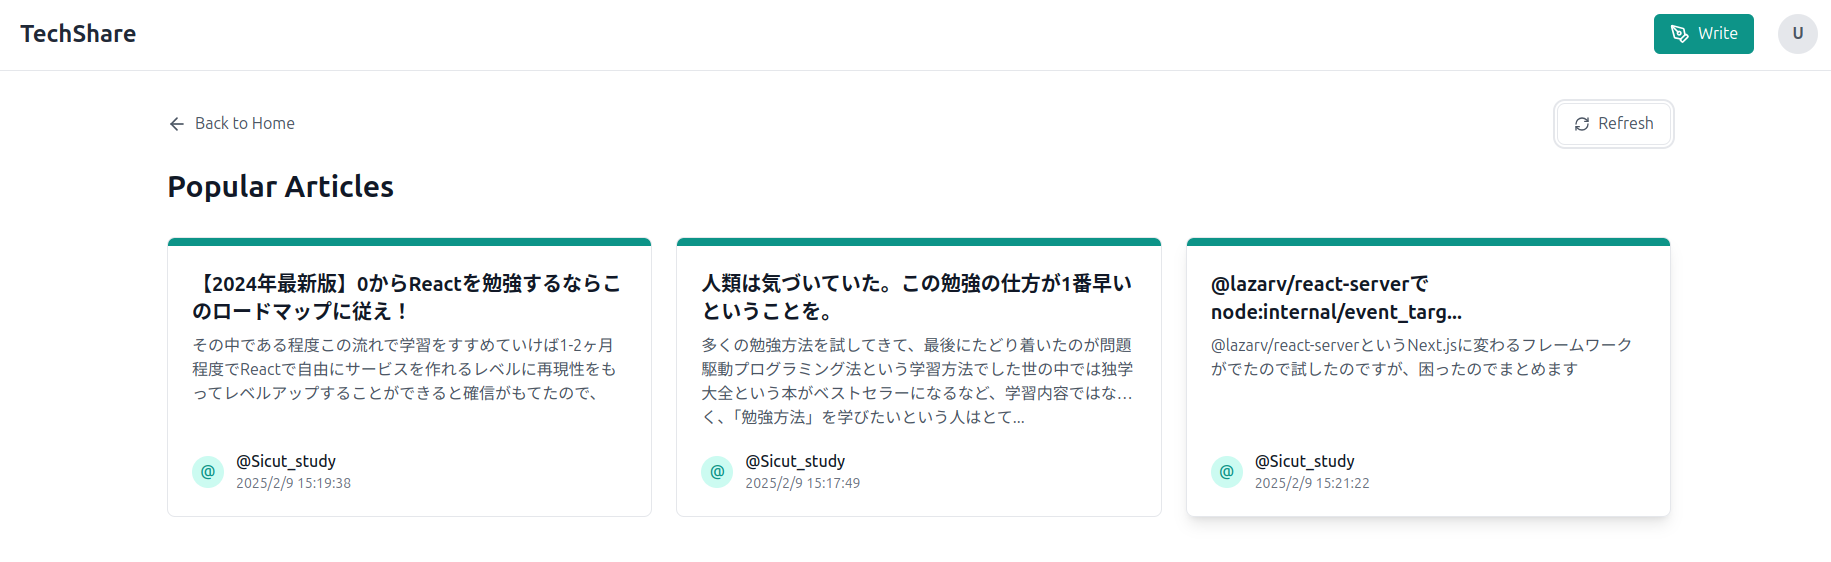
では成功したので人気記事一覧ページをみてみましょう。SSGで表示するにはnpm run startでプロダクションモードで起動する必要があります(こうすることでビルドの生成物をつかって起動ができます)
$ npm run start // npm run devは切る
リロードをかけても読み込みすることなくすぐに表示されました。
では実際にSSGされているかConvexのデータを少し変更してみます。(著者を変えてみます)
実際に画面をリロードしても著者は変更されません。
問題なくSSGできていることが確かめられました。
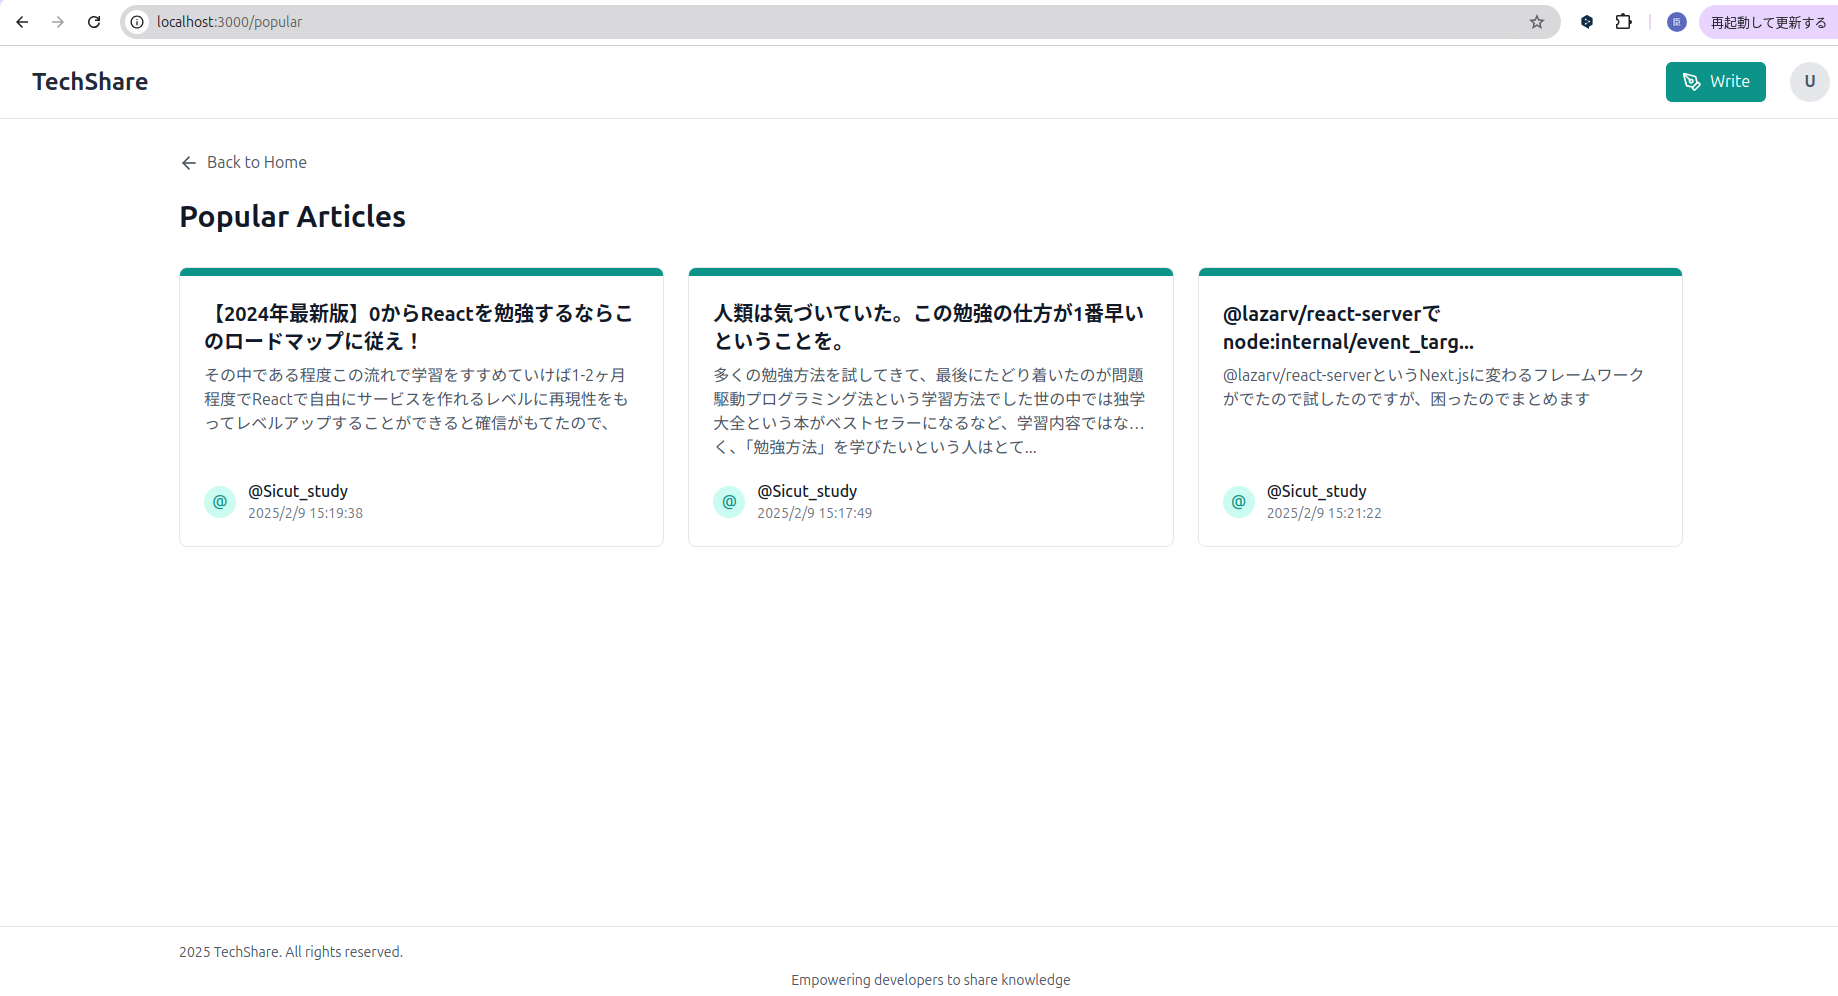
7. 人気記事一覧ページをISRにしてみる
SSGにすると最初のビルドから時間が経ってDBが更新されたとしても反映されなくなってしまうので、ISRを使ってリフレッシュできる仕組みを実装しましょう。
import { ArrowLeft, RefreshCw } from "lucide-react";
import { Link } from "@lazarv/react-server/navigation";
import { PopularArticleList } from "../../components/PopularArticleList";
import { invalidate } from "@lazarv/react-server";

type ArticleJson = {
  id: string;
  title: string;
  description: string;
  author: string;
  createdAt: number;
  viewCount: number;
};

const getArticles = async () => {
  "use cache; ttl=200; tags=articles"; // 追加
  const response = await fetch("http://localhost:3000/api/articles/popular?limit=50");
  const data = await response.json();
  return data;
};

// 追加
const refreshArticles = async () => {
  "use server";
  invalidate(getArticles);
};

export default async function Popular() {
  const articles = (await getArticles()) as ArticleJson[];

  if (!articles) return null;

  return (
    <div className="container mx-auto px-4 py-8">
      <div className="flex justify-between items-center mb-6">
        <Link
          to="/"
          className="flex items-center text-gray-600 hover:text-gray-900"
        >
          <ArrowLeft className="w-5 h-5 mr-2" />
          Back to Home
        </Link>
        {/* 追加 */}
        <form
          // @ts-expect-error Server Actions are not yet supported in types
          action={async () => {
            "use server";
            await refreshArticles();
          }}
        >
          <button
            className="flex items-center px-4 py-2 text-gray-600 bg-white border border-gray-200 rounded-lg hover:bg-gray-50 hover:border-gray-300 transition-all duration-200 ease-in-out focus:outline-none focus:ring-2 focus:ring-offset-2 focus:ring-gray-200"
            type="submit"
          >
            <RefreshCw className="w-4 h-4 mr-2" />
            Refresh
          </button>
        </form>
      </div>
      <div className="mb-12">
        <h1 className="text-3xl font-bold text-gray-900 mb-8">
          Popular Articles
        </h1>
        <PopularArticleList articles={articles} />
      </div>
    </div>
  );
}
react-serverのreavalideを利用してキャッシュの期間(200秒)とキャッシュ名(tag)を設定します。
const getArticles = async () => {
  "use cache; ttl=200; tags=articles"; // 追加
これで200秒ごとにキャッシュが消えて再度関数が呼ばれると新しいデータを取得しに行きます。
今回はリフレッシュボタンでいつでも最新の人気記事一覧を取得できるようにもします。
        <form
          // @ts-expect-error Server Actions are not yet supported in types
          action={async () => {
            "use server";
            await refreshArticles();
          }}
        >
          <button
            className="flex items-center px-4 py-2 text-gray-600 bg-white border border-gray-200 rounded-lg hover:bg-gray-50 hover:border-gray-300 transition-all duration-200 ease-in-out focus:outline-none focus:ring-2 focus:ring-offset-2 focus:ring-gray-200"
            type="submit"
          >
            <RefreshCw className="w-4 h-4 mr-2" />
            Refresh
          </button>
        </form>
formタグを使ってReact19から利用できるようになったアクションを設定しています。
リフレッシュボタンが押されてサブミットイベントが走るとアクションに指定したrefreshArticlesが実行されます。use serverをつけることでサーバー側で実行が可能です。
const refreshArticles = async () => {
  "use server";
  invalidate(getArticles);
};
refreshArticlesではrevalidateを用いてgetArticlesのキャッシュを強制的にクリアしています。こうすることで最新情報を取得してキャッシュすることが可能です。
それではSSGで起動しして確認してみましょう
$ npm run build // 別のターミナルでnpm run devをする
$ npm run start // npm run devは切る
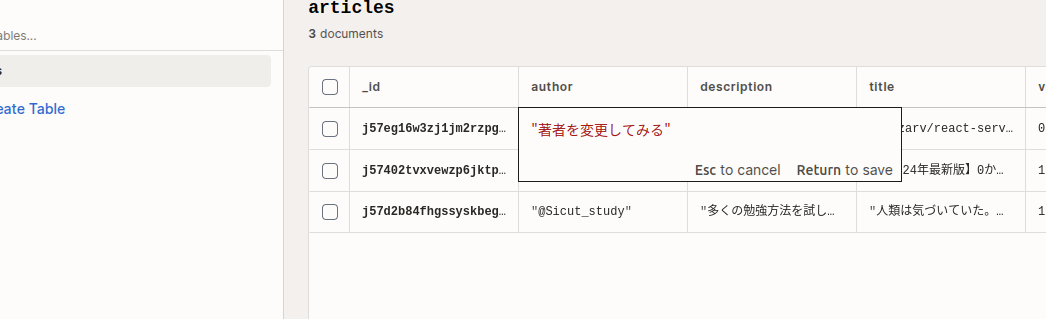
Convexからデータを変更してみます。
リロードをしても著者の名前は変わりません

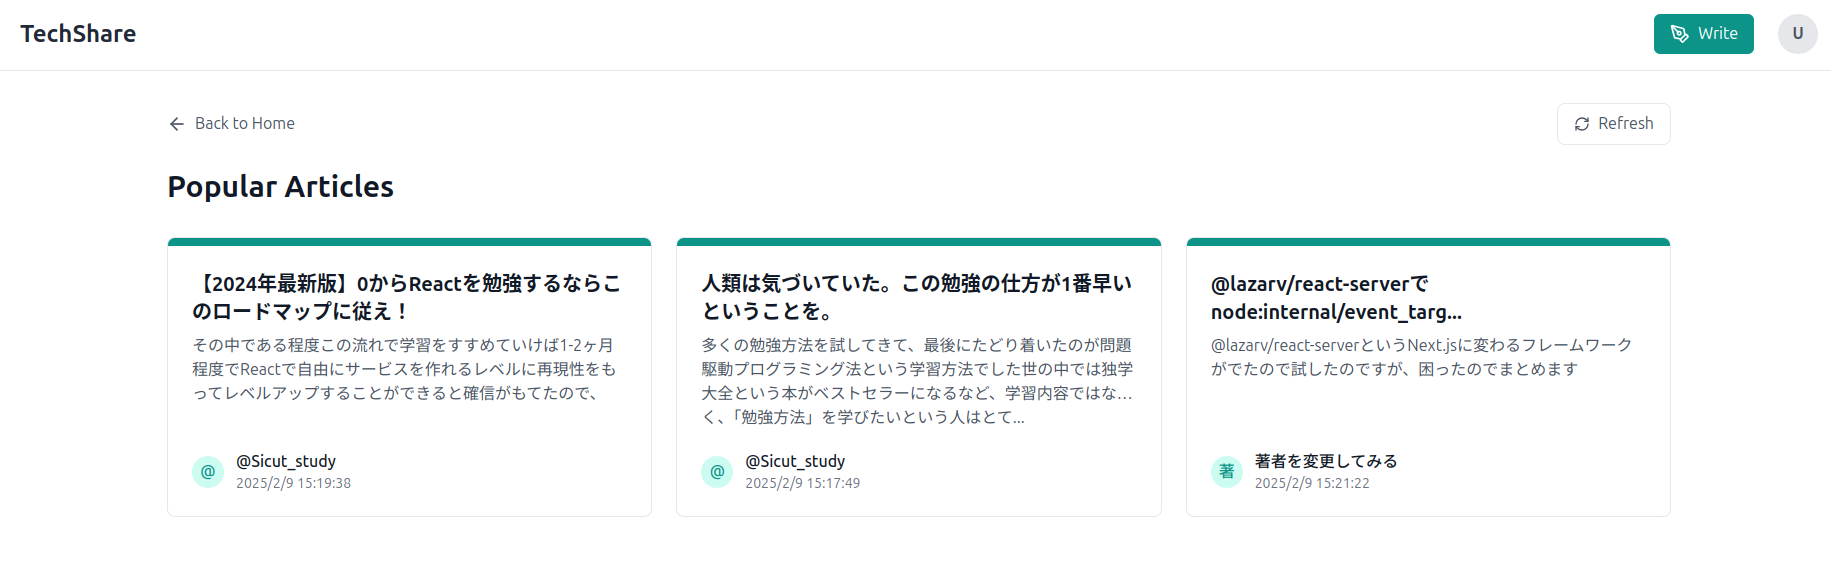
ではリフレッシュボタンを押してみます。
著者が更新されました!これでISRの実装は終了です!
8. 記事を追加できるようにする
続いて/editorの実装をします。エディターなどはユーザー操作を即座に反映することが大切になるのでクライアントサイドレンダリングで実装していきましょう。
まずはConvex関数を作成します。
import { v } from "convex/values";
import { mutation, query } from "./_generated/server";

export const get = query({
  args: {},
  handler: async (ctx) => {
    const articles = await ctx.db.query("articles").collect();

    const sortedArticles = articles.sort(
      (a, b) => b._creationTime - a._creationTime
    );

    return sortedArticles.map((article) => {
      return {
        id: article._id,
        title: article.title,
        description: article.description,
        author: article.author,
        createdAt: article._creationTime,
        viewCount: article.viewCount,
      };
    });
  },
});

export const getPopular = query({
  args: {
    limit: v.optional(v.number()),
  },
  handler: async (ctx, args) => {
    const { limit } = args;
    const articles = await ctx.db.query("articles").collect();

    const sortedArticles = articles
      .sort((a, b) => (b.viewCount ?? 0) - (a.viewCount ?? 0))
      .slice(0, limit ?? 10);
    return sortedArticles.map((article) => {
      return {
        id: article._id,
        title: article.title,
        description: article.description,
        author: article.author,
        createdAt: article._creationTime,
        viewCount: article.viewCount,
      };
    });
  },
});

// 追加
export const insert = mutation({
  args: {
    title: v.string(),
    description: v.string(),
  },
  handler: async (ctx, { title, description }) => {
    await ctx.db.insert("articles", {
      title,
      description,
      author: "@Sicut_study",
      viewCount: 0,
    });
  },
});
追加はPOSTリクエストなのでmutationを利用しています。
export const insert = mutation({
  args: {
    title: v.string(),
    description: v.string(),
  },
今回は著者は固定の文字で入力することとしてエディターからはタイトルと内容を受け取ることとします。
  handler: async (ctx, { title, description }) => {
    await ctx.db.insert("articles", {
      title,
      description,
      author: "@Sicut_study",
      viewCount: 0,
    });
  },
次にエディタ部分を実装します。Qiitaのようなエディタを実装するためにreact-md-editorを使います。
$ npm i @uiw/react-md-editor
$ touch src/components/MDEditorComponent.tsx
"use client";

import { useEffect, useState } from "react";
import type MDEditorType from "@uiw/react-md-editor";

interface MDEditorProps {
  value: string;
  onChange: (value?: string) => void;
}

export function MDEditorComponent({ value, onChange }: MDEditorProps) {
  const [MDEditor, setMDEditor] = useState<typeof MDEditorType | null>(null);

  useEffect(() => {
    import("@uiw/react-md-editor").then((mod) => {
      setMDEditor(() => mod.default);
    });
  }, []);

  if (!MDEditor) {
    return (
      <div className="w-full h-[400px] border border-gray-300 rounded-lg bg-gray-50 flex items-center justify-center">
        Loading editor...
      </div>
    );
  }

  return (
    <div className="space-y-2">
      <div
        data-color-mode="light"
        style={
          {
            "--color-fg-default": "#000000",
            "--color-canvas-default": "#ffffff",
          } as React.CSSProperties
        }
        className="prose max-w-none"
      >
        <MDEditor
          value={value}
          onChange={onChange}
          preview="live"
          height={400}
          className="w-full !text-black"
          textareaProps={{
            placeholder: "Write your article content here...",
            style: {
              color: "#000000",
              backgroundColor: "#ffffff",
              fontSize: "16px",
            },
          }}
        />
      </div>
    </div>
  );
}
このコンポーネントでは親コンポーネント(src/app/editor/page.tsx)からvalue(エディターの内容)とonChange(変更時の処理)を受け取ります。useStateを使って、MDEditorの状態を管理します
interface MDEditorProps {
  value: string;
  onChange: (value?: string) => void;
}

export function MDEditorComponent({ value, onChange }: MDEditorProps) {
  const [MDEditor, setMDEditor] = useState<typeof MDEditorType | null>(null);
次にuseEffectで見慣れない処理をしているところがあります。
  const [MDEditor, setMDEditor] = useState<typeof MDEditorType | null>(null);

  useEffect(() => {
    import("@uiw/react-md-editor").then((mod) => {
      setMDEditor(() => mod.default);
    });
  }, []);
これは動的インポートという方法でライブラリをインポートしています。
MDEditorがクライアントサイドでインポートしないとエラーになってしまいます。しかしuse clientをつけているもののreact-serverでは最初にサーバーサイドで依存関係を解決しようとしてしまうのでエラーになってしまいます。なので完全にクライアントサイドのときのみにインポートするようにしています。
取得したモジュールをuseStateに格納することでステートをコンポーネント(MDEditor)のように利用することが可能です。
        <MDEditor
          value={value}
          onChange={onChange}
          preview="live"
MDEditorはpreviewをliveにすることでマークダウンエディターと実際のスタイルがあたっている表示を同時に見ることができます。
"use client";
import { useState } from "react";
import { useMutation } from "convex/react";
import { api } from "../../../convex/_generated/api";
import { useClient } from "@lazarv/react-server/client";
import { MDEditorComponent } from "../../components/MDEditorComponent";
export default function Editor() {
const insertArticle = useMutation(api.articles.insert);
const [content, setContent] = useState("");
const { navigate } = useClient();
const handleAddArticle = async (formData: FormData) => {
const title = formData.get("title") as string;
await insertArticle({
title,
description: content,
});
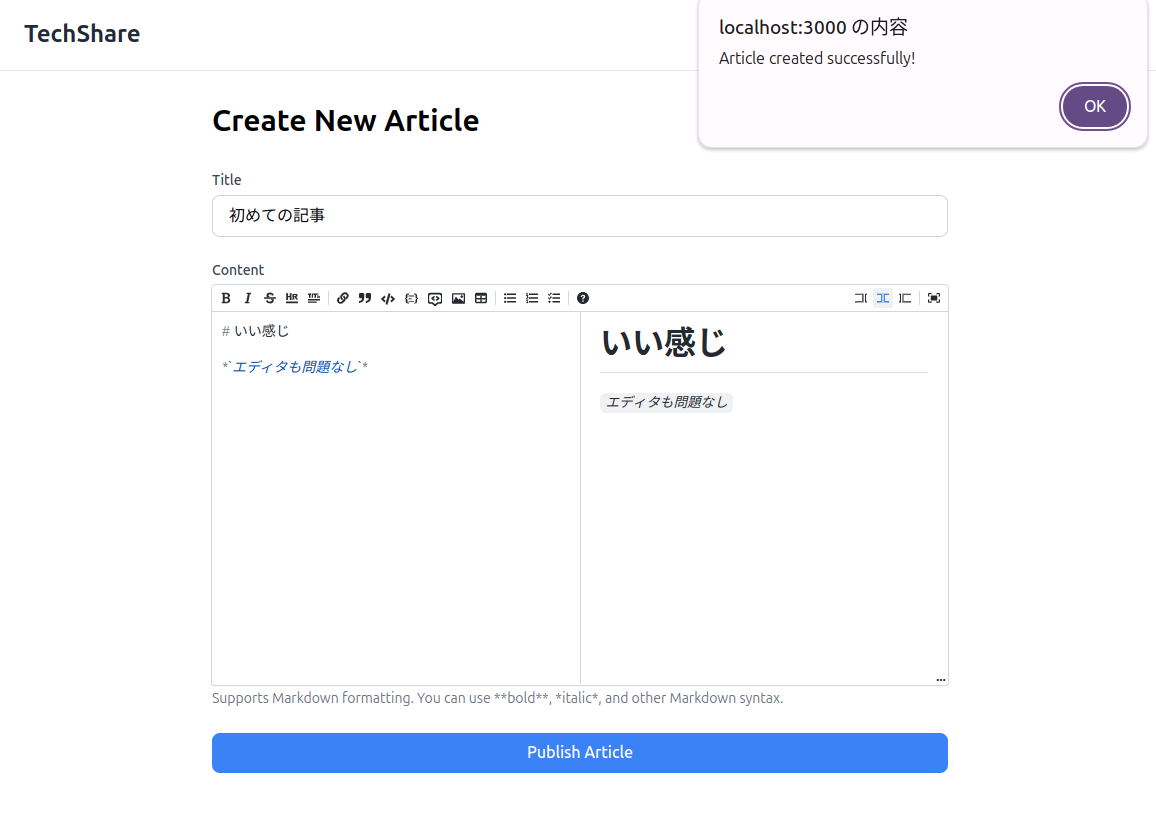
alert("Article created successfully!");
navigate("/");
};
return (
<div className="max-w-3xl mx-auto px-4 py-8" data-color-mode="light">
<h1 className="text-3xl font-bold mb-8">Create New Article</h1>
<form
// @ts-expect-error Server Actions are not yet supported in types
action={handleAddArticle}
className="space-y-6"
>
<div>
<label
htmlFor="title"
className="block text-sm font-medium text-gray-700 mb-1"
>
Title
</label>
<input
type="text"
name="title"
className="w-full px-4 py-2 border border-gray-300 rounded-lg focus:ring-2 focus:ring-blue-500 focus:border-blue-500 outline-none transition-colors"
required
/>
</div>
<div>
<label
htmlFor="content"
className="block text-sm font-medium text-gray-700 mb-1"
>
Content
</label>
<div className="prose max-w-none">
<MDEditorComponent
value={content}
onChange={(value) => setContent(value || "")}
/>
</div>
<p className="mt-1 text-sm text-gray-500">
Supports Markdown formatting. You can use **bold**, *italic*, and
other Markdown syntax.
</p>
</div>
<button
type="submit"
className="w-full bg-blue-500 text-white font-medium py-2 px-4 rounded-lg hover:bg-blue-600 transition-colors focus:outline-none focus:ring-2 focus:ring-blue-500 focus:ring-offset-2"
>
Publish Article
</button>
</form>
</div>
);
}

いい感じに画面ができたので解説していきます。
今回は追加のConvex関数を呼ぶためにuseMutationを使っています。クライアントサイドなので今回は問題なく利用ができます。
const insertArticle = useMutation(api.articles.insert);
追加の処理はボタンを押したら行われるのですがここではアクションを活用しています。
  <form
        // @ts-expect-error Server Actions are not yet supported in types
        action={handleAddArticle}
        className="space-y-6"
      >

      省略

        <button
          type="submit"
          className="w-full bg-blue-500 text-white font-medium py-2 px-4 rounded-lg hover:bg-blue-600 transition-colors focus:outline-none focus:ring-2 focus:ring-blue-500 focus:ring-offset-2"
        >
          Publish Article
        </button>
      </form>
ボタンを押したらサブミットイベントが走り、formのアクションhandleAddArticleが実行されます。
  const handleAddArticle = async (formData: FormData) => {
    const title = formData.get("title") as string;
    await insertArticle({
      title,
      description: content,
    });

    alert("Article created successfully!");
    navigate("/");
  };
handleAddArticleではタイトルと内容をinsertArticleに渡すのですが、タイトルはformから直接取得しています。
    const title = formData.get("title") as string;

(省略)

          <input
            type="text"
            name="title"
            className="w-full px-4 py-2 border border-gray-300 rounded-lg focus:ring-2 focus:ring-blue-500 focus:border-blue-500 outline-none transition-colors"
            required
          />
しかし内容(MDEditorの値)はコンポーネントが違うためformDataから取得できないのでステートで管理して使うようにしています。
  const [content, setContent] = useState("");

  (省略)

          <div className="prose max-w-none">
            <MDEditorComponent
              value={content}
              onChange={(value) => setContent(value || "")}
            />
先程のMDEditorComponentももう一度見てみましょう
        <MDEditor
          value={value}
          onChange={onChange}
MDEditorにvalueとonChangeを渡すことで、エディタの入力が変わったらonChangeが発火してcontentのステートの値が更新されます。この値をアクションの中では利用しています。
    await insertArticle({
      title,
      description: content,
    });

    alert("Article created successfully!");
    navigate("/");
convex関数(insertArticle)を実行したあとにアラートを表示して、ホーム画面に遷移するようにしています。
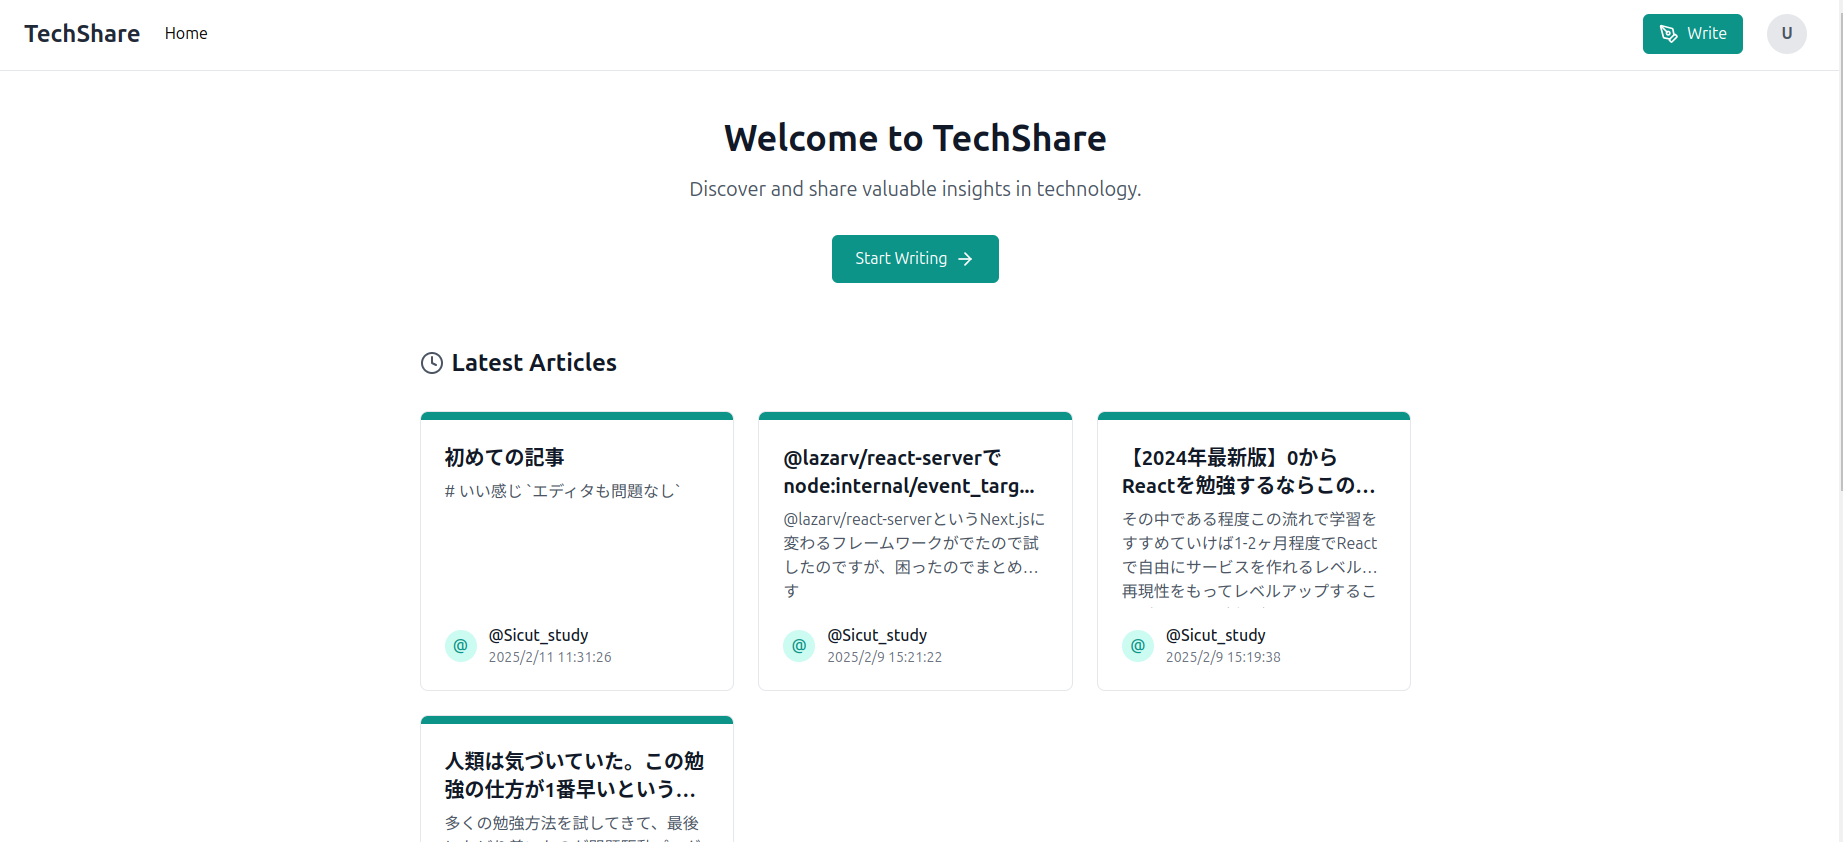
実際に登録をしてみましょう。
トップページに戻ると新しい記事が追加されていることがわかります。
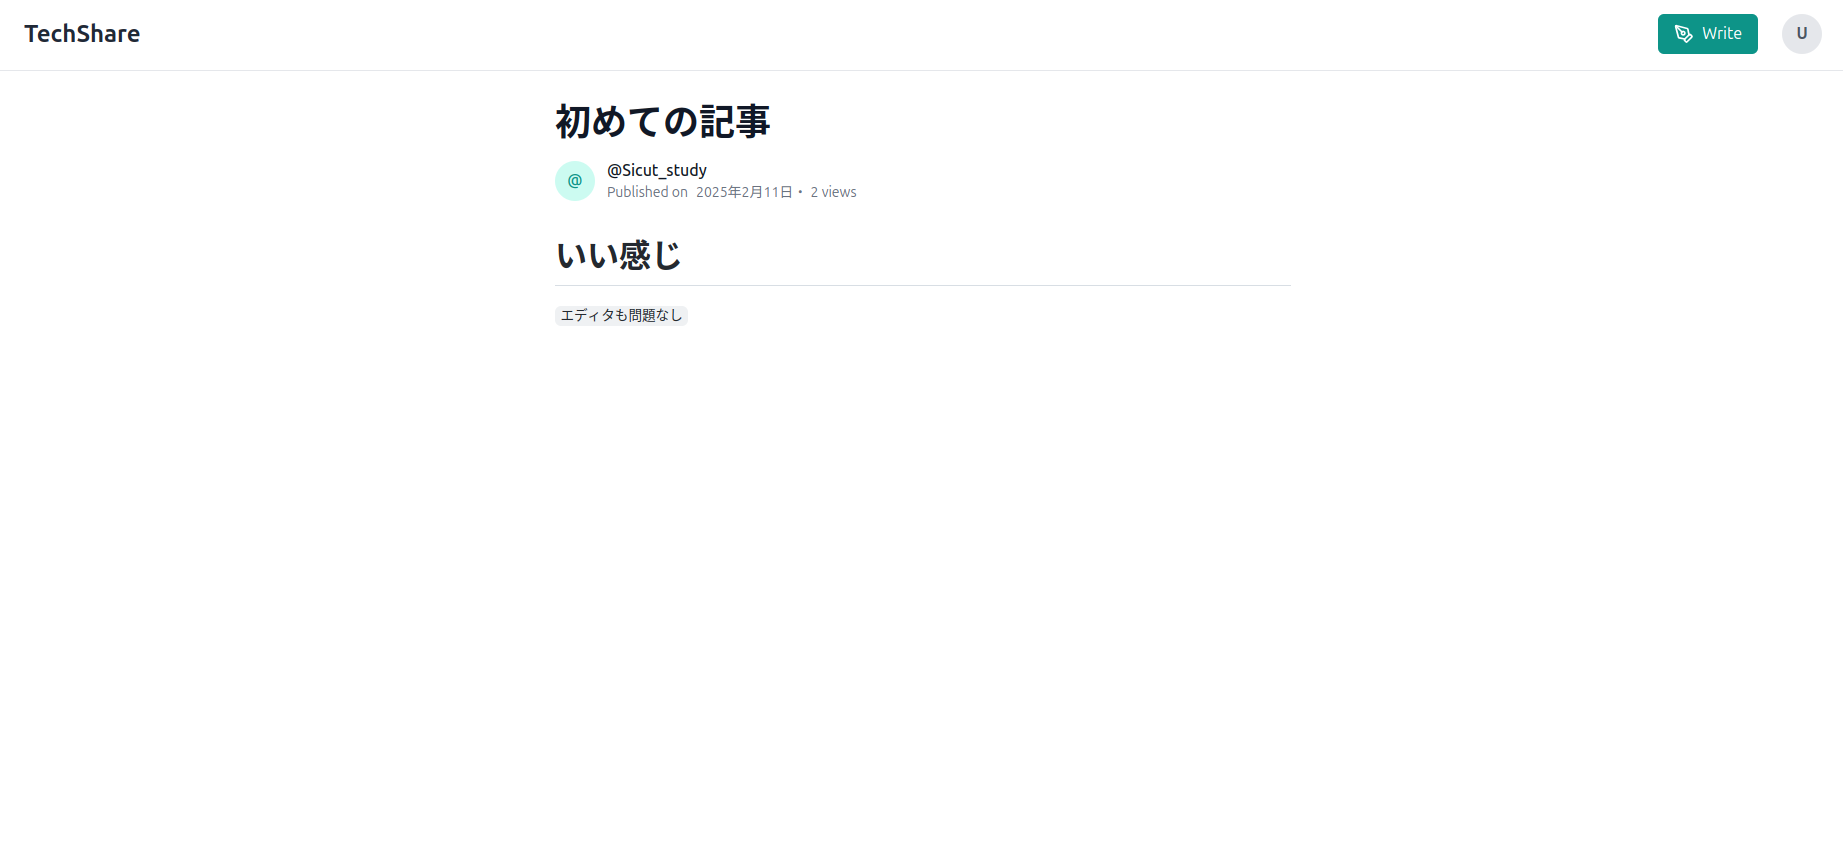
9. 記事詳細ページを作ろう
最後に記事詳細ページを作成します。
このページでは記事の内容をスタイルがあった状態で表示をします。
また詳細ページを見た場合はその記事のviewCountを+1するようにします。
最初にConvex関数を2つ作成します。
import { v } from "convex/values";
import { mutation, query } from "./_generated/server";

export const get = query({
  args: {},
  handler: async (ctx) => {
    const articles = await ctx.db.query("articles").collect();

    const sortedArticles = articles.sort(
      (a, b) => b._creationTime - a._creationTime
    );

    return sortedArticles.map((article) => {
      return {
        id: article._id,
        title: article.title,
        description: article.description,
        author: article.author,
        createdAt: article._creationTime,
        viewCount: article.viewCount,
      };
    });
  },
});

export const getPopular = query({
  args: {
    limit: v.optional(v.number()),
  },
  handler: async (ctx, args) => {
    const { limit } = args;
    const articles = await ctx.db.query("articles").collect();

    const sortedArticles = articles
      .sort((a, b) => (b.viewCount ?? 0) - (a.viewCount ?? 0))
      .slice(0, limit ?? 10);
    return sortedArticles.map((article) => {
      return {
        id: article._id,
        title: article.title,
        description: article.description,
        author: article.author,
        createdAt: article._creationTime,
        viewCount: article.viewCount,
      };
    });
  },
});

export const insert = mutation({
  args: {
    title: v.string(),
    description: v.string(),
  },
  handler: async (ctx, { title, description }) => {
    await ctx.db.insert("articles", {
      title,
      description,
      author: "@Sicut_study",
      viewCount: 0,
    });
  },
});

// 追加
export const getById = query({
  args: {
    id: v.id("articles"),
  },
  handler: async (ctx, { id }) => {
    const article = await ctx.db.get(id);
    if (!article) {
      throw new Error("Article not found");
    }

    return {
      id: article._id,
      title: article.title,
      description: article.description,
      author: article.author,
      createdAt: article._creationTime,
      viewCount: article.viewCount,
    };
  },
});

// 追加
export const incrementViewCount = mutation({
  args: {
    id: v.id("articles"),
  },
  handler: async (ctx, { id }) => {
    const article = await ctx.db.get(id);
    if (!article) {
      throw new Error("Article not found");
    }

    await ctx.db.patch(article._id, {
      viewCount: article.viewCount + 1,
    });
  },
});
"use client";

import { useMutation, useQuery } from "convex/react";
import { api } from "../../../../convex/_generated/api";
import { Id } from "../../../../convex/_generated/dataModel";
import { useEffect, useState } from "react";
import type MDEditorType from "@uiw/react-md-editor";

export default function ArticlePage({ id }: { id: string }) {
  const article = useQuery(api.articles.getById, {
    id: id as Id<"articles">,
  });
  const incrementViewCount = useMutation(api.articles.incrementViewCount);
  const [MDEditor, setMDEditor] = useState<typeof MDEditorType | null>(null);

  useEffect(() => {
    import("@uiw/react-md-editor").then((mod) => {
      setMDEditor(mod.default);
    });

    incrementViewCount({ id: id as Id<"articles"> });
  }, [incrementViewCount, id]);

  if (!article || !MDEditor) {
    return (
      <div className="min-h-screen flex items-center justify-center">
        <div className="animate-spin rounded-full h-32 w-32 border-t-2 border-b-2 border-teal-500"></div>
      </div>
    );
  }

  return (
    <div className="max-w-3xl mx-auto px-4 py-8">
      <div className="mb-8">
        <h1 className="text-4xl font-bold text-gray-900 mb-4">
          {article.title}
        </h1>
        <div className="flex items-center space-x-4">
          <div className="flex items-center">
            <div className="w-10 h-10 rounded-full bg-teal-100 flex items-center justify-center text-teal-600 font-medium">
              {article.author.charAt(0)}
            </div>
            <div className="ml-3">
              <div className="font-medium text-gray-900">{article.author}</div>
              <div className="text-sm text-gray-500 flex">
                <div>
                  <span className="mr-2">Published on</span>
                  {new Date(article.createdAt).toLocaleDateString("ja-JP", {
                    year: "numeric",
                    month: "long",
                    day: "numeric",
                  })}
                </div>
                <div className="text-gray-500">
                  ・ {article.viewCount} views
                </div>
              </div>
            </div>
          </div>
        </div>
      </div>

      <div data-color-mode="light" className="prose max-w-none">
        <MDEditor.Markdown source={article.description} />
      </div>
    </div>
  );
}
今回は動的ルーティングなのでURLからid部分を取得していきます。
export default function ArticlePage({ id }: { id: string }) {
そしてuseQueryで記事の情報を取得します。
  const article = useQuery(api.articles.getById, {
    id: id as Id<"articles">,
  });
記事は閲覧数を+1しないといけないのでuseEffectの中でincrementViewCountを実行します。
 const incrementViewCount = useMutation(api.articles.incrementViewCount);

  useEffect(() => {
    (省略)
    incrementViewCount({ id: id as Id<"articles"> });
  }, [incrementViewCount, id]);
これにて技術投稿アプリができました!お疲れ様でした!
課題
今回のハンズオンでは/blogsを実装していません。
最新記事一覧ページをこれまでの実装を参考に作成してください。
おわりに
今回は今後人気が出そうなreact-serverについて解説しました!
私もこのライブラリには期待しておりなんとスポンサーにもなっており日本語ドキュメント作成にも携わっております。普及するためにハンズオンを今後作成予定です!

テキストでは細かく解説しましたが、一部説明しきれていない箇所もありますので動画教材で紹介しています。合わせてご利用ください
JISOUのメンバー募集中!
プログラミングコーチングJISOUでは、新たなメンバーを募集しています。
日本一のアウトプットコミュニティでキャリアアップしませんか?
興味のある方は、ぜひホームページからお気軽にカウンセリングをお申し込みください!
▼▼▼
追記
作者の方にもチュートリアルが網羅的であると感謝いただきました!
An outstanding tutorial on modern React server-side rendering with @lazarv/react-server and Convex! 🚀 Jin has not only crafted this fantastic guide, but alongside other fellow Japanese developers, they're working on translating the documentation website into Japanese! 🇯🇵✨… https://t.co/mk2e90Oqs9
— Viktor Lázár (@lazarv1982) March 2, 2025
図解ハンズオンたくさん投稿しています!
本記事のレビュアーの皆様
- へいほー様
- ARISA様
- 上嶋様
- 後藤様
- tokec様
次回のハンズオンのレビュアーはXにて募集します。
参考