Wiiのようなジェスチャーゲームを作っていたので、そこで学んだことを記述していきたいと思います。
こちらが魔法の杖!
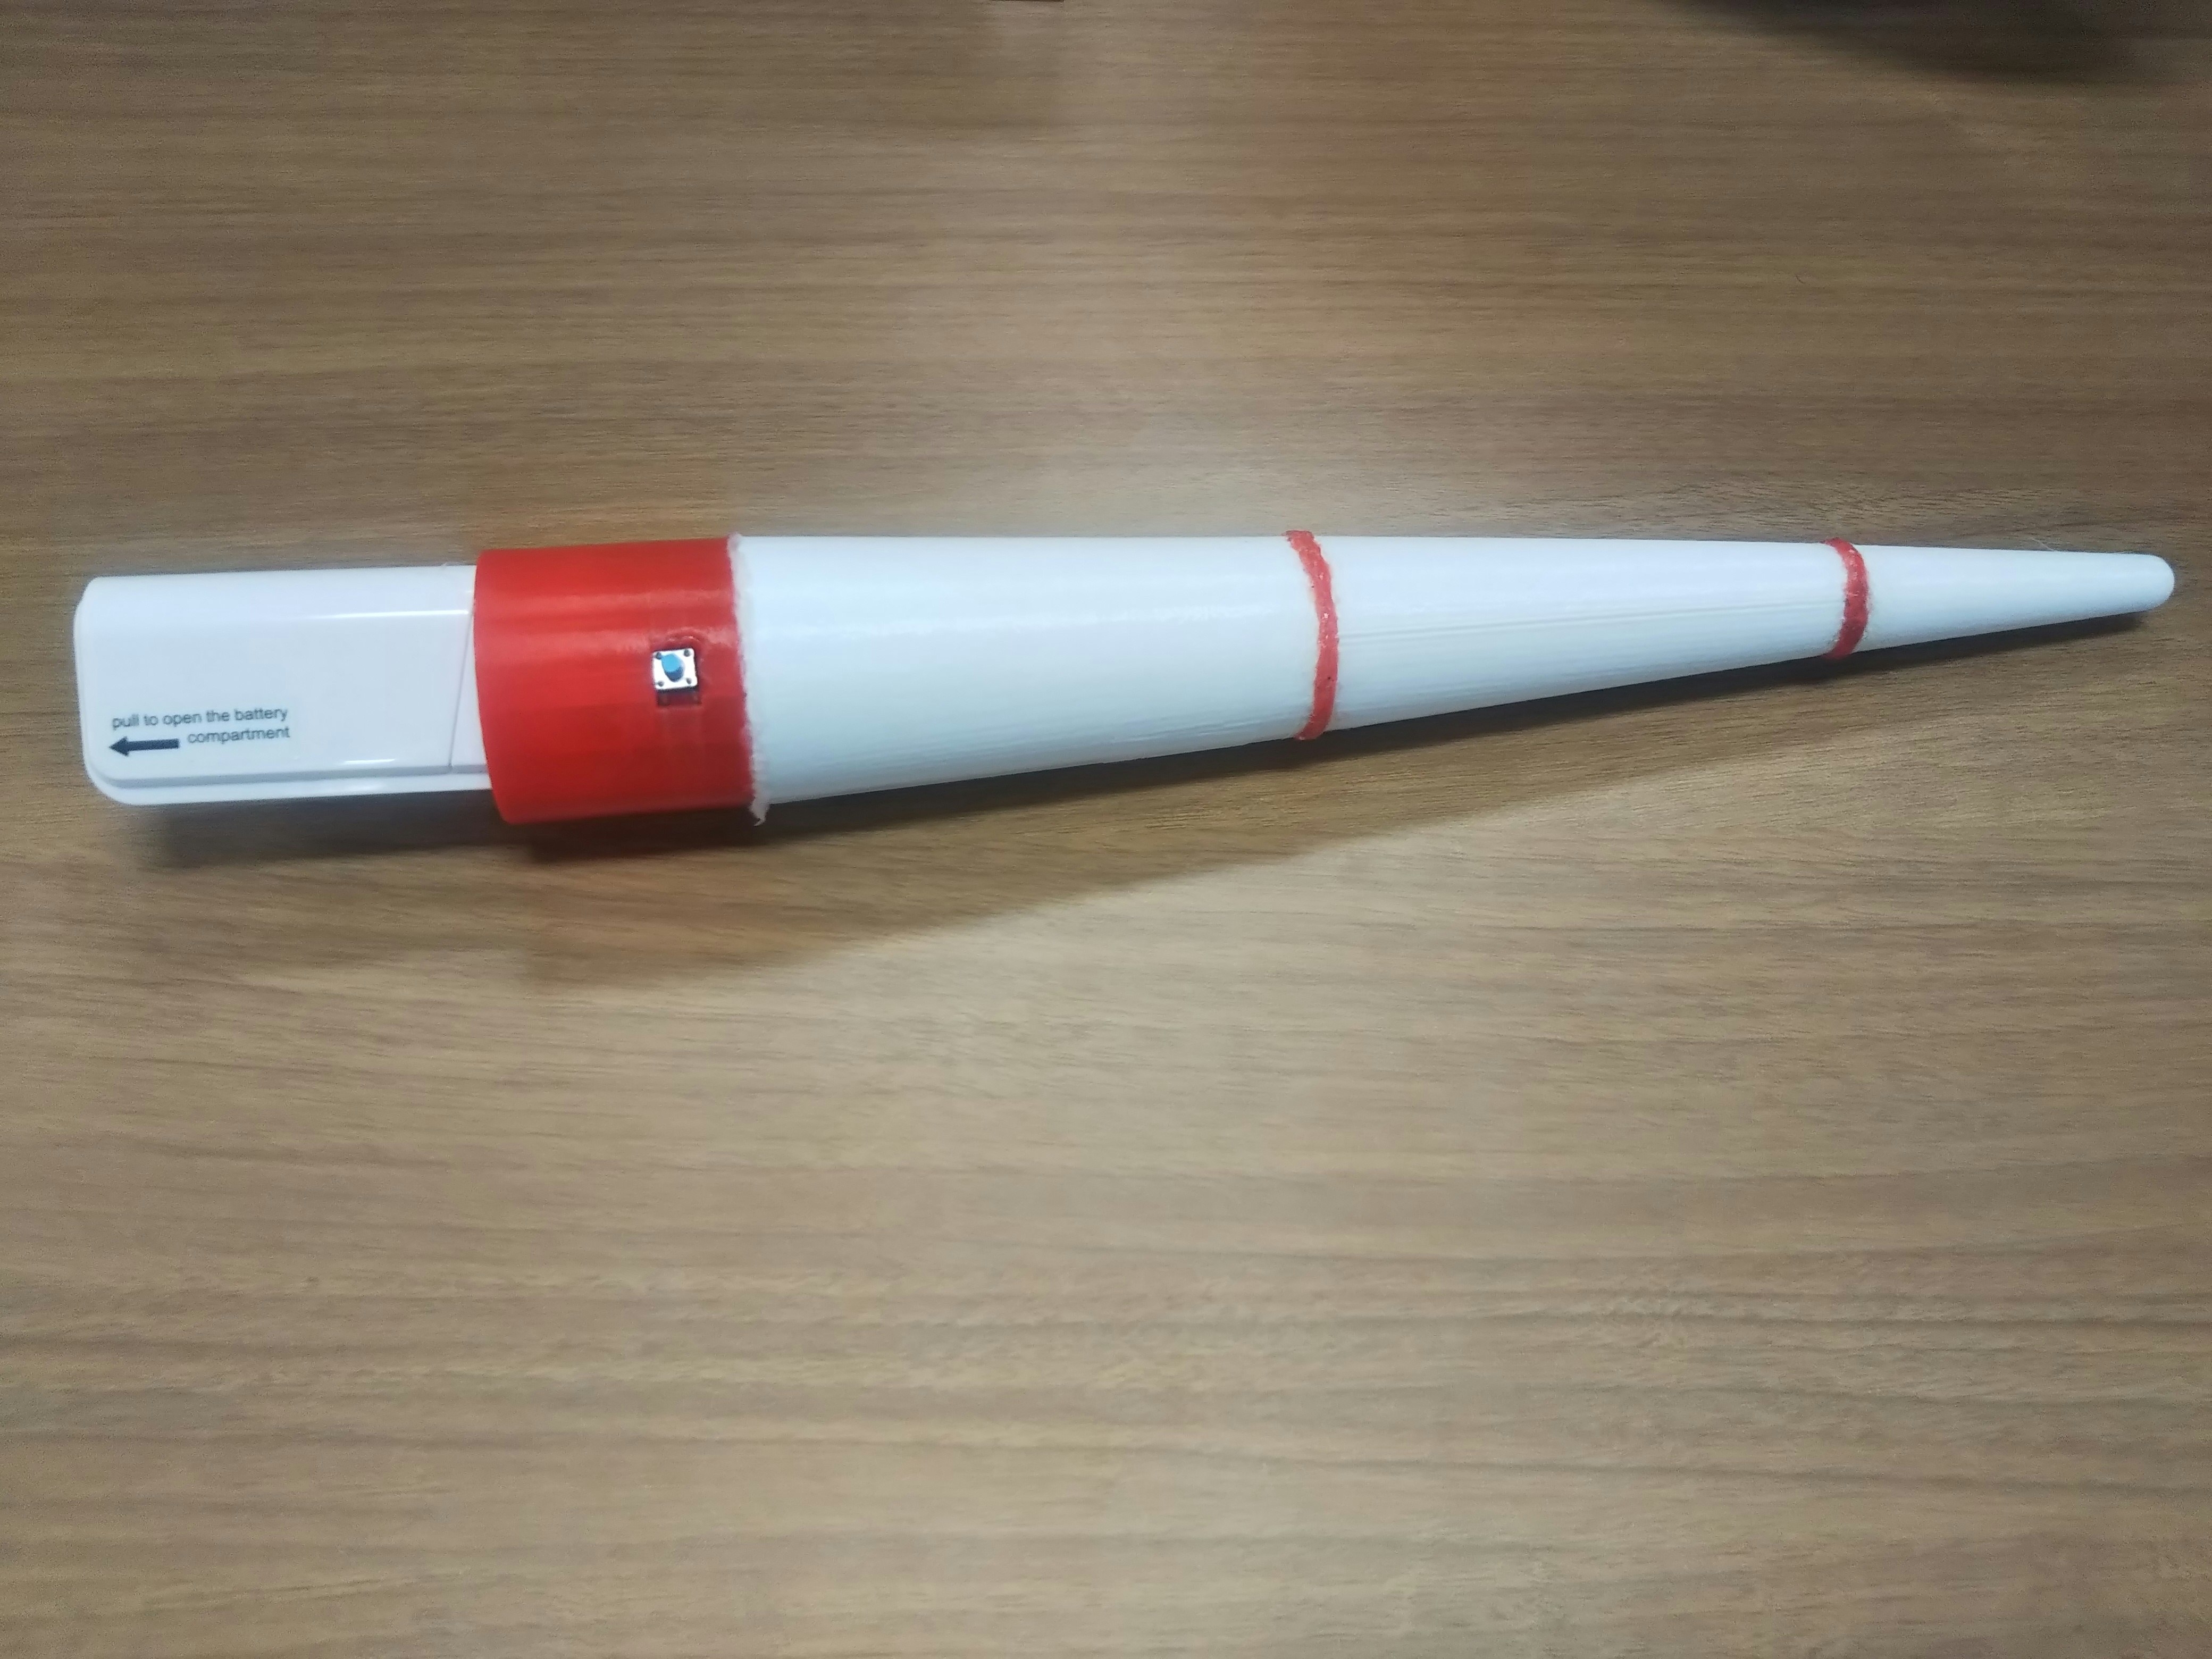
外装は3Dプリンタで作成。
中にはESPと加速度センサが入っている。
スイッチは外から押せるようにした。
100円ショップのモバイルバッテリーとESPを接続。
魔法の杖から加速度を取得する
こちらは「スイッチを押しているとき、加速度の値をBluetoothで送信する」からコードを少し変えています。
変更点はこちら
- スイッチを押しているときではなく、常に加速度の値を送信しています。
- スイッチを押した瞬間、押されたという情報を送信します。
# include <SparkFunLSM9DS1.h>
# include "BluetoothSerial.h"

# define LSM9DS1_M 0x1E
# define LSM9DS1_AG 0x6B
# define SW_PIN 7 //pin番号を指定する

LSM9DS1 imu;
BluetoothSerial SerialBT;

int sw_before = 0;
uint16_t connectionState = 0;

void setup()
{
  Serial.begin(115200);
  SerialBT.begin("ESP32"); //Bluetooth接続で表示される名前を指定
  pinMode(SW_PIN, INPUT);

  imu.settings.device.commInterface = IMU_MODE_I2C;
  imu.settings.device.mAddress = LSM9DS1_M;
  imu.settings.device.agAddress = LSM9DS1_AG;
  if (connectionState == 0)
  {
    connectionState = imu.begin();
    while (connectionState == 0)
    {
      Serial.println("Failed to communicate with LSM9DS1.");
      Serial.println("Double-check wiring.");
      Serial.println("Default settings in this sketch will "
                     "work for an out of the box LSM9DS1 "
                     "Breakout, but may need to be modified "
                     "if the board jumpers are.");
      Serial.print("Connection Status: ");
      Serial.println(imu.begin());
      delay(1000);
      connectionState = imu.begin();
      Serial.println("------------------------------------------------------\n");
    }if(connectionState!=1){
      Serial.print("connectionState: ");
      Serial.println(connectionState);
    }
  }
}

void loop()
{
  float x, y, z;
  imu.readAccel();
  x = imu.calcAccel(imu.ax)*10;
  y = imu.calcAccel(imu.ay)*10;
  z = imu.calcAccel(imu.az)*10;
  int sw_state = digitalRead(SW_PIN); // スイッチが押されてるとき1、押されていないと0
  if(sw_state == 1 && sw_before == 0){ // 0だったのが1に切り替わった
    SerialBT.println("clicked");
  }else{
    SerialBT.println("no");
  }
  SerialBT.println(x);
  SerialBT.println(y);
  SerialBT.println(z);
  sw_before = sw_state;
  delay(20);
}
ジェスチャーの予測モデルを作成
PCで加速度を受信し、ジェスチャの予測モデルを作成します。
Bluetoothを接続
ESP側を動かしたままで、PC本体の、
"設定→デバイス→Bluetoothとその他のデバイス→Bluetoothまたはその他のデバイスを追加する→Bluetooth"
の順で探し、自信で指定したESPのデバイス名(今回の場合はESP32_2)をクリック。接続が終わったら完了。
COMポートを探す
そのまま、PC本体の、
"設定→デバイス→Bluetoothとその他のデバイス→その他のBluetoothオプション→COMポート
で、接続されたESPの"発信"側のポート番号をコピー。
コード
上記のポート番号を、12行目の
ser = serial.Serial(.......
の "COM??" に入力する。
今回は3種類のジェスチャーを3回ずつ行い、入力した名前の予測モデルを作成するコードです。ゲームのチューニング程度なので3回にしましたが、ジェスチャーの種類の数と回数、長さ等は仕様に応じて変更してください。
# coding utf-8
import serial #シリアル通信を行うため
import numpy as np #numpyで2次元配列を扱うため
from sklearn.svm import SVC #学習用
import pickle #モデルをファイルとして使用する用

length = 20 #ジェスチャの長さ(連続で受信するデータの個数)
gestures = 3 #ジェスチャの種類の数
times = 3 #各ジェスチャを行う回数

print('Connecting...')
ser = serial.Serial('COM19',115200,timeout=None) #ポート番号19からシリアル受信

print('Input your name:')
name = input()
filename = 'model_' + name + '.sav' #入力した名前の学習モデルのファイル名
X = []
Y = []

for i in range(gestures * times):
    cnt = 0 #受信したデータのカウント用
    mx = [] #各軸ごとの配列を初期化
    my = []
    mz = []
    gesture_num = i % gestures + 1 #ジェスチャ番号を指定

    print('Do gesture No.', gesture_num)

    while True:
        line = ser.readline() #シリアルから1行取得
        switch = line.decode('utf-8') #コード変換
        line = ser.readline()
        x = line.decode('utf-8')
        line = ser.readline()
        y = line.decode('utf-8')
        line = ser.readline()
        z = line.decode('utf-8')

        if switch == 'clicked\r\n' and cnt == 0: #クリックされたらカウント開始
            cnt = 1

        if cnt != 0: #ジェスチャ中
            mx.append(x.rstrip('\r\n')) #シリアルから受け取ってたデータのゴミを取って配列へ追加
            my.append(y.rstrip('\r\n'))
            mz.append(z.rstrip('\r\n'))
            cnt += 1
            if cnt == length: #lengthまでいったら次のジェスチャ待ちへ
                break

    m = mx + my + mz #三軸の加速度を横一列にする
    X.append(m) #学習データ用リストへ追加
    Y.append(str(gesture_num)) #学習ラベル用リストへ追加

ser.close() #シリアルを閉じる

model = SVC(kernel = 'linear', C=1, gamma=1) #学習モデルのパラメータを指定
model.fit(X,np.ravel(Y)) #学習を行う

with open(filename, 'wb') as fp_model: #学習モデルを保存するためのファイルを開く
    pickle.dump(model, fp_model) #モデルを保存

print('Model created.')
これで予測モデルが保存されました!
研究目的ではありませんので、精度検証は行わず早速ジェスチャーを判定してみましょう。
ジェスチャーを判定し続ける
PCで加速度を受信し、ジェスチャーを判定し続けます。
以下のプログラムで、ポート番号を適切に変えて実行するだけです。
import serial #シリアル通信を行うため
import pickle #モデルをファイルとして使用する用

length = 20 #ジェスチャの長さ(連続で受信するデータの個数)
print('Connecting...')
ser = serial.Serial('COM19',115200,timeout=None) #ポート番号19からシリアル受信

print('Input your name:')
name = input()
filename = 'models/model_' + name + '.sav' #入力した名前の学習モデルのファイル名

print('Loading...')
with open(filename, 'rb') as fp_model: #学習モデルファイルを開く
    loaded_model = pickle.load(fp_model) #モデルをロード
print('Do any gesture!')

try:
    while True:
        cnt = 0 #受信したデータのカウント用
        mx = [] #各軸ごとの配列を初期化
        my = []
        mz = []

        while True:
            line = ser.readline() #シリアルから1行取得
            switch = line.decode('utf-8') #コード変換
            line = ser.readline()
            x = line.decode('utf-8')
            line = ser.readline()
            y = line.decode('utf-8')
            line = ser.readline()
            z = line.decode('utf-8')

            if switch == 'clicked\r\n' and cnt == 0: #クリックされたらカウント開始
                cnt = 1

            if cnt != 0: #ジェスチャ中
                mx.append(x.rstrip('\r\n')) #シリアルから受け取ってたデータのゴミを取って配列へ追加
                my.append(y.rstrip('\r\n'))
                mz.append(z.rstrip('\r\n'))
                cnt += 1
                if cnt == length: #lengthまでいったら次のジェスチャ待ちへ
                    break

        m = mx + my + mz #三軸の加速度を横一列にする
        m2 = [] #リスト型にするため
        m2.append(m) #リストへ追加

        pre = loaded_model.predict(m2) #ジェスチャの判定
        print('This gesture is No.', pre[0][0])

except KeyboardInterrupt: # Ctrl-C を捕まえたら終了
    print('Close!')

ser.close() #シリアルを閉じる
できましたでしょうか?
ゲームで応用する場合は、判定したものをソケット通信で送信し、Unity側のC#で受け取れば実装できます。処理もなかなか素早くできますよ。
ご不明点等あればお気軽に質問してください。