あらすじ
UnityとVSCodeで開発していくために必須な項目を列挙していきます。
Windows の記事です。Macは別で書きます。
インストールするもの
- Chocolatey
- Visual Studio Code
- Unity Hub
- Unity 2020 (LTS)
- LTS とは「安定バージョンとして長期的にメンテナンスされているバージョン」です
- Mono
- NetFramework 4.7.1 Tageting Pack
Chocolatey
インストール用ページに行きます。
こんなコマンドが「コピーしてっ!」て感じで書いてあるのでコピーします。
Set-ExecutionPolicy Bypass -Scope Process -Force; [System.Net.ServicePointManager]::SecurityProtocol = [System.Net.ServicePointManager]::SecurityProtocol -bor 3072; iex ((New-Object System.Net.WebClient).DownloadString('https://chocolatey.org/install.ps1'))
自分のPCで、powershellを起動します。先ほどコピーしたものを貼り付けてEnterキーで実行します。
※ここでpowershellのウィンドウは一度閉じてください。完全に。
VScode
Chocolatey を使って、VScodeをインストールします。
powershellを立ち上げて、下記のコマンドを実行します。
choco install vscode -y
拡張機能
下記の3つの拡張機能は必須です。
https://marketplace.visualstudio.com/items?itemName=Unity.unity-debug
https://marketplace.visualstudio.com/items?itemName=ms-dotnettools.csharp
https://marketplace.visualstudio.com/items?itemName=ms-vscode.mono-debug
インストールはもちろんコマンドです。Powershellで下記を実行します。
code --install-extension Unity.unity-debug
code --install-extension ms-vscode.mono-debug
※vscodeのインストール後にpowershellを開きなおすか、refreshenvコマンドを実行してから行ってください。
ms-dotnettools.csharpはUnity.unity-debugをインストールする時に半自動的にインストールされます。
Mono
MonoはC# Mono
https://www.mono-project.com/download/stable/
これをインストールして、Pathの設定をしておきます。
Windowsの場合、システム環境変数のPathでも、ユーザー環境変数のPathでもどちらでもよいです。
なんか32bitとか64bitとかGTK有り無しとか、考えるのが面倒です。
そのため、思考停止でchoco install monoします。
念のため、確認するためにmono --versionコマンドを実行すると、64が入ったみたいです。(GTKは?)
Mono JIT compiler version 6.12.0 (Visual Studio built mono)
Copyright (C) 2002-2014 Novell, Inc, Xamarin Inc and Contributors. www.mono-project.com
        TLS:           __thread
        SIGSEGV:       normal
        Notification:  Thread + polling
        Architecture:  amd64
        Disabled:      none
        Misc:          softdebug
        Interpreter:   yes
        LLVM:          supported, not enabled.
        Suspend:       preemptive
        GC:            sgen (concurrent by default)
GTKがどうなったのかよく分かりません。詳しく知りたくなったら、Inkscape開発者とかGimp開発者に聞いたら良さそうです。
ちなみに、cmdでwhere monoしたら、monoは下記に居ることが分かりました。
C:\Program Files\Mono\bin\mono.exe
.Net Core
https://dotnet.microsoft.com/download/
Build Appsしなければいけないので、SDKをダウンロードしてインストールします。
これはとりあえず最新をいれれば動きます。
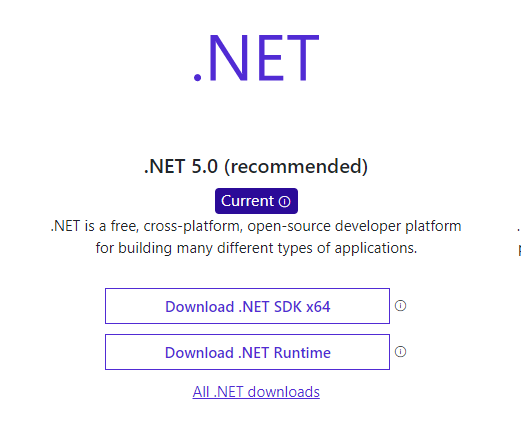
5 がrecommendedらしいので5を使います。
(SDKは64bit版しかないらしい。)
.Net Framework
https://dotnet.microsoft.com/download/
にて最新版をダウンロードしてインストールしてもダメでした。
 [ fail ] : OmniSharp.MSBuild.ProjectLoader
        .NETFramework,Version=v4.7.1 の参照アセンブリが見つかりませんでした。この問題を解決するには、このフレームワーク バージョンの Developer Pack (SDK/Targeting Pack) をインストールするか、アプリケーションのターゲットを再設定してください。https://aka.ms/msbuild/developerpacks で .NET Framework Developer Pack をダウンロードできます。
Vscodeで拡張機能を入れると出てくるエラーメッセージを確認します。
該当するバージョンを、エラーメッセージ内のURL
https://aka.ms/msbuild/developerpacks
からダウンロードしてインストールする必要があるようです。
うまく設定できたか確認
Unityの右クリックメニューで一番下にあるOpen C# Projectから、vscodeを開いてみましょう。
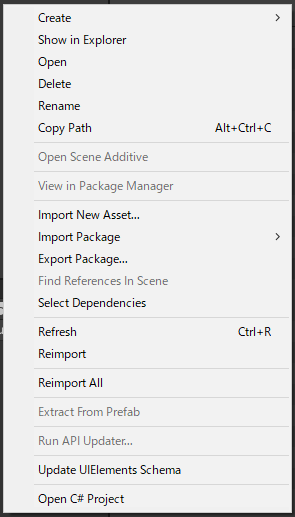
そのとき、下記のようなlogが出ます。
--------------------------------------------------------------------------------
Razor.VSCode version 6.0.0-alpha.1.20575.5
--------------------------------------------------------------------------------
Razor's trace level is currently set to 'Off'
- To change Razor's trace level set 'razor.trace' to 'Off', 'Messages' or 'Verbose' and then restart VSCode.
- To report issues invoke the 'Report a Razor issue' command via the command palette.
-----------------------------------------------------------------------------------------------------------------------------

 [Client - 16:46:55] No Razor files detected in workspace, delaying language server start.
Starting OmniSharp server at 2021/2/18 16:46:55
    Target: c:\Unity\ProjectFighterX\ProjectFighterX\ProjectFighterX.sln

OmniSharp server started.
    Path: c:\Users\%username%\.vscode\extensions\ms-dotnettools.csharp-1.23.9\.omnisharp\1.37.6\OmniSharp.exe
    PID: 6840

[info]: OmniSharp.Stdio.Host
        Starting OmniSharp on Windows 6.2.9200.0 (x64)
[info]: OmniSharp.Services.DotNetCliService
        DotNetPath set to dotnet
[info]: OmniSharp.MSBuild.Discovery.MSBuildLocator
        Located 3 MSBuild instance(s)
            1: Visual Studio Build Tools 2019 16.8.30804.86 - "C:\Program Files (x86)\Microsoft Visual Studio\2019\BuildTools\MSBuild\Current\Bin"
            2: Visual Studio Community 2019 16.7.30621.155 - "C:\Program Files (x86)\Microsoft Visual Studio\2019\Community\MSBuild\Current\Bin"
            3: StandAlone 16.8.0 - "c:\Users\%username%\.vscode\extensions\ms-dotnettools.csharp-1.23.9\.omnisharp\1.37.6\.msbuild\Current\Bin"
下記画像を見ていただくと、5・6行目の間に0 referencesと表示されています。
また、MonoBehabiourのあたりにマウスカーソルを当てていますが、DocStringの中身が表示できています。
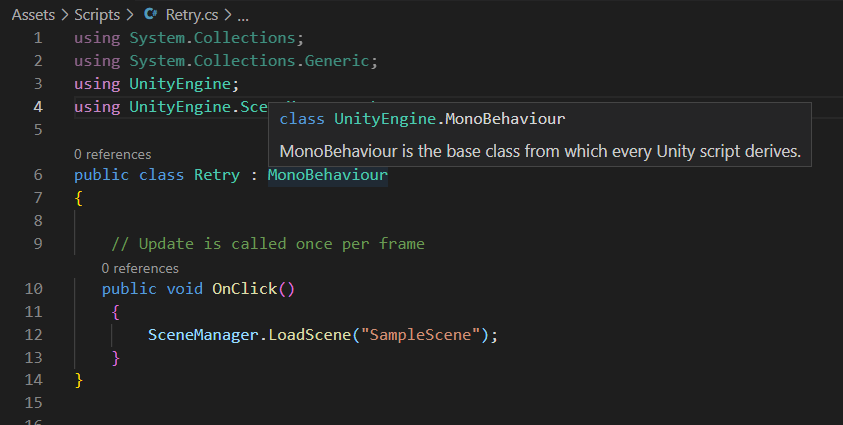
インテリセンス(入力補完機能)もしっかり効いています。
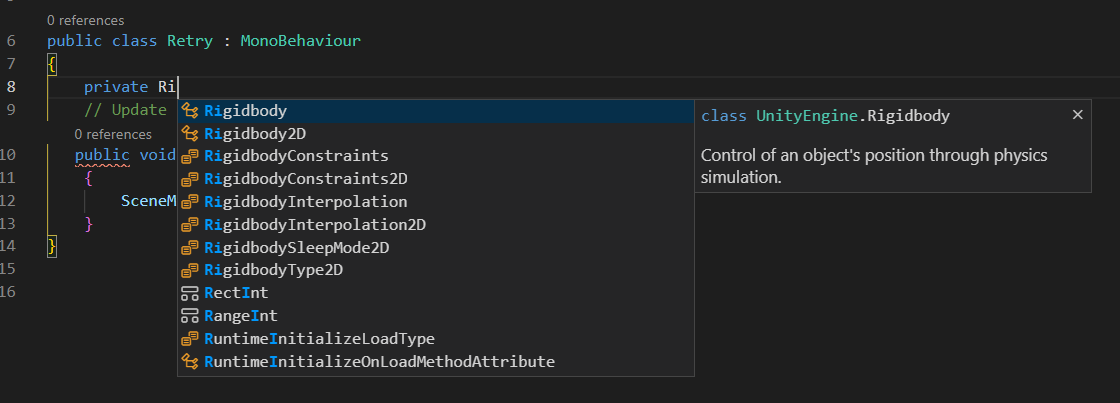
ここまでくれば完璧です。
ちなみに初回のみ下記のようなLogが出ます。合計130MBくらいダウンロードしていますね。
Installing C# dependencies...

Platform: win32, x86_64

Downloading package 'OmniSharp for Windows (.NET 4.6 / x64)' (36013 KB).................... Done!
Validating download...
Integrity Check succeeded.
Installing package 'OmniSharp for Windows (.NET 4.6 / x64)'

Downloading package '.NET Core Debugger (Windows / x64)' (43209 KB).................... Done!
Validating download...
Integrity Check succeeded.
Installing package '.NET Core Debugger (Windows / x64)'

Downloading package 'Razor Language Server (Windows / x64)' (52339 KB).................... Done!
Installing package 'Razor Language Server (Windows / x64)'

Finished
Unityとvscodeを連携させる
UnityでWindow→PackageManagerでこのようなウィンドウが開きます。
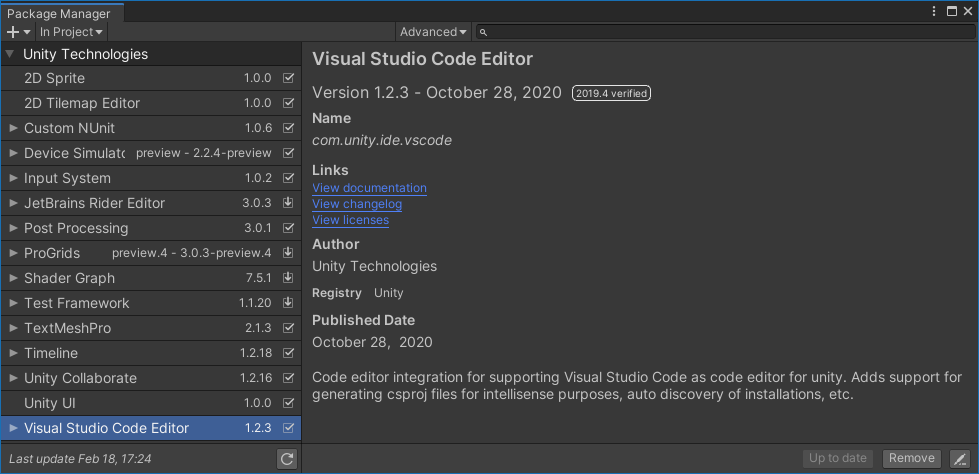
ここで、Visual Studio Code EditorがVerifiedのバージョンか確かめます。
もし古かったりしたら、Up to dateボタンを押して最新にします。
次に、Edit→Preferenceでこのウィンドウを開きます。
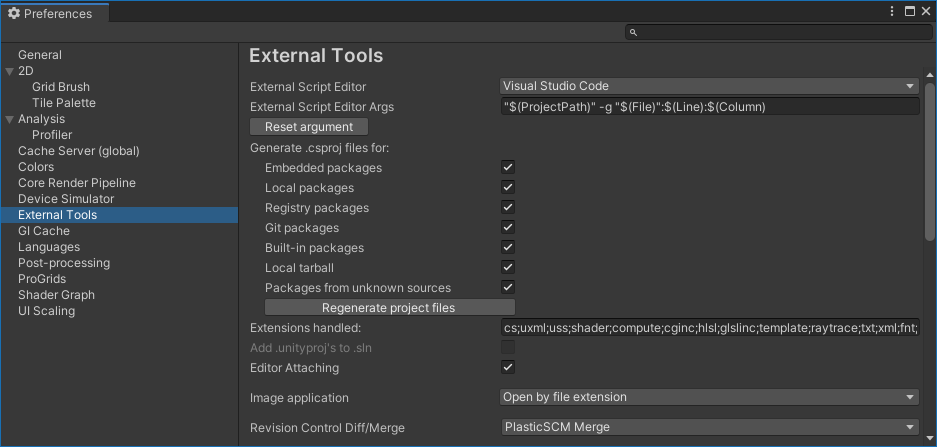
External Script EditorをVisual Studio Codeに変えます。
これで、Unityの右クリックメニューOpen C# Projectを押したときや、
Unity上でC# Project`を押したときや、
External Script Editor Args はデフォルトで "$(ProjectPath)" -g "$(File)":$(Line):$(Column)になっています。
書き換えてカスタマイズしてもいいですし、Reset argmentボタンでもとに戻すこともできます。
generate .csproj files for:のところはすべてチェックを入れておきましょう。
チェックを入れた後に、Regenarate project filesボタンを押せば、vscodeがc#プロジェクトを認識できるようになります。
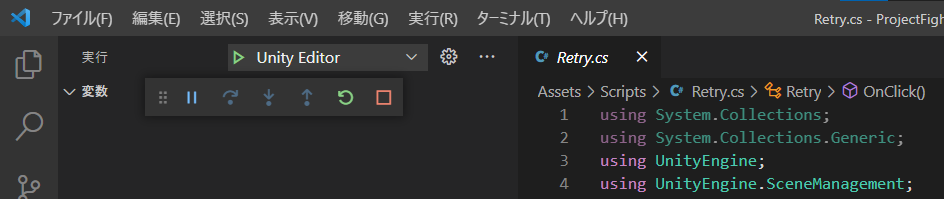
デバッグしてみる
ドロップダウン選択できるところをUnity EditorにしてF5キーを押せばデバッグが始まります。
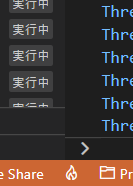 デバッグ中は下のバーがオレンジになります。
上記ができたら、Unityに戻ってPlayボタン(横三角ボタン)を押しましょう。
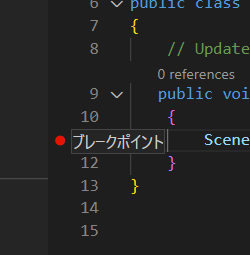
ブレークポイントを設定すれば、ちゃんと止まります。
Debug.Logの出力がvscode側にも出ます。
.vscodeフォルダ内のおすすめ設定
長いので折りたたんでおきます
settings.jsonは自動生成されます。
{
    "files.exclude":
    {
        "**/.DS_Store":true,
        "**/.git":true,
        "**/.gitignore":true,
        "**/.gitmodules":true,
        "**/*.booproj":true,
        "**/*.pidb":true,
        "**/*.suo":true,
        "**/*.user":true,
        "**/*.userprefs":true,
        "**/*.unityproj":true,
        "**/*.dll":true,
        "**/*.exe":true,
        "**/*.pdf":true,
        "**/*.mid":true,
        "**/*.midi":true,
        "**/*.wav":true,
        "**/*.gif":true,
        "**/*.ico":true,
        "**/*.jpg":true,
        "**/*.jpeg":true,
        "**/*.png":true,
        "**/*.psd":true,
        "**/*.tga":true,
        "**/*.tif":true,
        "**/*.tiff":true,
        "**/*.3ds":true,
        "**/*.3DS":true,
        "**/*.fbx":true,
        "**/*.FBX":true,
        "**/*.lxo":true,
        "**/*.LXO":true,
        "**/*.ma":true,
        "**/*.MA":true,
        "**/*.obj":true,
        "**/*.OBJ":true,
        "**/*.asset":true,
        "**/*.cubemap":true,
        "**/*.flare":true,
        "**/*.mat":true,
        "**/*.meta":true,
        "**/*.prefab":true,
        "**/*.unity":true,
        "build/":true,
        "Build/":true,
        "Library/":true,
        "library/":true,
        "obj/":true,
        "Obj/":true,
        "ProjectSettings/":true,
        "temp/":true,
        "Temp/":true
    }
}
launch.jsonは自動生成されます。
{
    // IntelliSense を使用して利用可能な属性を学べます。
    // 既存の属性の説明をホバーして表示します。
    // 詳細情報は次を確認してください: https://go.microsoft.com/fwlink/?linkid=830387
    "version": "0.2.0",
    "configurations": [
        {
            "name": "Unity Editor",
            "type": "unity",
            "path": "Unityプロジェクトフォルダの絶対path/Library/EditorInstance.json",
            "request": "launch"
        },
        {
            "name": "Windows Player",
            "type": "unity",
            "request": "launch"
        },
        {
            "name": "OSX Player",
            "type": "unity",
            "request": "launch"
        },
        {
            "name": "Linux Player",
            "type": "unity",
            "request": "launch"
        },
        {
            "name": "iOS Player",
            "type": "unity",
            "request": "launch"
        },
        {
            "name": "Android Player",
            "type": "unity",
            "request": "launch"
        },
        {
            "name": "Xbox One Player",
            "type": "unity",
            "request": "launch"
        },
        {
            "name": "PS4 Player",
            "type": "unity",
            "request": "launch"
        },
        {
            "name": "SwitchPlayer",
            "type": "unity",
            "request": "launch"
        }
    ]
}
extensions.jsonは自作します。チーム内で使う拡張機能をサジェスト共有できます。
{
	"recommendations": [
		"CoenraadS.bracket-pair-colorizer-2",
		"ms-dotnettools.csharp",
		"MS-CEINTL.vscode-language-pack-ja",
		"ms-vscode.mono-debug",
		"kameshkotwani.google-search",
		"Unity.unity-debug",
		"VisualStudioExptTeam.vscodeintellicode"
	],
	// List of extensions recommended by VS Code that should not be recommended for users of this workspace.
	"unwantedRecommendations": [

	]
}
まとめ
みなさん設定完了しましたか?これで、軽快動作なvscodeで心地よい作業環境になりました。いえい!
もし困ったらコメント欄で聞いていただいたらお答えします。
公式情報
Excelsior!