目標
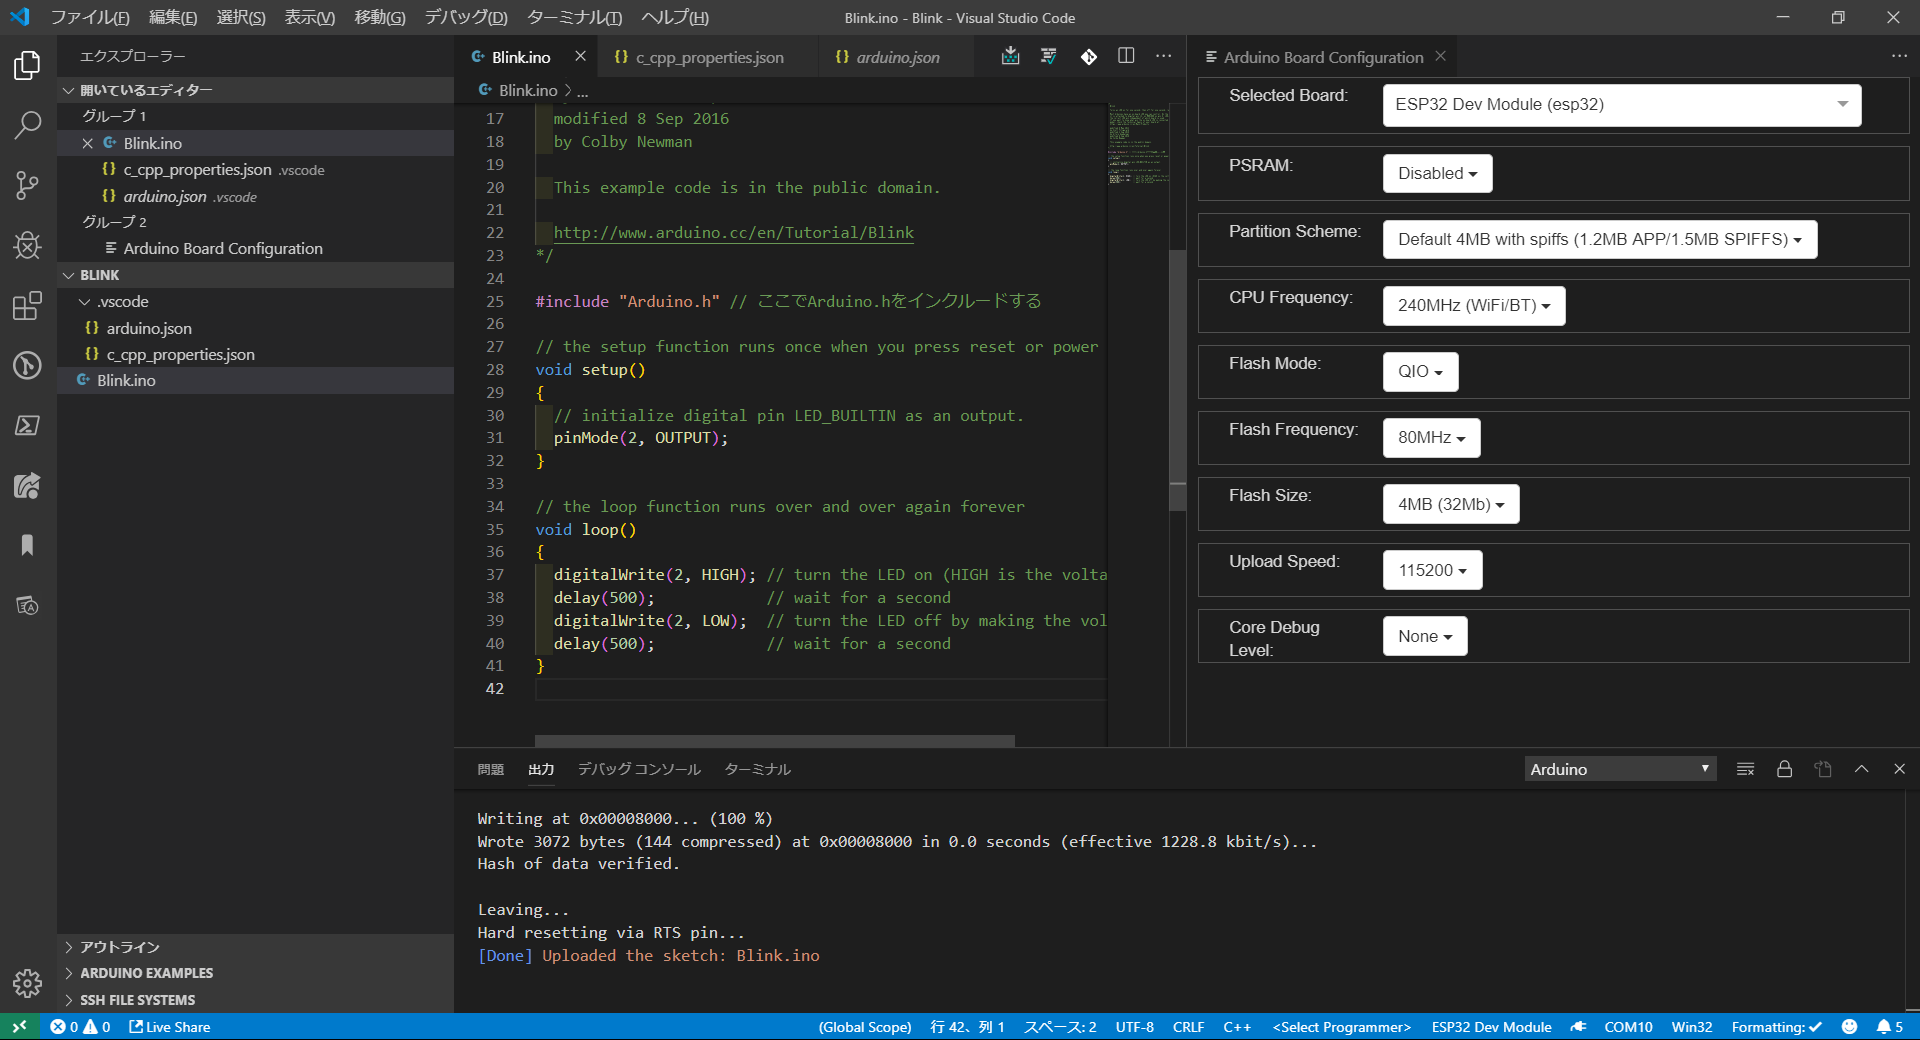
VSCode を使って ESP32 で LED Blink = Lチカ をします。
なんと、せっかくWi-Fi と BLE が使えるボードなのに全く使用しておりません。
前提条件
ハード
-
ESP32 ESPDuino-32 (ESP-WROOM-32) 技適取得品
- Amazon`s Choice になってます。お買い得です。
- データ通信用USBケーブル
- CH340 ドライバ
- PCとの通信にはCH340ドライバのインストールが必要と成る場合が有ります。
- http://www.wch.cn/download/CH341SER_ZIP.html
ソフト
OS
Windows10 Homeで行いましたが、以下でも可能なようです。
アプリケーション
入力補完や自動フォーマット機能などが使いたい方は以下構成にしましょう。
何でもいいという方は、Arduino IDE だけでいいと思います。
-
VSCode
-
Visual Studio Code extension for Arduino
-
Arduino IDE
-
https://github.com/espressif/arduino-esp32
(OSによってインストール方法が違うので気を付けてください。)
-
https://github.com/espressif/arduino-esp32
-
Arduino IDE
-
Visual Studio Code extension for Arduino
Windowsの場合の設定
arduino.jsonはスケッチのアップロード設定です。GUIで設定すれば自動生成されます。
{
    "board": "esp32:esp32:esp32",
    "configuration": "PSRAM=disabled,PartitionScheme=default,CPUFreq=240,FlashMode=qio,FlashFreq=80,FlashSize=4M,UploadSpeed=115200,DebugLevel=none",
    "port": "*** your board port ***",
    "sketch": "Blink.ino"
}
c_cpp_properties.jsonはコンパイラやリンカの設定です。このファイルも自動生成されます。Cコンパイラがインストールされていると自動で認識するようです。その辺りの挙動はわからないので割愛します。includePathとintelliSenseModeとbrowseは書き換えました。
{
  "configurations": [
    {
      "name": "Win32",
      "includePath": [
        "C:/Program Files (x86)/Arduino/hardware/arduino/avr/cores/arduino",
        "C:/Program Files (x86)/Arduino/hardware/arduino/avr/variants/standard",
        "C:/Program Files (x86)/Arduino/hardware/tools/avr/avr/include",
        "C:/Program Files (x86)/Arduino/hardware/tools/avr/lib/gcc/avr",
        "${workspaceRoot}",
        "C:/Users/${env:USERNAME}/AppData/Local/Arduino15/packages"
      ],
      "forcedInclude": [],
      "compilerPath": "C:/Program Files (x86)/Microsoft Visual Studio/2017/BuildTools/VC/Tools/MSVC/14.16.27023/bin/Hostx64/x64/cl.exe",
      "cStandard": "c11",
      "cppStandard": "c++17",
      "intelliSenseMode": "msvc-x64",
      "browse": {
        "path": [
          "C:/Program Files (x86)/Arduino/hardware/arduino/avr/cores/arduino",
          "C:/Program Files (x86)/Arduino/hardware/arduino/avr/variants/standard",
          "C:/Program Files (x86)/Arduino/hardware/tools/avr/avr/include",
          "C:/Program Files (x86)/Arduino/hardware/tools/avr/lib/gcc/avr",
          "${workspaceRoot}",
          "C:/Users/${env:USERNAME}/AppData/Local/Arduino15/packages",
          "C:/Users/${env:USERNAME}/Documents/Arduino"
        ],
        "limitSymbolsToIncludedHeaders": false,
        "databaseFilename": ""
      }
    }
  ],
  "version": 4
}
Arduino IDE を立ち上げてもできますが、VSCode上からesp32のライブラリをインストールするには.vscode/settings.jsonで下記のように拡張機能設定を変更します。
{
    "arduino.additionalUrls": [
        "https://dl.espressif.com/dl/package_esp32_index.json",
        "http://arduino.esp8266.com/stable/package_esp8266com_index.json"
    ],
}
つまづきやすいところ
- USBケーブルに給電専用のものを使っていてPCに認識されない。
-
c_cpp_properties.jsonの設定をしていないためコンパイルできない。 -
c_cpp_properties.jsonの設定をしていないためLinterがエラーメッセージを出す。 - このボードはLEDのIOポートが13ではなく2だということに気が付くのが遅れる。
結果
参考
- ESP8266/ESP32環境向上委員会
- Arduino core for the ESP32 のインストール方法
- 他のESP32ボードに手を出した
- ESP-WROOM-32ボードで、ARDUINO IDEを使用してスケッチプログラミング
Excelsior!
