** Laraveで顧客管理システムを作ってみよう **
この記事の操作例はMacかLinuxを想定して書いてあります。
この記事で説明するLaravelの機能
- Migrate
- Factory
- Seeder
- Eloquent
-- hasMany(), belongsTo(), hasOne() - Policy
- Controller
- Middleware
- @csrf
- Validation
- FormRequest
- Blade
-- layout include - Event & Listener
- Provider
この記事で説明されていないLaravelの機能や概念
- TDD
- Test
- SOLID
- Method DELETE の処理
- Controller での EDITの処理
- Eloquent JOIN
- Cache
対象となる方
- PHPの基本を分かっている
- オブジェクト指向の基本を分かっている
- データベースの基本を分かっている
- MySQLの基本操作が出来る
- PHP7.xの実行環境が有る
- composerコマンドが使える環境を持っている
ごめんなさい。あまり基本的な説明はしません。分からないところが出てきたらググって他の記事を見てください。
構築済みLaravelプロジェクトをGitHubに置きました
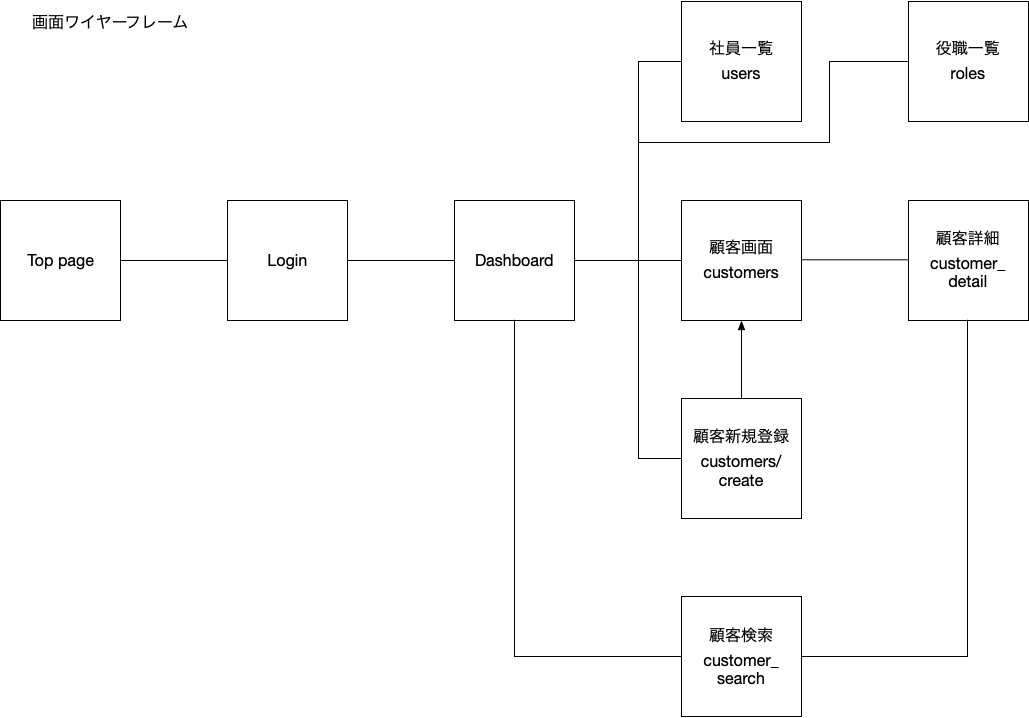
こんなシステムを作ります
簡単な顧客管理システム
- 社員がログインをする
- 社員は役職を持ち、役職にはスーパーバイザーと店員の2つがある
- 社員は顧客を登録・検索して顧客詳細情報を見ることが出来る
- 顧客の履歴を入力・一覧表示できる
- クレーマー顧客が登録されたらスーパーバイザーに通知メールを送る
- 社員は店舗に所属する
- 店舗は東京本社、名古屋支店、大阪支店の3つがある
今回作成しない機能
- 社員の登録編集画面
- 店舗の登録編集画面
画面ワイヤーフレーム
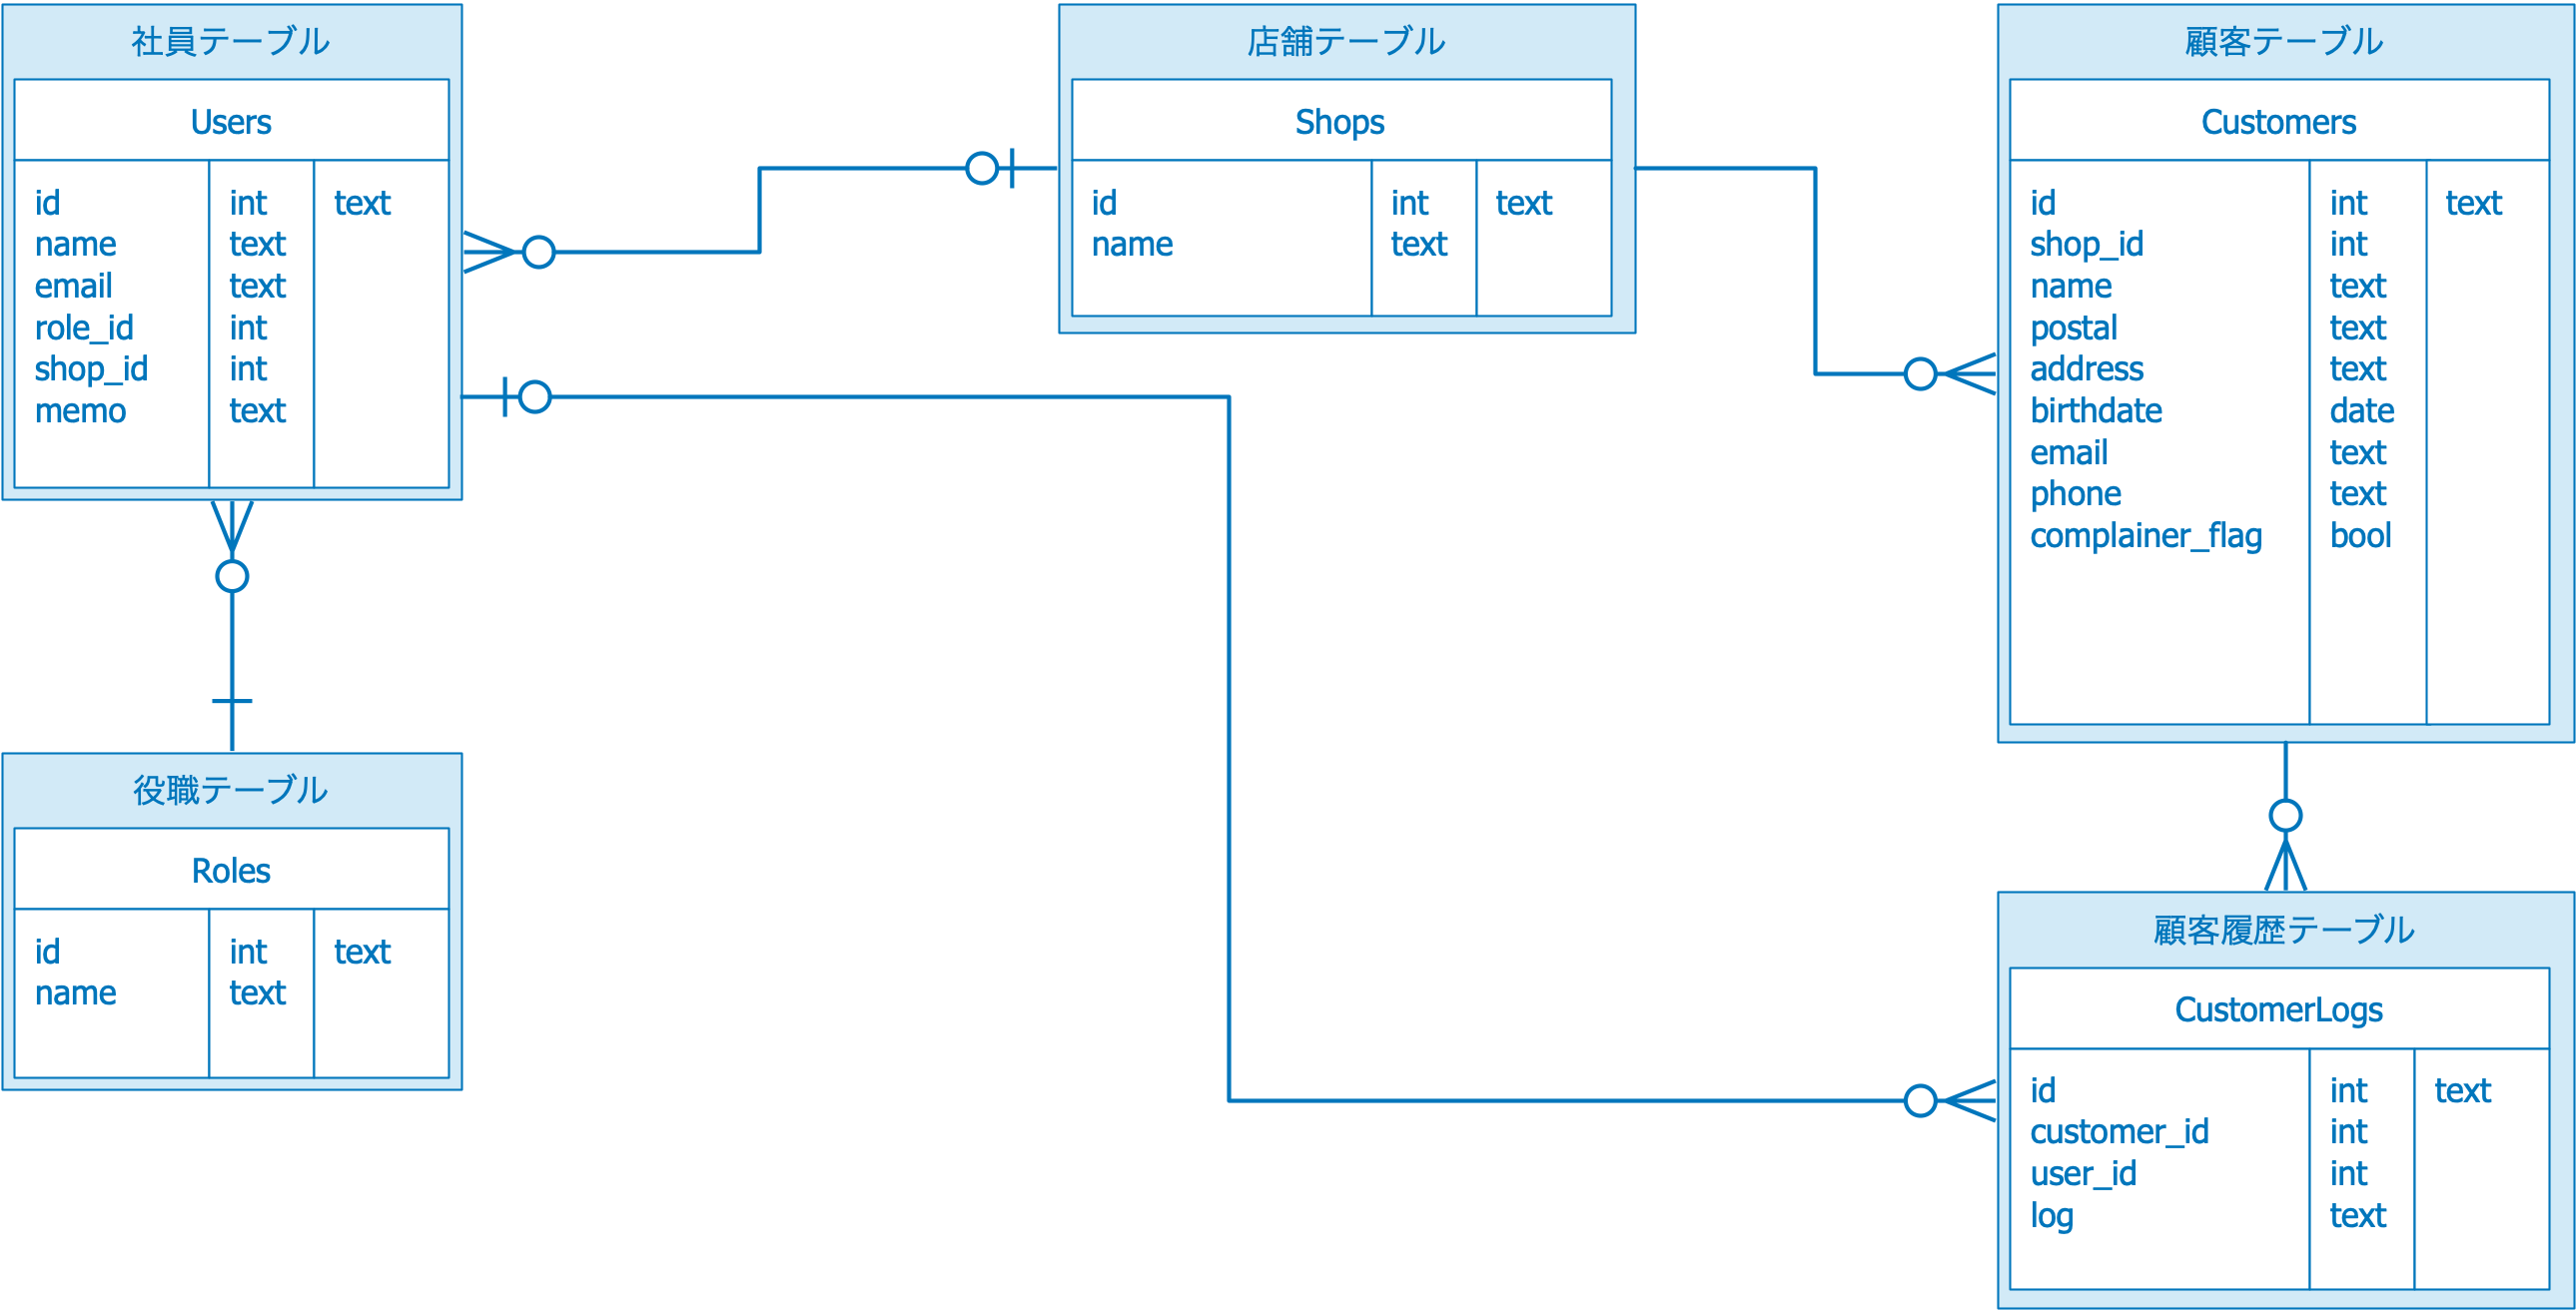
ER図
準備
このプログラムを作成して動かすためには
- ターミナル
- composer
- php7.3以上
- MySQL
が必要になります。
Macを使った場合の準備
ターミナル
Macの場合 スポットライトから「ターミナル」で検索してエンターキーで起動。
Apple公式の説明は以下のURLを参照
https://support.apple.com/ja-jp/guide/terminal/apd5265185d-f365-44cb-8b09-71a064a42125/mac
ターミナルの起動に成功すると以下のようなウィンドウが現れる。
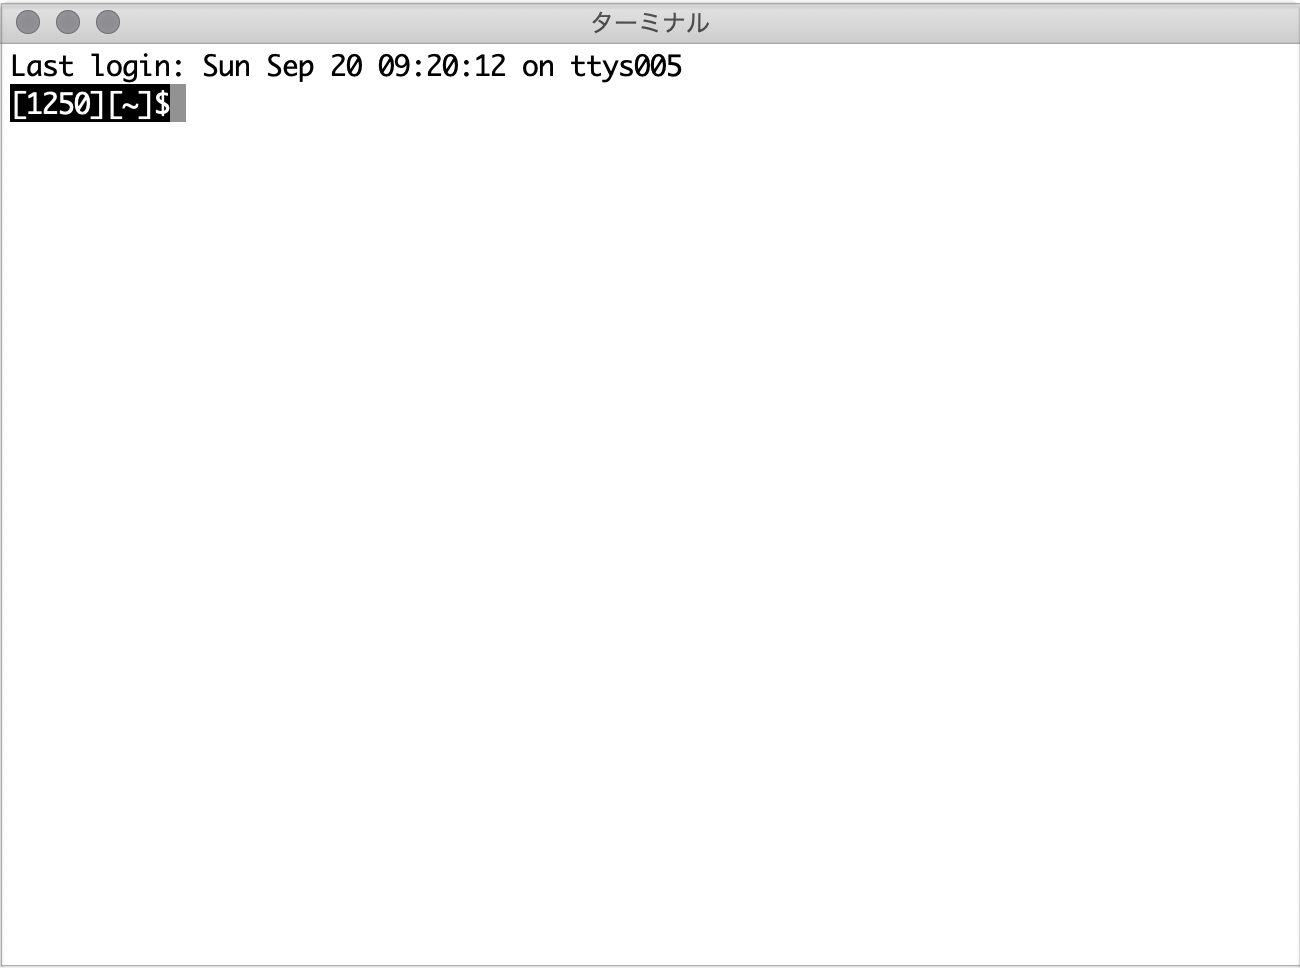
この画面にコマンドを入力してエンターキーを押すと、コマンドが実行される。
composerのインストール
composerがインストールされていない場合、インストールが必要です。
公式ページインストールは
https://getcomposer.org/doc/00-intro.md
を、参照してください。
公式だと難しいと思う方は「Mac composer インストール」で検索すると、インストール記事が見つかります。
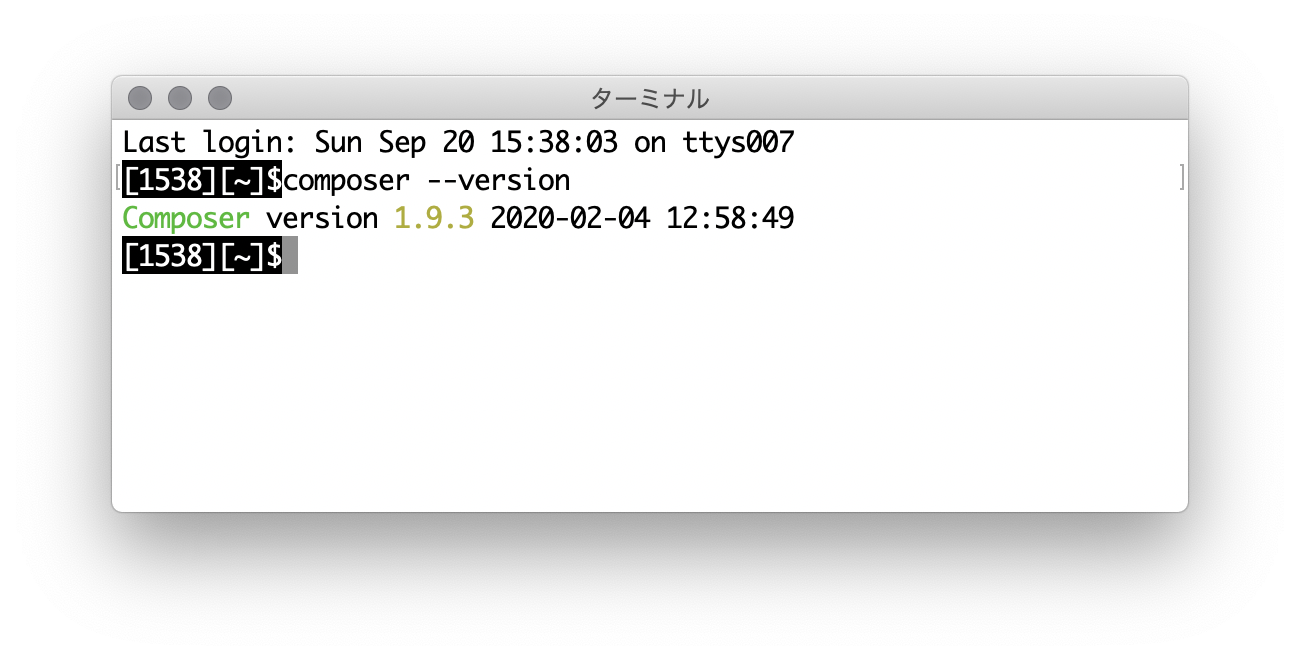
ターミナルを開いて
composer --version
を実行してバージョン情報が表示されればOK。
php7.3 and MySQL
MacにphpとMySQLをインストールするにはMAMPが最も簡単。VirtualBoxをインストールしてHomesteadにする手もあるがMAMPより大変。
MAMPはMac用のアプリで、PHP, MySQL, Apacheといった開発に必要なサーバー側のソフトウェアを一発でインストールできるスグレモノだ。
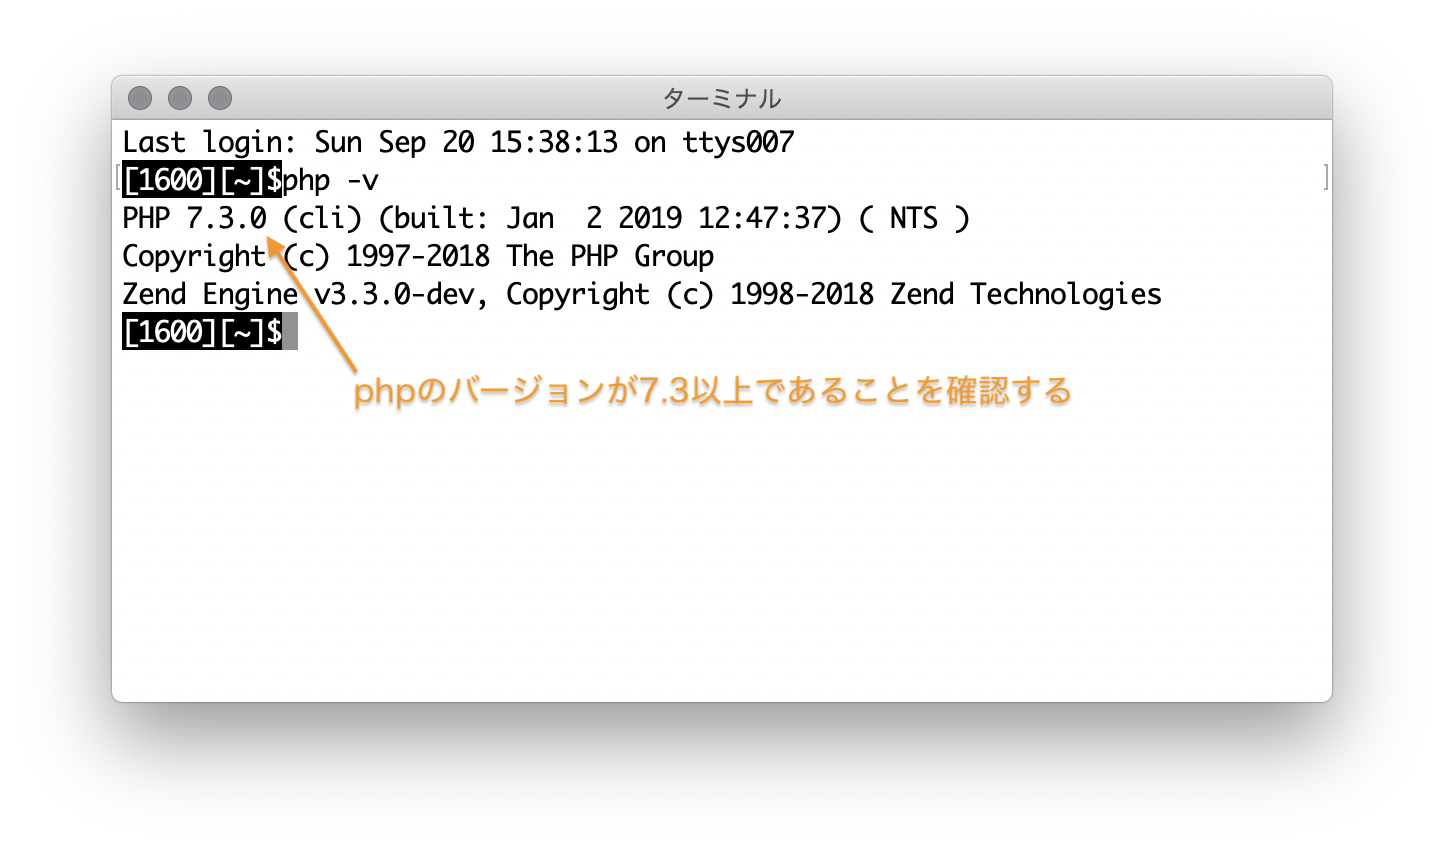
Laravel8はPHP7.3以上でないと動かないのでPHPは7.3以上をインストールする必要がある。
MAMPをMacにインストールしたらターミナルから php -v を実行してPHPのバージョンを確認する。
(記事修正TODO MAMPのパスの設定方法を書く。)
Windowsを使った場合の準備
作成準備中(著者は2020年9月現在、Windows PC持ってない)
基本設定
composerでプロジェクトを作る
それでは1から 顧客管理システムを作っていきましょう
Macの場合 ホームディレクトリ直下に learn フォルダなどを作るのが良いでしょう。
ターミナルを開いてコマンドラインから
cd ~
mkdir learn
cd learn
を実行して、作業フォルダに移動します。
作業ディレクトリを決めて、以下のcomposerコマンドを実行します。
Laravelのバージョンは8.*の最新
プロジェクト名はchibi_crmとしました。
composer create-project laravel/laravel=8.* chibi_crm
composerでプロジェクトが作成されたら、作成されたディレクトリでcomposer installを行いましょう。
cd chibi_crm
composer install
・・・ composerガンバル ・・・
ロケールをJPにする
config/app.phpファイルを変更します。
秀丸やviエディタ,nanoエディタなどで app.php を編集しましょう。
例:
vi config/app.php
70行目近辺
'timezone' => 'Asia/Tokyo',
83行目近辺
'locale' => 'ja',
↑この設定をすることでエラーメッセージなどが日本語に切り替わります。日本語のメッセージファイルを用意する必要がありますが。
109行目近辺
'faker_locale' => 'ja_JP',
↑この設定をするとテスト用データを作成するときに人の名前を日本人っぽい名前にしてくれます。
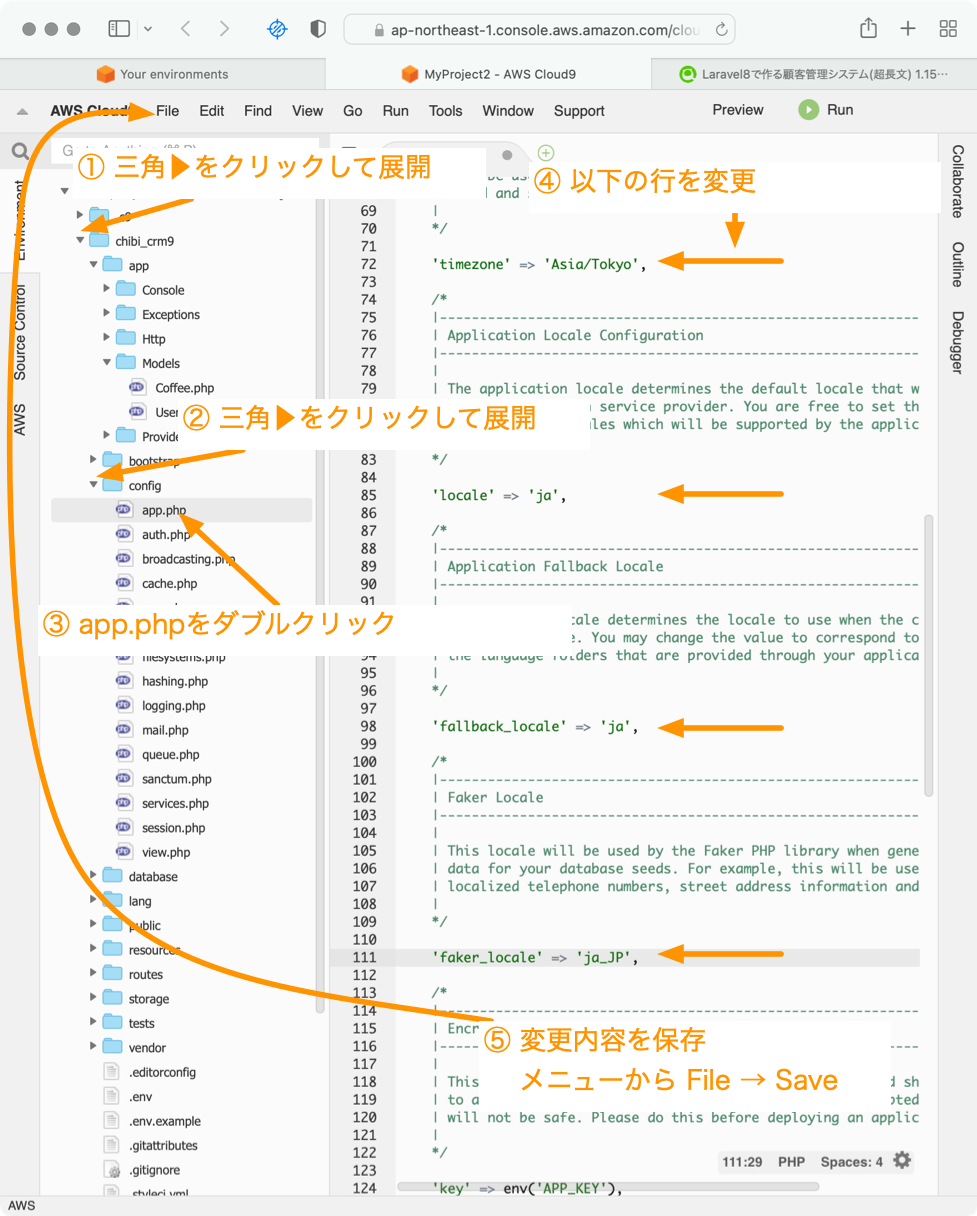
編集が終わったら、編集内容を保存してエディタを終了します。
viエディタをお使いの場合は :wq を実行します。

.png)
MySQLデータベースにデータベースを作成
今回データベースはMySQLを使用します。
MySQLにコマンドラインでログインしてユーザーとデータベースを作成します。
私の例では MySQLにchibi_crm ユーザーを作成し、chibi_crmユーザーがアクセス出来る chibi_crm データベースを作成します。
使用するデータベースの作成方法はご自分の好みの方法で構いません。
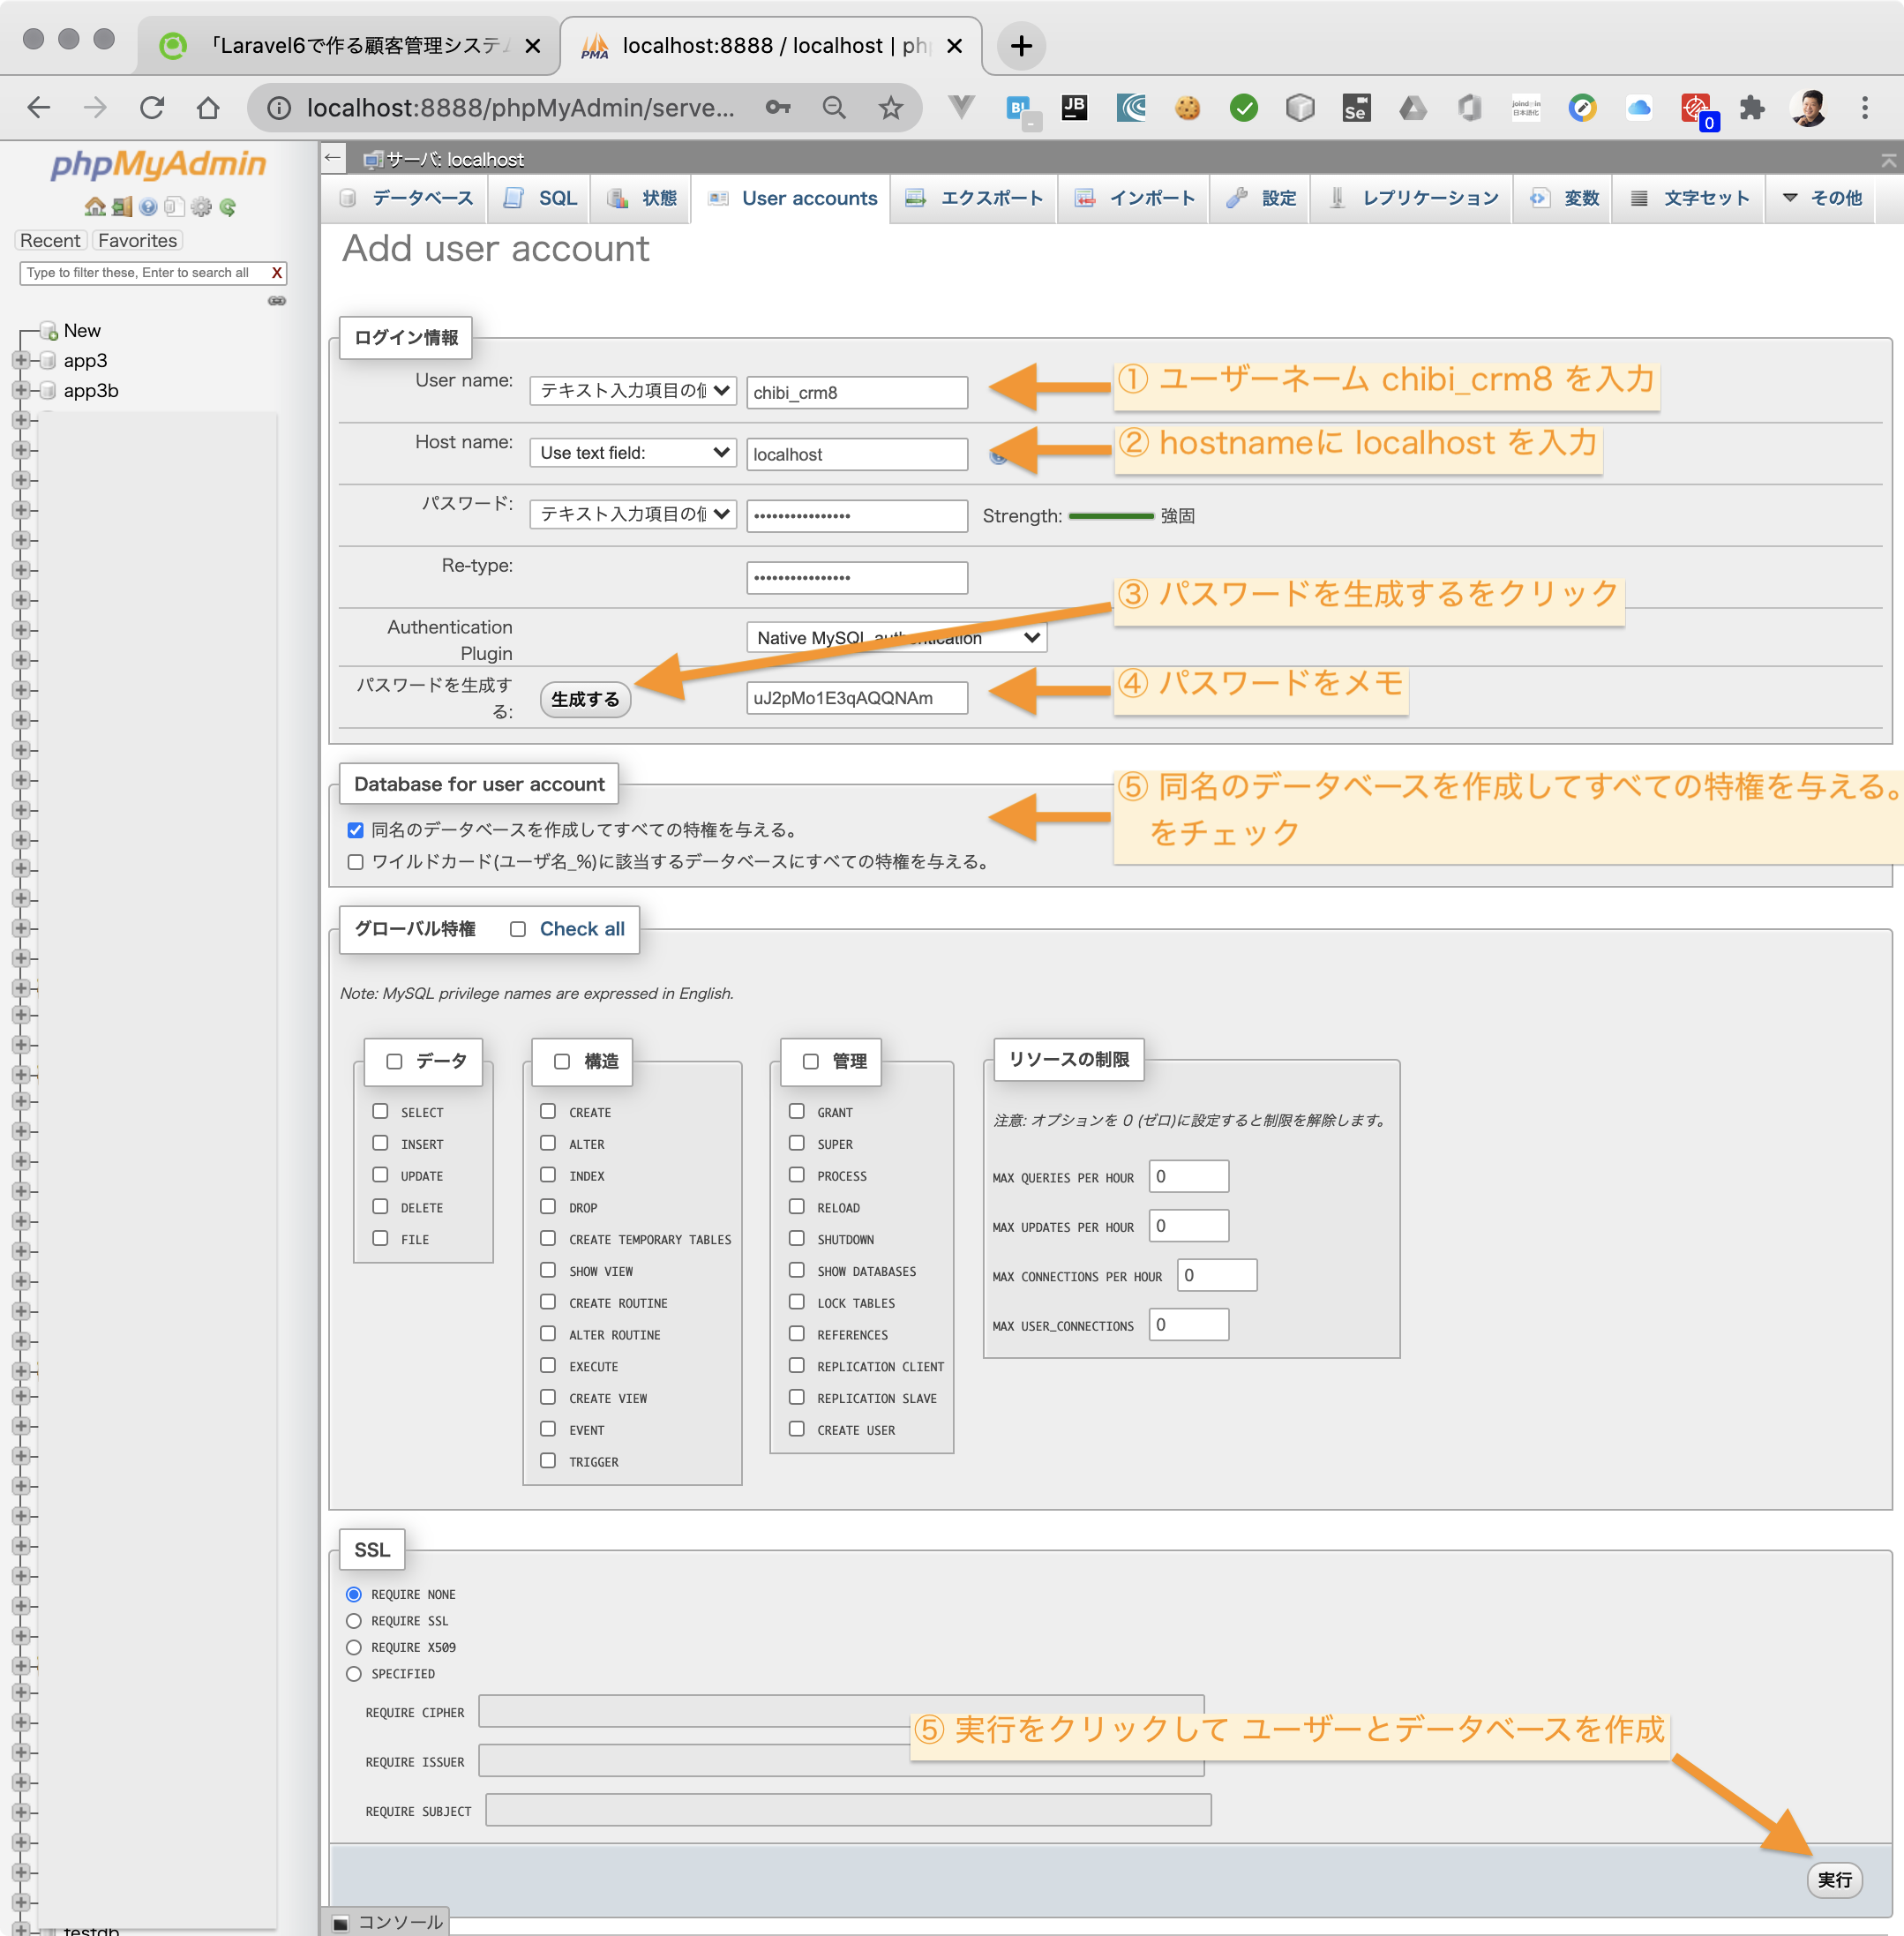
ここではMAMPのphpMyADMINを使ってデータベースの例を説明します。
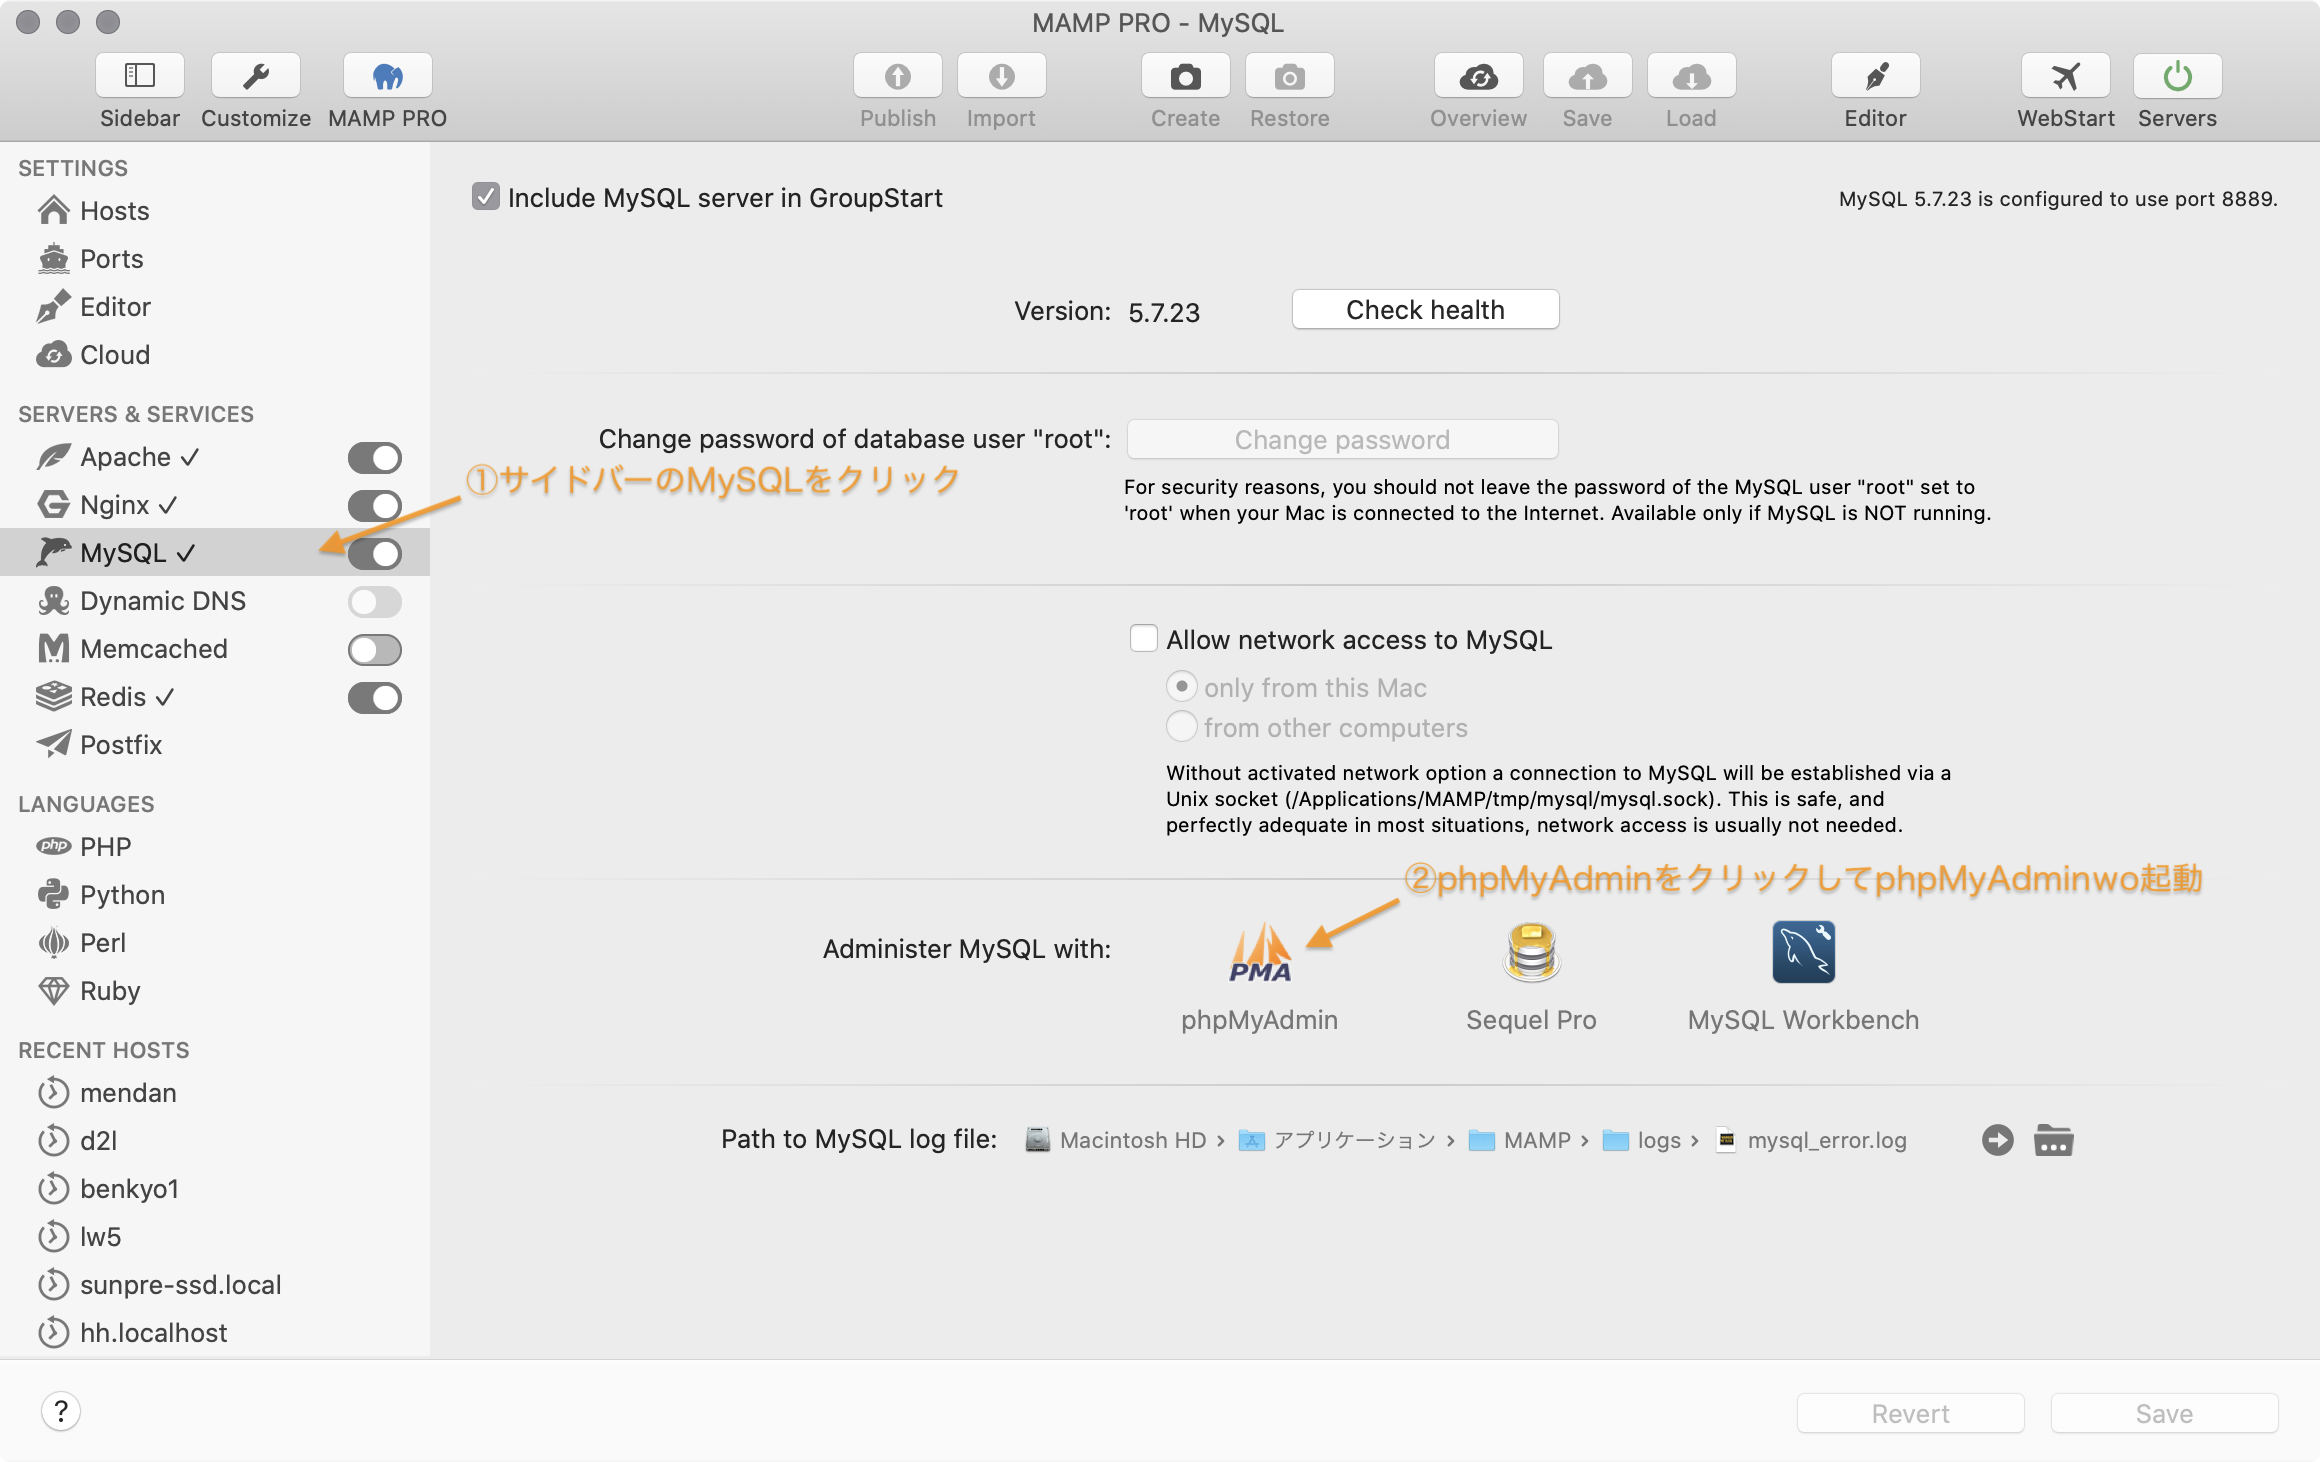
chibi_crm用のデータベースとユーザーを一気に作るのでデータベース作成ではなくMAMPのUser accounts機能を使います。
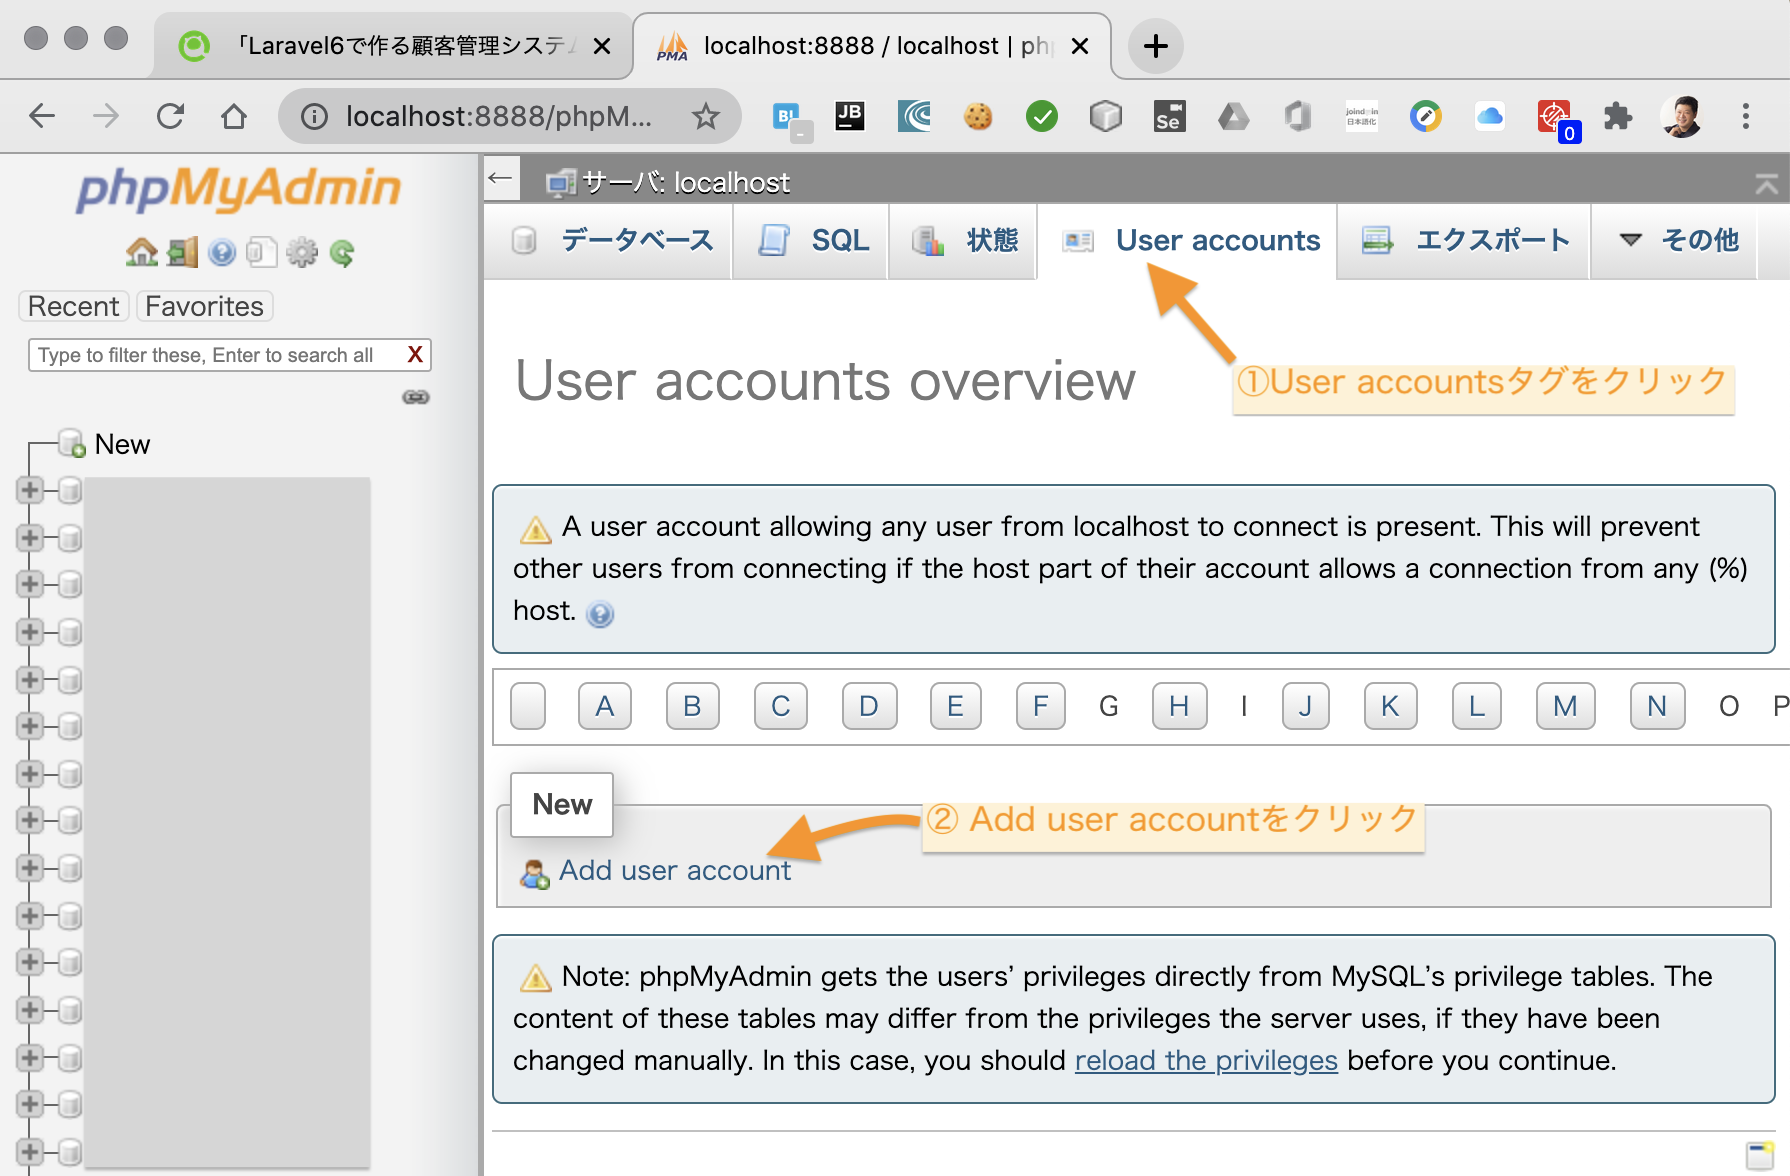
ユーザーネーム chibi_crm8 を入力して ユーザーとデータベースを作成します。入力項目は下図を参照。
.env を設定
.envファイルとはプロジェクトで使用する設定定義ファイルです。.秘匿にすべきパスワード情報なども入っています。取り扱い要注意です。
ターミナルから
cp -p .env.example .env
を実行して.envを用意します。
以下の設定は例です。ご自分のMySQLとSMTPサーバーの設定を行ってください。
viエディタ起動例(nanoエディタでもOK)
vi .env
変更箇所のみ抜粋
APP_NAME=ちびCRM

DB_CONNECTION=mysql
DB_HOST=localhost
DB_PORT=3306
DB_DATABASE=chibi_crm8
DB_USERNAME=chibi_crm8
DB_PASSWORD=#mypassword#

MAIL_DRIVER=smtp
MAIL_HOST=mysmtpserver.example.com
MAIL_PORT=587
MAIL_USERNAME=#myaccount#
MAIL_PASSWORD=#mypassword#
MAIL_ENCRYPTION=tls
MAIL_FROM_ADDRESS=#your_email_address#
MAIL_FROM_NAME=#your_name#
key generate と laravel/uiのインストール
Laravel8の認証機能を使うために以下のコマンドを実行します。
php artisan key:generate
composer require laravel/ui
composer install
php artisan ui vue --auth
メモ:Laravel6からmake:authが無くなりました。以前のLaravelではmake:authで認証機能を作成しました。
ためしに migration してみる
基本的なデータベース設定が済んだところでちゃんと接続できるか試してみましょう。
以下のコマンドを実行します。
php artisan migrate
エラーにならずにusersテーブルなどが作成されるはずです。
↓こんなエラーが出たら。PHPのバージョンが古いのでPHP7.3以上にアップデート。
データベースアクセスクラスの用意
artisan make:modelコマンドを使って データベースにアクセスするクラスを作成します。
php artisan help make:model
を実行してみてください。make:modelで指定出来るオプション一覧が表示されます。
今回は--migration, --factoryオプションを使用します。
--migrationオプションを指定するとクラスのファイルと一緒にmigration fileと呼ばれるテーブル定義作成ファイルが作成されます。
--factoryオプションを指定するとテスト用のダミーデータを作成するファクトリークラスがモデルと一緒に作成されます。
$php artisan help make:model
Description:
  Create a new Eloquent model class

Usage:
  make:model [options] [--] <name>

Arguments:
  name                  The name of the class

Options:
  -a, --all             Generate a migration, factory, and resource controller for the model
  -c, --controller      Create a new controller for the model
  -f, --factory         Create a new factory for the model
      --force           Create the class even if the model already exists
  -m, --migration       Create a new migration file for the model
  -p, --pivot           Indicates if the generated model should be a custom intermediate table model
  -r, --resource        Indicates if the generated controller should be a resource controller
  -h, --help            Display this help message
  -q, --quiet           Do not output any message
  -V, --version         Display this application version
      --ansi            Force ANSI output
      --no-ansi         Disable ANSI output
  -n, --no-interaction  Do not ask any interactive question
      --env[=ENV]       The environment the command should run under
  -v|vv|vvv, --verbose  Increase the verbosity of messages: 1 for normal output, 2 for more verbose output and 3 for debug
$
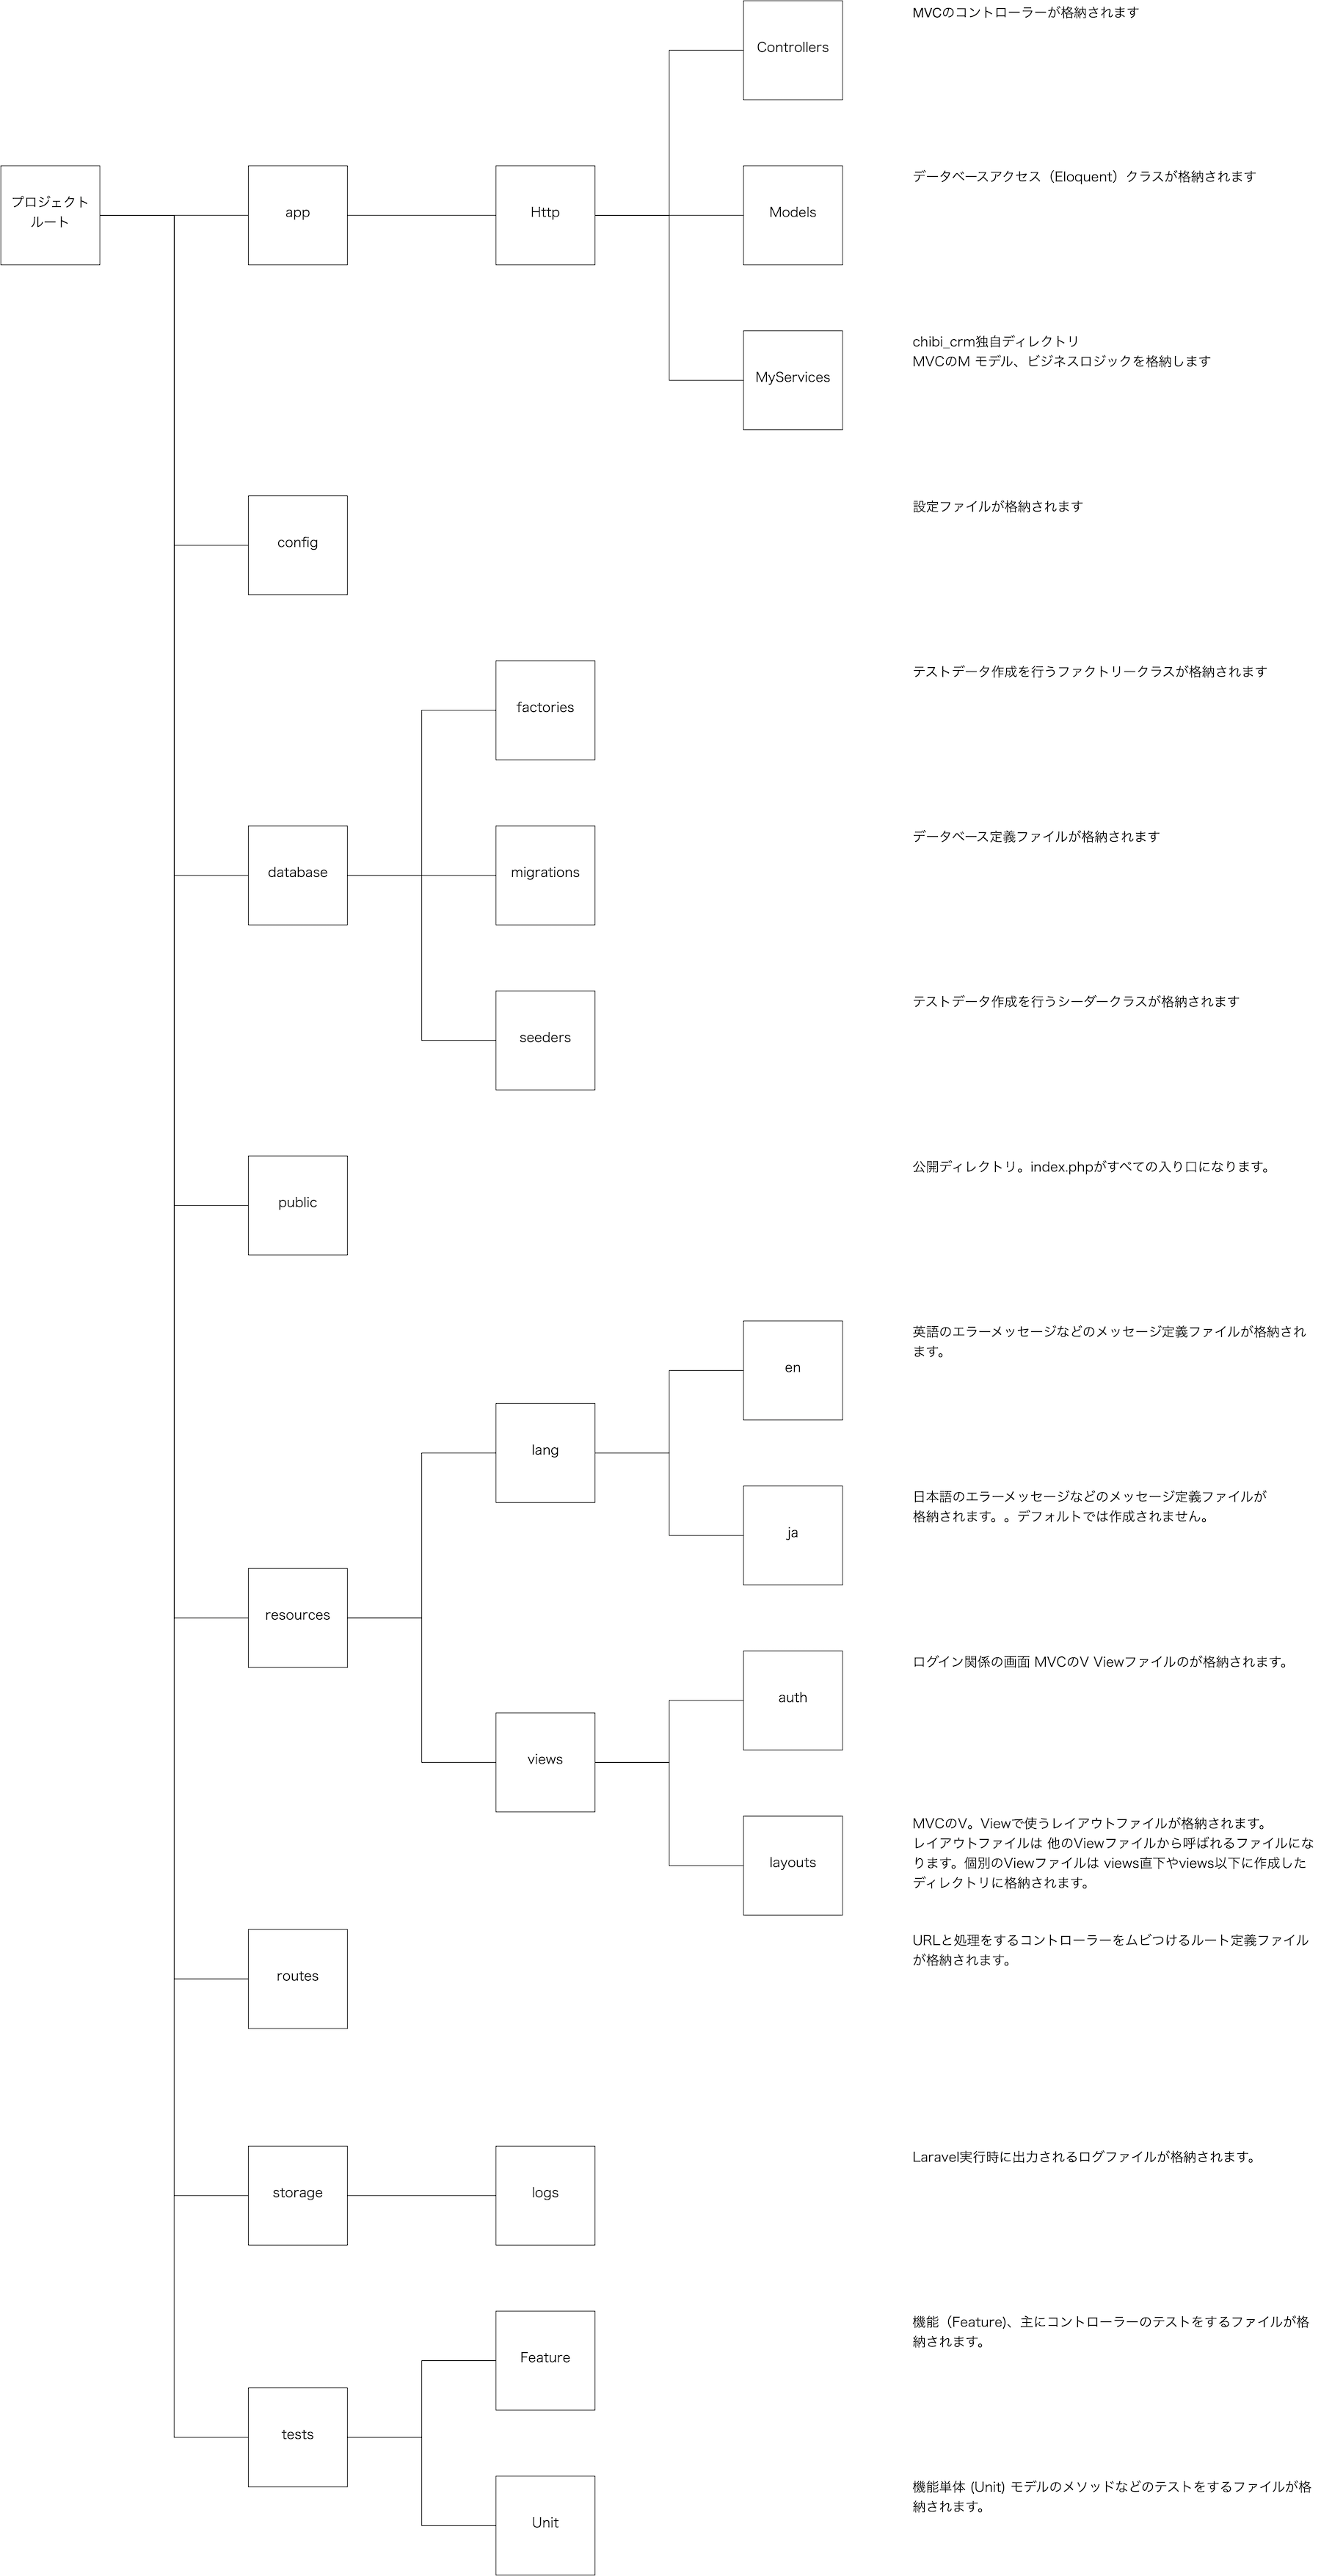
ここらでLaravelのディレクトリ構成を説明
今まで作成したファイルはLaravelのディレクトリに格納されます。
抜粋ですがディレクトリ構成は以下の様になります。実際に存在するディレクトリはもっと多いのですが、今回chibi_crmを作るにあたって必要になる主要なディレクトリを抜粋してあります。
Laraveを使いこなすならこのディレクトリ構造は頭に入れておきたいですね。
データベースのテーブルとテーブルにアクセスするPHPファイルの作成
Rolesテーブルとクラス
ER図をみてデータベース構造をイメージしましょう。rolesテーブルには役職一覧が入ります。rolesテーブルはマスターテーブルという種類のテーブルになります。マスターテーブルには日々の業務でデータが増えない情報を扱います。最終的には以下のように店員とスーパーバイザーという2つのロールが格納されます。
(none)>use chibi_crm
You are now connected to database "chibi_crm" as user "root"
Time: 0.000s
chibi_crm>select * from roles;
+----+-------+------------------+------------+------------+
| id | name  | memo             | created_at | updated_at |
+----+-------+------------------+------------+------------+
| 1  | sv    | スーパーバイザー | <null>     | <null>     |
| 2  | clerk | 店員             | <null>     | <null>     |
+----+-------+------------------+------------+------------+
2 rows in set
Time: 0.014s
chibi_crm>
それでは役職の処理を行うrolesテーブルを作っていきましょう。いっしょにrolesテーブルにアクセスするために使用するRole.phpクラスも作ります。
ターミナルを開いて以下のコマンドをchibi_crmディレクトリで実行します。
cd ~/learn/chibi_crm
php artisan make:model Role --migration
成功すると以下のような表示になります。
[1624][chibi_crm]$php artisan make:model Role --migration
Model created successfully.
Created Migration: 2020_09_20_072422_create_roles_table
[1624][chibi_crm]$
php artisan make:model Role --migrationを実行したときに以下のファイルが作られます。
- database/migrations/#YYYY_MM_DD_NNNN#_create_roles_table.php
- app/Models/Role.php
#YYYY_MM_DD_NNNN#には実行時の年月日_時刻が入ります。
#YYYY_MM_DD_NNNN#_create_roles_table.phpは役職テーブル rolesの定義ファイルです。
Role.phpはrolesテーブルにアクセスするためのEloquentモデルクラスファイルです。
EloquentとはLaravelのデータベースアクセスクラスになります。
EloquentとはLaravelの一部で、データベースにアクセスする機能がまとまっているファイルになります。データベースの1テーブルに対して1つのファイルを作ります。
rolesテーブルの定義
マイグレーションファイルはartisanコマンドで作った直後にはidとタイムスタンプカラムしかありません。
rolesテーブルにnameとmemoカラムを追加します。
エディタでファイルを開いて編集します。
viエディタでの例
vi database/migrations/2020_09_20_054042_create_roles_table.php
use Illuminate\Database\Migrations\Migration;
use Illuminate\Database\Schema\Blueprint;
use Illuminate\Support\Facades\DB;// ← 追記 *
use Illuminate\Support\Facades\Schema;

class CreateRolesTable extends Migration
{
    public function up()
    {
        Schema::create('roles', function (Blueprint $table) {
            $table->id();
            $table->string('name', 8)->comment('ロール名');  // ← 追記 *********
            $table->string('memo')->comment('備考');  // ← 追記 *********
            $table->timestamps();
        });
        DB::table('roles')->insert(['id'=>1,'name'=>'sv','memo'=>'スーパーバイザー']);
        DB::table('roles')->insert(['id'=>2,'name'=>'clerk','memo'=>'店員']);
    }
}
$table->string('name', 8)->comment('ロール名'); の部分がカラムの定義になります。
Blueprintクラスのインスタンス $tableに対して stringメソッドを呼んで文字列型のカラムを追加しています。
$table->integer('amount');のようにintegerメソッドを呼ぶと数値型を格納するカラムを追加出来ます。
他にもDateなど日付を扱う指定もできます。
rolesテーブルと同様に他のテーブルにもカラムを追加します。
shopsテーブル
shopテーブルに店舗情報が入ります。以下のようなデータを持ちます。
chibi_crm>select * from shops
+----+------------+------------+------------+
| id | name       | created_at | updated_at |
+----+------------+------------+------------+
| 1  | 東京本店   | <null>     | <null>     |
| 2  | 名古屋支店 | <null>     | <null>     |
| 3  | 大阪支店   | <null>     | <null>     |
+----+------------+------------+------------+
データベースにshopテーブルを作成し、これにアクセスするShopクラスを作ります。
コマンドラインから以下の命令を実行します。
php artisan make:model Shop --migration
以下のファイルが作られます。
- app/Models/Shop.php
- database/migrations/2020_09_20_080003_create_shops_table.php
テキストエディタを使って 2020_09_20_080003_create_shops_table.php を編集します。
vi エディタの場合以下のコマンドを実行します。
vi database/migrations/2020_09_20_054053_create_shops_table.php
nameカラムを追加します。
use Illuminate\Database\Migrations\Migration;
use Illuminate\Database\Schema\Blueprint;
use Illuminate\Support\Facades\DB;   // ← 追記 *
use Illuminate\Support\Facades\Schema;

class CreateShopsTable extends Migration
{
    public function up()
    {
        Schema::create('shops', function (Blueprint $table) {
            $table->id();
            $table->string('name')->comment('店名');  // ← 追記 *********
            $table->timestamps();
        });
        DB::table('shops')->insert(['id'=>1,'name'=>'東京本店']);
        DB::table('shops')->insert(['id'=>2,'name'=>'名古屋支店']);
        DB::table('shops')->insert(['id'=>3,'name'=>'大阪支店']);
    }
}
customersテーブル
日々の業務で顧客情報を追加・編集うしていきます。顧客情報を入れるテーブルがcustomersテーブルになります。
以下のようなデータが格納されます。
chibi_crm>SELECT * FROM customers LIMIT 3
+----+---------+-------------+---------+--------------------------------------------+-----------------------------+------------+---------------+-------------+---------------------+---------------------+
| id | shop_id | name        | postal  | address                                    | email                       | birthdate  | phone         | kramer_flag | created_at          | updated_at          |
+----+---------+-------------+---------+--------------------------------------------+-----------------------------+------------+---------------+-------------+---------------------+---------------------+
| 1  | 3       | 大垣 涼平   | 7511896 | 5301197  秋田県吉田市東区野村町伊藤3-8-8   | hanako.yamamoto@example.net | 1960-05-03 | 080-7708-2244 | 0           | 2020-02-04 09:41:46 | 2020-02-04 09:41:46 |
| 2  | 3       | 渚 亮介     | 2673332 | 5055424  滋賀県鈴木市南区井上町渚5-7-4     | yasuhiro.kijima@example.net | 1949-09-04 | 080-2046-9203 | 0           | 2020-02-04 09:41:46 | 2020-02-04 09:41:46 |
| 3  | 2       | 佐々木 花子 | 9146165 | 8449178  秋田県坂本市西区坂本町中津川7-2-9 | isugiyama@example.org       | 1974-12-31 | 0560-264-451  | 0           | 2020-02-04 09:41:46 | 2020-02-04 09:41:46 |
+----+---------+-------------+---------+--------------------------------------------+-----------------------------+------------+---------------+-------------+---------------------+---------------------+
顧客テーブルは日々の業務で追加されていくテーブルになります。このようなテーブルをトランザクションテーブルと呼びます。
customersテーブルとこれにアクセスするCustomer.phpファイルを作成します。
コマンドラインから以下の命令を実行します。
php artisan make:model Customer --migration --factory
- app/Models/Customer.php
- database/factories/CustomerFactory.php
- database/migrations/2020_09_20_080142_create_customers_table.php
今回は --factory オプションを指定したのでfactoriesディレクトリに テストデータ作成用のCustomerFactory.phpファイルが作られています。ファクトリーに関しては後で説明します。
まずcustomersテーブルに顧客情報を格納するカラムを追加します。
viエディタの場合、以下のコマンドを実行します。
vi database/migrations/2020_09_20_054059_create_customers_table.php
class CreateCustomersTable extends Migration
{
    public function up()
    {
        Schema::create('customers', function (Blueprint $table) {
            $table->id();
            $table->unsignedInteger('shop_id');  // ← 追記 *********
            $table->string('name');  // ← 追記 *********
            $table->string('postal');  // ← 追記 *********
            $table->string('address');  // ← 追記 *********
            $table->string('email');  // ← 追記 *********
            $table->date('birthdate');  // ← 追記 *********
            $table->string('phone');  // ← 追記 *********
            $table->boolean('kramer_flag')->default(false)->comment('クレーマーフラグ');  // ← 追記 *********
            $table->timestamps();
        });
    }
}
顧客の行動を記録する customer_logsテーブルの作成
customer_logsテーブルには顧客行動情報を記録します。
以下のようなデータが入ります。
chibi_crm>select * from customer_logs limit 3                                       +----+-------------+---------+--------------------------+---------------------+---------------------+
| id | customer_id | user_id | log                      | created_at          | updated_at          |
+----+-------------+---------+--------------------------+---------------------+---------------------+
| 1  | 23          | 3       | 紅茶を買っていかれた     | 2020-02-04 09:41:47 | 2020-02-04 09:41:47 |
| 2  | 29          | 3       | 苦情を賜った             | 2020-02-04 09:41:47 | 2020-02-04 09:41:47 |
| 3  | 2           | 3       | 新商品に興味を持っていた | 2020-02-04 09:41:47 | 2020-02-04 09:41:47 |
+----+-------------+---------+--------------------------+---------------------+---------------------+
artisan コマンドでcustomer_logsテーブル、これにアクセスするCustomerLog.phpファイル、テストデータを作成するCustomerLogFactory.phpファイルを作成します。
php artisan make:model CustomerLog --migration --factory
以下のファイルが作成されます。
- app/Models/CustomerLog.php
- database/factories/CustomerLogFactory.php
- database/migrations/2020_09_20_080832_create_customer_logs_table.php
customer_logsテーブルにカラムを追加します。
viエディタの場合は以下のコマンドを実行して編集します。
vi database/migrations/2020_09_20_054105_create_customer_logs_table.php
class CreateCustomerLogsTable extends Migration
{
    public function up()
    {
        Schema::create('customer_logs', function (Blueprint $table) {
            $table->id();
            $table->unsignedInteger('customer_id');  // ← 追記 *********
            $table->unsignedInteger('user_id')->comment('ログを入力した店員のID');  // ← 追記 *********
            $table->text('log')->comment('顧客記録');  // ← 追記 *********
            $table->timestamps();
        });
    }
}
Laravelが作ったUserテーブルを編集
Laravelはログイン処理などを行うユーザー情報を格納するテーブルとして usersテーブルを使います。このusersテーブルにアクセスするためのクラスがUser.phpになります。
今回作成するchibi_crmにはユーザーはどの役職(=Role)を持つかの情報を持たせるため users テーブルにrole_id カラムと、どの店舗に所属するのかのshop_idカラムを追加します。
テキストエディタでデータベース定義ファイルを編集してroleカラムを追加します。
以下のファイルをテキストエディタで編集します。
2014_10_12_000000_create_users_table.phpをテキストエディタを使って編集します。
vi エディタの場合は以下の様にコマンドを入力します。
vi database/migrations/2014_10_12_000000_create_users_table.php
以下の「 // ← 追記 *********」 になっている行をそれぞれ追加します。
<?php

use Illuminate\Database\Migrations\Migration;
use Illuminate\Database\Schema\Blueprint;
use Illuminate\Support\Facades\DB;// ← 追記 *
use Illuminate\Support\Facades\Schema;

class CreateUsersTable extends Migration
{
    /**
     * Run the migrations.
     *
     * @return void
     */
    public function up()
    {
        Schema::create('users', function (Blueprint $table) {
            $table->id();
            $table->string('name');
            $table->string('email')->unique();
            $table->timestamp('email_verified_at')->nullable();
            $table->string('password');
            $table->unsignedInteger('role_id')->default(2);  // ← 追記 *********
            $table->unsignedInteger('shop_id')->default(1);  // ← 追記 *********
            $table->string('memo')->nullable();  // ← 追記 *********
            $table->rememberToken();
            $table->timestamps();
        });
        DB::table('users')->insert(['id' => 1, 'name' => '山田太郎', 'email' => 'sute1@example.com', 'password' => bcrypt('password'), 'role_id' => 1, 'shop_id' => 1, 'memo' => '総括主任']);
        DB::table('users')->insert(['id' => 2, 'name' => '畠山俊二', 'email' => 'sute2@example.com', 'password' => bcrypt('password'), 'role_id' => 2, 'shop_id' => 2, 'memo' => '東京本店店員']);
        DB::table('users')->insert(['id' => 3, 'name' => '伊藤あきら', 'email' => 'sute3@example.com', 'password' => bcrypt('password'), 'role_id' => 2, 'shop_id' => 2, 'memo' => '名古屋支店店員']);
        DB::table('users')->insert(['id' => 4, 'name' => '財条浩二', 'email' => 'sute4@example.com', 'password' => bcrypt('password'), 'role_id' => 2, 'shop_id' => 3, 'memo' => '大阪支店店員']);

    }

    /**
     * Reverse the migrations.
     *
     * @return void
     */
    public function down()
    {
        Schema::dropIfExists('users');
    }
}
テーブル定義が出来たところで migrate:refreshしてみる
User.phpにデータ定義を追記します。
エディタで \App\Models\User.phpを開いて、以下の定義を記述します。
class User extends Authenticatable
{
    use HasFactory, Notifiable;

    const ROLE_SUPER_VISOR = 1; // スーパーバイザー    ←この定義を追加
    const ROLE_EMPLOYEE = 2; // 社員            ←この定義を追加

・・・略・・・
以下のコマンドを実行してみてください。
php artisan
artisanコマンドが実行できるコマンド一覧が表示されます。
$php artisan
・・・・抜粋・・・・
 migrate
  migrate:fresh        Drop all tables and re-run all migrations
  migrate:install      Create the migration repository
  migrate:refresh      Reset and re-run all migrations
  migrate:reset        Rollback all database migrations
  migrate:rollback     Rollback the last database migration
  migrate:status       Show the status of each migration
・・・・抜粋・・・・
migrateの箇所をみてください。
migrate:refresh Reset and re-run all migrations
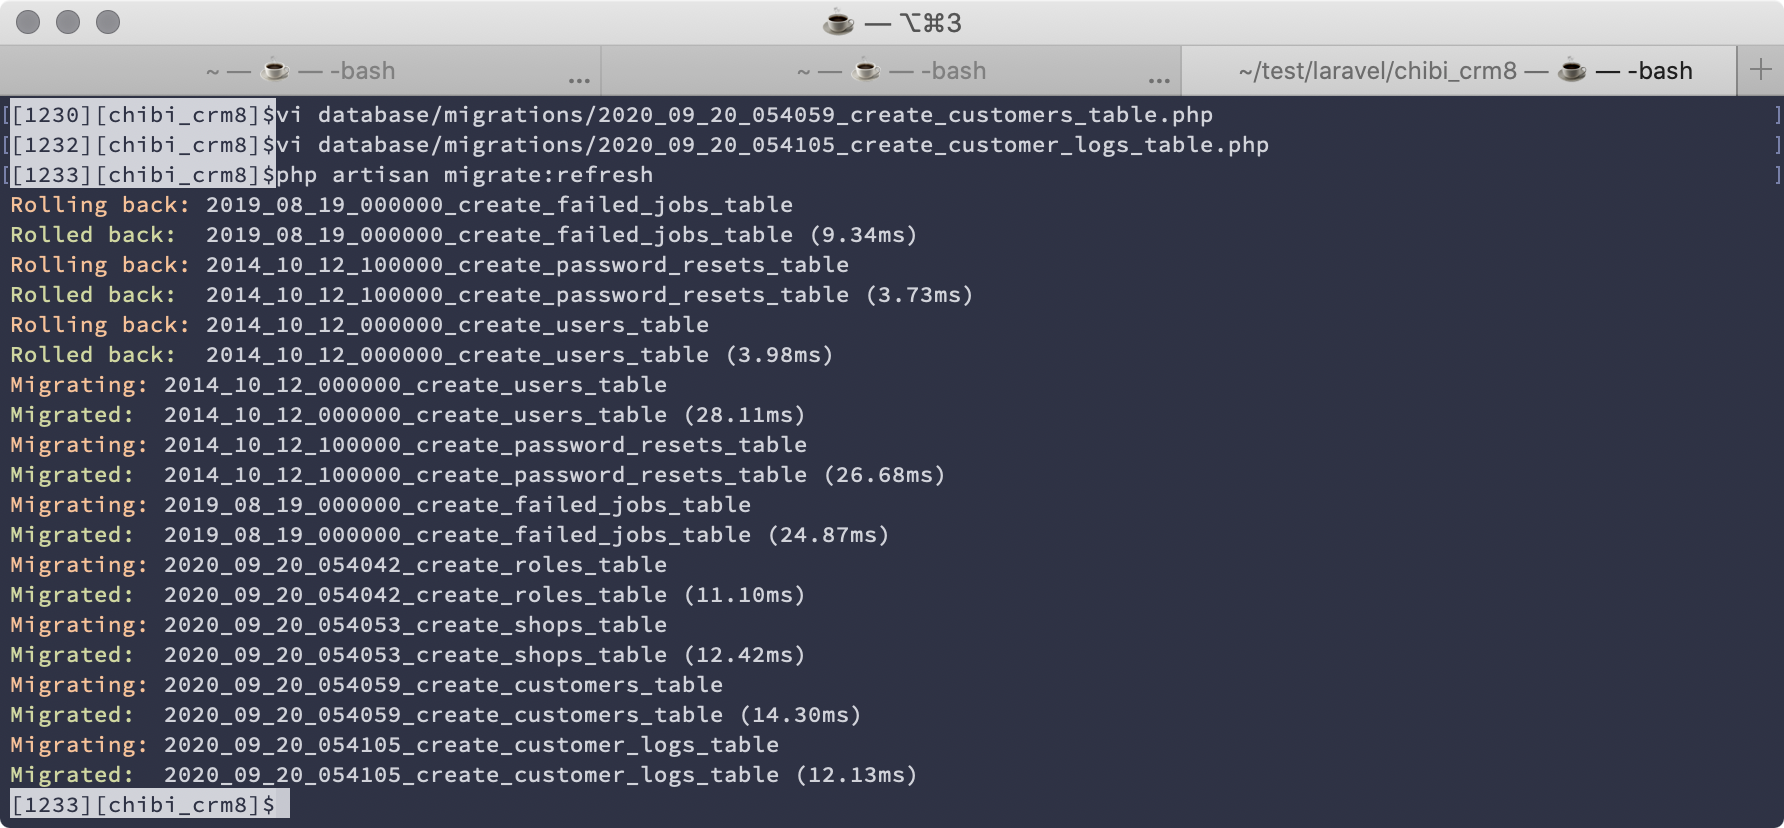
テーブル定義を変更後の2回め以降のmigrationなので migrate:refresh を実行します。
php artisan migrate:refresh
migrate:refreshを実行すると、マイグレーションファイルに間違えがなければマイグレーションが実行されます。
成功すると以下のような表示になります。
ファクトリの作成
モデルを作成したときに--factoryオプションを指定していたのでdatabase/factories ディレクトリ以下のファイルが作成されています。
CustomerFactory.php
CustomerLogFactory.php
ファクトリはテスト用にダミーデータを作る仕組みです。TDDでの開発が楽に出来るようになります。
CustomerFactory.php
CustomerFactory.phpを変更します。fakerを使ってダミーデータを作成します。fakerはLaraveの機能で氏名やアドレス、電話番号をそれっぽいフェイクデーターを作成する機能です。
app/config.phpのfaker_localeをja_JPにしたので日本用のデータが作成されます。たとえば氏名なら山口 さゆり、山田 洋次の様なランダムな名前を生成してくれます。。
テキストエディタを開いてCustomerFactory.phpを変更します。
viエディタの場合
vi database/factories/CustomerFactory.php
内容を以下のように変更します。
<?php

namespace Database\Factories;

use App\Models\Customer; // ← 追記 *
use Illuminate\Database\Eloquent\Factories\Factory;
use Illuminate\Support\Str; // ← 追記 *

class CustomerFactory extends Factory
{
    /**
     * The name of the factory's corresponding model.
     *
     * @var string
     */
    protected $model = Customer::class;

    /**
     * Define the model's default state.
     *
     * @return array
     */
    public function definition()
    {
        return [
            'shop_id' => random_int(1, 3),  // ショップIDは1が本店、2が名古屋、3が大阪 。
            'name' => $this->faker->name,
            'email' => $this->faker->unique()->safeEmail,
            'postal' => $this->faker->postcode,
            'address' => $this->faker->address,
            'birthdate' => $this->faker->dateTimeBetween('-90 years', '-18 years'),// 18歳から90歳までの誕生日を生成
            'phone' => $this->faker->phoneNumber,
            'kramer_flag' => 0,  // クレーマーフラグ とりあえず全員 0 にしておく
        ];
    }
}
CustomerLogFactory.php
CustomerLogFactory.phpも変更します。テキストエディタを使って変更しましょう。
viエディタの場合
vi database/factories/CustomerLogFactory.php
を実行します。
CustomerLogFactory.phpの内容を以下のように変更します。
<?php

namespace Database\Factories;

use App\Models\CustomerLog;
use Illuminate\Database\Eloquent\Factories\Factory;
use Illuminate\Support\Str;

class CustomerLogFactory extends Factory
{
    /**
     * The name of the factory's corresponding model.
     *
     * @var string
     */
    protected $model = CustomerLog::class;

    /**
     * Define the model's default state.
     *
     * @return array
     */
    public function definition()
    {
        return [
            'customer_id' => random_int(1, 30),
            'user_id' => random_int(1, 4),
            'log' => $this->faker->sentence(40),
        ];
    }
}
シーダーの作成
seederというテスト用データ作成クラスを作ります。今回はシーダーを使って社員や顧客テーブルの中身を作っていきます。
以下のコマンドを実行して一気にシーダークラスを作成してしまいましょう。
php artisan make:seeder RolesTableSeeder
php artisan make:seeder ShopsTableSeeder
php artisan make:seeder CustomersTableSeeder
php artisan make:seeder CustomerLogsTableSeeder
php artisan make:seeder UsersTableSeeder
database/seedsに 以下のファイルが作成されます。
CustomerLogsTableSeeder.php
CustomersTableSeeder.php
DatabaseSeeder.php
RolesTableSeeder.php
ShopsTableSeeder.php
UsersTableSeeder.php
CustomerLogsTableSeeder.php
以下の様に変更しましょう。以下の例ではCustomerLogFactory.phpを使って120件のログデータを作成します。
<?php

use Illuminate\Database\Seeder;

class CustomerLogsTableSeeder extends Seeder
{
    /**
     * Run the database seeds.
     *
     * @return void
     */
    public function run()
    {
        \App\Models\CustomerLog::factory()->count(120)->create();
    }
}
CustomersTableSeeder.php
<?php

use Illuminate\Database\Seeder;

class CustomersTableSeeder extends Seeder
{
    /**
     * Run the database seeds.
     *
     * @return void
     */
    public function run()
    {
        \App\Models\Customer::factory()->count(200)->create();
    }
}
RolesTableSeeder.php
シーダーはテスト用データの作成という位置づけで考えると テスト用ではないマスターレコードの定義はmigrationに書くべき。でも今回はシーダーに書いてしまった。後で直すかも。
<?php

use Illuminate\Database\Seeder;
use Illuminate\Support\Facades\DB;// ← 追記 *

class RolesTableSeeder extends Seeder
{
    /**
     * Run the database seeds.
     *
     * @return void
     */
    public function run()
    {
    }
}
ShopsTableSeeder.php
<?php

use Illuminate\Database\Seeder;
use Illuminate\Support\Facades\DB;// ← 追記 *

class ShopsTableSeeder extends Seeder
{
    /**
     * Run the database seeds.
     *
     * @return void
     */
    public function run()
    {
    }
}
UsersTableSeeder.php
<?php

use Illuminate\Database\Seeder;
use Illuminate\Support\Facades\DB;// ← 追記 *

class UsersTableSeeder extends Seeder
{
    /**
     * Run the database seeds.
     *
     * @return void
     */
    public function run()
    {
    }
}
DatabaseSeeder.phpに実行するシーダーを登録
DatabaseSeederクラスのrun関数にある $this->callの引数に実行するシーダークラスを追記します。
<?php

use Illuminate\Database\Seeder;

class DatabaseSeeder extends Seeder
{
    /**
     * Seed the application's database.
     *
     * @return void
     */
    public function run()
    {
        // $this->call(UsersTableSeeder::class);
        $this->call([
            RolesTableSeeder::class,
            UsersTableSeeder::class,
            ShopsTableSeeder::class,
            CustomersTableSeeder::class,
            CustomerLogsTableSeeder::class,
        ]);
    }
}
ためしに マイグレーション
php artisan migrate:refresh を実行してみる。
シーダーを実行
php artisan db:seed を実行してシーダーを実行します。
** ここでUndefine エラーが出たらApp\Models\Shop.phpのconst SHOP_ID_TOKYO = 1;の箇所を確認。
php artisan db:seed
こんな感じのデータが作成されているはずです。
kokyaku>SELECT * FROM customers LIMIT 5
+----+---------+-------------+---------+--------------------------------------------------------------+----------------------------+------------+---------------+-------------+---------------------+---------------------+
| id | shop_id | name | postal | address | email | birthdate | phone | kramer_flag | created_at | updated_at |
+----+---------+-------------+---------+--------------------------------------------------------------+----------------------------+------------+---------------+-------------+---------------------+---------------------+
| 1 | 1 | 山口 さゆり | 3519079 | 2805820 岐阜県中村市南区田中町高橋7-1-7 コーポ中村101号 | osamu.nagisa@example.com | 1934-07-10 | 080-4996-6411 | 0 | 2019-11-22 11:16:17 | 2019-11-22 11:16:17 |
| 2 | 1 | 村山 和也 | 6265934 | 5742765 愛媛県西之園市北区山口町井高4-1-3 | mikako87@example.com | 1930-01-12 | 0374-37-4158 | 0 | 2019-11-22 11:16:17 | 2019-11-22 11:16:17 |
| 3 | 1 | 津田 聡太郎 | 9311596 | 9997357 三重県田中市中央区中村町三宅6-4-3 ハイツ津田102号 | shuhei77@example.com | 1989-10-06 | 090-9212-4853 | 0 | 2019-11-22 11:16:17 | 2019-11-22 11:16:17 |
| 4 | 3 | 渡辺 陽子 | 1581161 | 5312267 神奈川県笹田市北区山口町近藤9-6-9 | ematsumoto@example.net | 1974-02-24 | 021-043-9247 | 0 | 2019-11-22 11:16:17 | 2019-11-22 11:16:17 |
| 5 | 1 | 青田 充 | 3359132 | 4697243 大分県斉藤市中央区加納町中津川1-7-6 コーポ斉藤104号 | asuka.yamamoto@example.com | 1931-08-13 | 0078-09-2986 | 0 | 2019-11-22 11:16:17 | 2019-11-22 11:16:17 |
+----+---------+-------------+---------+--------------------------------------------------------------+----------------------------+------------+---------------+-------------+---------------------+---------------------+
5 rows in set
Time: 0.020s
kokyaku>
Laravelリレーション定義*****
belongsTo, hasMany設定
ER図を見てみましょう。
https://qiita-image-store.s3.ap-northeast-1.amazonaws.com/0/6384/12cfb20e-1738-a952-7ffe-6ed1666cf7d5.png
Laravelでは1対多の関係はhasMany、多対1の関係はbelongsTo、1対1の関係はhasOneで設定します。
例えば 店舗と顧客はは1対多の関係になり。(今回顧客は1つの店舗にしか所属しない)
Customerクラスには belongsToを指定し
public function shop()
{
    return $this->belongsTo(Shop::class);
}
Shopクラスには hasManyを指定します
public function customers()
{
    return $this->hasMany(Customer::class);
}
Customer.php, CustomerLog.php, Role.php, Shop.php, User.phpテーブルにリレーションの設定をします。
Customer.php
リレーションの設定と一緒に guardedの設定もします。guardedはModelのプロパティで外から設定出来ないようにしたいものを指定するものです。今回すべてのプロパティを設定可能にするため guaredは[]の空の配列を設定します。
<?php

namespace App;

use App\Events\KramerInComming;
use Illuminate\Database\Eloquent\Model;

class Customer extends Model
{

    protected $guarded = [];

    public function shop()
    {
        return $this->belongsTo(Shop::class);
    }

    public function customerLogs()
    {
        return $this->hasMany(CustomerLog::class);
    }

}
CustomerLog.php
<?php

namespace App;

use Illuminate\Database\Eloquent\Model;

class CustomerLog extends Model
{
    protected $guarded = [];

    public function customer()
    {
        return $this->belongsTo(Customer::class);
    }

    public function user()
    {
        return $this->belongsTo(User::class);
    }

}
Role.php
<?php

namespace App;

use Illuminate\Database\Eloquent\Model;

class Role extends Model
{
    public const SUPER_VISOR_ID = 1;
    public const CLERK_ID = 2;

    protected $guarded = [];

    public function users()
    {
        return $this->hasMany(User::class);
    }
}
Shop.php
<?php

namespace App;

use Illuminate\Database\Eloquent\Model;

class Shop extends Model
{
    const SHOP_ID_TOKYO = 1;
    const SHOP_ID_NAGOYA = 2;
    const SHOP_ID_OSAKA = 3;
    protected $guarded = [];

    public function users()
    {
        return $this->hasMany(User::class);
    }

    public function customers()
    {
        return $this->hasMany(Customer::class);
    }
}
User.php
<?php

namespace App;

use Illuminate\Contracts\Auth\MustVerifyEmail;
use Illuminate\Foundation\Auth\User as Authenticatable;
use Illuminate\Notifications\Notifiable;

class User extends Authenticatable
{
    use Notifiable;

    /**
     * The attributes that are mass assignable.
     *
     * @var array
     */
    protected $fillable = [
        'name', 'email', 'password',
    ];

    /**
     * The attributes that should be hidden for arrays.
     *
     * @var array
     */
    protected $hidden = [
        'password', 'remember_token',
    ];

    /**
     * The attributes that should be cast to native types.
     *
     * @var array
     */
    protected $casts = [
        'email_verified_at' => 'datetime',
    ];

    public function role()
    {
        return $this->belongsTo(Role::class);
    }

    public function shop()
    {
        return $this->belongsTo(Shop::class);
    }

    public function customers()
    {
        return $this->hasMany(CustomerLog::class);
    }

}
TinkerでDBからデータを取得してみる
リレーションの設定が出来たところで Tinker コマンドを使ってデータ取得確認をします。
$ php artisan tinker

\App\Models\User::find(1)->name
=> "山田太郎"

\App\Models\User::find(1)->shop->name
=> "東京本店"


\App\Models\User::find(1)->role->memo
=> "スーパーバイザー"

\App\Models\Shop::find(1)->users
=> Illuminate\Database\Eloquent\Collection {#3086
     all: [
       App\User {#3116
         id: 1,
         name: "山田太郎",
         email: "sute1@example.com",
         email_verified_at: null,
         role_id: 1,
         shop_id: 1,
         memo: "総括主任",
         created_at: null,
         updated_at: null,
       },
     ],
   }


\App\Models\Customer::find(3)->customerLogs[1]->log
=> "Fugiat ad ea iusto quia sed dolores id tempore architecto placeat provident distinctio quo eos enim mollitia ut assumenda nostrum quis impedit perspiciatis a mollitia."
ポリシーの作成
以下の権限をLaravelのポリシー機能を使って実装していきます。
スーパーバイザー
- 全店員を閲覧できる
- 全顧客を閲覧できる
店員
- 店員情報は自分のものだけ閲覧出来る
- 自店舗の顧客のみ閲覧出来る
artisan make:policy コマンドでポリシーファイルを作成する
helpオプションをつけてどんなオプションが指定できるか確認します。
php artisan help make:policy
$php artisan help make:policy
Description:
  Create a new policy class

Usage:
  make:policy [options] [--] <name>

Arguments:
  name                  The name of the class

Options:
  -m, --model[=MODEL]   The model that the policy applies to
  -h, --help            Display this help message
  -q, --quiet           Do not output any message
  -V, --version         Display this application version
      --ansi            Force ANSI output
      --no-ansi         Disable ANSI output
  -n, --no-interaction  Do not ask any interactive question
      --env[=ENV]       The environment the command should run under
  -v|vv|vvv, --verbose  Increase the verbosity of messages: 1 for normal output, 2 for more verbose output and 3 for debug
$
--modelオプションを使用して 対象となるモデルを指定してポリシーファイルを作成します。
php artisan make:policy UserPolicy --model=User
php artisan make:policy CustomerPolicy  --model=Customer
User.phpに isSuperVisor関数とenumSupserVisor関数を追加
app/Models/User.phpを編集します。
    /**
     * スーパーバイザーであればtrueを返す
     * @return bool
     */
    public function isSuperVisor(): bool
    {
        return $this['role_id'] === 1;
    }

    public static function enumSupserVisor()
    {
        return User::where('role_id', '=', 1)->get();
    }
ポリシーファイルを編集します
UserPolicy.php
app/Policies/UserPolicie.phpをテキストエディタで編集します。
<?php

namespace App\Policies;

use App\User;
use Illuminate\Auth\Access\HandlesAuthorization;

class UserPolicy
{
    use HandlesAuthorization;

    /**
     * スーパーバイザーのみ閲覧できる
     *
     * @param \App\User $user
     * @return mixed
     */
    public function viewAny(User $user)
    {
        return $user->isSuperVisor();
    }

    /**
     * スーパーバイザーと自分自身のみ閲覧できる
     *
     * @param \App\User $user
     * @param \App\User $model
     * @return mixed
     */
    public function view(User $user, User $model)
    {
        return $user->id === $model->id || $user->isSuperVisor();
    }

}
CustomerPolicy.php
app/Policies/CustomerPolicy.phpも編集します。
<?php

namespace App\Policies;

use App\Customer;
use App\User;
use Illuminate\Auth\Access\HandlesAuthorization;

class CustomerPolicy
{
    use HandlesAuthorization;

    /**
     * スーパーバイザーは全店舗の顧客を閲覧出来る
     * 以外は 自分が所属する店舗の顧客だけ閲覧出来る
     * @param  \App\Models\User  $user
     * @param  \App\Models\Customer  $customer
     * @return mixed
     */
    public function view(User $user, Customer $customer)
    {
        return $user->shop_id === $customer->shop_id || $user->isSuperVisor();
    }

}
ページ表示
ブラウザで表示してみる
php artisan serveコマンドはhttpサーバー立ち上げてLaravelのプロジェクトをブラウザで確認できる用意する仕組みです。
php artisan help serve でserveコマンドのオプションを確認。
$php artisan help serve
Description:
  Serve the application on the PHP development server

Usage:
  serve [options]

Options:
      --host[=HOST]     The host address to serve the application on [default: "127.0.0.1"]
      --port[=PORT]     The port to serve the application on
      --tries[=TRIES]   The max number of ports to attempt to serve from [default: 10]
  -h, --help            Display this help message
  -q, --quiet           Do not output any message
  -V, --version         Display this application version
      --ansi            Force ANSI output
      --no-ansi         Disable ANSI output
  -n, --no-interaction  Do not ask any interactive question
      --env[=ENV]       The environment the command should run under
  -v|vv|vvv, --verbose  Increase the verbosity of messages: 1 for normal output, 2 for more verbose output and 3 for debug
$
ポート番号を指定できるので指定する。省略すると8000ポートが使われる。
$php artisan serve --port=9999
Laravel development server started: http://127.0.0.1:9999
デフォルトのWelcome画面が表示されます。
顧客情報システムの画面が表示されるように設定して行きましょう。
routes/web.php
どのURLでどの画面を表示するかの設定をweb.phpで行います。
エディタでroutes/web.phpを開いて見てみましょう。
<?php

use Illuminate\Support\Facades\Route;

/*
|--------------------------------------------------------------------------
| Web Routes
|--------------------------------------------------------------------------
|
| Here is where you can register web routes for your application. These
| routes are loaded by the RouteServiceProvider within a group which
| contains the "web" middleware group. Now create something great!
|
*/

Route::get('/', function () {
    return view('welcome');
});

Auth::routes();

Route::get('/home', [App\Http\Controllers\HomeController::class, 'index'])->name('home');
とりあえず表示してみる
web.phpに
Route::get('/test', function () {
    return 'Hello World';
});
を書き込んで、ブラウザから
を開いてみましょう。
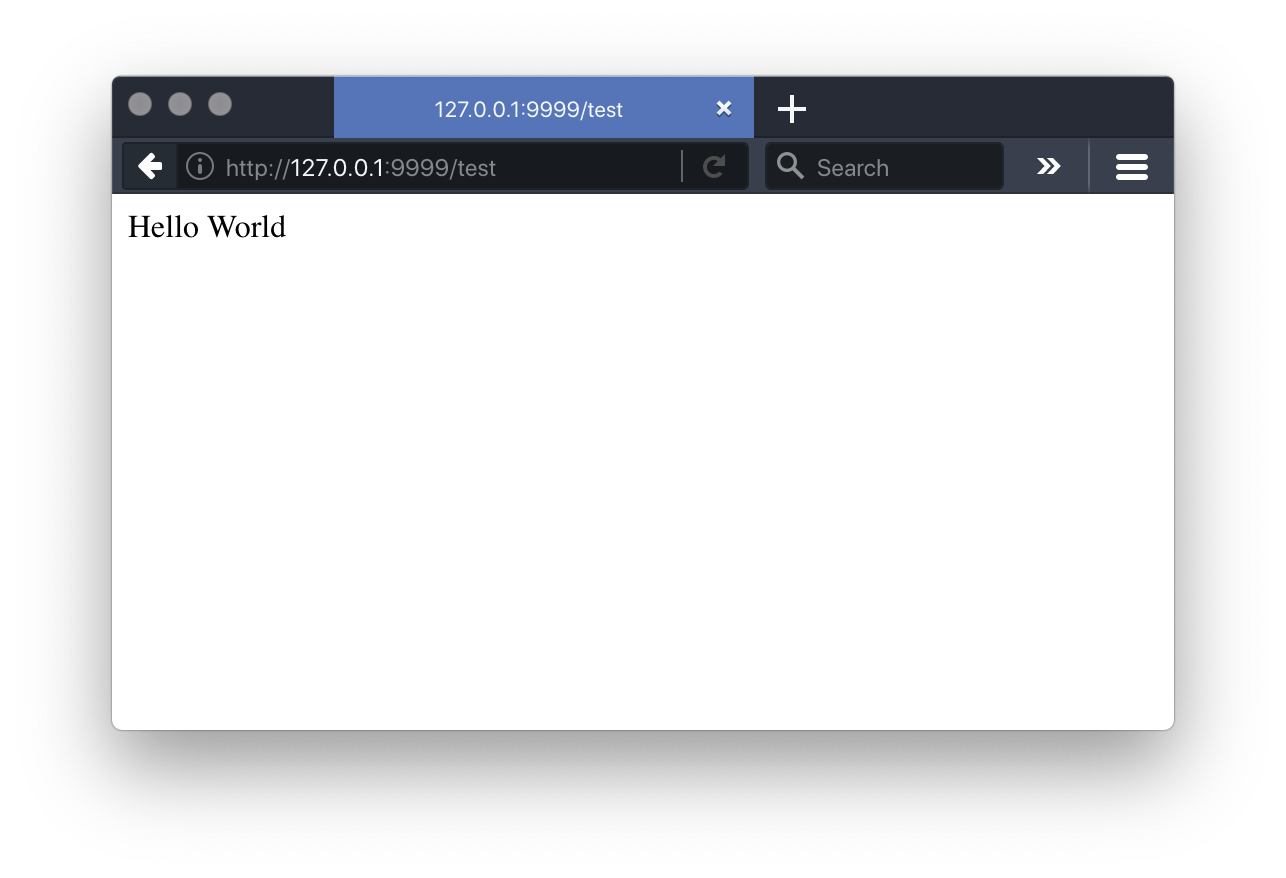
このようにHello Worldが表示されます。
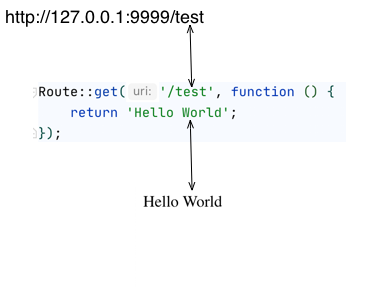
上の図のように Route::get()第一引数に、URLのパスを。第2引数に表示する内容を書きます。
ではブラウザにLaravelから何が送られているでしょうか。ブラウザのページのソースコードを表示する機能を使って確認してみましょう。
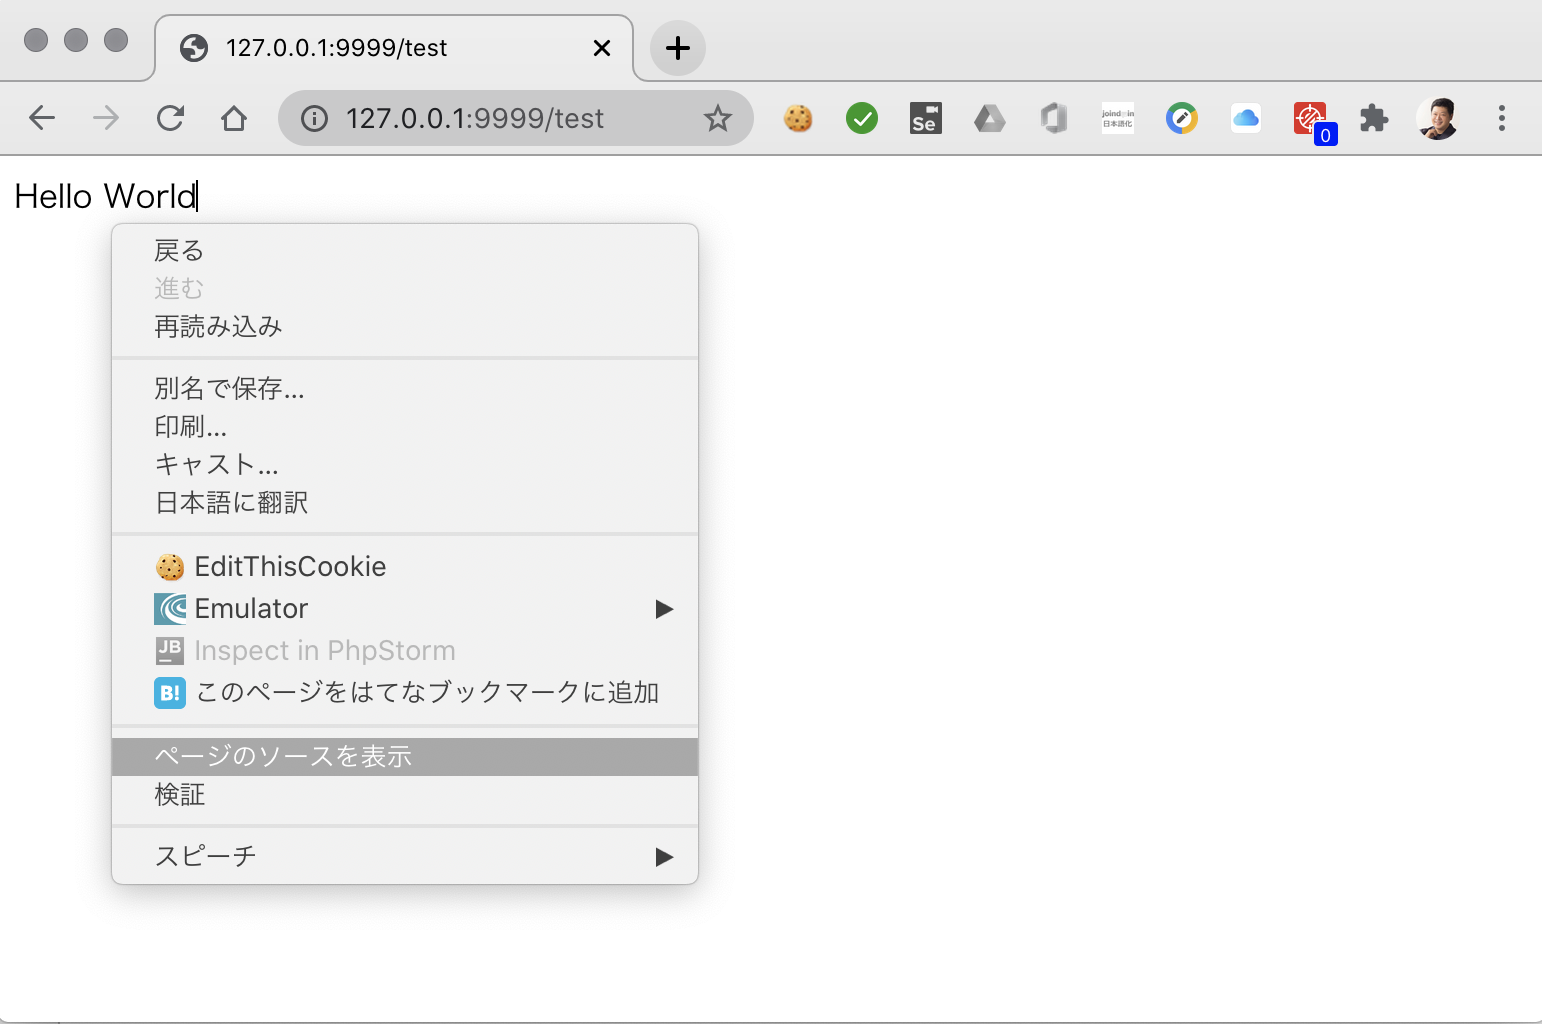
Chromeブラウザの場合はページの白い部分で右クリックして 「ページのソースを表示」で確認できます。
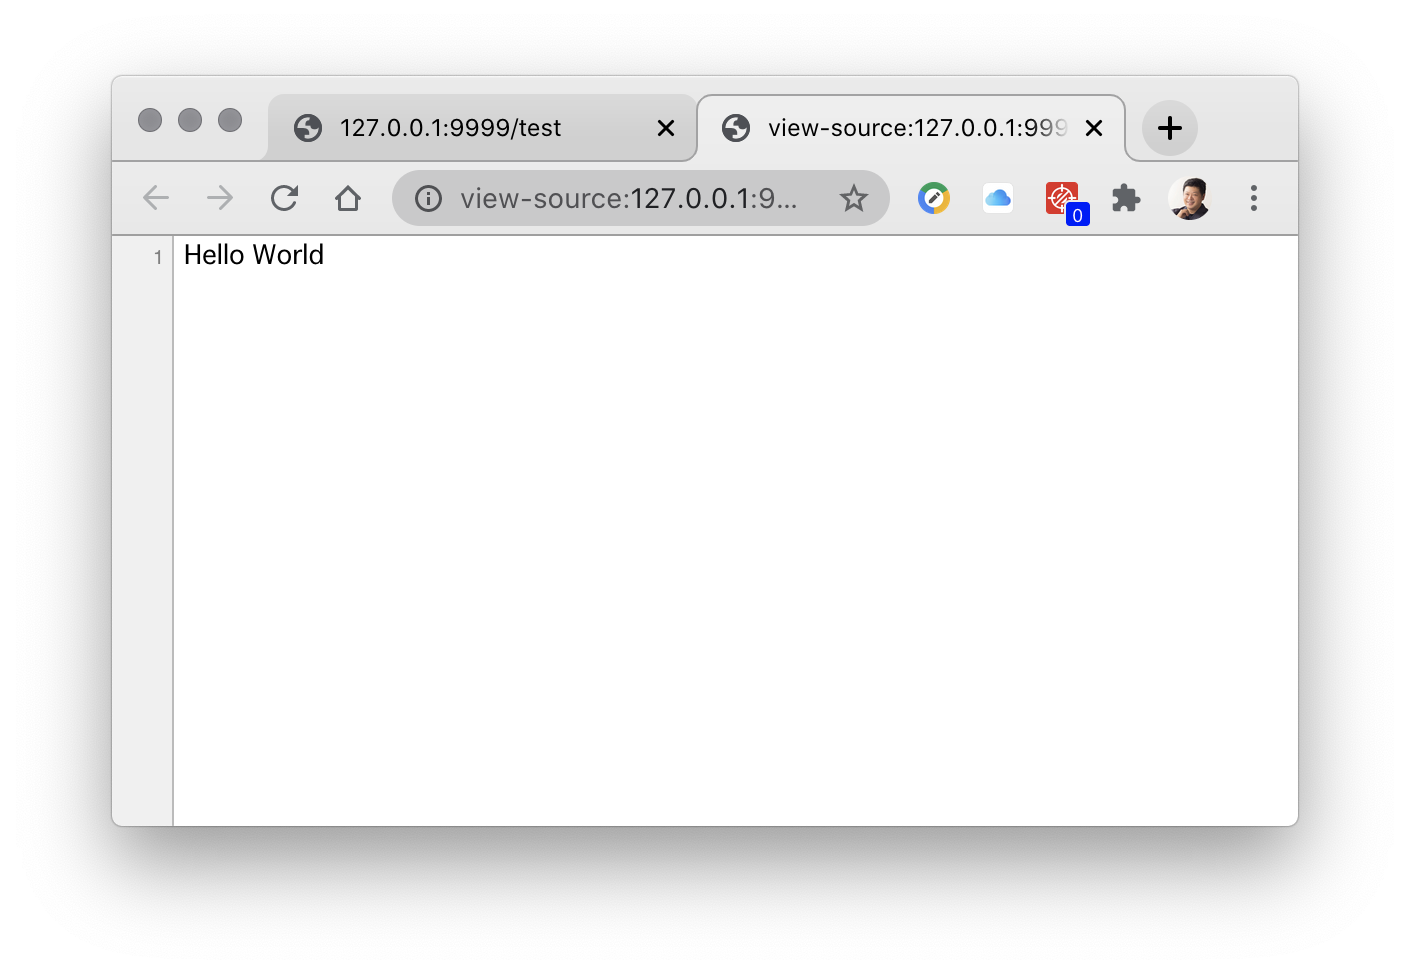
Hello Worldの文字だけしか表示されていません。
ブラウザにはHTMLという言語を使って、文字を大きくしたり、色を付けたり、図形を表示したりします。そのためHello Worldという文字だけでは非常に質素な表示しかできません。
HTMLを表示してみる
web.phpに以下のコードを追加して、ブラウザから http://127.0.0.1:9999/test2 を開いてみましょう。
Route::get('/test2', function () {
    return '
    <!DOCTYPE html>
<html lang="en">
<head>
    <meta charset="UTF-8">
    <title>Hello HTML</title>
</head>
<body>
<h1 style="color: hotpink;">Hello HTML</h1>
</body>
</html>
';
});
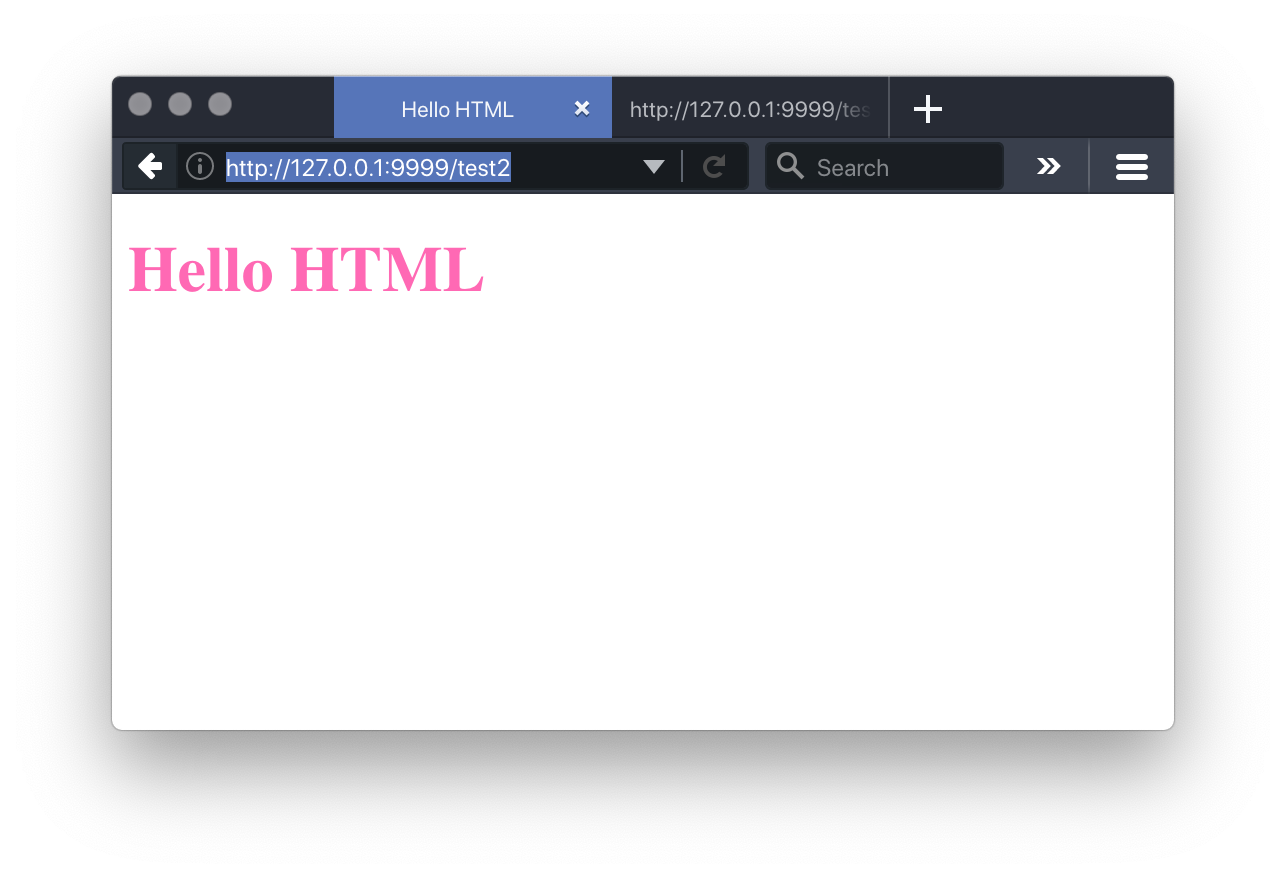
ブラウザにピンク色文字でHello HTMLが表示されます。先ほどと同じ方法でソースを確認すると。
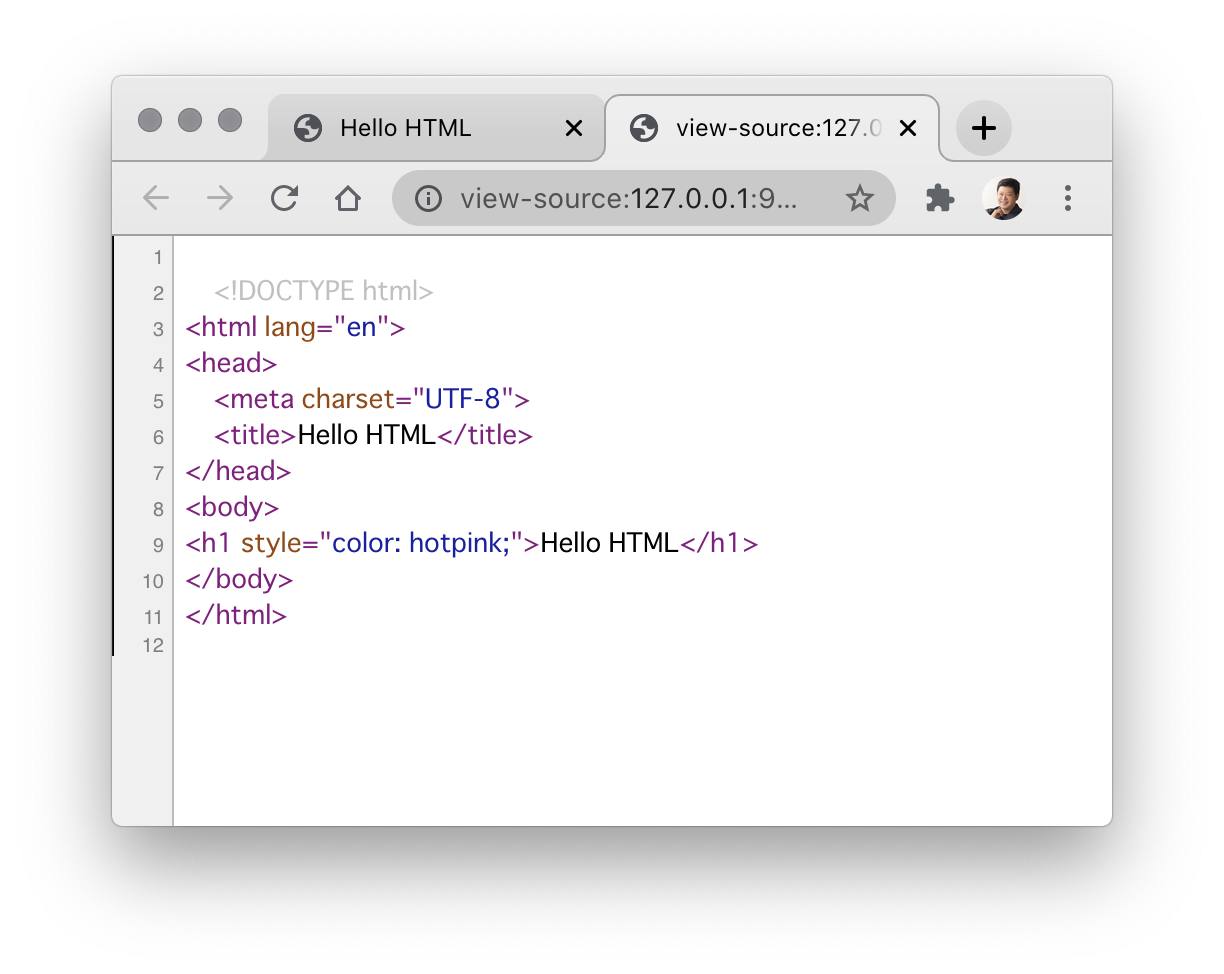
web.phpに記述したHTMLが送らていることがわかります。
今の例ではweb.phpにHTMLを直接書きましたが、ページの数が少なければ問題有りませんが、100ページ1000ページとなったときに全てのHTMLをweb.phpに書くのは現実的では有りません。このためLaravelではHTMLを管理するための仕組みとしてbladeというシステムを使っています。
jsとcssを用意する
https://github.com/sugie/chibi_crm/blob/master/public/css/app.css
↑このページで公開しているCSSを、プロジェクトの public/css/app.css に配置します。
https://github.com/sugie/chibi_crm/blob/master/public/js/app.js
↑このページで公開しているJSを、プロジェクトの public/js/app.js に配置します。
app.jsは最初カラですが、プロジェクト共通で使うJavaScriptをこのファイルに記述していきます。
bladeファイルを書いてみよう
Laravelのプロジェクトディレクトリ内の resources/views ディレクトリ直下に hello.blade.php ファイルを作ってみましょう。
エディタで resources/views/hello.blade.php ファイルを開いて
<!DOCTYPE html>
<html lang="en">
<head>
    <meta charset="UTF-8">
    <title>Hello Blade</title>
</head>
<body>
<h1 style="color: orange;">Hello Blade</h1>
</body>
</html>
と、記述してます。
次にweb.phpを編集して、
Route::get('/test3', function() {
    return view('hello');
});
を追記しましょう。
ブラウザから http://127.0.0.1:9999/test3 を開くと Hello Bladeが表示されます。
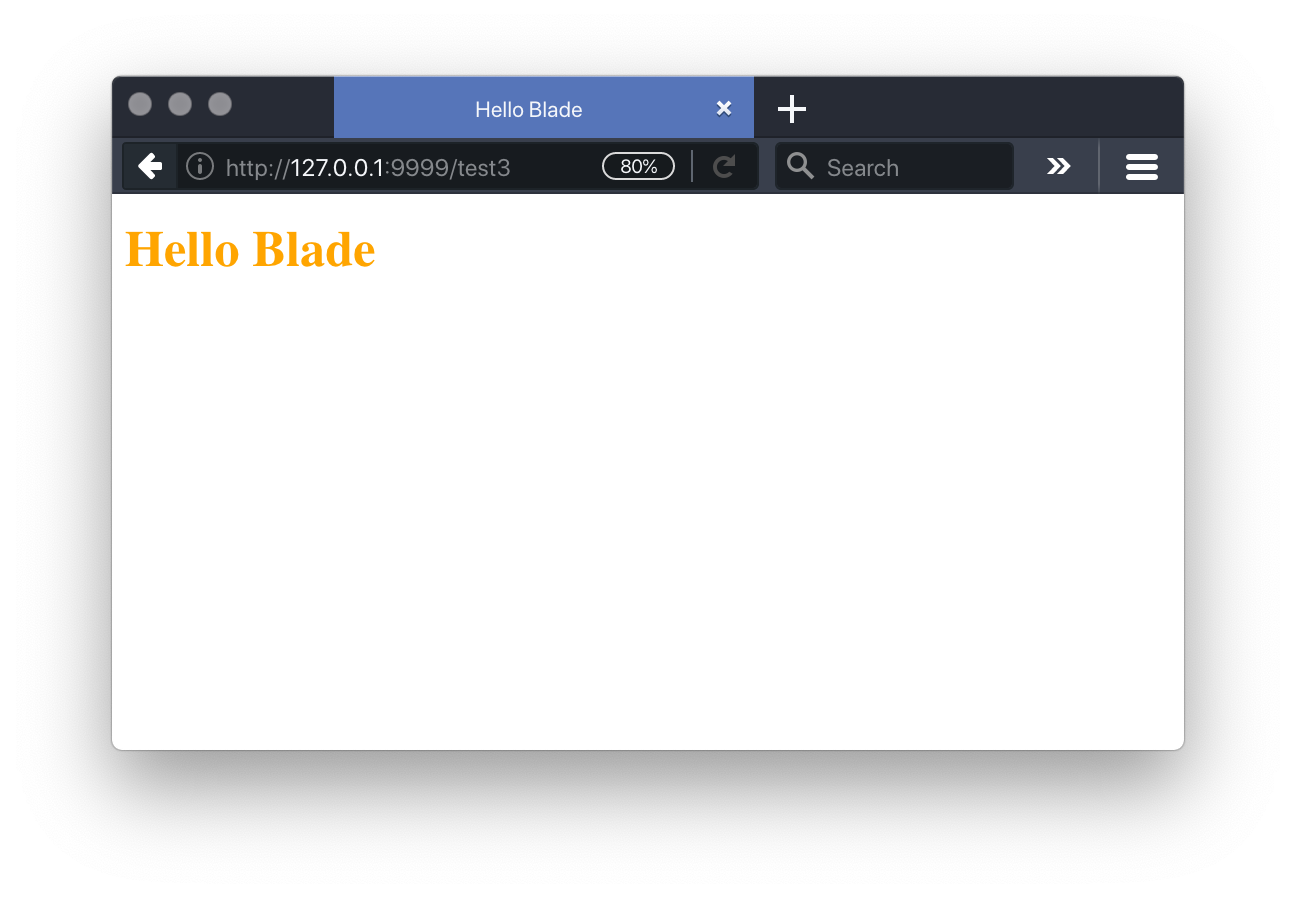
これでひとつひとつの画面を一個のbladeファイルにして管理することが出来るようになりました。
layout
下の画面イメージ図をみてください。
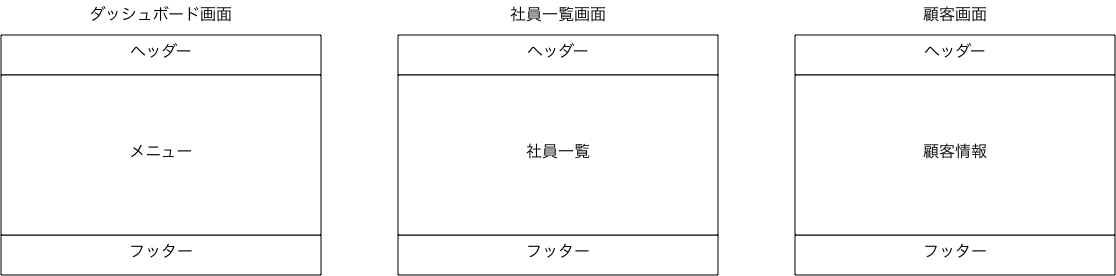
ダッシュボード、社員一覧、顧客画面のイメージを並べてみました。
どの画面も上にヘッダー、下にフッターが存在しています。この様にどの画面でも共通にする部分があります。この共通部分を管理する仕組みがlayoutになります。
my_layout.blade.php
my_layout.blade.phpファイルを resources/views/layouts フォルダ直下に作成します。
<!DOCTYPE html>
<html lang="en">
<head>
    <meta charset="UTF-8">
    <title>Hello Layout</title>
</head>
<body>
<div>Header</div>
@yield('content')
<div>Footer</div>
</body>
</html>
このmy_layout.blade.phpに画面で共通する部分を書きます。
レイアウトを使うページを用意します。
resources/viewsフォルダ直下にpage_a.blade.phpとpage_b.blade.phpを作成します。
page_a.blade.php
@extends('layouts.my_layout')
@section('content')
    PAGE A
@endsection
page_b.blade.php
@extends('layouts.my_layout')
@section('content')
    PAGE B
@endsection
page_a.blade.php, page_b.blade.phpがレイアウトを呼ぶ記述になります。
web.phpに追加
Route::get('page_a', function () {
    return view('page_a');
});
Route::get('page_b', function () {
    return view('page_b');
});
ブラウザでアクセス
http://127.0.0.1:9999/page_a
と
http://127.0.0.1:9999/page_b
をブラウザで開いてみましょう。

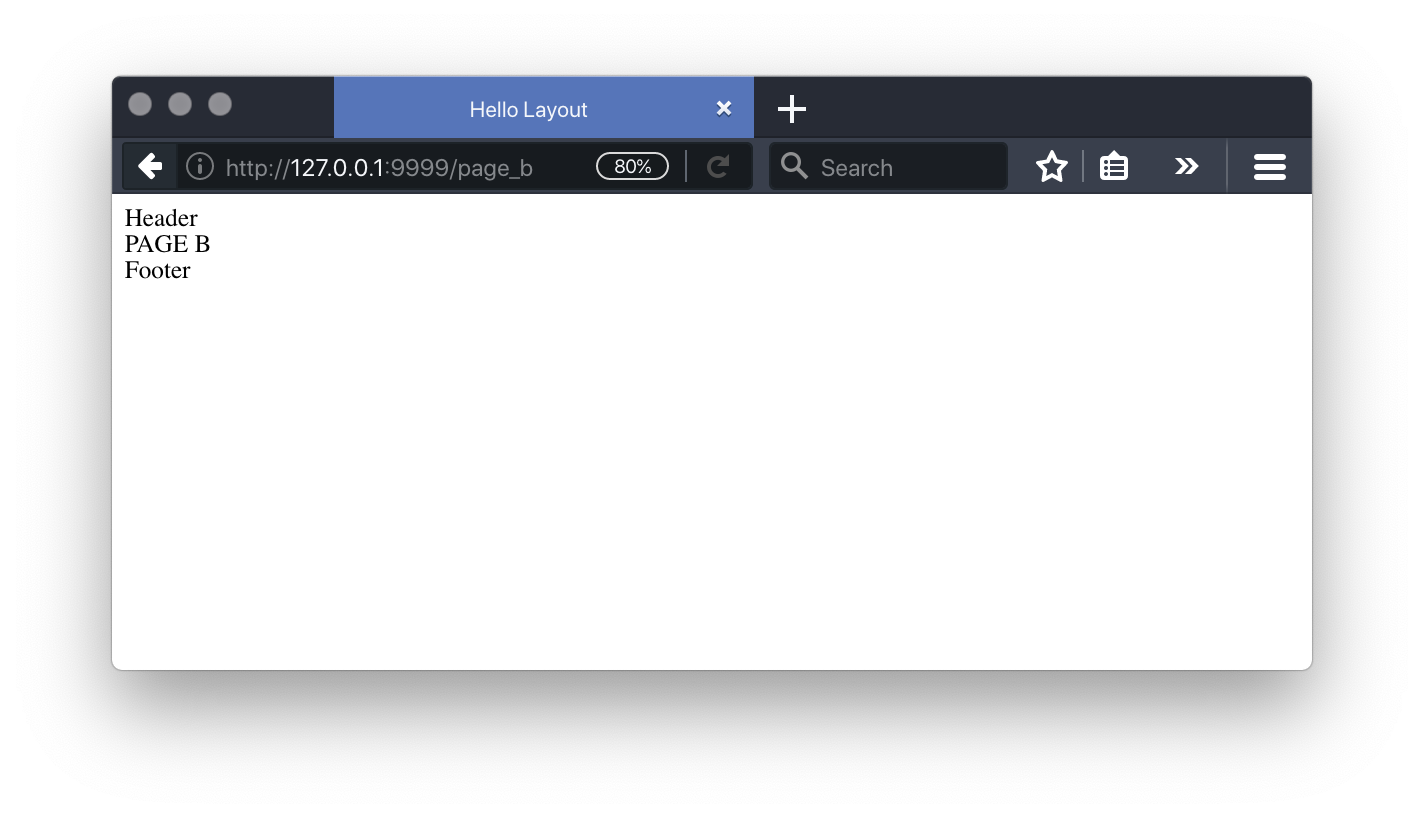
レイアウトの構成どおりに"PAGE A","PAGE B"が、表示されます。
コントローラー
MVCのおさらい
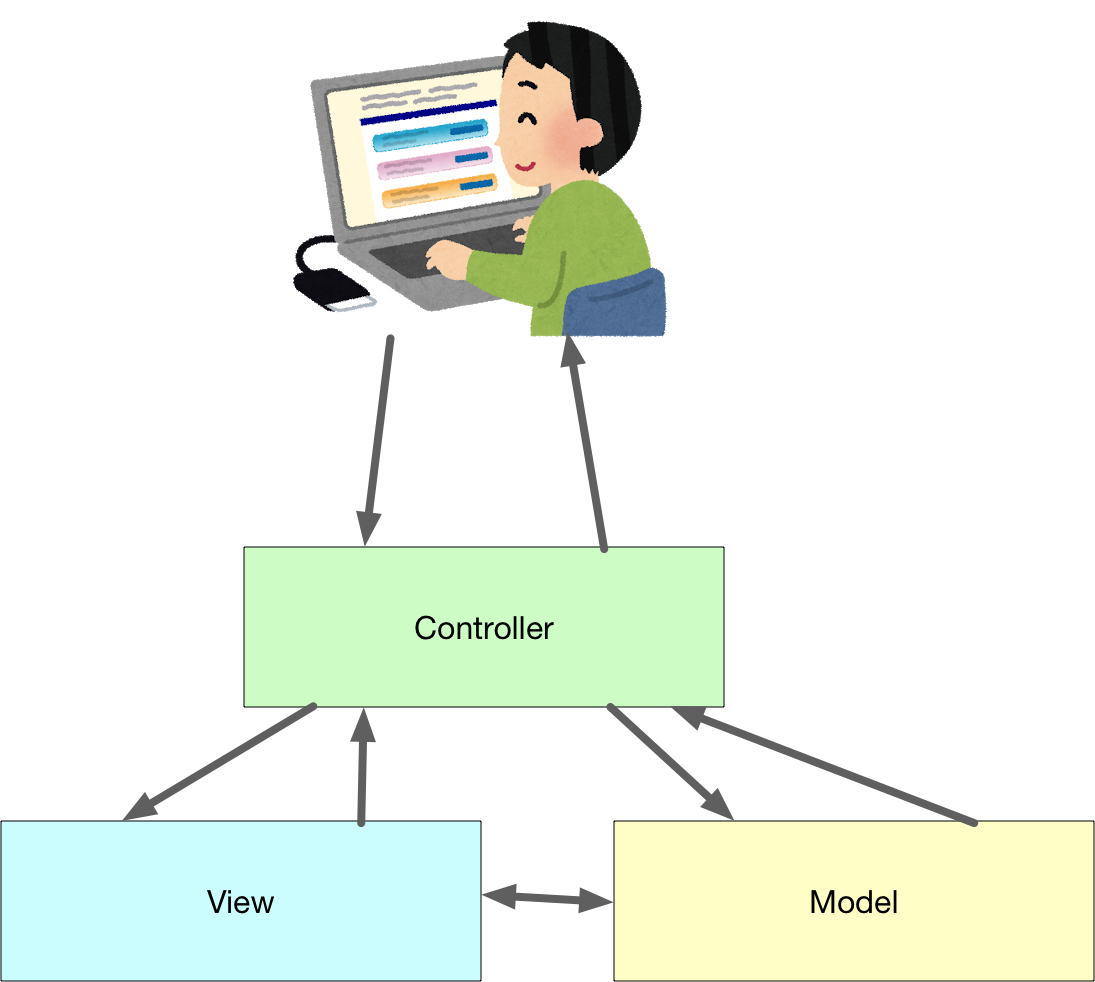
ソフトウェアの役割をきちんと分けましょう。という考え方で、Model、View、Controllerという役割があります。通常 これらの頭文字を取ってMVCと呼びます。
| 役割 | 意味 |
|---|---|
 |
ブラウザからのリクエストを受けて、レスポンスを返します。 |
 |
画面表示をどのように表示するかを管理します。page_a.blade.php, page_b.blade.phpがviewにあたります。 |
 |
いろいろな計算や、システム全体で使う機能を書きます。ビジネスロジックを書きます。金融機関であれば金利計算などの処理をModelに書きます。 |
参考URL https://ja.wikipedia.org/wiki/Model_View_Controller
今までの例ではコントローラーとモデルを使わずに、ページの表示を行っていました。
しかしプログラムが小さいうちは大丈夫ですが、プログラムの規模が大きくなっていくうちに役割の違う機能が色んな所に散らかっていき、収集が着かなくなってしまいます。
これからはキチンとコントローラーを作ってページの表示を行っていきましょう。
app.blade.php レイアウトの用意
laravelをインストールすると resources/views/layoutsディレクトリに
app.blade.php レイアウトが作成されています。
今回はこのapp.blade.phpを利用していきます。
top_page.blade.phpの作成
resources/views/top_page.blade.phpを作成します。
エディタでtop_page.blade.phpを開いて編集します。
以下のように記述します。
@extends('layouts.app')
@section('content')
    <div class="content">
        <div class="title m-b-md text-center">
            顧客管理システム
        </div>
    </div>
@endsection
TopPageControllerの作成
php artisan make:Controller TopPageController
このコマンドを実行して TopPageControllerを作成します。
TopPageControllerでトップページ表示のコントロールを行います。
テキストエディタで app/Http/Controllers/TopPageController.php を開いて編集します。
<?php

namespace App\Http\Controllers;

use Illuminate\Http\Request;

class TopPageController extends Controller
{
    //
}
最初はこのように最小限の記述しかありません。トップページを表示する関数を記述します。
<?php

namespace App\Http\Controllers;

use Illuminate\Http\Request;

class TopPageController extends Controller
{
    public function top_page() {
        return view('top_page');
    }
}
web.php に トップページのURLとコントローラーの関係を記述
テキストエディタでroutes/web.php を開いて編集します。
Route::get('/top_page', [\App\Http\Controllers\TopPageController::class, 'top_page'])->name('top_page');
ブラウザで /top_page を表示
ブラウザで
http://127.0.0.1:9999/top_page
を開きます。
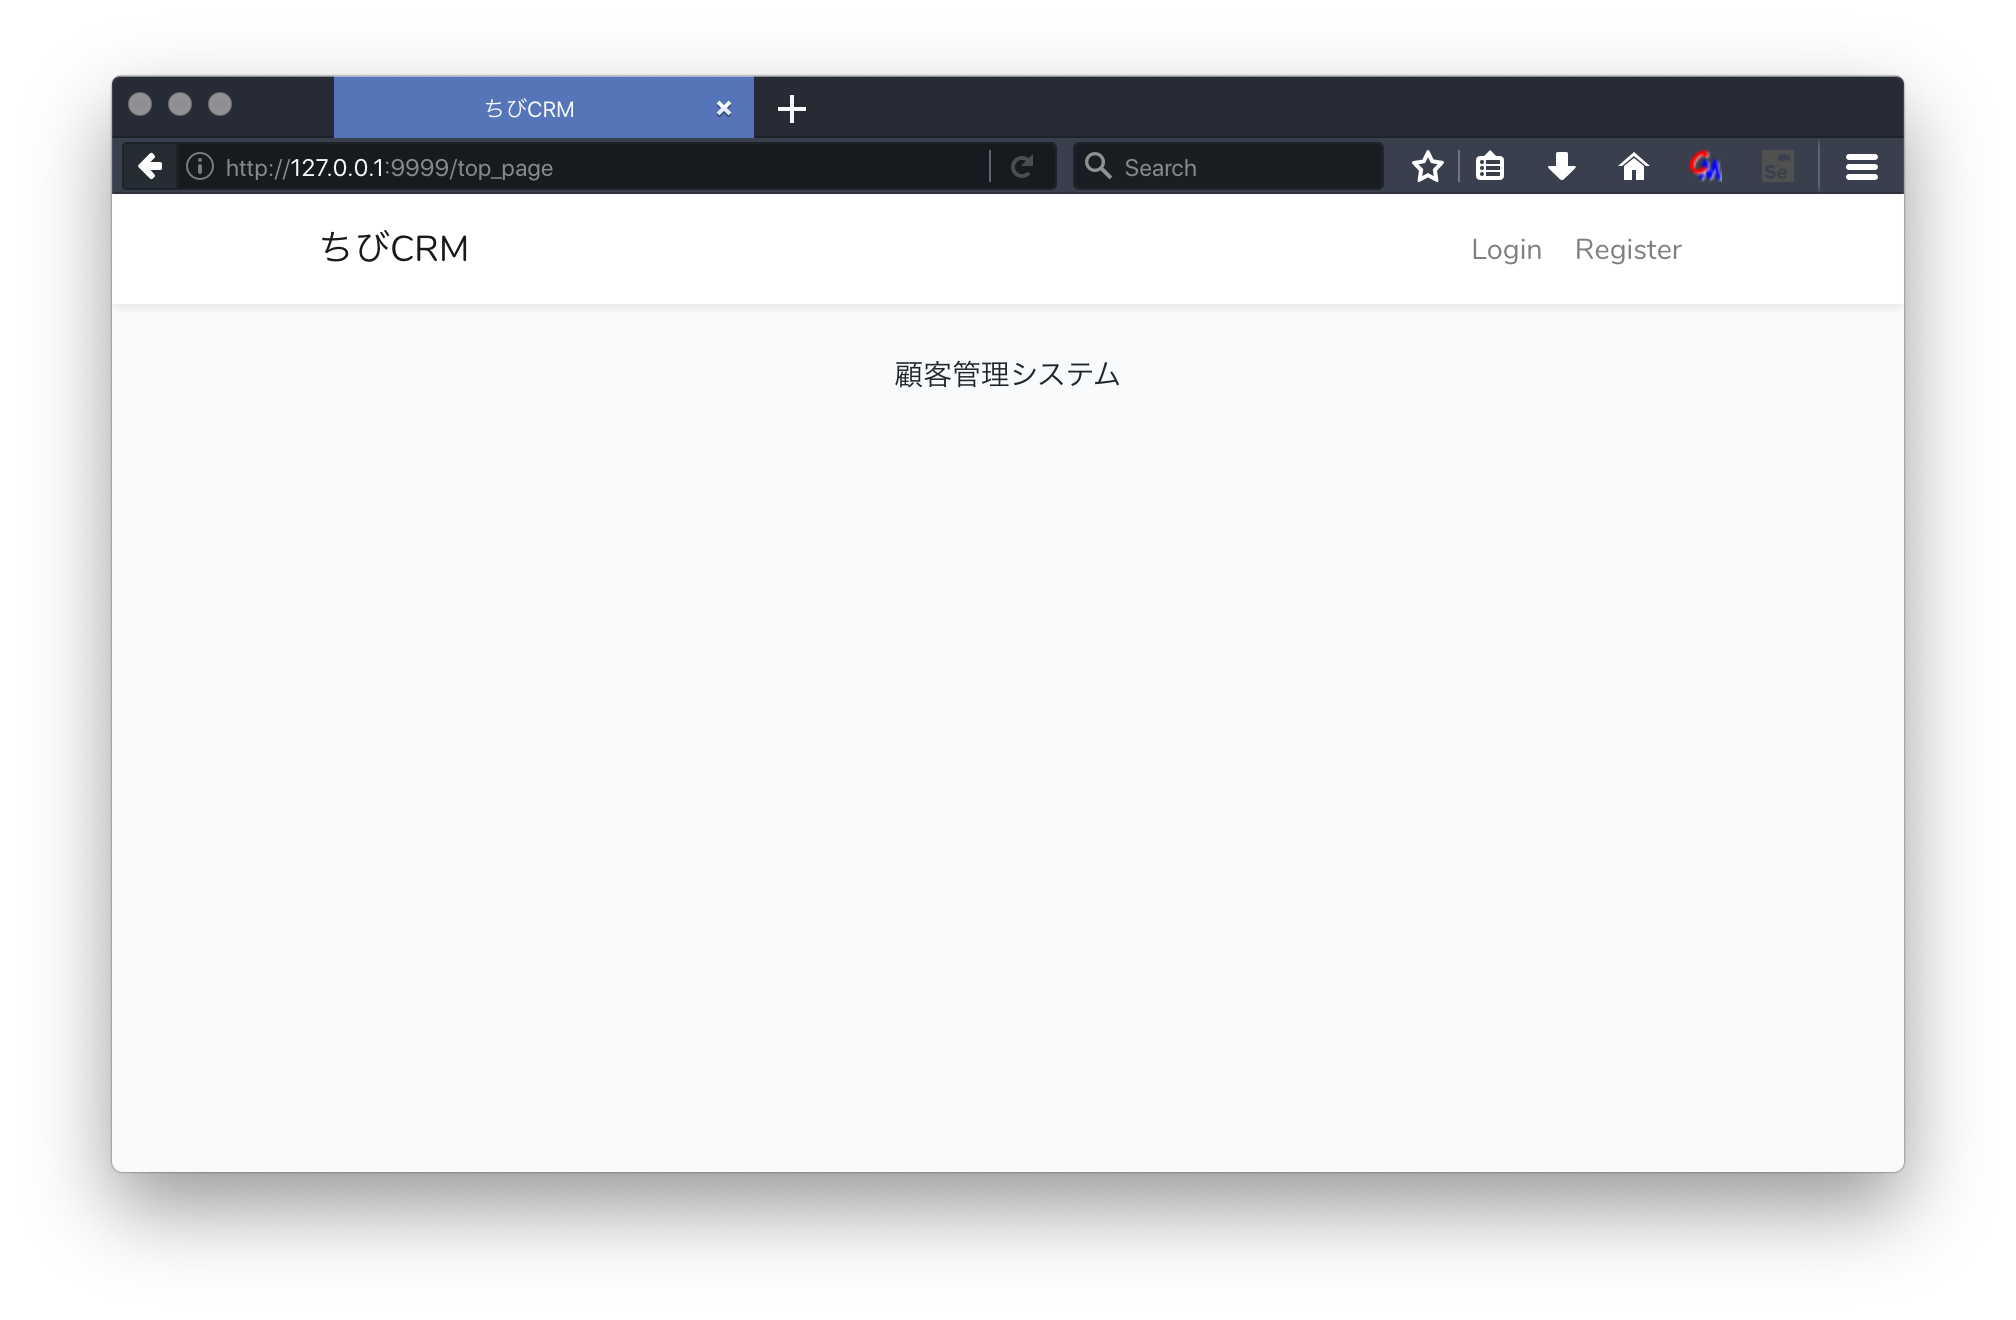
上の様な表示になると思います。
/top_page を / に変更
通常ウェブサイトのトップページは
/
で始まります。
top_pageを/に変更します。
テキストエディタで routes/web.php を開いて編集します。
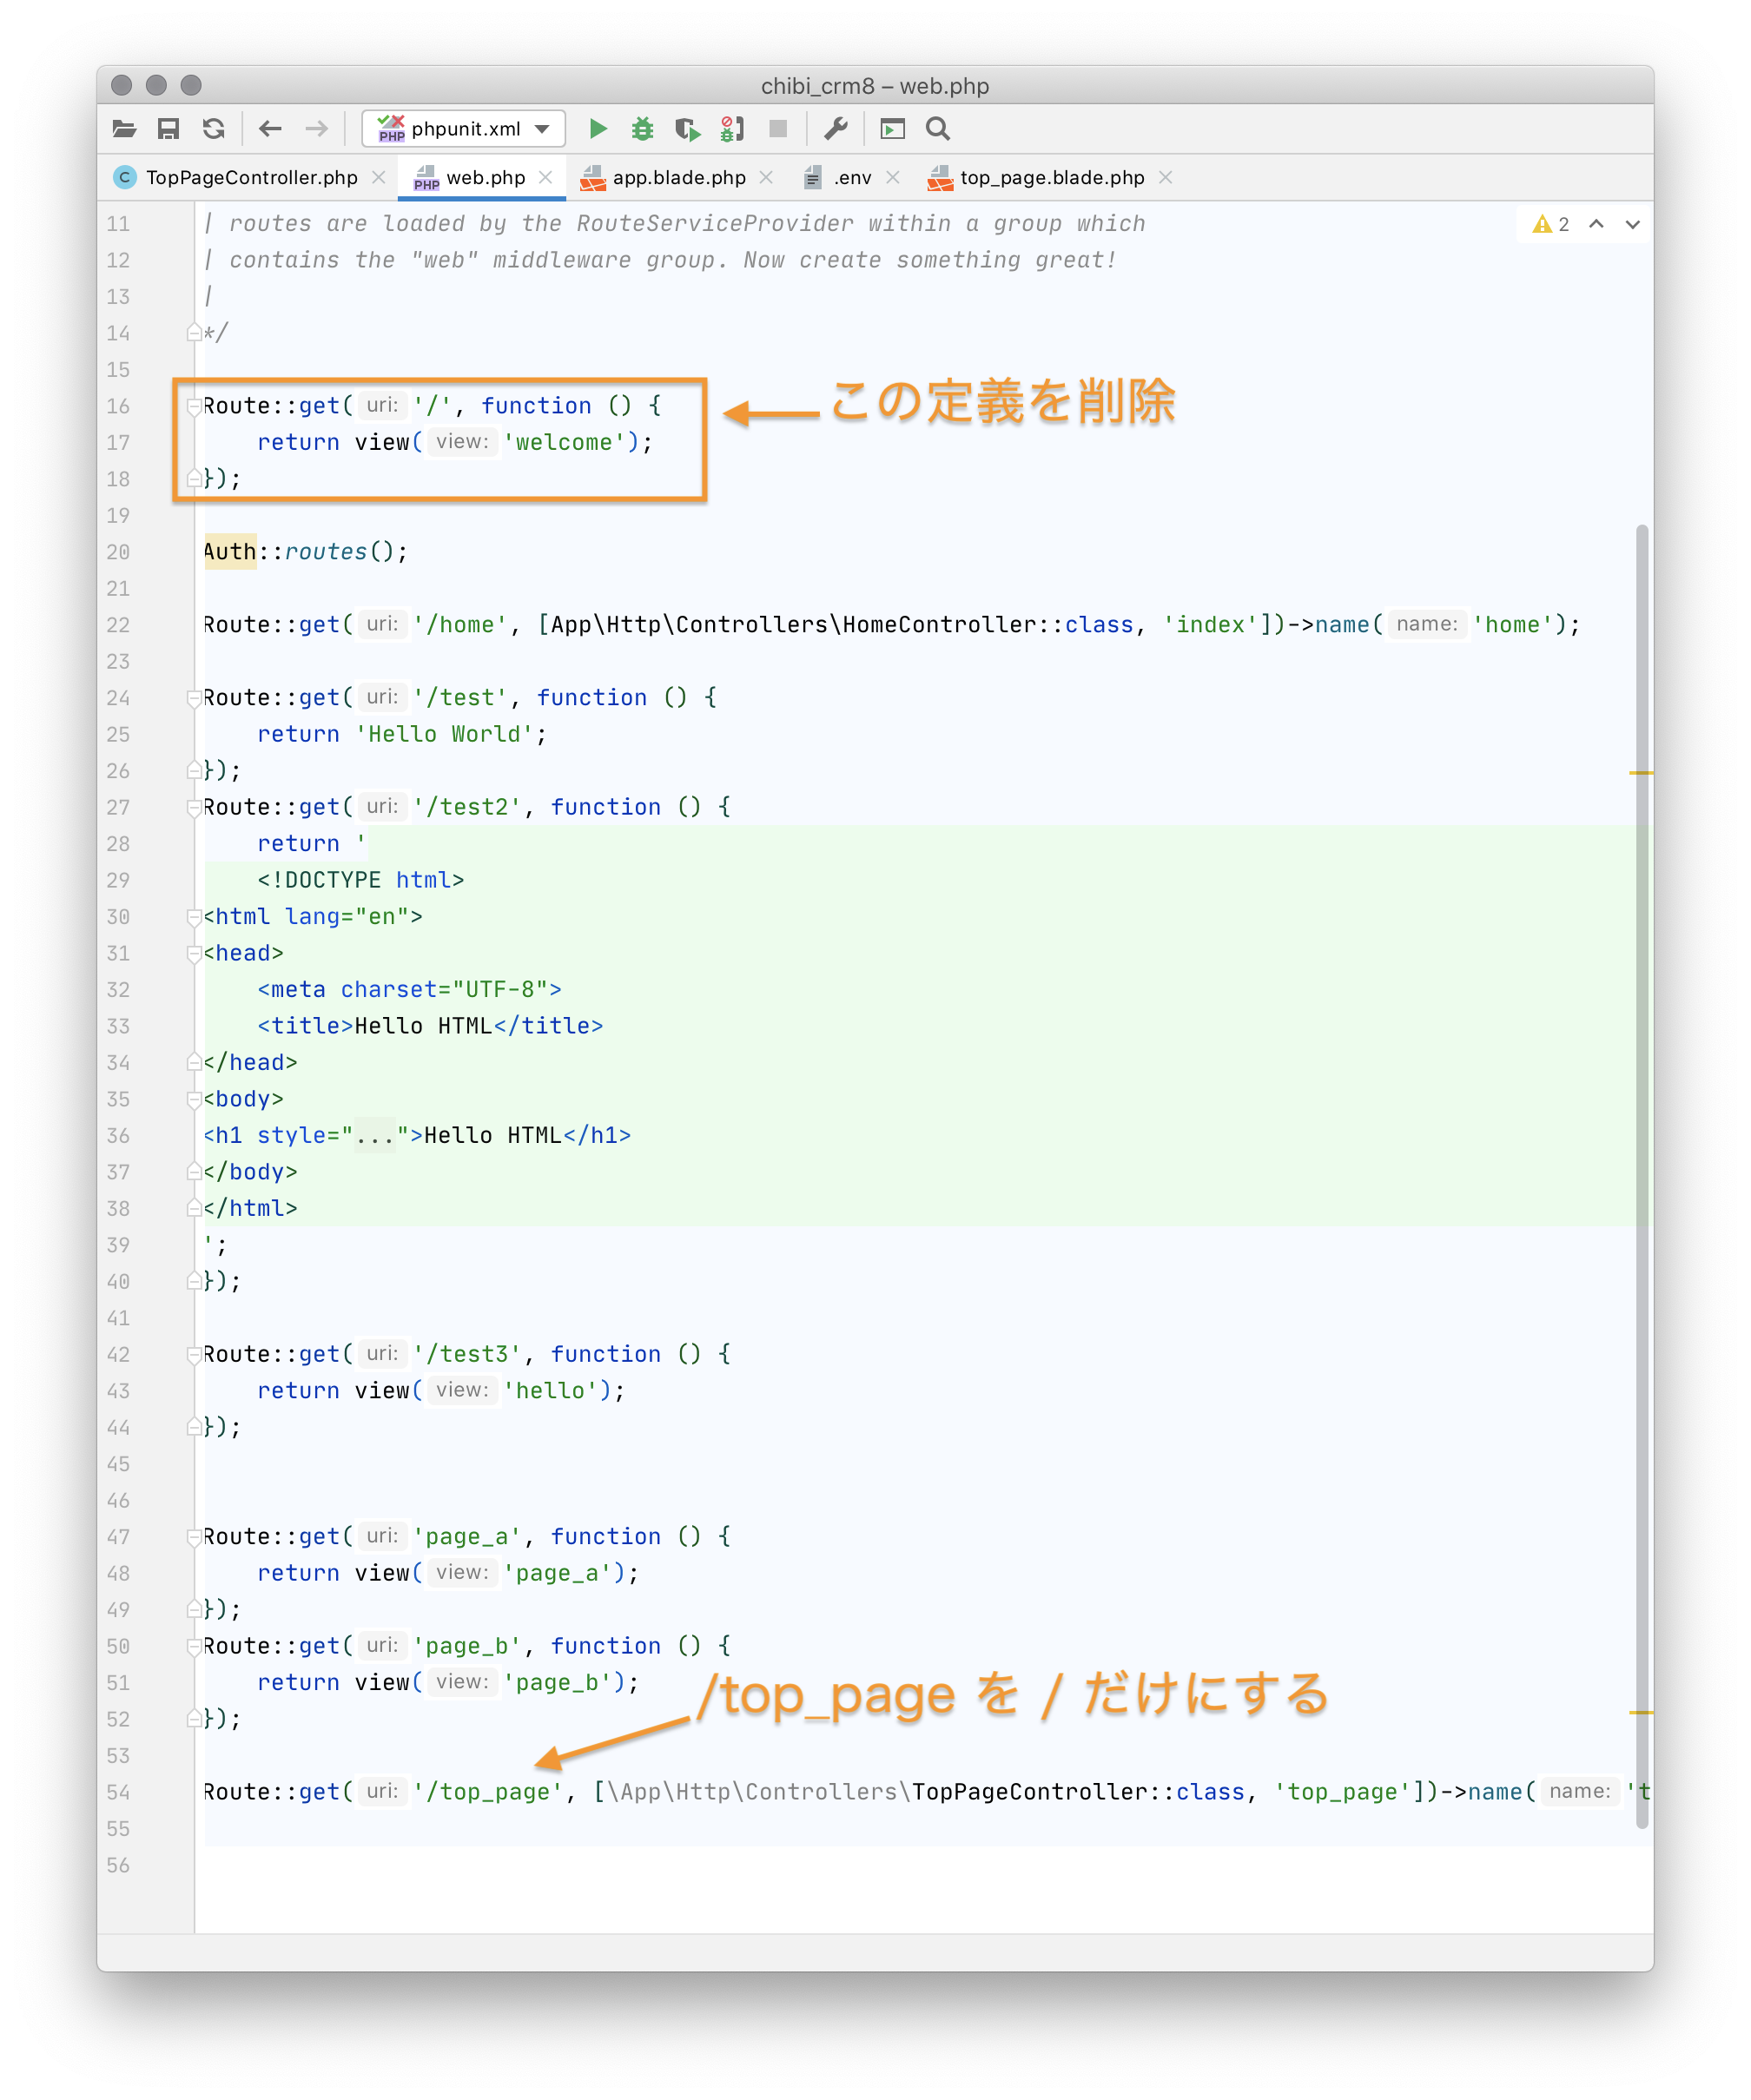
Laravelをインストールすると既に作成されている / への定義がぶつかるので削除します。
先ほど作成した get('/top_page', の部分を get('/', に変更します。
だんだんWEBアプリっぽくなってきました。
画面の作成
それでは、顧客管理システムの画面を作っていきます。
ログイン画面

ログインの画面とコントローラはLaravelの初期状態をそのまま使うので変更はしません。
CreateUsersTable.phpで初期ユーザーが登録されているのでsute1@example.comでこのアカウントでログインしてみます。
ログイン画面のviewである blade ファイル resources/views/auth/login.blade.php にあります。
ログイン画面の表示内容を変更する場合は login.blade.php を編集します。
ダッシュボード画面
ダッシュボード画面はWebアプリケーションでよく使う機能へのリンクなどが置いてあるログイン後のトップページの事です。
ログインをすると /home に遷移します。これはLaravelのデフォルトの動作です。/homeを変更することも出来ますが、今回は変更しません。
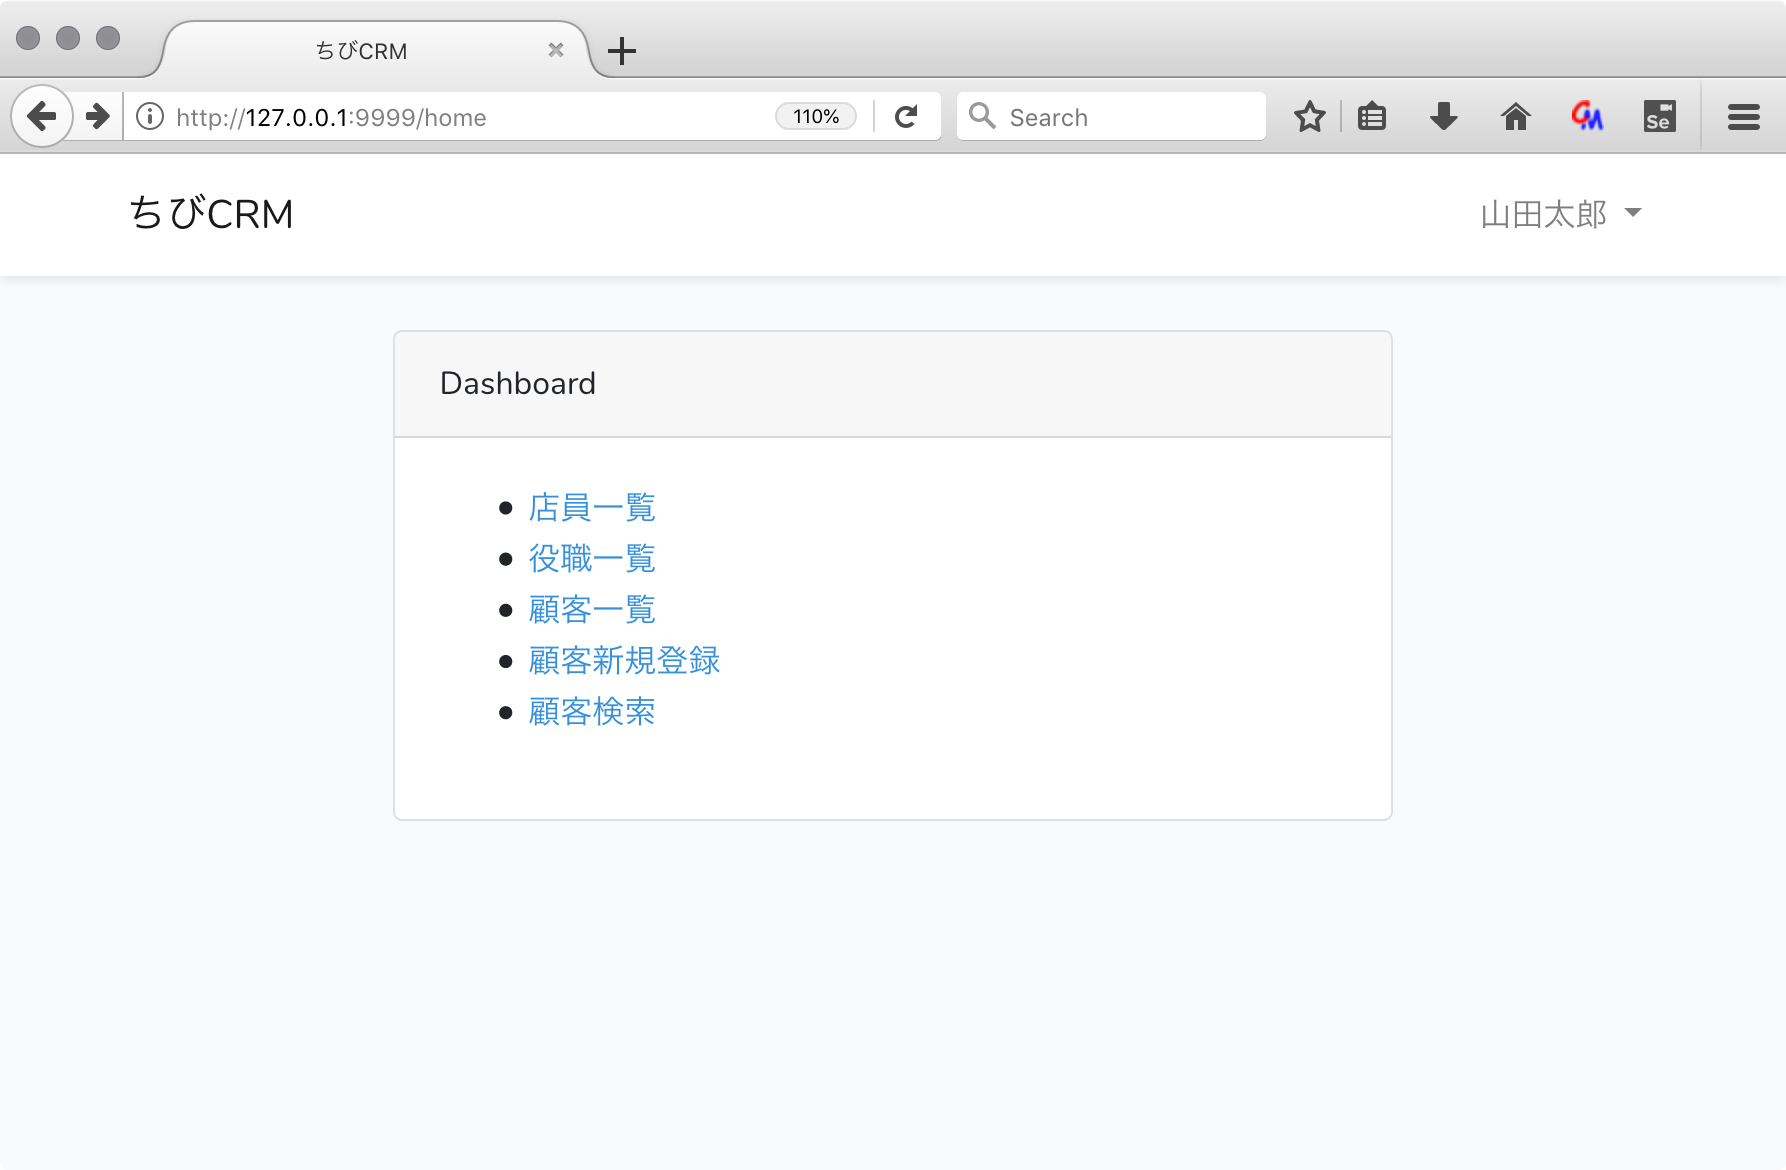
Laravelにデフォルトで入っている home.bladeを変更して使います。
resources/views/home.blade.php
ダッシュボードには各画面へのリンクを一覧表示します
テキストエディタを開いて home.blade.php を編集します。
@extends('layouts.app')

@section('content')
    <div class="container">
        <div class="row justify-content-center">
            <div class="col-md-8">
                <div class="card">
                    <div class="card-header">{{ __('Dashboard') }}</div>

                    <div class="card-body">
                        @if (session('status'))
                            <div class="alert alert-success" role="alert">
                                {{ session('status') }}
                            </div>
                        @endif

                        <ul>
                            @canany('viewAny', auth()->user())
                                <li><a href="/users">社員一覧
                                    </a></li>
                            @endcanany
                            <li><a href="/roles">役職一覧</a></li>
                            <li><a href="/customers">顧客一覧</a></li>
                            <li><a href="/customers/create">顧客新規登録</a></li>
                            <li><a href="/customer_search">顧客検索</a></li>
                        </ul>
                    </div>
                </div>
            </div>
        </div>
    </div>
@endsection
@canany
@cananyは ポリシーを確認して true であれば内容を表示します。
今回のケースでは 先に編集したUserPolicy.phpのviewAny関数を呼んで true になれば社員一覧
のリンクを表示します。スーパーバイザーの社員一覧
を表示します。
ブラウザでダッシュボードを表示
http://127.0.0.1:9999/home
をブラウザで開いて、ダッシュボードが表示されることを確認しましょう。
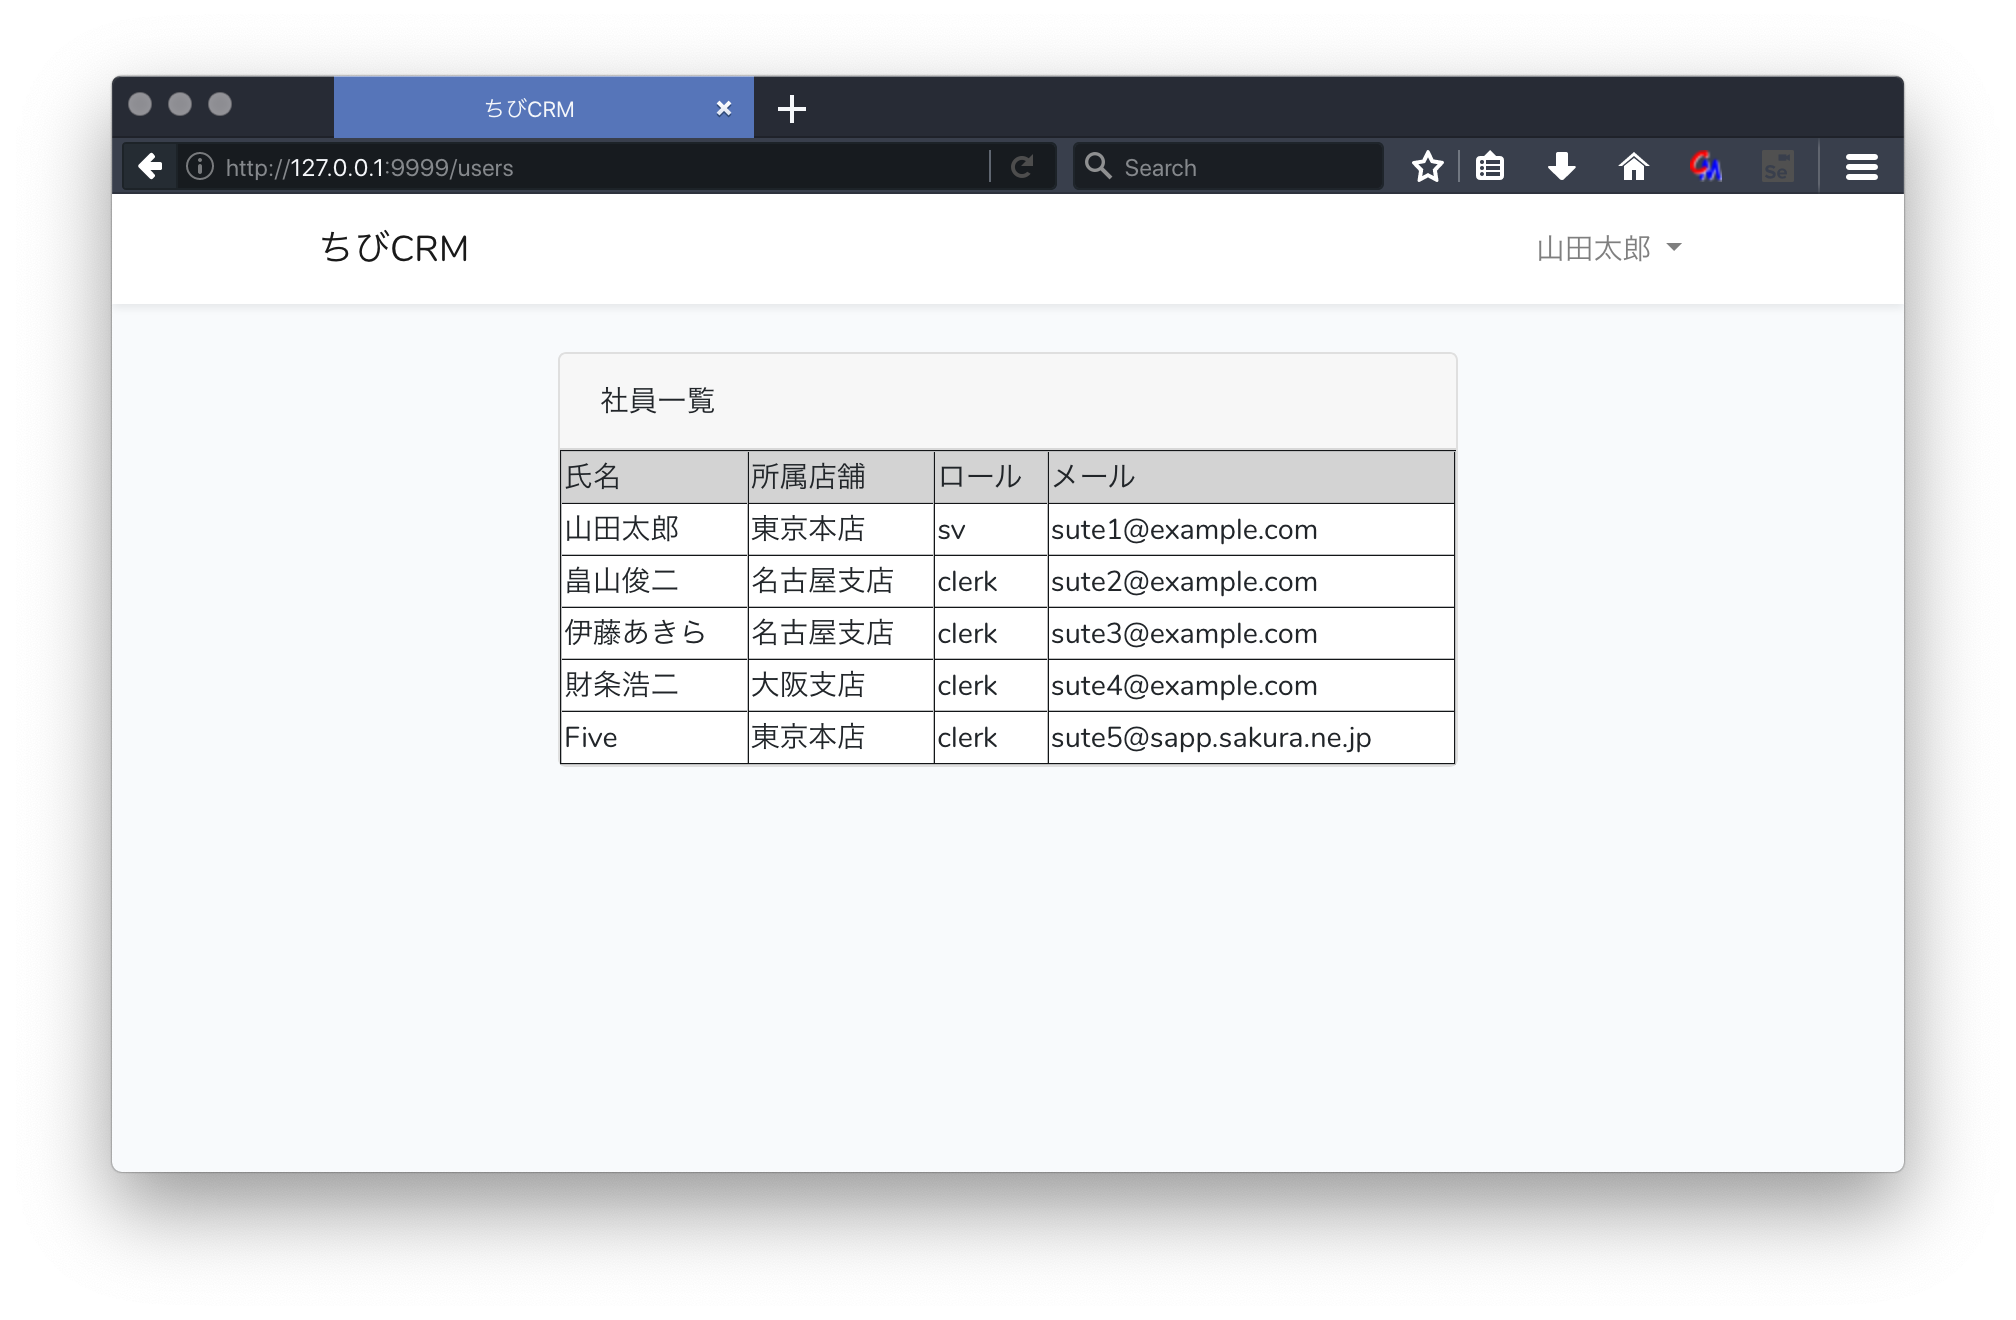
社員一覧画面
登録されている社員一覧が表示されるページを作成します。

コントローラーで usersテーブルから社員一覧を取得し、users変数に格納して viewである index.blade.php にusers変数を渡し、
index.blade.phpでusers変数をループ処理して 一人一行で表示を行います。
社員一覧画面のusers.blade.php
resources/views/users ディレクトリを作成して
この中に index.blade.php ファイルを作ります。
テキストエディタを開いて以下の様に変更します。
@extends('layouts.app')
@section('content')
    <div class="container">
        <div class="row justify-content-center">
            <div class="col-md-8">
                <div class="card">
                    <div class="card-header">社員一覧
</div>
                    <table width="100%" border="1">
                        <thead>
                        <tr style="background-color: lightgray">
                            <td>氏名</td>
                            <td>所属店舗</td>
                            <td>ロール</td>
                            <td>メール</td>
                        </tr>
                        </thead>
                        @foreach($users as $user)  {{-- Controllerから渡された users を foreach で回す --}}
                            <tr>
                                <td>{{ $user->name }}</td> {{-- 各要素を表示 --}}
                                <td>{{ $user->shop->name }}</td>
                                <td>{{ $user->role->name }}</td>
                                <td>{{ $user->email }}</td>
                            </tr>
                        @endforeach
                    </table>
                </div>
            </div>
        </div>
    </div>
@endsection
社員一覧画面コントローラの作成
invokableオプションを指定して invokable コントローラを作成します。invokableコントローラは呼び出される関数が一つのみのコントローラです。
少ない処理の画面であれば invokable で十分でしょう。
またweb.phpでコントローラ内の関数を指定しないで済みます。
実際に作成して動作を確認してみましょう。
例:
Route::get('foo', 'FooController@show'); 左の showが呼び出される関数の指定する部分。invokableの場合自動的に__invoke関数が呼び出される。
php artisan make:controller UserController --invokable
app/Http/Controllers/UserController.phpが作成される。
デフォルトで以下のようになっています。 __invoke メソッドが作成されています。
<?php

namespace App\Http\Controllers;

use Illuminate\Http\Request;

class UserController extends Controller
{
    /**
     * Handle the incoming request.
     *
     * @param  \Illuminate\Http\Request  $request
     * @return \Illuminate\Http\Response
     */
    public function __invoke(Request $request)
    {
        //
    }
}
__invokeメソッド内を以下のように変更します。
    public function __invoke(Request $request)
    {
        $user = auth()->user();
        $this->authorize('viewAny', $user);  // Policy をチェック
        $users = \App\Models\User::get(); // 社員一覧を取得
        return view('users.index', compact('users')); // users.index.bldae を呼出し、 usersを渡す
    }
社員一覧画面のweb.phpを確認
routes/web.php の以下の部分が
社員一覧コントローラを呼ぶ定義になります。
Route::get('/users', \App\Http\Controllers\UserController::class)->name('社員一覧')->middleware('auth');
ブラウザで社員一覧が表示されることを確認します。
http://127.0.0.1:9999/users
をブラウザで開きます。
役職一覧画面

役職一覧画面は社員一覧画面とほぼ同じです。
同じ様にweb.phpを確認して、コントローラーとbladeファイルを作っていきます。
役職一覧画面コントローラの作成
php artisan make:controller RoleController --invokable
app/Http/Controllers/RoleController.php ファイルが作られます。
以下の様に変更します。
<?php

namespace App\Http\Controllers;

use App\Role;
use Illuminate\Http\Request;

class RoleController extends Controller
{
    /**
     * Handle the incoming request.
     *
     * @param \Illuminate\Http\Request $request
     * @return \Illuminate\Http\Response
     */
    public function __invoke(Request $request)
    {
        $roles = \App\Models\Role::get(); // 役職一覧を取得
        return view('roles.index', compact('roles'));  // $roles一覧情報を渡して roles./index.blade.phpを呼びます
    }
}
役職一覧画面のusers.blade.php
resources/views/roles ディレクトリを作成して、
resources/views/roles/index.blade.php ファイルを作成します。
@extends('layouts.app')
@section('content')
    <div class="container">
        <div class="row justify-content-center">
            <div class="col-md-8">
                <div class="card">
                    <div class="card-header">役職一覧</div>
                    <table width="100%" border="1">
                        <thead>
                        <tr style="background-color: lightgray">
                            <td>ID</td>
                            <td>役職コード</td>
                            <td>役職</td>
                        </tr>
                        </thead>
                        @foreach($roles as $role)
                            <tr>
                                <td>{{ $role->id }}</td>
                                <td>{{ $role->name }}</td>
                                <td>{{ $role->memo }}</td>
                            </tr>
                        @endforeach
                    </table>
                </div>
            </div>
        </div>
    </div>
@endsection
役職一覧画面のweb.phpの定義
routes/web.phpをテキストエディタで開いて
以下の定義を記述します。
Route::get('/roles', \App\Http\Controllers\RoleController::class)->name('ロール一覧')->middleware('auth');
ブラウザで役職一覧を確認
http://127.0.0.1:9999/roles
をブラウザで開きます。

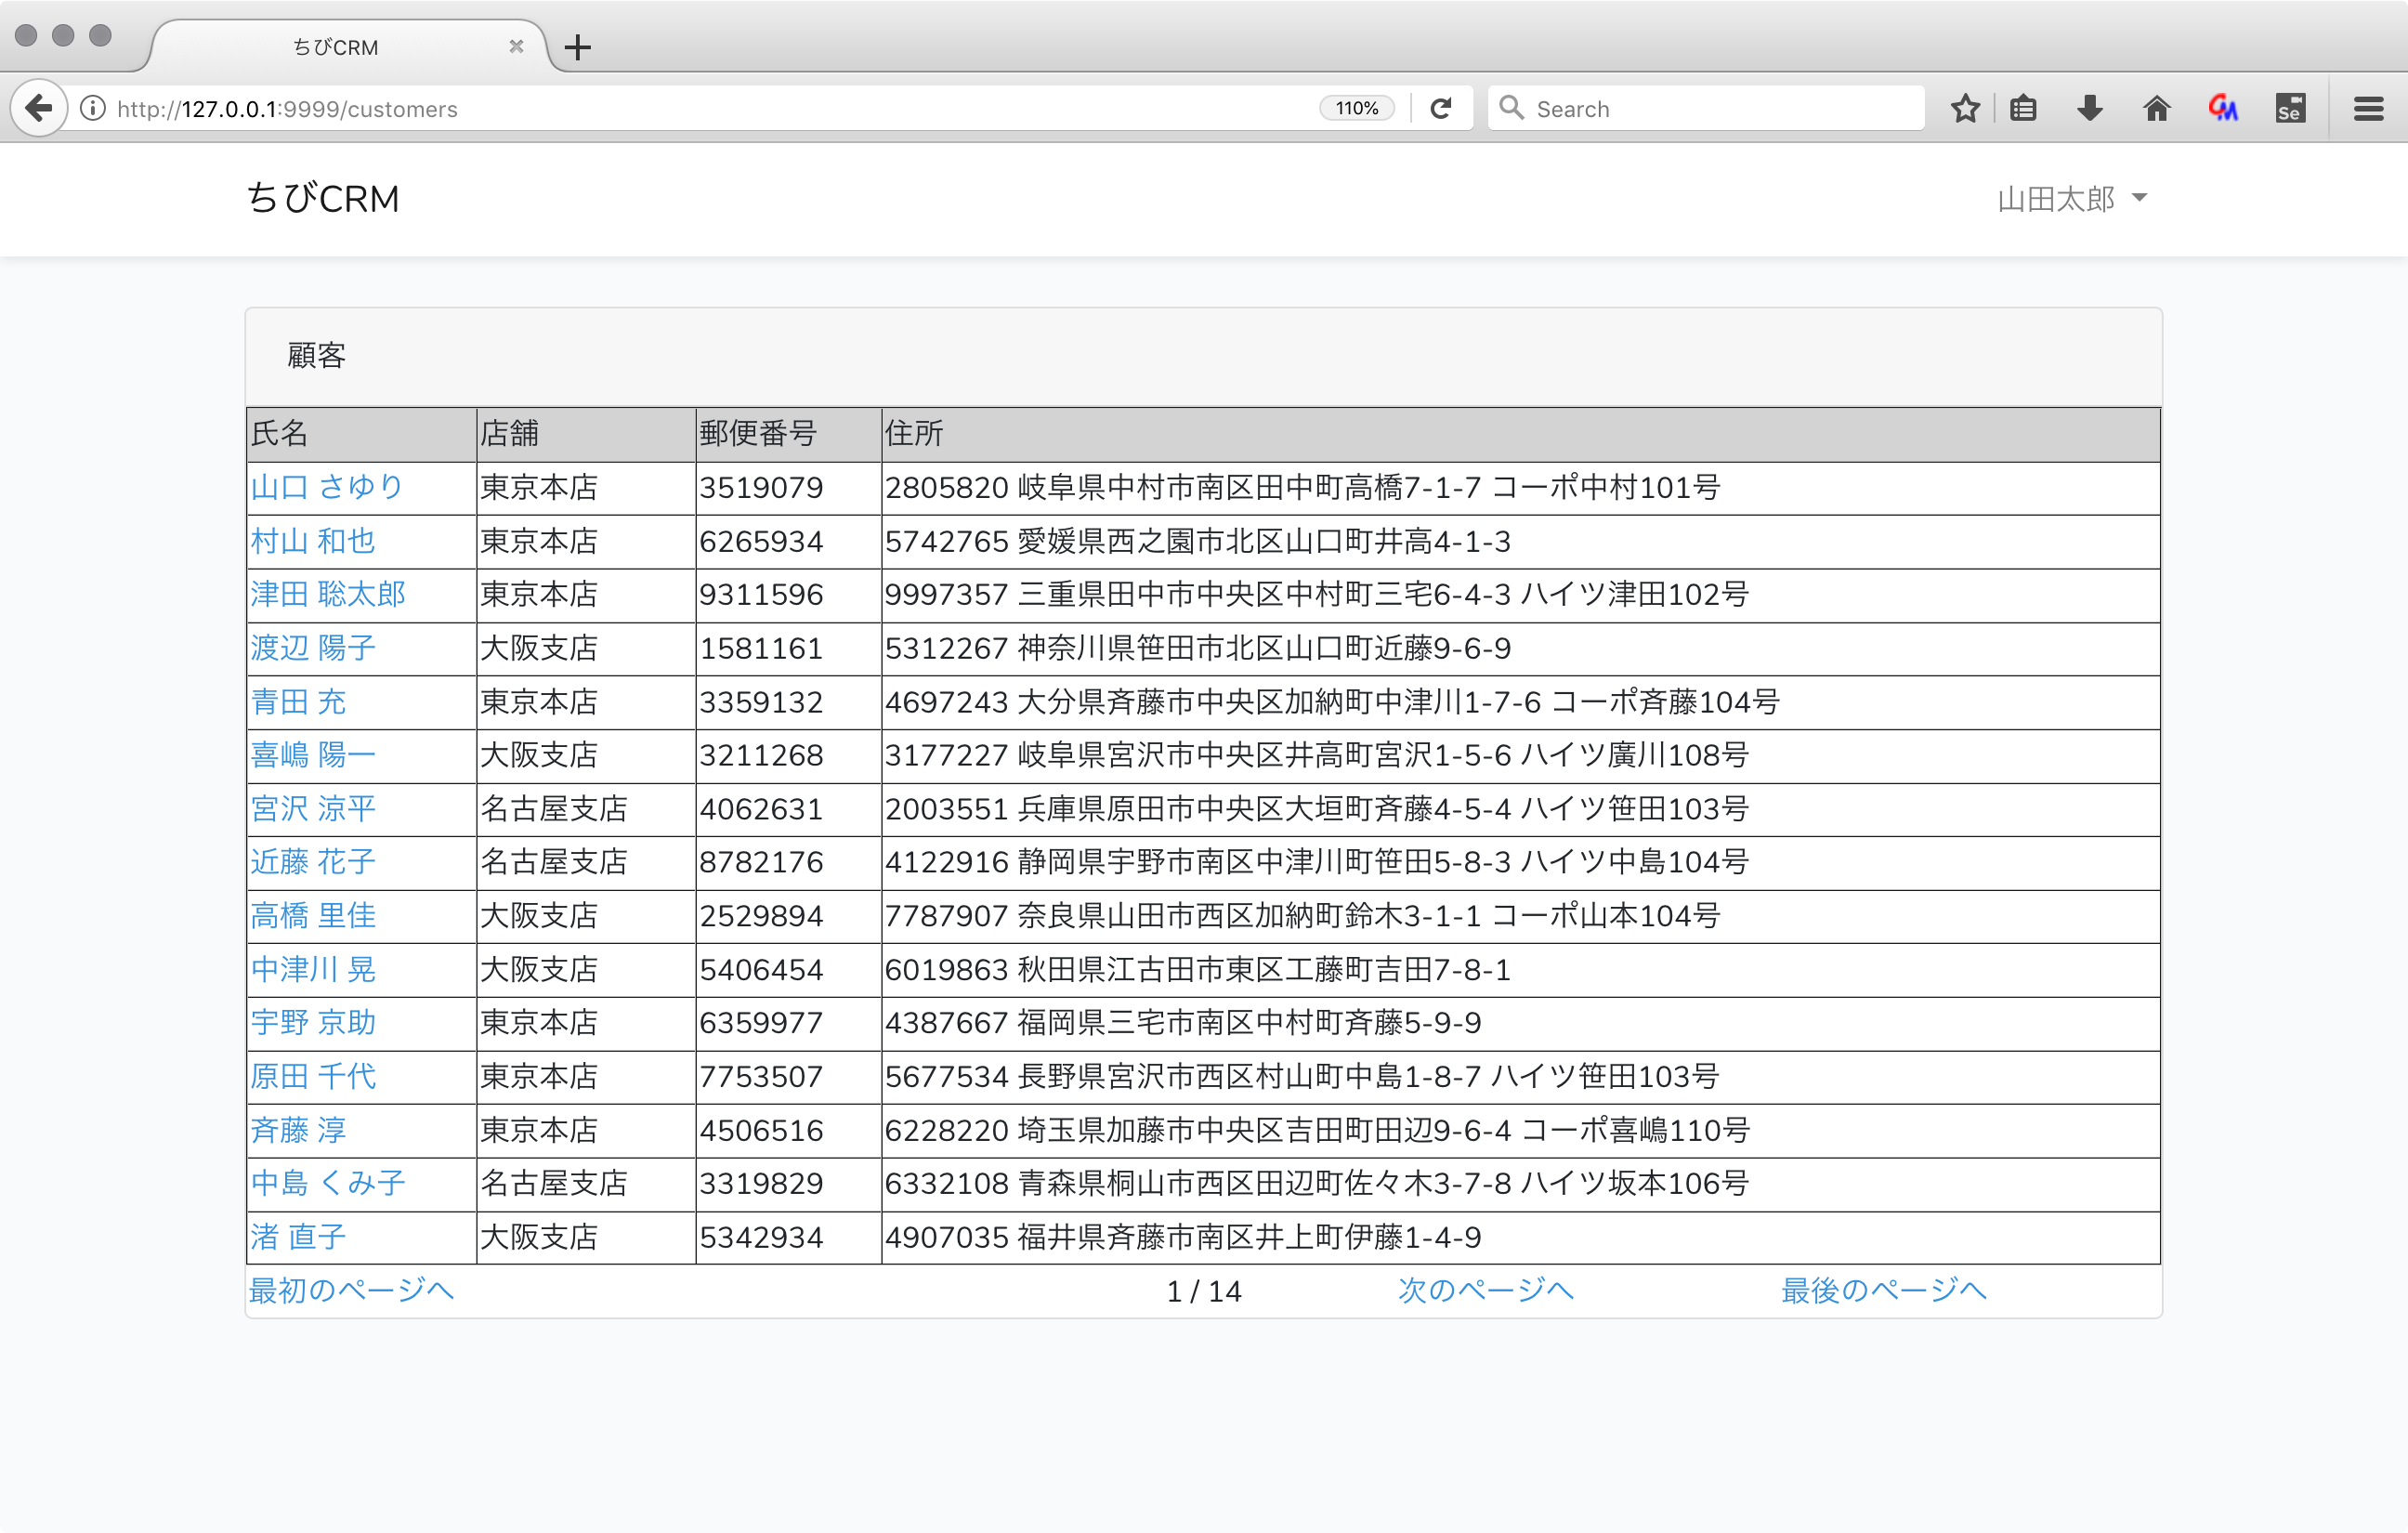
顧客一覧画面画面
顧客一覧画面のweb.phpを確認
routes/web.php の以下の部分が
顧客一覧コントローラを呼ぶ定義になります。
web.phpに追記します。
Route::resource('/customers', \App\Http\Controllers\CustomerController::class)->middleware('auth');
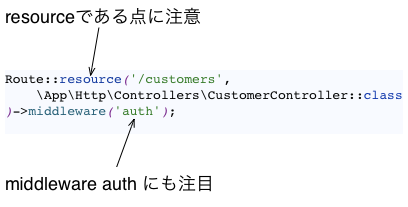
Route::resourceは 予め決められたメソッドに振り分ける記述方法です。
Webサーバーへのリクエスト送信種類にmethodというものがあり、GET,POST,PATCH,DELETEという種類があります。
ページを表示するためにPCやスマートフォンのブラウザがWebサーバーに投げるリクエストはGETメソッドで送ります。
参考URL https://ja.wikipedia.org/wiki/Hypertext_Transfer_Protocol
今まではRoutes::getでgetメソッドだけ受け付けていましたが、顧客情報は登録機能が必要なためGETとPOSTメソッドでの受付が必要です。
Route::post(..中略..)と書く方法もありますが、Laravelでは、GET,POSTで表示、変更を行うよく使うパータンのために
Route::resourceという書き方が用意されています。
Route::resourceと一行書くだけで、複数の種類のメソッドのリクエストを受け付ける書き方ができて楽が出来ます。
覚えるのはちょっと大変ですが。
振り分けは以下のようになっています。
(今はこんなものが有るんだなぁくらいの理解で大丈夫です)
| Verb | URI | アクション | ルート名 |
|---|---|---|---|
| GET | /customers | index | customers.index |
| GET | /customers/create | create | customers.create |
| POST | /customers | store | customers.store |
| GET | /customers/{customer} | show | customers.show |
| GET | /customers/{customer}/edit | edit | customers.edit |
| PUT | /PATCH/customers/{customer} | update | customers.update |
| DELETE | /customers/{customer} | destroy | customers.destroy |
顧客一覧画面コントローラの作成
以下のコマンドを実行してCustomerControllerを作成します。
php artisan make:controller CustomerController --resource --model=Customer
--resource オプションを入れることで CustomerControllerに予め表示、編集、削除などの処理を行う関数が作成されます。
--modelはこのコントローラーで操作するModelを指定します。顧客(Customer)を扱うため Customerモデルを指定します。
<?php

namespace App\Http\Controllers;

use App\Models\Customer;
use Illuminate\Http\Request;

class CustomerController extends Controller
{
    /**
     * Display a listing of the resource.
     *
     * @return \Illuminate\Http\Response
     */
    public function index()
    {
        //
    }

    /**
     * Show the form for creating a new resource.
     *
     * @return \Illuminate\Http\Response
     */
    public function create()
    {
        //
    }

    /**
     * Store a newly created resource in storage.
     *
     * @param  \Illuminate\Http\Request  $request
     * @return \Illuminate\Http\Response
     */
    public function store(Request $request)
    {
        //
    }

    /**
     * Display the specified resource.
     *
     * @param  \App\Models\Customer  $customer
     * @return \Illuminate\Http\Response
     */
    public function show(Customer $customer)
    {
        //
    }

    /**
     * Show the form for editing the specified resource.
     *
     * @param  \App\Models\Customer  $customer
     * @return \Illuminate\Http\Response
     */
    public function edit(Customer $customer)
    {
        //
    }

    /**
     * Update the specified resource in storage.
     *
     * @param  \Illuminate\Http\Request  $request
     * @param  \App\Models\Customer  $customer
     * @return \Illuminate\Http\Response
     */
    public function update(Request $request, Customer $customer)
    {
        //
    }

    /**
     * Remove the specified resource from storage.
     *
     * @param  \App\Models\Customer  $customer
     * @return \Illuminate\Http\Response
     */
    public function destroy(Customer $customer)
    {
        //
    }
}
app/Http/Controllers/CustomerController.php に変更を加えていきます。
顧客一覧処理の処理を加えるのでindex関数内に処理を書いていきます。
indexメソッドの部分を以下の様に変更します。
    /**
     * 顧客一覧表示
     * スーパーバイザーは全店舗の顧客を見られる
     * 以外は自分が所属する顧客のみ表示
     *
     * @return \Illuminate\Http\Response
     */
    public function index()
    {
        // 顧客情報はスーパーバイザーであれば 全店舗の顧客情報を閲覧できますが、店員の場合は自分が所属する店舗の顧客情報しか閲覧できません。
        if (auth()->user()->isSuperVisor()) {
            $customers = Customer::paginate();
        } else {
            $customers = Customer::where('shop_id', auth()->user()['shop_id'])->paginate();
        }
        return view('customers.index', compact('customers'));
    }
    ・・・・略・・・・
}
ページネーション
ページネーションとは一覧を表示するときに一度に表示する件数を、設定して次のページで続きのデータ一覧を表示する よくある機能です。
数万件を一度に一画面に表示するのは現実的ではありませんね。このためページに分けて、一度に50件程度の件数を表示して次ページ、前ページで表示していきます。
Customer::paginate();
この処理はページネーションを行い顧客一覧譲歩を取得します。デフォルトでは1ページに15件表示されます。
1ページ目は最初の15人分、2ページでは次の15人分の顧客一覧情報を取得します。
たった一行でページネーションの処理をやってくれるとはLaravelすごすぎ!
$customers = Customer::where('shop_id', auth()->user()['shop_id'])->paginate();
whereの部分はSQLのWHERE区の処理を行います。
店員が所属するショップの顧客だけを抽出する検索条件を設定しています。
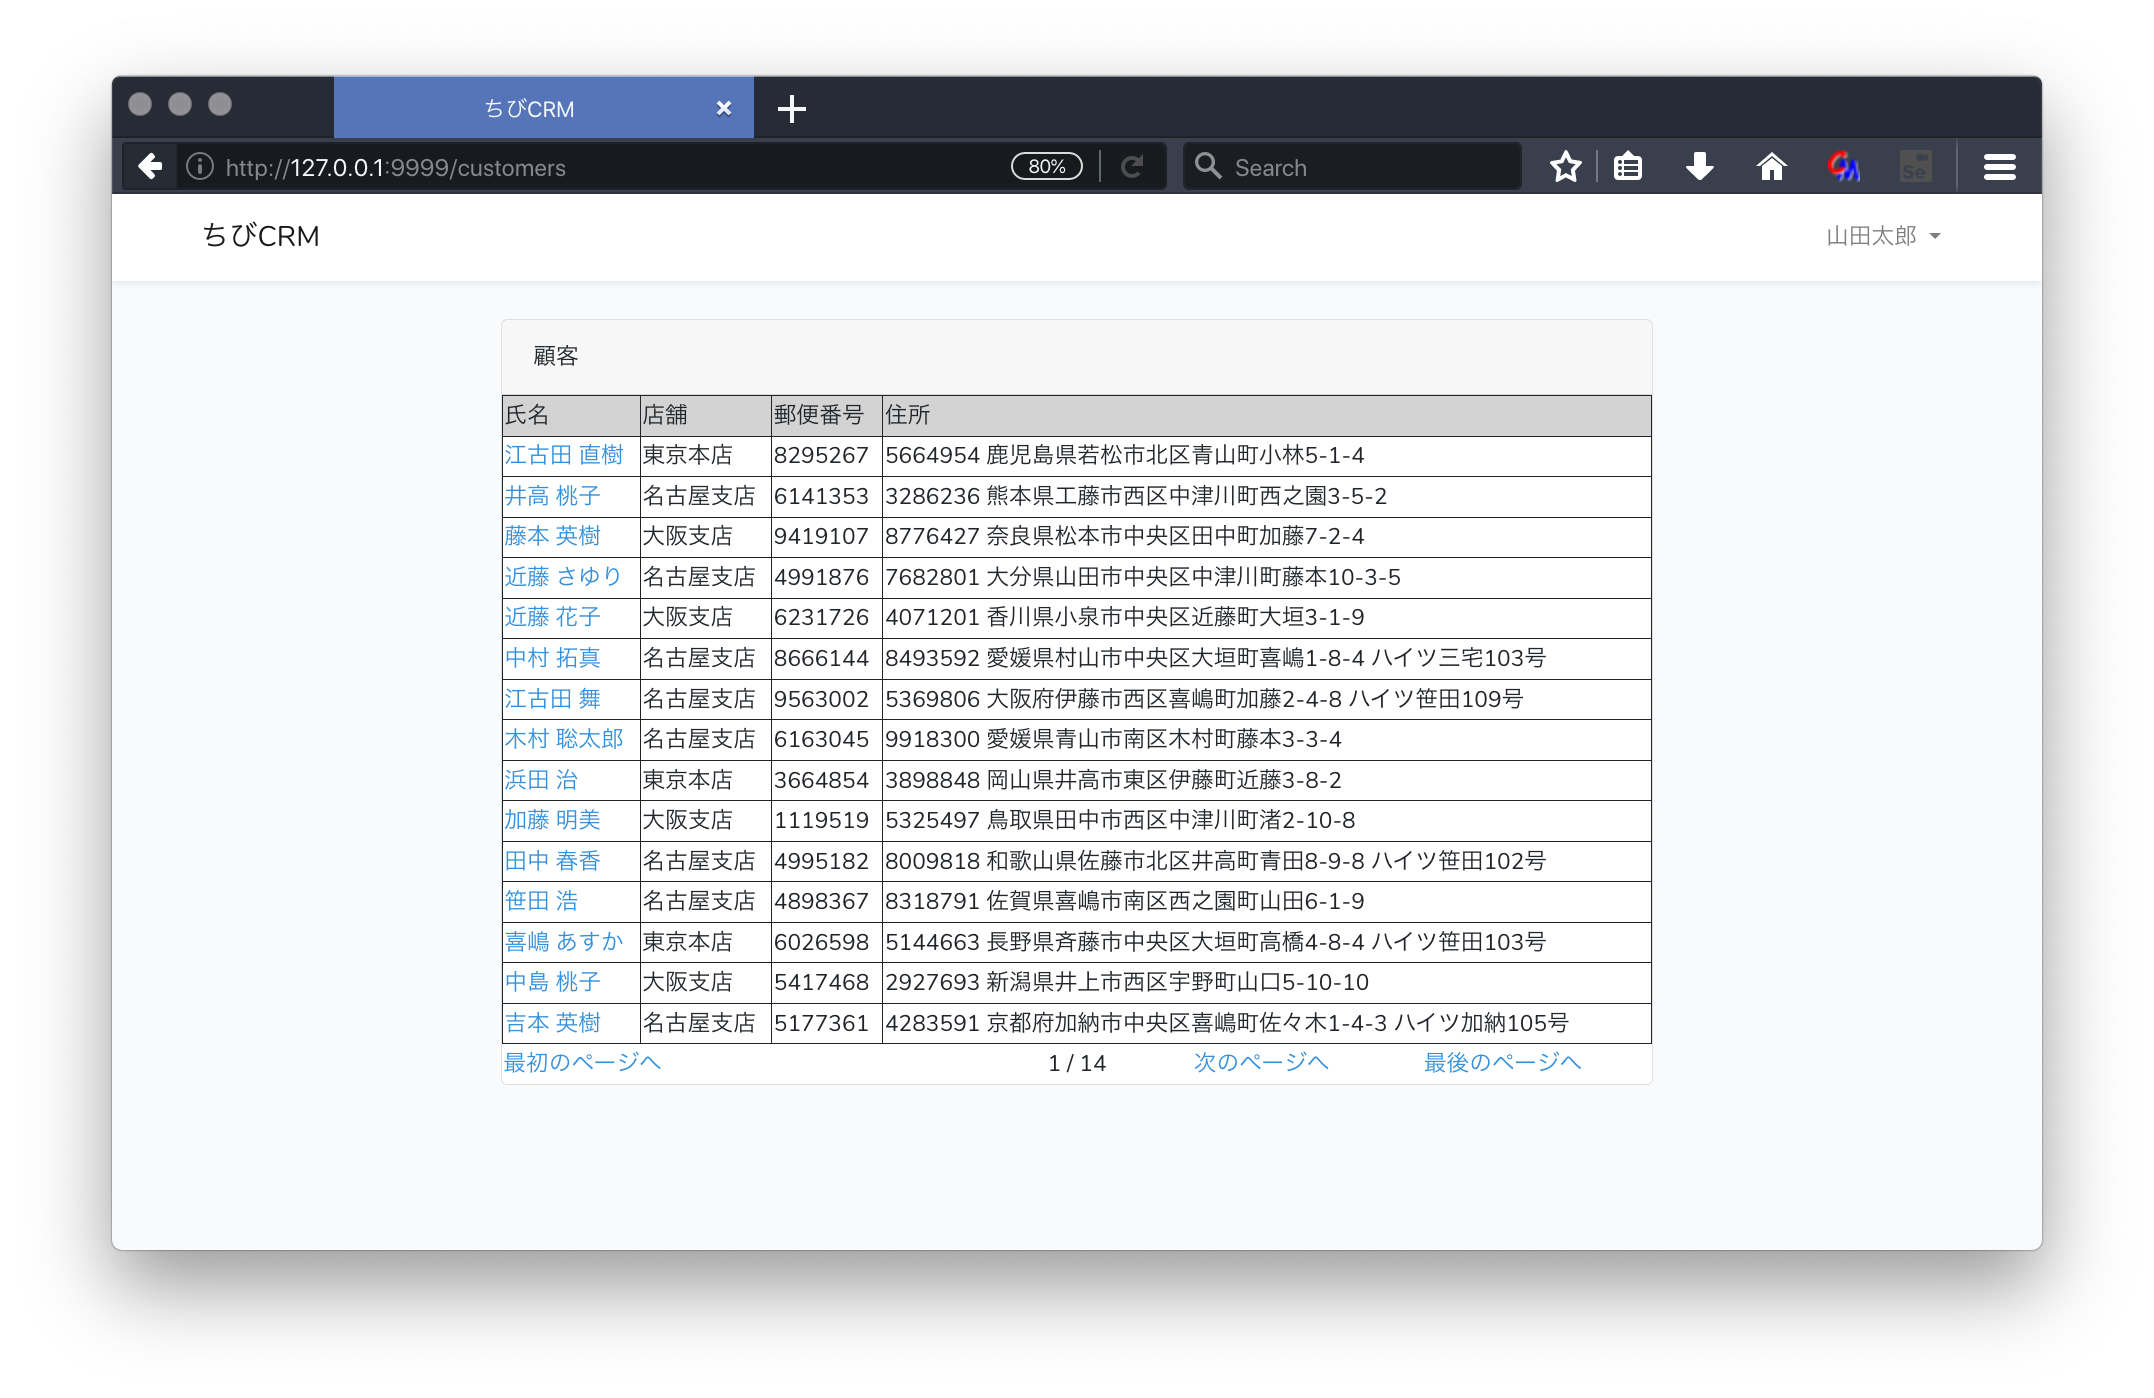
顧客一覧画面のusers.blade.php
resources/views/customersフォルダを作成します。
次に、
resources/views/customers/index.blade.phpファイルを作成します。
@extends('layouts.app')
@section('content')
    <div class="container">
        <div class="row justify-content-center">
            <div class="col-md-8">
                <div class="card">
                    <div class="card-header">顧客</div>
                    <table width="100%" border="1">
                        <thead>
                        <tr style="background-color: lightgray">
                            <td>氏名</td>
                            <td>店舗</td>
                            <td>郵便番号</td>
                            <td>住所</td>
                        </tr>
                        </thead>
                        @foreach($customers as $customer)
                            <tr>
                                <td>
                                    <a href="/customers/{{ $customer->id }}">
                                        {{ $customer->name }}
                                    </a>
                                </td>
                                <td>{{ $customer->shop->name }}</td>
                                <td>{{ $customer->postal }}</td>
                                <td>{{ $customer->address }}</td>
                            </tr>
                        @endforeach
                    </table>
                    {{--  pagenation link -------------------------------------------------------------------------------       --}}
                    <table width="100%">
                        <tr>
                            @if($customers->lastPage() > 1)
                                <td width="120px"><a href="{{ $customers->url(0) }}">最初のページへ</a></td>
                                <td width="120px">
                                    @if($customers->previousPageUrl())
                                        <a href="{{ $customers->previousPageUrl() }}">前のページへ</a>
                                    @endif
                                </td>
                                <td width="120px" style="text-align: center">{{ $customers->currentPage() }}
                                    / {{ $customers->lastPage() }}</td>
                                <td width="120px">
                                    @if($customers->nextPageUrl())
                                        <a href="{{ $customers->nextPageUrl() }}">次のページへ</a>
                                    @endif
                                </td>
                                <td width="120px"><a href="{{ $customers->url($customers->lastPage()) }}">最後のページへ</a>
                                </td>

                            @endif
                        </tr>
                    </table>
                    {{--  End of pagenation link -------------------------------------------------------------------------       --}}

                </div>
            </div>
        </div>
    </div>
@endsection
index.blade.phpの説明
-
ページネーション
$customers は コントローラーでCustomer::paginate();で取得したのでページネーション関連の機能を使えます。- $customers->previousPageUrl() 前ページのリンクを取得
- $customers->nextPageUrl() 次ページのリンクを取得
- $customers->url(0) 最初ページのリンクを取得
- $customers->url($customers->lastPage()) 最終ページのリンクを取得
- {{ \$customer->shop->name }} customersテーブルにはshop_idが入っていますが店舗名が入っていません。ですのでそのまま表示すると店舗欄には店舗IDが表示されますが Customer.php モデルで定義したshop関数でbelongsToを指定してあるので $customer->shop->name と書くことでLaravelが店舗名をデータベースから読んでくれます。楽ですね。
ブラウザで確認
http://127.0.0.1:9999/customers
をブラウザで開きます。
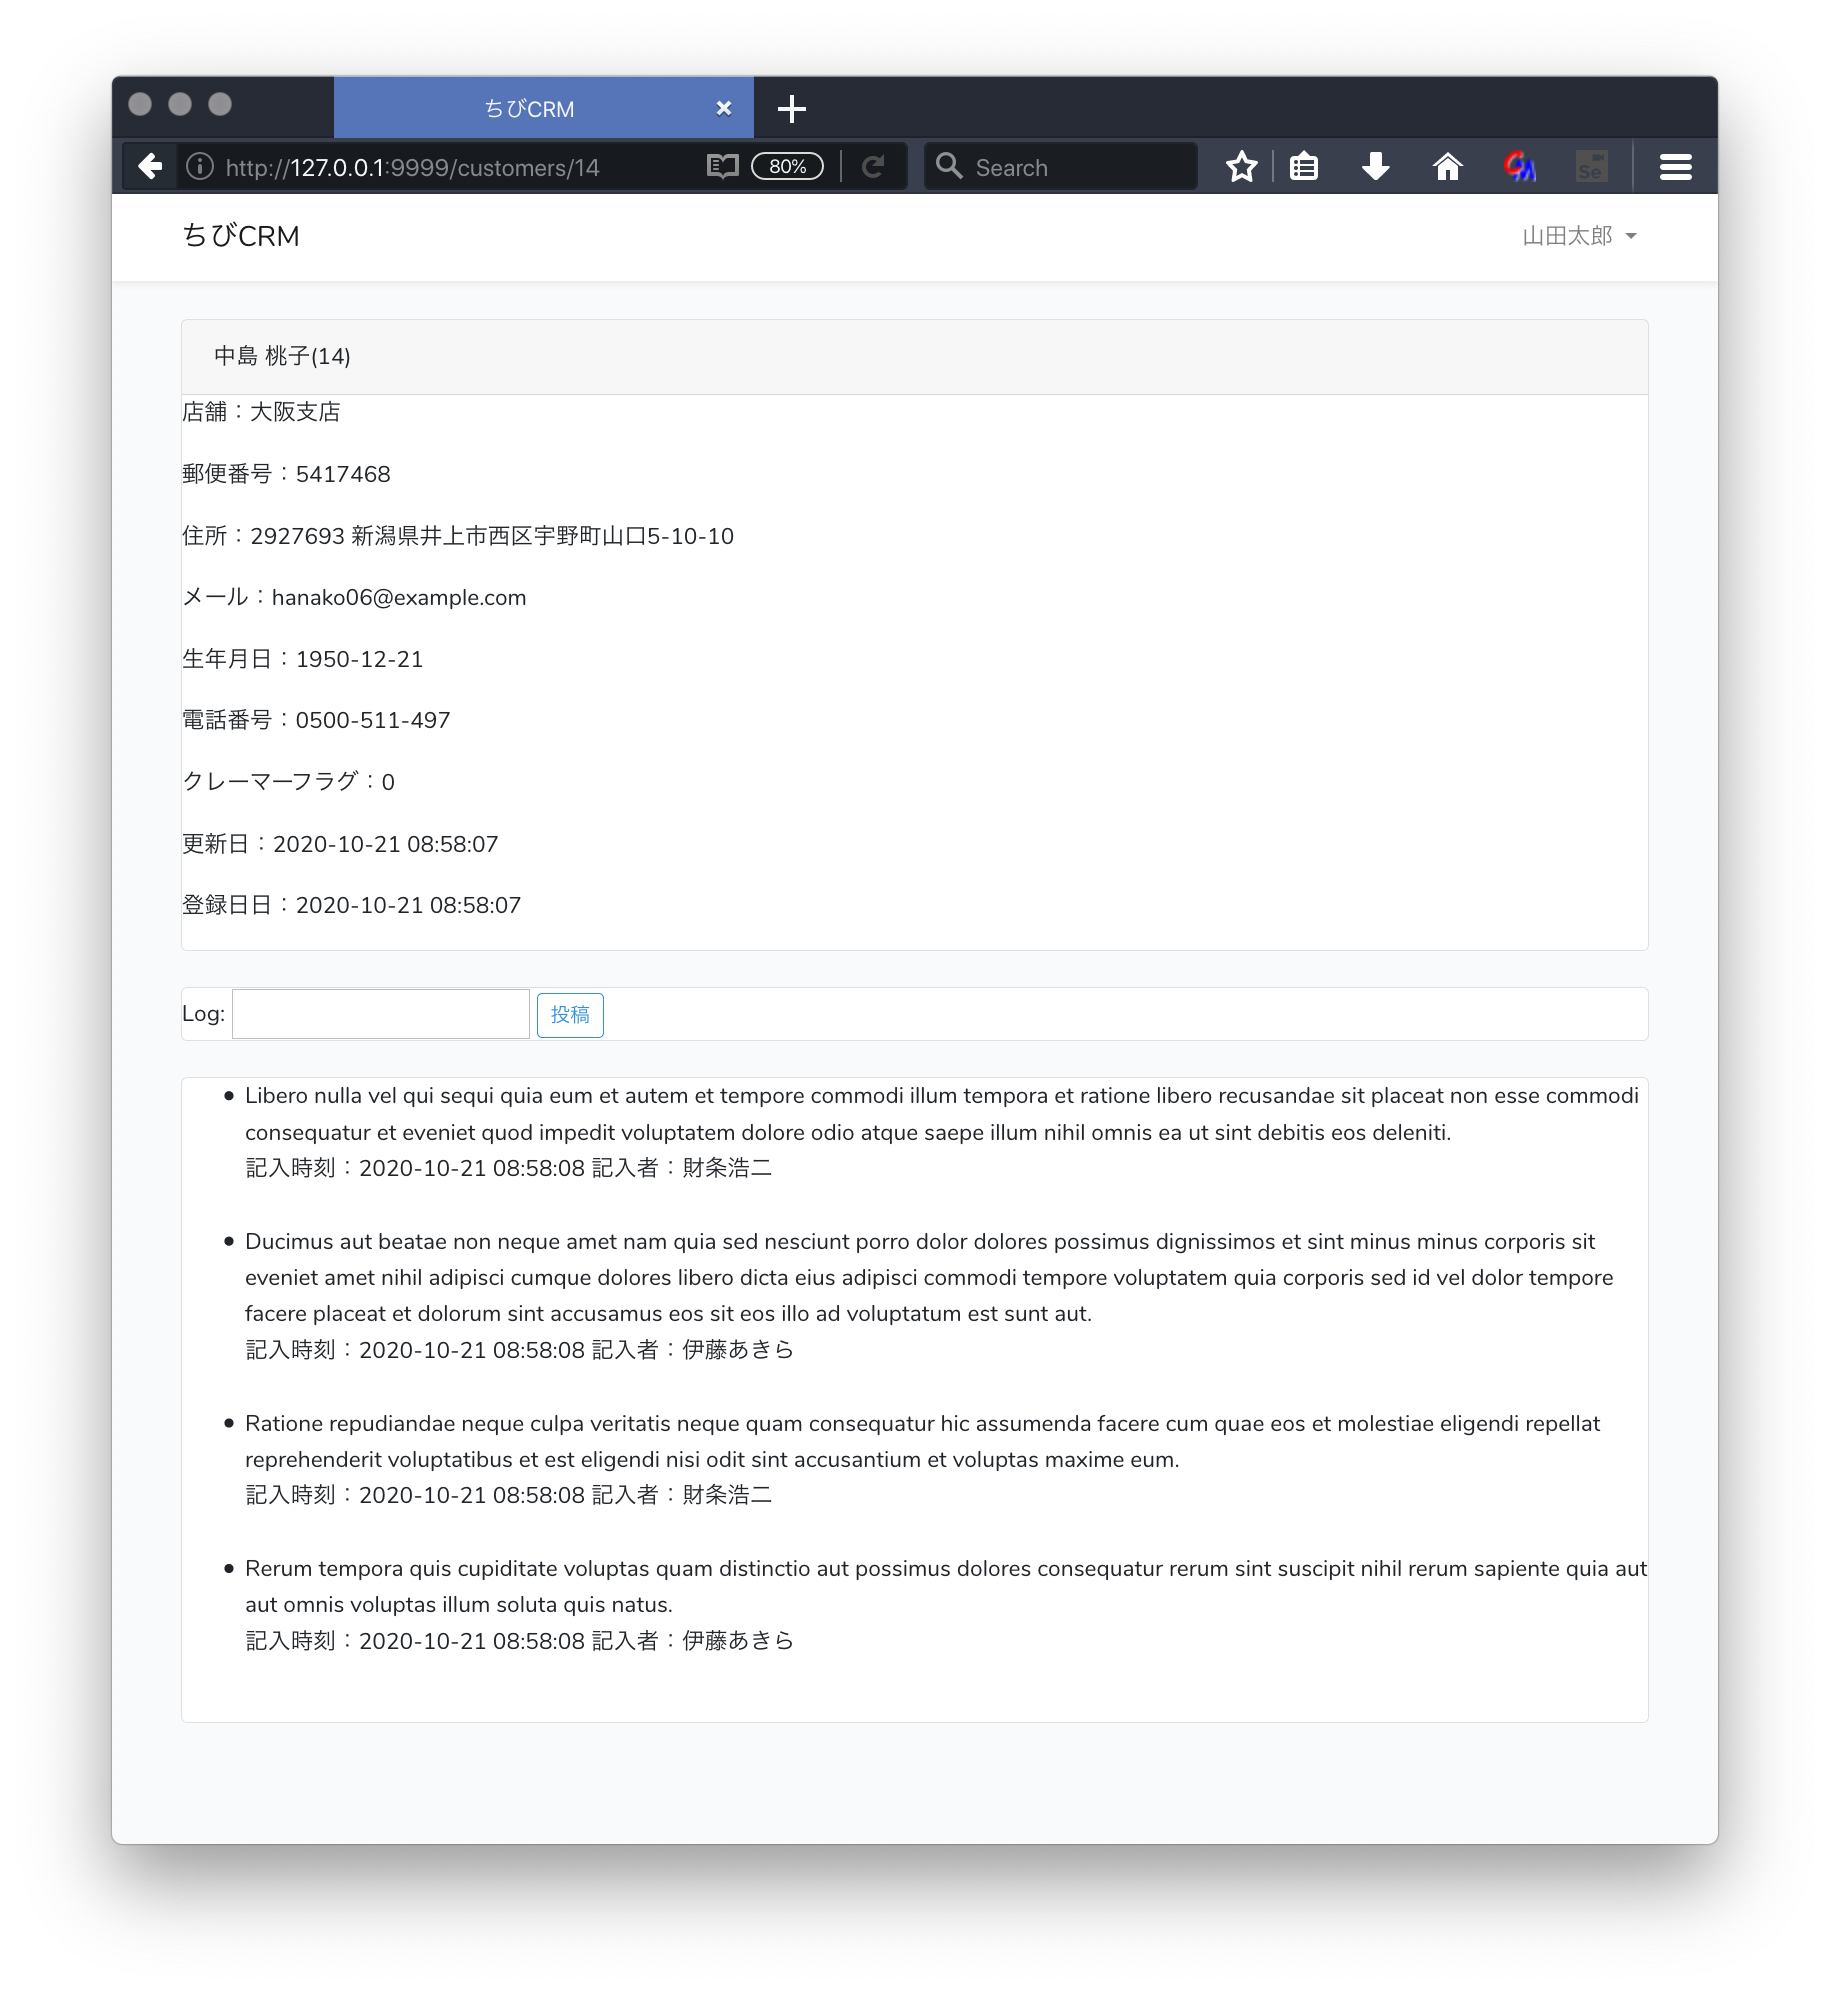
顧客詳細
顧客名をクリックしたら顧客の詳細情報を表示します。

顧客詳細画面のweb.phpを確認
routes/web.php の以下の部分が
先程web.phpに設定した resource の設定を確認します。
Route::resource('/customers', 'CustomerController')->middleware('auth');
/customers/{customer} のパスで GET リクエストが来ると。
CustomerControllerのshow()メソッドが呼ばれます。
このとき {customer} の部分にcustomersテーブルのidの値を指定するようにします。
顧客詳細画面コントローラの作成
顧客一覧画面で作った CustomerController を使います。
CustomerController.phpのshow()関数に処理を書きます。
    /**
     * Display the specified resource.
     *
     * @param \App\Models\Customer $customer
     * @return \Illuminate\Http\Response
     */
    public function show(Customer $customer)
    {
        $this->authorize('view', $customer);
        return view('customers.show', compact('customer'));
    }
showメソッドの説明
- public function show(Customer $customer)
Laravelが該当するカスタマー情報をデータベースから取得し $customer変数に入れます。引数にモデルを指定するだけなんて楽で良いですね。 - $this->authorize('view', $customer);
CustomerPolicy.phpのview関数を呼んで スーパーバイザーでなければ ユーザーの所属する顧客しか見られないように制御します。 - return view('customers.show', compact('customer'));
customer変数を渡して customers/show.blade.php で Viewを作成します。
顧客詳細画面のusers.blade.php
resources/views/customers/show.blade.php ファイルを作成して以下のように記述します。
@extends('layouts.app')
@section('content')
    <div class="container">
        <div class="row justify-content-center">
            <div class="col-md-12">
                <div class="card">
                    <div class="card-header">{{ $customer->name }}({{ $customer->id }})</div>
                    <p>店舗:{{ $customer->shop['name'] }}</p>
                    <p>郵便番号:{{ $customer->postal }}</p>
                    <p>住所:{{ $customer->address }}</p>
                    <p>メール:{{ $customer->email }}</p>
                    <p>生年月日:{{ $customer->birthdate }}</p>
                    <p>電話番号:{{ $customer->phone }}</p>
                    <p>クレーマーフラグ:{{ $customer->kramer_flag }}</p>
                    <p>更新日:{{ $customer->created_at }}</p>
                    <p>登録日日:{{ $customer->updated_at }}</p>

                </div>
                <br/>
                <div class="card">
                    <form action="/customers/{{$customer->id}}/logs" method="POST">
                        @csrf
                        Log: <input type="text" name="log" value="{{old('log')}}">
                        <button type="submit" class="btn btn-sm btn-outline-primary">投稿</button>
                    </form>

                </div>
                <br/>
                <div class="card">
                    <ul>
                        @foreach($customer->customerLogs as $log)
                            <li>
                                {{ $log->log }}<br/>
                                記入時刻:{{ $log->created_at }} 記入者:{{ $log->user->name }}<br/>
                                <br/>
                            </li>
                        @endforeach
                    </ul>
                </div>
            </div>
        </div>
    </div>
@endsection
show.blade.phpの説明
-
@foreach($customer->customerLogs as $log)
顧客履歴を表示します。CustomerController show関数内で 顧客履歴取得は行っていませんが、Customer モデルの customerLogs関数でhasManyを指定しているので Laravelが $customer->customerLogs で 顧客履歴をデータベースから取得します。
ブラウザで確認
顧客一覧から顧客名をクリックします。
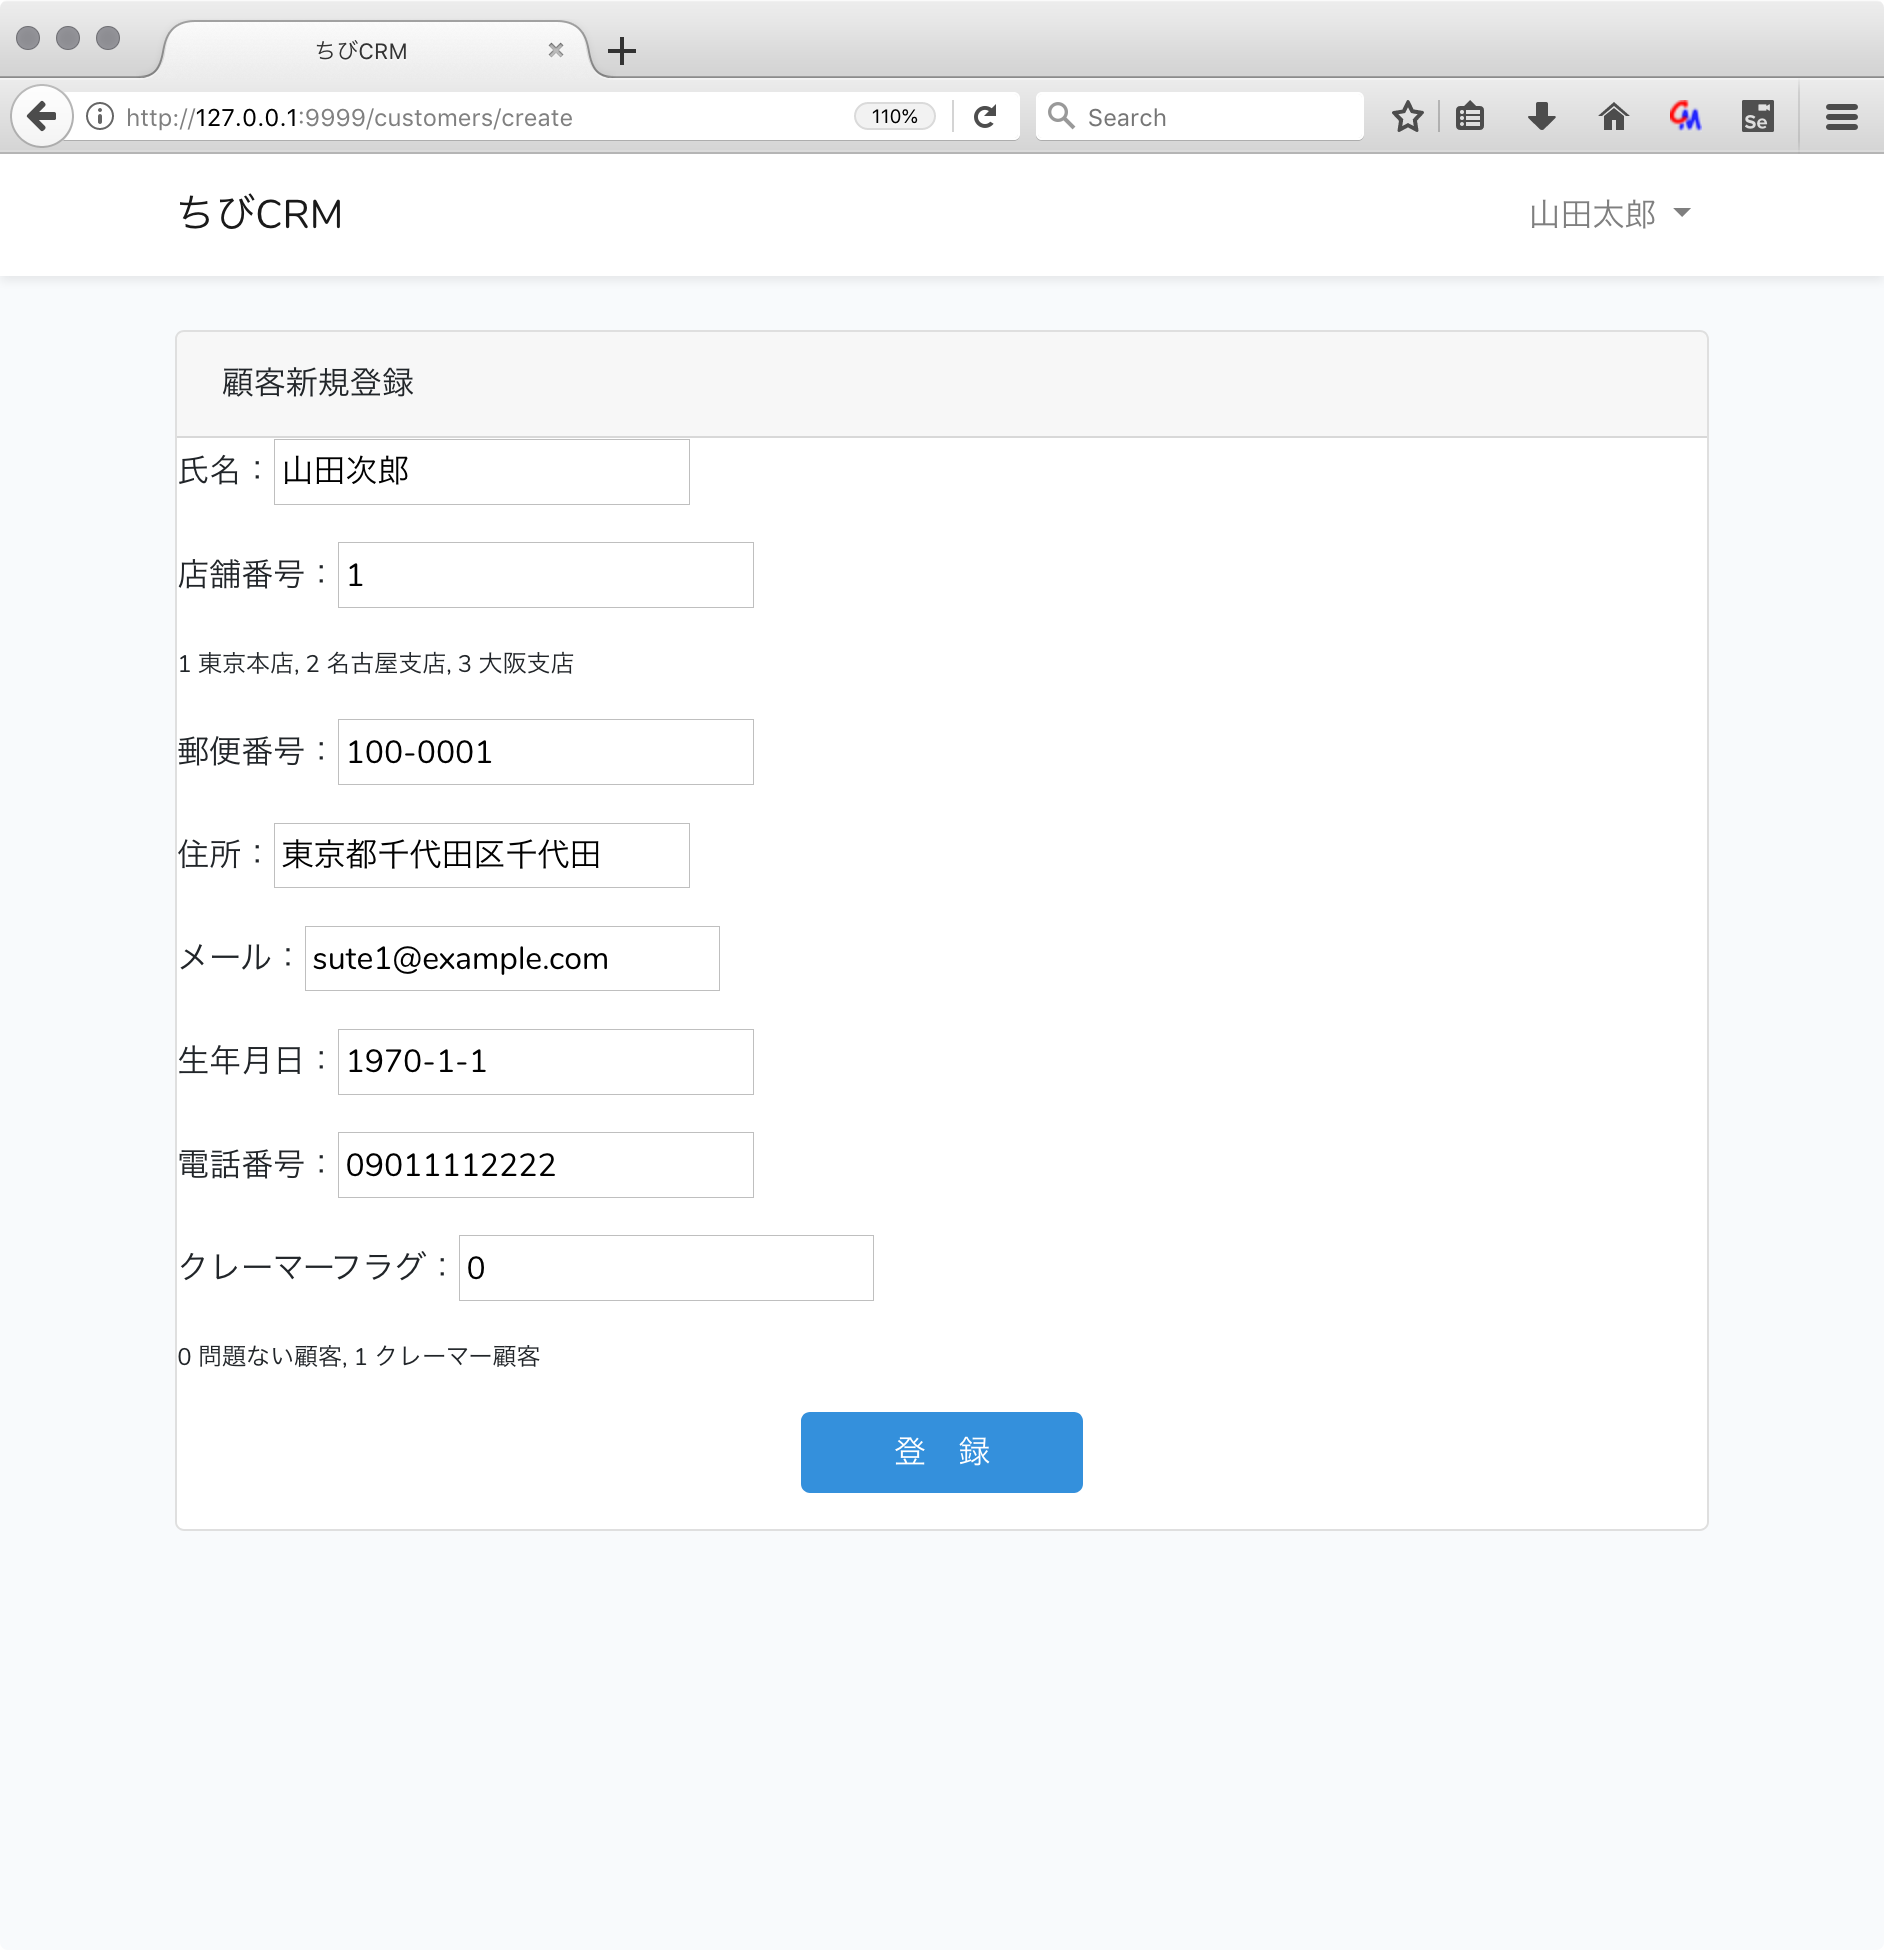
顧客新規登録
新規顧客登録画面を作っていきます。社員が顧客情報をを入力します。
顧客新規登録画面のweb.phpを確認
- /customers/create のパスで get リクエストが呼ぶと CustomerControllerのcreate()メソッドが呼ばれます。
- /customers のパスを POST リクエストで呼ぶと CustomerControllerのstore()メソッドが呼ばれます。
顧客新規登録画面コントローラの作成
すでに作られている CustomerController を追加います。
createメソッドを以下のように変更します。
顧客情報入力画面のbladeを呼び出す処理を行います。
    /**
     * Show the form for creating a new resource.
     *
     * @return \Illuminate\Http\Response
     */
    public function create()
    {
        return view('customers.create');
    }
customers/create.blade.phpファイルを作成します。
@extends('layouts.app')
@section('content')
<div class="container">
<div class="row justify-content-center">
<div class="col-md-12">
<div class="card">
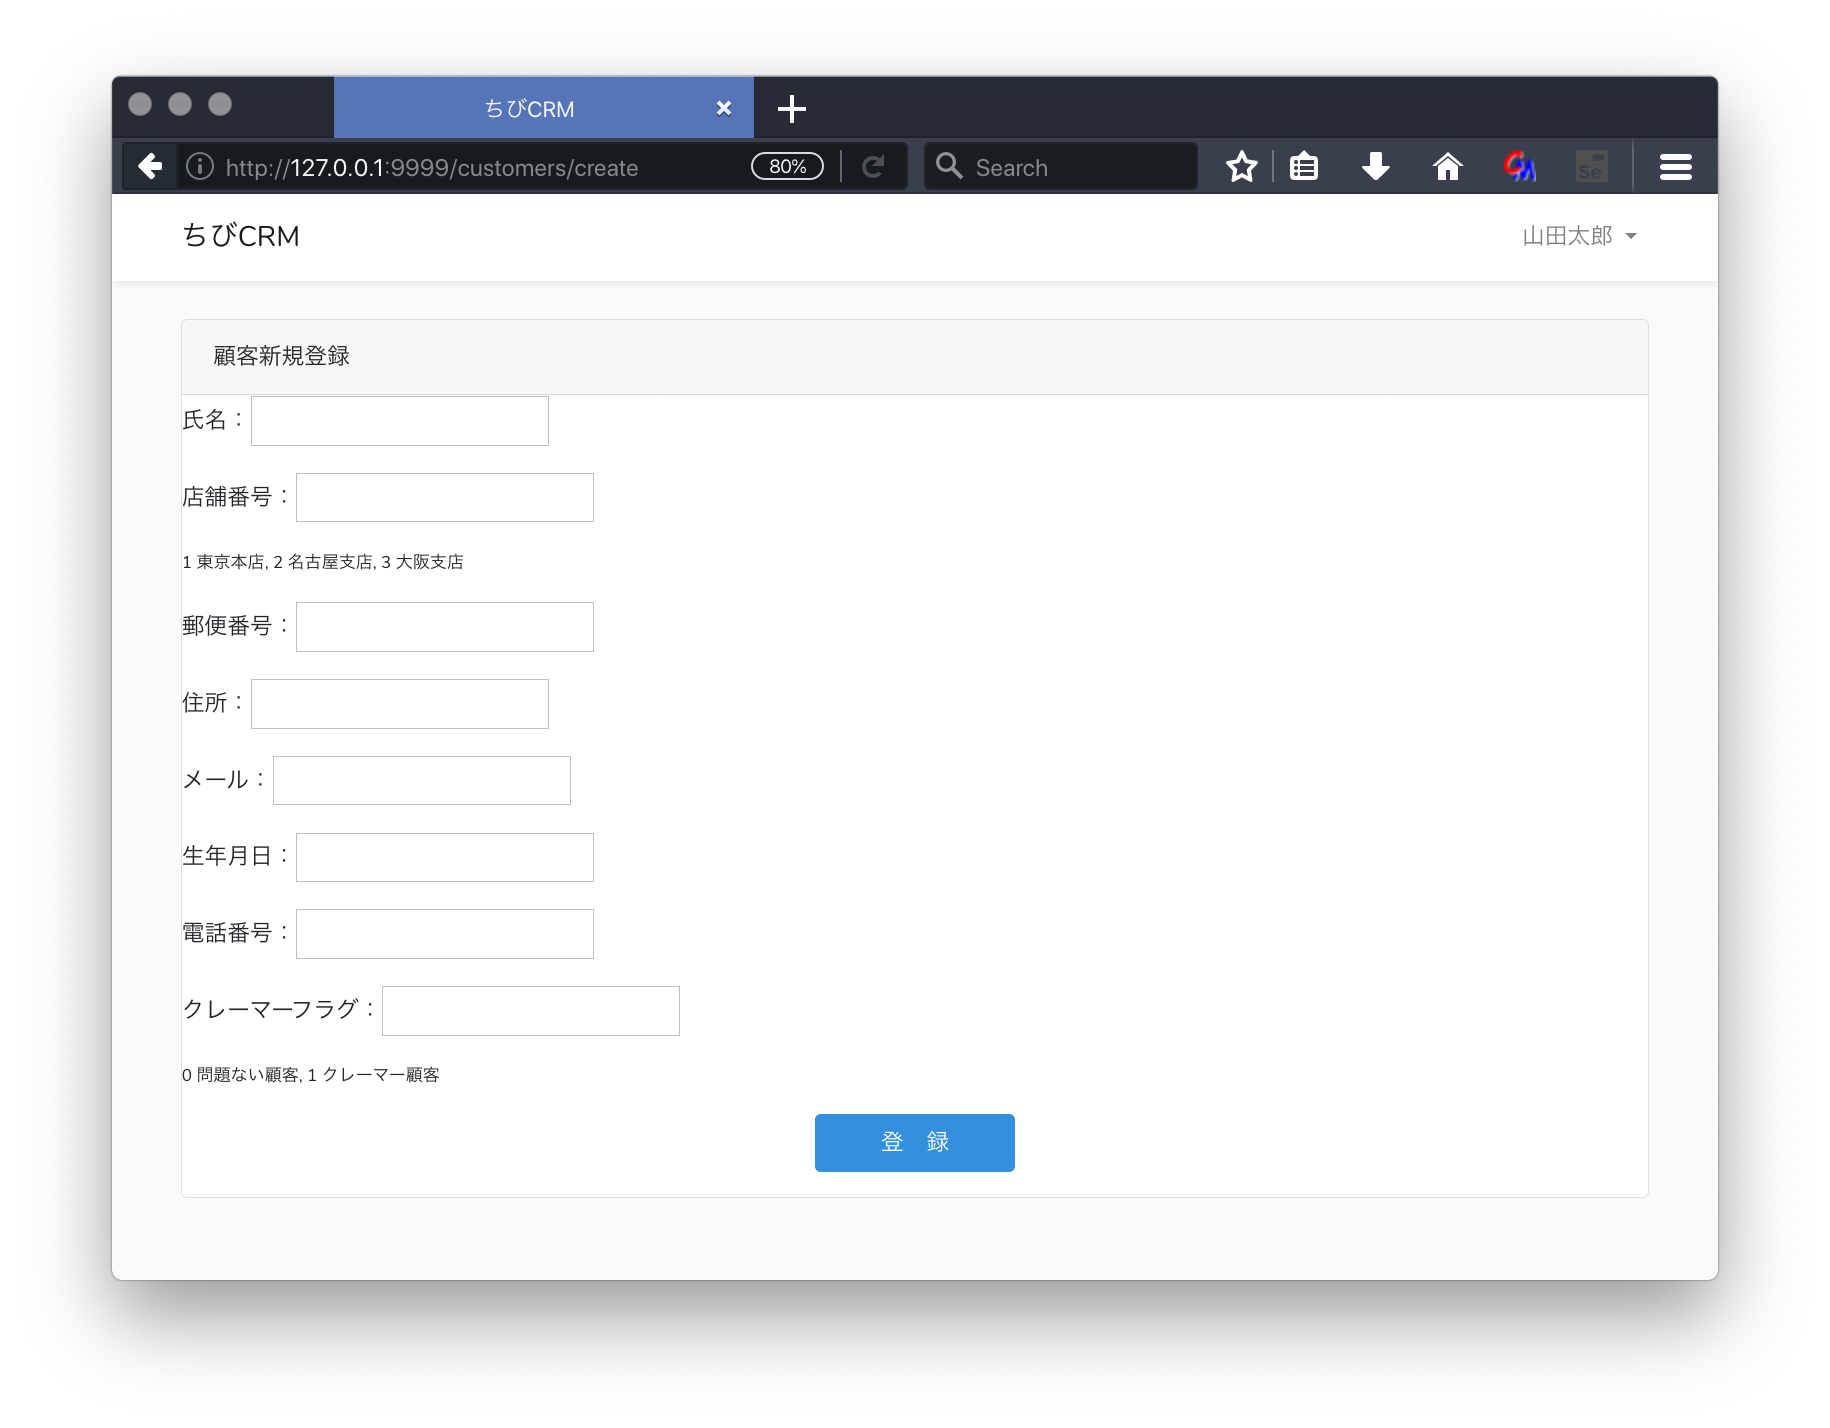
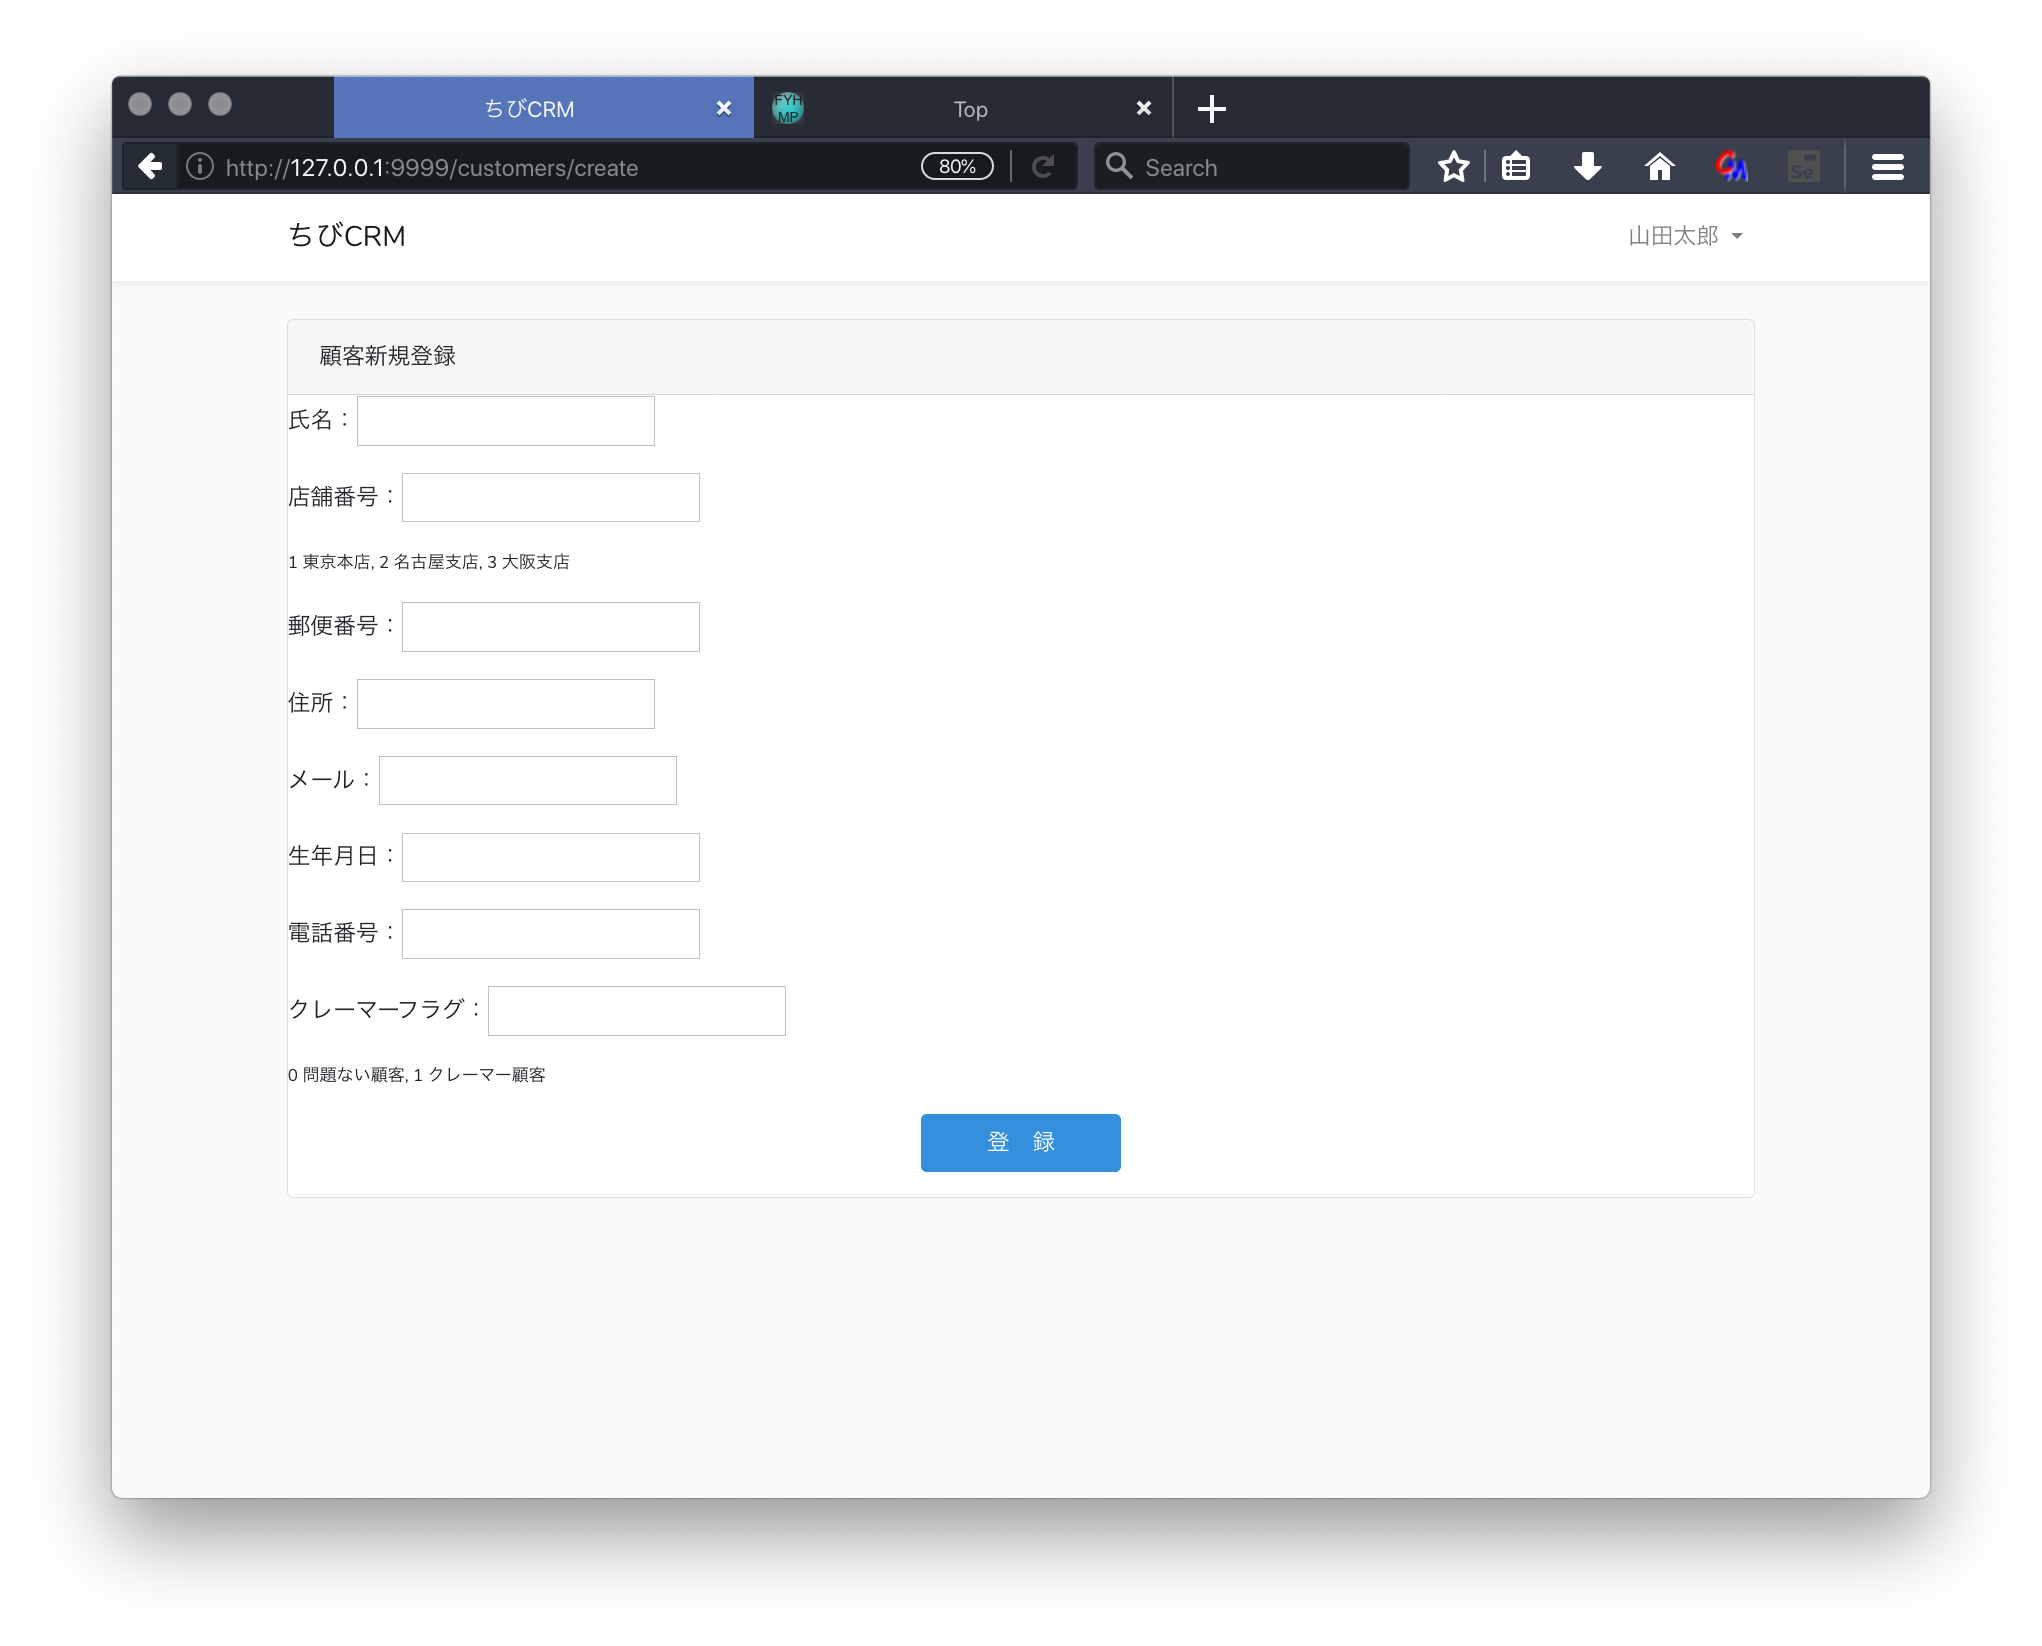
<div class="card-header">顧客新規登録</div>
<form action="/customers" method="POST">
@csrf
<p>氏名:<input type="text" name="name" value="{{ old('name') }}"></p>
<p>店舗番号:<input type="text" name="shop_id" value="{{ old('shop') }}"></p>
<p style="font-size: 0.75em">1 東京本店, 2 名古屋支店, 3 大阪支店</p>
<p>郵便番号:<input type="text" name="postal" value="{{ old('postal') }}"></p>
<p>住所:<input type="text" name="address" value="{{ old('address') }}"></p>
<p>メール:<input type="text" name="email" value="{{ old('email') }}"></p>
<p>生年月日:<input type="text" name="birthdate" value="{{ old('birthdate') }}"></p>
<p>電話番号:<input type="text" name="phone" value="{{ old('phone') }}"></p>
<p>クレーマーフラグ:<input type="text" name="kramer_flag" value="{{ old('kramer_flag') }}"></p>
<p style="font-size: 0.75em">0 問題ない顧客, 1 クレーマー顧客</p>
<p style="text-align: center"><button class="btn btn-primary" type="submit"> 登 録 </button></p>
</form>
</div>
</div>
</div>
</div>
@endsection
ブラウザで確認
ダッシュボード画面から 顧客新規登録 リンクをクリックして 顧客新規登録画面に遷移します。
顧客情報データベース登録の処理
顧客新規登録画面に顧客情報を入力して、登録を行えるようにします。
create.blade.phpを確認。
<form action="/customers" method="POST">
顧客情報を入力して登録ボタンをクリックするとこのフォームのactionに定義されている
customersのパスにPOSTメソッドでリクエストが送られます。このときに入力された顧客情報が一緒の送られます。
@csrf に関して
create.blade.phpには @csrf という記述があります。これはセキュリティ対策のためにあるものです。LaravelでフォームをPOSTで送信するときに @csrf を入れないとエラーになってしまいます。
CustomController storeメソッド
CustomerControllerのstoreメソッドを以下のように記述します。
    /**
     * Store a newly created resource in storage.
     *
     * @param  \Illuminate\Http\Request  $request
     * @return \Illuminate\Http\Response
     */
    public function store(Request $request)
    {
        $attribute = request()->validate([
        'name' => ['required', 'min:3', 'max:32'],
            'shop_id' => ['required', 'Numeric', 'Between:1,3'],
            'postal' => ['required',],
            'address' => ['required',],
            'email' => ['required', 'E-Mail'],
            'birthdate' => ['required', 'Date'],
            'phone' => ['required',],
            'kramer_flag' => ['required', 'Numeric', 'Between:0,1'],
        ]);
        $customer = Customer::create($attribute);
        return redirect('/customers');
    }
処理の説明
- request()->validate の部分
バリデーションは入力が正しいか確認する仕組みです。
バリデーション関数にバリデーションルールを連想配列として渡します。
バリデーションに失敗すると新規顧客画面に戻ります。 - store(Request $request)
ストア関数 ユーザーが入力した情報の入っている Requestを受けます。 - $customer = Customer::create($attribute);
顧客情報をデータベースに新規登録します。 - return redirect('/customers');
顧客一覧画面に遷移します。
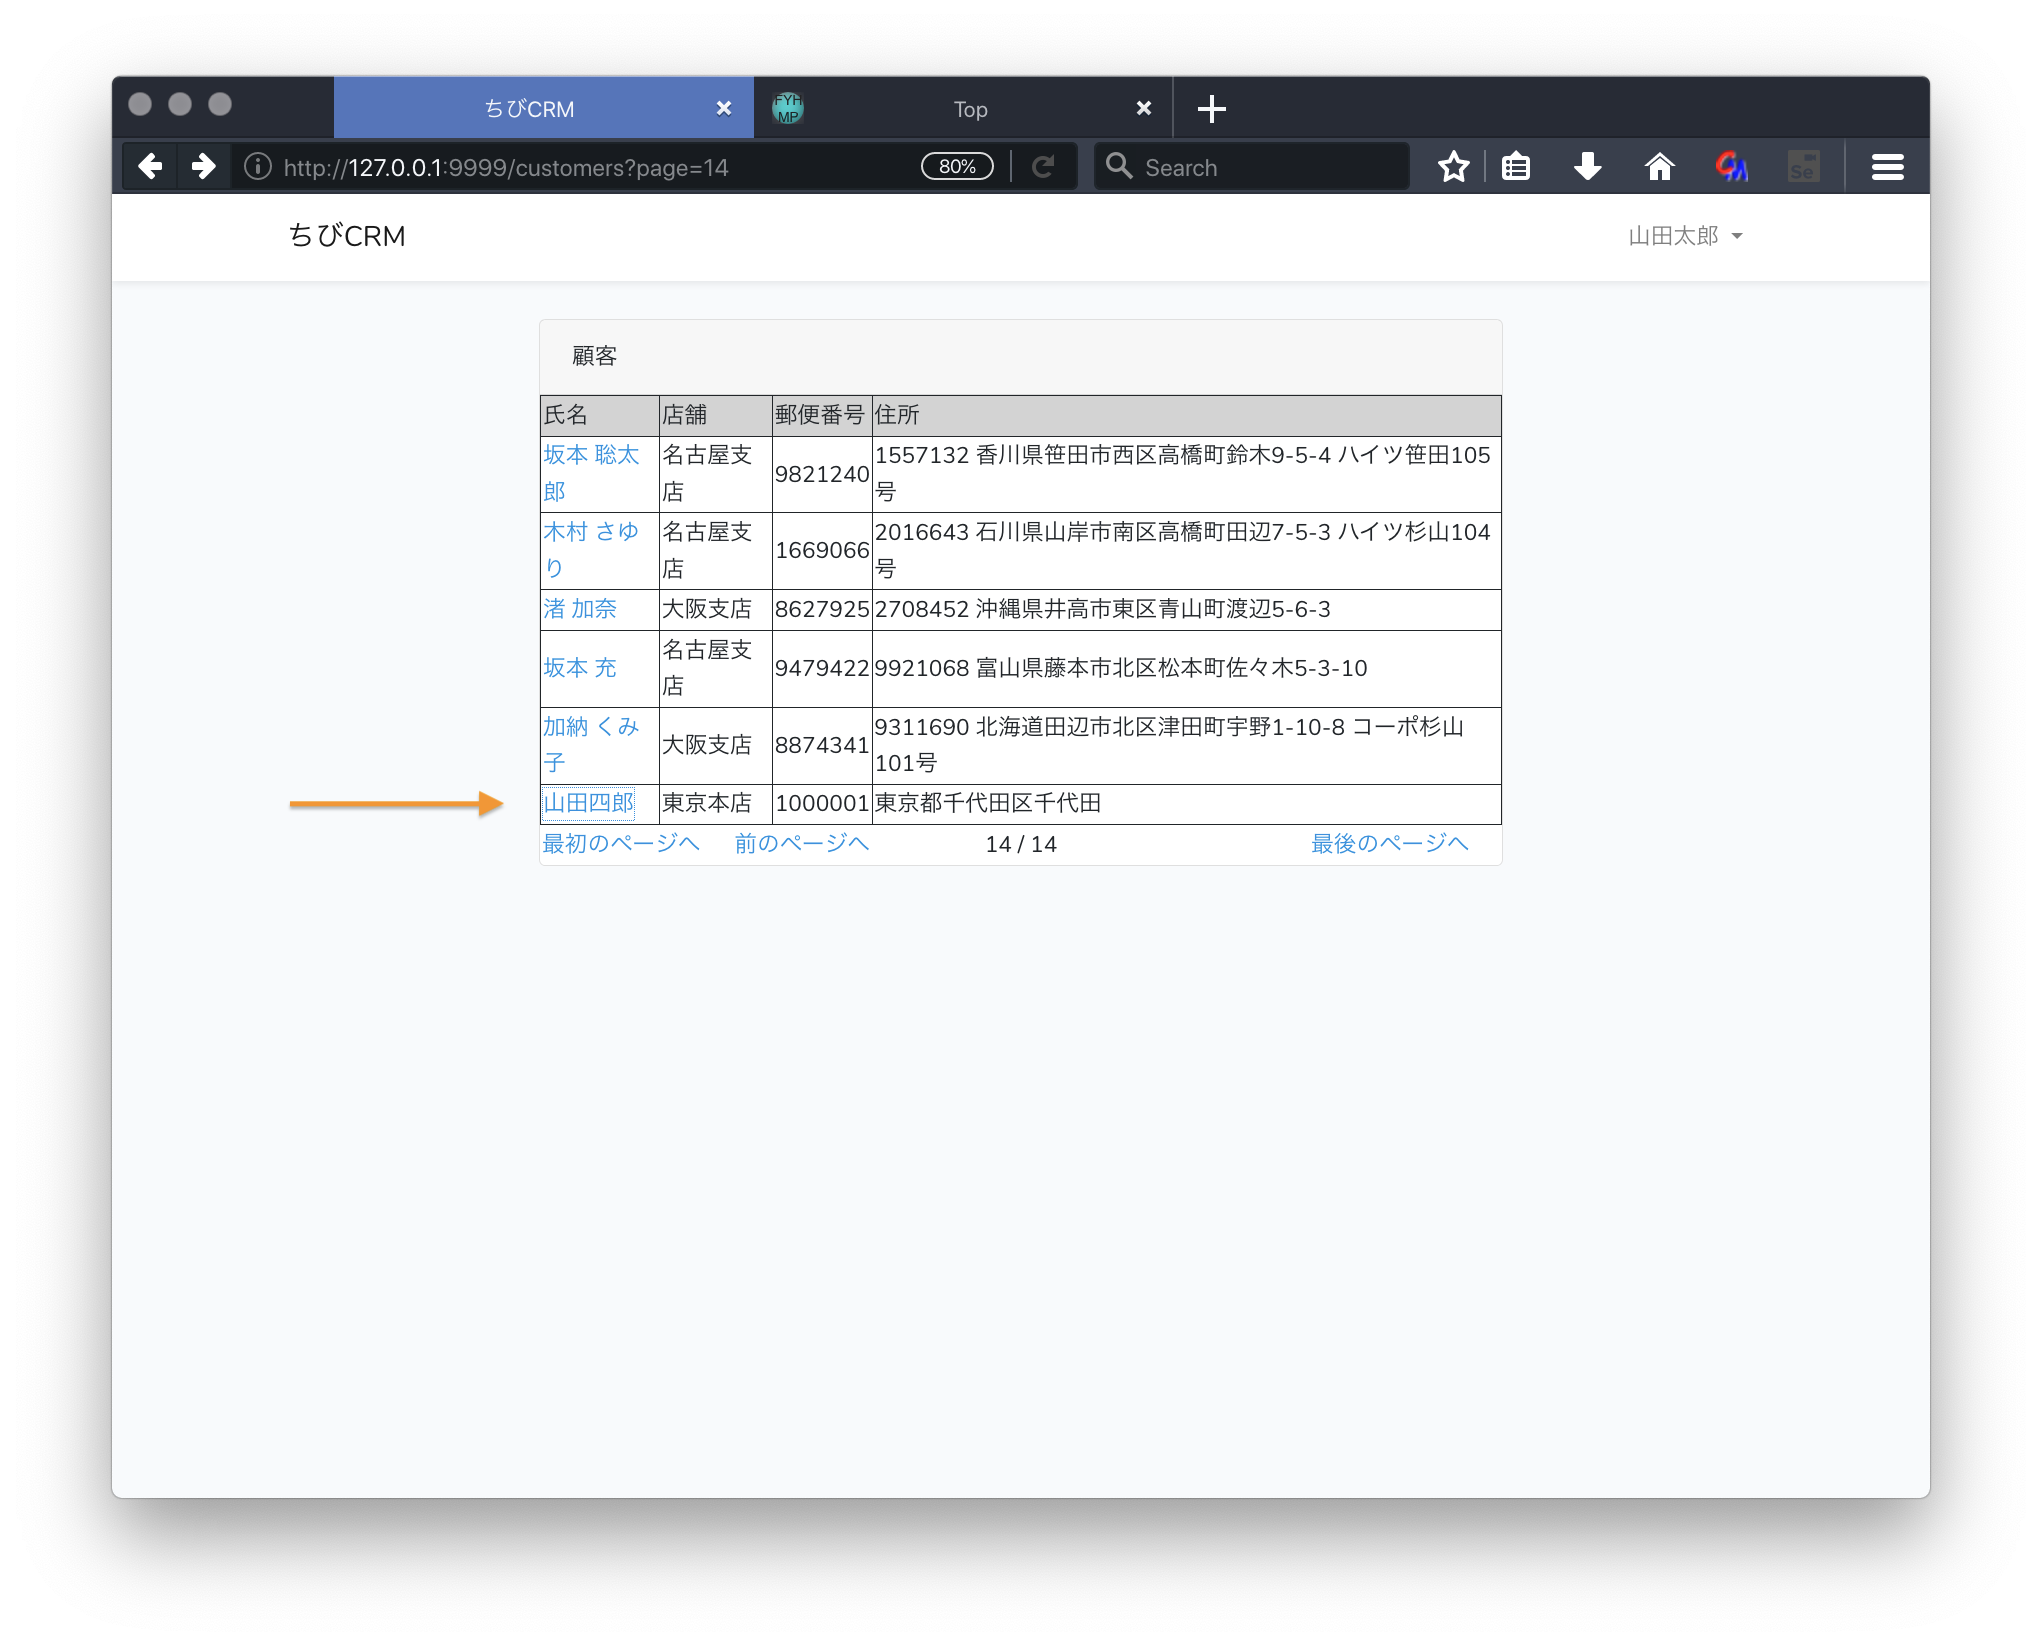
実際に登録してみる
顧客新規登録リンクをクリックして
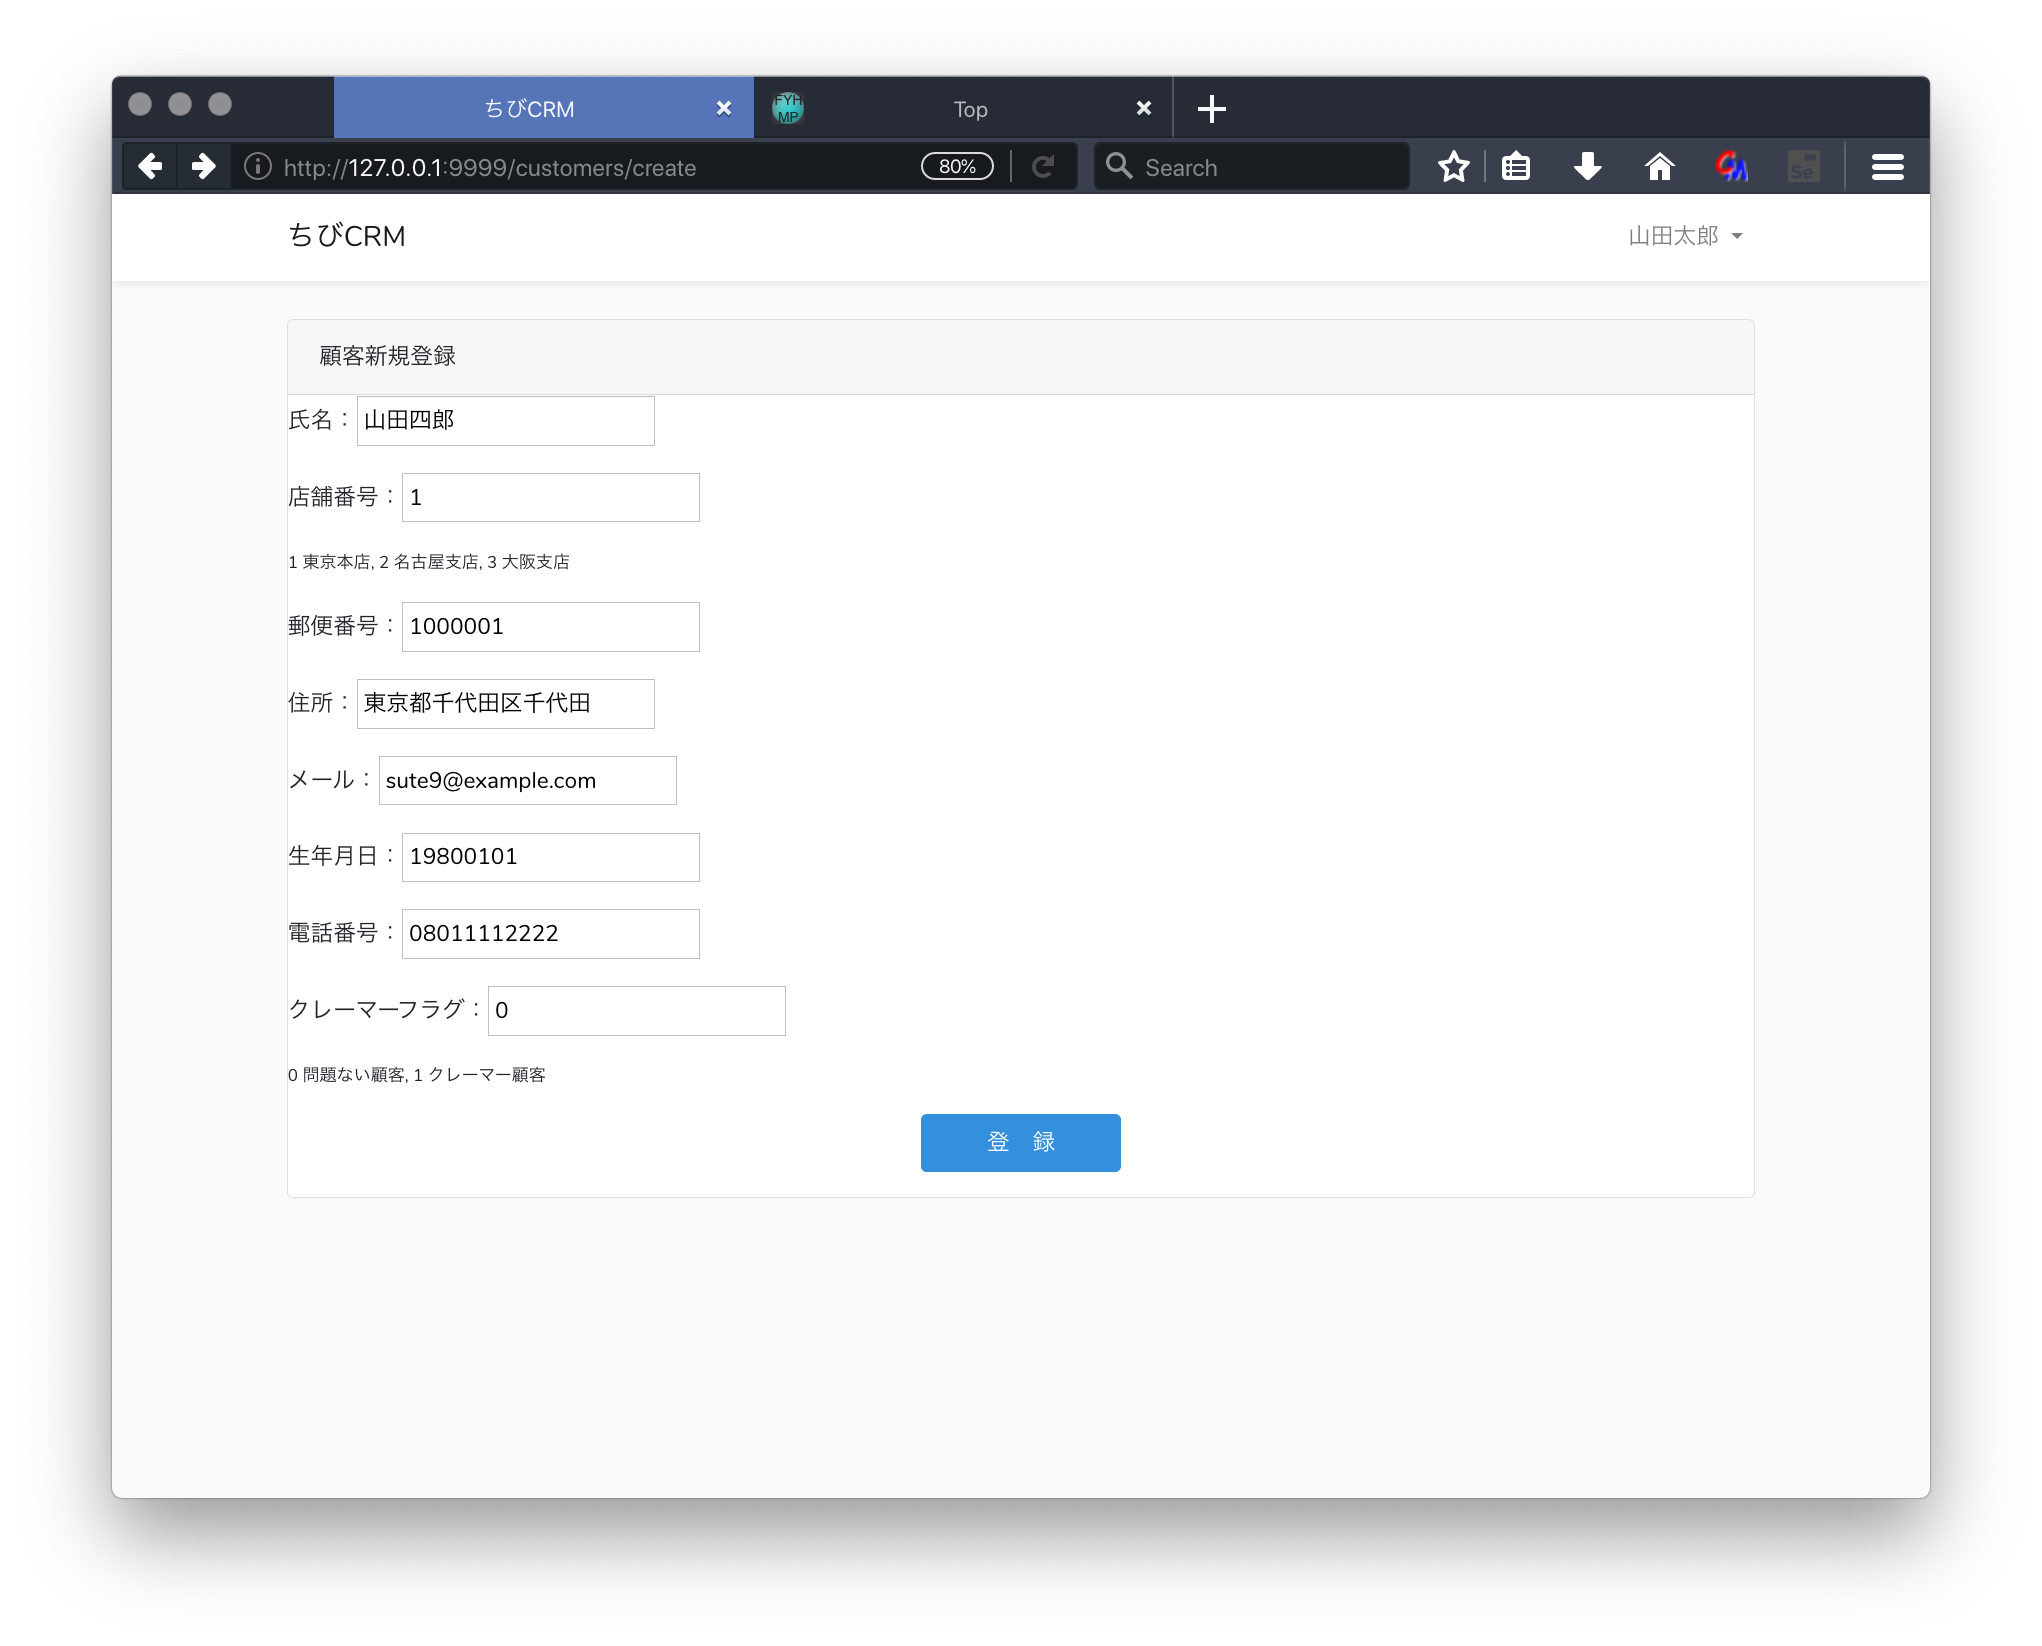
一覧画面に表示されることを確認
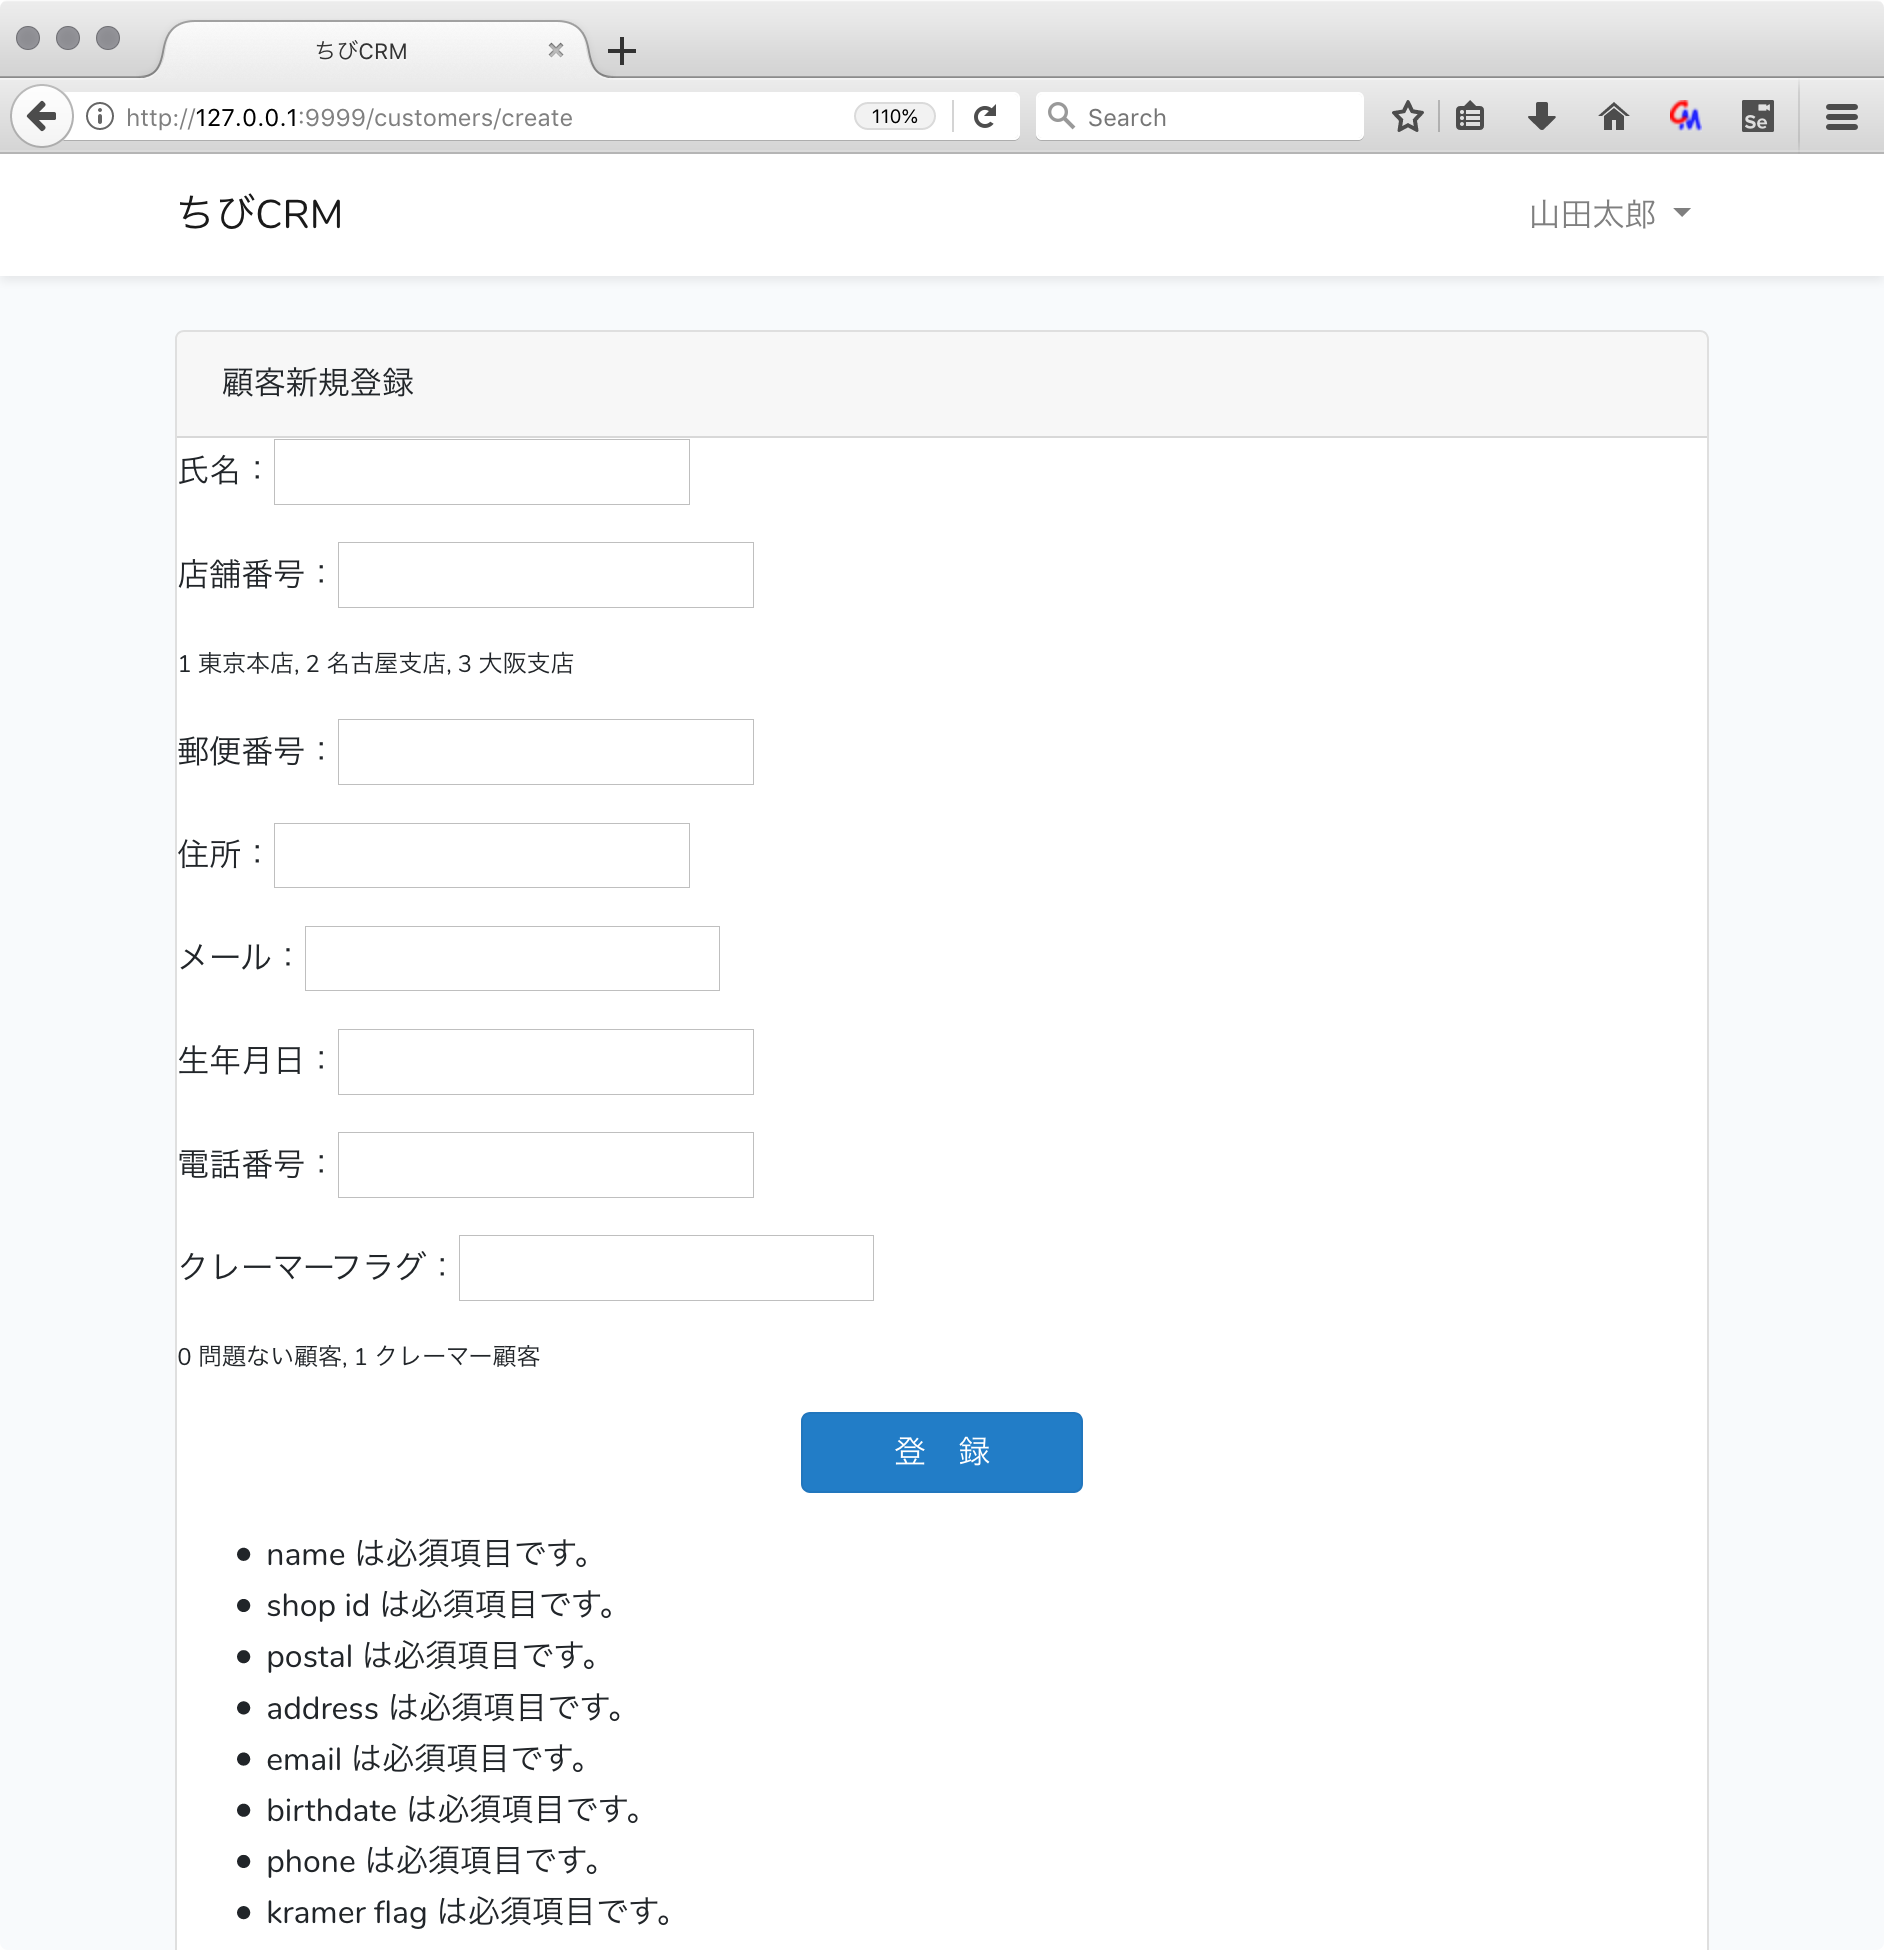
エラー処理を追加
必須項目が入力されなかった場合に、エラーにして登録中止して、エラー表示をさせます。
コントローラのvalidateの部分で自動的にバリデーション処理が動作するので、バリデーションエラーで返ってきた場合のエラーメッセージを表示する処理をbladeに記述します。
エディタで create.blade.phpを開いてエラー表示を追記します。
@extends('layouts.app')
@section('content')
    <div class="container">
        <div class="row justify-content-center">
            <div class="col-md-12">
                <div class="card">
                    <div class="card-header">顧客新規登録</div>
                    <form action="/customers" method="POST">
                        @csrf
                        <p>氏名:<input type="text" name="name" value="{{ old('name') }}"></p>
                        <p>店舗番号:<input type="text" name="shop_id" value="{{ old('shop') }}"></p>
                        <p style="font-size: 0.75em">1 東京本店, 2 名古屋支店, 3 大阪支店</p>
                        <p>郵便番号:<input type="text" name="postal" value="{{ old('postal') }}"></p>
                        <p>住所:<input type="text" name="address" value="{{ old('address') }}"></p>
                        <p>メール:<input type="text" name="email" value="{{ old('email') }}"></p>
                        <p>生年月日:<input type="text" name="birthdate" value="{{ old('birthdate') }}"></p>
                        <p>電話番号:<input type="text" name="phone" value="{{ old('phone') }}"></p>
                        <p>クレーマーフラグ:<input type="text" name="kramer_flag" value="{{ old('kramer_flag') }}"></p>
                        <p style="font-size: 0.75em">0 問題ない顧客, 1 クレーマー顧客</p>
                        <p style="text-align: center"><button class="btn btn-primary" type="submit">  登 録  </button></p>
                    </form>

                    {{-- エラーを表示--}}
                    @if( $errors->any() )
                        <ul>
                            @foreach($errors->all() as $error)
                                <li>{{$error}}</li>
                            @endforeach
                        </ul>
                    @endif

                </div>
            </div>
        </div>
    </div>
@endsection
ブラウザで確認
登録画面でなにも入力しないで登録ボタンをクリック。
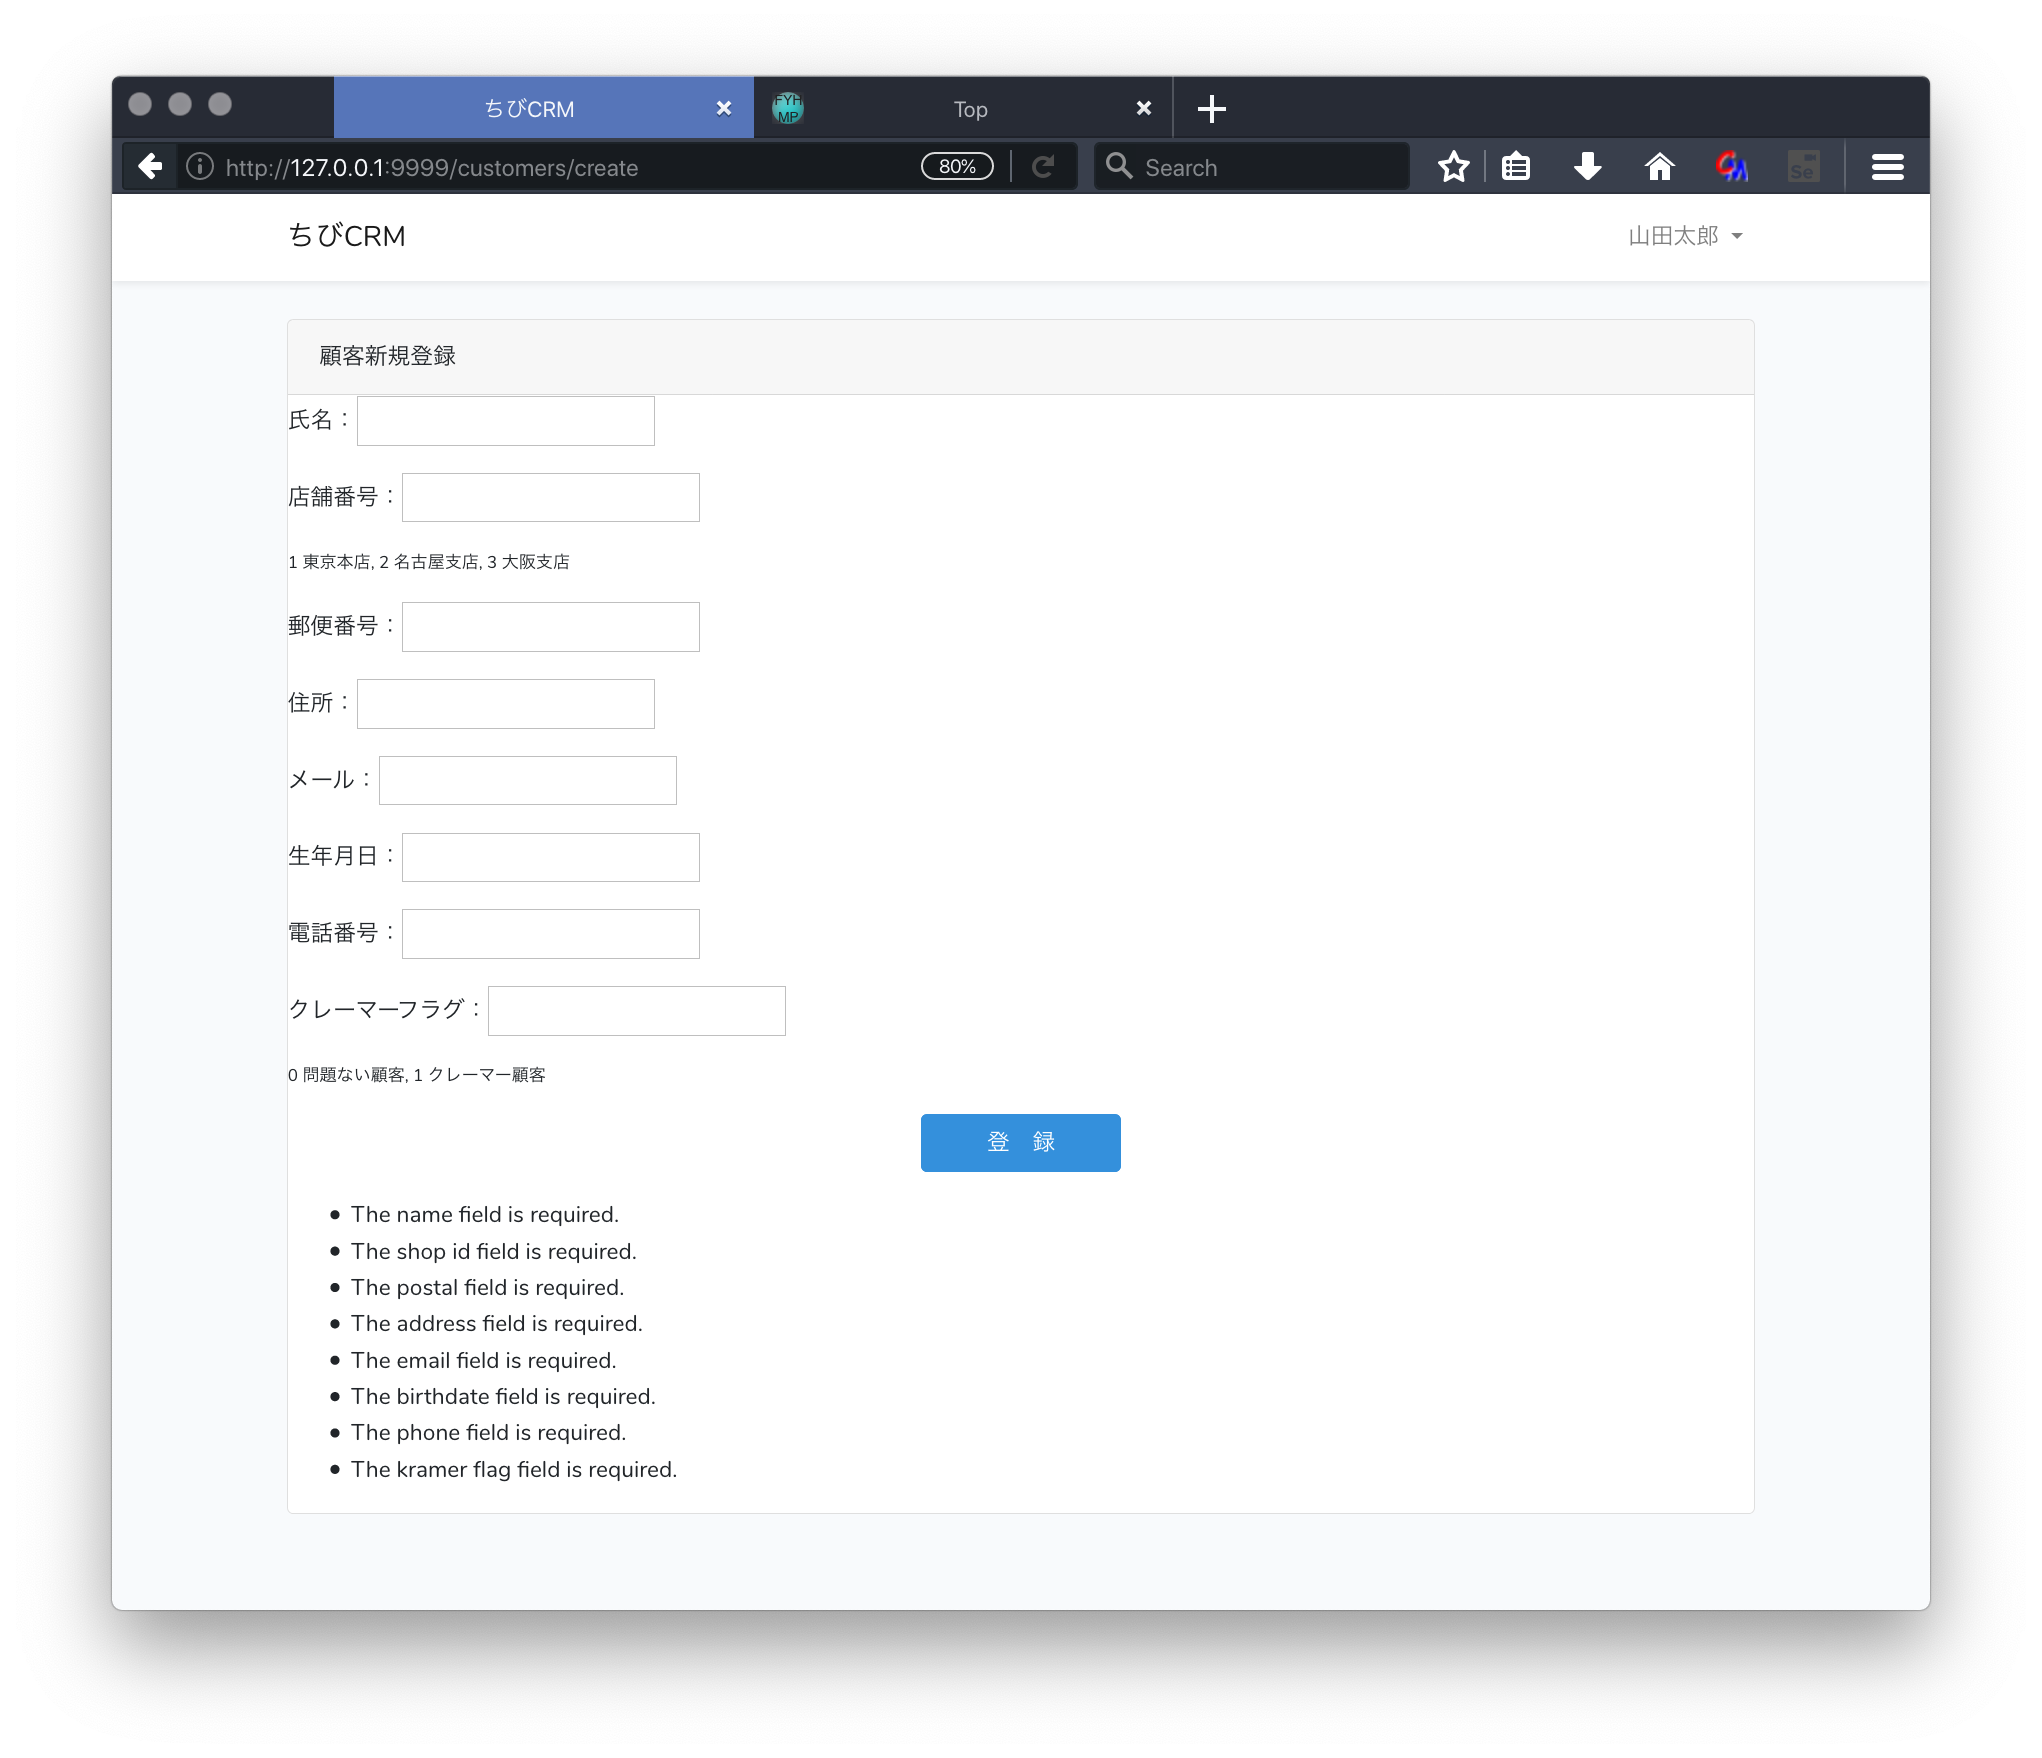
エラーメッセージが表示される。
エラーメッセージは英語で表示される。(日本語にする方法もありますが今回は説明しません。)
クレーマーが登録されたらスーパーバイザーにメールを送る
クレーマーが登録されたらスーパーバイザーにメールを送るようにします。
Laravelの Mail, Evnet, Listener の機能を使います。
メール KramerInComming
以下のコマンドを実行
php artisan make:mail KramerInComming --markdown="kramer-in-comming"
KramerInComming Mailableクラスを作成します。
app/Mail/KramerInComming.php が作られます。
コンストラクタを変更して kramer オブジェクトを保存するようにします。
app/Mail/KramerInComming.phpファイルをテキストエディタで開きます。
デフォルトで以下のようなファイルが作成されています。
<?php

namespace App\Mail;

use Illuminate\Bus\Queueable;
use Illuminate\Contracts\Queue\ShouldQueue;
use Illuminate\Mail\Mailable;
use Illuminate\Queue\SerializesModels;

class KramerInComming extends Mailable
{
    use Queueable, SerializesModels;

    /**
     * Create a new message instance.
     *
     * @return void
     */
    public function __construct()
    {
        //
    }

    /**
     * Build the message.
     *
     * @return $this
     */
    public function build()
    {
        return $this->markdown('kramer-in-comming');
    }
}
app/Mail/KramerInComming.phpを以下のように記述します。
<?php

namespace App\Mail;

use Illuminate\Bus\Queueable;
use Illuminate\Mail\Mailable;
use Illuminate\Queue\SerializesModels;

class KramerInComming extends Mailable
{
    use Queueable, SerializesModels;
    /**
     * @var \App\Models\Customer
     */
    public $kramer;

    /**
     * Create a new message instance.
     *
     * @return void
     */
    public function __construct(\App\Models\Customer $kramer)
    {
        $this->kramer = $kramer;
    }

    /**
     * Build the message.
     *
     * @return $this
     */
    public function build()
    {
        return $this->markdown('kramer-in-comming');
    }
}
artisan コマンドで markdown オプションを指定したので メール本文のテンプレートファイル kramer-in-comming.blade.phpが resources/views/kramer-in-comming.blade.phpに作られます。
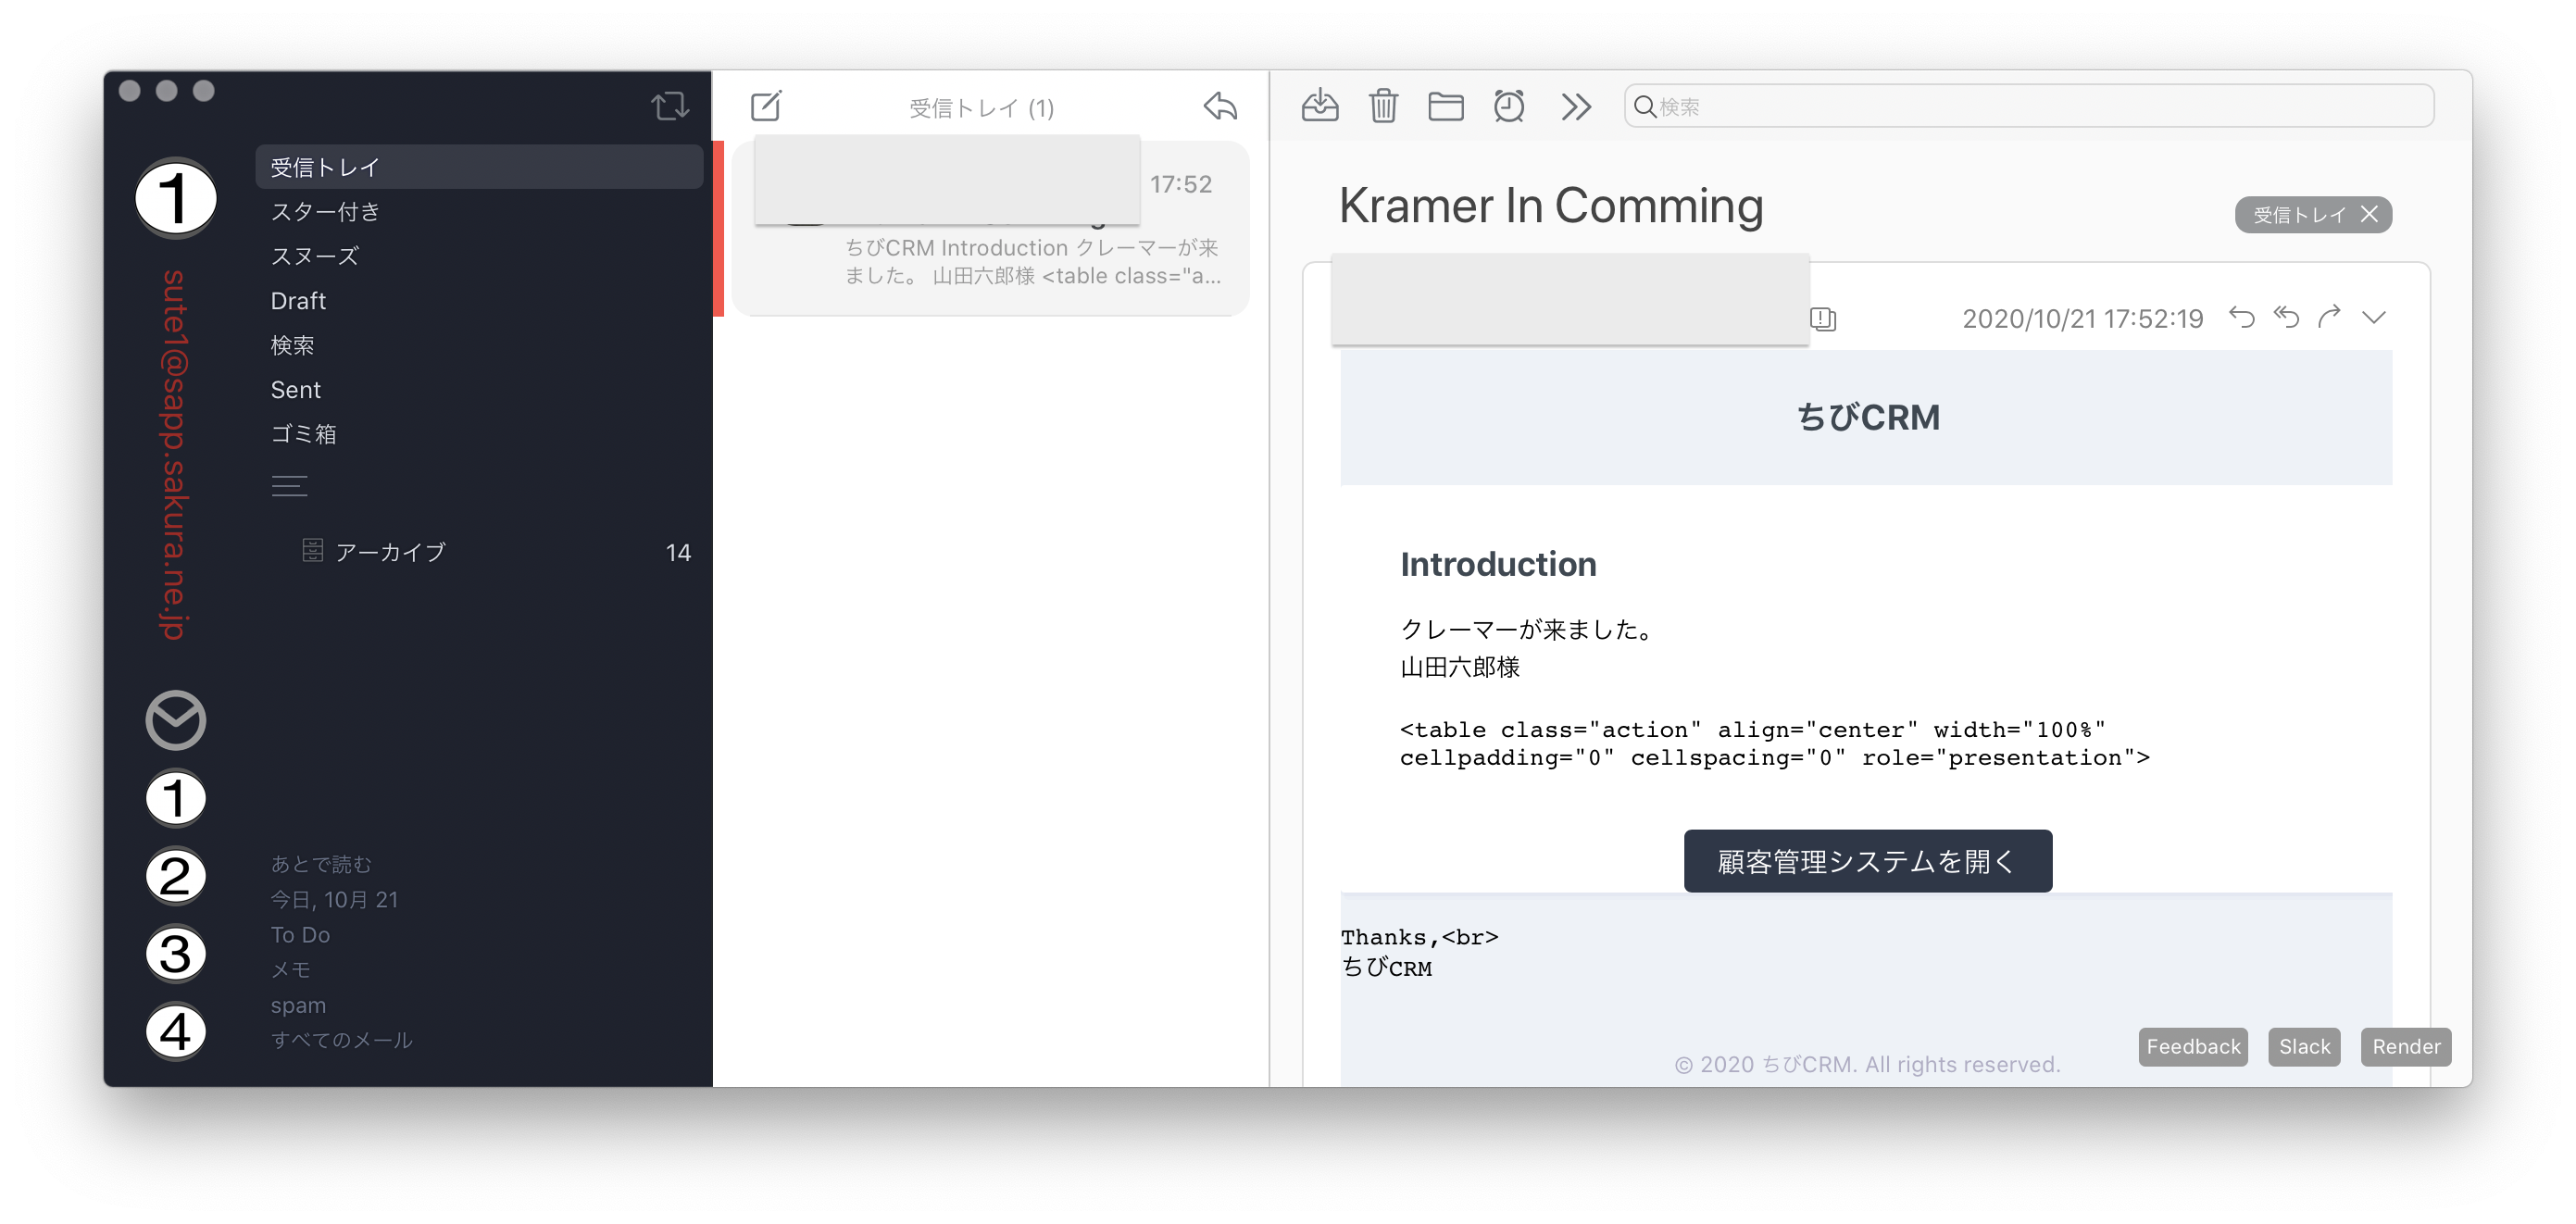
resources/views/kramer-in-comming.blade.php をテキストエディタで開いて
以下の様に変更します。
@component('mail::message')
# Introduction

クレーマーが来ました。
{{ $kramer->name }}様

@component('mail::button', ['url' => ''])
顧客管理システムを開く
@endcomponent

Thanks,<br>
{{ config('app.name') }}
@endcomponent
イベント KramerInComming
KramerInCommingイベントを作成します。(クレーマーが来たぞイベント)
以下のコマンドを実行
php artisan make:event KramerInComming
KramerInComming イベントを作成します。
app/Events/KramerInComming.php ファイルが作られます。
コンストラクタを変更して kramer オブジェクトを保存するようにします。
app/Events/KramerInComming.phpをエディタで開いて以下の様に変更します
<?php

namespace App\Events;

use Illuminate\Broadcasting\Channel;
use Illuminate\Broadcasting\InteractsWithSockets;
use Illuminate\Broadcasting\PresenceChannel;
use Illuminate\Broadcasting\PrivateChannel;
use Illuminate\Contracts\Broadcasting\ShouldBroadcast;
use Illuminate\Foundation\Events\Dispatchable;
use Illuminate\Queue\SerializesModels;

class KramerInComming
{
    use Dispatchable, InteractsWithSockets, SerializesModels;

    /**
     * @var \App\Models\Customer
     */
    public $kramer;

    /**
     * Create a new event instance.
     *
     * @return void
     */
    public function __construct(\App\Models\Customer $kramer)
    {
        $this->kramer = $kramer;
    }

    /**
     * Get the channels the event should broadcast on.
     *
     * @return \Illuminate\Broadcasting\Channel|array
     */
    public function broadcastOn()
    {
        return new PrivateChannel('channel-name');
    }
}
- Customer.php dispatchesEvents に KramerInCommingイベントを追加します。
app/Models/Customer.phpをテキストエディタで開いて以下の記述を追加。
<?php

namespace App\Models;

use Illuminate\Database\Eloquent\Factories\HasFactory;
use Illuminate\Database\Eloquent\Model;

class Customer extends Model
{
    use HasFactory;
    protected $guarded = [];

    protected $dispatchesEvents = [
        'created' => \App\Events\KramerInComming::class,
    ];

    public function shop()
    {
        return $this->belongsTo(Shop::class);
    }

    public function customerLogs()
    {
        return $this->hasMany(CustomerLog::class);
    }
}
リスナー SendKramerInCommingNotification
イベントを受け取るリスナーを作成します。
以下のコマンドを実行して SendKramerInCommingNotification リスナーを作成します。
php artisan make:listener SendKramerInCommingNotification --event=KramerInComming
app/Listeners/SendKramerInCommingNotification.php が作られます。
app/Listeners/SendKramerInCommingNotification.phpをテキストエディタで開いて、
handle()関数内に処理を書きます
<?php
namespace App\Listeners;
use App\Events\KramerInComming;
use Illuminate\Contracts\Queue\ShouldQueue;
use Illuminate\Queue\InteractsWithQueue;
use Illuminate\Support\Facades\Mail;
class SendKramerInCommingNotification
{
/**
* Create the event listener.
*
* @return void
*/
public function __construct()
{
//
}
/**
* Handle the event.
*
* @param KramerInComming $event
* @return void
*/
public function handle(KramerInComming $event)
{
// クレーマーなら通知を発送 。クレーマー確定前に クレーマー変数にカスタマーを入れているのはなんか変だなぁ。
if ($event->kramer->isKramer()) {
foreach (\App\Models\User::enumSupserVisor() as $superVisor) {
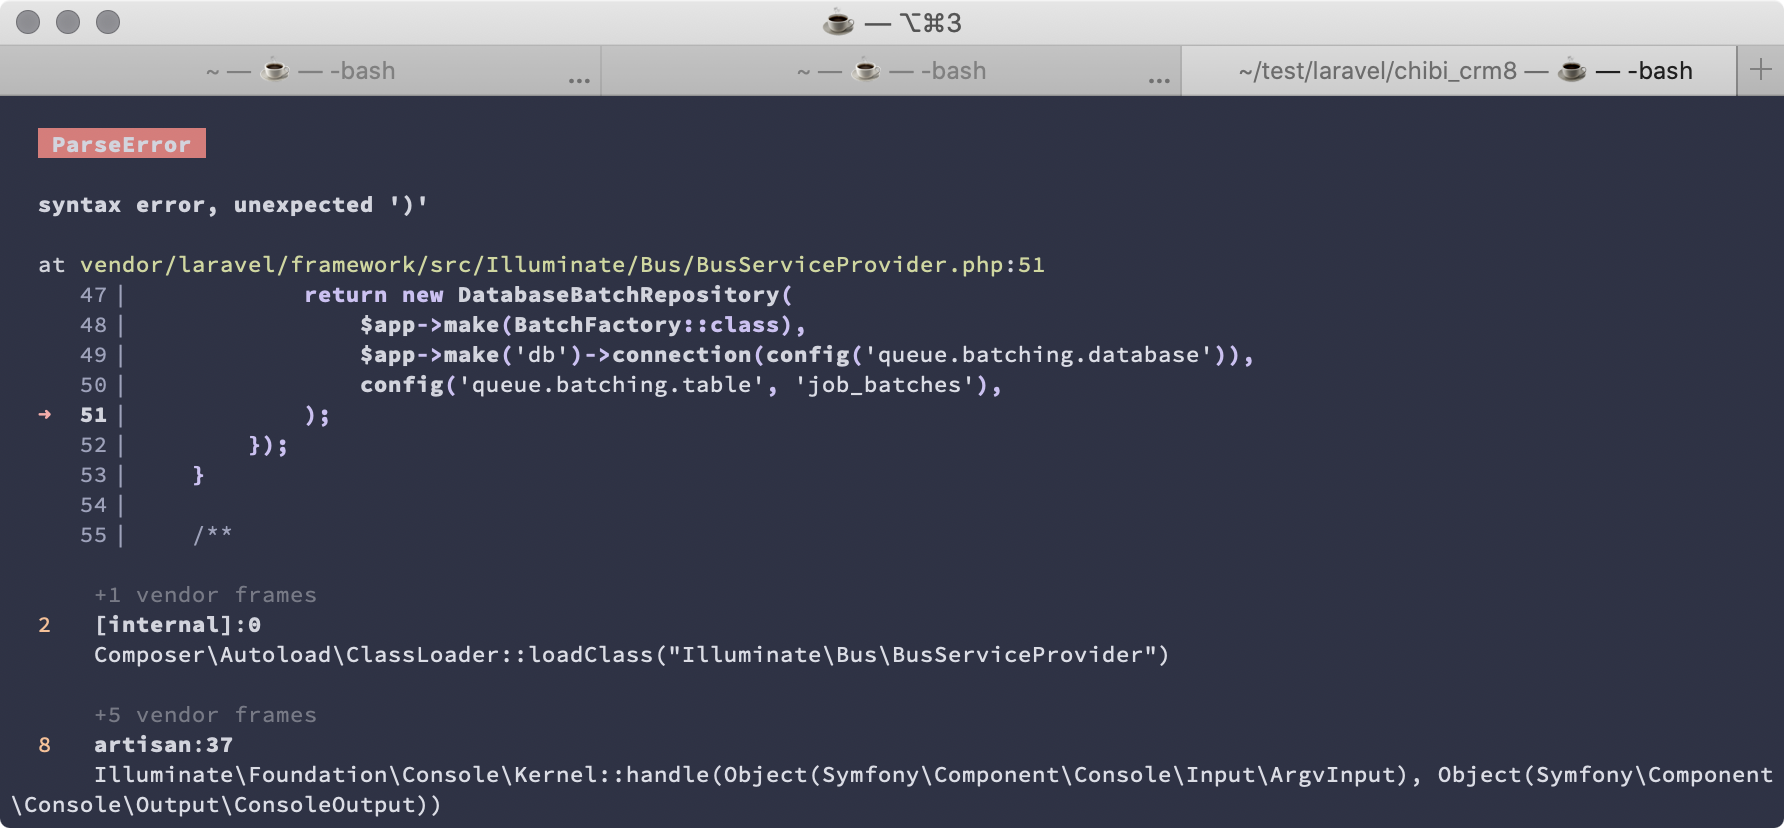
Mail::to($superVisor->email)->send(new \App\Mail\KramerInComming($event->kramer));
//Mail::to($superVisor->email)->send(\App\Mail\KramerInComming($event->kramer));
}
}
}
}
EventServiceProvider.php に listen に追加します。
app/Providers/EventServiceProvider.phpをエディタで開いて $listen に SendKramerInCommingNotification を追記します。
<?php

namespace App\Providers;

use Illuminate\Auth\Events\Registered;
use Illuminate\Auth\Listeners\SendEmailVerificationNotification;
use Illuminate\Foundation\Support\Providers\EventServiceProvider as ServiceProvider;
use Illuminate\Support\Facades\Event;

class EventServiceProvider extends ServiceProvider
{
    /**
     * The event listener mappings for the application.
     *
     * @var array
     */
    protected $listen = [
        Registered::class => [
            SendEmailVerificationNotification::class,
        ],
        \App\Events\KramerInComming::class => [
            \App\Listeners\SendKramerInCommingNotification::class
        ],
    ];

    /**
     * Register any events for your application.
     *
     * @return void
     */
    public function boot()
    {
        //
    }
}
Customerクラスにクレーマー判断処理を追加
app/Models/Customer.phpをエディタで開いて以下のように記述
<?php

namespace App\Models;

use Illuminate\Database\Eloquent\Factories\HasFactory;
use Illuminate\Database\Eloquent\Model;

class Customer extends Model
{
    const KRAMER_FLAG_ON = 1;

    use HasFactory;
    protected $guarded = [];

    protected $dispatchesEvents = [
        'created' => \App\Events\KramerInComming::class,
    ];

    public function shop()
    {
        return $this->belongsTo(Shop::class);
    }

    public function customerLogs()
    {
        return $this->hasMany(CustomerLog::class);
    }

    public function isKramer(): bool
    {
        return $this->kramer_flag == Customer::KRAMER_FLAG_ON;
    }

}
これで新規顧客登録時に クレーマーフラグ 1 が登録されたら、クレーマーが来たとして スーパーバイザーに 通知メールが送られます。
ブラウザでクレーマーを登録して確認
クレーマーフラグを1にして登録
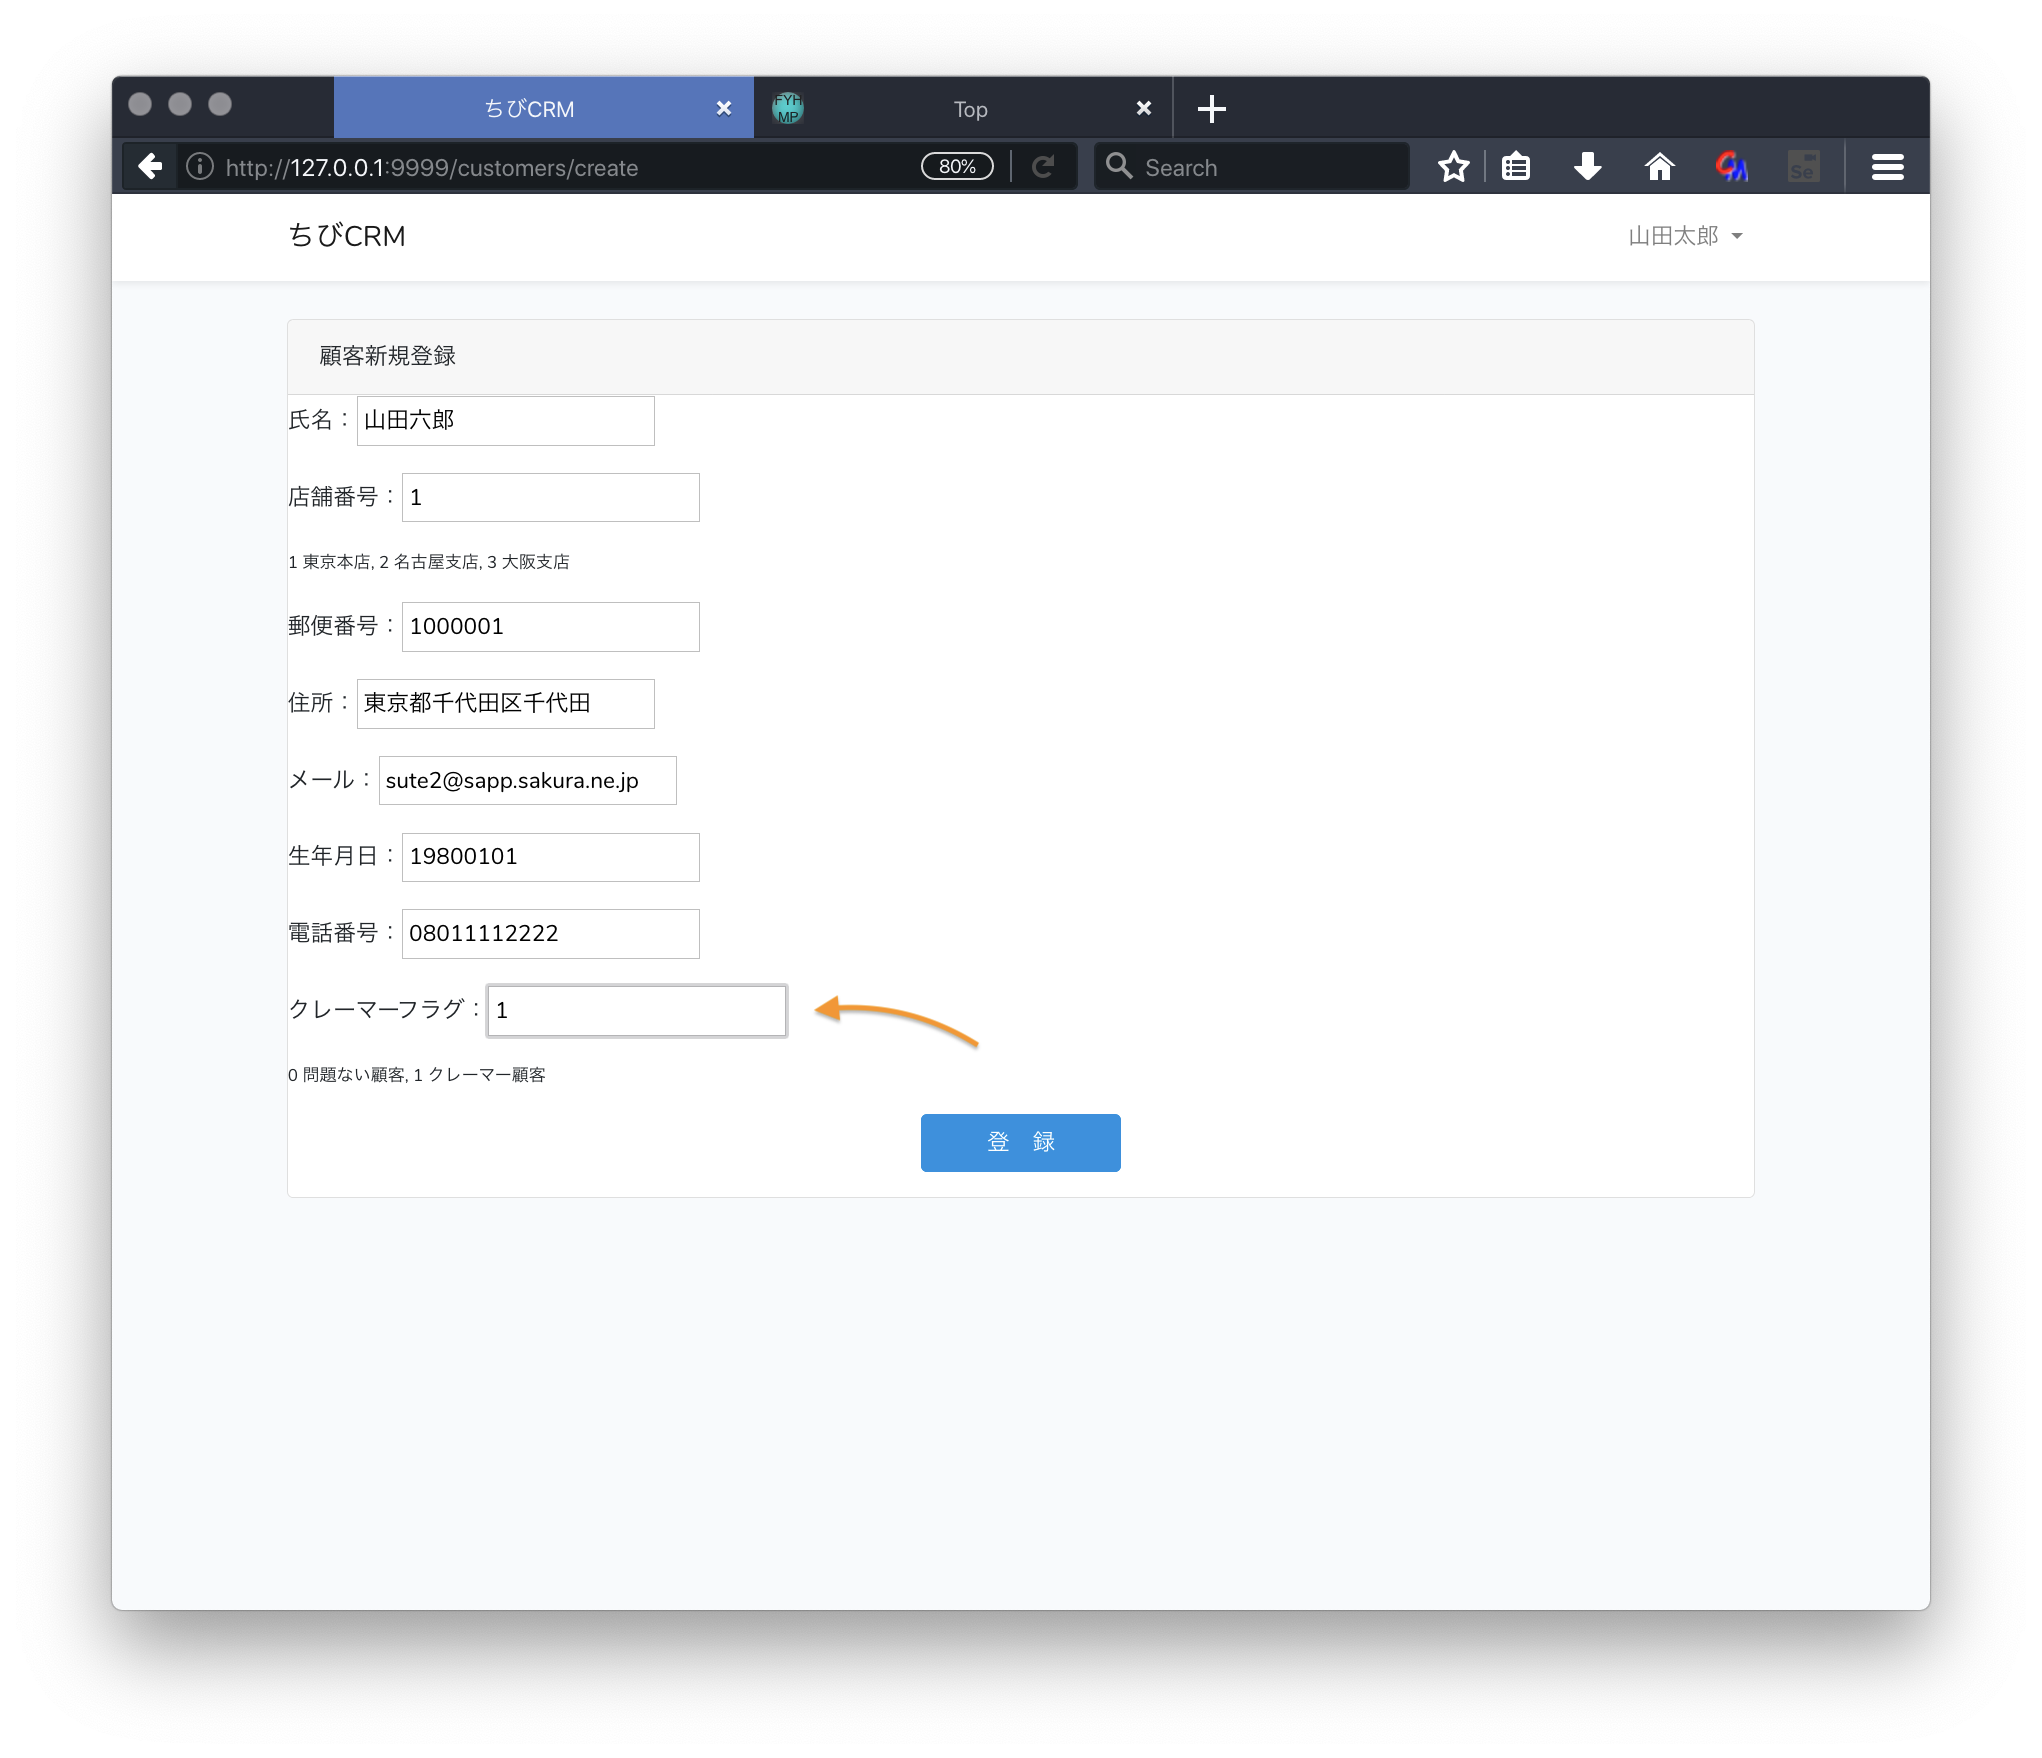
メールtが届くことを確認
2020年10月21日ここまで 此処から先は 記述途中
顧客検索
MyApplicationService
顧客検索のController, Viewに入る前に、今回はアプリケーション全体で使う MyApplicationService を作成します。
このクラスはMVCのモデルに相当します。
ビジネスロジックを記述します。
先にユニットテストを作る(ここだけTDDっぽいな)
tests/Unit/MyApplicationServiceTest.php
<?php

namespace App\MyServices;


use Illuminate\Foundation\Testing\DatabaseTransactions;
use Illuminate\Support\Facades\App;
use Tests\TestCase;

class MyApplicationServiceTest extends TestCase
{
    use DatabaseTransactions;

    /** @test */
    public function get_birth_day_range()
    {
        $apService = App::make('myapplicationservice');

        try {
            $num = $apService->getBirthdayRange(1, strtotime('1940-1-1'));
            $this->assertTrue(false);
        } catch (\Exception $e) {
            $this->assertSame($e->getCode(), MyApplicationService::ERROR_CODE_WRONG_START_TIMESTAMP);
        }

        // 1970年境界値チェック
        try {
            $num = $apService->getBirthdayRange(1, strtotime('1969-12-31'));
            $this->assertTrue(false);
        } catch (\Exception $e) {
            $this->assertSame($e->getCode(), MyApplicationService::ERROR_CODE_WRONG_START_TIMESTAMP);
        }

        // 1970年境界値チェック
        try {
            $num = $apService->getBirthdayRange(1, strtotime('1970-1-1 8:59:59'));// Timezone JP
            $this->assertTrue(false);
        } catch (\Exception $e) {
            $this->assertSame($e->getCode(), MyApplicationService::ERROR_CODE_WRONG_START_TIMESTAMP);
        }

        // 1970年境界値チェック
        $num = $apService->getBirthdayRange(1, strtotime('1970-1-1 09:00'));
        $this->assertNotEmpty($num);

        // 1歳
        $num = $apService->getBirthdayRange(1);
        $this->assertNotEmpty($num);
        $num = $apService->getBirthdayRange(1, time());
        $this->assertNotEmpty($num);


        // 40歳
        $num = $apService->getBirthdayRange(10);
        $this->assertNotEmpty($num);
        $num = $apService->getBirthdayRange(10, strtotime('1980-1-1'));
        $this->assertSame(['start' => '1969-01-02', 'end' => '1970-01-01'], $num);

    }
}
MyApplicationServiceを作る
./app/MyServices ディレクトリを作成し
このディレクトリの中に MyApplicationService.php ファイルを作成します。
./app/MyServices/MyApplicationService.php
<?php


namespace App\MyServices;


class MyApplicationService
{
    const ERROR_CODE_WRONG_START_TIMESTAMP = 1992;

    /**
     * 年齢を指定して 誕生日の始まりの日と終わりの日を返す
     * @param int $age 年齢を指定
     * @param int $targetTimestamp 対象タイムスタンプ。指定するとこの時刻を基準にして年齢を計算する。デフォルトはNULL
     * @return array 0に開始日、1に終了日が入る
     */
    function getBirthdayRange(int $age, int $targetTimestamp = null)
    {
        if ($targetTimestamp < 0) {
            throw new \Exception('基準日は1970年以降', self::ERROR_CODE_WRONG_START_TIMESTAMP);
        }
        $ts = $targetTimestamp;
        if (is_null(($targetTimestamp))) {
            $targetTimestamp = time();
        }
        $_ts_b = $targetTimestamp + 86400;

        $start = mktime(0, 0, 0, date('m', $_ts_b), date('d', $_ts_b), date('Y', $_ts_b) - $age - 1);
        $end = mktime(0, 0, 0, date('m', $targetTimestamp), date('d', $targetTimestamp), date('Y', $targetTimestamp) - $age);
        return ['start' => date('Y-m-d', $start), 'end' => date('Y-m-d', $end)];
    }

}
顧客検索画面のweb.phpを確認
routes/web.php の以下の部分が
Route::get('customer_search', 'CustomerSearchController@index')->middleware('auth');
CustomerSearchControllerコントローラを呼ぶ定義になります。
顧客検索画面コントローラの作成
php artisan make:controller CustomerSearchController
を実行。app/Http/Controllers/CustomerSearchController.php が作られます。
<?php

namespace App\Http\Controllers;

use App\Customer;
use App\Http\Requests\CustomerSearchPost;
use App\MyServices\MyApplicationService;
use Illuminate\Http\Request;

class CustomerSearchController extends Controller
{
    protected $myApplicationService;

    public function __construct()
    {
        $this->myApplicationService = app()->make('myapplicationservice');
    }

    /**
     * 顧客を検索して表示する
     * @return \Illuminate\Http\Response
     */
    public function index(Request $request)
    {
        return view('customer_search');
    }

    public function search(CustomerSearchPost $request, MyApplicationService $myApplicationService)
    {
        $validated = $request->validated();
        $wheres = [];
        $search_criterias = [];

        // 氏名の指定は有るか
        if (!empty($validated['name'])) {
            array_push($wheres, ['name', '=', $validated['name']]);
            array_push($search_criterias, '氏名が' . $validated['name'] . 'に一致する');
        }
        // 年齢 from の指定は有るか
        if (!empty($validated['age_from'])) {
            $ages = $myApplicationService->getBirthdayRange(($validated['age_from']));
            array_push($wheres, ['birthdate', '<=', $ages['end']]);
        }

        // 年齢 to の指定は有るか
        if (!empty($validated['age_to'])) {
            $ages = $myApplicationService->getBirthdayRange(($validated['age_to']));
            array_push($wheres, ['birthdate', '>=', $ages['end']]);
        }

        $customers = Customer::where($wheres)->paginate();
        return view('customer_search', compact('customers', 'search_criterias', 'validated'));

    }

}
CustomerSearchPost の作成
今回は ユーザー入力のバリデーションを FormRequest クラスを使って行います。以下のartisan コマンドを実行して FormRequest クラスを生成します。
php artisan make:request CustomerSearchPost
./app/Http/Requests/CustomerSearchPost.php が作られます。
<?php

namespace App\Http\Requests;

use Illuminate\Foundation\Http\FormRequest;

class CustomerSearchPost extends FormRequest
{
    /**
     * Determine if the user is authorized to make this request.
     *
     * @return bool
     */
    public function authorize()
    {
        return true;
    }

    /**
     * Get the validation rules that apply to the request.
     *
     * @return array
     */
    public function rules()
    {
        return [
            'searchItems' => 'required_without_all:name,age_from,age_to',
            'name' => '',
            'age_from' => '',
            'age_to' => '',
        ];
    }

    public $attributes;

    public function attributes()
    {
        return [
            'name' => '氏名',
            'age_from' => '年齢から',
            'age_to' => '年齢まで',
        ];
    }
}
- rules にバリデーションのルールを書きます
- attributes関数で 項目名を日本語にします。エラーメッセージで使われます。
エラーメッセージをカスタマイズします
resources/lang/ja ディレクトリを作成し ここに resources/lang/en/validation.php ファイルをコピーします。
resources/lang/ja/validation.phpをエディタで開いてエラーメッセージをカスタマイズします。
'required_without_all' => ' :values のどれか一つは入力してください。',
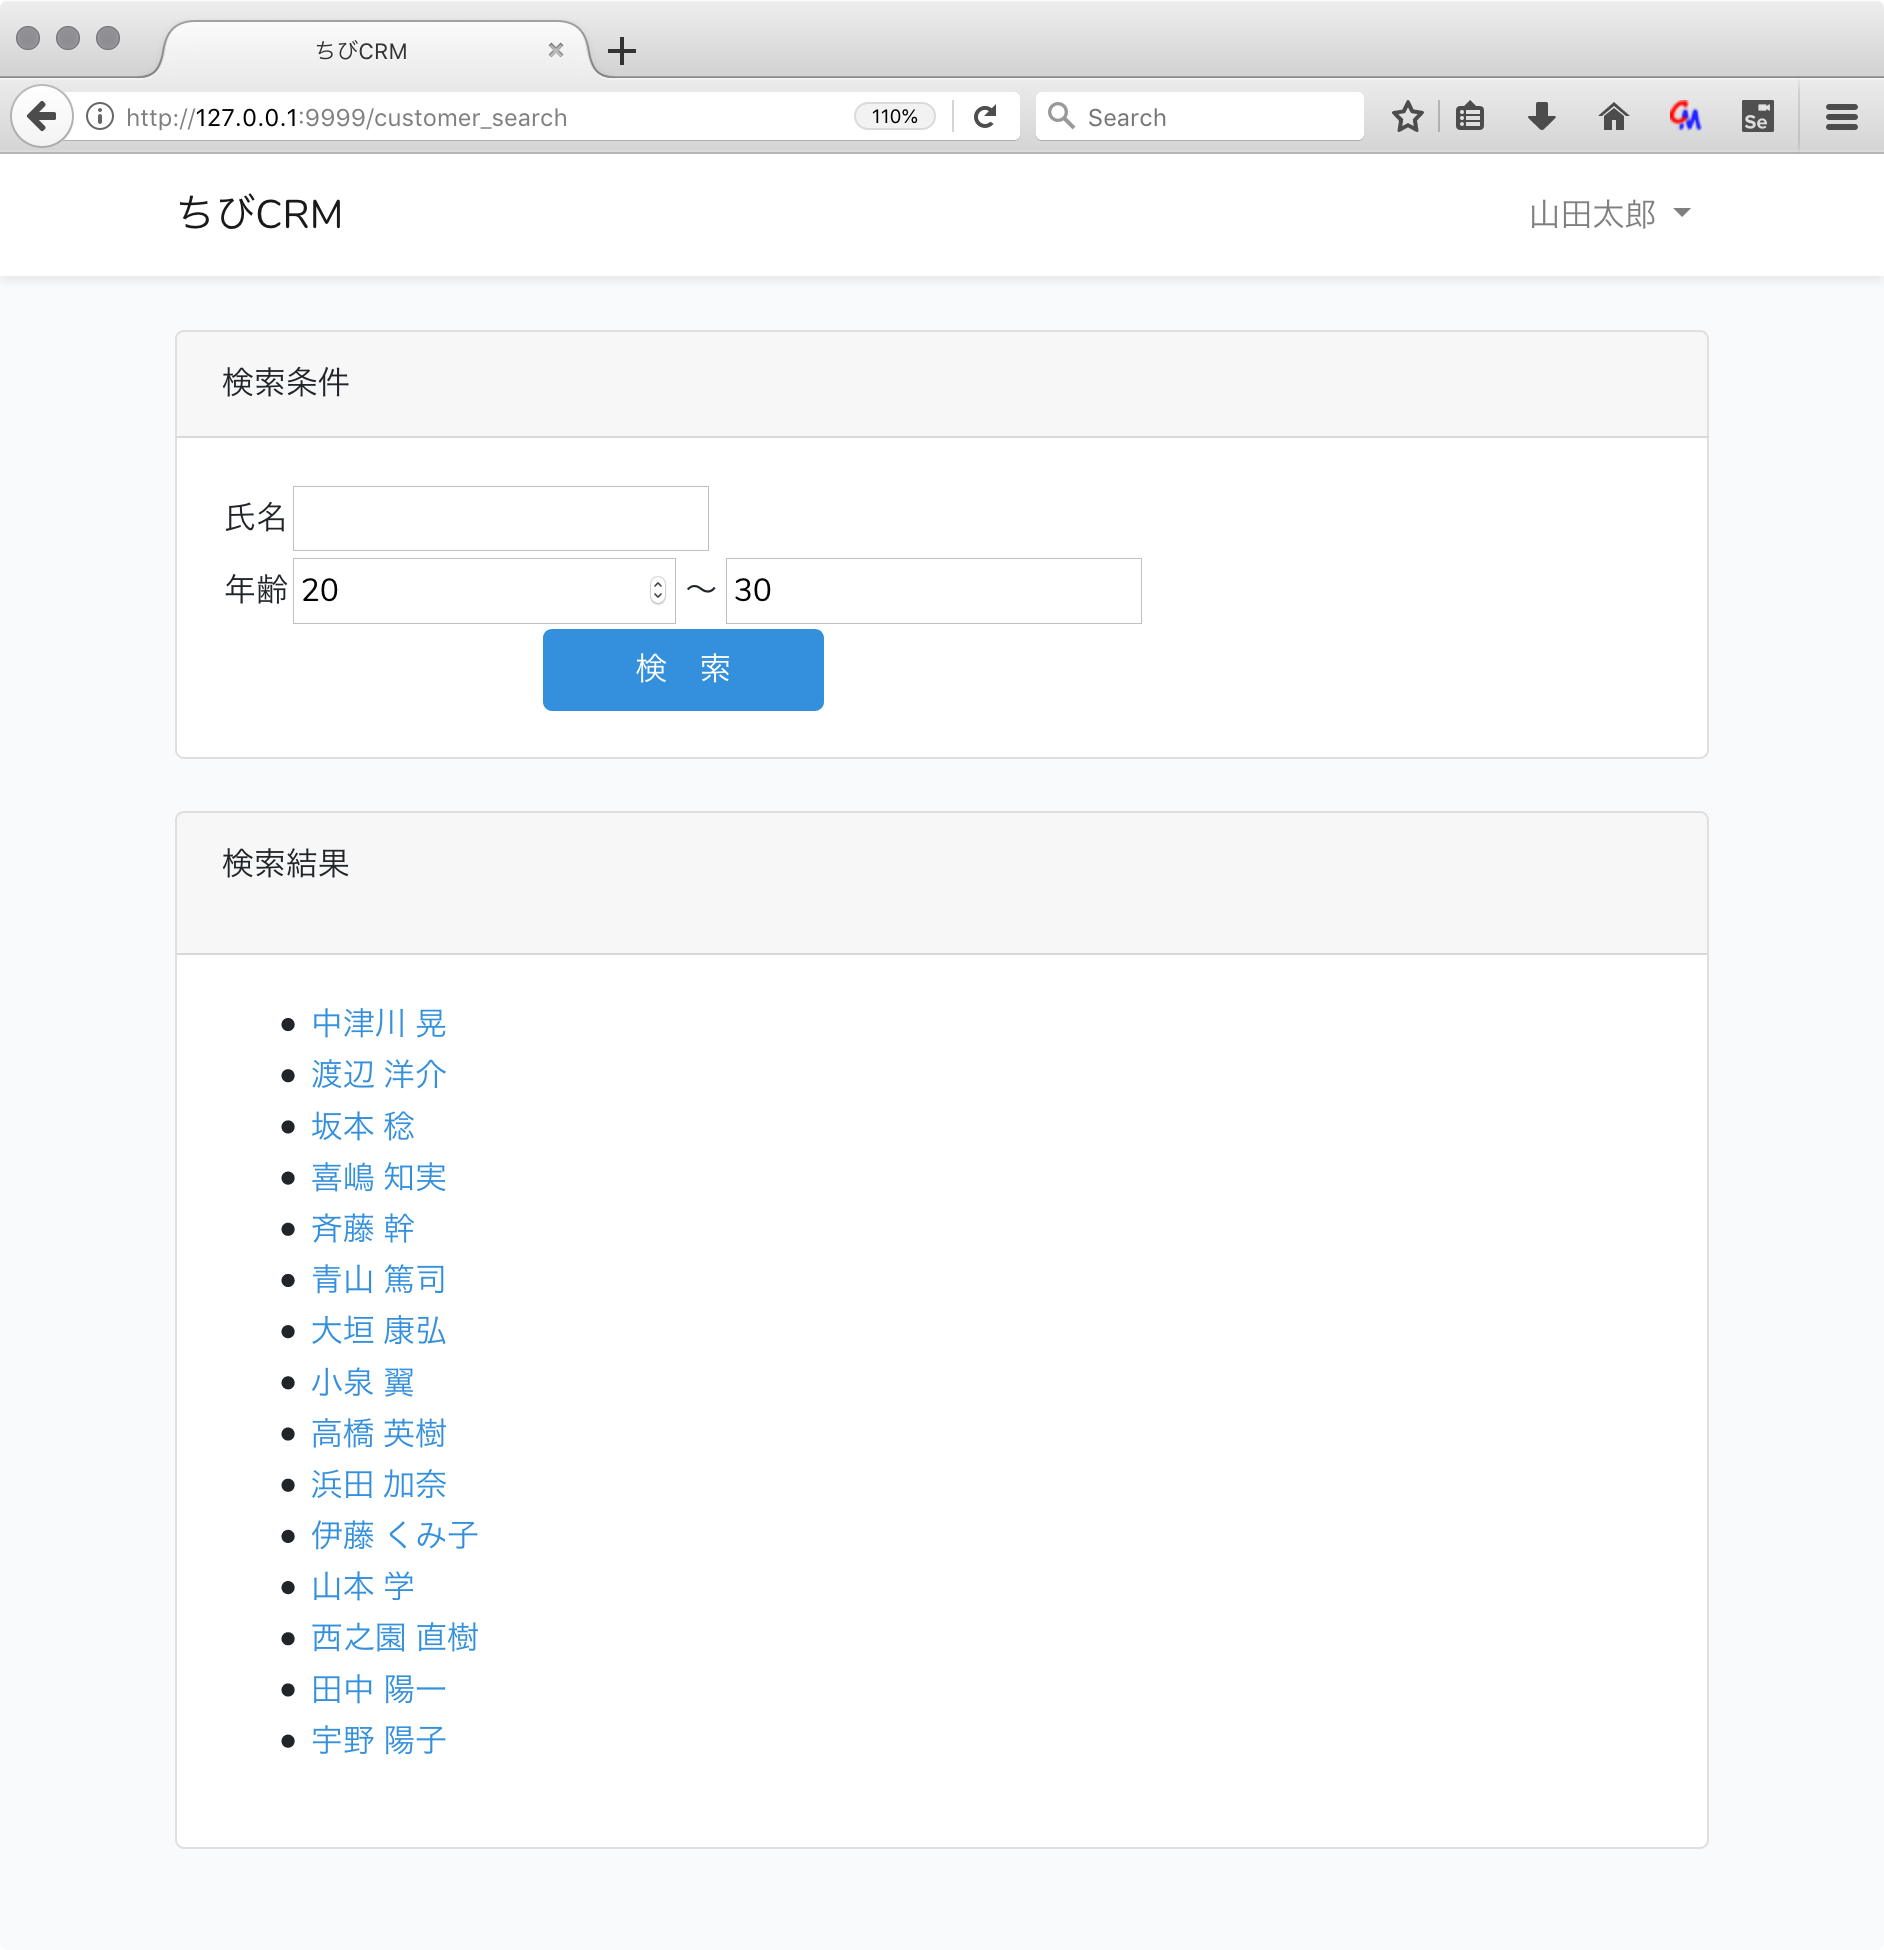
顧客検索画面のusers.blade.php
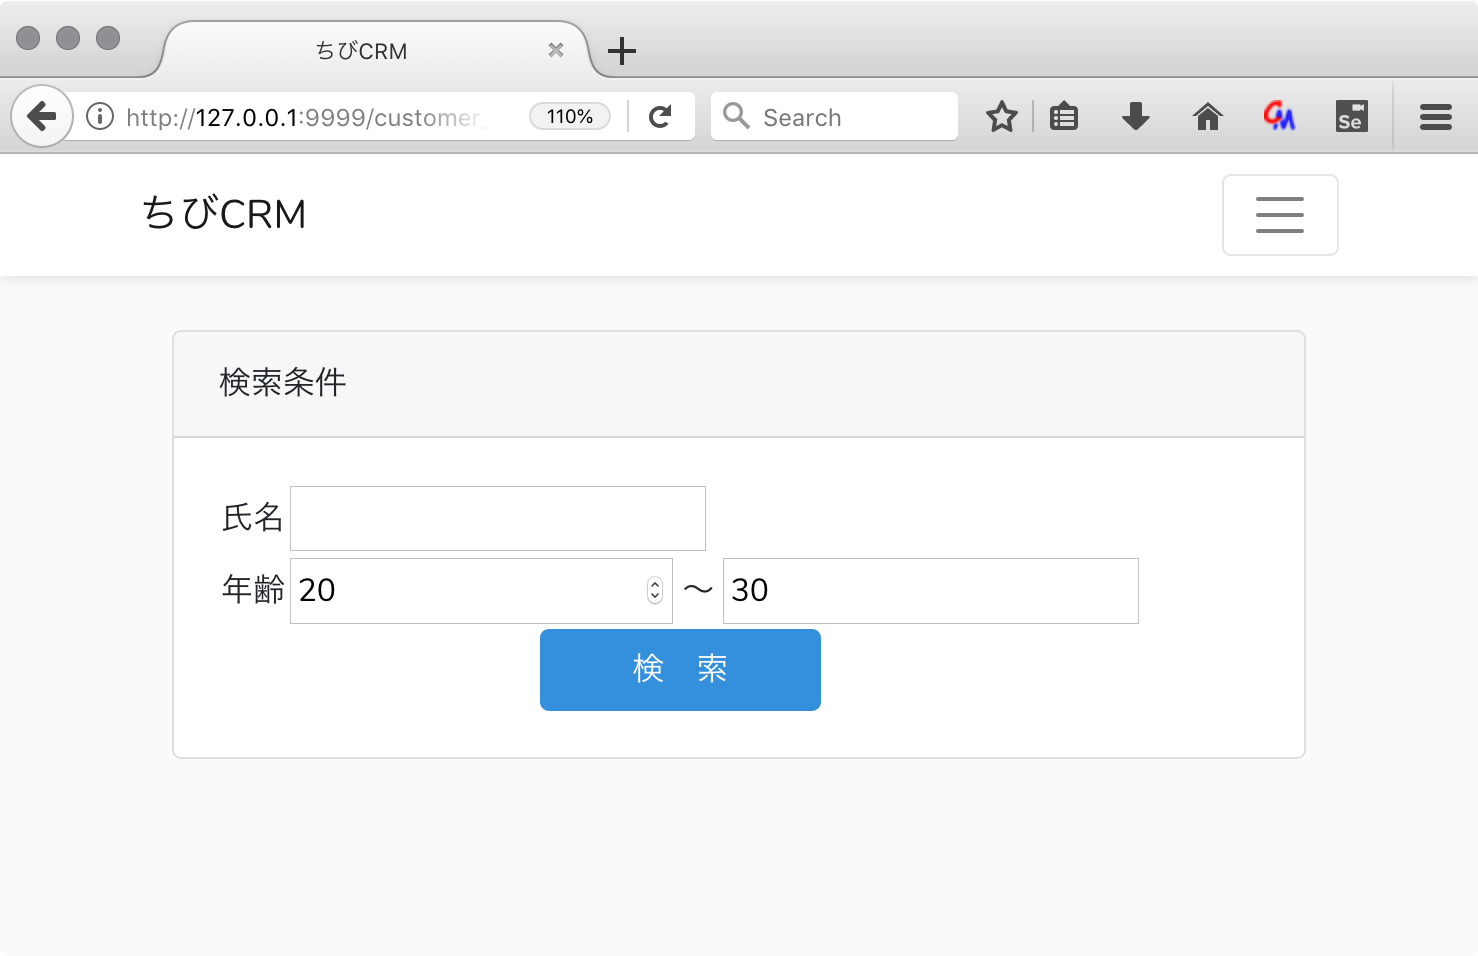
resources/views/customer_search.blade.php
@extends('layouts.app')

@section('content')
    <div class="container">
        <div class="row justify-content-center">
            <div class="col-md-12">
                <div class="card">
                    <div class="card-header">検索条件</div>
                    <div class="card-body">
                        <form action="/customer_search" method="POST">
                            @csrf
                            <table>
                                <tr>
                                    <td>氏名</td>
                                    <td>
                                        <input type="text" name="name"
                                               value="{{isset($validated['name'])?$validated['name']:''}}"
                                        />
                                    </td>
                                </tr>
                                <tr>
                                    <td>年齢</td>
                                    <td>
                                        <input type="number" min="0" max="999" name="age_from"
                                               value="{{isset($validated['age_from'])?$validated['age_from']:''}}"
                                        />
                                        〜
                                        <input type="text" min="0" max="999" name="age_to"
                                               value="{{isset($validated['age_to'])?$validated['age_to']:''}}"
                                        />
                                    </td>
                                </tr>
                                <tr>
                                    <td colspan="2" align="center">
                                        <button type="submit" class="btn btn-primary">  検 索  </button>
                                    </td>
                                </tr>
                            </table>
                        </form>
                        @include('errors')
                    </div>
                </div>
                <br/>
                @if(!empty($customers))
                    <div class="card">
                        <div class="card-header">
                            <p>検索結果</p>
                            <ul>
                                @foreach($search_criterias as $criteria)
                                    <li>{{$criteria}}</li>
                                @endforeach
                            </ul>
                        </div>
                        <div class="card-body">
                            <ul>
                                @foreach($customers as $customer)
                                    <li>
                                        <a href="/customers/{{$customer['id']}}">{{ $customer['name'] }}</a>
                                    </li>
                                @endforeach
                            </ul>
                        </div>
                    </div>
                @endif
            </div>
        </div>
    </div>
@endsection
顧客検索結果
顧客検索結果画面のweb.phpを確認
routes/web.php の以下の部分が
Route::post('customer_search', 'CustomerSearchController@search')->middleware('auth');
CustomerSearchControllerのsearch関数を呼ぶ定義になります。
顧客検索結果画面コントローラの作成
すでに作られている CustomerSearchController.php を使います。
search関数に検索処理を書いていきます。
    public function search(CustomerSearchPost $request, MyApplicationService $myApplicationService)
    {
        $validated = $request->validated();
        $wheres = [];
        $search_criterias = [];

        // 氏名の指定は有るか
        if (!empty($validated['name'])) {
            array_push($wheres, ['name', '=', $validated['name']]);
            array_push($search_criterias, '氏名が' . $validated['name'] . 'に一致する');
        }
        // 年齢 from の指定は有るか
        if (!empty($validated['age_from'])) {
            $ages = $myApplicationService->getBirthdayRange(($validated['age_from']));
            array_push($wheres, ['birthdate', '<=', $ages['end']]);
        }

        // 年齢 to の指定は有るか
        if (!empty($validated['age_to'])) {
            $ages = $myApplicationService->getBirthdayRange(($validated['age_to']));
            array_push($wheres, ['birthdate', '>=', $ages['end']]);
        }

        $customers = Customer::where($wheres)->paginate();
        return view('customer_search', compact('customers', 'search_criterias', 'validated'));

    }
-
CustomerSearchPost $request で バリデーション済みの 検索条件が渡されます。バリデーションが成功しなければsearch関数は実行されません。
public function search(CustomerSearchPost $request, MyApplicationService $myApplicationService)
MyApplicationService $myApplicationService アプリケーションサービスインスタンスが渡されます
クラス型を指定することによって Laravelが自動的に対応するインスタンスを設定してくれます。便利です。 - $wheres 配列に 検索条件を追加していき Customer::where($wheres)->paginate(); で検索結果を得ます。paginate()を呼ぶことで1ページ分のレコードが設定されます。
顧客検索結果画面のcustomer_search.blade.php
resources/views/customer_search.blade.php
@extends('layouts.app')

@section('content')
    <div class="container">
        <div class="row justify-content-center">
            <div class="col-md-12">
                <div class="card">
                    <div class="card-header">検索条件</div>
                    <div class="card-body">
                        <form action="/customer_search" method="POST">
                            @csrf
                            <table>
                                <tr>
                                    <td>氏名</td>
                                    <td>
                                        <input type="text" name="name"
                                               value="{{isset($validated['name'])?$validated['name']:''}}"
                                        />
                                    </td>
                                </tr>
                                <tr>
                                    <td>年齢</td>
                                    <td>
                                        <input type="number" min="0" max="999" name="age_from"
                                               value="{{isset($validated['age_from'])?$validated['age_from']:''}}"
                                        />
                                        〜
                                        <input type="text" min="0" max="999" name="age_to"
                                               value="{{isset($validated['age_to'])?$validated['age_to']:''}}"
                                        />
                                    </td>
                                </tr>
                                <tr>
                                    <td colspan="2" align="center">
                                        <button type="submit" class="btn btn-primary">  検 索  </button>
                                    </td>
                                </tr>
                            </table>
                        </form>
                        @include('errors')
                    </div>
                </div>
                <br/>
                @if(!empty($customers))
                    <div class="card">
                        <div class="card-header">
                            <p>検索結果</p>
                            <ul>
                                @foreach($search_criterias as $criteria)
                                    <li>{{$criteria}}</li>
                                @endforeach
                            </ul>
                        </div>
                        <div class="card-body">
                            <ul>
                                @foreach($customers as $customer)
                                    <li>
                                        <a href="/customers/{{$customer['id']}}">{{ $customer['name'] }}</a>
                                    </li>
                                @endforeach
                            </ul>
                        </div>
                    </div>
                @endif
            </div>
        </div>
    </div>
@endsection
Customer log
 顧客詳細画面で顧客履歴を表示・登録が行えます
web.php に登録処理の定義をします。
Route::post('/customers/{customer}/logs', 'CustomerLogController')->middleware('auth');
php artisan make:controller CustomerLogController --invokable
を実行して ivokableなCustomerLogControllerクラスを作成します。
app/Http/Controllers/CustomerLogController.php
が作られます。
app/Http/Controllers/CustomerLogController.php
<?php

namespace App\Http\Controllers;

use App\Customer;
use App\CustomerLog;
use Illuminate\Http\Request;

class CustomerLogController extends Controller
{
    /**
     * Handle the incoming request.
     *
     * @param \Illuminate\Http\Request $request
     * @return \Illuminate\Http\Response
     */
    public function __invoke(Customer $customer)
    {
        $attribute = $this->validateLog();
        $attribute['customer_id'] = $customer['id']; // カスタマーIDを記録
        $attribute['user_id'] = auth()->user()['id']; // ログを記録した人を保存
        $customerLog = CustomerLog::create($attribute);
        return back();
    }

    protected function validateLog()
    {
        return request()->validate([
            'log' => ['required', 'min:1', 'max:100'],
        ]);
    }

}
おしまい
以上でLaravel6で作る顧客管理システムの記事はおしまいです。
読んでくれて ありがとう。

保留ブロック
社員一覧画面表示
Route::get('/users', 'UserController')->name('社員一覧')->middleware('auth');
http://127.0.0.1:8000/users へのGET リクエストを UserControllerに渡します。ミドルウェアにauthを指定しています。authミドルウェアを指定することでログインされたユーザーのみアクセス出来るようになっています。ミドルウェアの指定を省略することも出来ます。
役職一覧表示
Route::get('/roles', 'RoleController')->name('ロール一覧')->middleware('auth');
http://127.0.0.1:8000/roles へのGET リクエストを RoleControllerに渡します。
顧客画面 表示・登録画面
Route::resource('/customers', 'CustomerController')->middleware('auth');
resourceを指定しているので customersテーブルのCRUD 処理をコントローラー該当するメソッドに割り当てている。
顧客履歴登録
Route::post('/customers/{customer}/logs', 'CustomerLogController')->middleware('auth');
顧客履歴登録処理を行う。POSTリクエストをCustomerLogControllerに渡す。
顧客検索画面を表示する
Route::get('customer_search', 'CustomerSearchController@index')->middleware('auth');
/customer_searchへの GETリクエストをCustomerSearchControllerの index関数に渡す。
顧客検索結果画面を表示する
Route::post('customer_search', 'CustomerSearchController@search')->middleware('auth');
/customer_searchへの POSTリクエストをCustomerSearchControllerの search関数に渡す。
ミドルウェアの説明
Laravelの重要な機能。
ミドルウェアはアプリケーションの手前でRequestを処理し、アプリケーションんから出るResponseに処理を行うことが出来る仕組みです。
今回authミドルウェアを使うことによって ログイン認証を実装しています。
ミドルウェアは php artisan make:middleware コマンドで独自のミドルウェアを作成することもできますが、本記事では独自ミドルウェアは扱いません。
include
includeはbladeでヘッダーやフッターなどの共通部分を一箇所で定義して各画面で読み込んで使う場合などに使用します。
今回エラーメッセージ表示を errors.blade.php に共通化して必要な画面でincludeして使います。