Layoutプロトコルに準拠した構造体を独自に定義すれば、
Viewのコレクションの配置をカスタムすることができる。
これを使って、Viewを円形に配置し、時計の文字盤を作ってみる。
placeSubviewsの挙動を理解する
まずはLayoutに準拠した、RadialLayoutを定義して、
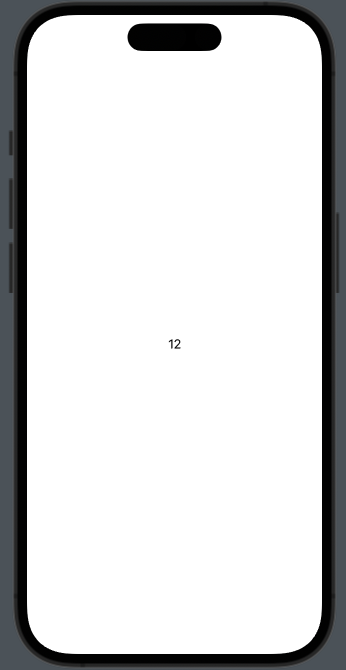
ただのテキストを囲ってみる
struct Clock: View {
    var body: some View {
        RadialLayout {
            Text("12")
        }
    }
}

struct RadialLayout: Layout {
    func sizeThatFits(proposal: ProposedViewSize, subviews: Subviews, cache: inout ()) -> CGSize {
        proposal.replacingUnspecifiedDimensions()
    }

    func placeSubviews(in bounds: CGRect, proposal: ProposedViewSize, subviews: Subviews, cache: inout ()) {

    }
}
boundsはRadialLayoutが占有する画面の領域。この場合だと画面全体。
subviewsはRadialLayoutに渡されたViewの配列。この場合だとText("12")が入った配列。
placeメソッドで座標を指定すれば、その要素は指定した座標に描画される。
struct Clock: View {
    var body: some View {
        RadialLayout {
            Text("12")
        }
    }
}

struct RadialLayout: Layout {
    func sizeThatFits(proposal: ProposedViewSize, subviews: Subviews, cache: inout ()) -> CGSize {
        proposal.replacingUnspecifiedDimensions()
    }

    func placeSubviews(in bounds: CGRect, proposal: ProposedViewSize, subviews: Subviews, cache: inout ()) {
        subviews[0].place(at: CGPoint(x: 50, y: 50), proposal: .unspecified)
    }
}
画面の中心を取得するには、以下のようにする。
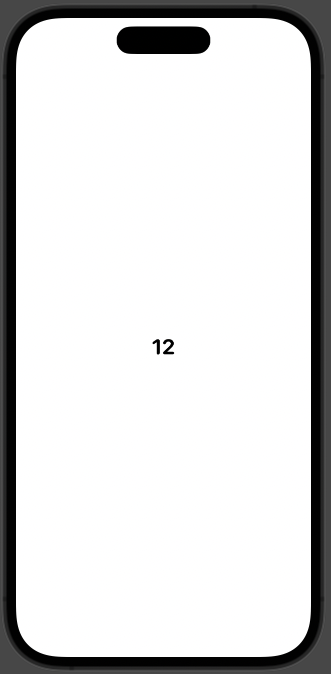
(わかりやすいように、文字も大きく太くした)
struct Clock: View {
    var body: some View {
        RadialLayout {
            Text("12")
                .font(.system(.title, design: .rounded)).bold()
        }
    }
}

struct RadialLayout: Layout {
    func sizeThatFits(proposal: ProposedViewSize, subviews: Subviews, cache: inout ()) -> CGSize {
        proposal.replacingUnspecifiedDimensions()
    }

    func placeSubviews(in bounds: CGRect, proposal: ProposedViewSize, subviews: Subviews, cache: inout ()) {
        subviews[0].place(at: CGPoint(x: bounds.midX, y: bounds.midY), proposal: .unspecified)
    }
}
画面の中心は取得できたが、これでは要素の左上が画面の中心に配置されただけ。
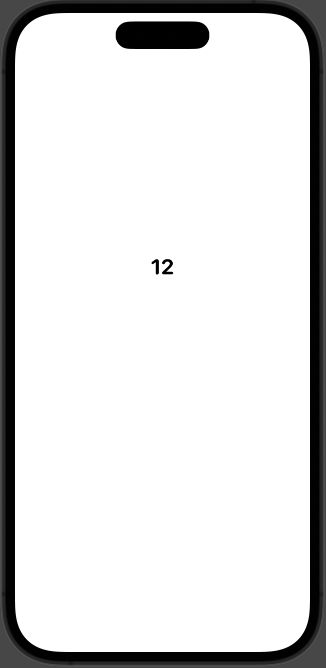
要素の中心を画面の中心に配置するには、anchorを指定する。
struct Clock: View {
    var body: some View {
        RadialLayout {
            Text("12")
                .font(.system(.title, design: .rounded)).bold()
        }
    }
}

struct RadialLayout: Layout {
    func sizeThatFits(proposal: ProposedViewSize, subviews: Subviews, cache: inout ()) -> CGSize {
        proposal.replacingUnspecifiedDimensions()
    }

    func placeSubviews(in bounds: CGRect, proposal: ProposedViewSize, subviews: Subviews, cache: inout ()) {
        subviews[0].place(at: CGPoint(x: bounds.midX, y: bounds.midY), anchor: .center, proposal: .unspecified)
    }
}
CGPointのapplyingメソッドを使えば、軸を回転させることができる。
(0度)
struct Clock: View {
    var body: some View {
        RadialLayout {
            Text("12")
                .font(.system(.title, design: .rounded)).bold()
        }
    }
}

struct RadialLayout: Layout {
    func sizeThatFits(proposal: ProposedViewSize, subviews: Subviews, cache: inout ()) -> CGSize {
        proposal.replacingUnspecifiedDimensions()
    }

    func placeSubviews(in bounds: CGRect, proposal: ProposedViewSize, subviews: Subviews, cache: inout ()) {
        let angle = Angle.degrees(0.0).radians

        var point = CGPoint(x: 0, y: -100)
            .applying(CGAffineTransform(rotationAngle: angle))

        point.x += bounds.midX
        point.y += bounds.midY

        subviews[0].place(at: point, anchor: .center, proposal: .unspecified)
    }
}
(90度)
struct Clock: View {
    var body: some View {
        RadialLayout {
            Text("12")
                .font(.system(.title, design: .rounded)).bold()
        }
    }
}

struct RadialLayout: Layout {
    func sizeThatFits(proposal: ProposedViewSize, subviews: Subviews, cache: inout ()) -> CGSize {
        proposal.replacingUnspecifiedDimensions()
    }

    func placeSubviews(in bounds: CGRect, proposal: ProposedViewSize, subviews: Subviews, cache: inout ()) {
        let angle = Angle.degrees(90.0).radians

        var point = CGPoint(x: 0, y: -100)
            .applying(CGAffineTransform(rotationAngle: angle))

        point.x += bounds.midX
        point.y += bounds.midY

        subviews[0].place(at: point, anchor: .center, proposal: .unspecified)
    }
}
あとはこれを動的にやればOK
動的に配置する
1~12のテキストをRadialLayoutに渡す
subviewをfor文で回して、indexによって角度を変える。
struct Clock: View {
    let numbers = [12, 1, 2, 3, 4, 5, 6, 7, 8, 9, 10, 11]

    var body: some View {
        RadialLayout {
            ForEach(numbers, id: \.self) { item in
                Text("\(item)")
                    .font(.system(.title, design: .rounded)).bold()
            }
        }
    }
}

struct RadialLayout: Layout {
    func sizeThatFits(proposal: ProposedViewSize, subviews: Subviews, cache: inout ()) -> CGSize {
        proposal.replacingUnspecifiedDimensions()
    }

    func placeSubviews(in bounds: CGRect, proposal: ProposedViewSize, subviews: Subviews, cache: inout ()) {
        for (index, subview) in subviews.enumerated() {
            let radius = bounds.width / 3.0
            let angle = Angle.degrees(360.0 / Double(subviews.count)).radians

            var point = CGPoint(x: 0, y: -radius)
                .applying(CGAffineTransform(rotationAngle: angle * Double(index)))

            point.x += bounds.midX
            point.y += bounds.midY

            subview.place(at: point, anchor: .center, proposal: .unspecified)
        }
    }
}
いろいろ付け加えていい感じにする
struct Clock: View {
    let numbers = [12, 1, 2, 3, 4, 5, 6, 7, 8, 9, 10, 11]

    var body: some View {
        ZStack {
            RadialLayout {
                ForEach(numbers, id: \.self) { item in
                    Text("\(item)")
                        .font(.system(.title, design: .rounded)).bold()
                }
            }
            .frame(width: 240)

            RadialLayout {
                ForEach(numbers, id: \.self) { item in
                    Text("\(item * 5)")
                        .font(.system(.caption, design: .rounded))
                }
            }
            .frame(width: 360)

            Circle()
                .strokeBorder(style: StrokeStyle(lineWidth: 10, dash: [1, 10]))
                .frame(width: 220)
        }
    }
}

struct RadialLayout: Layout {
    func sizeThatFits(proposal: ProposedViewSize, subviews: Subviews, cache: inout ()) -> CGSize {
        proposal.replacingUnspecifiedDimensions()
    }

    func placeSubviews(in bounds: CGRect, proposal: ProposedViewSize, subviews: Subviews, cache: inout ()) {
        for (index, subview) in subviews.enumerated() {
            let radius = bounds.width / 3.0
            let angle = Angle.degrees(360.0 / Double(subviews.count)).radians

            var point = CGPoint(x: 0, y: -radius)
                .applying(CGAffineTransform(rotationAngle: angle * Double(index)))

            point.x += bounds.midX
            point.y += bounds.midY

            subview.place(at: point, anchor: .center, proposal: .unspecified)
        }
    }
}


