ソースコード:https://github.com/ShionKoga/configure-values-differently-per-environment
やりたいこと
開発中はhttp://localhost:8080
TestFlight配信時はhttps://stage.hoge.com
AppStore配信時はhttps://hoge.com
のように、環境に応じて何かしら値を切り替えたい場面があるかと思います。
今回は、バックエンドのホストを例に説明していきます。
プロジェクトを作成する
適当にiOSプロジェクトをテストなしで作成してください。
Schemeを理解する
Xcodeがビルド時、アプリケーション実行時、テスト時などの設定値をひとまとめにしたものがSchemeです。
Xcode上部でSchemeを切り替えたり、編集する画面を開くことができます。

デフォルトで1つのスキームが作成されています。
「edit Scheme」をクリックすると、Schemeを編集することができます。

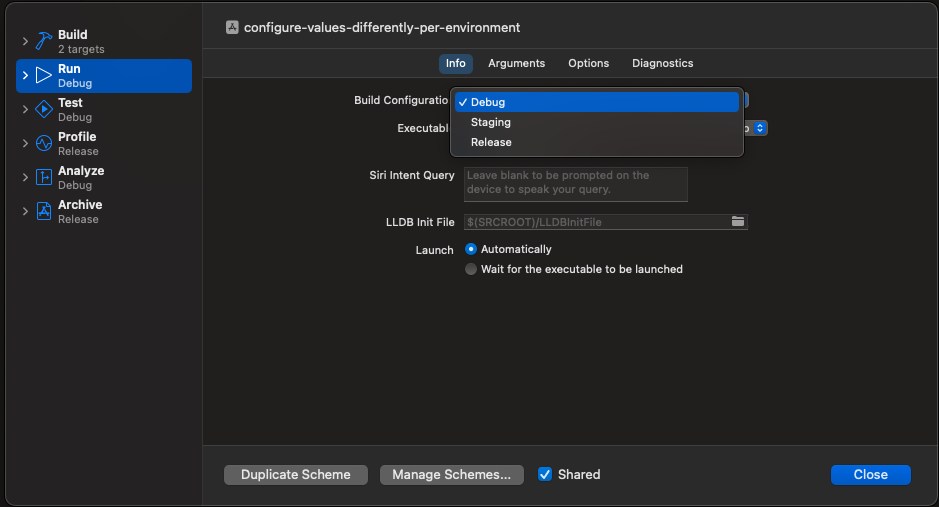
各アクションに対して「Build Configuration」の選択項目があり、それぞれDebugもしくはReleaseが選択できます。
環境に応じてバックエンドの参照先のような値を変更するために、このBuild Configurationの値を使用します。
Build Configurationで選択できる値を増やす
プロジェクトのInfoタブから設定することができます。

Configurationsの下にある「+」マークを押して、新しいStagingのConfigurationを作成しましょう。
「Duplicate "Debug" Configuration」と「Duplicate "Release" Configuration」のどちらを選択しても構いません。
下の画像の状態になっていればOKです。

先ほどのScheme編集画面で選択できるBuild Configurationの項目にStagingが増えていることが確認できると思います。

環境ごとのSchemeを用意する
開発PCのシュミレーターでの実行時、TestFlight配信時、AppStore配信時のSchemeをそれぞれ用意していきます。
すでにRunアクション(アプリケーション実行時)のBuild ConfigurationがDebugになっているSchemeは存在しているので、
Staging, Releaseの合計2つのSchemeを追加します。
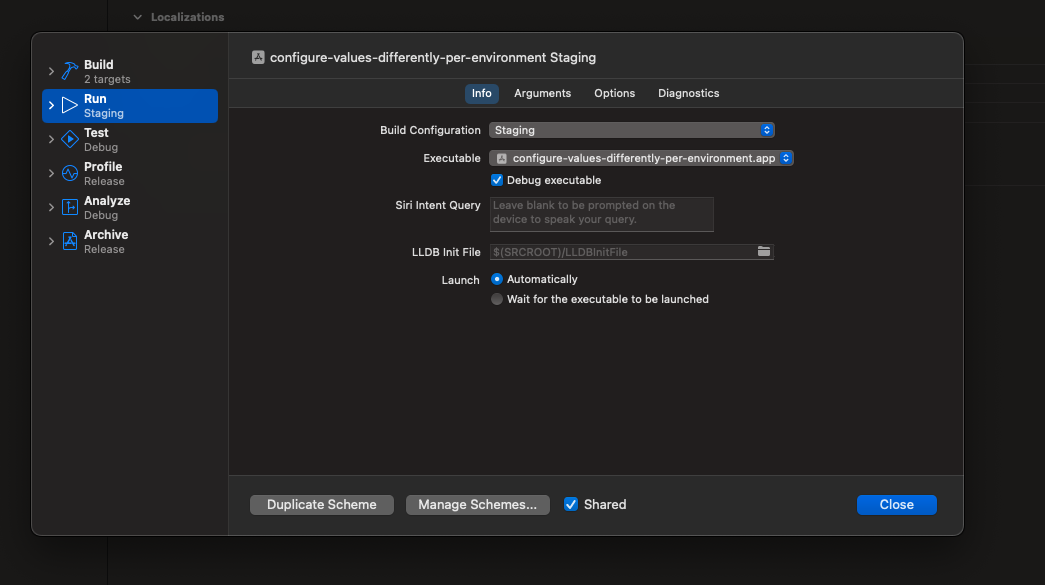
作成されたSchemeの編集画面を開き、RunアクションのBuild ConfigurationをStagingに変更します

同様の手順でRunアクションのBuild ConfigurationがReleaseになっているSchemeも作成してください。

実行時のSchemeが3つ選べる状態になっているはずです。
作ったこの3つのSchemeをTestFlight配信時、AppStore配信時などに応じて切り替えてビルドすることで、
環境に応じて実行時のBuild Configurationの値を変えることが可能になります。
| 環境 | Scheme | Build Configuration |
|---|---|---|
| 開発PCのシュミレーターでの実行時 | configure-values-differently-per-environment | Debug |
| TestFlight配信時 | configure-values-differently-per-environment Staging | Stage |
| AppStore配信時 | configure-values-differently-per-environment Release | Release |
Build Configurationに応じて値を切り替える
Info.plistに新たに値を追加します。
| Key | Type | Value |
|---|---|---|
| APIConfiguraiton | String | $(CONFIGURATION) |
$()の中に環境変数名を指定することで、環境変数をplistの値として指定することができます。
この値を、Swiftファイルから読み取ってみましょう。
ContentView.swiftを以下のように編集します。
struct ContentView: View {
    var body: some View {
        VStack {
            Text(Bundle.main.object(forInfoDictionaryKey: "APIConfiguration") as! String)
        }
        .padding()
    }
}
configure-values-differently-per-environment選択時:

configure-values-differently-per-environment Staging選択時:

configure-values-differently-per-environment Release選択時:

Info.plistの値を参照することができたので、この値を使ってバックエンドのホストを切り替えていきます。
Configuration.swiftとEnvironment.swiftをそれぞれ以下のように作成します。
import Foundation

struct Configuration {
    static var environment: Environment {
        get {
            let configuration = Bundle.main.object(forInfoDictionaryKey: "APIConfiguration") as! String
            return Environment(rawValue: configuration)!
        }
    }
}
enum Environment: String {
    case Debug
    case Staging
    case Release

    var baseUrl: String {
        switch self {
        case .Debug: return "http://localhost:8080"
        case .Staging: return "https://stage.yourapp.com"
        case .Release: return "https://yourapp.com"
        }
    }
}
structConfigurationのstatic var environmentは、
Info.plistのAPIConfigurationの値に応じて、enum Environmentを初期化して返します。
enum Environmentの baseUrl は自身のrowValueに応じて、適切なバックエンドのホストを返します。
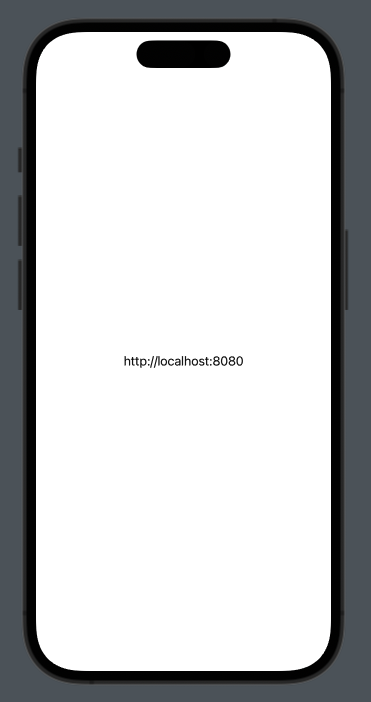
これを試しにContentView で表示してみます。
struct ContentView: View {
    var body: some View {
        VStack {
            Text(Configuration.environment.baseUrl)
        }
        .padding()
    }
}
configure-values-differently-per-environment選択時:

configure-values-differently-per-environment Staging選択時:

このようにConfiguration.environment.baseUrlを参照することで、環境ごとに異なるバックエンドのホストを切り替えることが可能になります。


