Daniel Shiffmanさんのcodingtrainのチュートリアルを参考に
特徴抽出を用いた分類器(Classifier with Feature Extractor)を試してみました。
featureExtractor()メソッドを用いて実装できます。
-
ml5.js: Feature Extractor Classification
https://www.youtube.com/watch?v=eeO-rWYFuG0&&feature=youtu.be -
featureExtractor()
https://ml5js.org/docs/FeatureExtractor
ファイルは以下にアップしています。
https://www.dropbox.com/s/i7f8fs6wiznzxs6/02_2_featureExtractorClassification-demo.zip?dl=0
コードは以下です。
試す場合は、プロジェクトフォルダに「images」フォルダを設置し、配下に「happy.png」「sad.png」を置いてください。
ライブラリはCDNを読み込んでますのでローカルサーバー上で実行してください。
<!DOCTYPE html>
<html>
<head>
	<meta charset="UTF-8">
	<meta http-equiv="X-UA-Compatible" content="IE=edge">
	<meta name="viewport" content="width=device-width, initial-scale=1">

	<title>Feature Extractor Classification</title>
	<style>
		body {
			width: 100%;
			height: 100%;
			margin: 0;
			padding: 0;
			overflow: hidden;
		}
		#inputContainer {
			position: absolute;
			top: 10px;
			left: 10px;
		}
		input, button {
			display: block;
			margin: 0 10px 10px 0;
		}
	</style>
	<script src="https://cdnjs.cloudflare.com/ajax/libs/p5.js/0.6.1/p5.min.js"></script>
	<script src="https://cdnjs.cloudflare.com/ajax/libs/p5.js/0.6.1/addons/p5.dom.min.js"></script>
	<script src="https://unpkg.com/ml5@0.1.1/dist/ml5.min.js"></script>
	<script src="sketch.js"></script>
</head>
<body>
	<div id="inputContainer"></div>
</body>
</html>
let mobilenet;
let classifier;
let video;
let happyIco;
let sadIco;
let label = '';
let preLabel = '';
let happyButton;
let sadButton;
let trainButton;
let count = 0;
// MobileNetモデルの準備が完了したときコールバック関数として呼ばれる
function modelReady() {
console.log('モデルが準備できた!!!');
}
// ビデオ入力したクラス分類機の準備が完了したときコールバック関数として呼ばれる
function videoReady() {
console.log('ビデオが準備できた!!!');
}
// トレーニング完了時に1度だけ実行される関数
function whileTraining(loss) {
if (loss == null) {
console.log('トレーニングが完了した!');
// 画像の予測を取得する
classifier.classify(gotResults);
} else {
console.log(loss);
}
}
// トレーニング完了時に再帰的に実行される関数
function gotResults(error, result) {
if (error) {
console.error(error);
} else {
// ラベルに結果を代入
label = result;
// 画像の予測を取得する
// 再帰的に実行
classifier.classify(gotResults);
}
}
function setup() {
// キャンバスを生成する
createCanvas(windowWidth, windowHeight);
// ウェブカメラから映像をキャプチャし、Video要素を生成
video = createCapture(VIDEO);
// Video要素を非表示にする
video.hide();
happyIco = loadImage('images/happy.png');
sadIco = loadImage('images/sad.png');
// 背景を黒で塗りつぶす
background(0);
// MobileNetで事前学習された特徴を展開
mobilenet = ml5.featureExtractor('MobileNet', modelReady);
// ビデオを入力にして、既に展開させた特徴抽出でクラス分類機を生成する
classifier = mobilenet.classification(video, videoReady);
// 「楽しい」ボタンを生成する
happyButton = createButton('楽しい');
happyButton.parent('inputContainer');
// 「楽しい」ボタンが押された時の処理
happyButton.mousePressed(function() {
// クラス分類機に「楽しい」ラベルを付与して画像を追加
classifier.addImage('happy');
});
// 「悲しい」ボタンを生成する
sadButton = createButton('悲しい');
sadButton.parent('inputContainer');
// 「悲しい」ボタンが押された時の処理
sadButton.mousePressed(function() {
// クラス分類機に「悲しい」ラベルを付与して画像を追加
classifier.addImage('sad');
});
// 「トレーニング開始」ボタンを生成する
trainButton = createButton('トレーニング開始');
trainButton.parent('inputContainer');
// 「トレーニング開始」ボタンが押された時の処理
trainButton.mousePressed(function() {
// クラス分類機を再トレーニングする(Transfer Learning 転移学習)
classifier.train(whileTraining);
});
}
function draw() {
// 背景を黒で塗りつぶし
background(0);
// ウェブカメラからの映像をキャンバスに描画
// ミラー表示
imageMode(CORNER)
push();
translate(width,0);
scale(-1.0,1.0);
image(video, 0, 0, width, height);
pop();
// 画像の直径は横幅の1/10
let diameter = width / 10;
// 円を描画
imageMode(CENTER);
// 状態が変更(happy <-> sad)されたらカウンターをリセット
if (label !== preLabel) count = 0;
// 上下左右に画像を配置
for ( let x = 0; x < width; x += diameter) {
for ( let y = 0; y < height; y += diameter) {
// 回転のタイミングをずらす
let delay = (x / diameter + y / diameter) * 0.2;
// 画像のサイズ
let scale = Math.min(1, count/90);
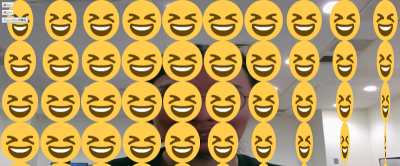
if (label == 'happy') {
// 楽しい顔のアイコンを表示
image(happyIco, x + diameter/2, y + diameter/2, diameter*Math.sin(count * Math.PI / 180 - delay) * scale, diameter * scale);
} else if (label == 'sad') {
// 悲しい顔のアイコンを表示
image(sadIco, x + diameter/2, y + diameter/2, diameter*Math.sin(count * Math.PI / 180 - delay) * scale, diameter * scale);
}
}
}
count+=4;
// 前フレームのlabelをキャッシュしておく
preLabel = label;
}
function windowResized() {
resizeCanvas(windowWidth, windowHeight);
}
ローカルサーバーを立ち上げ、ブラウザでindex.htmlを開いたら、
以下の手順でテストしてみてください。
- ウェブカメラの前で前でポーズをとって、[楽しい]ボタンをクリックします。約15枚の画像を追加してみてください。
- ウェブカメラの前でポーズを変えて、[悲しい]ボタンをクリックします。約15枚の画像を追加してみてください。
- [トレーニング開始]をクリックして、トレーニングプロセスが完了するまで待ちます。 (コンソールログにプロセスが表示されます。)
- トレーニングが完了したら、モデルをトレーニングした2つのポーズを切り替えます。
※カメラのいろんな位置で、ポーズ画像を追加した方が精度が上がるかと思います。
-
楽しい
-
悲しい