経緯
シムシティみたいな箱庭ゲームで、昼から夜へ、夜から昼へ、シームレスに風景が切り替わるようなアニメーションを作りたい

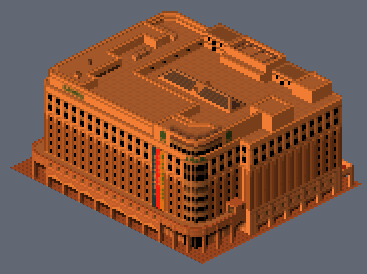
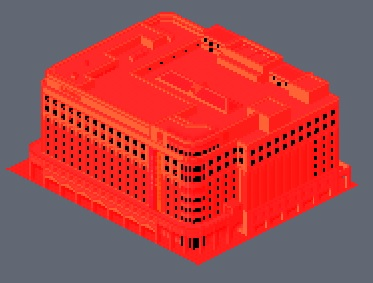
イメージとしては上の画像のように、昼用(左上)と夜用(右上)をピクセル合成して夕方(左下)や夜明け前(右下)の絵を0~1の適用率付きで出せるようにしたい。夜の照明部分はそのまま出したい。
レタッチソフトでの合成実験
冒頭の画像は Photopea というフォトショップ風オンラインツールで作成したもので、フォトショップと同じような機能が使えてpsd形式でも出力できるものです。

このpsdファイルはこちら(Github)に置いてますので、ご参考まで。
具体的な設定方法は
- 昼用画像レイヤーの上に夜用画像レイヤーを重ねる
- 昼用画像にレイヤースタイルのカラーオーバーレイでオレンジやブルーを指定する
- カラーオバーレイのブレンドモードを線形焼きこみ(linear burn)にする、適用率は適宜調節
- 夜用画像レイヤーの重ね合わせモードを、昼夜のうち明るい方のピクセルを採用する(lighter color)にする、適用率100%
※サンプルとして使用した画像は FreeTrain というオープンソースのゲーム用のもので、作者の了解を得て使用させていただいてます。
シェーダー実装
前述の処理をコードに変換するとこうなります。
Shader "Custom/PseudoSpriteAdv"
{
    Properties
    {
        [NoScaleOffset] _DayTex ("Day Texture", 2D) = "white" {}
        [NoScaleOffset] _NightTex ("Night Texture", 2D) = "black" {}
        [MaterialToggle] _NightTexEnabled ("Night Texture Enabled", Float) = 1
        _DayRatio ("Day Night Mixture Ration", Range (0.0, 1.0)) = 0.5
        _Transpalent ("Transpalent Color", Color) = (1,0,1,1)
        _BurnColor ("Burn Color", Color) = (1,0.7,0,1)
        _BurnRatio ("Burn Ration", Range (0.0, 1.0)) = 0.5
    }
    SubShader
    {
        Tags { "RenderType"="Opaque" }
        LOD 100

        Pass
        {
            CGPROGRAM
            #pragma vertex vert
            #pragma fragment frag
            // make fog work
            #pragma multi_compile_fog

            #include "UnityCG.cginc"

            struct appdata
            {
                float4 vertex : POSITION;
                float2 uv : TEXCOORD0;
            };

            struct v2f
            {
                float2 uv : TEXCOORD0;
                UNITY_FOG_COORDS(1)
                float4 vertex : SV_POSITION;
            };

            sampler2D _DayTex;
            float4 _DayTex_ST;
            sampler2D _NightTex;
            float4 _NightTex_ST;

            float _NightTexEnabled;
            fixed3 _Transpalent;
            float _DayRatio;

            fixed3 _BurnColor;
            float _BurnRatio;

            v2f vert (appdata v)
            {
                v2f o;
                o.vertex = UnityObjectToClipPos(v.vertex);
                o.uv = TRANSFORM_TEX(v.uv, _DayTex);
                UNITY_TRANSFER_FOG(o,o.vertex);
                return o;
            }

            fixed4 frag (v2f i) : SV_Target
            {
                // sample the texture
                fixed4 colDay = tex2D(_DayTex, i.uv);

                // stop rendering if it is transpalent color.
                fixed3 diff = abs(colDay.rgb - _Transpalent.rgb);
                if(length(diff) < 0.0001) discard;

                // use 25% brightness of day texture, if night texture is disabled.
                fixed4 colNight = lerp(colDay * 0.25, tex2D(_NightTex, i.uv), _NightTexEnabled);

                // apply color burn effect to the day color.
                fixed3 colBurn = (1 - _BurnColor.rgb) * _BurnRatio;
                colDay = fixed4(colDay.rgb - colBurn,1);

                // mixing day and night by ratio, unless it lowers night color.
                fixed4 col = max(lerp(colNight, colDay, _DayRatio), colNight);

                // apply fog
                UNITY_APPLY_FOG(i.fogCoord, col);
                return col;
            }
            ENDCG
        }
    }
}
ソースの前半部分はパラメーターの宣言などで、基本を知ってれば特に解説が必要なところはないと思いますので、frag関数内の解説だけさせていただきます。
フラグメントシェーダー
colDay に昼用画像のピクセルを取得します。私的理由でアルファチャンネルではなくカラーパレットで透明部分を指定したいので、Transpalentカラーに指定された色と(ほぼ)同じであればピクセルの書き込みを辞めています。
        // sample the texture
        fixed4 colDay = tex2D(_DayTex, i.uv);

        fixed3 diff = abs(colDay.rgb - _Transpalent.rgb);
        if(length(diff) < 0.0001) discard;
colNight に夜用のピクセルを取得します。 _NightTexEnabled=0 のときは、昼用画像の25%の明度のものを使用します。
※夜用テクスチャも、昼用テクスチャを明度25%に下げたものをベースに照明部分などを加筆して作られています。
        // use 25% brightness of day texture, if night texture is disabled.
        fixed4 colNight = lerp(colDay * 0.25, tex2D(_NightTex, i.uv), _NightTexEnabled);
colDay に焼き込みカラー(linear color burn)効果を適用します。焼き込みカラーは 画像Aの色 + 画像Bの色 ― 1 で計算できます。(参考: AfterEffects/Photoshopにある描画モードを実装する )
下の式はちょっと変形してるけど、実質同じ計算です。
        // apply color burn effect to the day color.
        fixed3 colBurn = (1 - _BurnColor.rgb) * _BurnRatio;
        colDay = fixed4(colDay.rgb - colBurn,1);
最後に昼夜のピクセルを合成します。
colDay と colNight を _DayRatio の比率で混ぜ合わせますが、 colNight の方が明るい(=大きい)なら colNight をそのまま使います。
        // mixing day and night by ratio, unless it lowers night color.
        fixed4 col = max(lerp(colNight, colDay, _DayRatio), colNight);
おまけ:他のブレンドモードを試してみた
ここで、なぜ焼き込みカラーという合成方法を選んだかについて、補足します。
一言で言えば「それが一番綺麗に見えた」ということですが、他の合成方法と比較してみます。
なお、下記のサンプル画像はいずれも適用度 80% (_BurnRatio=0.8) の場合の結果です。
通常混色(Normal)
単に lerp で混ぜるだけです。 colDay = fixed4(colDay.rgb - colBurn,1); の行を colDay = fixed4(lerp(colDay.rgb, _BurnColor.rgb, _BurnRatio),1); に書き換えるとできます。
適用度を増すほど、霧に包まれたように元絵の陰影メリハリが薄れてしまいますね。論外です。

乗算(Multiply)
RGBをかけ合わせる方法です。 colDay = fixed4(colDay.rgb - colBurn,1); の行を colDay = fixed4( lerp(colDay.rgb, _BurnColor.rgb * colDay.rgb, _BurnRatio),1); に書き換えるとできます。
陰影のメリハリは維持できるが、色眼鏡通したよう。人によってはこっちの方がいいという方もいるかも知れませんが、夕焼けにはちょっと明るすぎる気がします。

リニア焼きこみ(Linear burn)
最初に挙げたコードそのままです。
_BurnColorは他の合成方法と同じですが、適用度が高いと赤味が増して陰影がより強くなり、一層夕焼けっぽい気がします【採用!】。

焼きこみカラー(Color burn)
リニア焼きこみと似た名前で、焼きこみカラーって合成法もあるんですが、なんか明らかに変などぎつい色にしかならなかったので不採用です。一応式はこんな感じですかね?colDay = fixed4( 1-(1 - _BurnColor.rgb) / colDay.rgb * _BurnRatio),1);どこに _BurnRatio を掛けるのが適切なのかよくわかりませんでした。
参考
http://www.simplefilter.de/en/basics/mixmods.html
http://www.fbs.osaka-u.ac.jp/labs/ishijima/Photoshop-01.html
タイムラプス風の昼夜変化アニメーション
昼夜の切り替わりがスムーズに見えるかどうか確かめるため、アニメーションさせてみました。
using UnityEngine;

[ExecuteInEditMode]
public class DayNightAnimator : MonoBehaviour
{
    const float SUNSET_BEGIN = 0.1f;
    const float SUNSET_END = 0.4f;
    const float SUNRISE_BEGIN = 0.6f;
    const float SUNRISE_END = 0.9f;
    const float LIGHT_BEGIN = 0.2f;
    const float LIGHT_END = 0.5f;

    private void Update()
    {
        MeshRenderer renderer = GetComponent<MeshRenderer>();
        if (renderer == null) return;

        Material material  = renderer.sharedMaterial;
        float time = Mathf.Repeat(Time.fixedTime / 5f, 1f);

        if (SUNSET_BEGIN < time && time < SUNSET_END) // 夕焼けタイム
        {
            float rate = (time - SUNSET_BEGIN) / (SUNSET_END - SUNSET_BEGIN);
            material.SetFloat("_DayRatio", 1f - rate);
            material.SetFloat("_BurnRatio", rate);
            material.SetColor("_BurnColor", new Color(1f, 0.3f, 0f));
        }

        bool isLight = LIGHT_BEGIN < time && time < LIGHT_END;
        material.SetFloat("_NightTexEnabled", isLight ? 1f : 0f);

        if (SUNRISE_BEGIN < time && time < SUNRISE_END) // 夜明け前タイム
        {
            float rate = (time - SUNRISE_BEGIN) / (SUNRISE_END - SUNRISE_BEGIN);
            material.SetFloat("_DayRatio", rate);
            material.SetFloat("_BurnRatio", 1f - rate);
            material.SetColor("_BurnColor", new Color(0.2f, 0.6f, 1.0f));
        }


        //Debug.LogFormat("{0}", time);
        renderer.material = material;

    }
}
その他のソースやプレハブはこちら(GitHub)
結果
いかがでしょう? 深夜には照明を落として、以降夕方までは照明が消えたまま、という風にしてみました。 _NightTexEnabled を 0 にすると、夜用画像の代わりに昼用画像を暗くしたものが使われるので、ご覧のように任意のタイミングで照明をOn/Offできるわけです。
上記は、以前書いた『クォータービューのドット絵に深度バッファを適用する』で作ったシーンの建物に適用してみましたが、上に書いたシェーダー自体はUIやSpirteなどに汎用的に使えます。(やろうと思えば3Dオブジェクトにも適用できますが、フォグとかライティングなど一切考慮してないので使い道はなさそうですね。)
補足
シムシティのようなゲームを考えた場合、建物それぞれが夕焼け効果をレンダリングするのは無駄が多いと思われます。昼と夜のシーン画像をレンダリングして、ポストエフェクトなどでシーン全体で夕焼け効果を合成するのが理想的でしょう。いずれ機会を見つけてチャレンジしたいですね。

