例えば、VMインストール時にインターネット用のIPを前もって採番管理するのってちょっと面倒ですよね?こんな時、ホストの管理IPとVM間にDHCPがあれば何も準備せずインストールできるので楽です。また、特定のVLAN等に設定することも可能です。
参考:
Setup Simple Zone With SNAT and DHCP
前提
- ホストの管理IPにSNATでDHCPをVMに提供する場合の手順とする
- Firewallの設定は割愛
インストール
- dnsmasqのインストール(All)
ホストにログインし下記コマンドを実施。
既にdnsmasqがインストールされていないことを確認してからインストールする。
※他用途で使用しいる場合は要検討
# systemctl list-unit-files | grep dnsmasq
# apt install dnsmasq
SDN設定
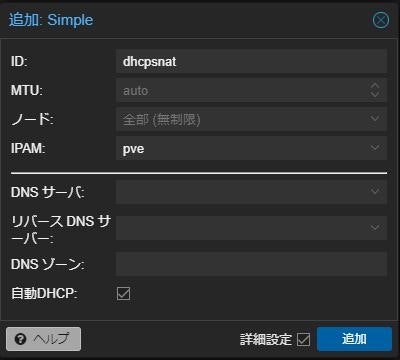
- ゾーン(Simple)を追加する
入力箇所はIDと自動DHCPの☑ボックス。

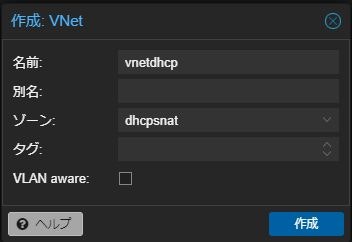
- Vnetを追加する
入力箇所は名前とゾーン(上記で作成したゾーンを選択)

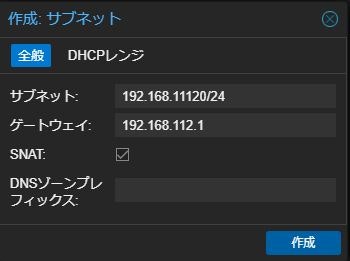
- サブネットの作成
[IP Address]/[Prefix]の形式でサブネットを入力してSNATを☑。
※サブネット内の適当なゲートウェイを入れておけば作業用端末からSSHできます。

右のタブからDHCPのレンジを設定

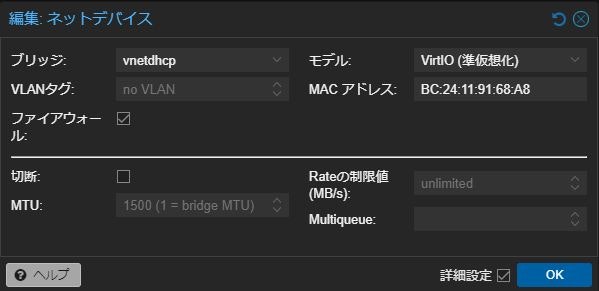
VMへの設定方法
ルーティング設定
- スタティックルートの設定
作業端末にて192.168.112.0/24の宛先はインターフェイス番号XXで[Host IP]を経由するというルーティングを管理者権限で設定する。但し、1サブネットに対し、設定できるホストのIPは一つ。
> route add -p 192.168.112.0 mask 255.255.255.0 [Host IP] if XX
以上
