はじめに 👋
本記事は以下のみのるんさん(@minorun365)の著書と記事を参考に作成しました:
- 書籍:Amazon Bedrock 生成AIアプリ開発入門
- 記事:Amazon BedrockのClaude 3をStreamlitで動かしてみる
- コード:bedrock-book/chapter5/2_langchain-react-agent.py
環境構築については上記Qiita記事を参考にしてください。
本記事では、GitHubで公開されているコードをベースに、Web検索機能とDynamoDBによる会話履歴保存機能を組み合わせる方法を紹介します。
できること 🎯
- 通常のチャット機能
- Web検索機能(DuckDuckGo検索 + Webスクレイピング)
- DynamoDBでの会話履歴保存
- 検索機能のON/OFF切り替え
事前準備 ⚙️
AWSの環境構築
本記事の実装を試すには、まずローカルPCでAmazon Bedrockを動かせる環境が必要です。
環境構築については、みのるんさんのQiita記事「Amazon BedrockのClaude 3をStreamlitで動かしてみる」を参照してください。
実装内容の解説 🛠️
実装は2つのファイルに分かれています:
-
main.py: メインのチャットボット機能 -
web_search.py: Web検索機能
main.py
基本的なチャットボット機能を実装したファイルです:
# main.py
import streamlit as st
from langchain_aws import ChatBedrock
from langchain_community.chat_message_histories import DynamoDBChatMessageHistory
from langchain_core.messages import HumanMessage
from langchain_core.prompts import ChatPromptTemplate, MessagesPlaceholder
from web_search import get_web_search_result

# セッションIDを定義
if "session_id" not in st.session_state:
    st.session_state.session_id = "session_id"

# セッションに会話履歴を定義
if "history" not in st.session_state:
    st.session_state.history = DynamoDBChatMessageHistory(
        table_name="bsc_db", session_id=st.session_state.session_id
    )

# セッションにLangChainの処理チェーンを定義
if "chain" not in st.session_state:
    # プロンプトを定義
    prompt = ChatPromptTemplate.from_messages(
        [
            ("system", """絵文字入りでフレンドリーに会話してください。
            Web検索結果が含まれている場合は、その情報も活用して回答してください。"""),
            MessagesPlaceholder(variable_name="messages"),
            MessagesPlaceholder(variable_name="human_message"),
        ]
    )

    # チャット用LLMを定義
    chat = ChatBedrock(
        model_id="arn:aws:bedrock:us-east-1:XXXXXXXX:inference-profile/us.anthropic.claude-3-5-sonnet-20241022-v2:0",
        provider="anthropic",
        model_kwargs={"max_tokens": 4000},
        streaming=True,
    )

    # チェーンを定義
    st.session_state.chain = prompt | chat

# タイトルを画面表示
st.title("🤖 Bedrockと話そう!")

# サイドバーにWeb検索の設定を追加
st.sidebar.title("設定 ⚙️")
enable_web_search = st.sidebar.toggle("Web検索を有効にする 🔍")

# 履歴クリアボタンを画面表示
if st.button("履歴クリア 🔄"):
    st.session_state.history.clear()

# メッセージを画面表示
for message in st.session_state.history.messages:
    with st.chat_message(message.type):
        st.markdown(message.content)

# チャット入力欄を定義
if prompt := st.chat_input("何でも話してね! 📝"):
    with st.chat_message("user"):
        st.markdown(prompt)

    # Web検索が有効な場合は検索を実行
    if enable_web_search:
        with st.spinner("Web検索中... 🔍"):
            search_result = get_web_search_result(prompt)
            enhanced_prompt = f"次の質問に対して、Web検索結果も参考にして回答してください。\n\n質問:{prompt}\n\nWeb検索結果:{search_result}"
    else:
        enhanced_prompt = prompt

    with st.chat_message("assistant"):
        response = st.write_stream(
            st.session_state.chain.stream(
                {
                    "messages": st.session_state.history.messages,
                    "human_message": [HumanMessage(content=enhanced_prompt)],
                },
                config={"configurable": {"session_id": st.session_state.session_id}},
            )
        )

    st.session_state.history.add_user_message(prompt)
    st.session_state.history.add_ai_message(response)
重要な設定項目 ⚙️
model_idについては、AWS Bedrockの推論プロファイルから取得する必要があります。
Bedrock->Cross-region inferenceからARNをコピーしてください

web_search.py
Web検索機能を実装したファイルです:
# web_search.py
# web_search.py
import nest_asyncio
from bs4 import BeautifulSoup
from langchain import hub
from langchain.agents import AgentExecutor, Tool, create_react_agent
from langchain_aws import ChatBedrock
from langchain_community.tools import DuckDuckGoSearchRun
from selenium import webdriver
from selenium.webdriver.chrome.options import Options
from selenium.webdriver.common.by import By
from selenium.webdriver.support.ui import WebDriverWait
from selenium.webdriver.support import expected_conditions as EC

nest_asyncio.apply()

def scrape_with_selenium(url: str) -> str:
    try:
        # Chromeオプションの設定
        options = Options()
        options.add_argument('--headless')
        options.add_argument('--no-sandbox')
        options.add_argument('--disable-dev-shm-usage')
        options.add_argument('--disable-gpu')
        options.add_argument('--window-size=1920,1080')
        options.add_argument('--lang=ja')
        options.add_argument('--user-agent=Mozilla/5.0 (Windows NT 10.0; Win64; x64) AppleWebKit/537.36 (KHTML, like Gecko) Chrome/120.0.0.0 Safari/537.36')

        driver = webdriver.Chrome(options=options)
        driver.get(url)

        WebDriverWait(driver, 10).until(
            EC.presence_of_element_located((By.TAG_NAME, "body"))
        )

        content = driver.page_source
        soup = BeautifulSoup(content, 'html.parser')

        for element in soup.find_all(['script', 'style']):
            element.decompose()

        text = soup.get_text(strip=True)
        return text

    except Exception as e:
        return f"スクレイピングエラー: {str(e)}"
    finally:
        try:
            driver.quit()
        except:
            pass

def get_web_search_result(query: str) -> str:
    tools = [
        Tool(
            name="webpage-reader",
            func=scrape_with_selenium,
            description="指定されたURLのWebページの内容を読み取り、日本語で返します。"
        ),
        Tool(
            name="duckduckgo-search",
            func=DuckDuckGoSearchRun().run,
            description="指定されたキーワードでWeb検索を行い、結果を日本語で返します。"
        )
    ]

    chat = ChatBedrock(
        model_id="arn:aws:bedrock:us-east-1:XXXXXXXX:inference-profile/us.anthropic.claude-3-5-sonnet-20241022-v2:0",
        provider="anthropic",
        model_kwargs={"max_tokens": 4000},
        streaming=True,
    )

    react_prompt = hub.pull("hwchase17/react").partial(
        system_message="""あなたは以下の特徴を持つアシスタントです:
        1. 常に日本語で応答します
        2. Webページの内容を日本語で要約します
        3. エラーが発生した場合も日本語で説明します
        4. ユーザーに対して丁寧な言葉遣いを心がけます
        5. 検索結果も日本語で分かりやすく説明します"""
    )

    agent = create_react_agent(chat, tools, prompt=react_prompt)
    agent_executor = AgentExecutor(
        agent=agent,
        tools=tools,
        verbose=True,
        handle_parsing_errors=True,
        max_iterations=3,
        early_stopping_method="generate"
    )

    try:
        result = agent_executor.invoke({"input": query})
        return result["output"]
    except Exception as e:
        return f"検索エラー: {str(e)}"
実行結果とデモ 🎮
実行方法
以下のコマンドで起動します:
streamlit run main.py
動作イメージ
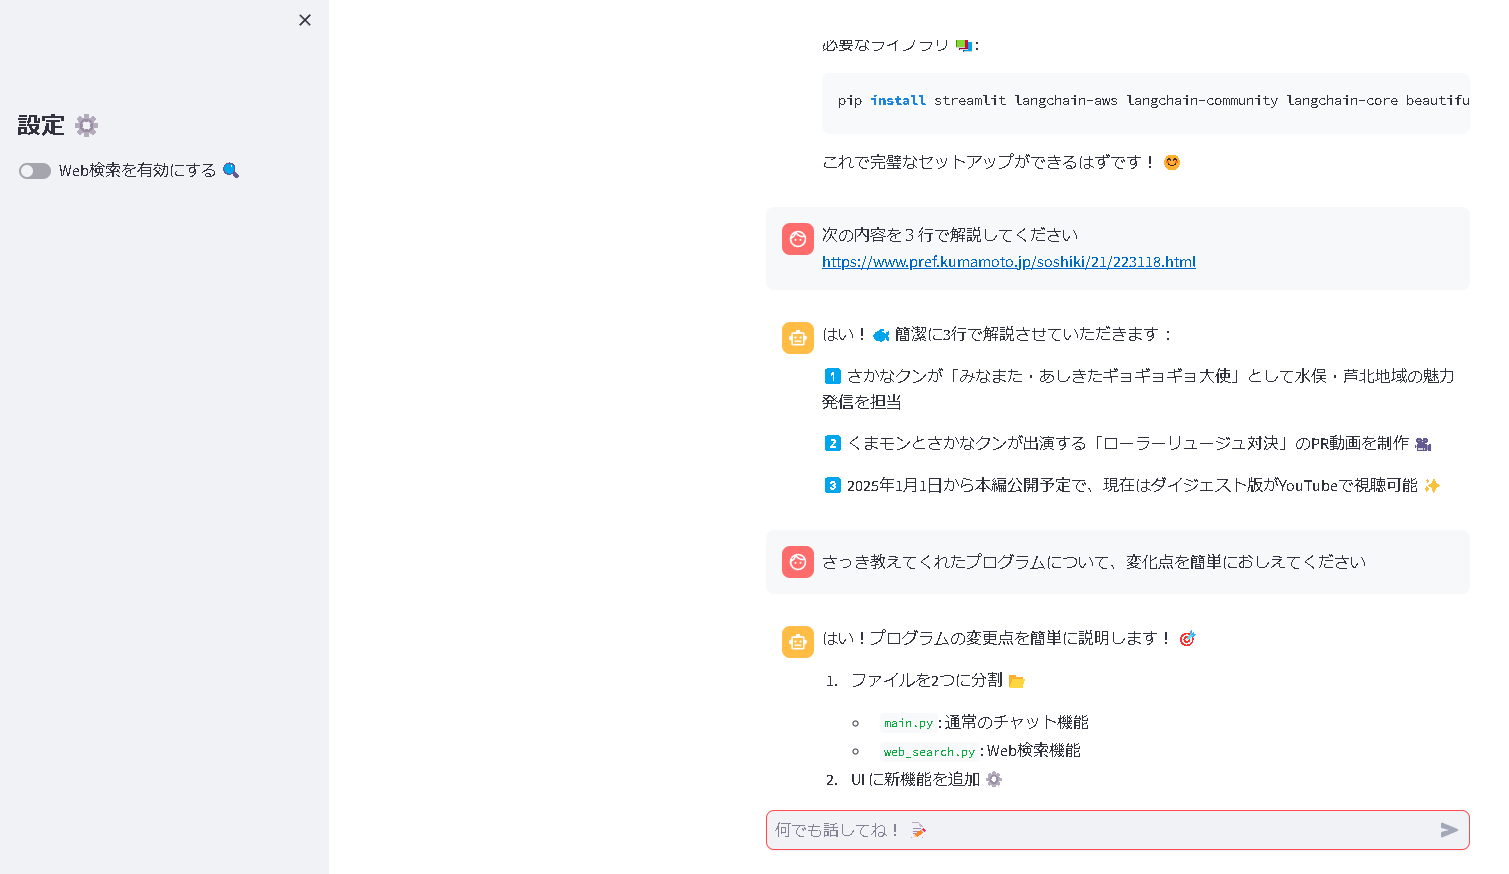
- サイドバーのスイッチでWeb検索機能のON/OFFを切り替えられます
- 過去の会話履歴を保持しながら、継続的な対話が可能です
- Web検索結果を含めた文脈を理解して会話を展開します
