手順
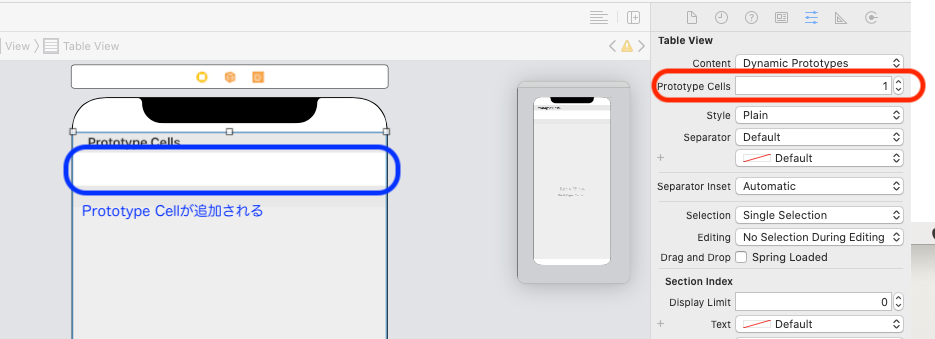
1. Prototype Cellの追加とセルの設定
- Storyboardで配置したTableViewを選択
- Attributes inspectorでPrototype Cellsの数を増やす
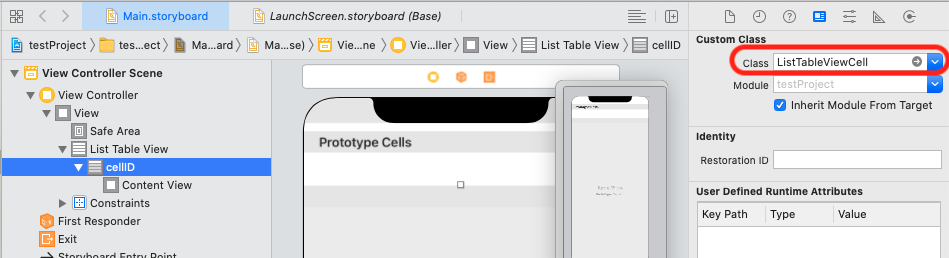
2. セルのUITableViewCellクラスの設定
- コードでUITableViewCellのClassを作成する(下記Code参照)
- StoryboardのPrototypeCellを選択してIdentity inspectorでCustomClassに作成したClassを設定
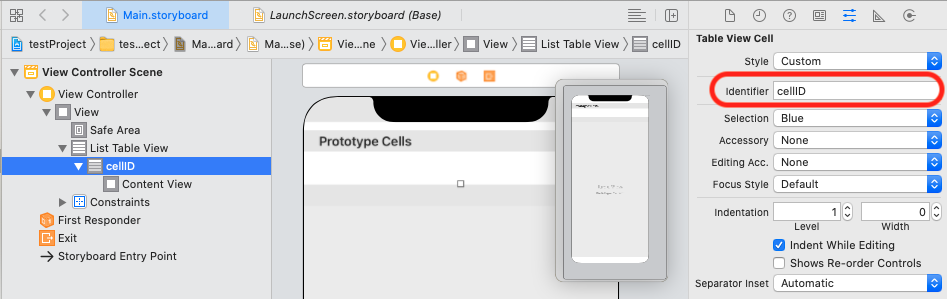
3. セルのIDを設定
- StoryboardでCellを選択しAttributes inspectorのIdentifireにセルのIDを設定
4. ViewControllerとUITableViewCellとの接続
TableViewはViewControllerクラスに接続して、CellのUIはUITableViewCellのクラスに接続する。
※先にClassを指定しておかないとつながらない。
※接続時にエラーが出るなどうまくいかない場合は一度ビルドする。
コード
ViewController.swift
import UIKit

class ListViewController: UIViewController {

  private let cellId = "cellId"

//TableViewの接続
  @IBOutlet weak var listTableView: UITableView!

  override func viewDidLoad() {
    super.viewDidLoad()

    listTableView.delegate = self
    listTableView.dataSource = self
  }
}

// MARK: - UITableViewDelegate, UITableViewDataSource
extension listViewController: UITableViewDelegate, UITableViewDataSource{
  //Cellの高さ
  func tableView(_ tableView: UITableView, heightForRowAt indexPath: IndexPath) -> CGFloat {
    return 80
  }
  //セルの個数
  func tableView(_ tableView: UITableView, numberOfRowsInSection section: Int) -> Int {
    return 10
  }
  //cellの中身を設定
  func tableView(_ tableView: UITableView, cellForRowAt indexPath: IndexPath) -> UITableViewCell {
    let cell = listTableView.dequeueReusableCell(withIdentifier: cellId, for:indexPath)
    //cellIdはストーリーボード側のセルにも設定する
    return cell
  }
}


// MARK: - UITableViewCell
class ListTableViewCell: UITableViewCell{

//CellのUIをOutlet接続
  @IBOutlet weak var imageView: UIImageView!
  @IBOutlet weak var msgLabel: UILabel!

  //awakeFromNibは「func」のみの方を選択
  //StoryBoardやxibファイルからインスタンス化される場合に呼ばれる
  //Nibファイルが開かれ、使用準備が完了。
  override func awakeFromNib() {
    super.awakeFromNib()

    //UIのプロパティーなどを記述
    imageView.layer.cornerRadius = 35
  }

  //セルの選択された状態を設定し、オプションで状態間の遷移をアニメーション化する
  override func setSelected(_ selected: Bool, animated: Bool) {
    super.setSelected(selected, animated: animated)
  }