動機
たとえばrandstrというスクリプトをpythonで実装したとする.
動作としては,与えられた引数の長さだけランダムな文字列を出力する.
$ python ./randstr.py 5
4UJrG
$ python ./randstr.py 10
1sHGTmjiAf
これを最終的に以下でインストール・配布できるようにしたい.
$ brew tap scstechr/ranstr
$ brew install randstr
全体の流れ
本記事はMacを前提にしてますが,流れ自体は他OSでも変わらないと思います.
-
pyinstallerで実行ファイル(バイナリ)作成 -
gitレポジトリを作成しGitHubにpush - 実行ファイルなどを含む
.tar.gzを作成 - 作成した
.tar.gzファイルを添付したリリースをパブリッシュ -
brew createでFormulaを作成 - 作成した
FormulaをGitHub上のhomebrew-<name>にpush
1. pyinstallerで実行ファイル(バイナリ)作成
実装
randstrは以下のソースコードで実装されている.
import random
import string
import click

def randomname(n):
   randlst = [random.choice(string.ascii_letters + string.digits) for i in range(n)]
   return ''.join(randlst)

@click.command()
@click.argument('length')
def main(length):
    try:
        length = int(length)
        randlst = [random.choice(string.ascii_letters + string.digits) for i in range(length)]
        print(''.join(randlst))
    except:
        print('./randstr [length]')


if __name__ == '__main__':
    main()
実行ファイルの作成
まずpyinstallerを使ってバイナリファイルを作成する.
pyinstallerが入っていなければpip install pyinstallerで入れる.
$ pyinstaller randstr.py --onefile
これでbuild/, dist/, randstr.specができる.
.
├── .git/
├── README.md
├── build/
├── dist/
│   └── randstr
├── randstr.py
└── randstr.spec
distディレクトリには実行形式のrandstrが入ってるので試しに実行してみる.
$ ./dist/randstr 5
FJCgc
$ ./dist/randstr 10
38cuZYR9xF
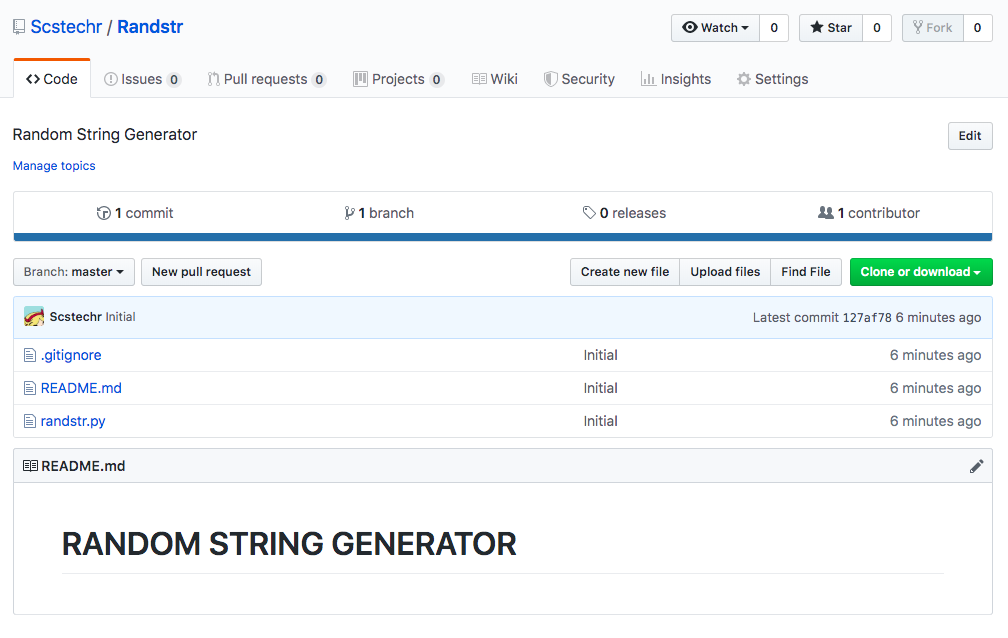
2. gitレポジトリを作成しGitHubにpush
ローカル
まず,git initしてレポジトリを作成する.
次に.gitignoreを作成してrandstr.specがコミットに追加されないようにする.
任意だがdist/,build/も必要なければ.gitignoreに追記する.
.*
*.spec
build
dist
git add -f .gitignoreで.gitignoreを強制的にaddする.
.
├── .git/
├── .gitignore
├── README.md
├── build/
├── dist
│   └── randstr
├── randstr.py
└── randstr.spec
次にgit add ., git commitでcommitする.
リモート
GitHubにレポジトリを作成し,先ほど作成したものをpushする.
3. 実行ファイルなどを含む.tar.gzを作成
ここで作成するのは*.tar.gzという実行バイナリを含むtar.gzファイルである.
今回の例ではrandstr-v1.0.tar.gzを作成する.
まず, randstr-v1.0ディレクトリを作成して,dist/randstr,README.mdをcpする.
ほかにLICENCEなど入れたいファイルがあれば追加する.
.
├── .git/
├── .gitignore
├── README.md
├── build/
├── dist
│   └── randstr
├── randstr-v1.0/
│   ├── README.md
│   └── randstr
├── randstr.py
└── randstr.spec
これをtar.gzに圧縮する.
$ tar zcvf randstr-v1.0.tar.gz randstr-v1.0
ついでにtar.gzも.gitignoreに追加しておく.
.*
*.spec
build
dist
*.tar.gz
バッチファイルの作成
ここまでの処理をbuild.shなどのスクリプトを書いておくと楽.
# !/bin/bash

printf '\e[34mmkdir release\e[m\n';
mkdir release;
printf '\e[34mcp README.md -> release\e[m\n';
cp README.md release;
printf '\e[34mpyinstaller gch\e[m\n';
pyinstaller randstr.py --onefile && mv dist/randstr release/
printf '\e[34mtar zcvf\e[m\n';
tar zcvf release.tar.gz release
printf '\e[34mrm -rf build, dist, release\e[m\n';
rm -rf build
rm -rf dist
rm -rf release
printf '\e[34mrm spec filest\e[m\n';
rm *.spec
上のbuild.shをchmod u+x build.sh後に./build.shとすると
実行ファイルの作成,README.mdとdist/randstrをrelease.tar.gzに圧縮するまでをやってくれる.
あとはmv release.tar.gz randstr-v1.0.tar.gzなどしてあげれば良い.
.
├── .git/
├── .gitignore
├── README.md
├── randstr.py
└── randstr-v1.0.tar.gz
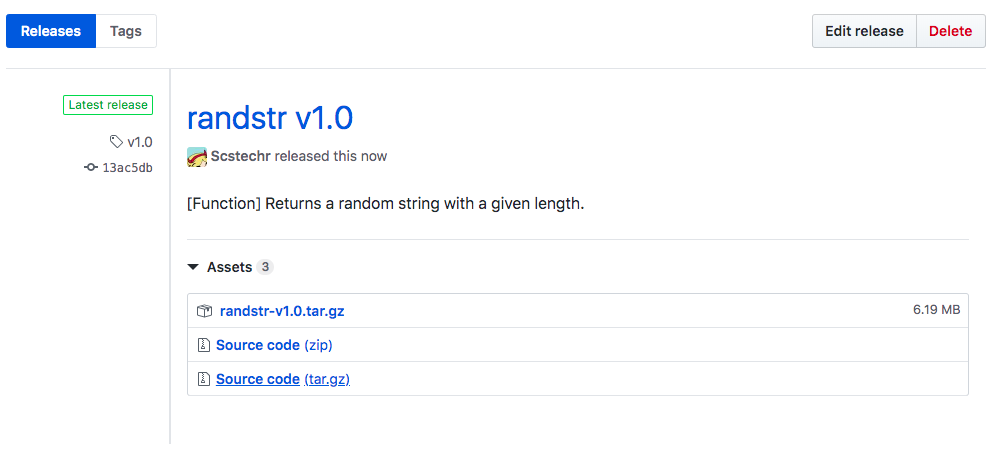
4. 作成した.tar.gzファイルを添付したリリースをパブリッシュ
GitHubに戻って, Releaseをクリックし Create a new releaseを選択する.
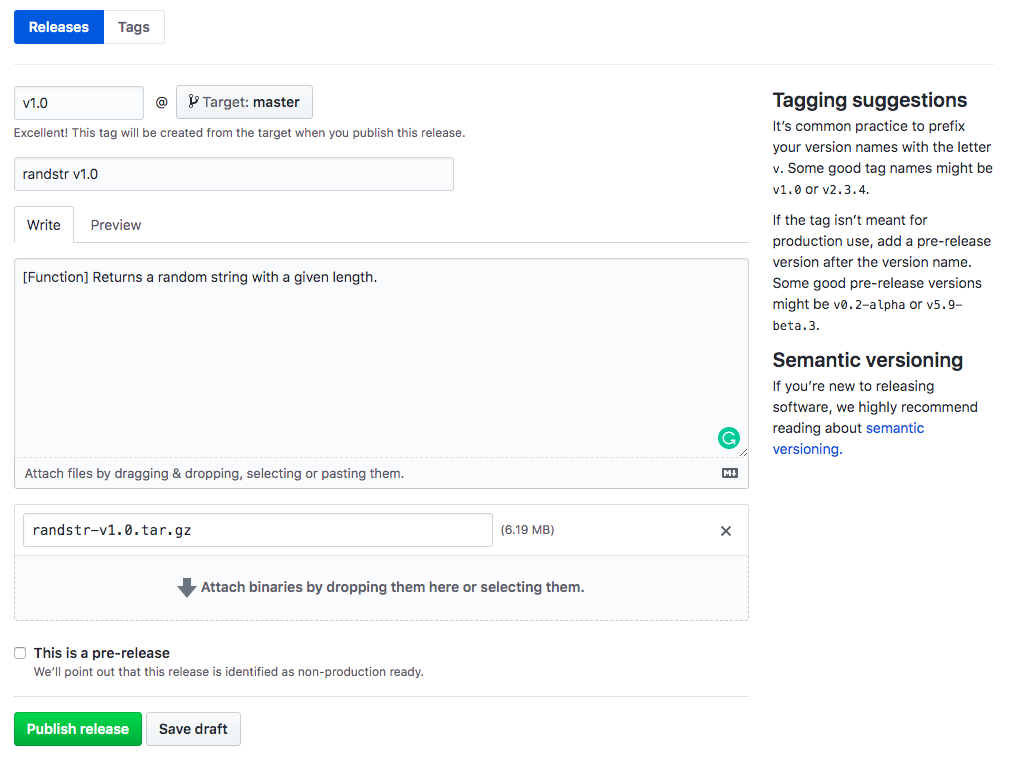
リリースノードを作成し,先ほど作成したrandstr-v1.0.tar.gzを添付する.
Publish releaseをクリックすれば無事パブリッシュされる.
5. brew createでFormulaを作成
まず, レポジトリhomebrew-<名前>(今回はhomebrew-randstr)をGitHubで作成する.
これを好きなところにgit cloneしておく. 今回は~/Works/にcloneしたとする.
$ git clone https://github.com/Scstechr/homebrew-randstr
Cloning into 'homebrew-randstr'...
warning: You appear to have cloned an empty repository.
.
└── .git/
次に,先ほどパブリッシュしたリリースに添付した実行ファイル(今回の例ではrandstr-v1.0.tar.gz)のリンクをコピーする.
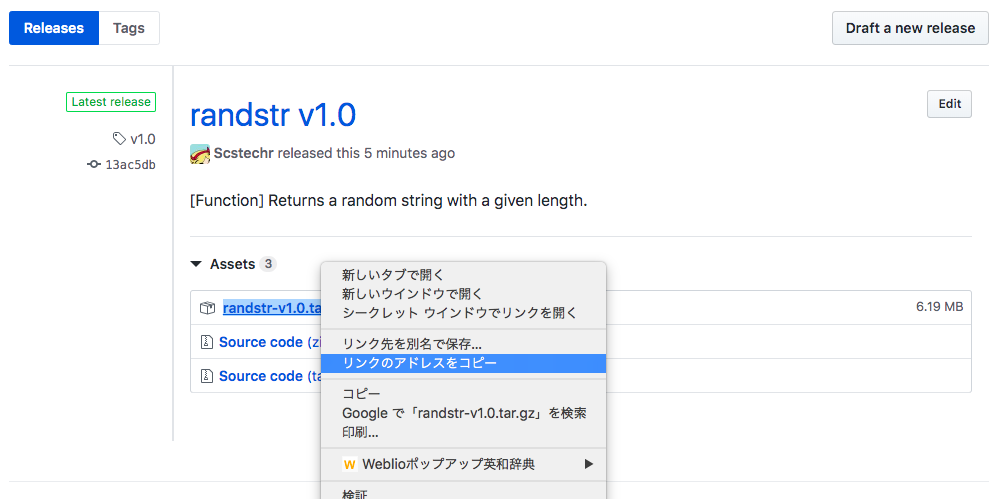
そして,brew create <コピーしたURL>をターミナルで実行する.
$ brew create https://github.com/Scstechr/Randstr/releases/download/v1.0/randstr-v1.0.tar.gz
これを実行すると, Formulaと呼ばれるものが/usr/local/Homebrew/Library/Taps/homebrew/homebrew-core/Formula/randstr.rbとして(細かいディレクトリは違うかもしれないが)作成される.
すぐに編集できるように自動的にVimが開くが,これ一旦:wqで抜ける.
作成されたrandstr.rbを<先ほどgit cloneした先>/randstr.rbにmvする.
mv /usr/local/Homebrew/Library/Taps/homebrew/homebrew-core/Formula/randstr.rb ~/Works/homebrew-randstr/
これで~/Works/homebrew-randstrのファイル構成が以下の通りとなる.
.
├── .git/
└── randstr.rb
改めて開いてみると,randstr.rbはこんなファイルのはずである.
# Documentation: https://docs.brew.sh/Formula-Cookbook
#                https://rubydoc.brew.sh/Formula
# PLEASE REMOVE ALL GENERATED COMMENTS BEFORE SUBMITTING YOUR PULL REQUEST!
class Randstr < Formula
  desc "Random String Generator"
  homepage ""
  url "https://github.com/Scstechr/Randstr/releases/download/v1.0/randstr-v1.0.tar.gz"
  sha256 "5c3b72ae94a11d85b4cf460595c64336ad9985dc976a9daf8dc33a0cbf5c9cb8"
  # depends_on "cmake" => :build

  def install
    # ENV.deparallelize  # if your formula fails when building in parallel
    # Remove unrecognized options if warned by configure
    system "./configure", "--disable-debug",
                          "--disable-dependency-tracking",
                          "--disable-silent-rules",
                          "--prefix=#{prefix}"
    # system "cmake", ".", *std_cmake_args
    system "make", "install" # if this fails, try separate make/make install steps
  end

  test do
    # `test do` will create, run in and delete a temporary directory.
    #
    # This test will fail and we won't accept that! For Homebrew/homebrew-core
    # this will need to be a test that verifies the functionality of the
    # software. Run the test with `brew test Randstr`. Options passed
    # to `brew install` such as `--HEAD` also need to be provided to `brew test`.
    #
    # The installed folder is not in the path, so use the entire path to any
    # executables being tested: `system "#{bin}/program", "do", "something"`.
    system "false"
  end
end
上記のファイルを下記のように書き換えて自動生成されたコメントを消す.
class Randstr < Formula
  desc "Random String Generator"
  homepage "https://github.com/Scstechr/Randstr"
  url "https://github.com/Scstechr/Randstr/releases/download/v1.0/randstr-v1.0.tar.gz"
  sha256 "5c3b72ae94a11d85b4cf460595c64336ad9985dc976a9daf8dc33a0cbf5c9cb8"

  def install
     bin.install 'randstr'
  end
end
ここで,bin.install 'randstr'はパスが通ってるディレクトリにシンボリックリンクを貼ってくれる.
細かいFormulaの書き方は他の記事を参照する.
6. 作成したFormulaをGitHub上のhomebrew-<name>にpush
git commitで変更を反映したあと,git pushでリモートレポジトリにpushする.
完成
ここまでくれば,まずbrew tab scstechr/randstrでtapし
$ brew tap scstechr/randstr
==> Tapping scstechr/randstr
Cloning into '/usr/local/Homebrew/Library/Taps/scstechr/homebrew-randstr'...
remote: Enumerating objects: 3, done.
remote: Counting objects: 100% (3/3), done.
remote: Compressing objects: 100% (2/2), done.
remote: Total 3 (delta 0), reused 3 (delta 0), pack-reused 0
Unpacking objects: 100% (3/3), done.
Tapped 1 formula (27 files, 23.5KB).
brew install randstrでrandstrをインストールできる.
$ brew install randstr
==> Installing randstr from scstechr/randstr
==> Downloading https://github.com/Scstechr/Randstr/releases/download/v1.0/randstr-v1.0.tar.gz
🍺  /usr/local/Cellar/randstr/1.0: 4 files, 6.2MB, built in 5 seconds
また,どこでもrandstrが実行できるようになった.
$ randstr 5
FNsB3
$ randstr 10
Wtgk8d9ABb
以上より,下記のコマンドでrandstrが誰でも簡単にインストールできるようになった.
$ brew tap scstechr/ranstr
$ brew install randstr