本日は
- 前回は Streamlit でデータの可視化アプリを作りました。
-
streamlit.imageで画像を表示させることができました。
-
- 人間は欲張りなので単数のオブジェクトができたら複数のこと、連続して単数のオブジェクトを処理できるか考えたくなるものです。
例えば Web カメラで撮像した画像を深層学習のモデルの入力として利用しその結果を表示するというようのなことができるのではないでしょうか? やりましょう。
やりたいことはな〜んだ?
- カメラから画像を取得
- モデルの用意
- 画像を適切に前処理しそれをモデルに投げる
- モデルの出力をStreamlit上に表示
これのフローが構築できればデモ作成が捗りそうですね。
作りましょう
- ここでは画像分類タスク (Image Classification) を実行するデモを作りましょう。
The fastest way to build data appsを実現するために OpenCV, Keras, (もちろん Streamlitも) を利用します。以下ではclassification.pyというファイルを用意しその中に逐次追記していくという形をとります。
必要なモジュールをインポート
import cv2  # opencv-python==4.2.0.34
import streamlit as st  # streamlit==0.61.0
import tensorflow as tf  # tensorflow==2.2.0
from tensorflow import keras
モデルの用意
- モデルは学習済みの MobileNetV2 を採用します。理由はGPUがない環境でも動かせるモデルであること, TensorFlowのチュートリアルにモデルの推論のコードが揃っていたからです。(やった!あまり頭を使わなくて済む!チュートリアルって大事だね(白目)).
コードはこんな感じです importlib.import_module で keras.applications 以下を動的にロードできるかな〜と思って関数化しましたが結局未実装。最速で作りたいですからね!
def get_model():
    model = keras.applications.MobileNetV2(include_top=True, weights="imagenet")
    model.trainable = False
    return model


def get_decoder():
    decode_predictions = keras.applications.mobilenet_v2.decode_predictions
    return decode_predictions


def get_preprocessor():
    def func(image):
        image = tf.cast(image, tf.float32)
        image = tf.image.resize(image, (224, 224))
        image = keras.applications.mobilenet_v2.preprocess_input(image)
        image = tf.expand_dims(image, axis=0)
        return image

    return func

class Classifier:
    def __init__(self, top_k=5):
        self.top_k = top_k
        self.model = get_model()
        self.decode_predictions = get_decoder()
        self.preprocessor = get_preprocessor()

    def predict(self, image):
        image = self.preprocessor(image)
        probs = self.model.predict(image)
        result = self.decode_predictions(probs, top=self.top_k)
        return result
カメラから画像を読み込むロジック
- ここでは下記のようなラフな方針が頭に浮かんでいればOKです。
import cv2
cap = cv2.VideoCapture(0)
while True:
    _,img=cap.read()
    # BGR->RGBに変換
    # 描画ロジックを作り込む
    if cv2.waitKey() & 0xFF == ord("q"):
            break
Streamlit 上で実現する際の注意
-
デスクトップ環境で OpenCV を用いた画像処理アプリのデモだと
cv2.imshow()で画像を描画してましたね。同じようにst.image(img)とすれば良いと考えるのが筋です。
ところが Streamlit 側から見るとst.image(img)で作ったUIの部品を上から順に並べるという命令と解釈されるので似たような画像がワラワラと上から下に伸びてしまいます(笑)。 -
さて解決策は Displaying image at the same place で提示されています。空のウィジェット
wを用意して動的にw.image(img_obj)を実行させる戦略を取ることで解決しています。一度寄り道してcam.pyを作りましょう。これは後では使いませんがこのファイル一枚でも立派なアプリになっています。
import streamlit as st
import cv2
import time
from PIL import Image

st.markdown("# Camera Application")

device = user_input = st.text_input("input your video/camera device", "0")
if device.isnumeric():
    # e.g. "0" -> 0
    device = int(device)

cap = cv2.VideoCapture(device)

image_loc = st.empty()
while cap.isOpened:
    ret, img = cap.read()
    time.sleep(0.01)
    img = Image.fromarray(cv2.cvtColor(img, cv2.COLOR_BGR2RGB))
    image_loc.image(img)

    if cv2.waitKey(1) & 0xFF == ord("q"):
        break

cap.release()
$ streamlit run cam.py
で実行できます。
めいんでぃっしゅ
Classifier クラスの実装直後に下記を追加します。
def main():
    st.markdown("# Image Classification app using Streamlit")
    st.markdown("model = MobileNetV2")
    device = user_input = st.text_input("input your video/camera device", "0")
    if device.isnumeric():
        device = int(device)
    cap = cv2.VideoCapture(device)
    classifier = Classifier(top_k=5)
    label_names_st = st.empty()
    scores_st = st.empty()
    image_loc = st.empty()

    while cap.isOpened():
        _, frame = cap.read()
        frame = cv2.cvtColor(frame, cv2.COLOR_BGR2RGB)
        result = classifier.predict(frame)
        labels = []
        scores = []
        for (_, label, prob) in result[0]:
            labels.append(f"{label: <16}")
            s = f"{100*prob:.2f}[%]"
            scores.append(f"{s: <16}")
        label_names_st.text(",".join(labels))
        scores_st.text(",".join(scores))
        image_loc.image(frame)
        if cv2.waitKey() & 0xFF == ord("q"):
            break
    cap.release()


if __name__ == "__main__":
    main()
これで完成です。classifier=Classifier(top_k=5)で保持しているmodelは画像を入力として受け付けます。出力としてあらかじめ登録されたラベルに対応する確率がスコアとして得られます。例えばキーボードが写っている画像が入力された場合、キーボードのラベルに対するスコアが他のそれよりも高いはずです。Classifier オブジェクトを得る際に入力する引数で top_k を指定することでスコアの上位top_k位のものまでのラベルと対応する確率を出します。
for (_, label, prob) in result[0]:
    labels.append(f"{label: <16}")
    s = f"{100*prob:.2f}[%]"
    scores.append(f"{s: <16}")
    label_names_st.text(",".join(labels))
は細々していますが、ラベルの名前は長いものだったり短いものだったりします。出力が結構ぶれるのであらかじめパディング処理をしておいてユーザーの体験をよくしてい(るつもりです)ます。
コードのまとめ
classification.py をまとめたのが以下にようになります.75行ほどでできます.
import cv2  # opencv-python==4.2.0.34
import streamlit as st  # streamlit==0.61.0
import tensorflow as tf  # tensorflow==2.2.0
from tensorflow import keras


def get_model():
    model = keras.applications.MobileNetV2(include_top=True, weights="imagenet")
    model.trainable = False
    return model


def get_decoder():
    decode_predictions = keras.applications.mobilenet_v2.decode_predictions
    return decode_predictions


def get_preprocessor():
    def func(image):
        image = tf.cast(image, tf.float32)

        image = tf.image.resize(image, (224, 224))
        image = keras.applications.mobilenet_v2.preprocess_input(image)
        image = tf.expand_dims(image, axis=0)
        return image

    return func


class Classifier:
    def __init__(self, top_k=5):
        self.top_k = top_k
        self.model = get_model()
        self.decode_predictions = get_decoder()
        self.preprocessor = get_preprocessor()

    def predict(self, image):
        image = self.preprocessor(image)
        probs = self.model.predict(image)
        result = self.decode_predictions(probs, top=self.top_k)
        return result


def main():
    st.markdown("# Image Classification app using Streamlit")
    st.markdown("model = MobileNetV2")
    device = user_input = st.text_input("input your video/camera device", "0")
    if device.isnumeric():
        device = int(device)
    cap = cv2.VideoCapture(device)
    classifier = Classifier(top_k=5)
    label_names_st = st.empty()
    scores_st = st.empty()
    image_loc = st.empty()

    while cap.isOpened():
        _, frame = cap.read()
        frame = cv2.cvtColor(frame, cv2.COLOR_BGR2RGB)
        result = classifier.predict(frame)
        labels = []
        scores = []
        for (_, label, prob) in result[0]:
            labels.append(f"{label: <16}")
            s = f"{100*prob:.2f}[%]"
            scores.append(f"{s: <16}")
        label_names_st.text(",".join(labels))
        scores_st.text(",".join(scores))
        image_loc.image(frame)
        if cv2.waitKey() & 0xFF == ord("q"):
            break
    cap.release()


if __name__ == "__main__":
    main()
結果
さてあとは run してみましょう.
$ streamlit run classification.py
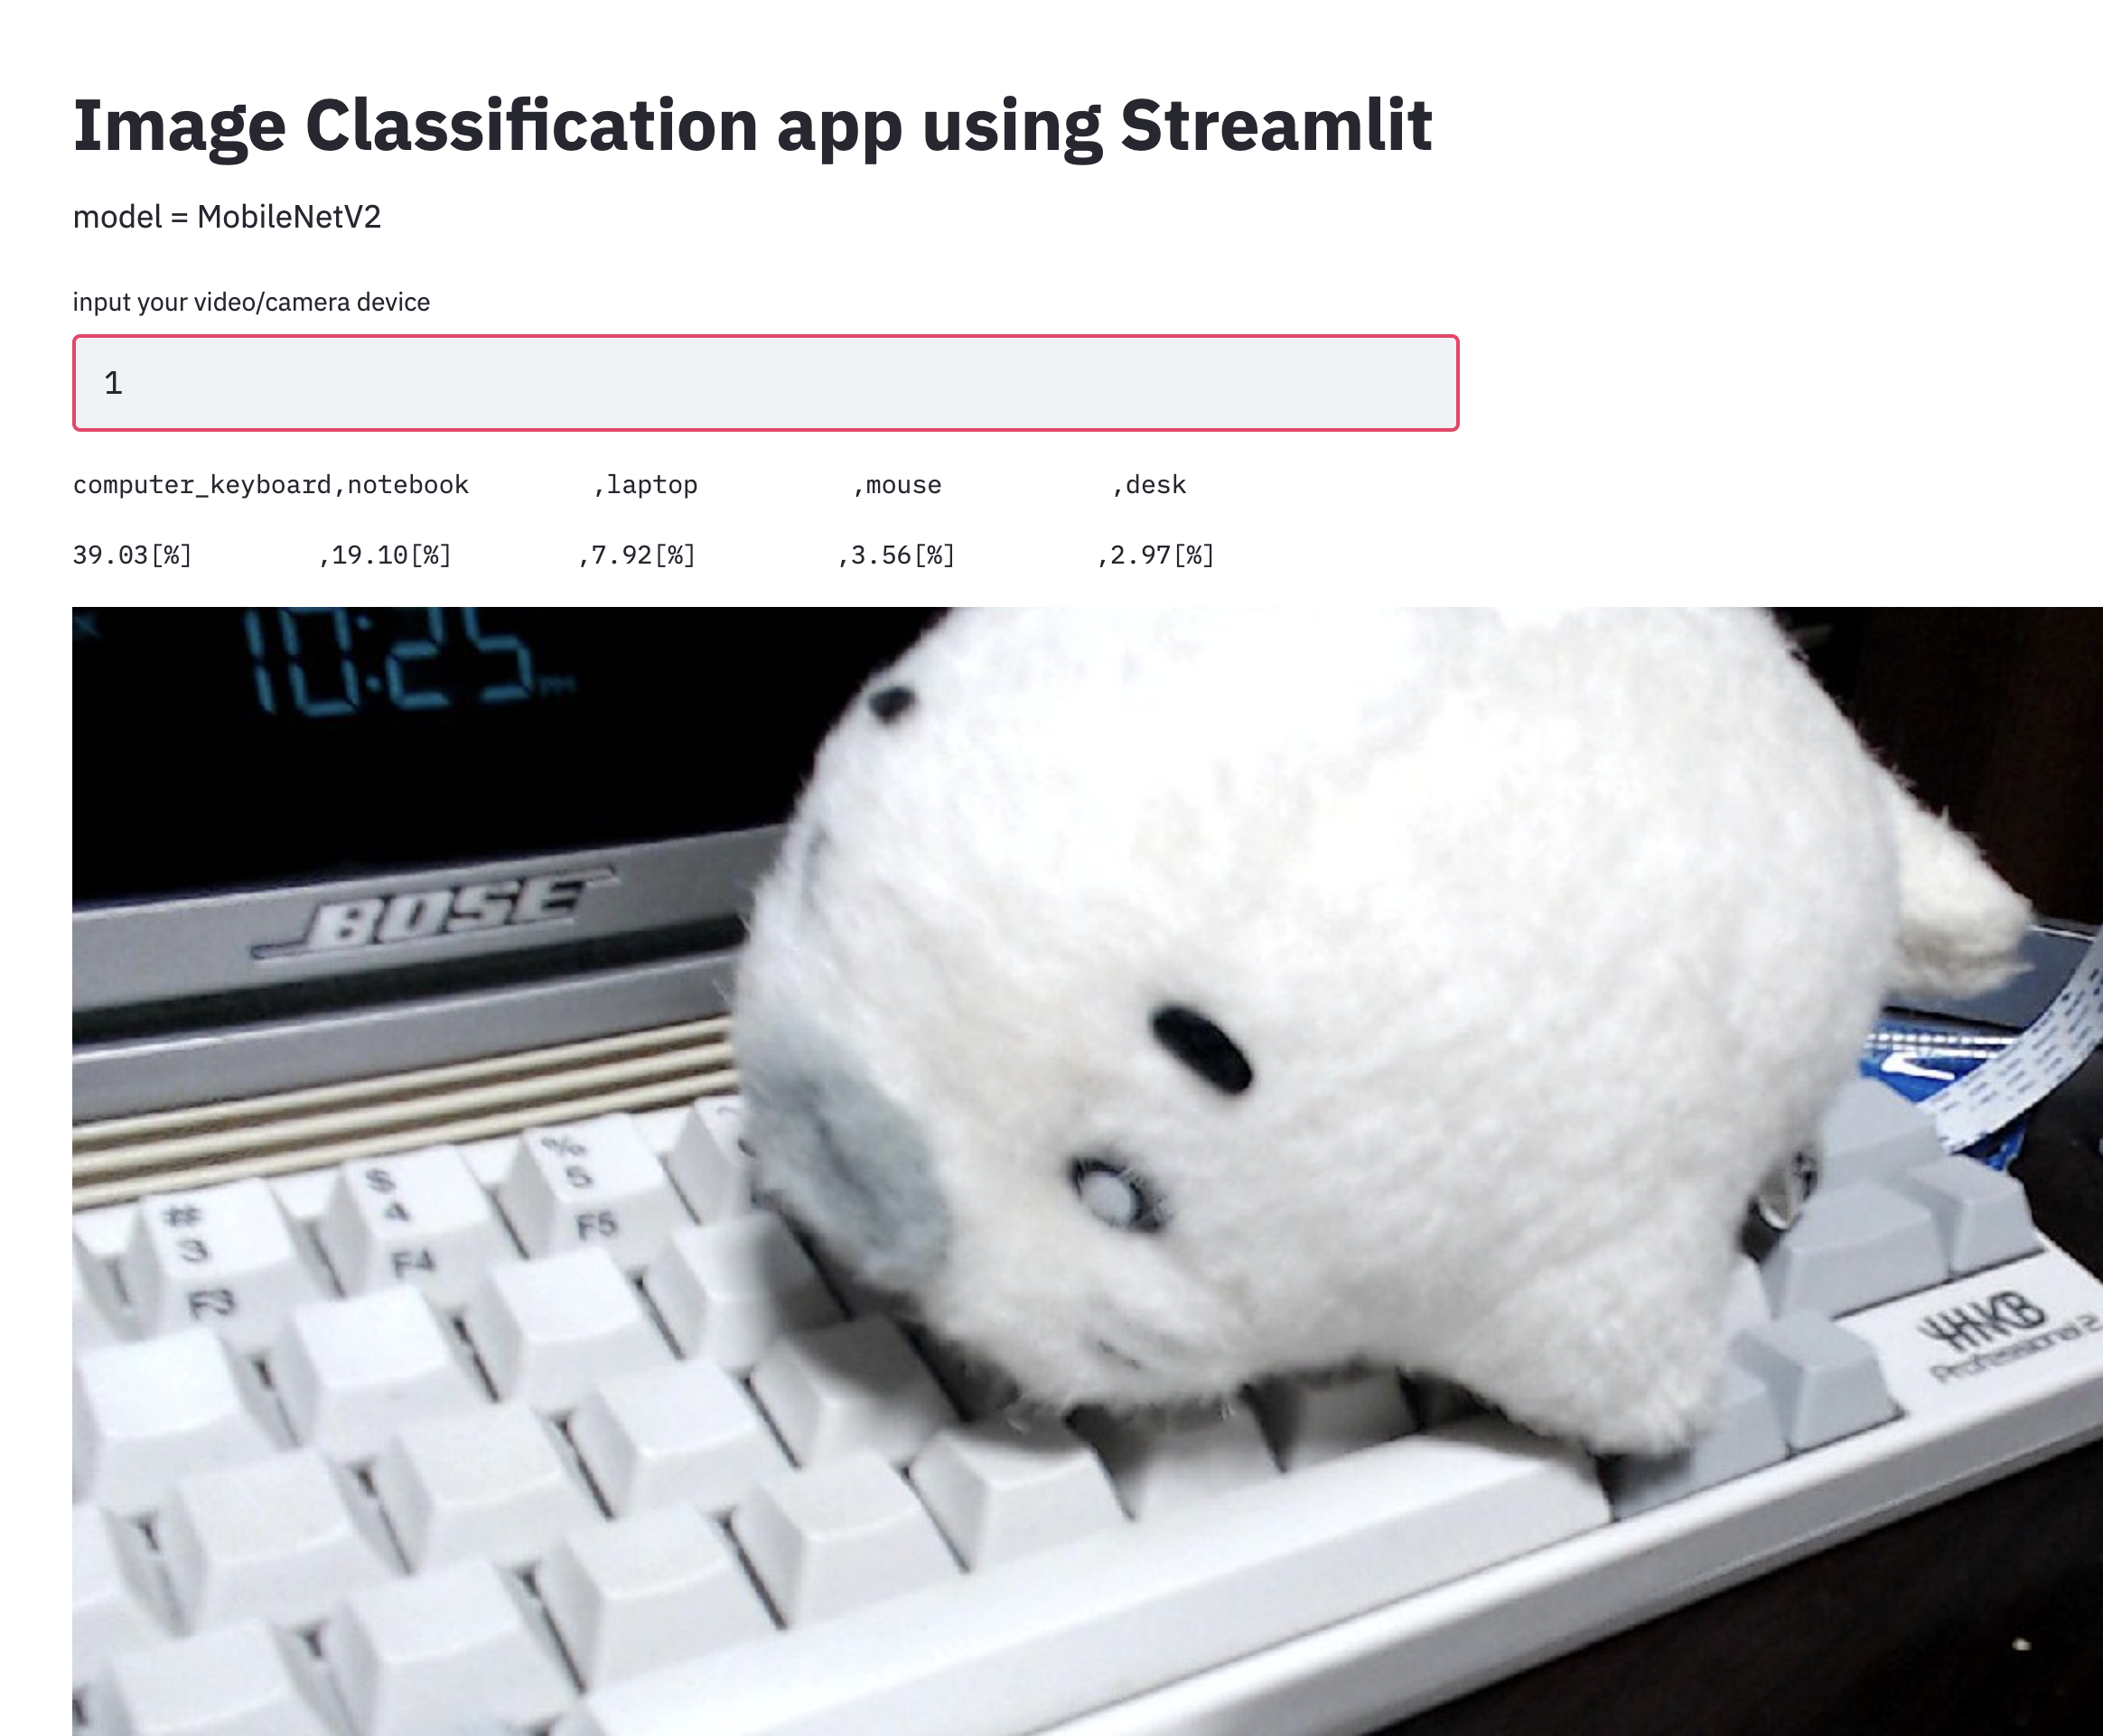
できたよゴマちゃん!
まとめ
- Streamlit で画像タスク実行するデモを作りました.