Deprecation Warning
この記事はもう古いので https://github.com/terasakisatoshi/MyWorkflow.jl を見てください.
本日は
最近ココロが壊れてたのですが最近ちょこっと復活しました。最近はPython書かずに Julia だけ書いています.
Julia の Editor はいまのところ Atom に Juno を導入した IDE による環境で行っています。
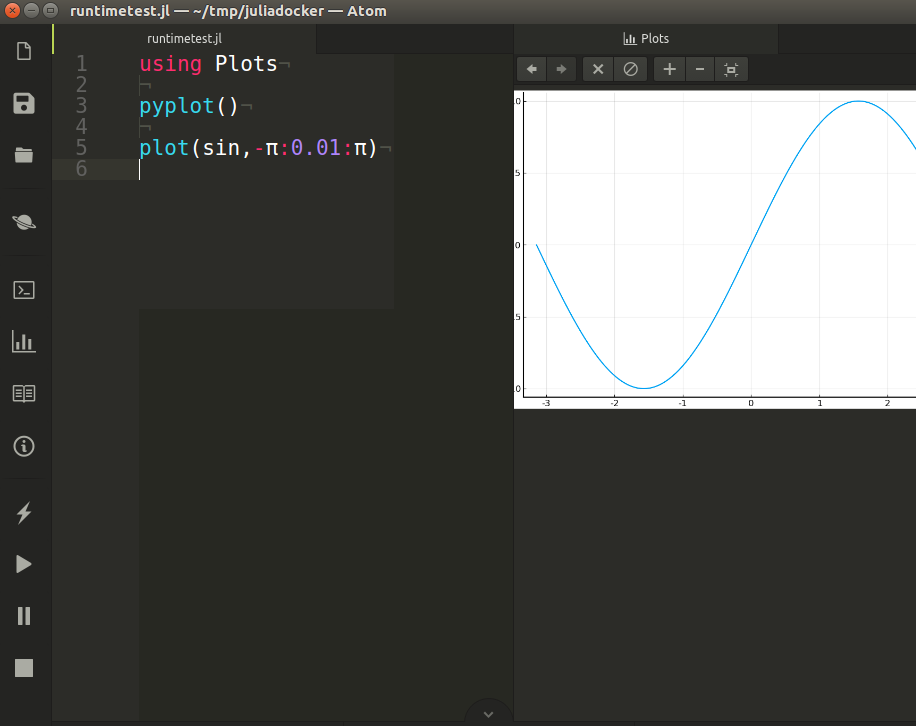
上図のようにグラフを描画するコードを書いたとします。出力結果が別の窓に出力されることはなく、右側にグラフが出力されるのでAtomの中で完結することができます。
Julia の Docker のコンテナと連携できるらしい
Junoのドキュメントに
Connecting to a Julia session in a (local) Docker container
があるんですよね。これの利用の仕方について述べていこうと思います。これによってコンテナ上で動くJuliaのグラフなどの出力結果も上図のようにUIで表示させることができます。
Dockerfile を作ります
よくばりなので Atom から利用できるようにするだけでなく
- Jupyter からも利用できるようにしたい
- PyCallも利用したい(Python と共存したい)
- PackageCompiler で Plots のロードを高速にしたい
を叶えるものを作りました。下記のとおりです。
FROM julia:1.1.0
MAINTAINER SATOSHI TERASAKI
# for Jupyter
EXPOSE 8888

RUN apt-get update
# to get python(Anaconda) via PyCall
RUN apt-get install -yq bzip2 python3-tk
# to build PackageCompiler
RUN apt-get install -yq build-essential
# Prepare Julia Packages
RUN julia -e 'ENV["PYTHON"]=""; using Pkg;Pkg.add(["PyCall", "Conda"])'
# adjust Python version, you can skip it
RUN julia -e 'using Pkg, Conda; Conda.add("python=3.6.*"); Pkg.build("PyCall"); using PyCall'
# install jupyter via Conda package
RUN julia -e 'using Pkg, Conda; Conda.add("jupyter"); Pkg.add("IJulia"); using IJulia'
# enable to call python and jupyter from bash
ENV PATH="/root/.julia/conda/3/bin:$PATH:${PATH}"
# install PyPlot and Sympy
RUN julia -e 'using Pkg, Conda; Conda.add("matplotlib"); Pkg.add("PyPlot"); using PyPlot'
# install SymPy
RUN julia -e 'using Pkg, Conda; Conda.add("sympy"); Pkg.add("SymPy"); using SymPy'
# for Juno(IDE; extension of Atom Editor)
RUN julia -e 'using Pkg; Pkg.add(["Atom", "Juno"])'
# add PackageCompiler to build Package or generate executable module
RUN julia -e 'using Pkg; Pkg.add("PackageCompiler"); using PackageCompiler'
# install Plots
RUN apt-get install -y qt5-default
RUN julia -e 'using Pkg; Pkg.add(["UnicodePlots", "GR", "Plots"]);\
              using UnicodePlots, GR, Plots'
# compile Plots to reduce overhead of `using Plots`
RUN julia -e 'using Pkg;\
              using PackageCompiler; compile_package("Plots",force=true);\
              using Plots'
(RUN apt-get install の部分をまとめたり クリーンアップの命令を追加、 --no-install-recommends オプションを追加することでイメージの大きさを減らすことができます。)
ビルド
myjulia というそっけない名前でイメージを作ります。
$ cd /path/to/this/Dockerfile
$ docker build -t myjulia .
作成の方針
うえで作った Dockerfile の方針を書いていますが、使い方を知りたい人は次の章に進んでください。
公式イメージを拡張
- Julia の Docker 公式イメージが https://hub.docker.com/_/julia にて配布されているのでそれを拡張するようにしています。
- 素の Julia にパッケージをどんどん入れていきます。
julia -e 'コード'でシェルからコードを実行できることを利用して
よく使うパッケージを予め導入
RUN julia -e 'using Pkg; Pkg.add("導入したいパッケージ名")'
で導入したいパッケージを導入します。
Pythonのバージョンを調節
PyCall 経由で Anaconda を導入します。bzip2 に依存するみたいなので apt-get で導入しています。 この時の Python のバージョンは 3.7 になるようです。諸事情で 3.6 とか別のバージョンにしたいんだ・・・という場合は $ conda install python=3.6.* に相当する
RUN julia -e 'using Pkg, Conda; Conda.add("python=3.6.*")'
書くことで解決します。ただし、Pythonのバージョンが変わるので PyCall を Pkg.build("PyCall") のようにしてビルドし直す必要があります(そうしないと using PyCall が失敗する)。
Python 側のライブラリを導入
Julia の Conda.jl パッケージを利用して導入します。Conda.add("Pythonのライブラリ") という形で導入します。
下記の例では Python のライブラリとそれに対応する Julia ラッパーを導入しています。
RUN julia -e 'using Pkg, Conda; Conda.add("jupyter"); Pkg.add("IJulia")'
RUN julia -e 'using Pkg, Conda; Conda.add("matplotlib"); Pkg.add("PyPlot")'
RUN julia -e 'using Pkg, Conda; Conda.add("sympy"); Pkg.add("SymPy")'
python や jupyer の実行モジュールが /root/.julia/conda/3/bin に配置されるのでそれをコンテナのシェルから呼び出したいのでパスを追加します。これは下記のように ENV で設定することで実現できるようです。
ENV PATH="/root/.julia/conda/3/bin:${PATH}"
Atom(Juno)と連携する場合
Docker のコンテナ側に Atom と Juno のパッケージを導入しておく必要があるみたいです。
RUN julia -e 'using Pkg; Pkg.add(["Atom", "Juno"])'
PackageCompiler で using Plots の高速化を図る(オプション)
PackageCompiler で描画系のパッケージの読み込みが遅い問題を解決します。JITコンパイルのオーバーヘッドを解消します。
RUN julia -e 'using Pkg;\
              Pkg.add("PackageCompiler");\
              using PackageCompiler; compile_package("Plots",force=true)'
自分の Macbook Air 2018 年モデルで Dockerfile をビルドすると QuartzImageIO の警告画面付近でビルドが失敗するのですが別の Ubuntu マシーンで行うと成功しました。謎い・・・。
使う (Atomから)
Atom 内にターミナルを起動
Ubuntu マシーンに Atom+Junoをすでに導入していると仮定します。 Ctrl+Shift+p で得られるコマンドパレットに terminal と入力します。
Julia Client:New Terminal をクリックしてAtom のUIの一部として Terminal を開きます。この Terminal は Atom のを使う必要はなく、通常のターミナルを開いて作業しても問題ありません。Atomの中で完結させたいかそうでないかの違いです。
Remark
上の写真にある Console ではダメなのかと思って試したのですが、Host側にあるJuliaの環境が立ち上がりうまく行きませんでした。なので、今回はこれを使いません!!!
Julia のコンテナを作る
上記セクションで作ったターミナルで下記を実行します。
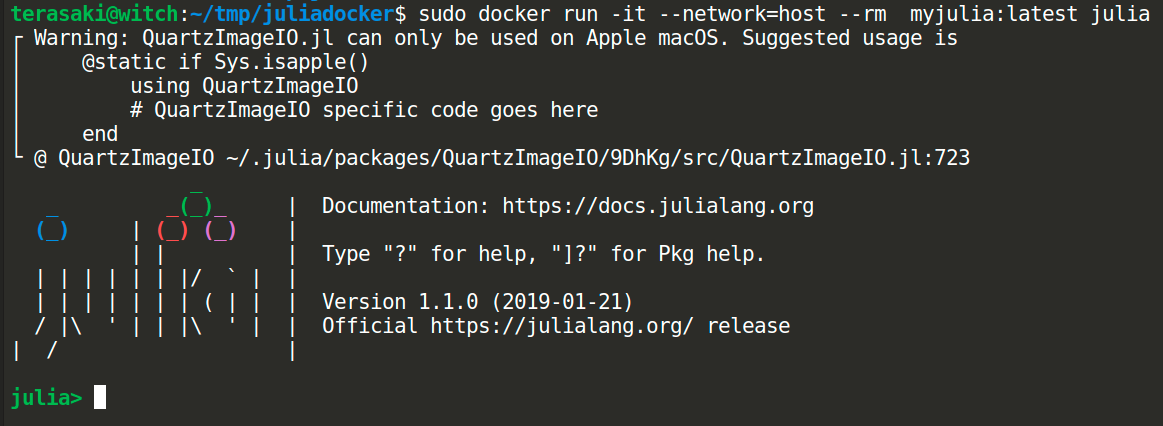
$ sudo docker run -it --network=host --rm myjulia:latest julia
そうすると下図のような画面が得られます。
QuartzImageIO まわりのワーニングが出ますが、ここでは無視します。
Julia Client: Connect External Process
コマンドパレットで Julia Client: Connect External Process を押下します。 これでAtomとJuliaのプロセスを連携することができるみたいです。
そうすると下記のように青い画面が得られます。
using Atom; using Juno; Juno.connect(42391)
をコンテナで動いているJuliaのREPL(すなわち、上で起動したターミナルに)にコピペします。 Juno.connect の番号は各自の環境に依存します。
Atom 側からコネクションが成功した通知がくるのでそれが確認できると成功です。
QuartzImageIO まわりのワーニングが出ますが、ここでは無視します。
これでAtomとコンテナを連携することができます。
あとはAtom上で適当なコードをを書いて(Ctrl+Shift+Enterを押すことで)実行させることができます。作業ディレクトリをマウントさせなくても動くんですよね。何気に手軽。
libQt5Widgets.so.5 が見つからないよと怒られてしましますが、ここでは無視します。
使う(Jupyterから)
以下は、Atomとは関係なく使えます。ターミナルを開いて次を実行します。
$ sudo docker run --rm -it -p 8888:8888 myjulia:latest jupyter notebook --ip=0.0.0.0 --allow-root
そうすると下記のようなログが得られるはずです。
    To access the notebook, open this file in a browser:
        file:///root/.local/share/jupyter/runtime/nbserver-1-open.html
    Or copy and paste one of these URLs:
        http://(4c245d2f219b or 127.0.0.1):8888/?token=ほにゃららららら
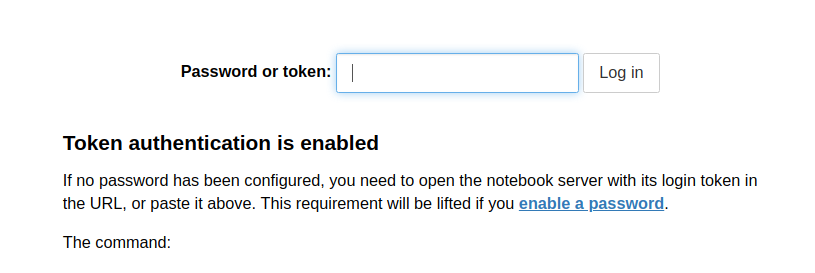
ホスト側のブラウザ環境で http://localhost:8888 にアクセスします。そうすると下記のようなログイン画面がでてきます。
ここに上記のログででている token= 以下の文字列をコピーして Log in を押すことでいつものJupyterが使えます。
まとめ
- Julia の Dockerfile を作ってみたよ
- Atom と連携できるよ
- Jupyter Notebook のJuliaカーネルをDockerのコンテナ上で走るそれを利用することができるよ
- いろいろワーニングがでて何もわからん(でも一応ウゴク)


