本日は
様々な理由からC++のコードをPythonから呼び出したい!!!という需要は一定量であるものと信じているこの頃です.しかもWindows上で.本日はこの願いをかなえるための手段の一つとしてpybind11を用いた方法を紹介します.
Mac, Linux の場合はすでに事例が紹介されています.
ここで用いたツール
- pybind11
- Python3.5(Miniconda)
- Visual Studio 2017
ドキュメントが言うには:
On Windows, only Visual Studio 2015 and newer are supported since pybind11 relies on various C++11 language features that break older versions of Visual Studio.
とのことです.現在は2018年.新しいVisualStudioを使っていきましょう.
準備(pybind11の準備)
> pip install pybind11
これでOKです.pybind11はヘッダーだけで構成されているようなので好みに応じてgit clone でソースを落としてということも可能のようですね.
ここでは pip install の方法で導入したと仮定して話を進めていきます.
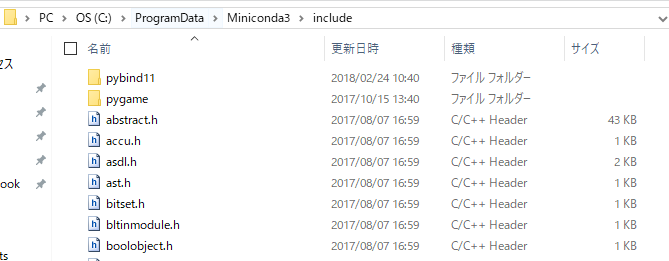
どこにソースが入ったかを確認
pybind11のヘッダーを探します.
これを手掛かりにインストールされた場所を探します.私の環境の場合結論から言うと C:\ProgramData\Miniconda3\include の直下に存在します.
C:\ProgramData\Miniconda3 のパスの部分は皆さんの環境によって場所が異なりますので以下適宜読み替えてください.
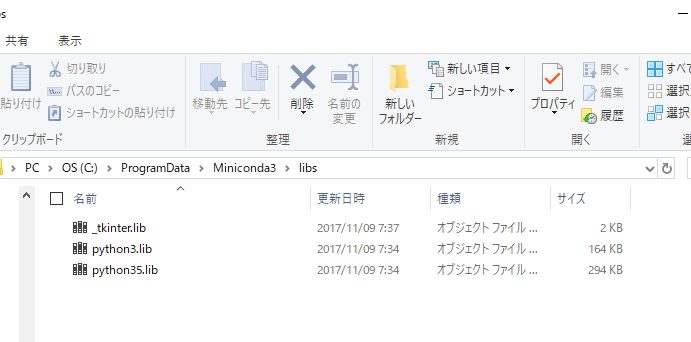
ついでに C:\ProgramData\Miniconda3\libs も眺めておきます.
これらのパスはVisualStudioの設定で用います.
VisualStudio起動
Visual Studioを起動してソルーション・プロジェクトを作る・・・のまえにC++のコードを呼び出すときのモジュール名を考えます.
ここでは pybindtest というモジュール名で後でPythonから呼び出すことを想定している,つまり
import pybindtest
として使うことを想定して準備します.
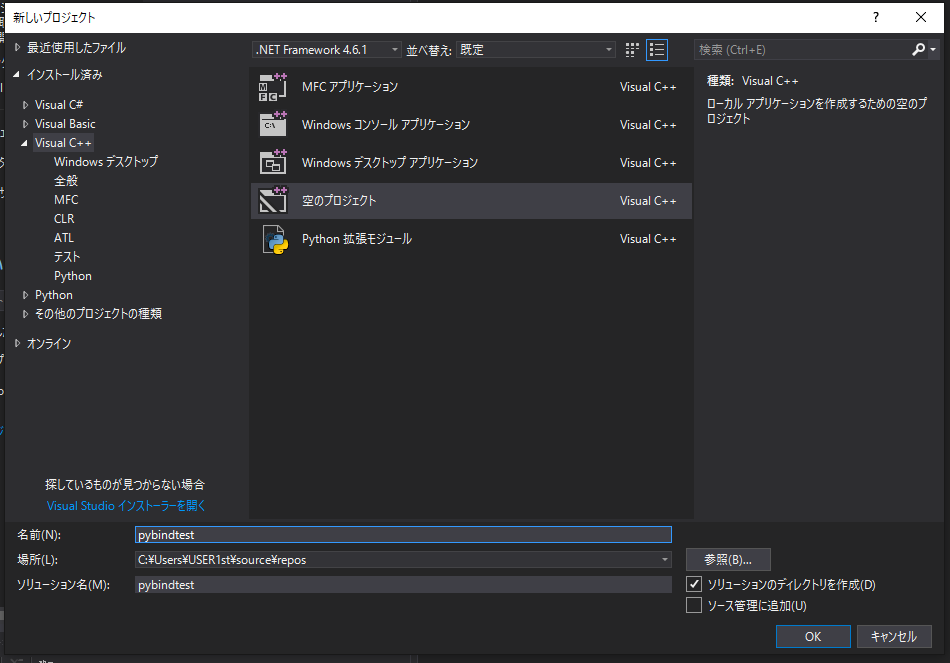
ソルーションを作成しプロジェクト名をpybindtestとして設定します.ここでは空のプロジェクトを指定します.
プロパティを編集
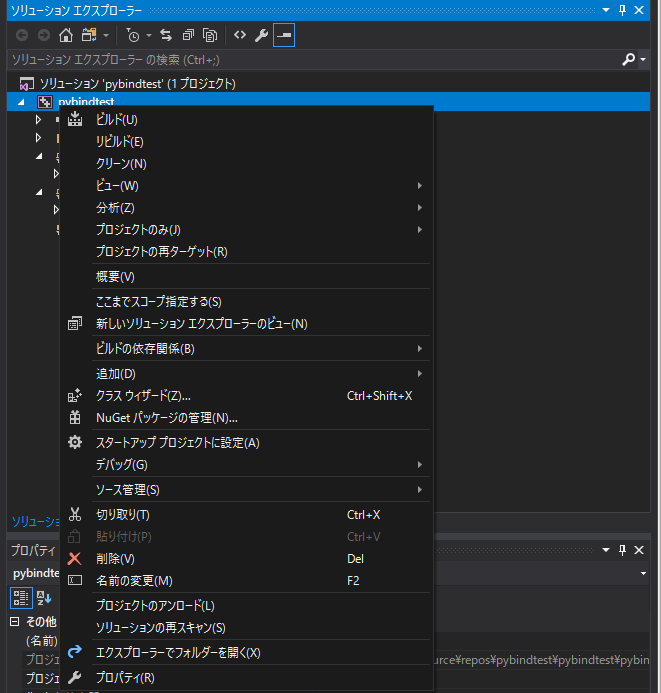
ソリューションエクスプローラー(たぶんIDEの画面の右側)のpybindtest プロジェクトのプロパティからいろいろと設定していきます.
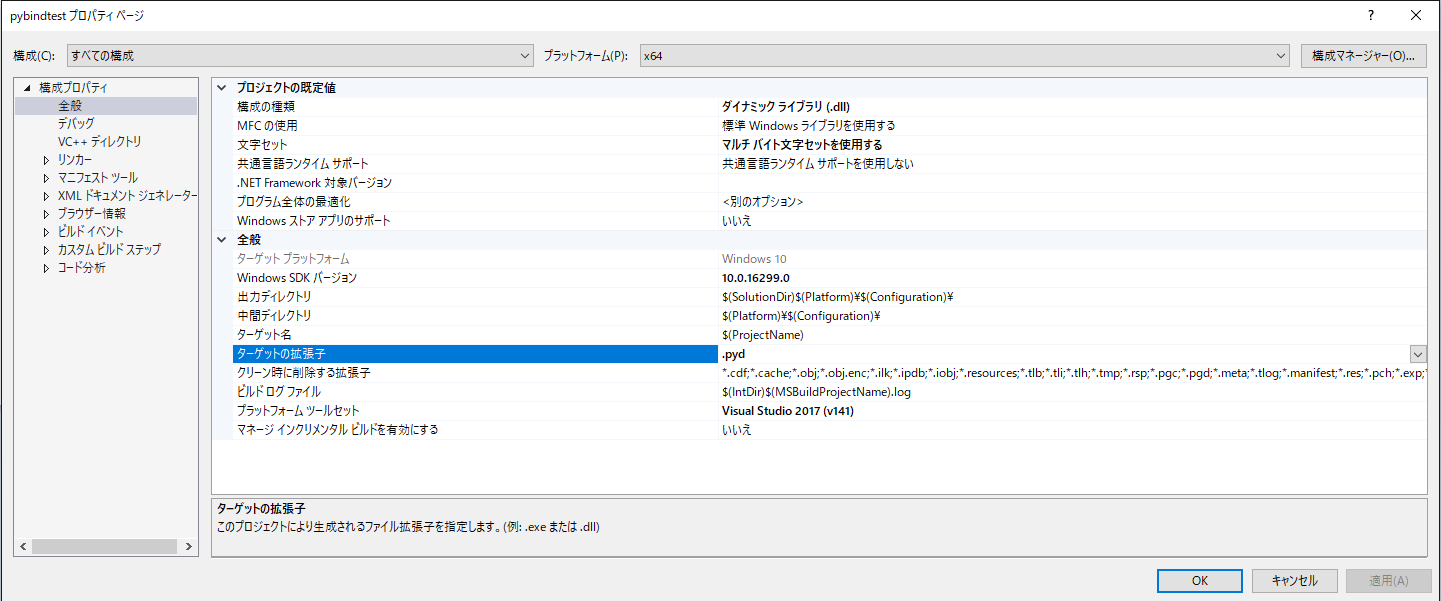
構成の種類をダイナミックライブラリとして設定.ターゲット拡張子をpydに変更します.
インクルードディレクトリ・ライブラリディレクトリの編集
pybind11 のソースの場所,libs の場所を上で見つけていたのでそれらのパスを各々インクルードディレクトリとライブラリディレクトリに追加します.
リンカーの設定
入力->追加依存ファイルの部分にpython35.libを追加.
ソース,ヘッダーファイルを追加
以上でプロジェクトの準備ができました.
あとはソースを追加していきます.
ここではSource.cpp Header.hを各々次のようなものとします.
# include<vector>
# include <utility>
using namespace::std;

int add(int x, int y);

class POINT {
private:
	int x;
	int y;
public:
	int sum;
	POINT(pair<int, int> xy) { this->x = xy.first; this->y = xy.second; this->sum = this->x + this->y; }
	POINT(int x, int y) { this->x = x; this->y = y; this->sum = x + y; }
	int X() { return x; }
	int Y() { return y; }
	POINT operator+(const POINT &v) const { return POINT(this->x + v.x, this->y + v.y); }
	std::string toString() const {
		return "(" + std::to_string(this->x) + ", " + std::to_string(this->y) + ")";
	}
};
//References:
//http://pybind11.readthedocs.io/en/stable/classes.html
//https://qiita.com/ignis_fatuus/items/c7523c0fe2bc2f415d50
//https://qiita.com/exy81/items/e309df7e33d4ff20a91a#_reference-c8a52580111447fade09
//http://pybind11.readthedocs.io/en/stable/advanced/classes.html#operator-overloading
//http://pybind11.readthedocs.io/en/stable/classes.html#overloaded-methods

# include <pybind11/pybind11.h>
# include <pybind11/stl.h> // vector用
# include <pybind11/operators.h>//operator
# include "Header.h"


using namespace::std;

int add(int x, int y) {
	return x + y;
}

namespace py = pybind11;
PYBIND11_MODULE(pybindtest, m) {
	m.doc() = "pybind11 example plugin";
	m.def("add", &add);
	py::class_<POINT>(m, "POINT")
		.def(py::init<int, int>())
		.def(py::init<pair<int, int>>())
		.def_readwrite("sum", &POINT::sum)
		.def_property_readonly("x", &POINT::X)
		.def_property_readonly("y", &POINT::Y)
		.def(py::self + py::self)
		.def("__repr__", &POINT::toString);
}
PYBIND11_MODULE(pybindtest, m) の部分ですが,プロジェクト名を指定しておかないとPython側から呼び出したときに失敗します.
あと一歩です.
あとはソルーションをビルドしてください.
pybindtest.pyd というのができていればOKです.
れっつ呼び出しFrom Python
準備は整いました.次のコードを呼び出すことができれば完成です.
import pybindtest
from pybindtest import add, POINT

print('doc=', pybindtest.__doc__)
x1, y1 = 1, 2
print("add({},{})=".format(x1, y1), pybindtest.add(x1, y1))

x2, y2 = 3, 4

p = POINT(x1, y1)
q = POINT([x2, y2])

print('p=', p)
print('q=', q)
print('p+q=', p+q)
print('p.x,p.y=', p.x, p.y)
C++側のPOINTクラスのコンストラクタを複数定義できるのですが,それに対応するPython側の呼び出しができるのがすごいと思ったこの頃です.あとC++側でPOINTクラスの+演算子を定義をしておくことでPythonがわでのPOINTクラスどうしの足し算が可能になります.
ということが
に書いてあります.
また def_property_readonly を用いることでC++のプライベート機能をPython側でも保つことができます.
ということが
に書いてあります.
感想
意外とドキュメントがわかりやすくてpybind11便利だなーと感じだこの頃です.
以前はBoostを使っていたのですが,これからはpybind11も視野に入れていこうと思いました.
以上です.

