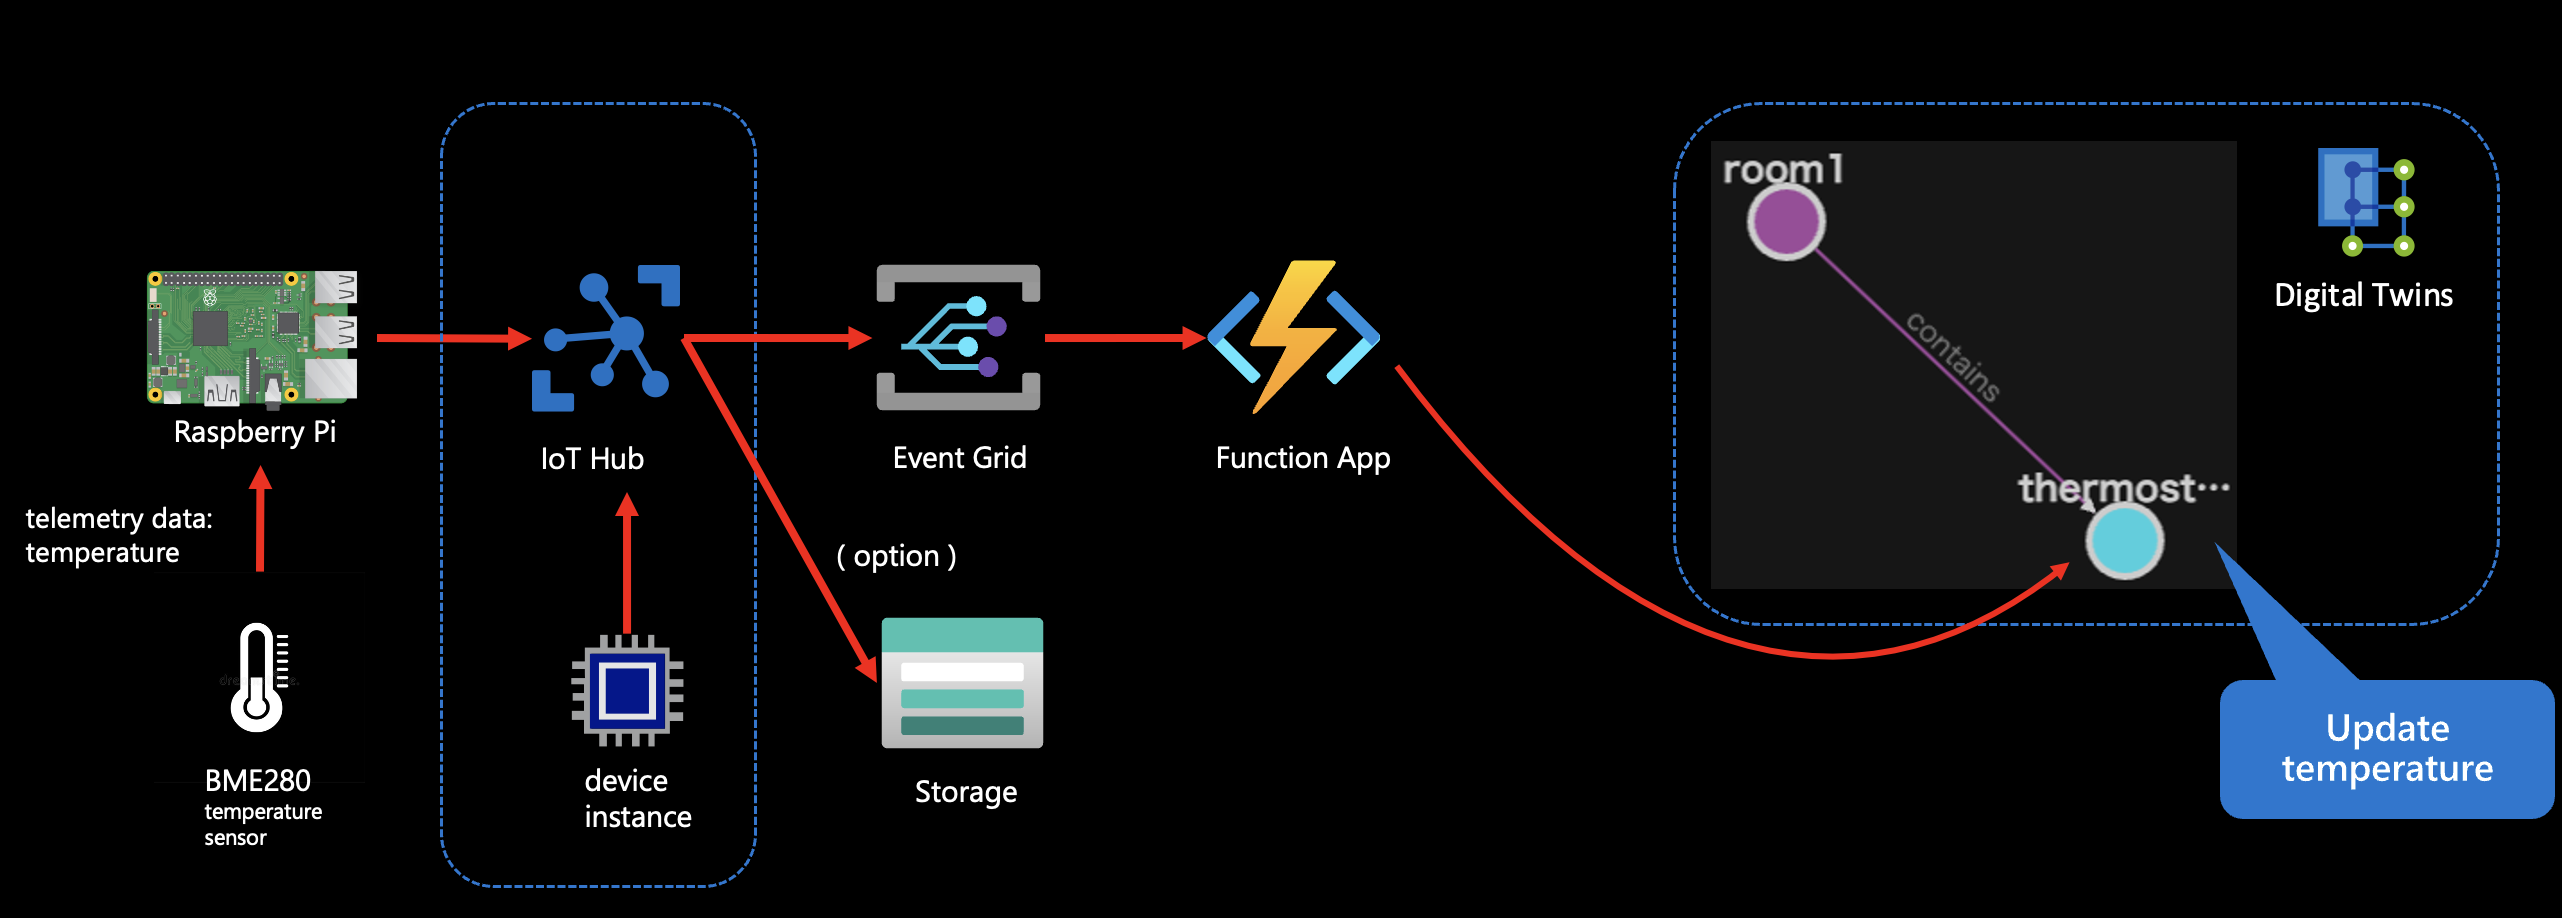
In this article, I will demonstrate deploying a system to reflect the temperature data that an IoT device gets to a Twin belonging to an Azure Digital Twins instance.
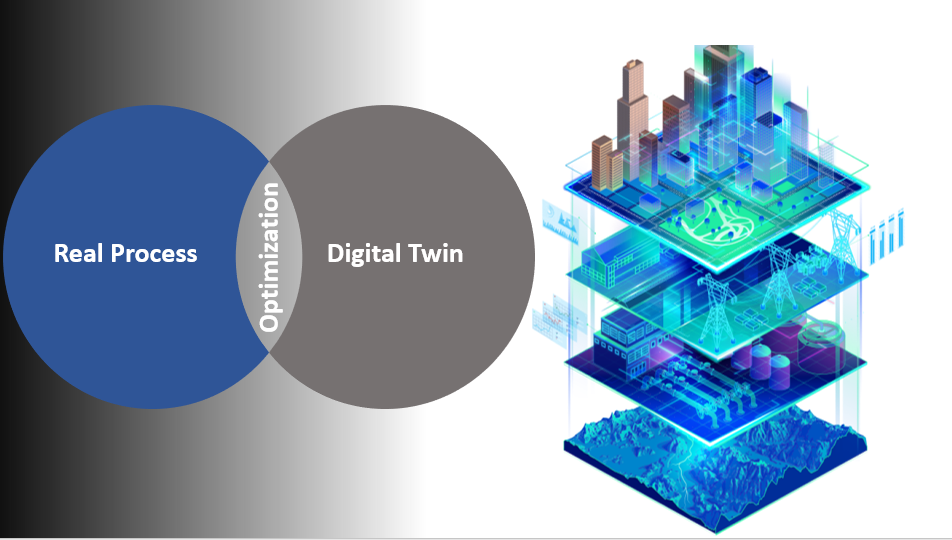
Azure Digital Twins is a platform as a service (PaaS) offering that enables the creation of twin graphs based on digital models of entire environments.
Imagine how awesome it would be to have a replica of the natural world in virtual space!

The system includes the following Azure resources.
- An IoT Hub instance
- A Storage Account
- An IoT device belonging to the IoT Hub instance
- An Event Grid instance
- A Function App
- An Azure Digital Twins instance
- Two models and related twins
System connectivity imagine
Here is a library of this demo that includes the steps and helpful content.
Instructions
1. Operations on an IoT Device (Raspberry Pi + BME280 sensor)
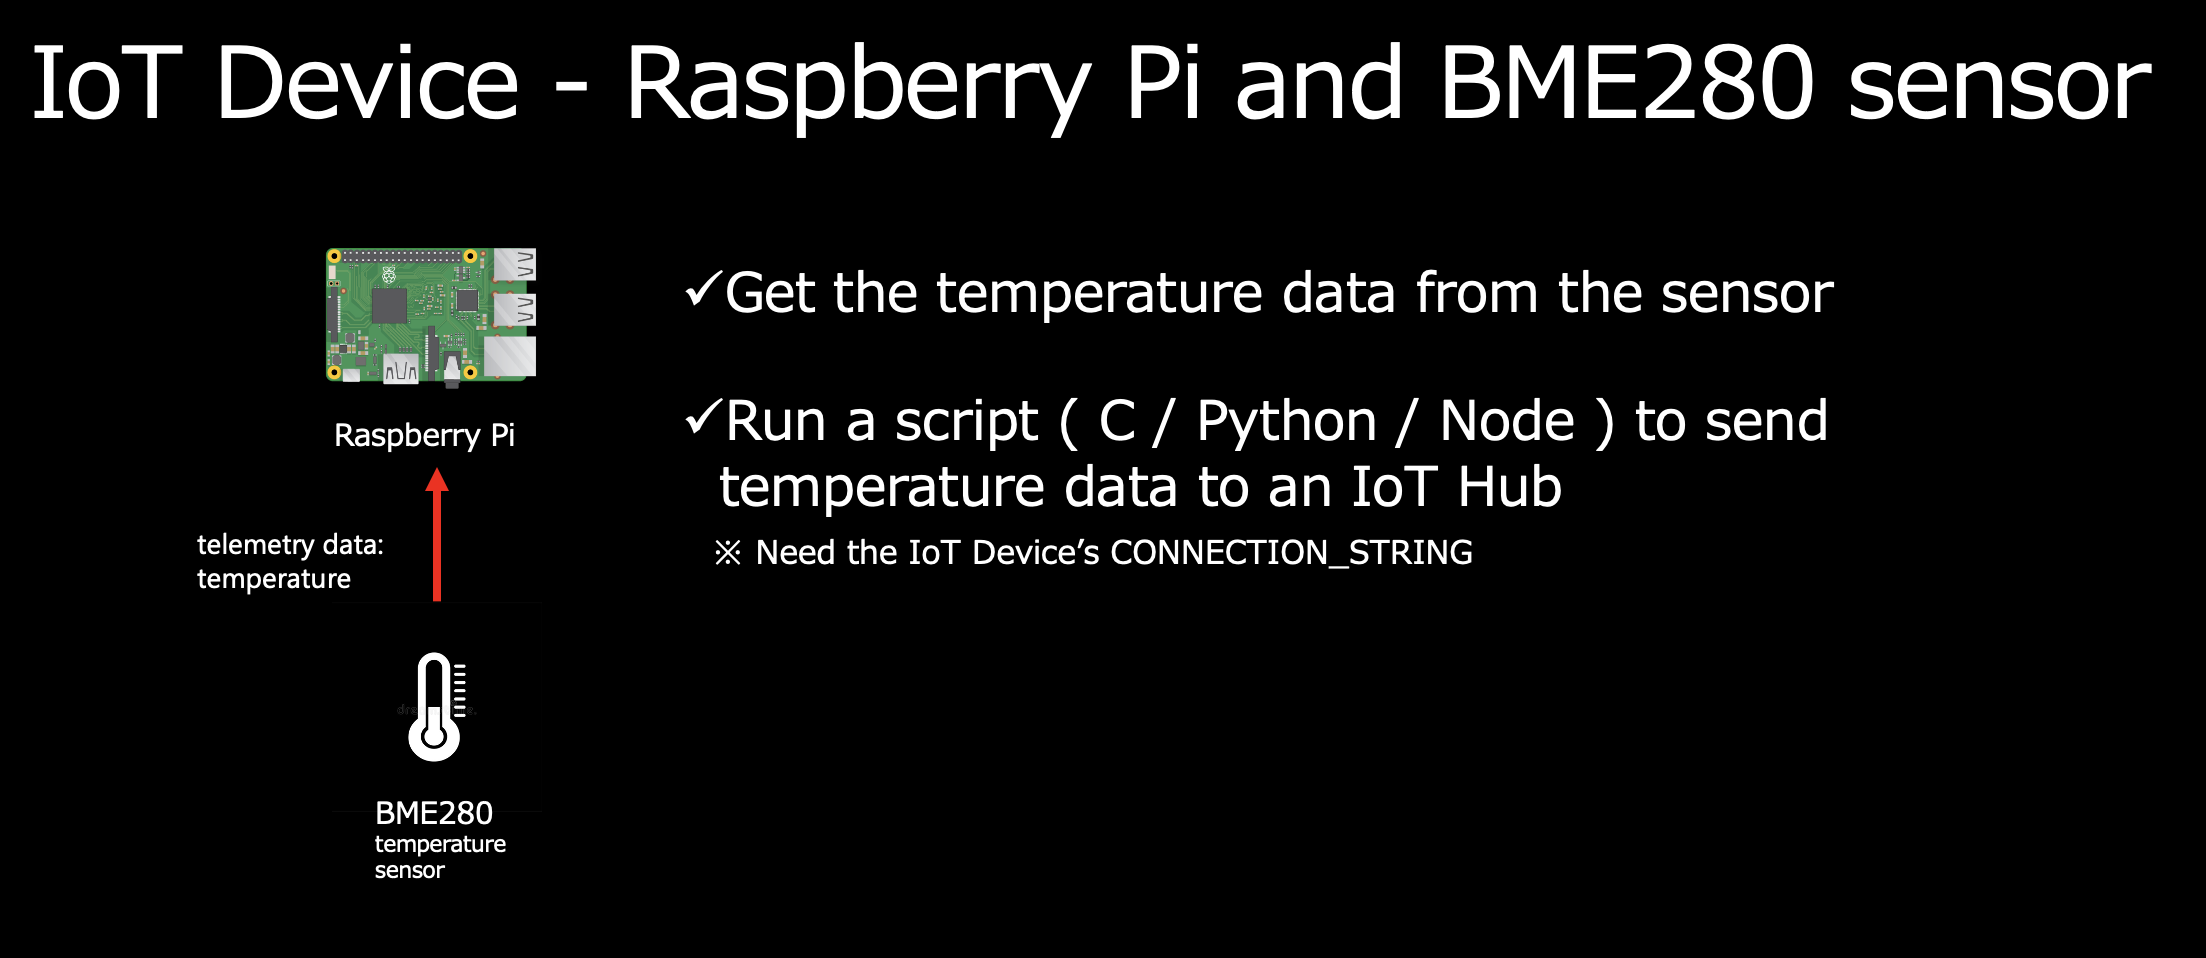
This time, I use a BME280 sensor to get the temperature date and use a Raspberry Pi as an IoT Device.
The following site provides instructions on connecting a BME280 sensor with a Raspberry Pi. After finishing the connectivity, A script is necessary to get the temperature data and send it to an IoT Hub instance as telemetry data. A sample Python script is also available on the following site.
Also, here is the Python script that I'm using.
In the script code, remember to update the IoT Hub device's CONNECTING_STRING.
※The CONNECT_STRING will be created later.
2. Operations on an IoT Hub and a Storage Account
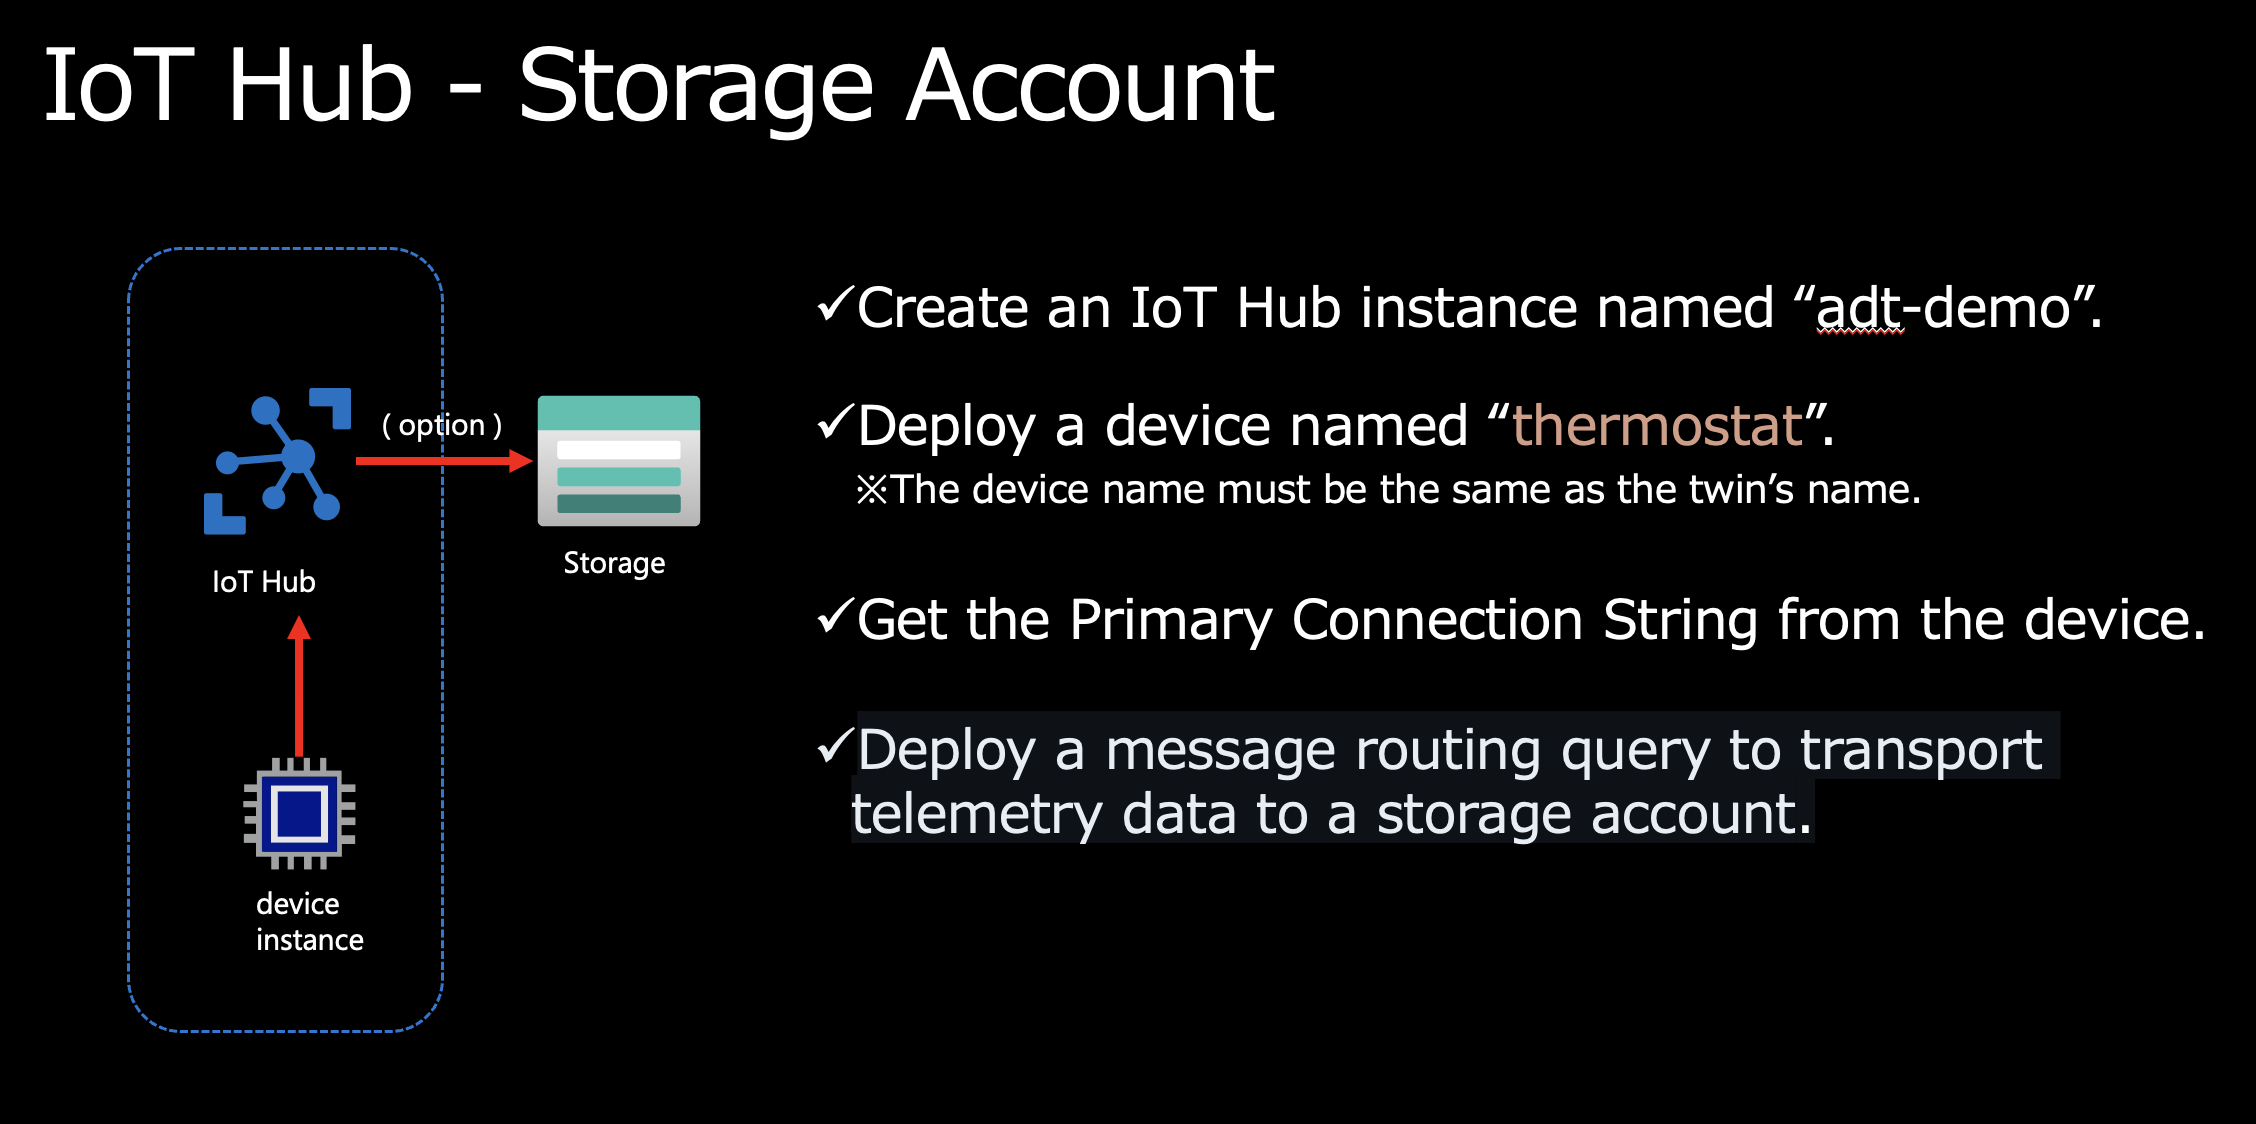
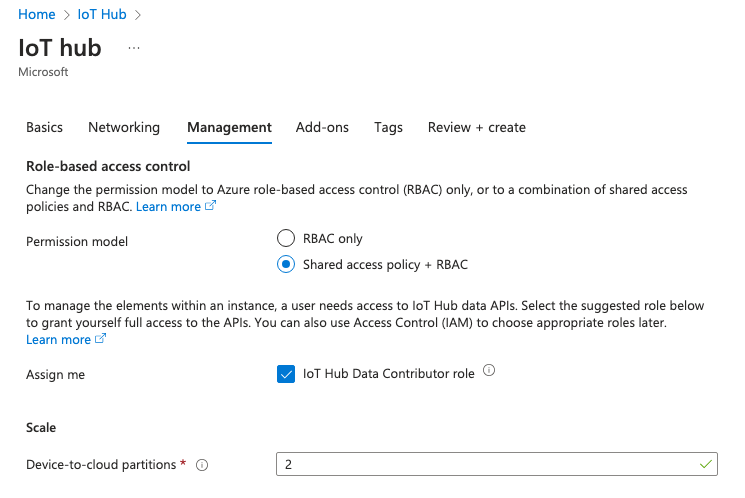
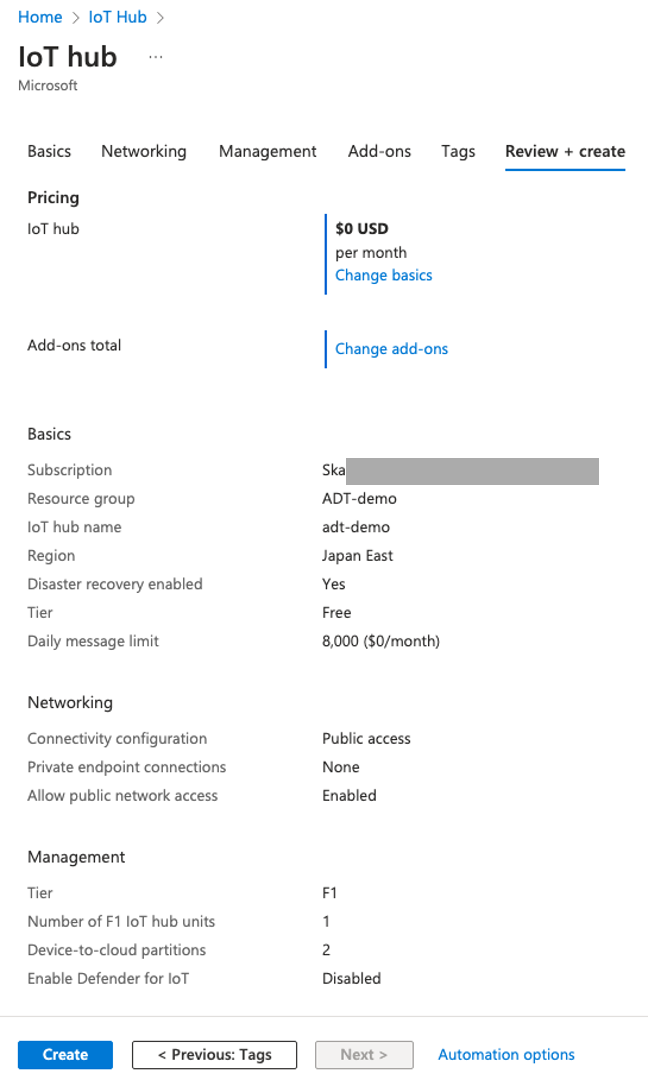
2-1. Deploy an IoT Hub instance.
Use the "Free" price tier because the daily message limit is enough for the demo.
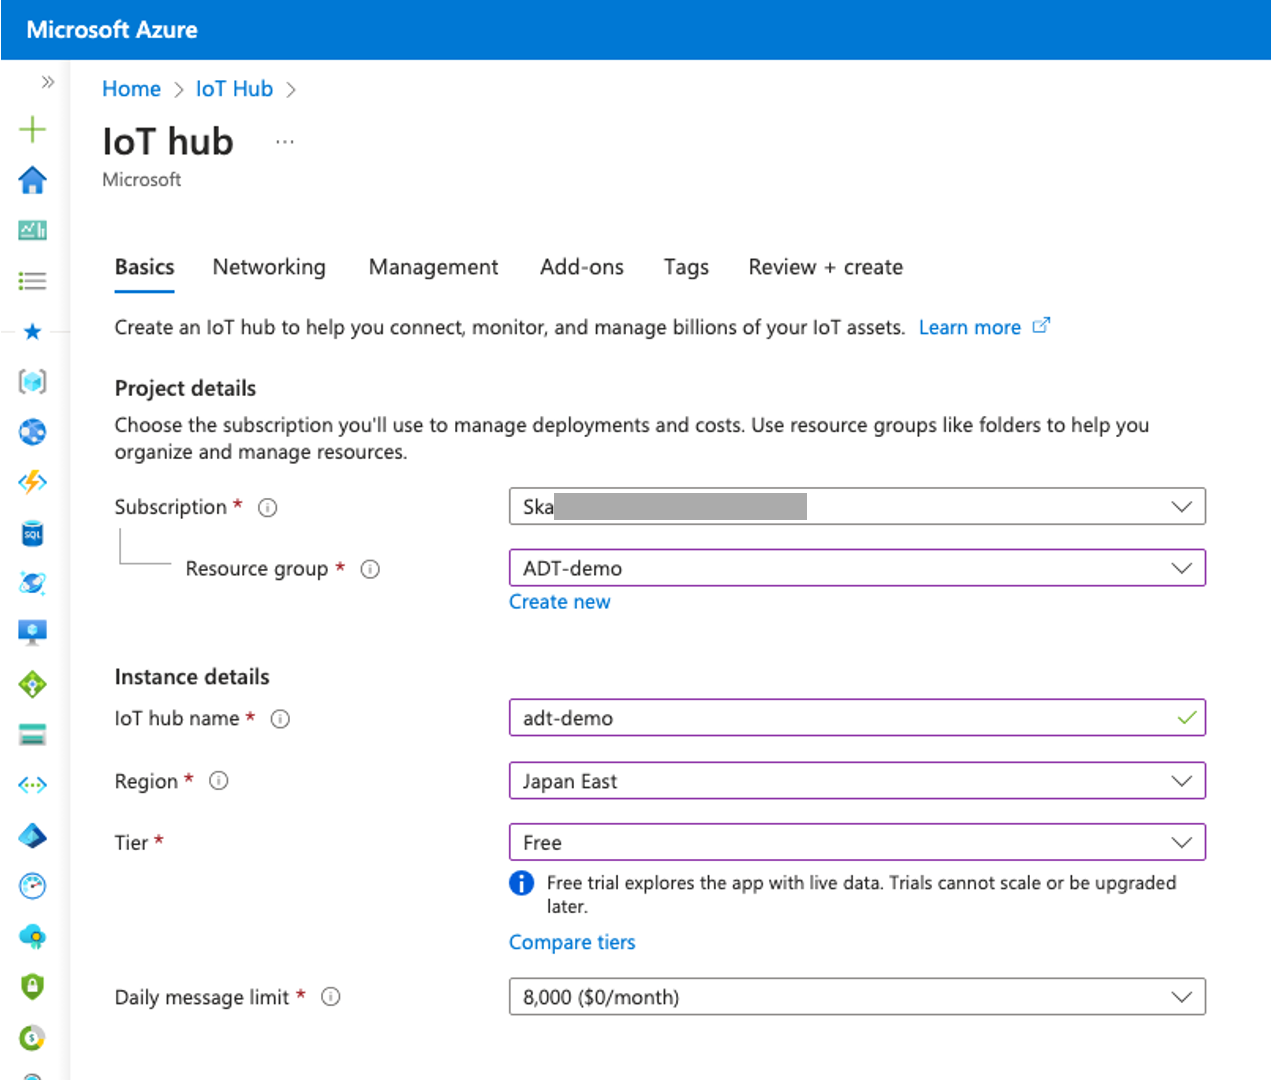
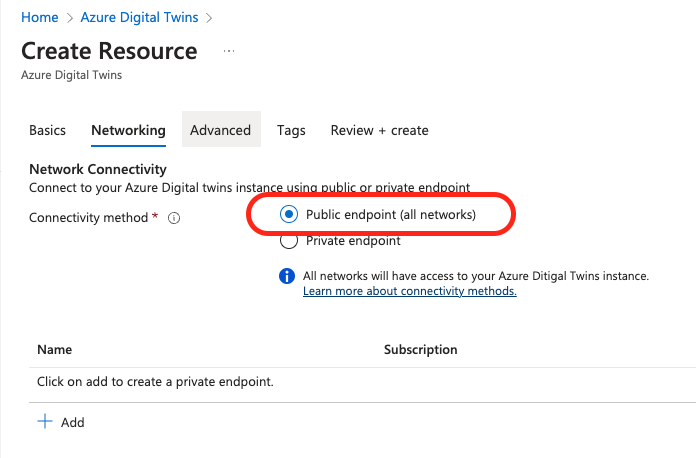
Use [Public access] in this demo.

Turn on the [IoT Hub Data Contributor role].
Accept the default value in the [Add-ons] and [Tags] tabs.
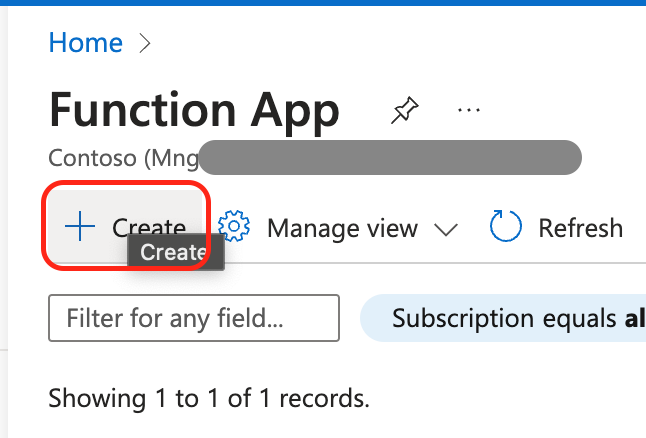
Click [Create].
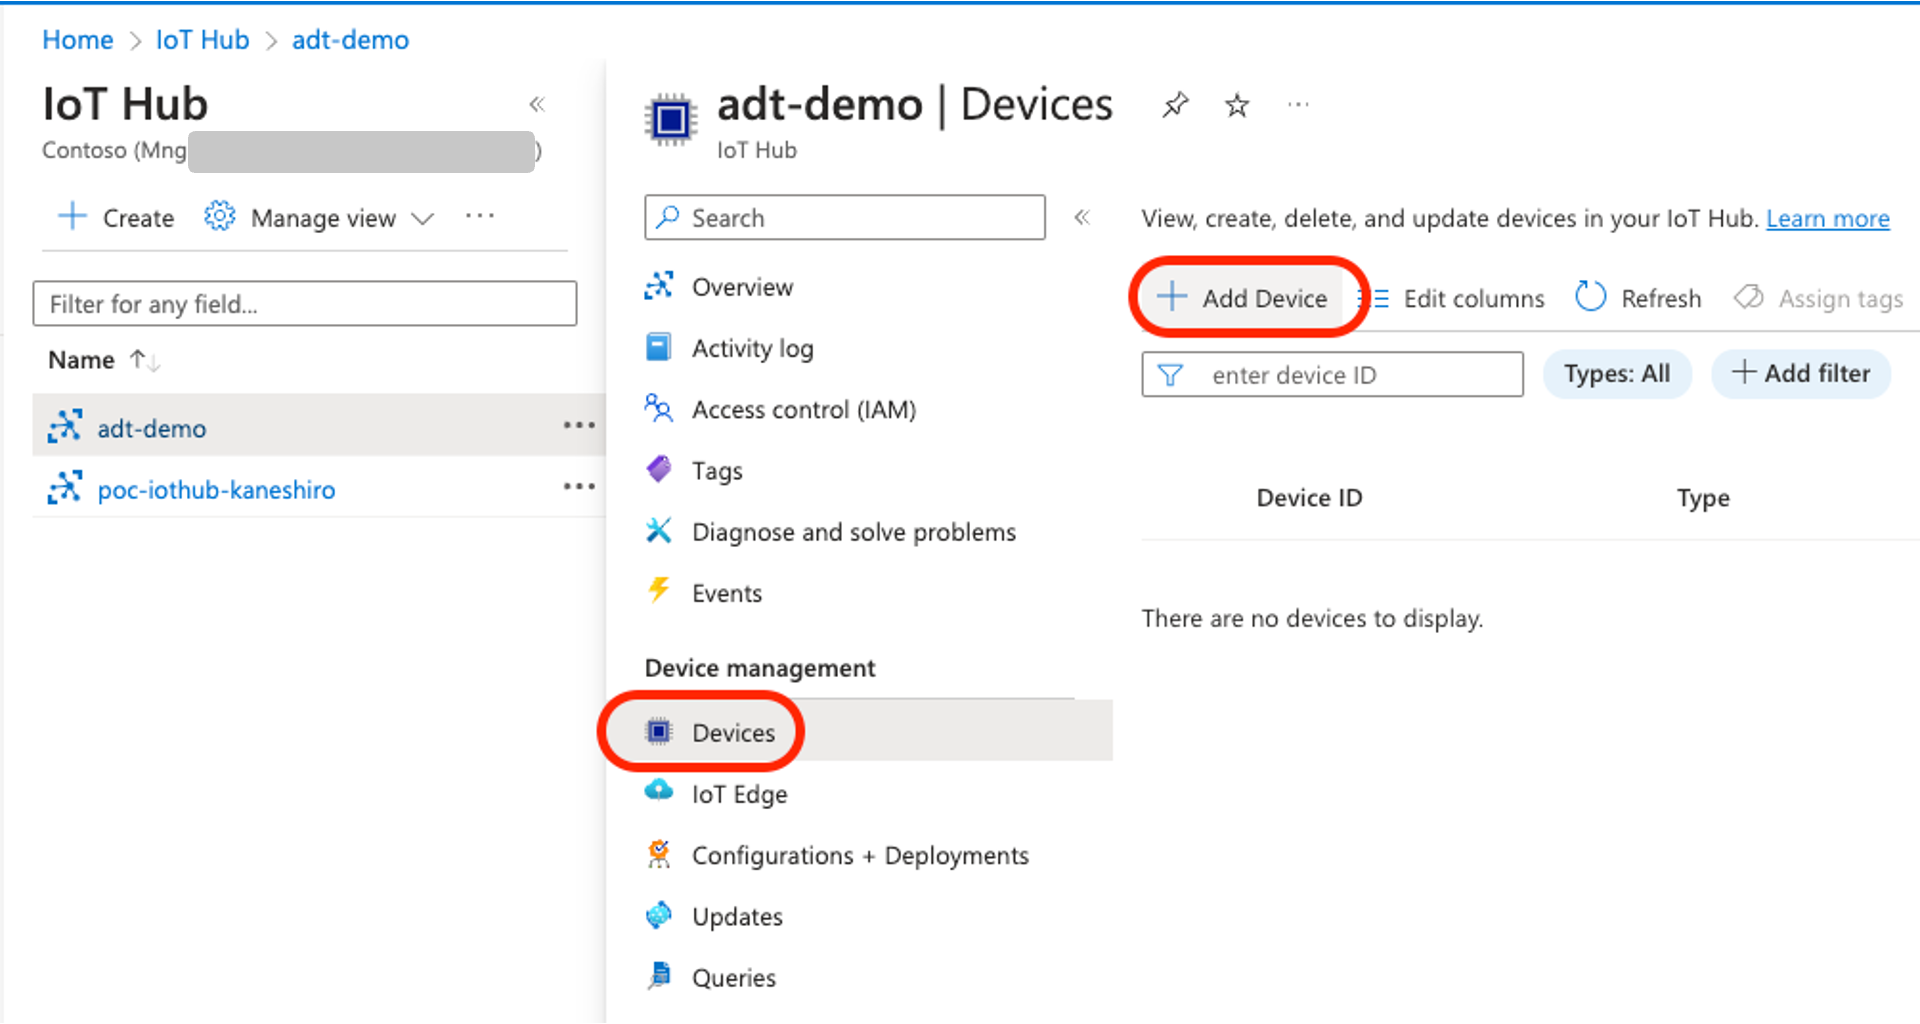
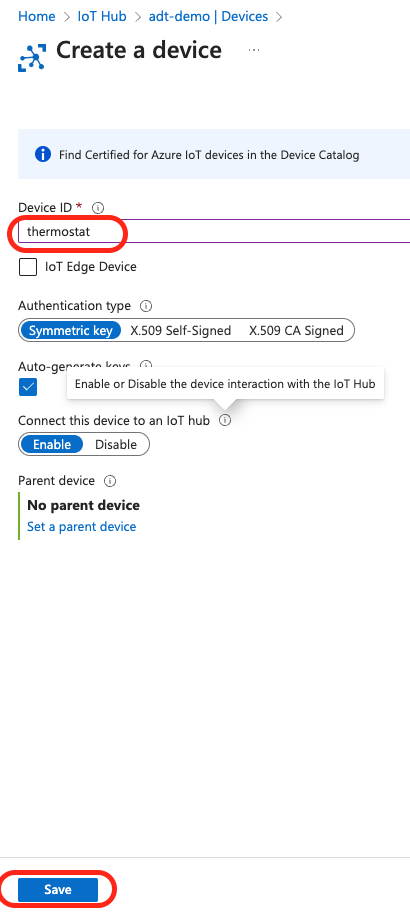
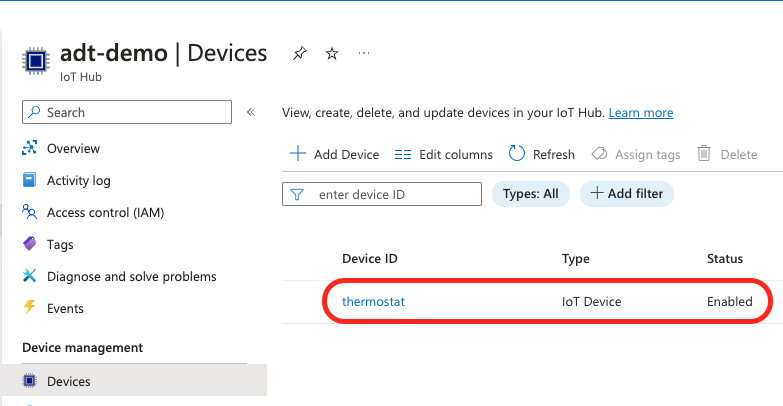
2-2. Deploy an IoT device in the IoT Hub.
!!! The device name must be the same as the twin's. !!!
※The twin will be deployed later
2-3. Get the primary CONNECT_STRING.

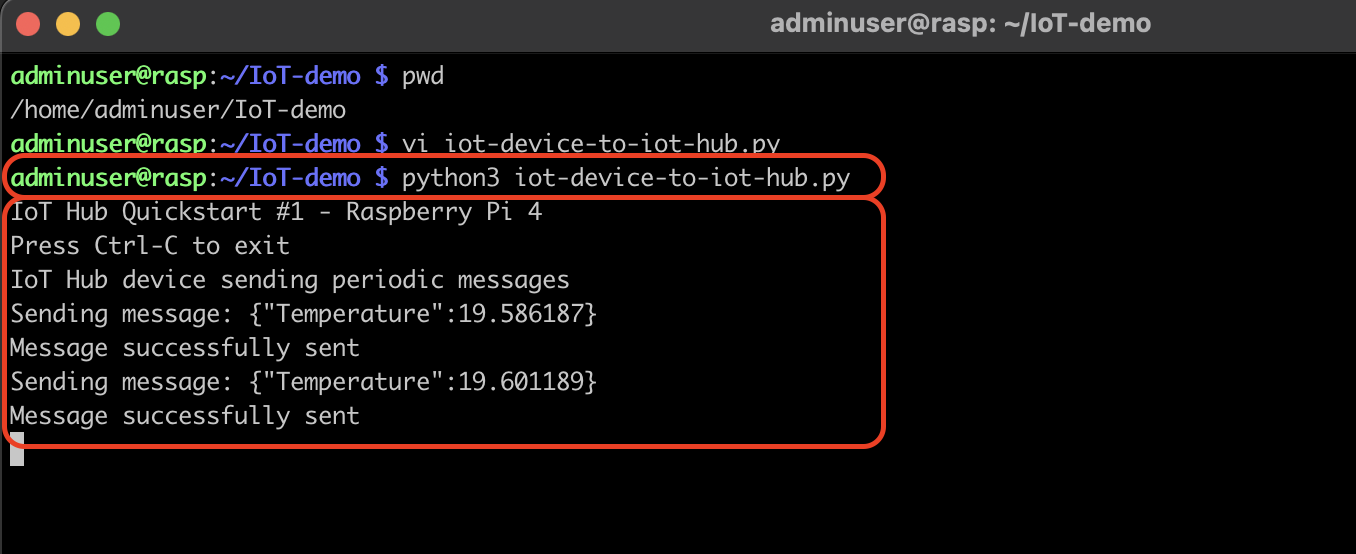
2-4. Confirm the connectivity between the Raspberry Pi and the IoT device.
Update the Python Script with the CONNECT_STRING.


Run the script to confirm the temperature data is sent to the IoT device properly.
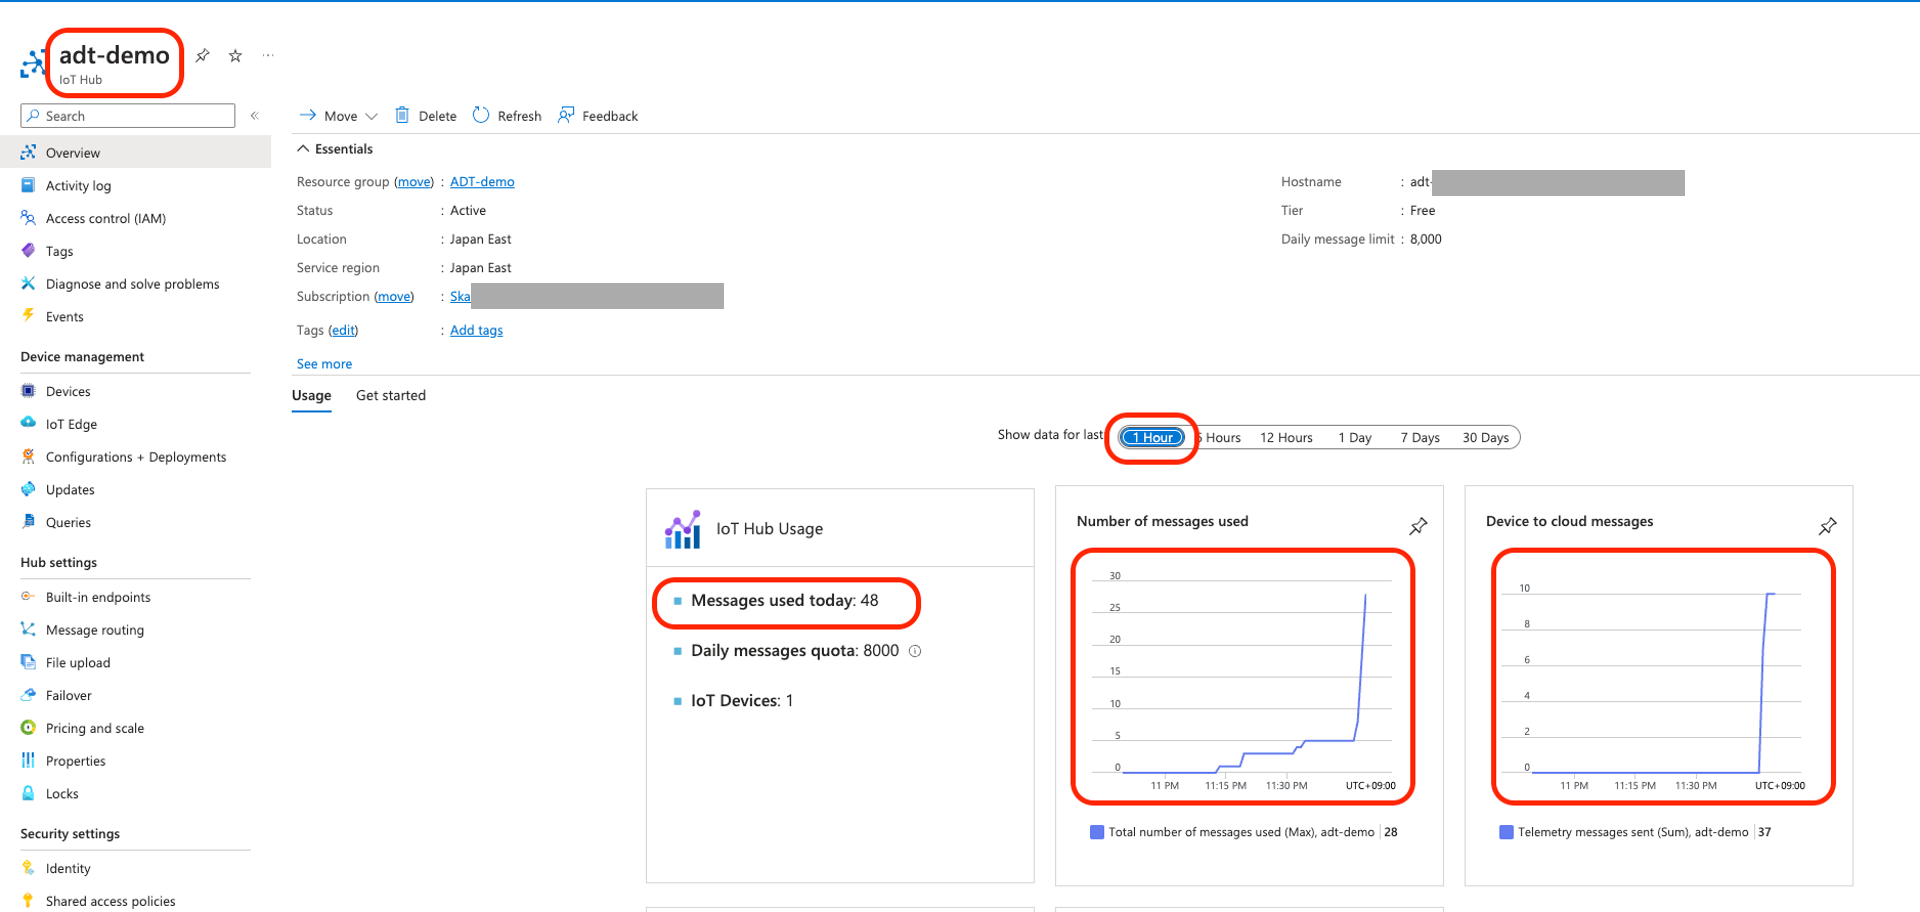
Open the IoT Hub's overview page.
Set the [Show data] period to "1 hour", and confirm charts that the message usage is more than 0.
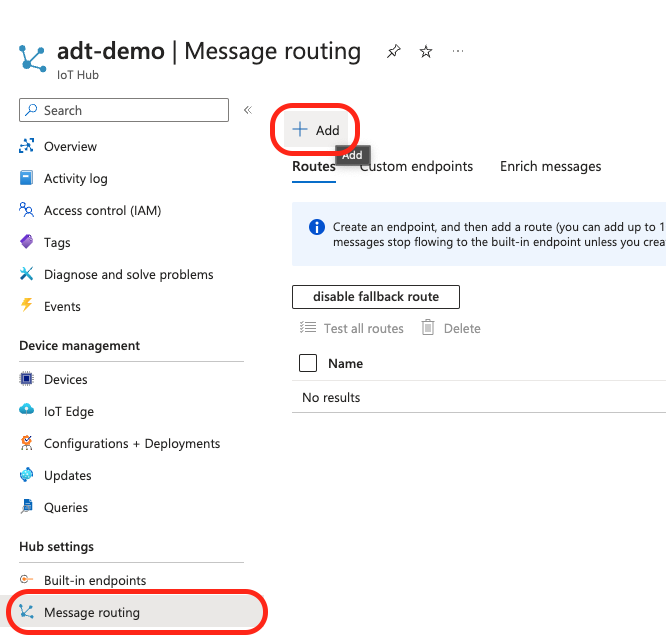
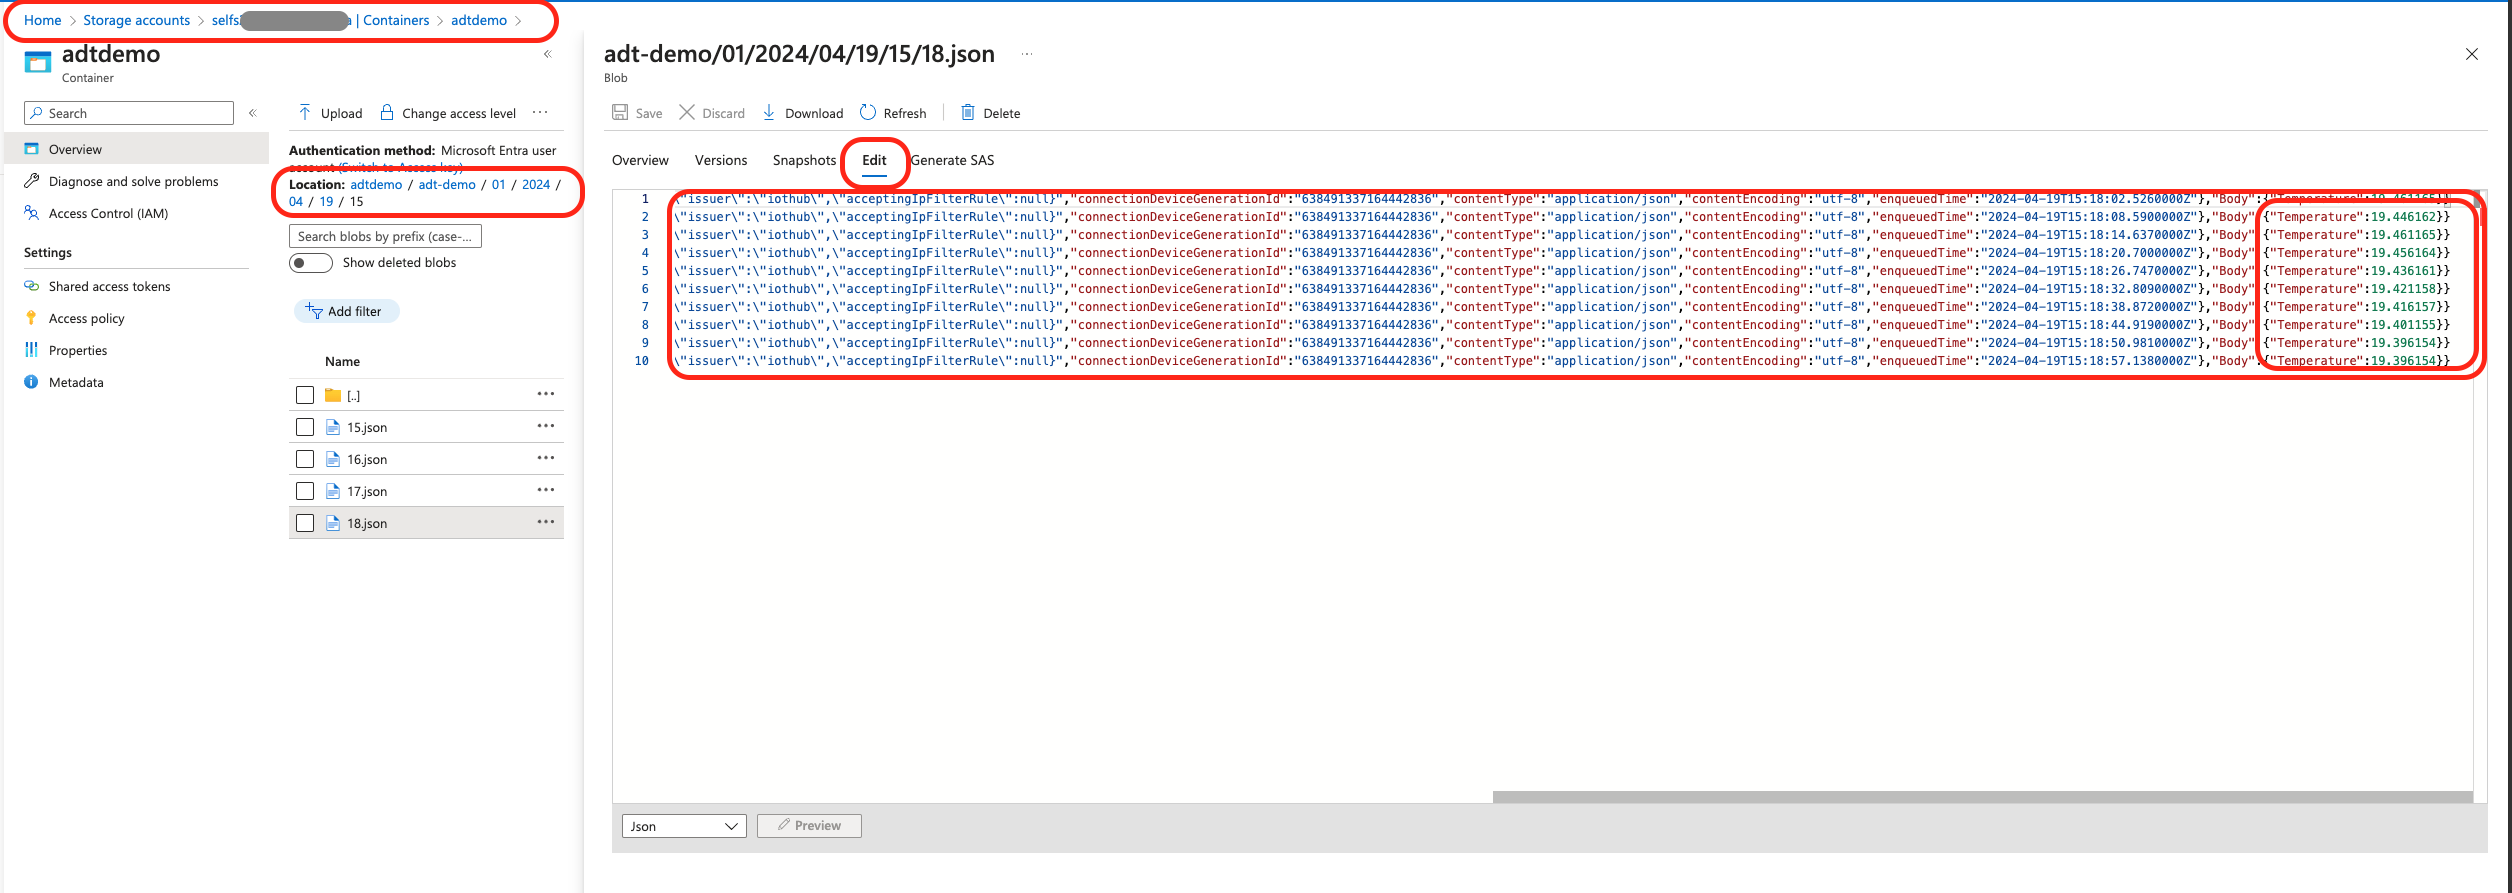
2-5. Deploy a [Message routing] to store the temperature data in a blob container.
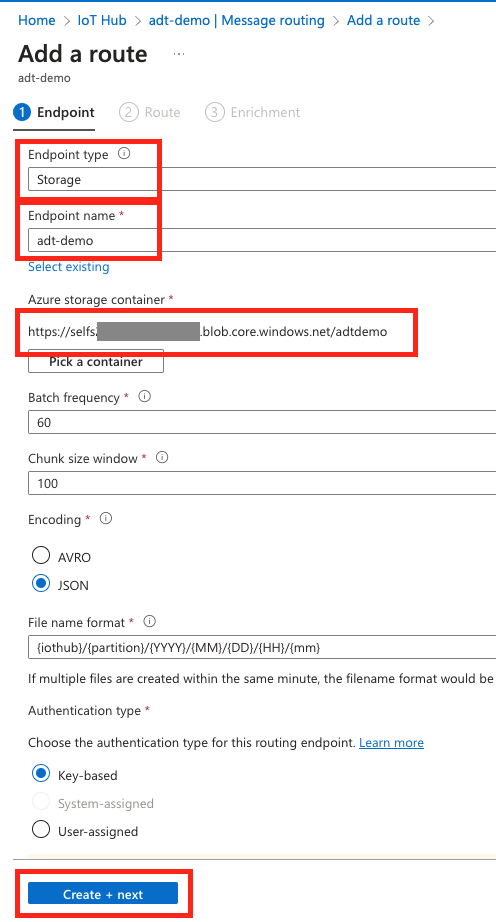
Choose the [Endpoint type] as "Storage".
Set a value in the [Endpoint name].
Choose a blob container from an existing storage account or create a new one.
Set the [Encoding] as "JSON".
Click [Create + next].
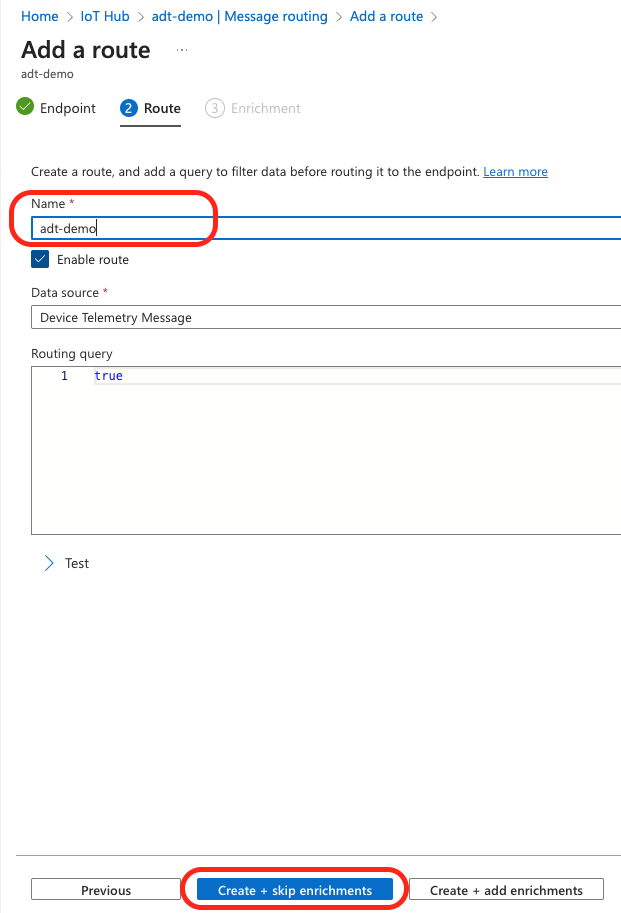
Set a value in the [Name].
Click [Create + skip enrichments].
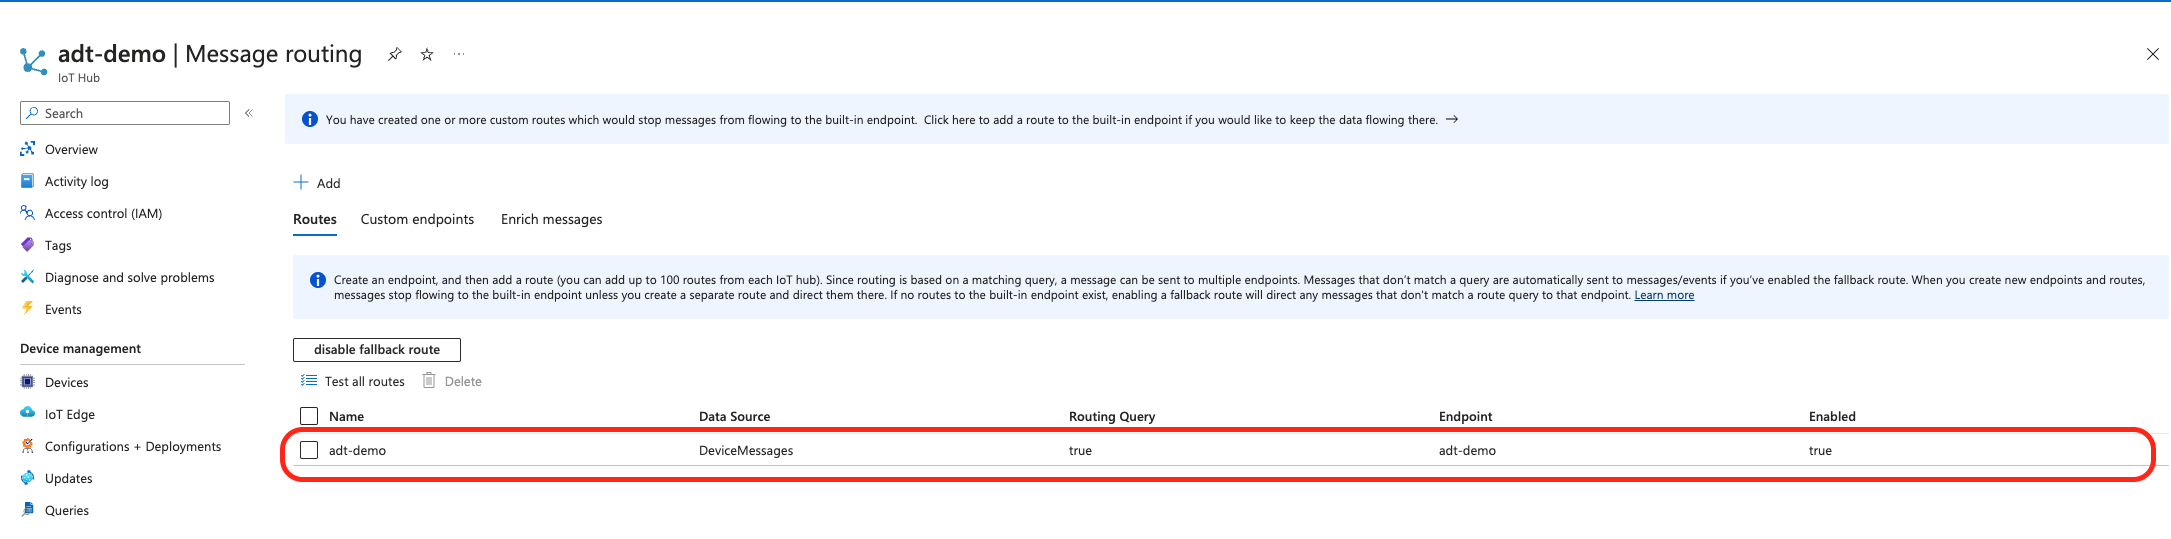
2-6. Confirm the temperature data is stored in the blob container.
3. Operations on the Azure Digital Twins
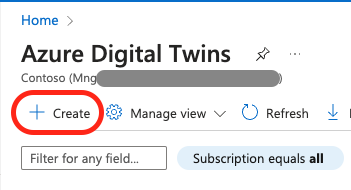
3-1. Deploy an Azure Digital Twins instance.
Turn on the [Assing Azure Digital Twins Data Owner Rolo] to assign the role to your active account.
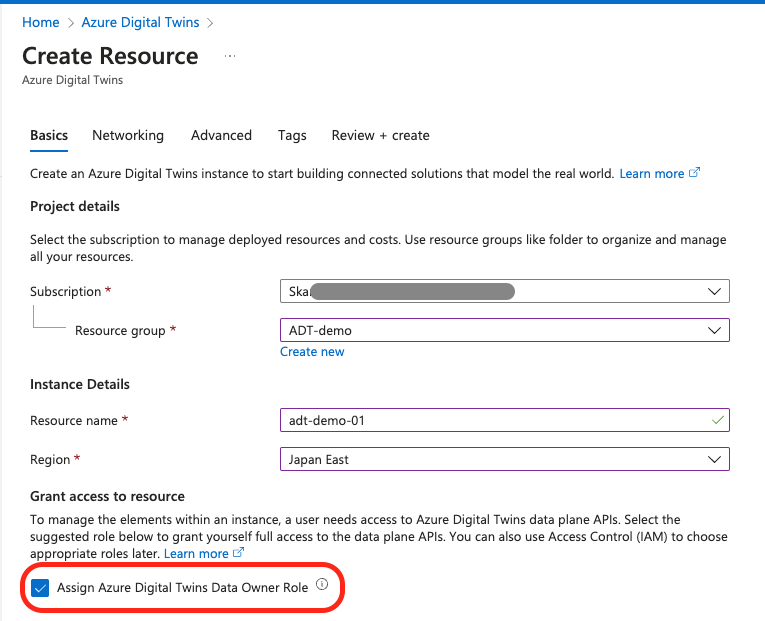
Allow Internet access since we use it in this demo, but private access is also available when choosing [Private endpoint].
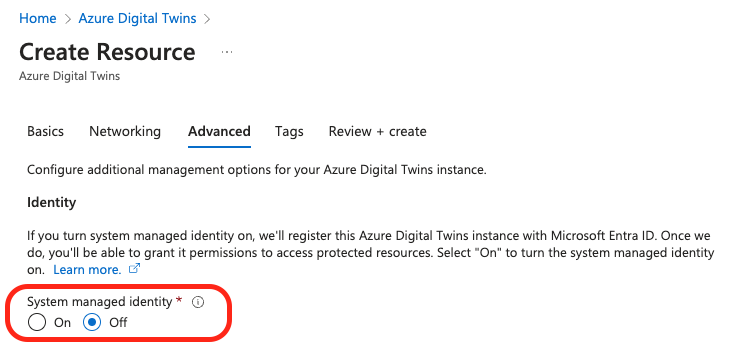
Keep the [System managed identity] off since we don't connect the Azure Digital Twins to other Azure services. Remember to turn this option on to use the Managed ID to access other resources and services.
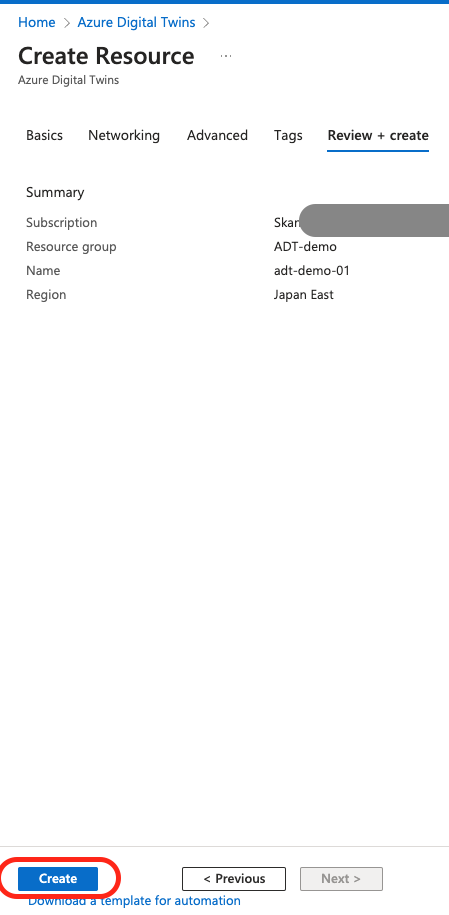
Create it.

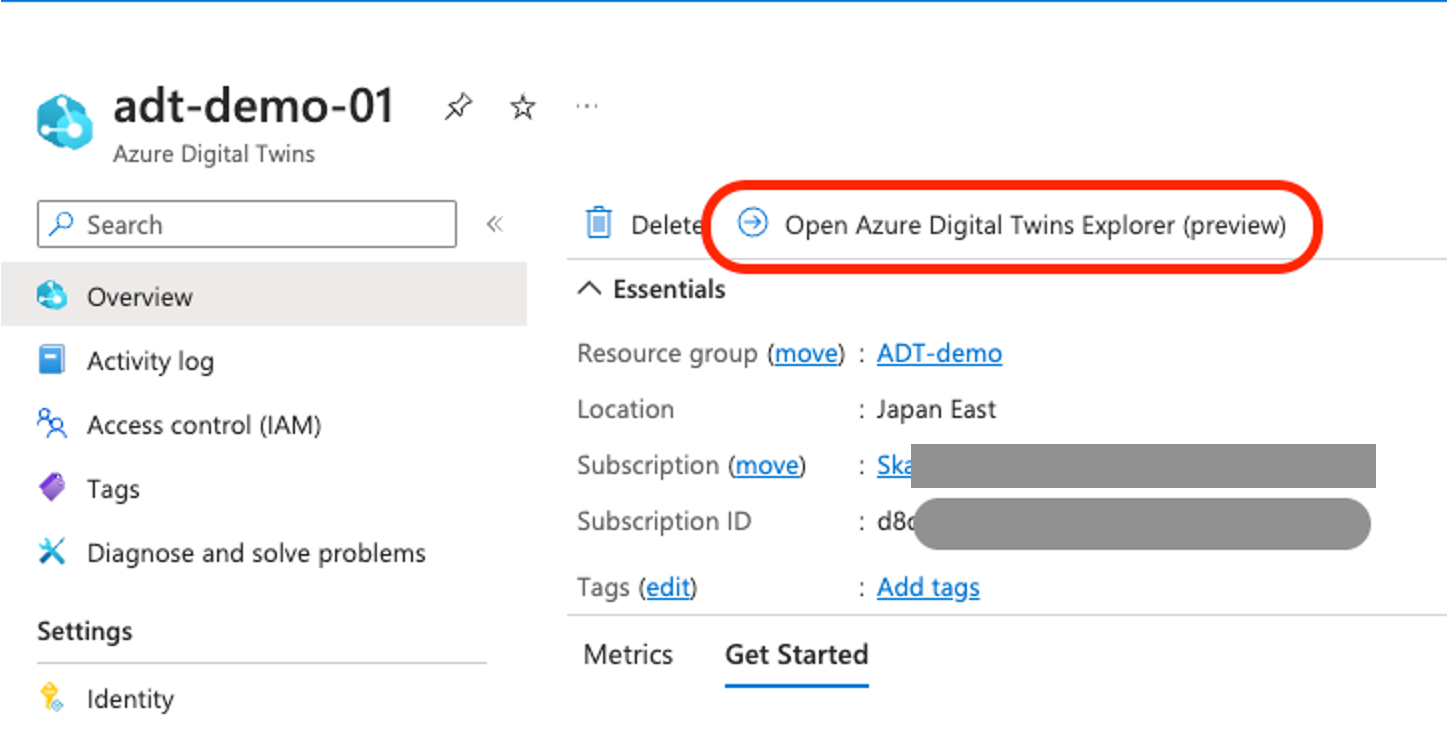
3-2. Open the Azure Digital Twins Explorer.
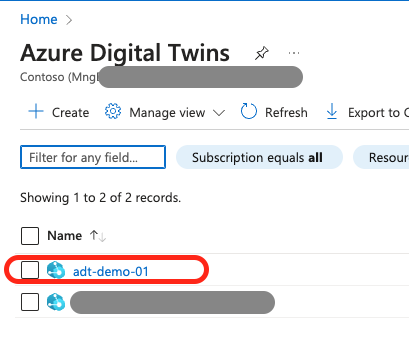
Confirm the Azure Digital Twins instance deployed properly and click it to open the overview page.
Click [Open Azure Digital Twins Explorer] to open it.
!!! It takes approximately 1 minute on my laptop to completely open the explorer, so be patient.
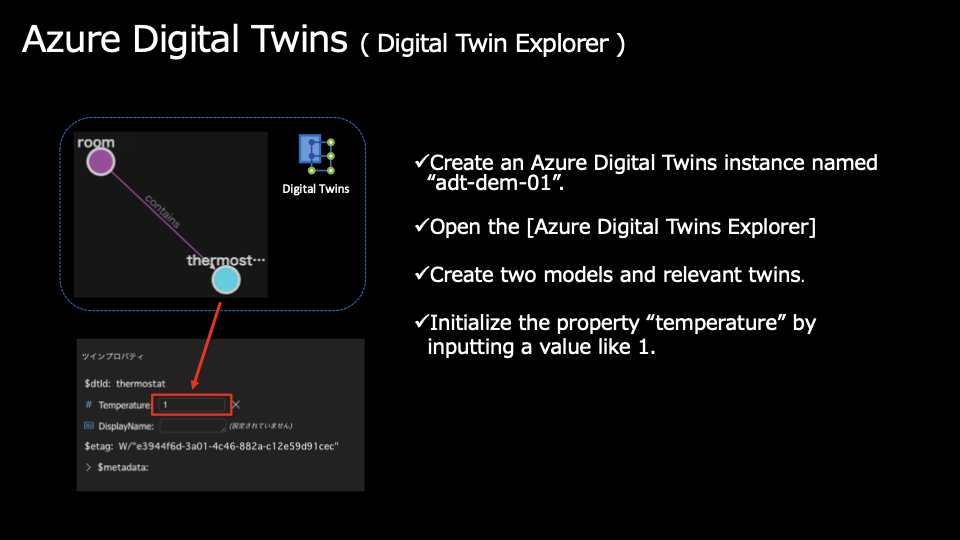
3-3. Create two models and twins.
Digital models and twins are defined by a specific language called "Digital Twin Definition Language," AKA "DTDL."
Here is a detailed library of DTDL.
The popular version is 2 and 3.
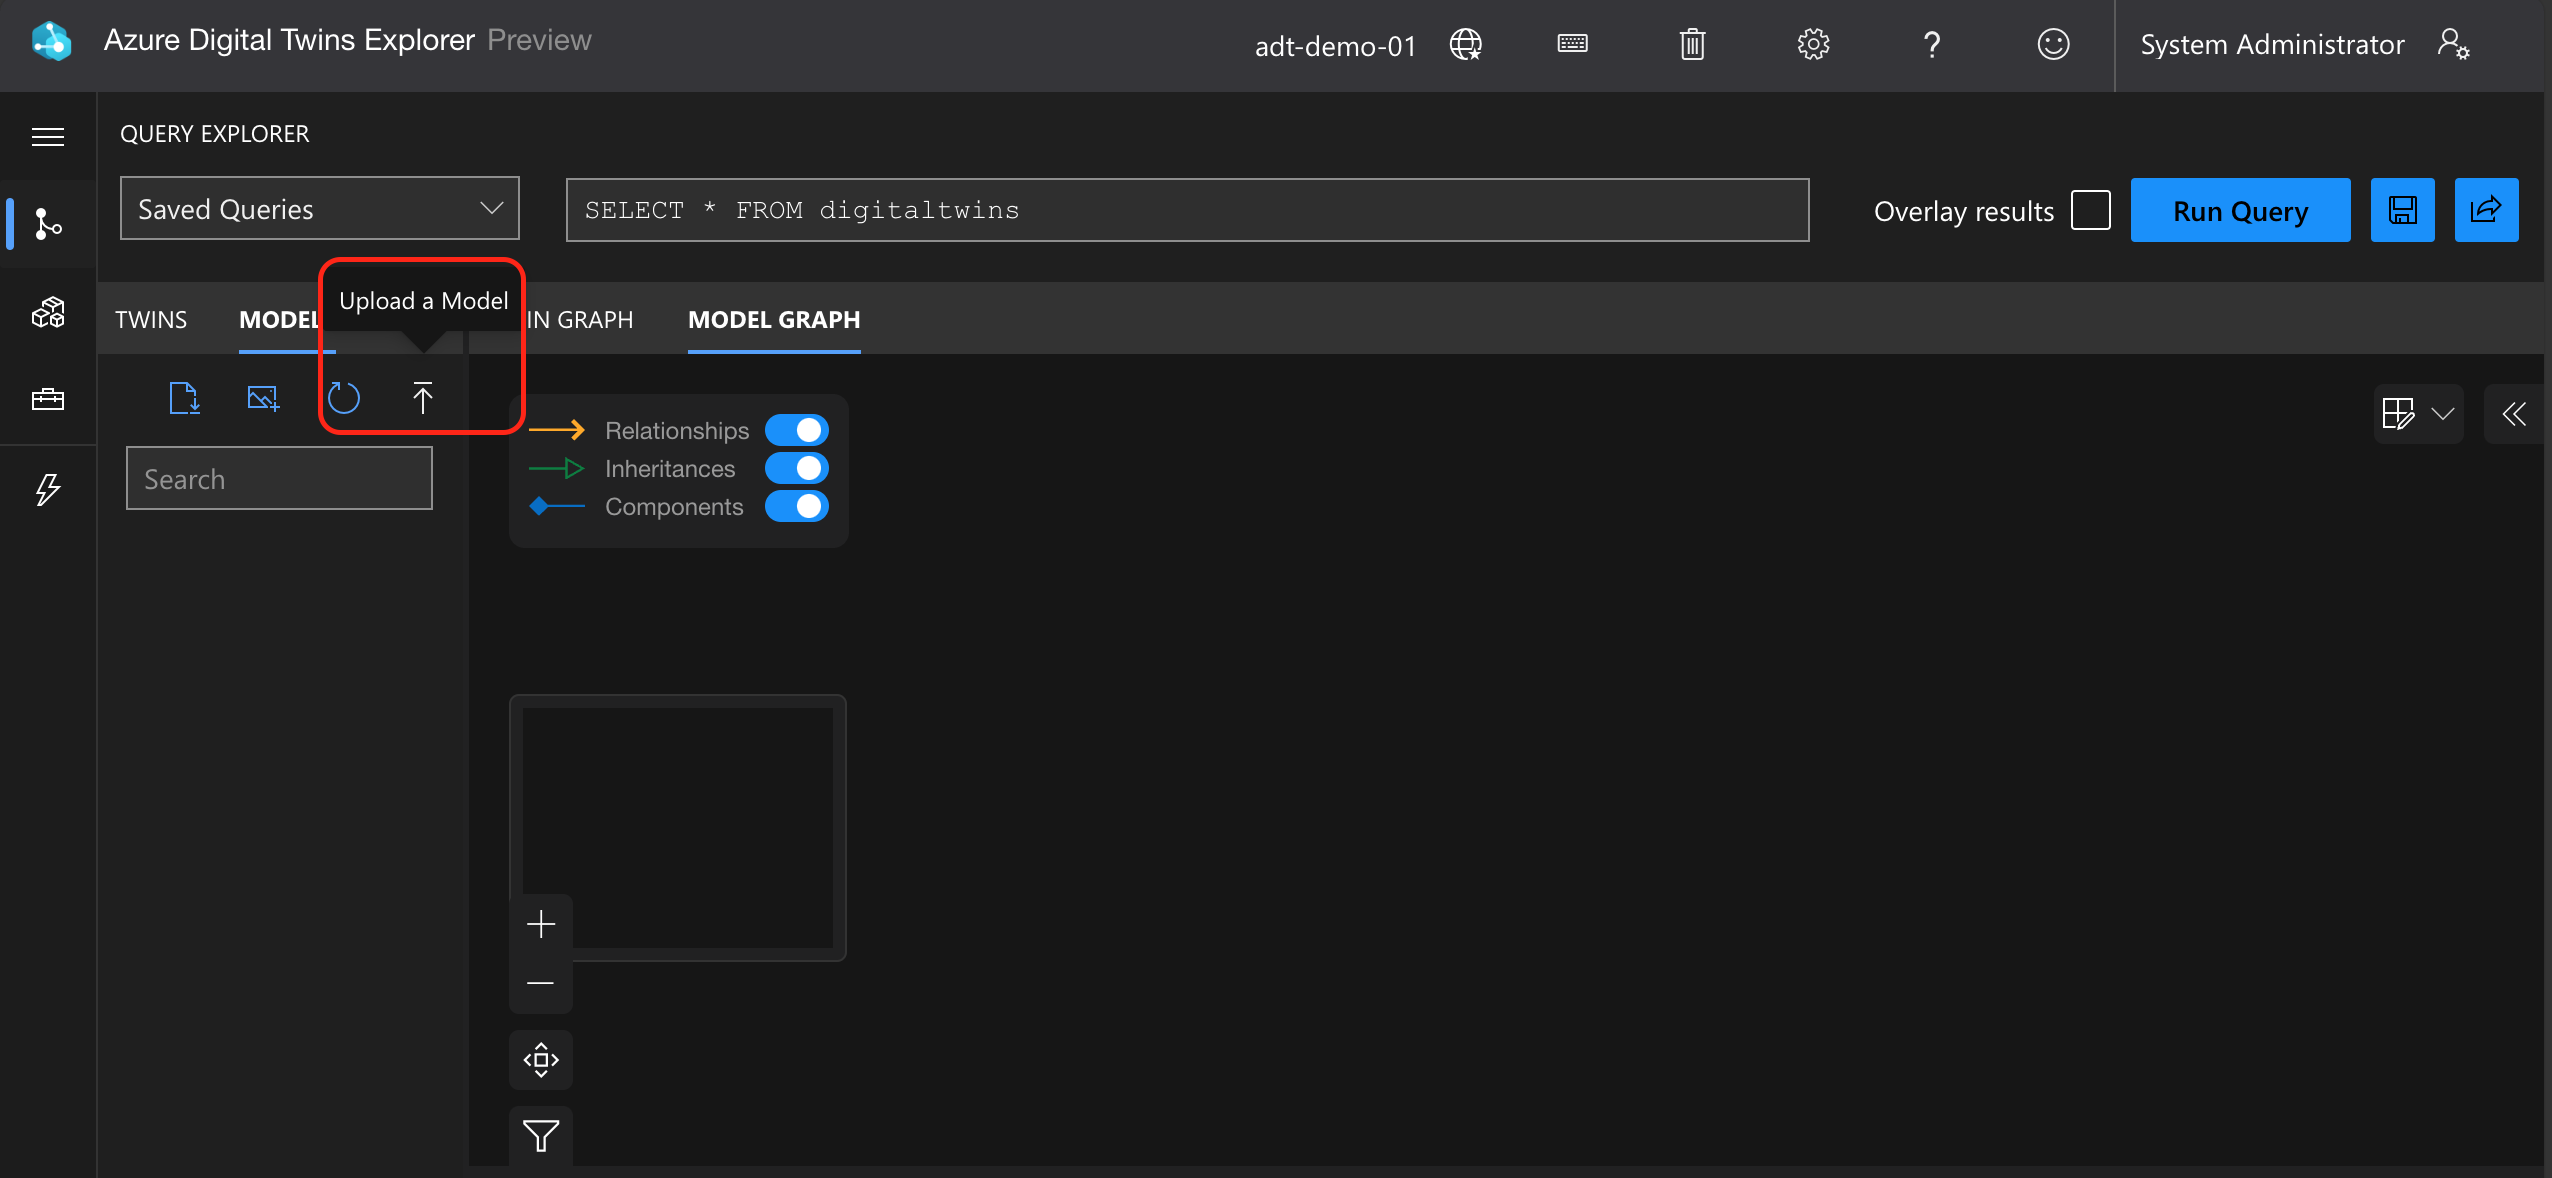
Users use DTDL to create model definition and save it as a JSON file. Then, they can upload the file to the Azure Digital Twins Explorer by clicking the [Upload] or running a command on a command prompt.
In this demo, I will run commands to create two models and twins related to the models and their relationship.
- The definition of a model named "Room" (Room.json)
{
   "@id": "dtmi:sample:room;2",
   "@context": "dtmi:dtdl:context;2",
   "@type": "Interface",
   "displayName": "room",
   "contents": [
     {
       "@type": "Property",
       "name": "RoomName",
       "schema": "string"
     },
     {
       "@type": "Relationship",
       "name": "contains"
     }
   ]
 }
- The definition of a model named "thermostat" (Thermostat.json)
※This model (twin) will be synchronized with the IoT device, so the name of this twin must be the same as the IoT device.
{
    "@id": "dtmi:sample:DigitalTwins:thermostat;1",
    "@context": "dtmi:dtdl:context;2",
    "@type": "Interface",
    "displayName": "thermostat",
    "contents": [
      {
        "@type": "Property",
        "name": "DisplayName",
        "schema": "string"
      },
      {
        "@type": "Property",
        "name": "Temperature",
        "schema": "double"
      }
    ]
  }
Run the command below to upload a model to a specific Azure Digital Twins instance.
az dt model create -n <Azure Digital Twins instance URL> -- models <the definition file's full path>
In this demo, run the commands below to upload the two models. (Mask a part of the resources's information for security protection purposes)
az dt model create -n "adt-demo-01.api.jpe.xxxxxx.azure.net" --models /xxxx/Room.json

az dt model create -n "adt-demo-01.api.jpe.xxxxxx.azure.net" --models /xxxx/Thermostat.json
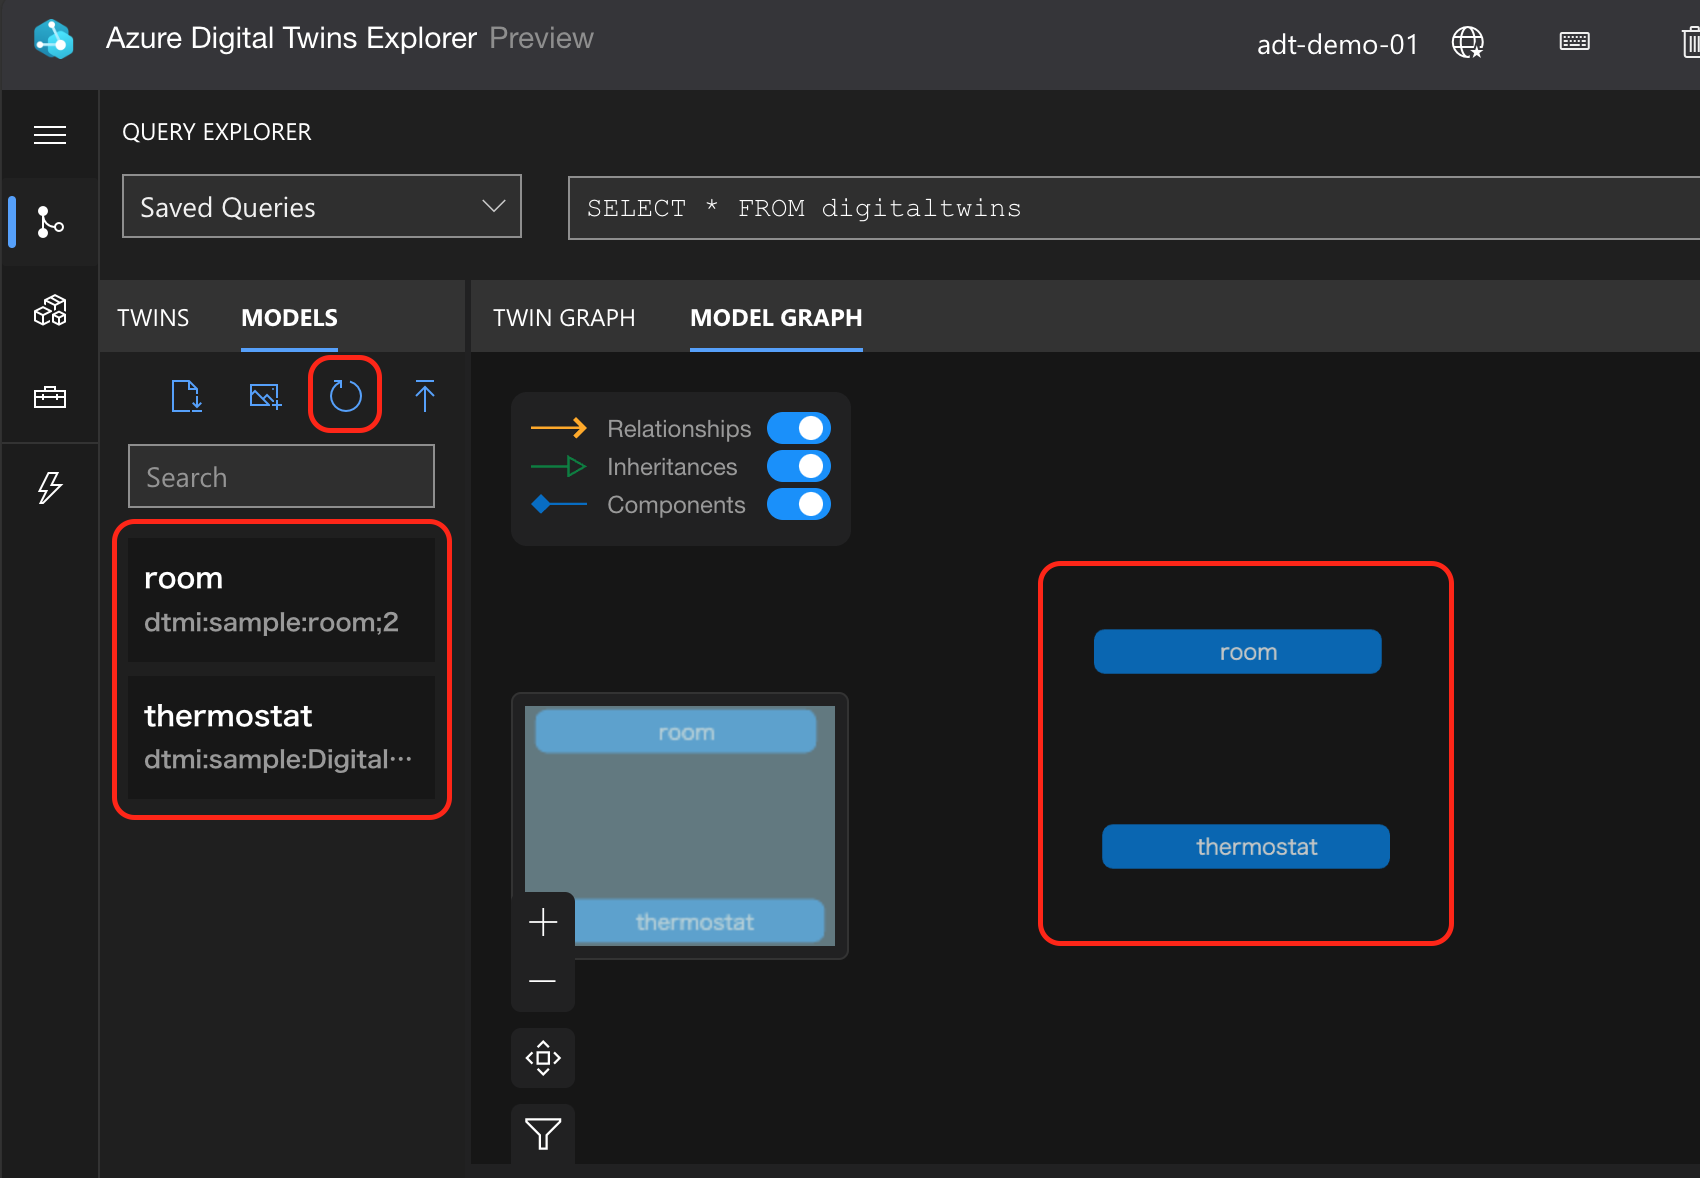
Confirm the models are correctly deployed.
Sometimes, clicking the [Refresh] button or refreshing the page is necessary.
Then, run the command below to create a twin related to a specific model.
az dt twin create -n <Azure Digital Twins instance URL> --dtmi <the model's dtmi> --twin-id <Define a name for the twin>
In this demo, run the commands below to create the two twins. (Mask a part of the resources's information for security protection purposes)
az dt twin create -n "adt-demo-01.api.jpe.xxxx.azure.net" --dtmi "dtmi:sample:room;2" --twin-id room

az dt twin create -n "adt-demo-01.api.jpe.xxxx.azure.net" --dtmi "dtmi:sample:DigitalTwins:thermostat;1" --twin-id thermostat
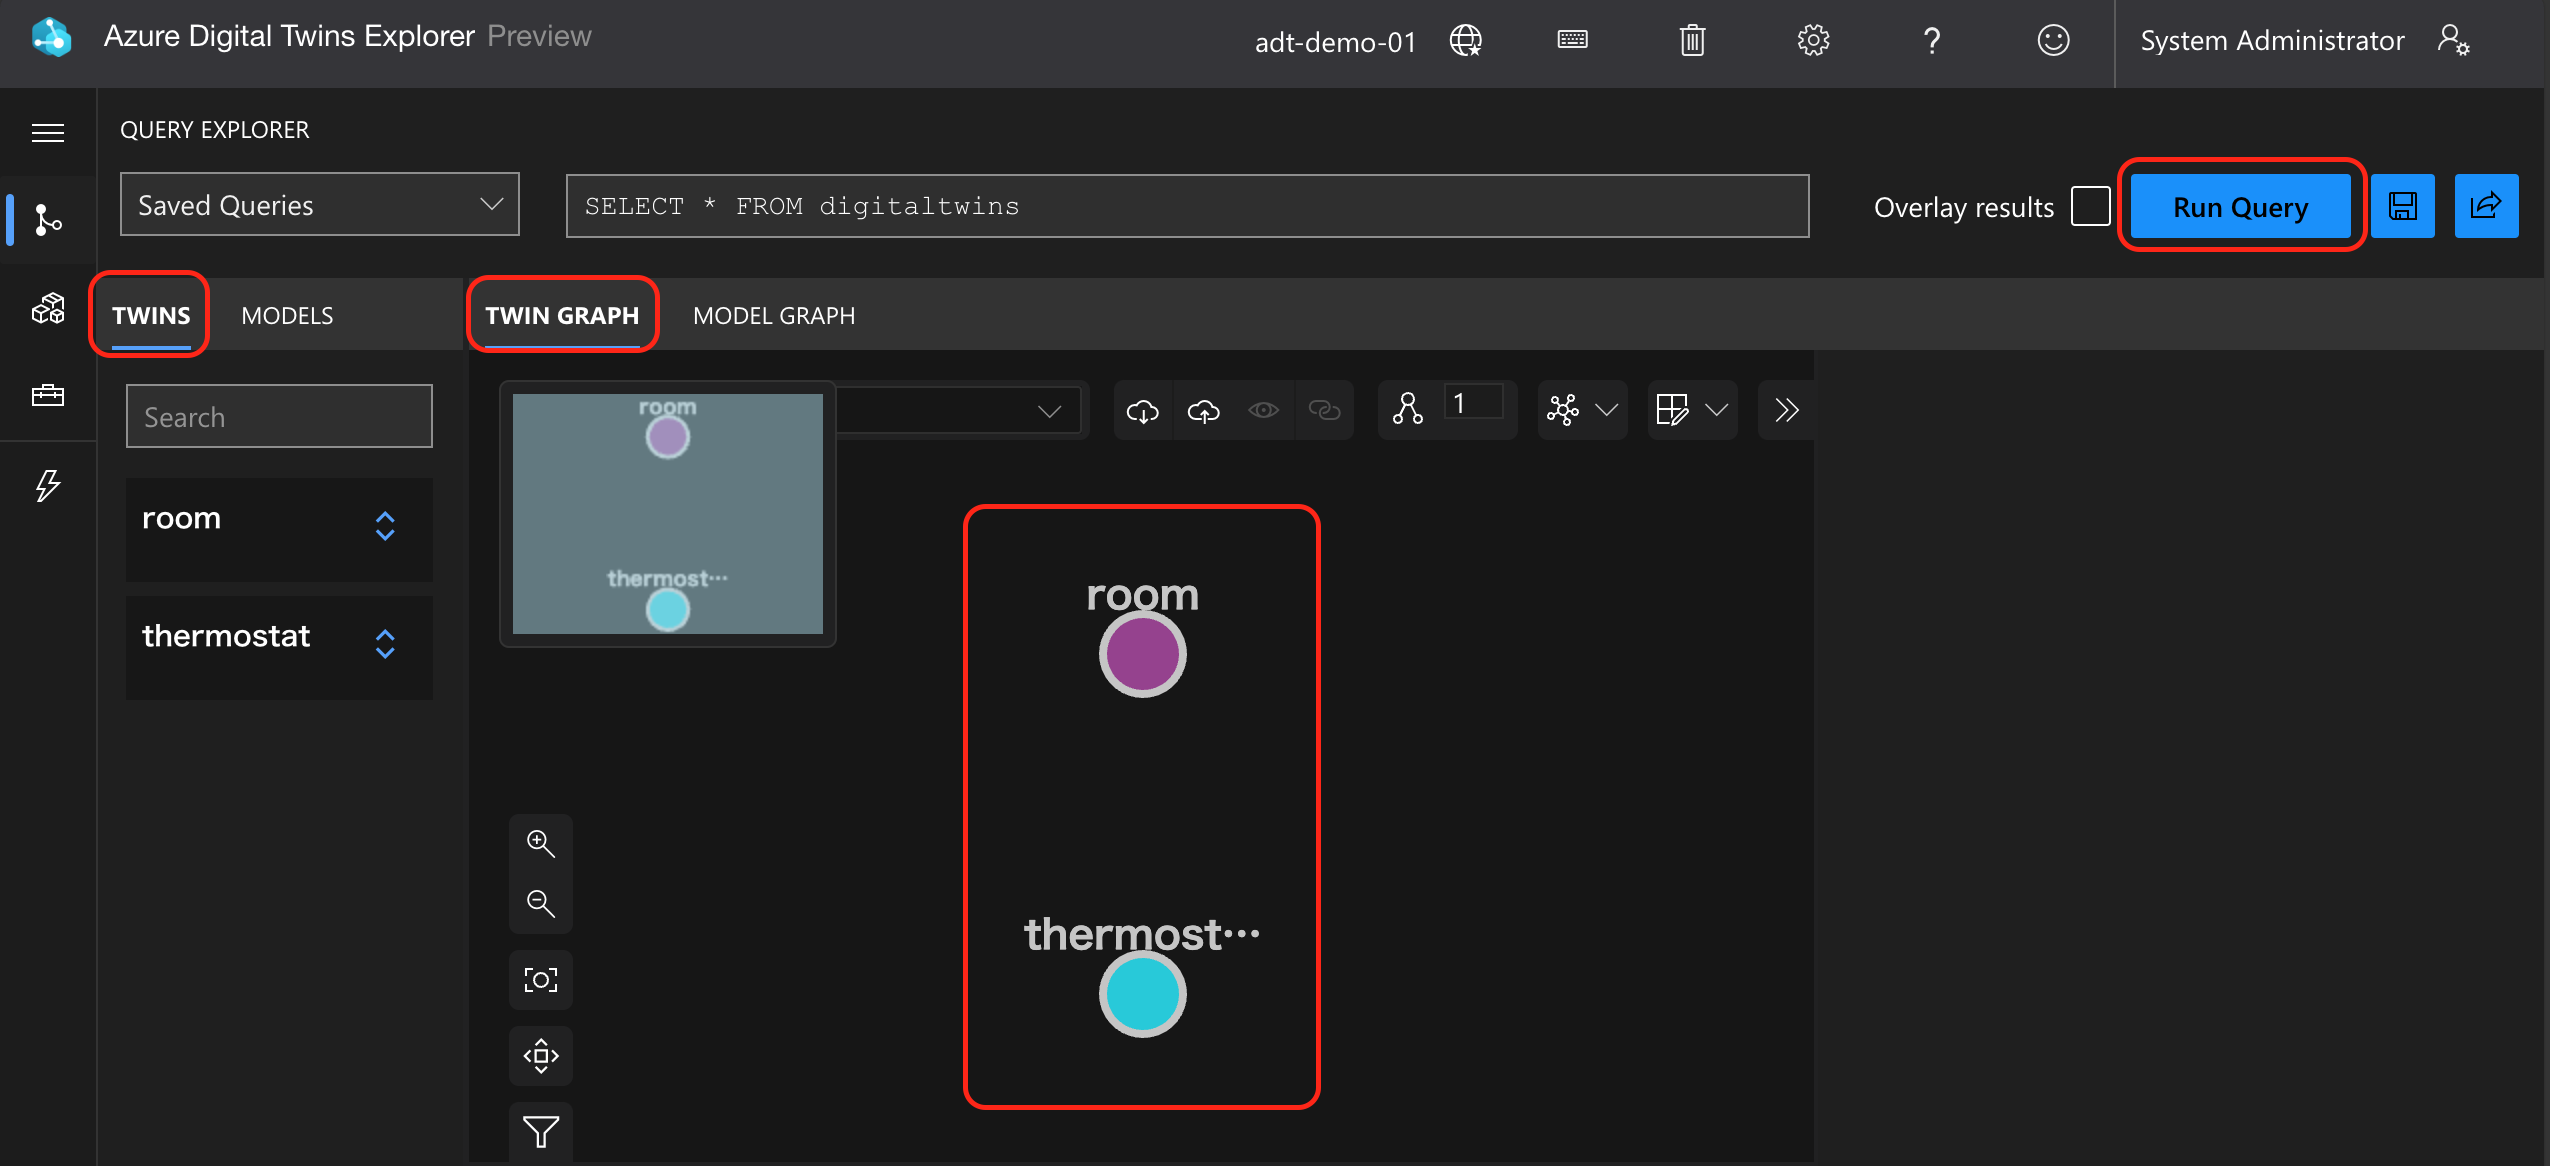
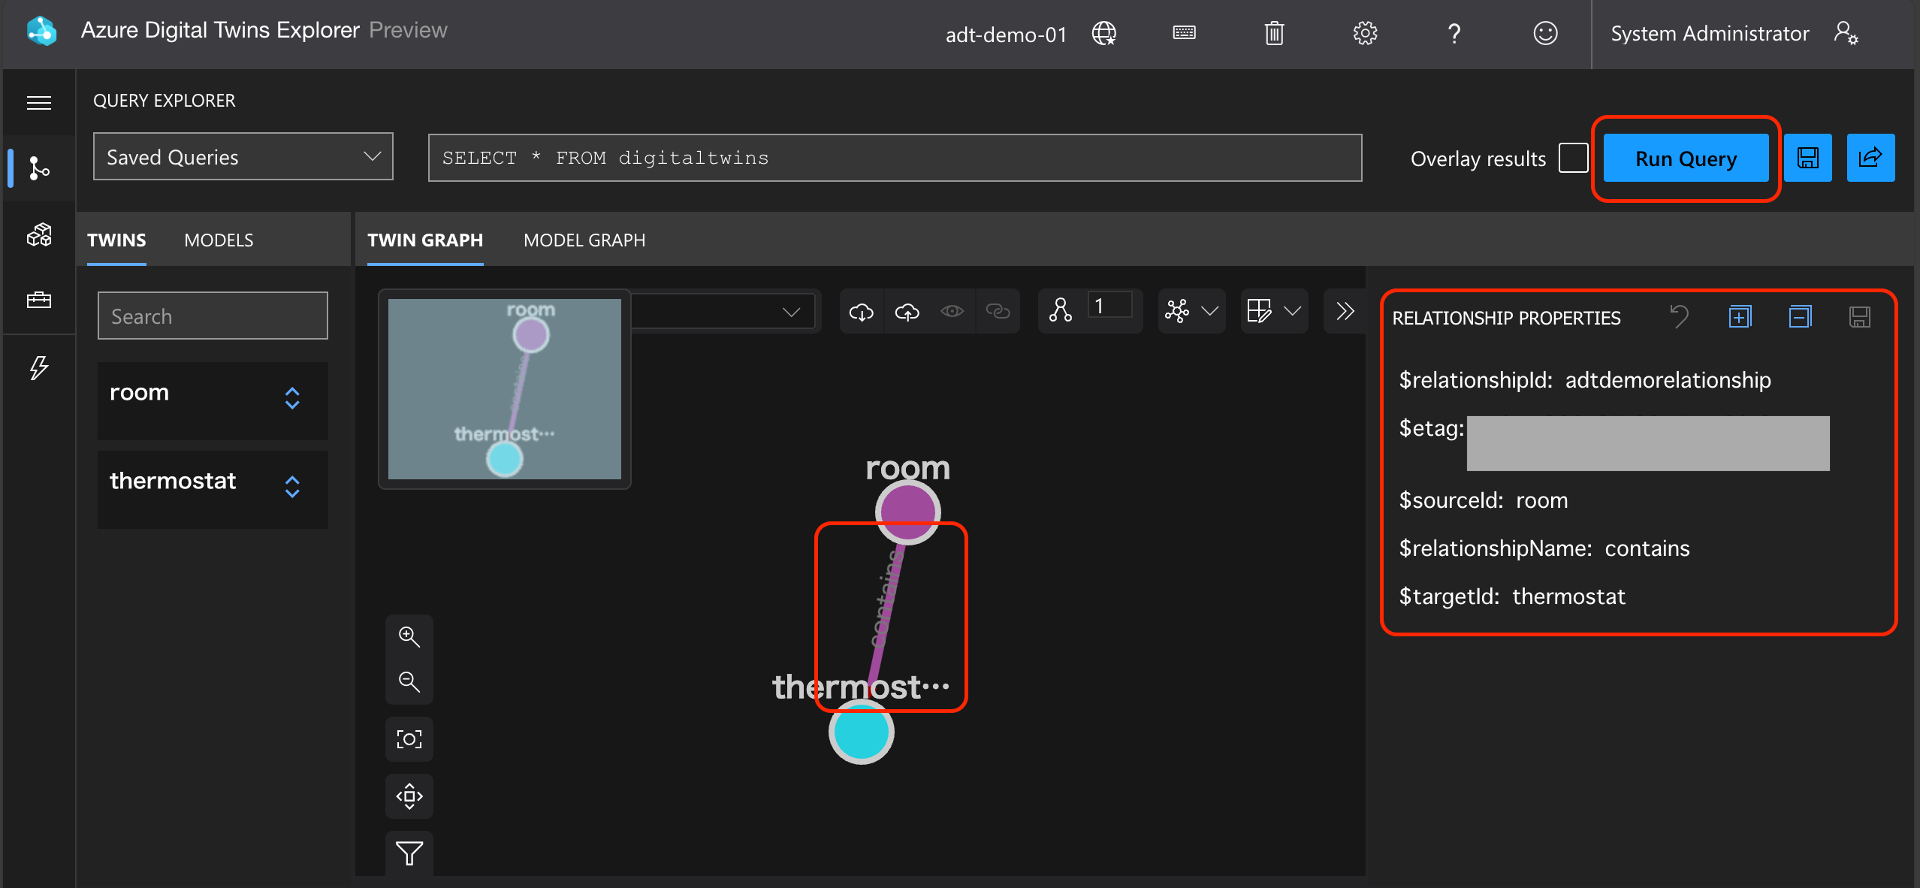
Click [Run Query] to update the Azure Digital Twins Explorer and confirm the twins are correctly created.
Finally, create a relationship between [room] and [thermostat].
Run the command below to create the relationship.
az dt twin relationship create -n "adt-demo-01.api.jpe.xxxx.azure.net" --relationship-id <the relationship's name> --relationship <relationship's type> --twin-id <the first twin's name> --target <the second twin's name>
In this demo, run the command below to create the relationship.(Mask a part of the resources's information for security protection purposes)
az dt twin relationship create -n "adt-demo-01.api.jpe.xxxx.azure.net" --relationship-id adtdemorelationship --relationship contains --twin-id room --target thermostat
Click [Run Query] to refresh the Explorer page and confirm the relationship has been correctly created.
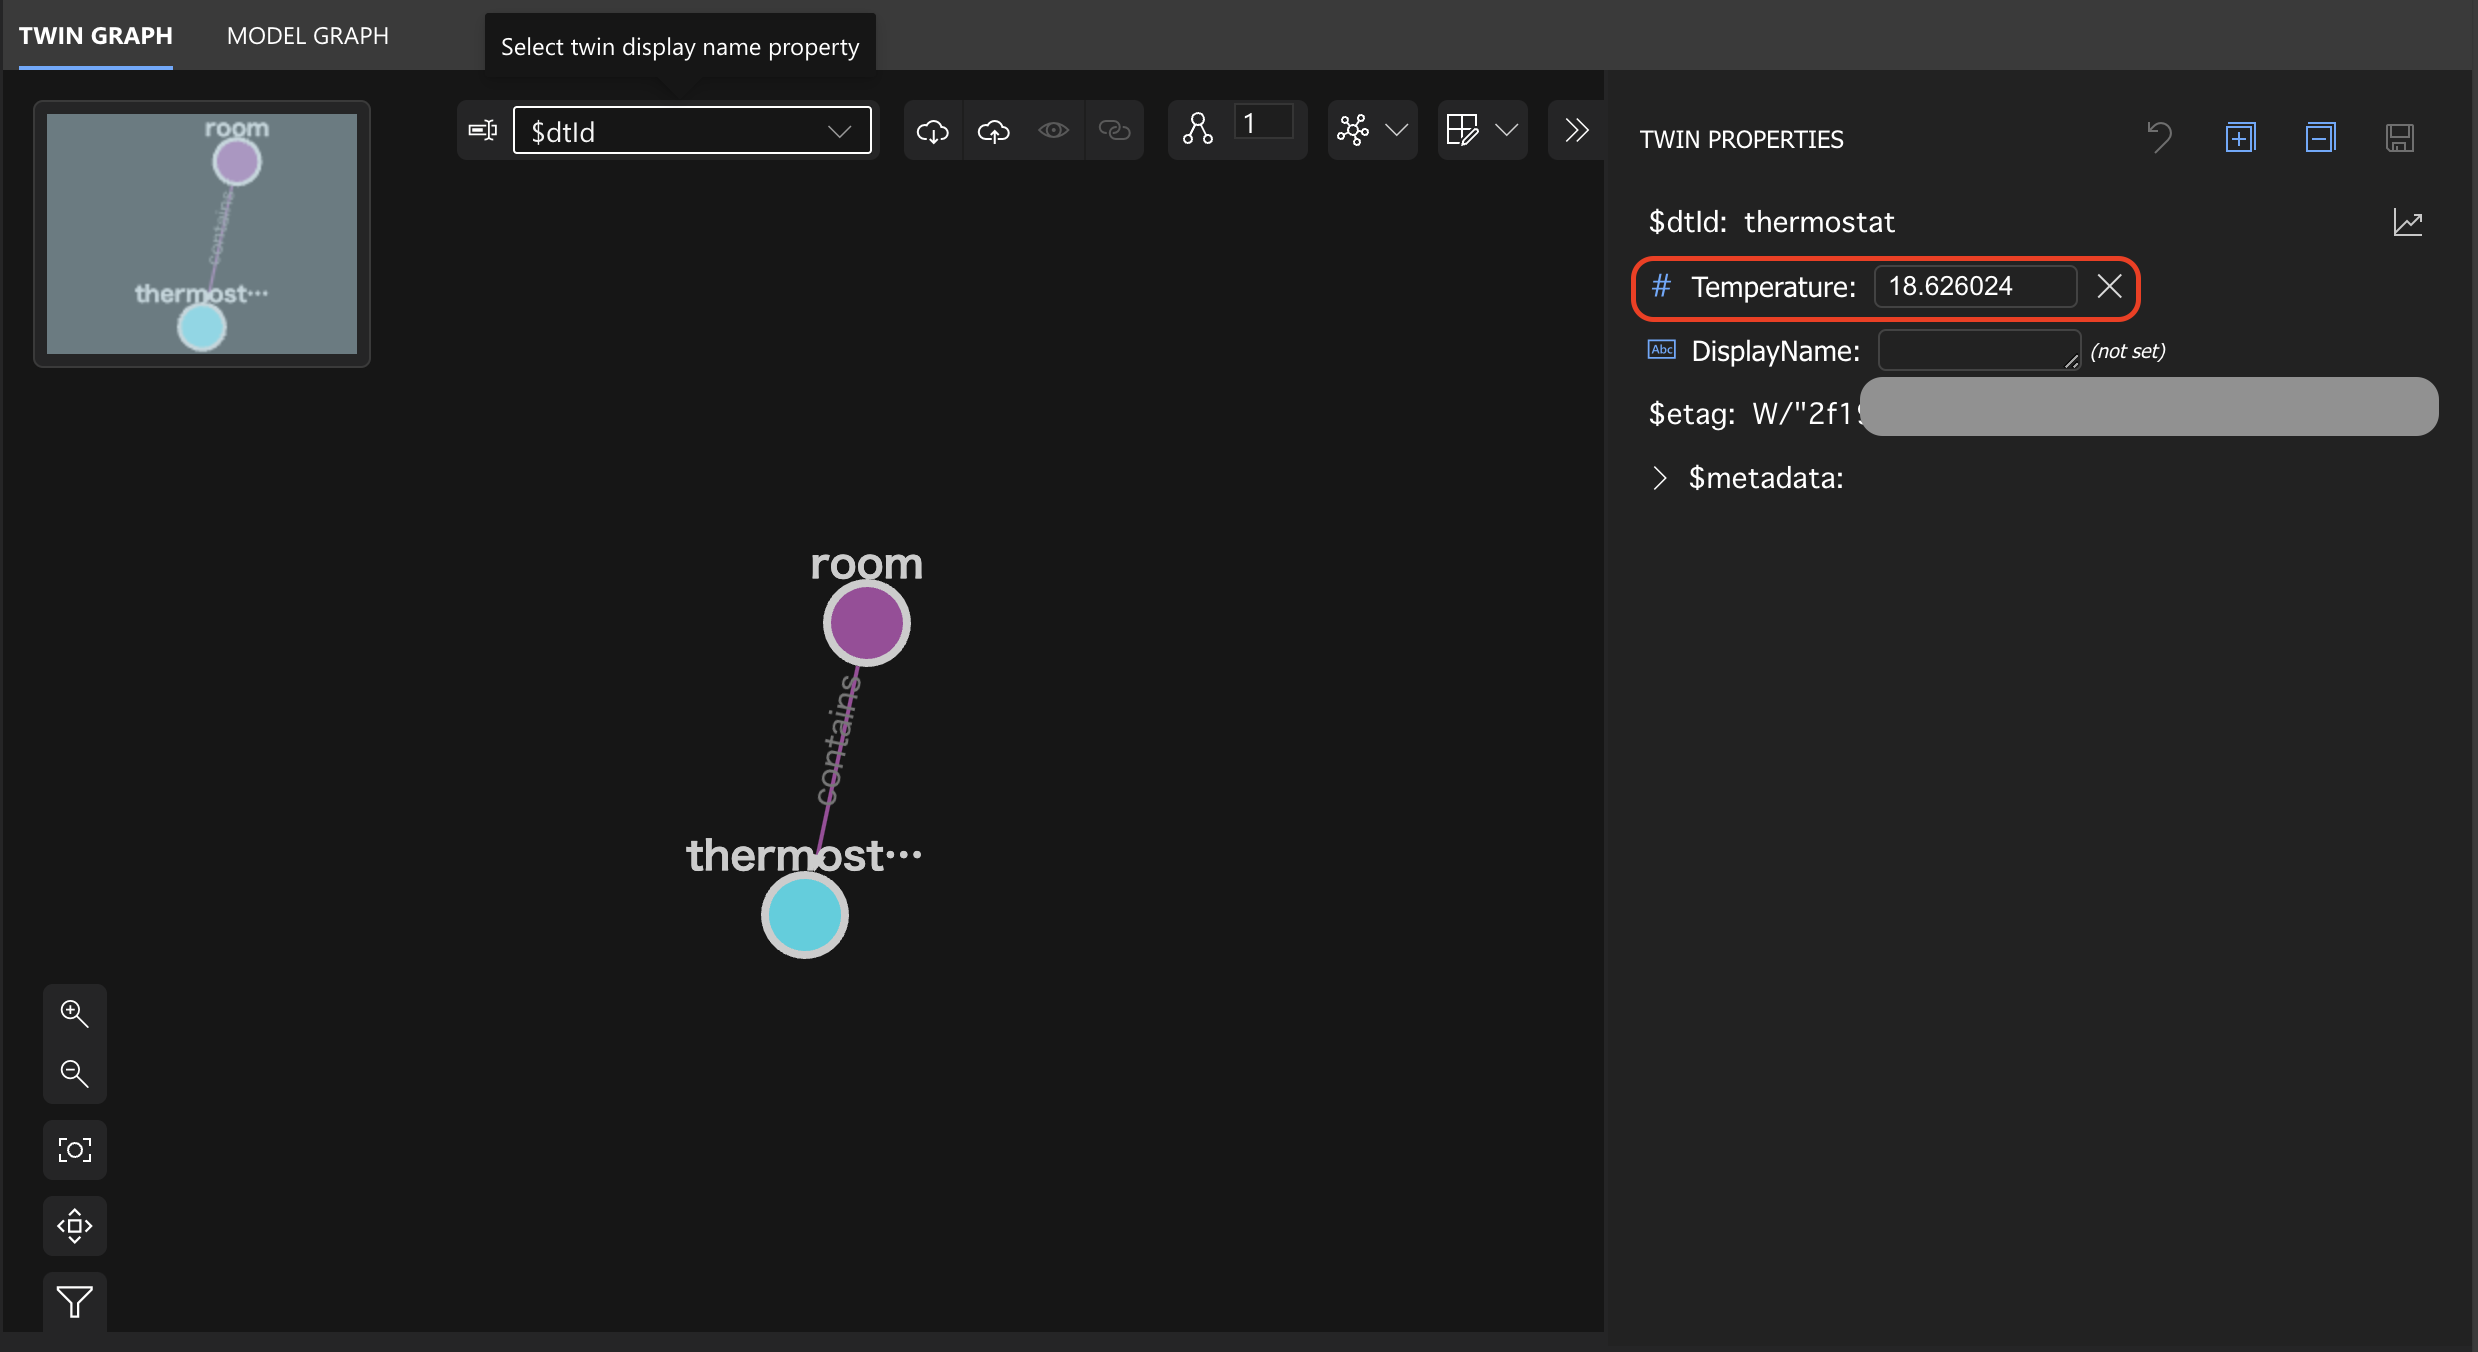
3-4. Initialize the "thermostat" twin's property [temperature].
We need to initialize the property [temperature] in advance to synchronize it with the IoT device.
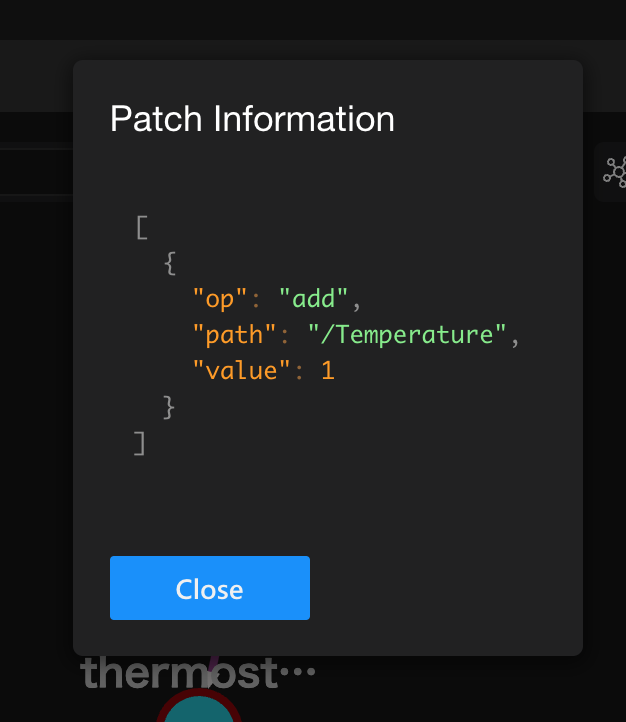
Click the twin "thermostat" to open the properties on the right side. Then, input a 1(number) to the property [temperature] and click the [save] (floppy disk mark) on the top right to save it.
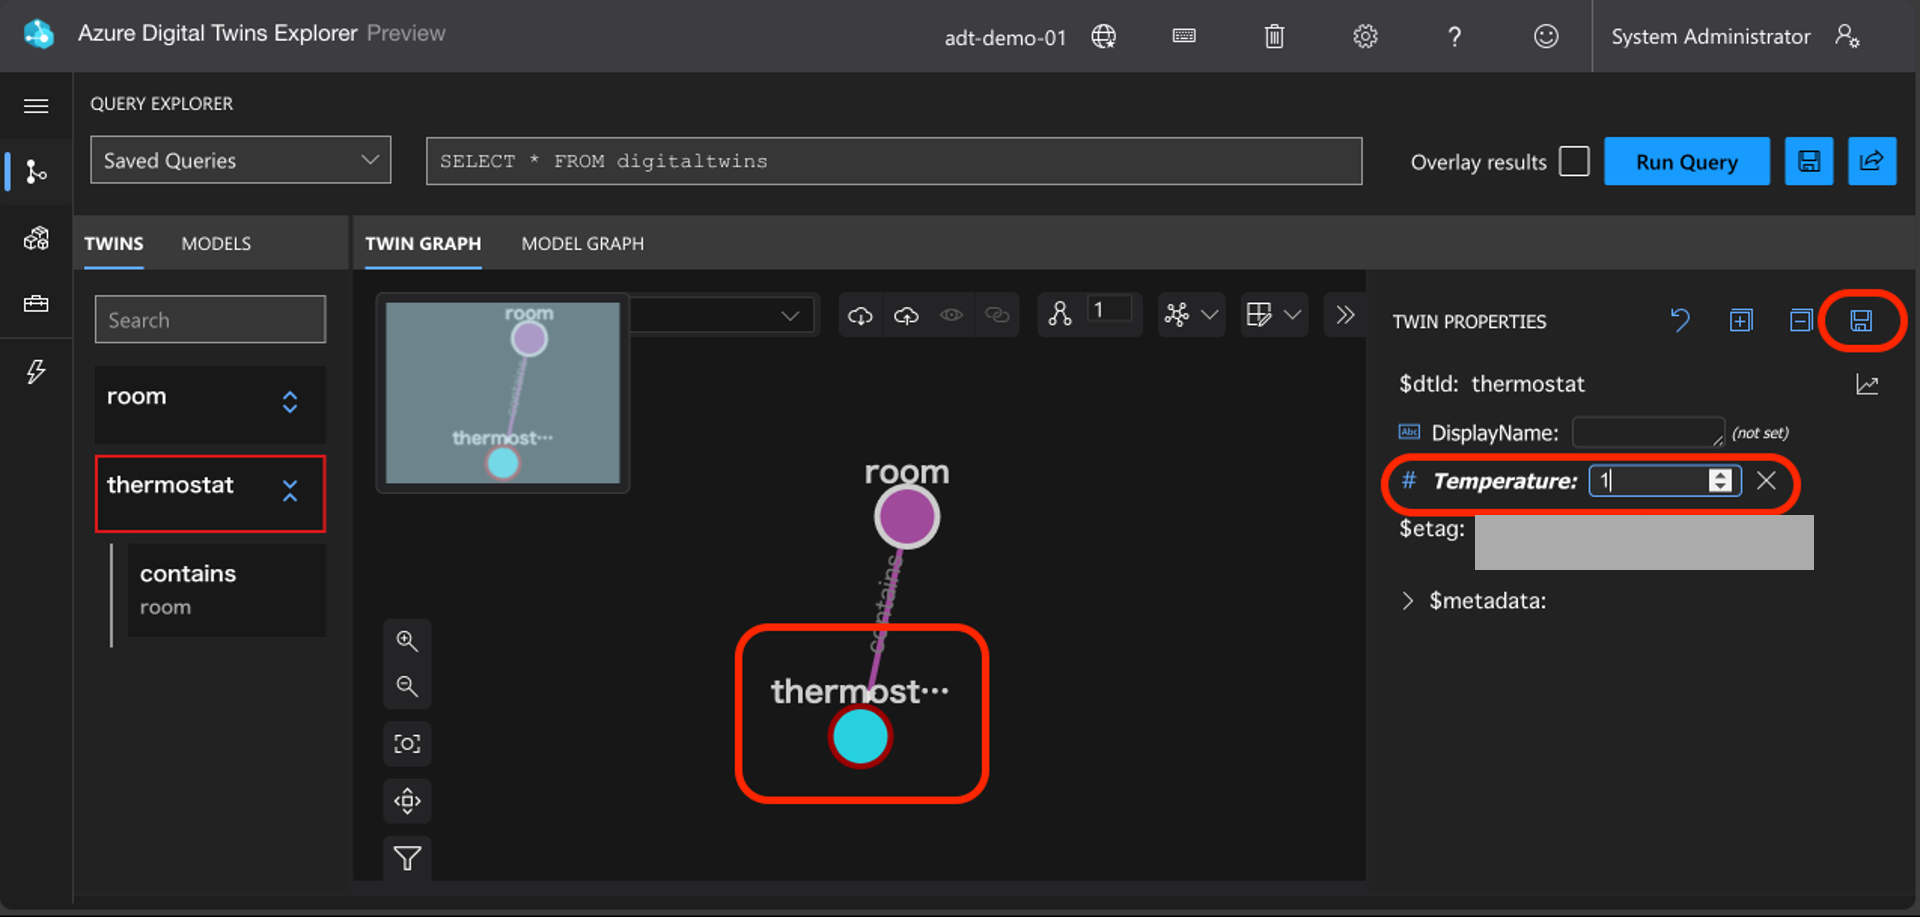
The Explorer will display a dialogue below for confirming; click [Close] to close it.
4. Operations on the Function App and Azure Digital Twins instance.
Now, we have connected the Raspberry Pi with the IoT Hub and deployed an Azure Digital Twins instance with the needed models and twins.
From now on, we need a program to transport the temperature data from the IoT Hub to the Azure Digital Twins instance.
We will create a Function App and upload the transportation program to it.
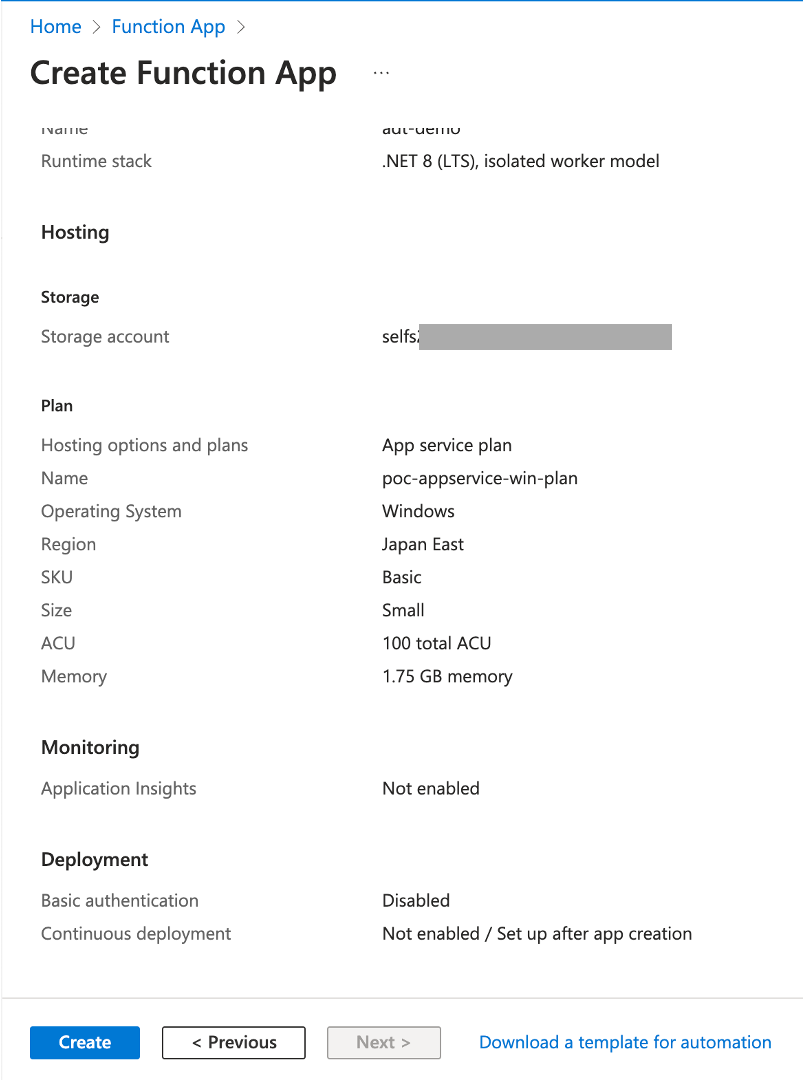
4-1. Create a Function App.
Create a Function App that uses .NET and set the version to 8(LTS) because we use a C program that Microsoft provides in the demo.
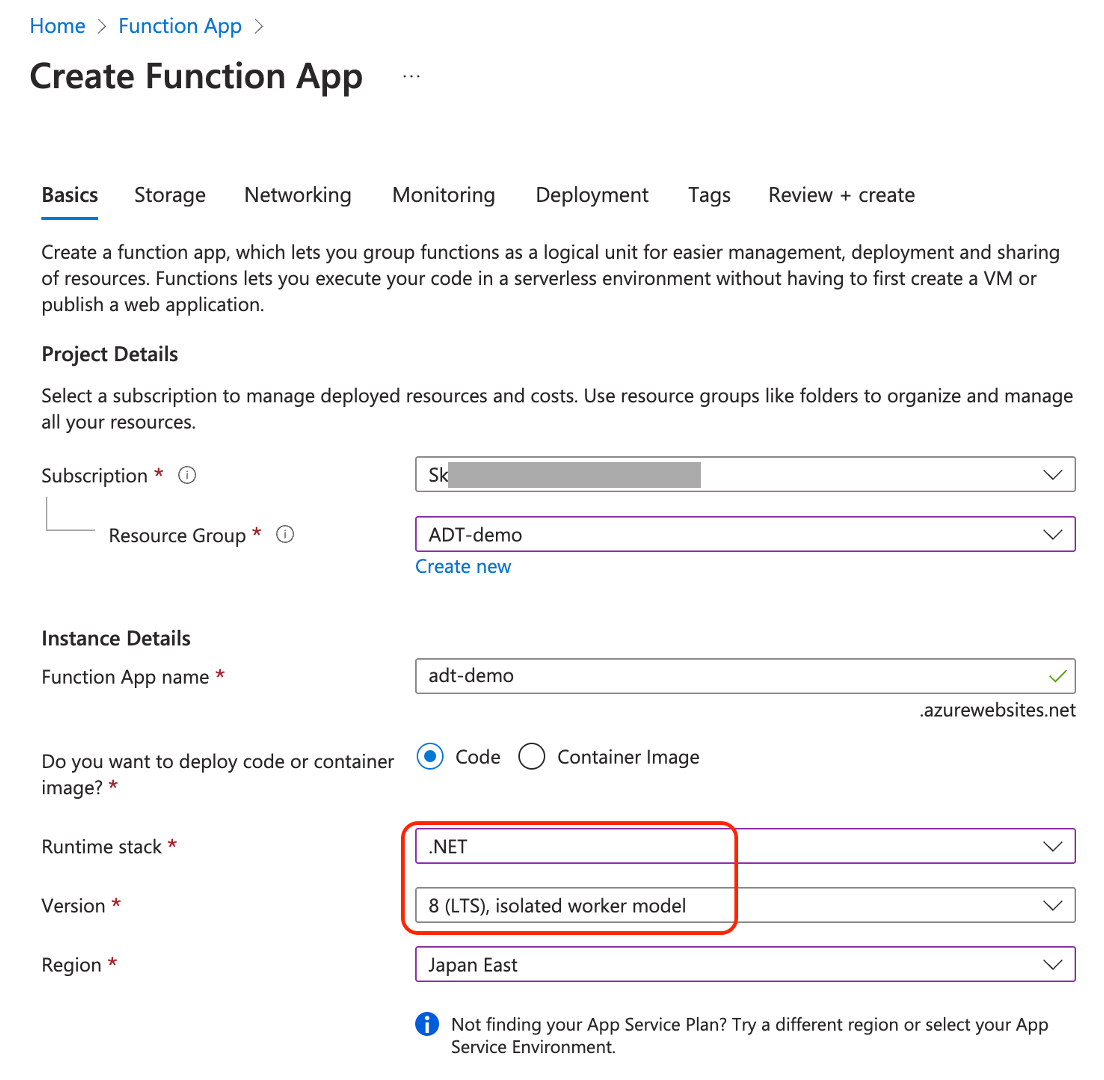
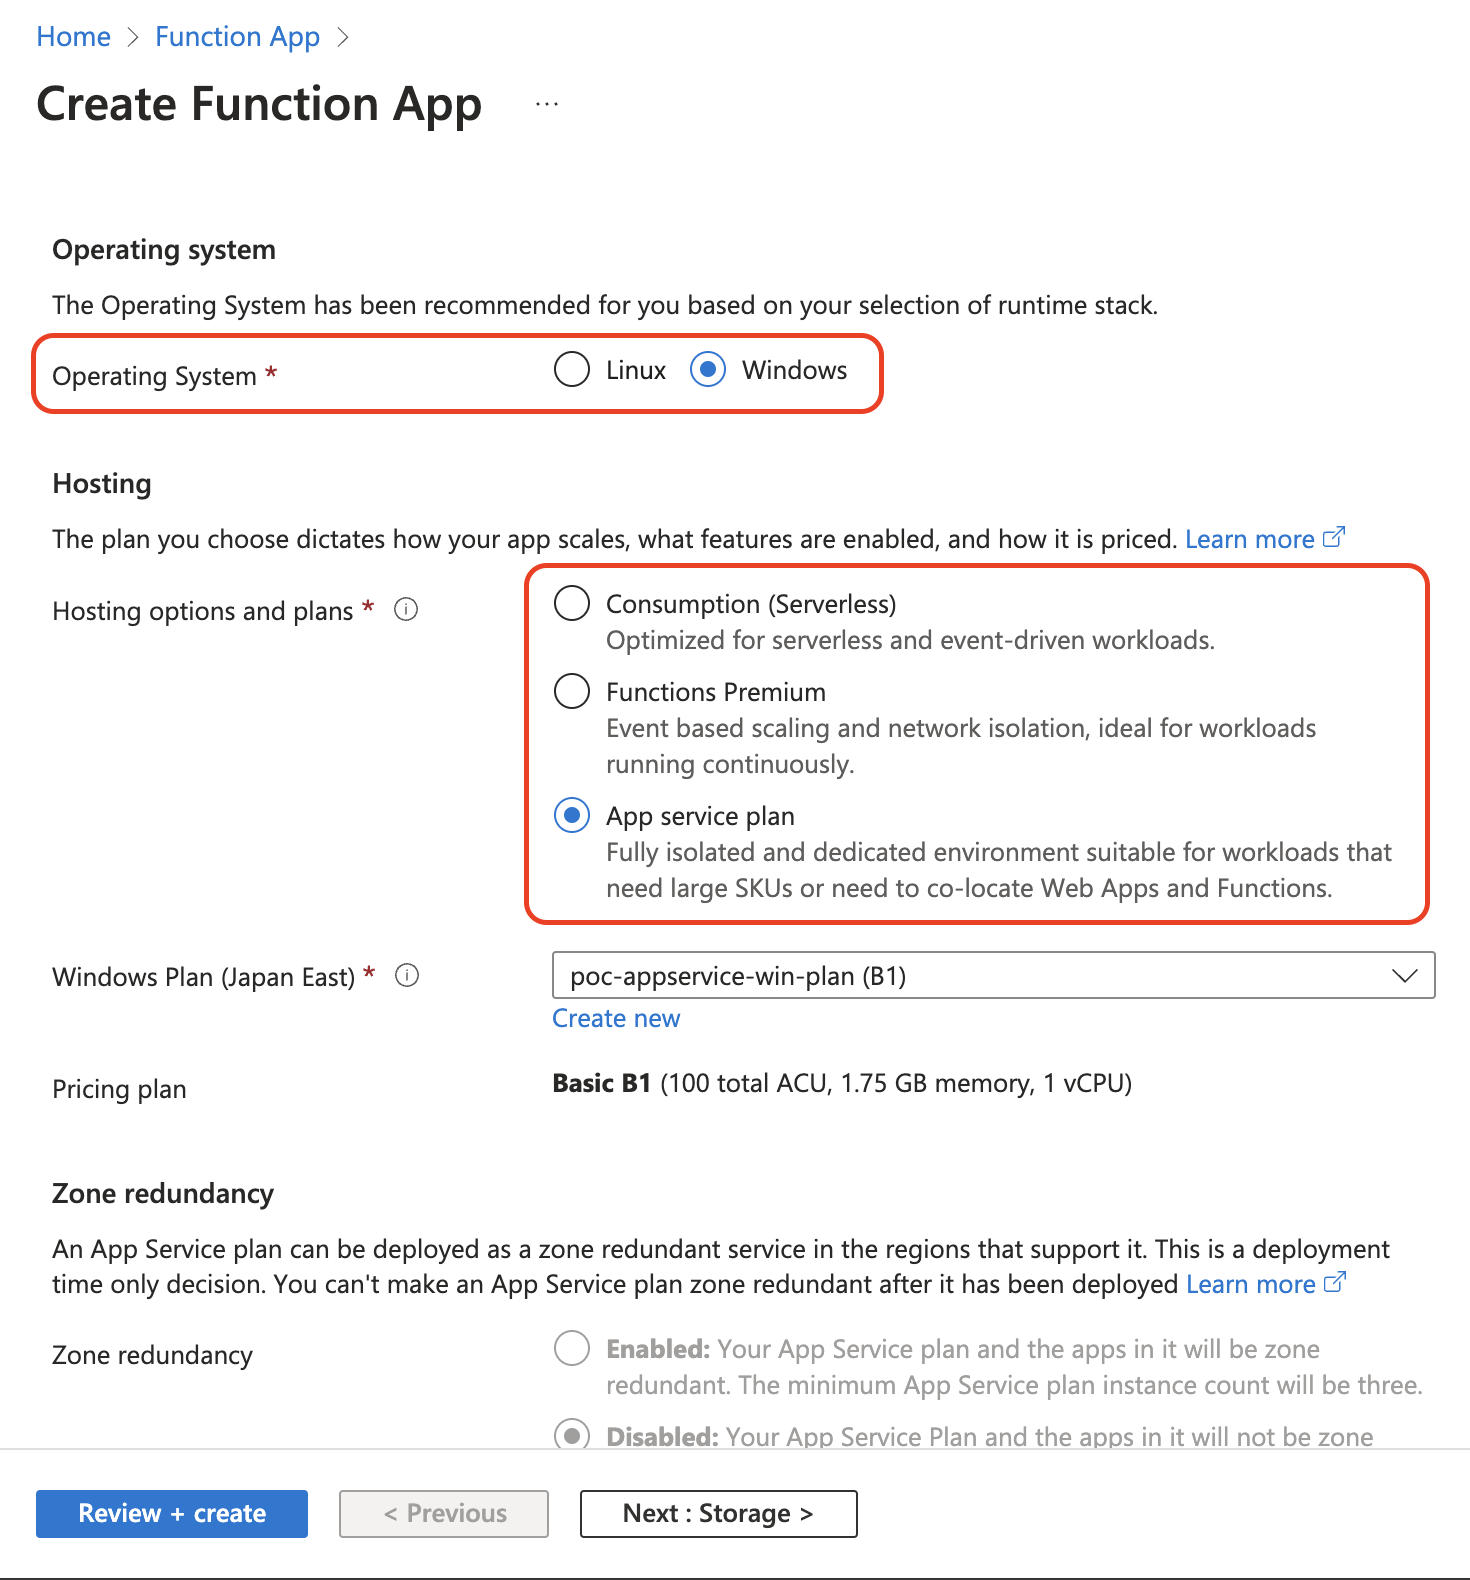
Choose "Windows" as the operating System.
Choose an existing "App service plan" if you have one, or choose "Consumption (Serverless) as the price tier.
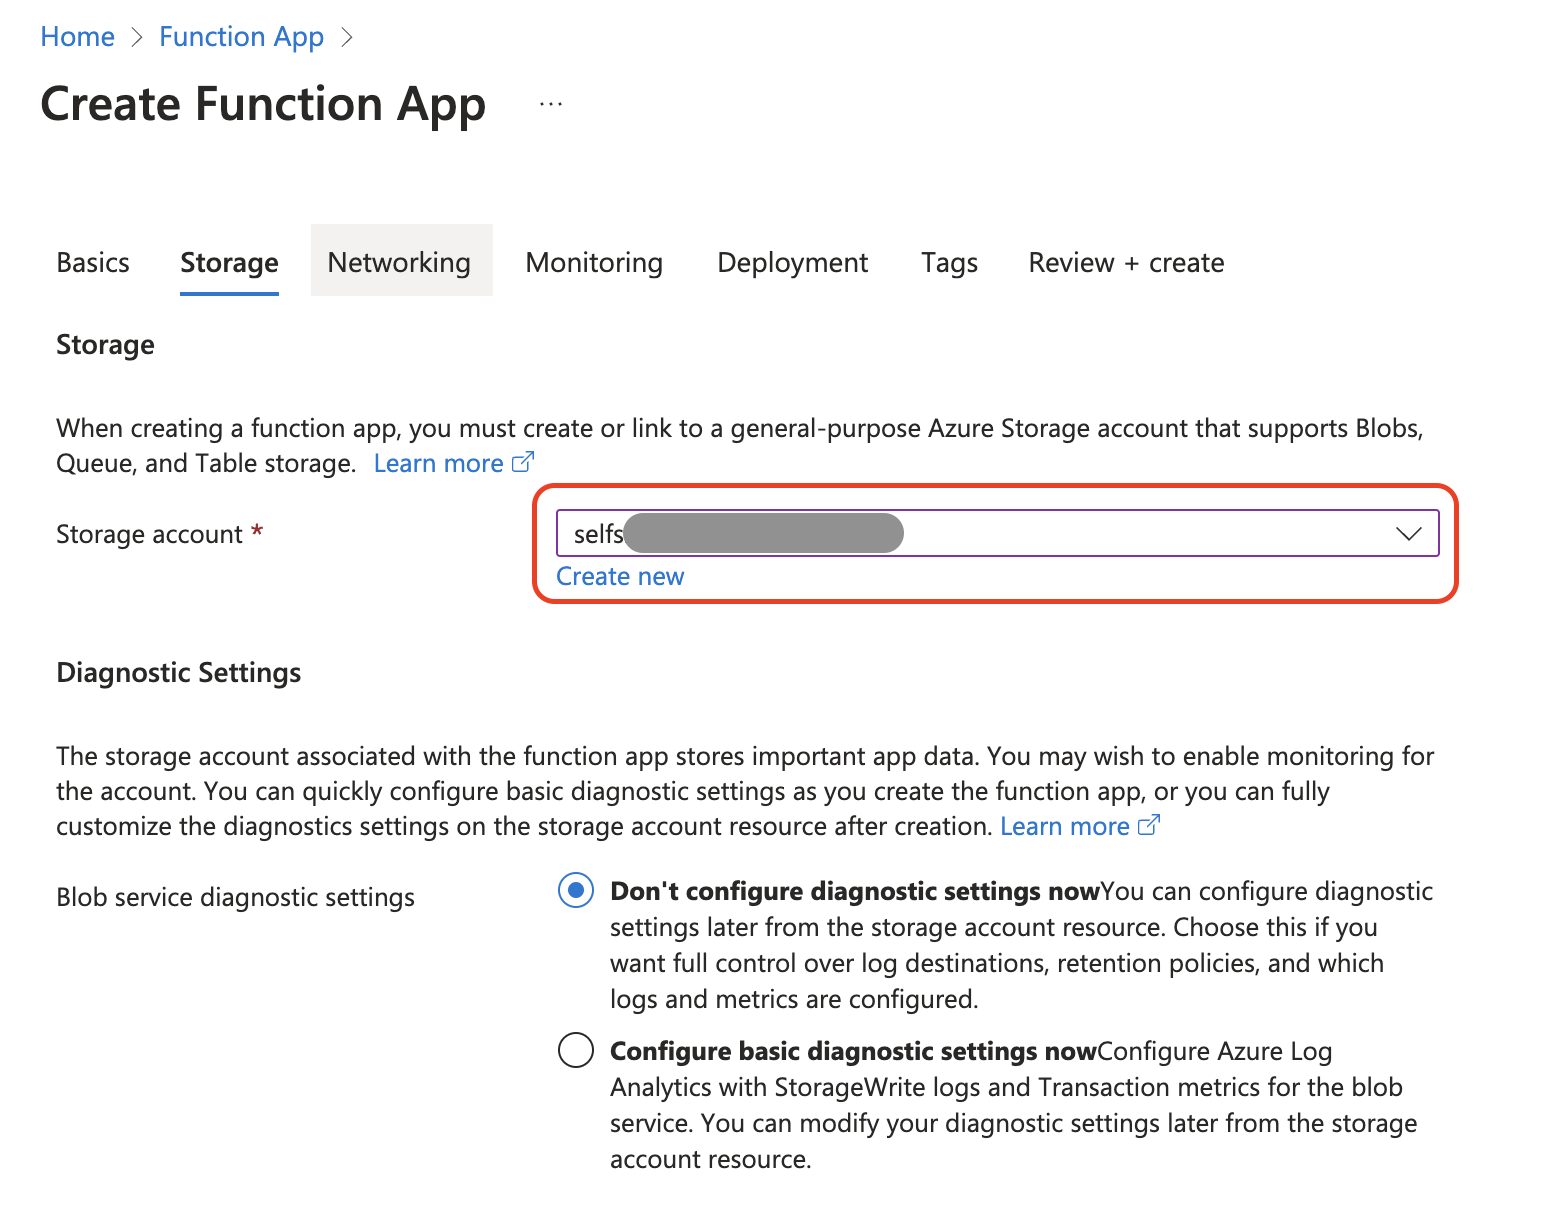
Set an existing storage account or create a new one.
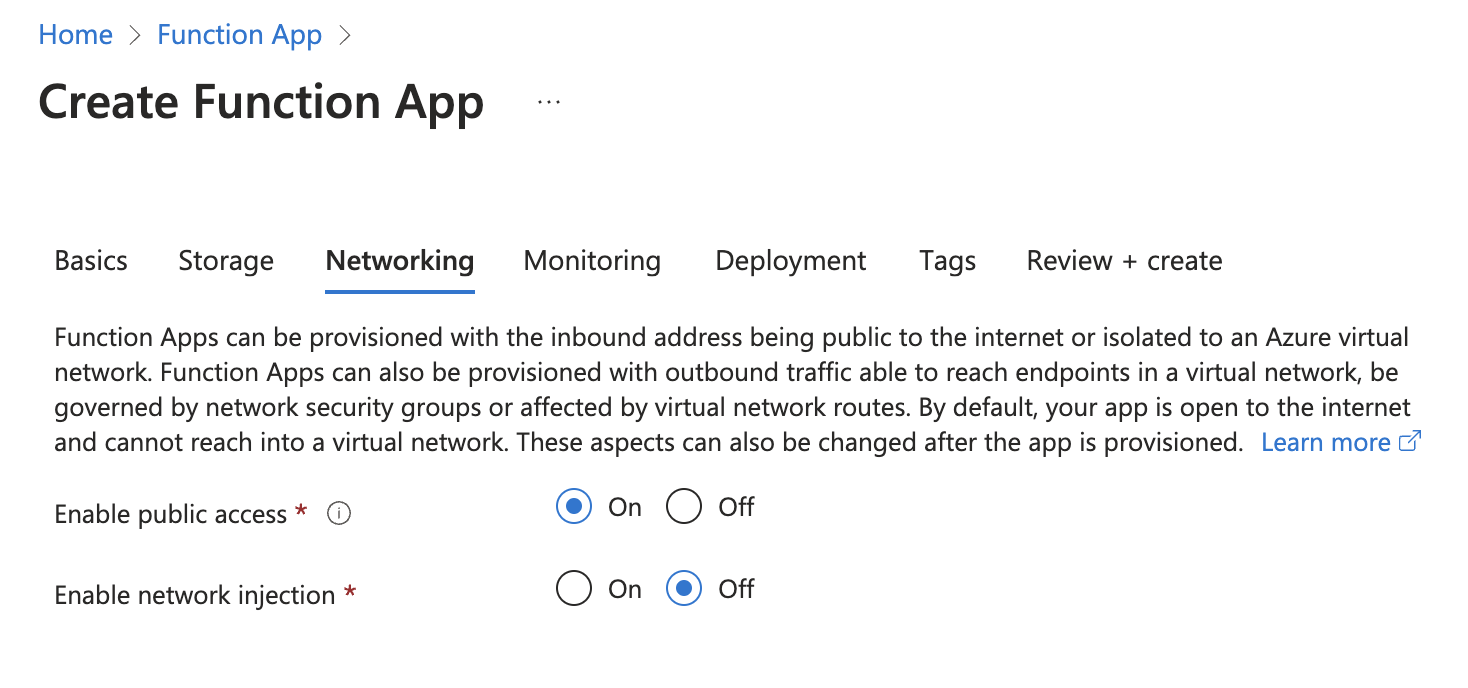
Use the default setting of Networking.
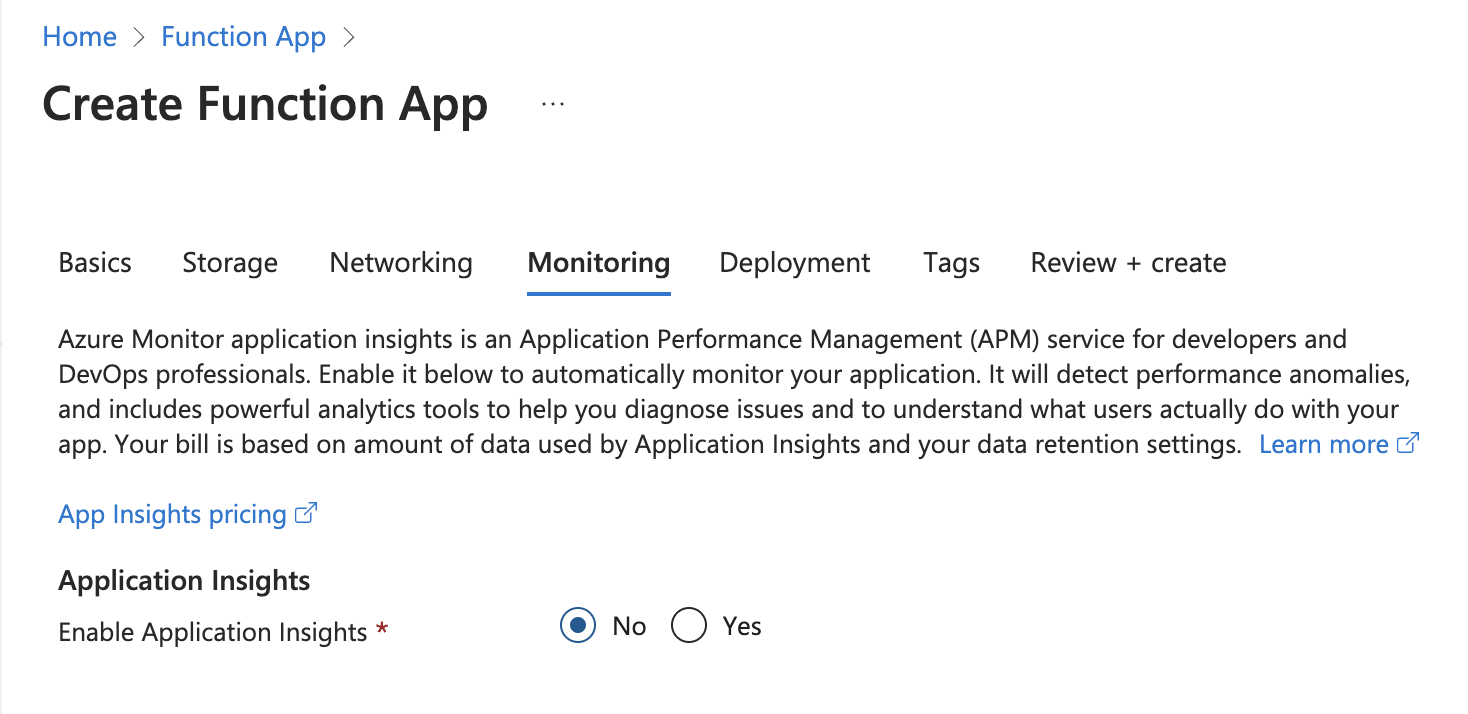
Turning off the [Application Insights] in this demo is no problem.
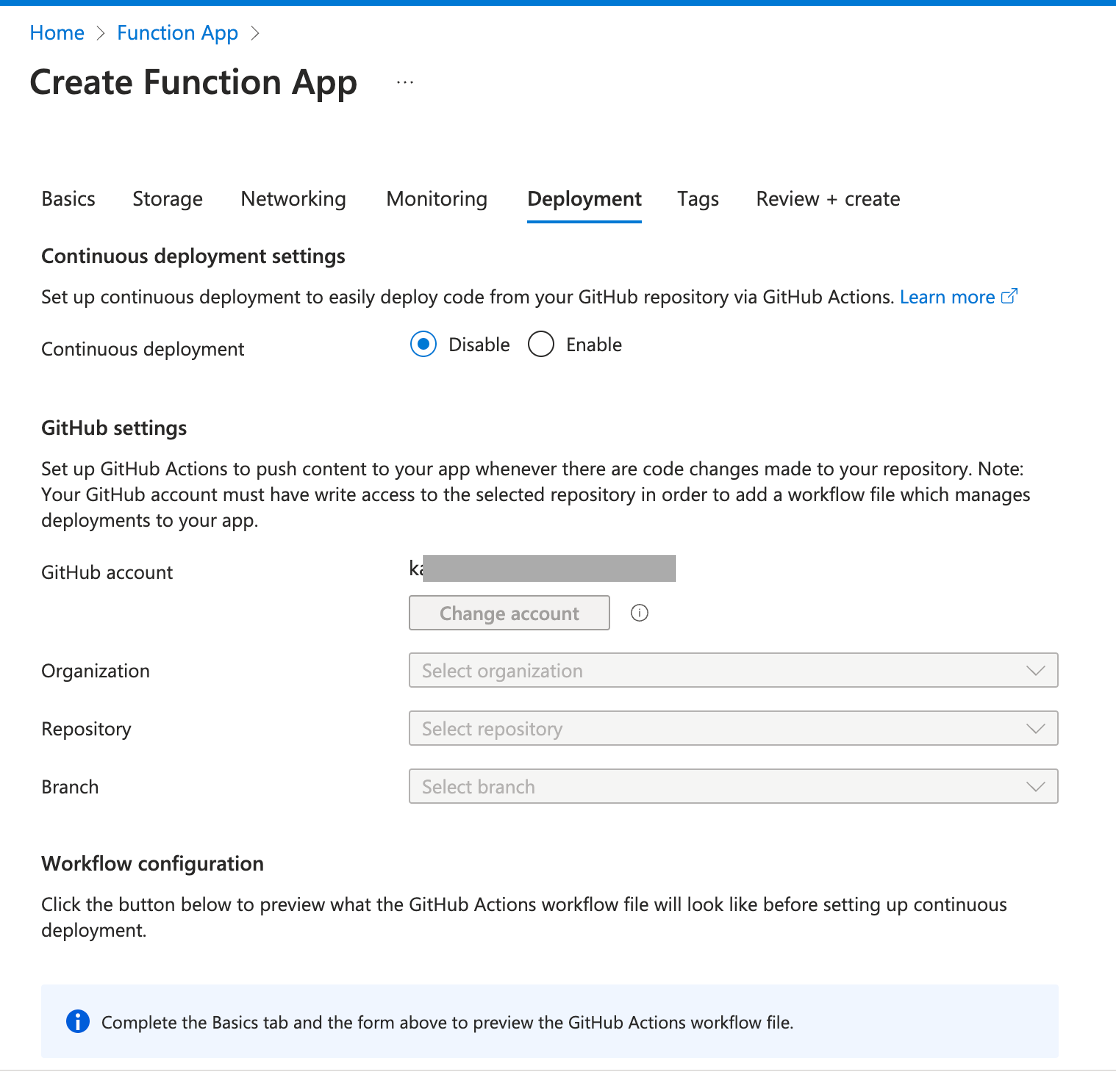
Associate a Github account with the Function App is a good choice for CICD, but we will skip it in this demo.
Create.
4-2. Upload the transportation program to the Function App.
This demo will use an MS-provided sample program that can transport temperature data. Users can also deploy programs that can transport different data.
Access the following link.
Click [Browse code].
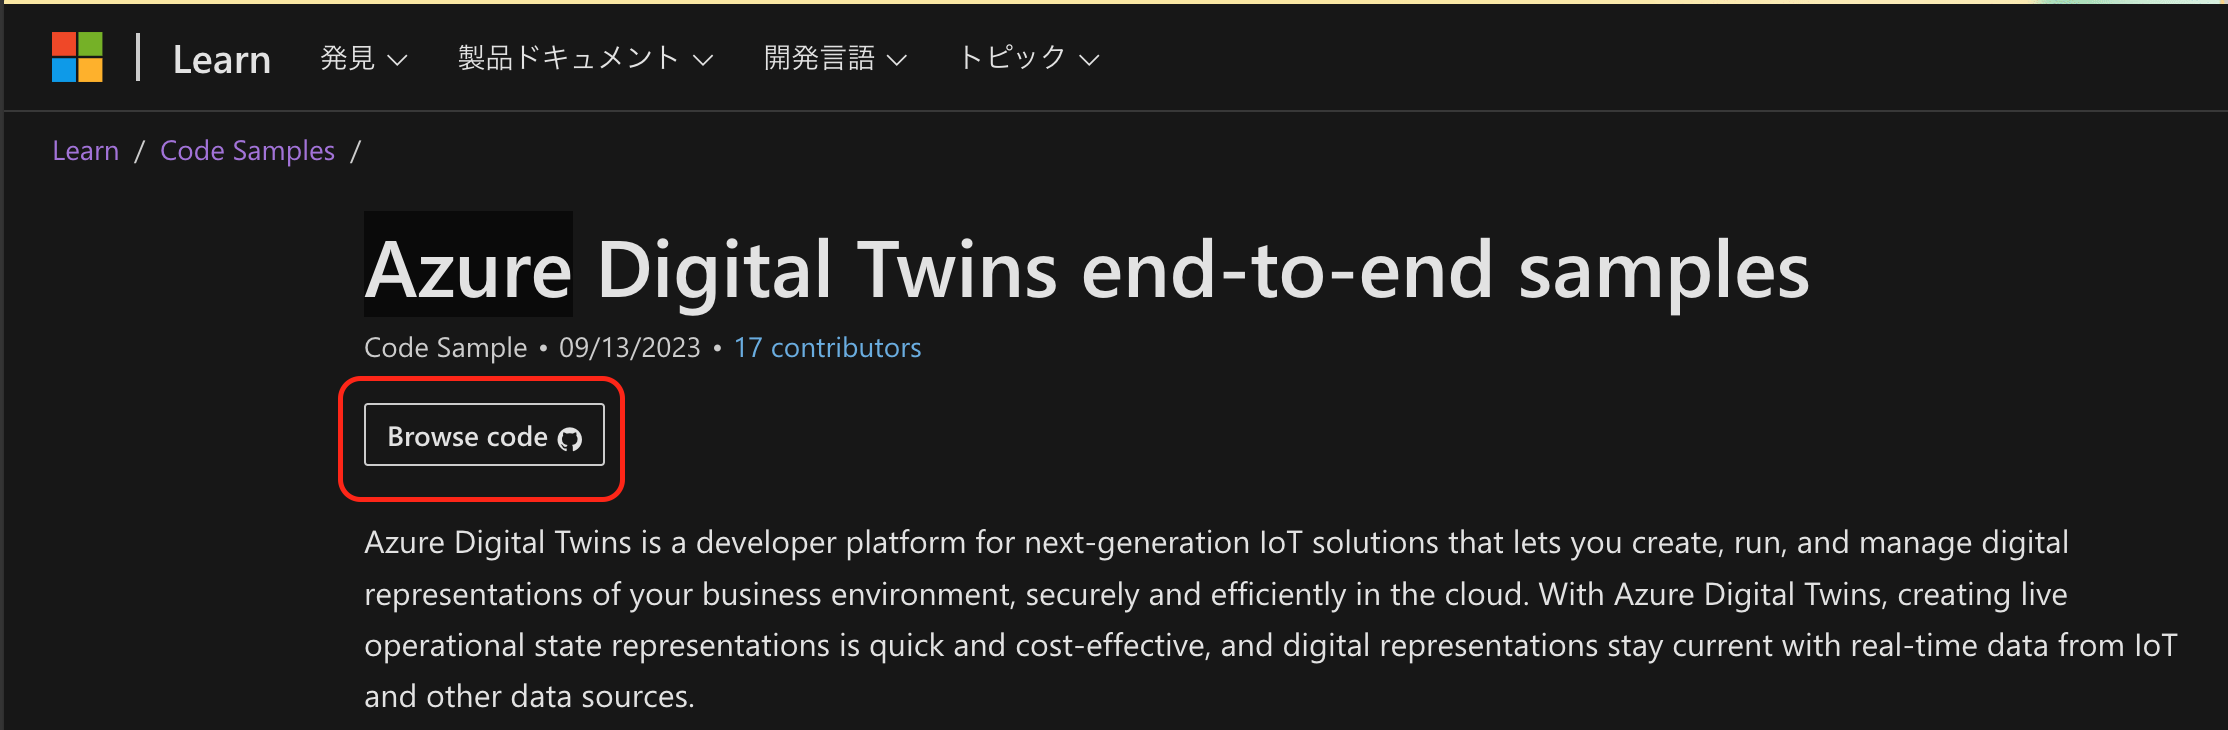
Download the source code as a ZIP file.
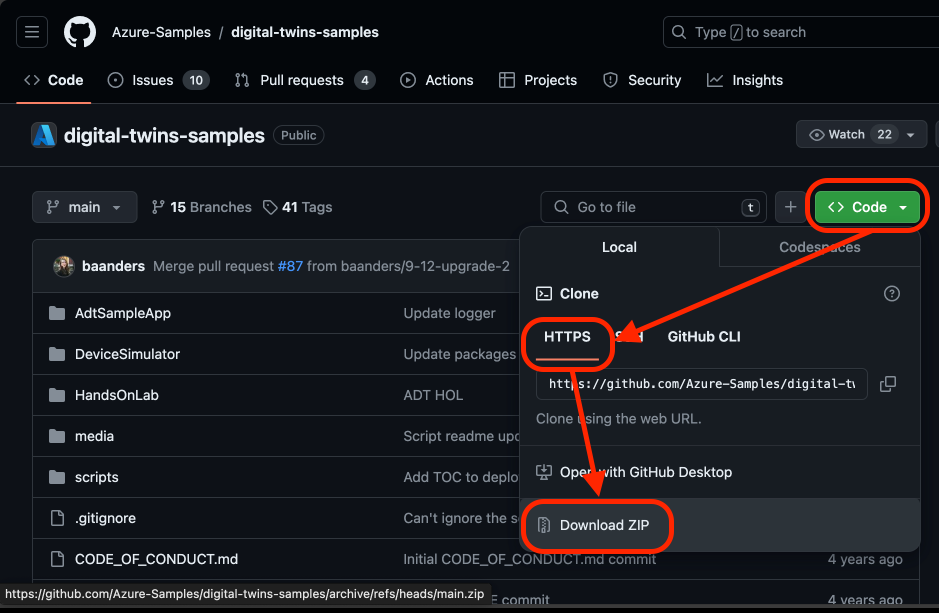
Extract the ZIP file and open a Powershell terminal.
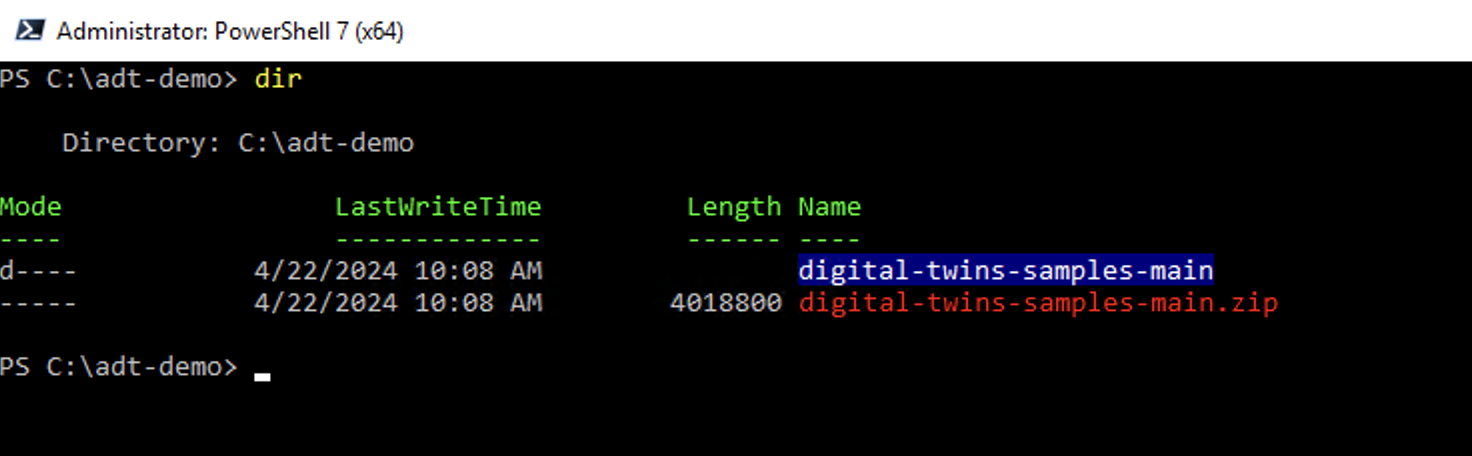
Move to the directory "\digital-twins-samples-main\AdtSampleApp\SampleFunctionsApp"

Run the following command to build the program.
※.NET SDK is necessary since the program is coded in C language.
dotnet publish -c Release

Confirm the following directory existing: "\digital-twins-samples-main\AdtSampleApp\SampleFunctionsApp\bin\Release\net7.0".

Run the following command to create a ZIP file of the program.
※Replace the directory with the directory of your program.
Compress-Archive -Path C:\adt-demo\digital-twins-samples-main\AdtSampleApp\SampleFunctionsApp\bin\Release\net7.0\publish\* -DestinationPath .\publish.zip

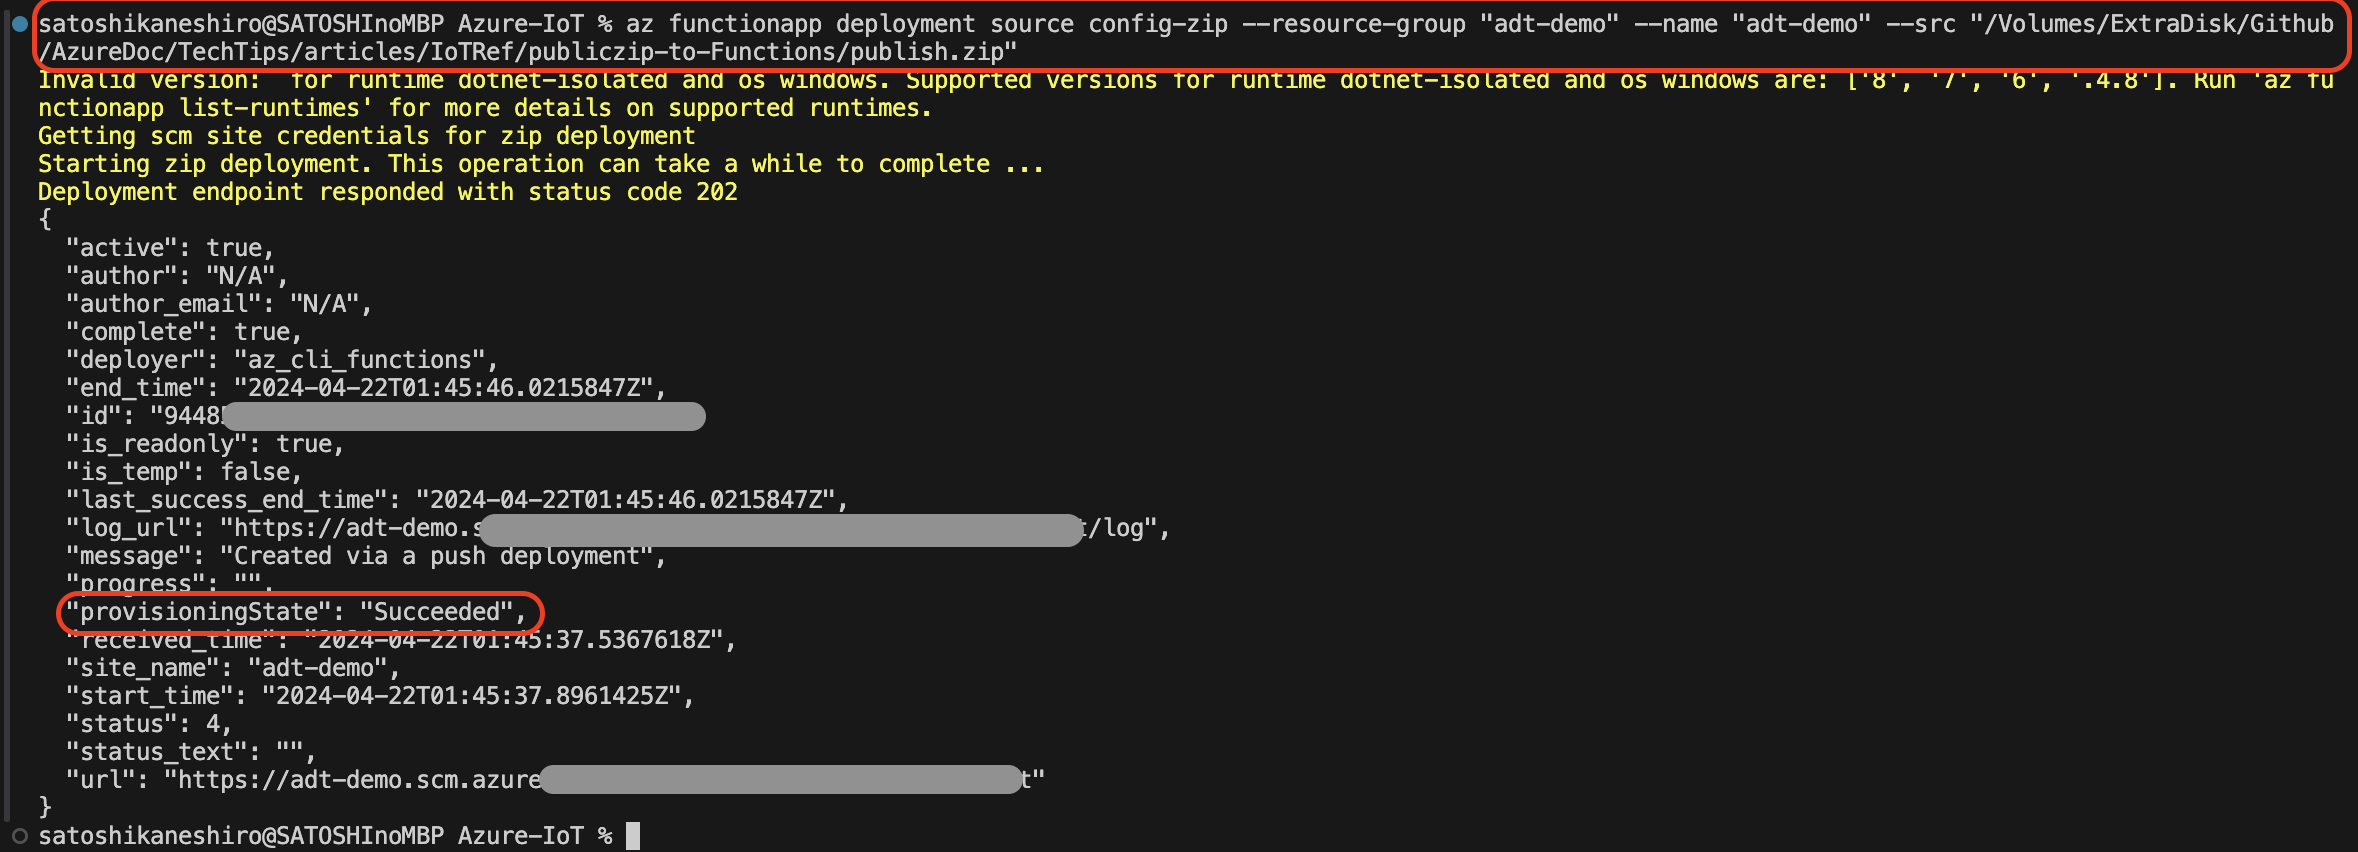
Run the command below to upload the ZIP file to the Function App.
※Azure CLI is necessary to run the command.
az functionapp deployment source config-zip --resource-group <Resource group name> --name <Azure Functions Name> --src <full path of the publish.zip>
e.g.
az functionapp deployment source config-zip --resource-group "adt-demo" --name "adt-demo" --src "/Volumes/ExtraDisk/Github/AzureDoc/TechTips/articles/IoTRef/publiczip-to-Functions/publish.zip"
The prompt may tell a version issue, but it doesn't make the uploading fail.
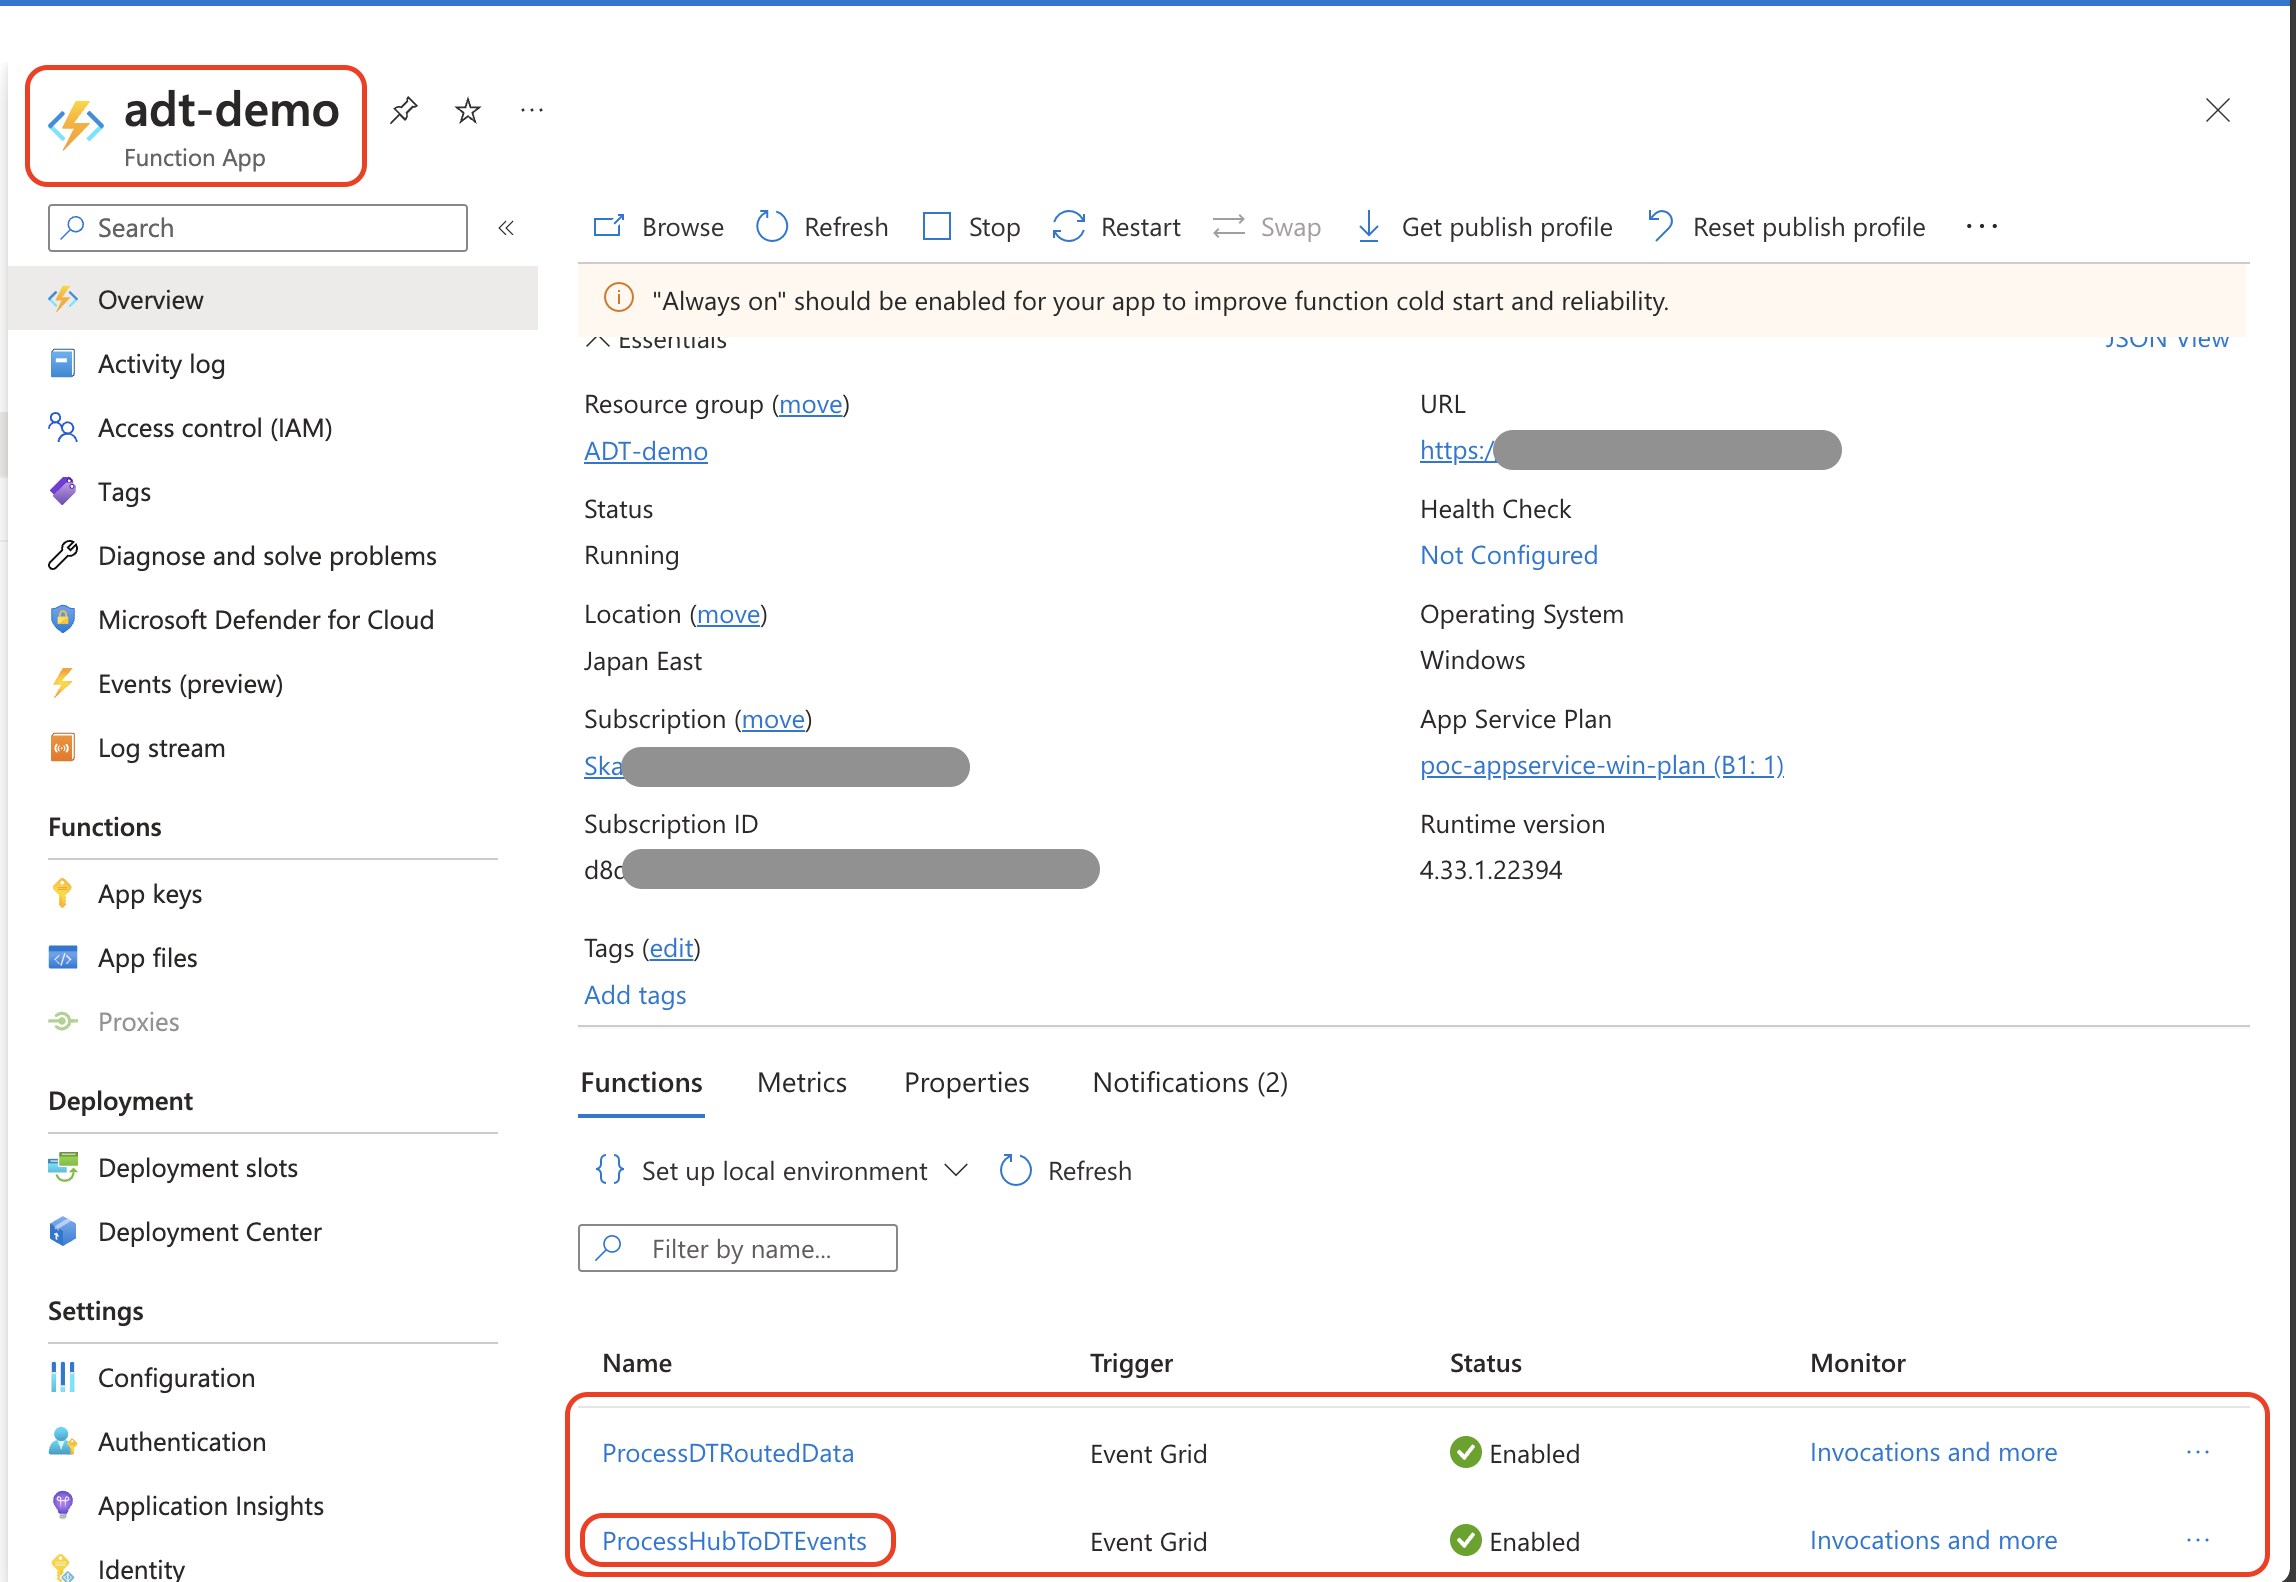
Confirm the program has been appropriately uploaded on the Function App overview page.
Two programs will be uploaded to the Function App, and we will use the [ProcessHubToDTEvents].
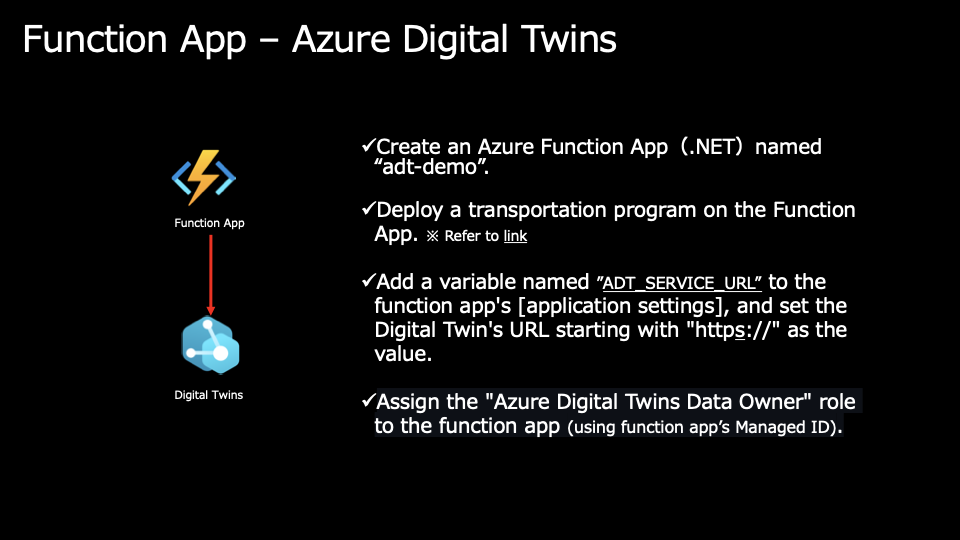
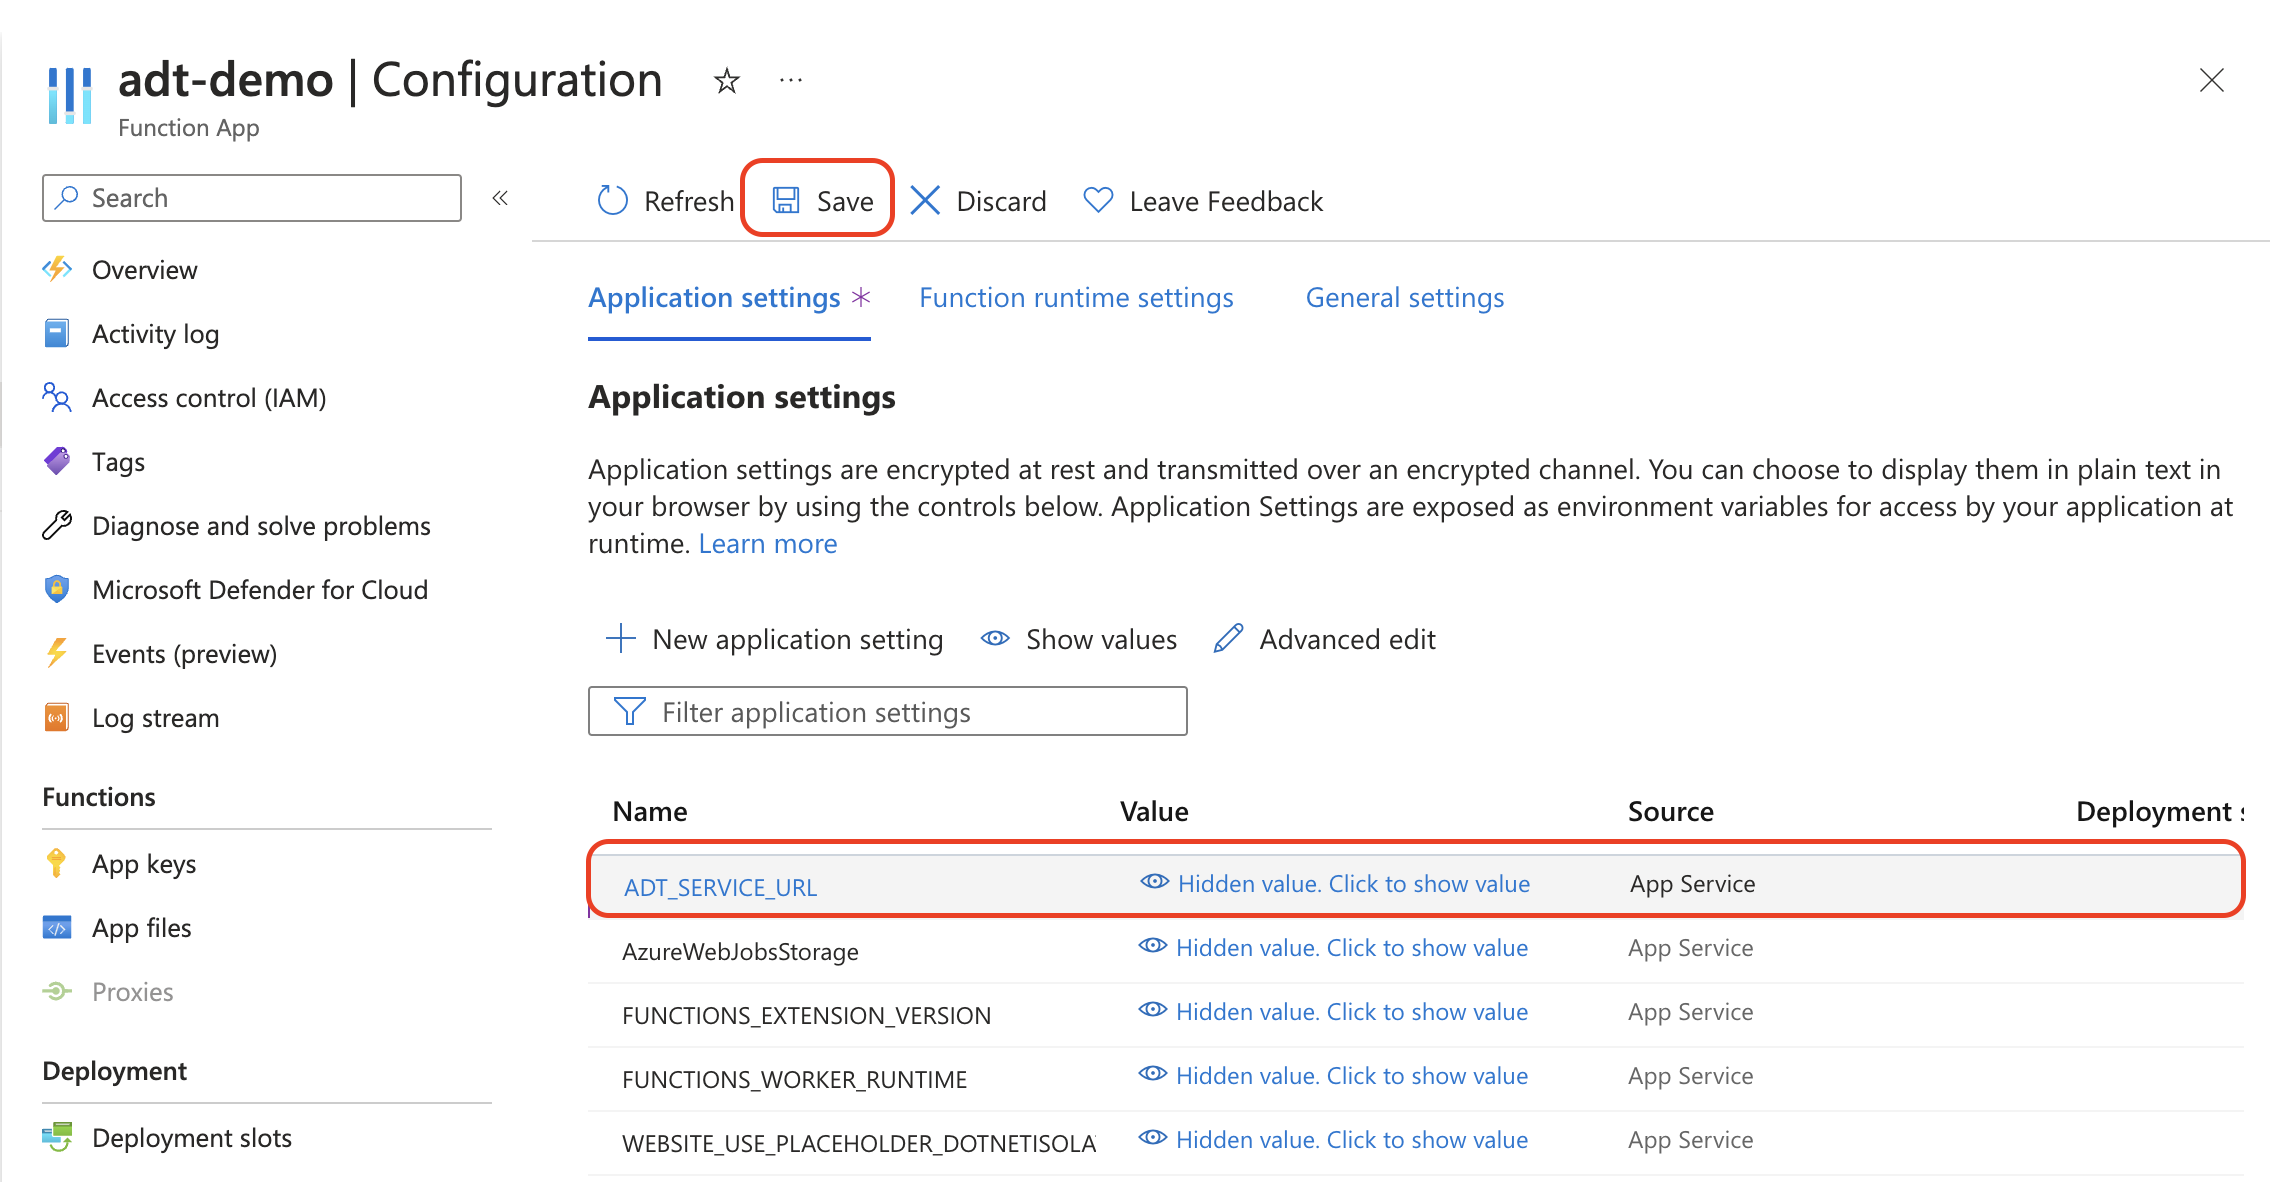
4-3. Add the Azure Digital Twins's URL as an application setting variable in the Function App.
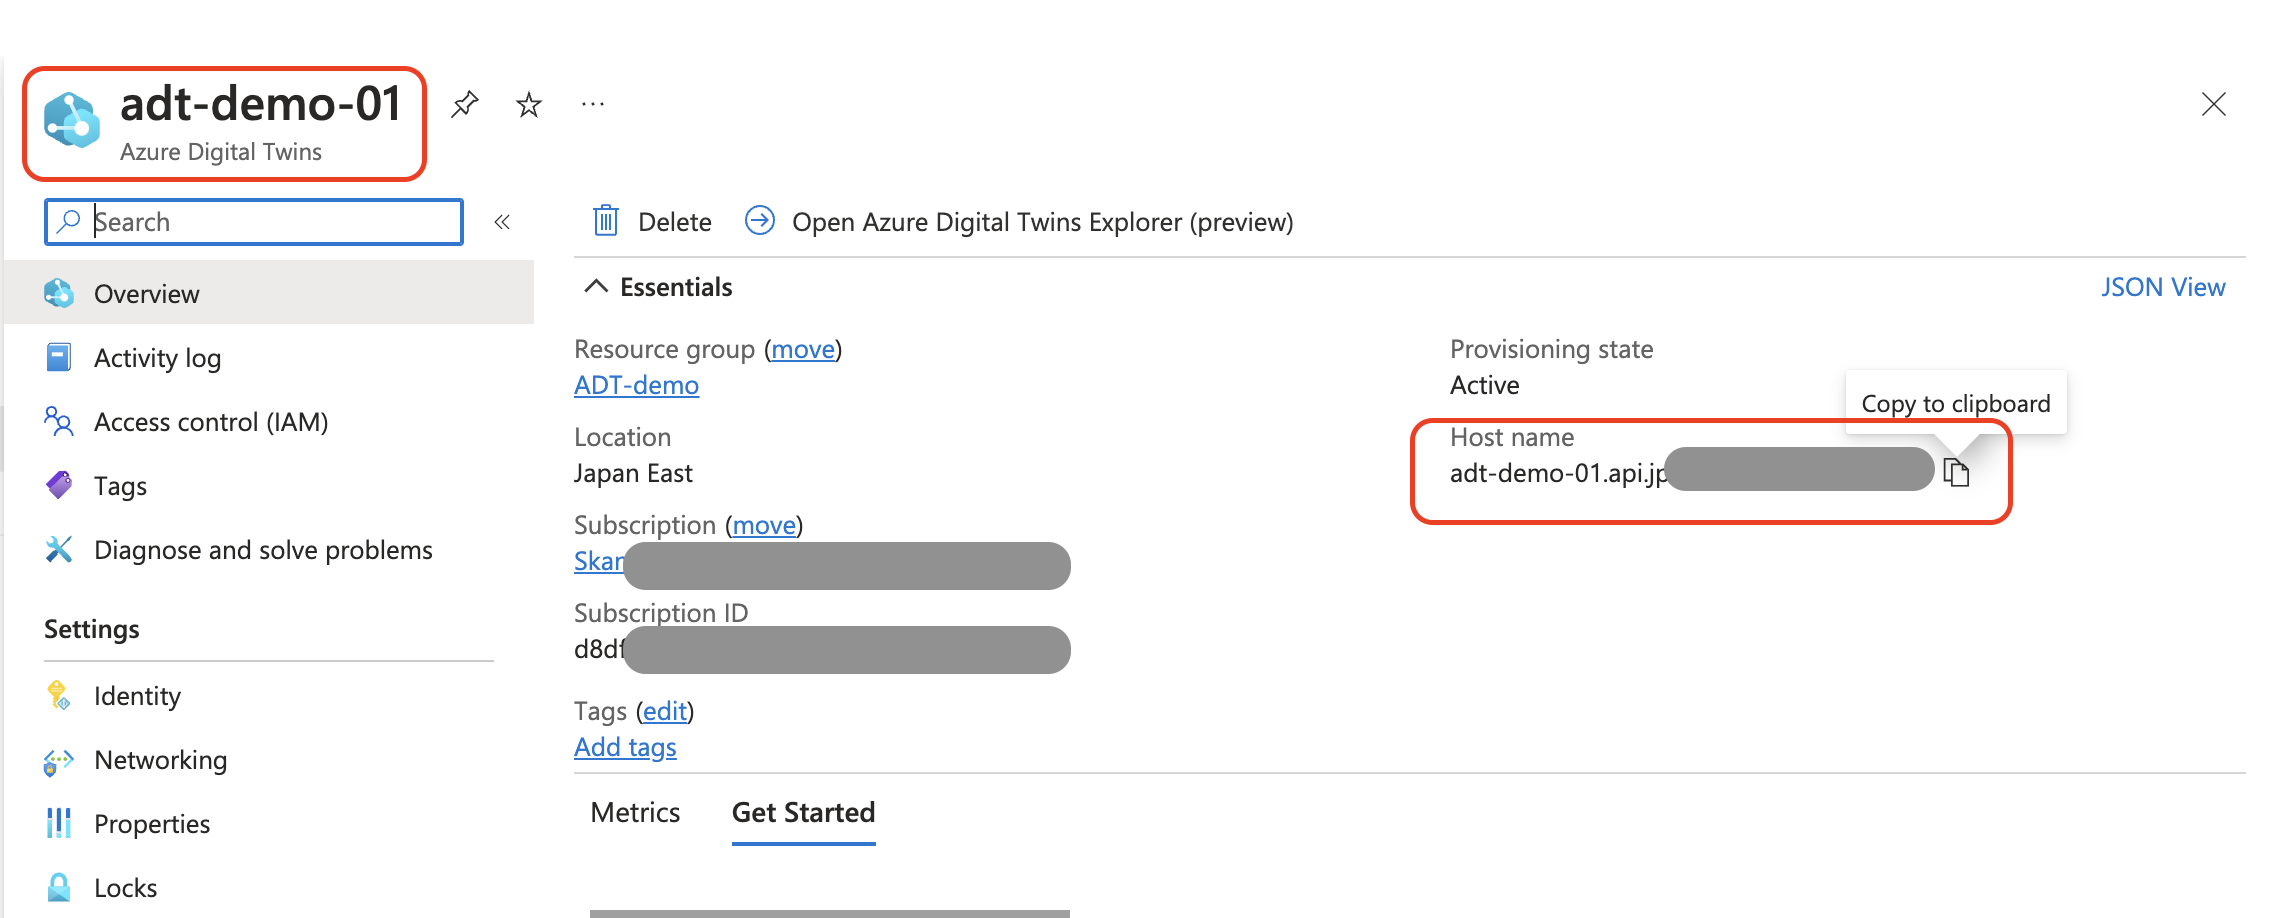
Get the Azure Digital Twins's URL(Hostname).
Move to the Function App, open the [Configuration] page, and click [New application setting].
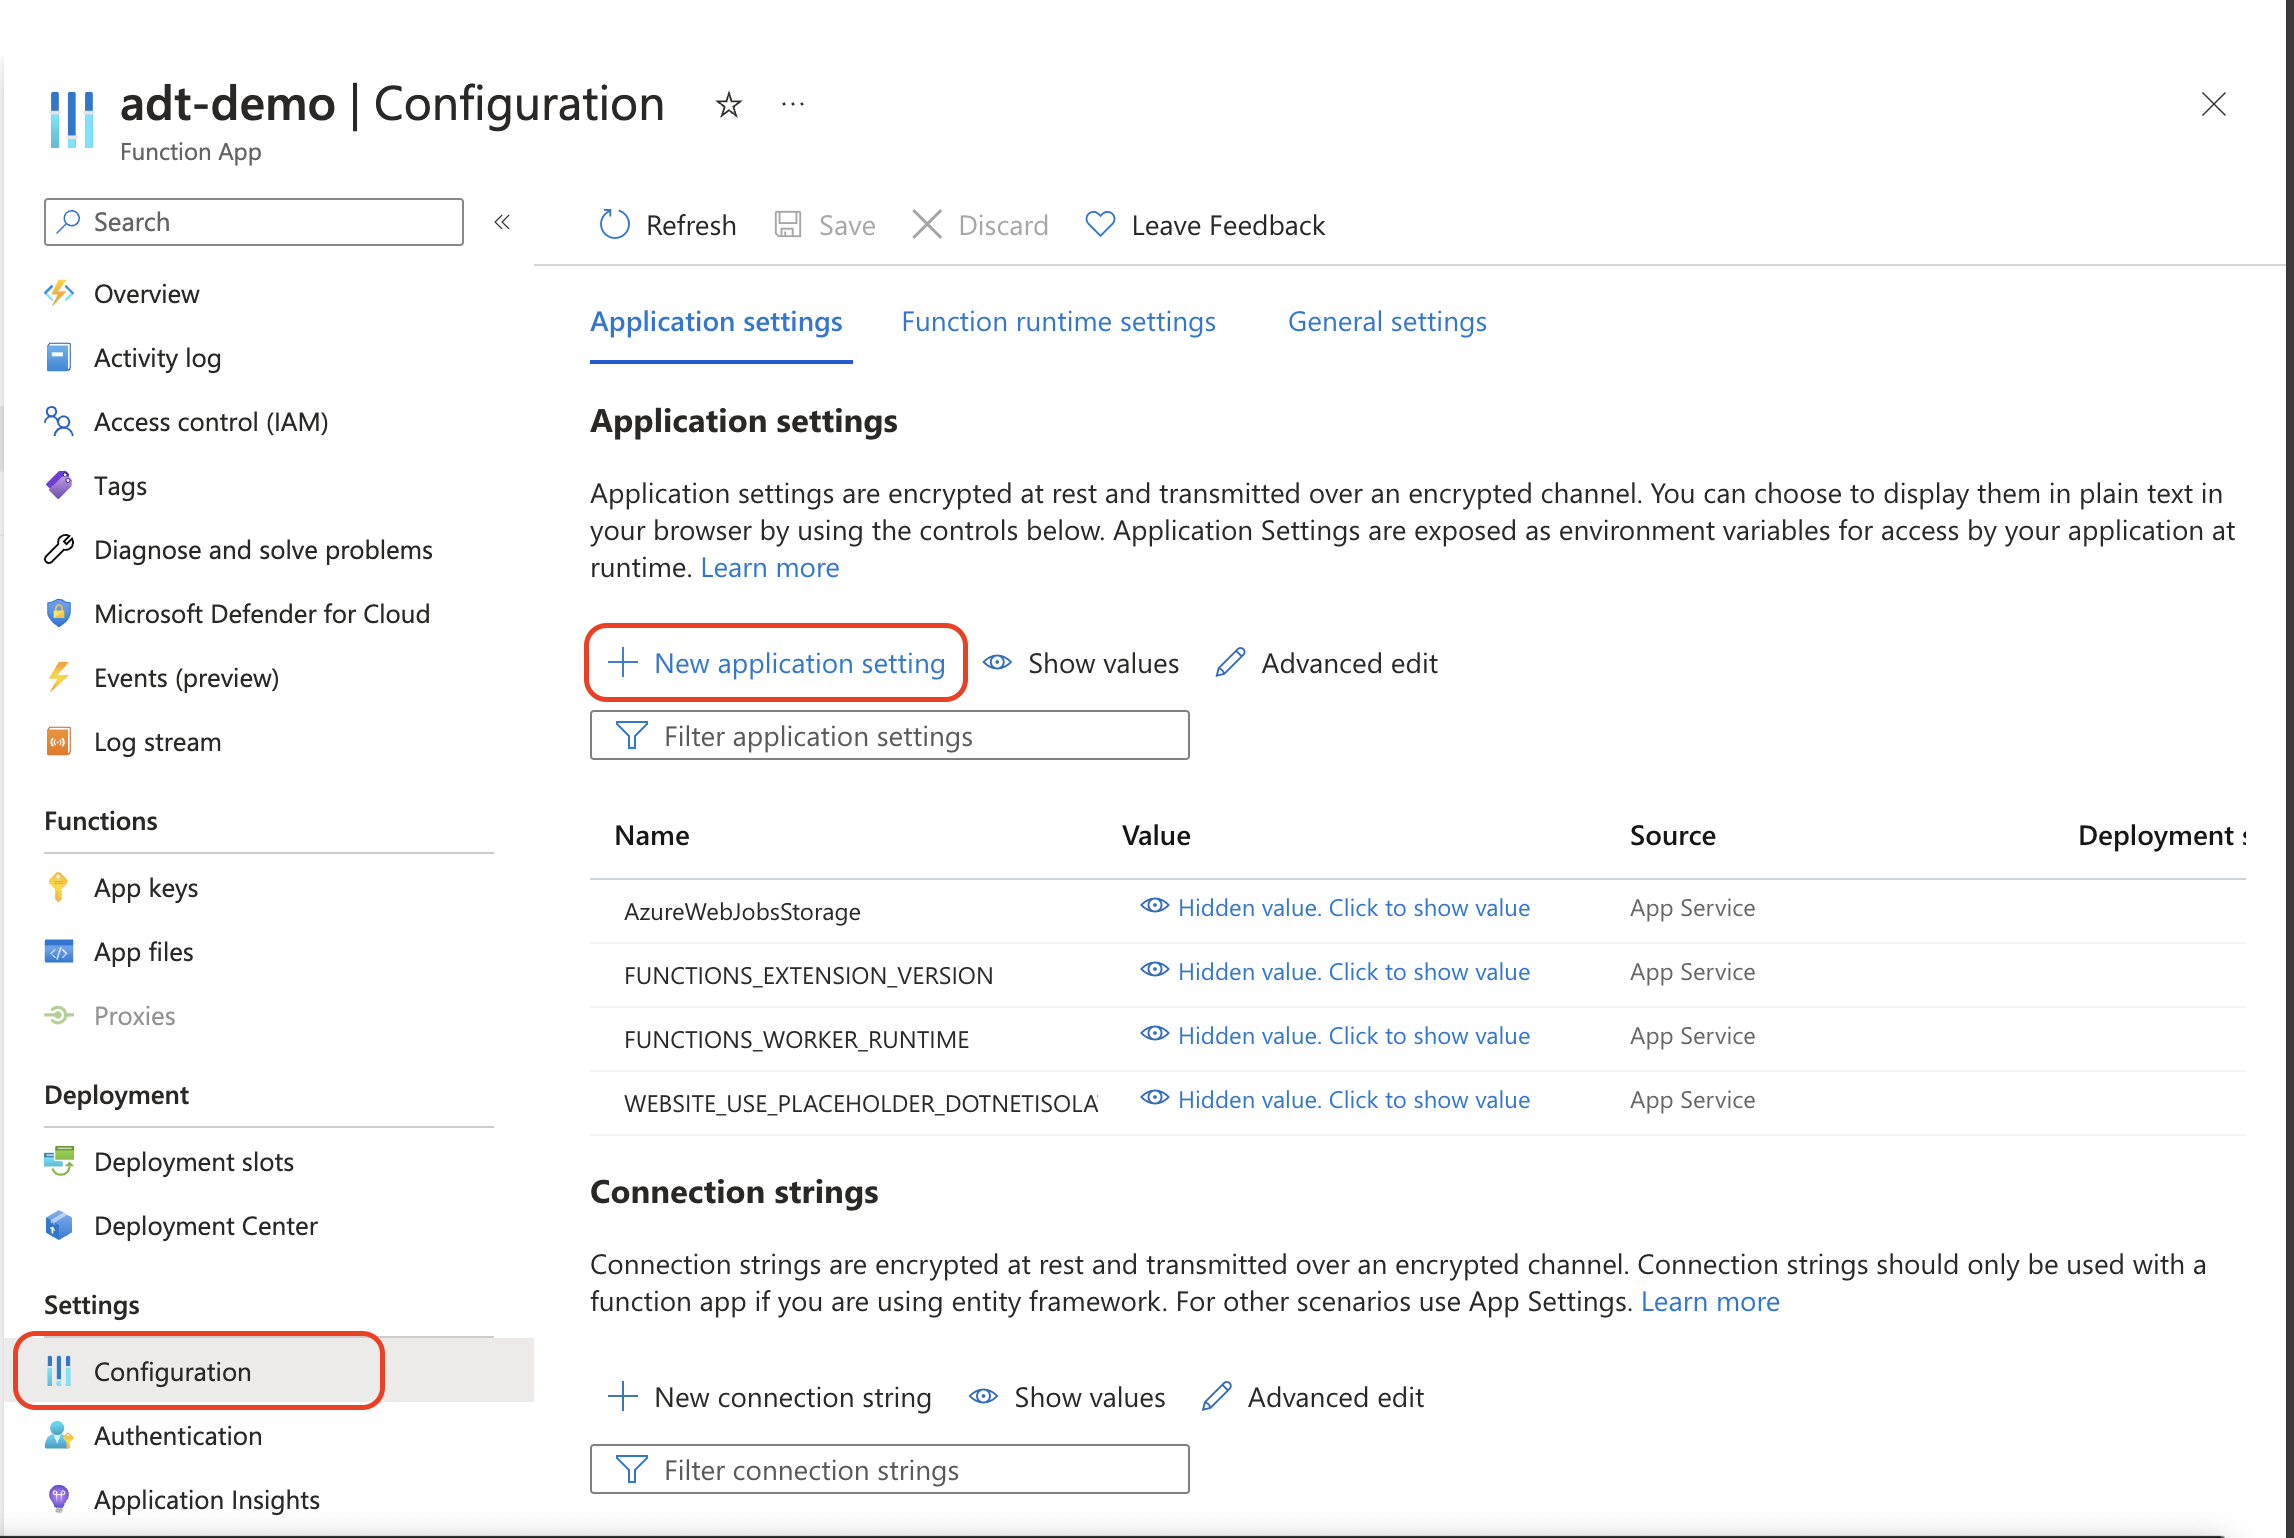
Set the [Name] as "ADT_SERVICE_URL" (Don't change the name) and set the [Value] as the Azure Digital Twins's URL. (Remember to add the "https://" header in front of the URL)
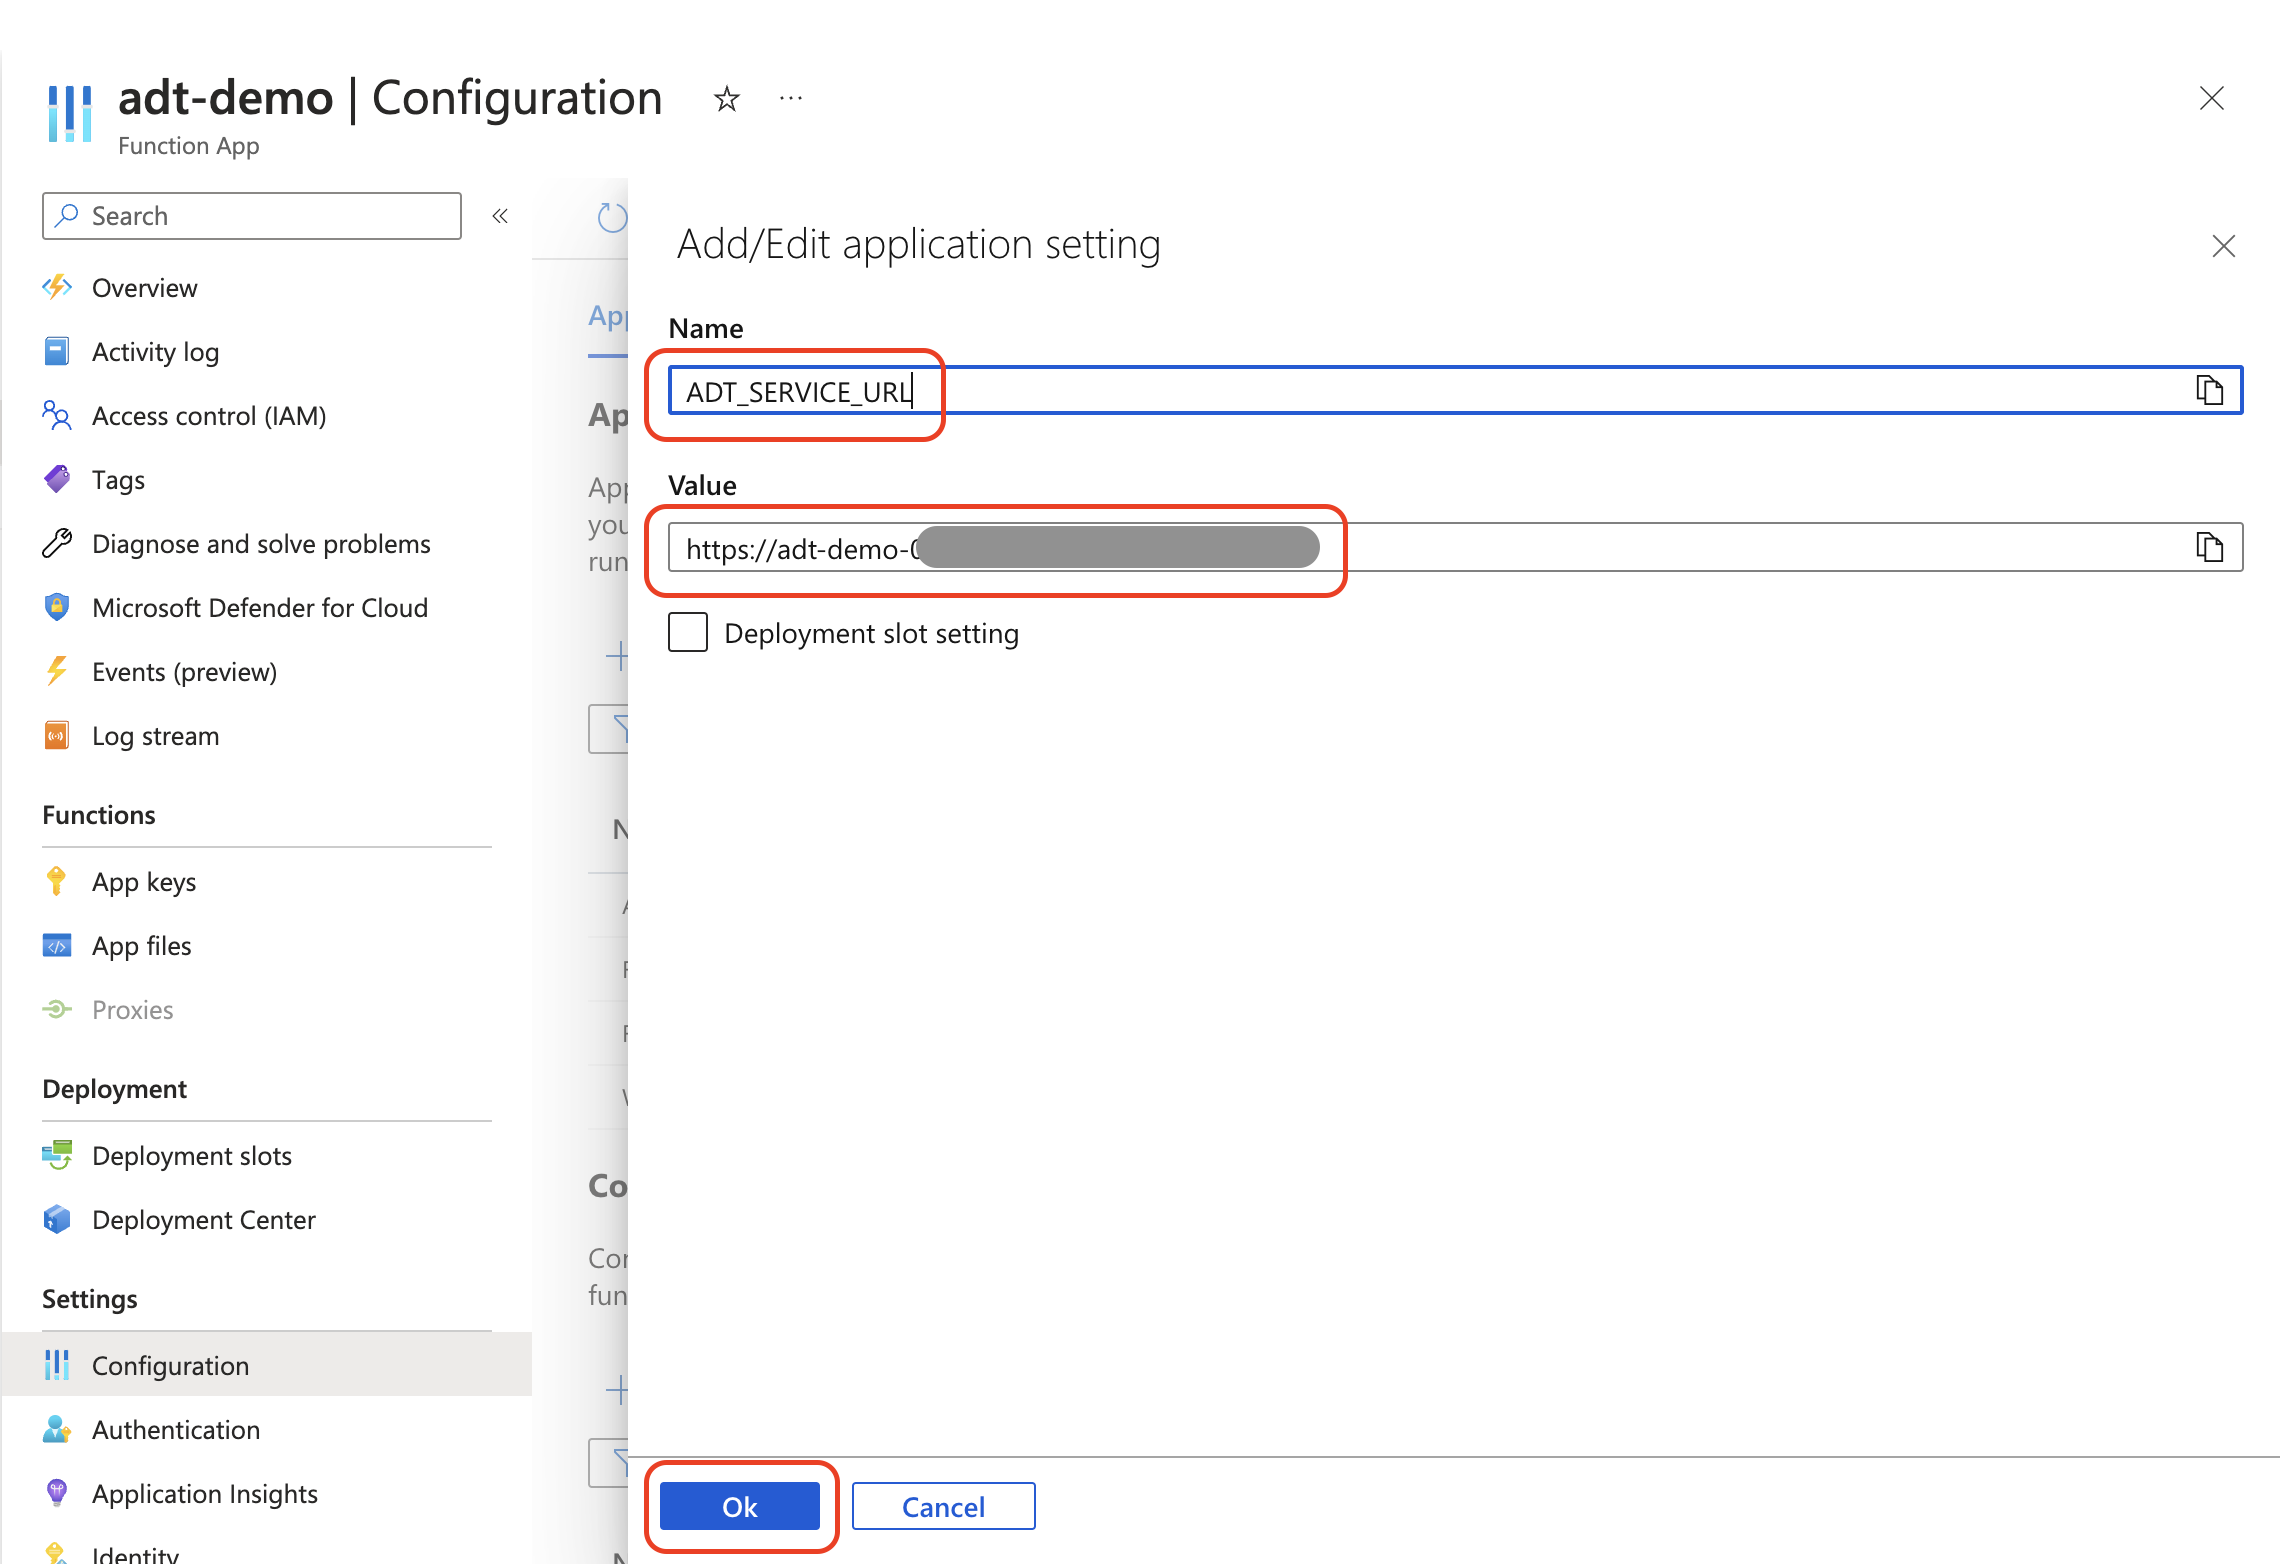
Confirm the variable has been properly created and click [Save].
4-4. Assign the [Azure Digital Twins Data Owner] role to the Function App.
The Function App needs the role to access the Azure Digital Twins instance.
We will turn on the Function App's Managed ID and assign the role to it.
Open the [Identity] in the Function App's [Setting] menu.
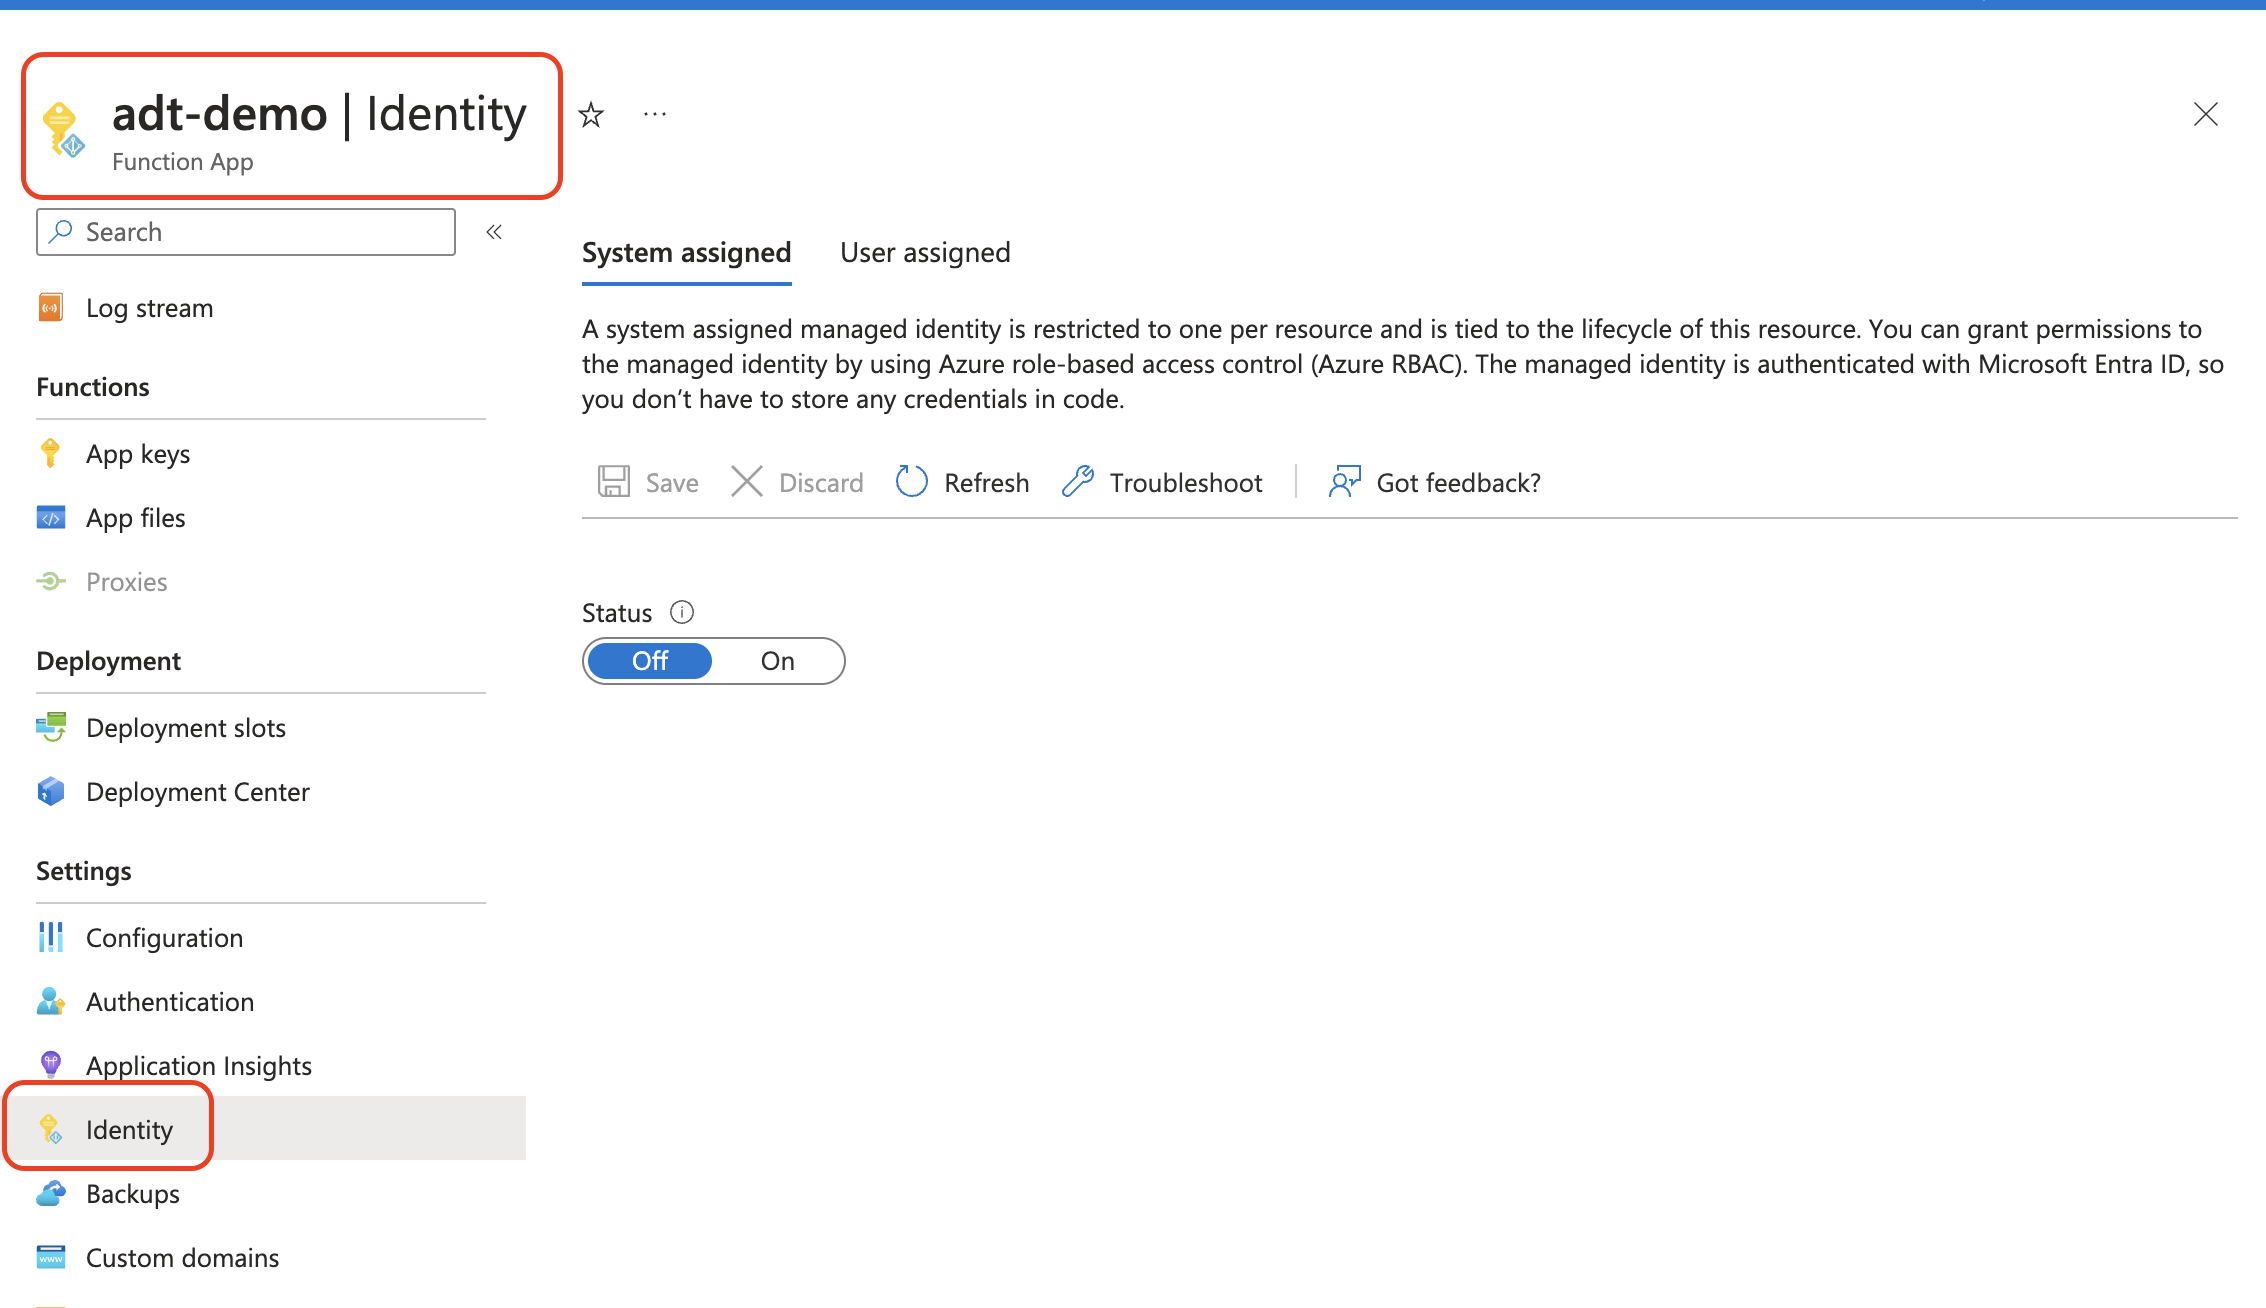
Turn on the [Sysmem assigned]'s status and Click [Save].
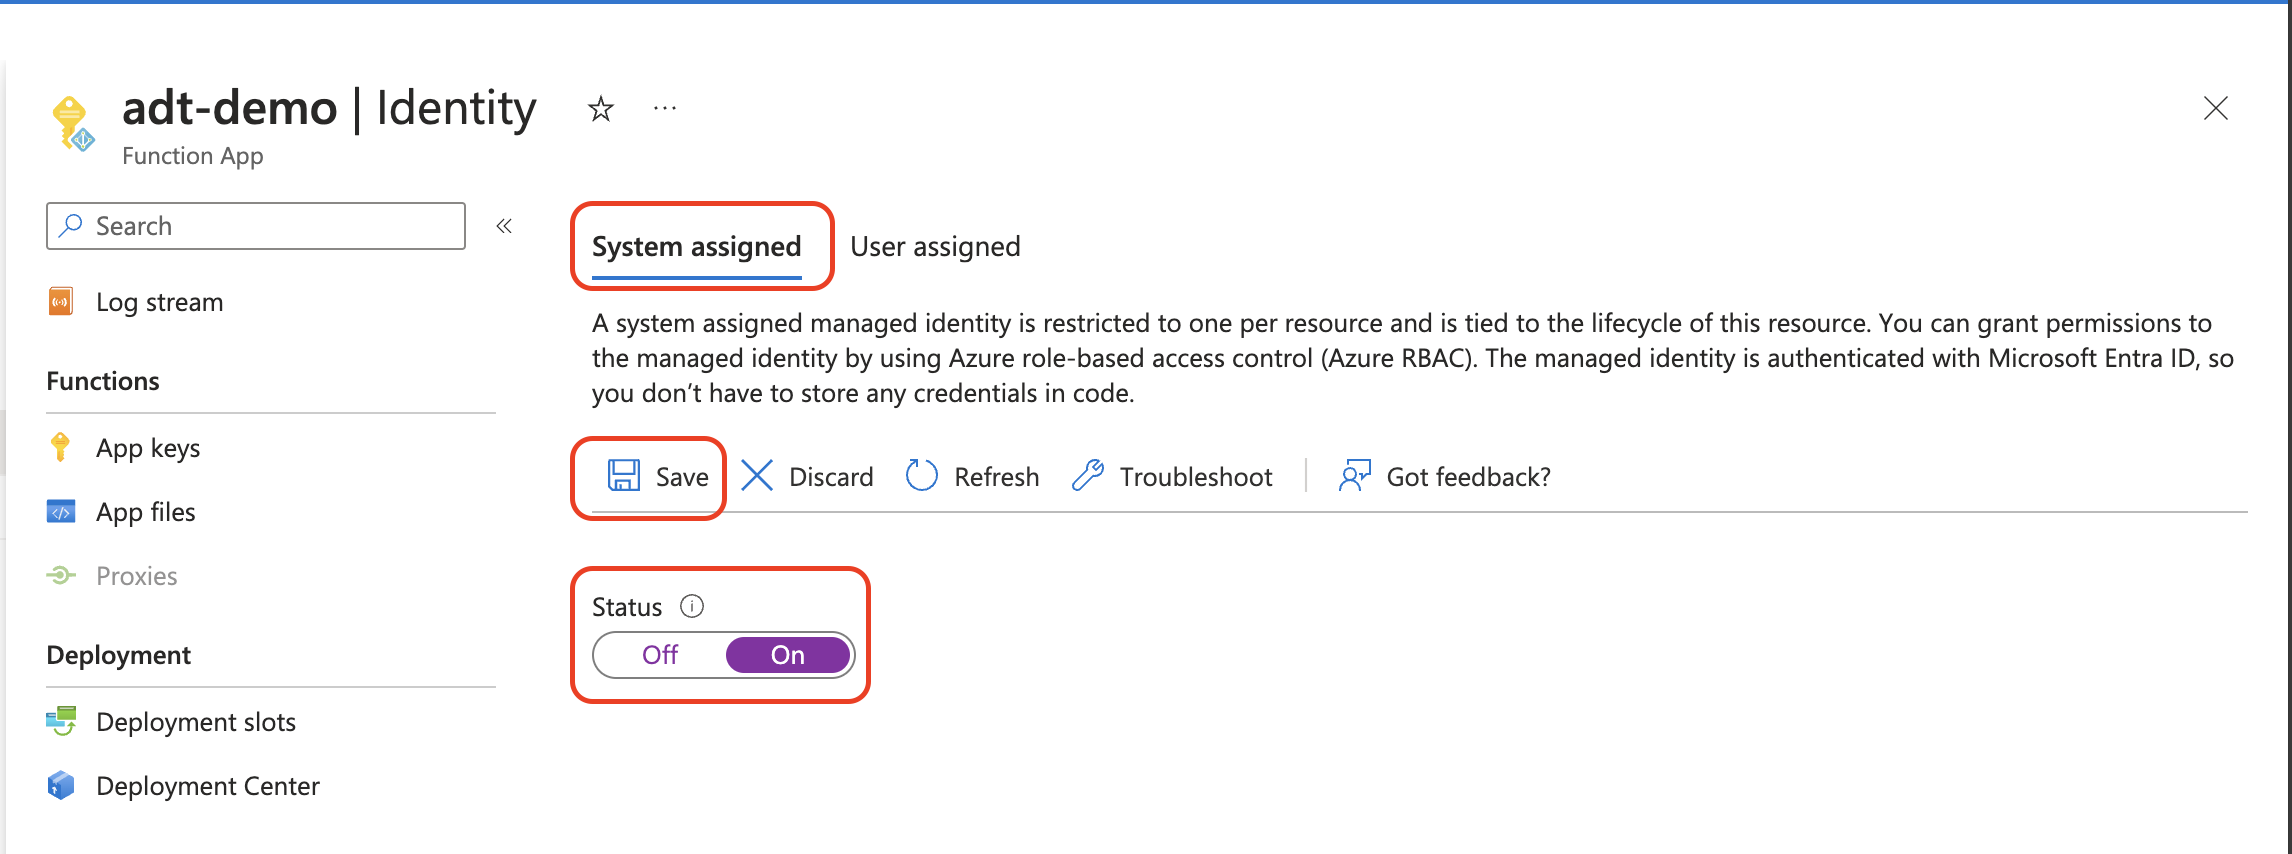
Click [Yes].

Move to the Azure Digital Twins overview and open the [Access control(IAM)] page.
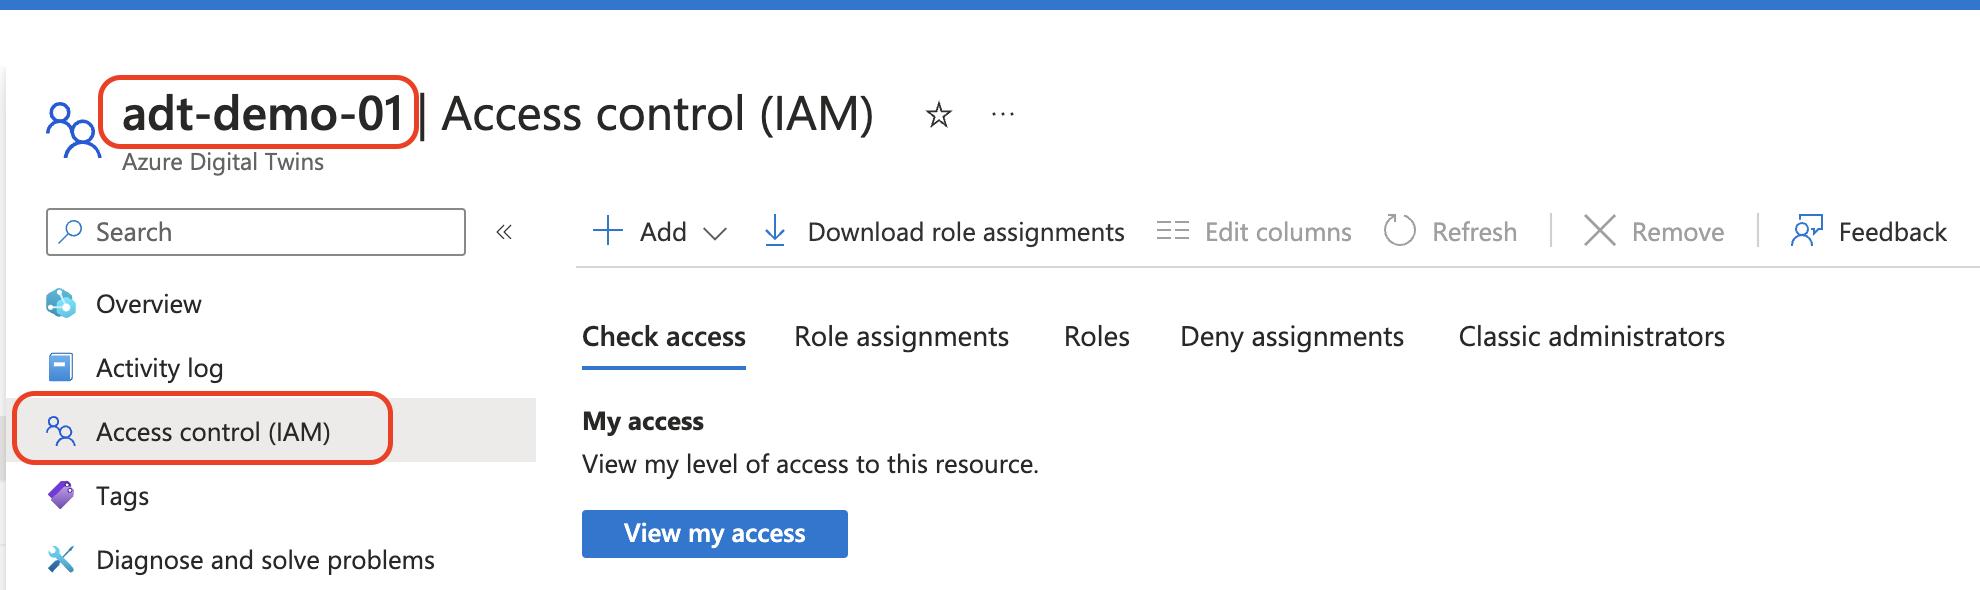
Click [Add] → [Add role assignment].
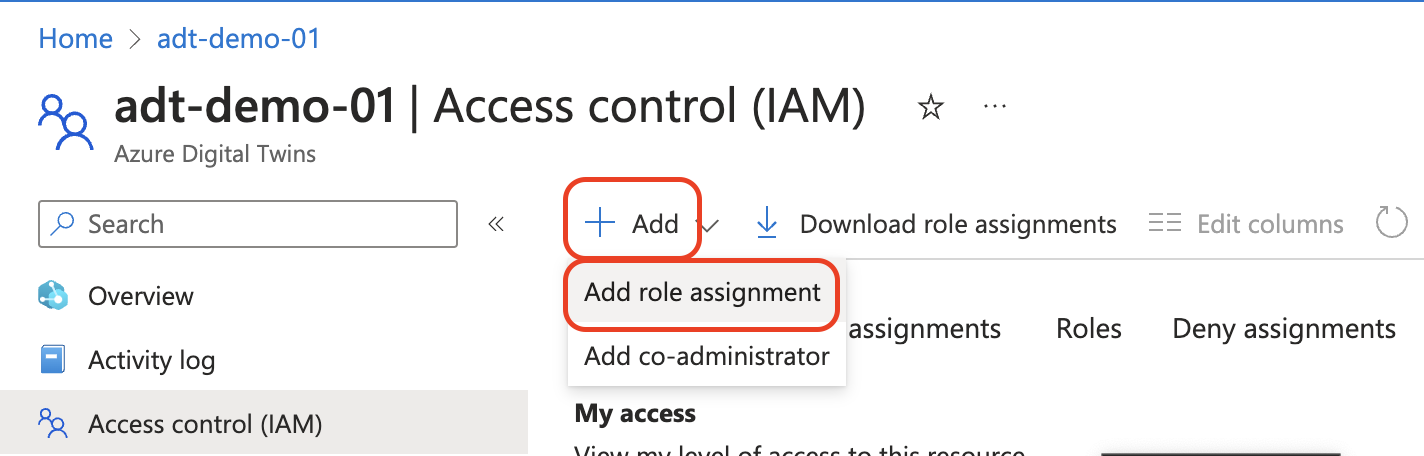
Search "digital" and choose the [Azure Digital Twins Data Owner].
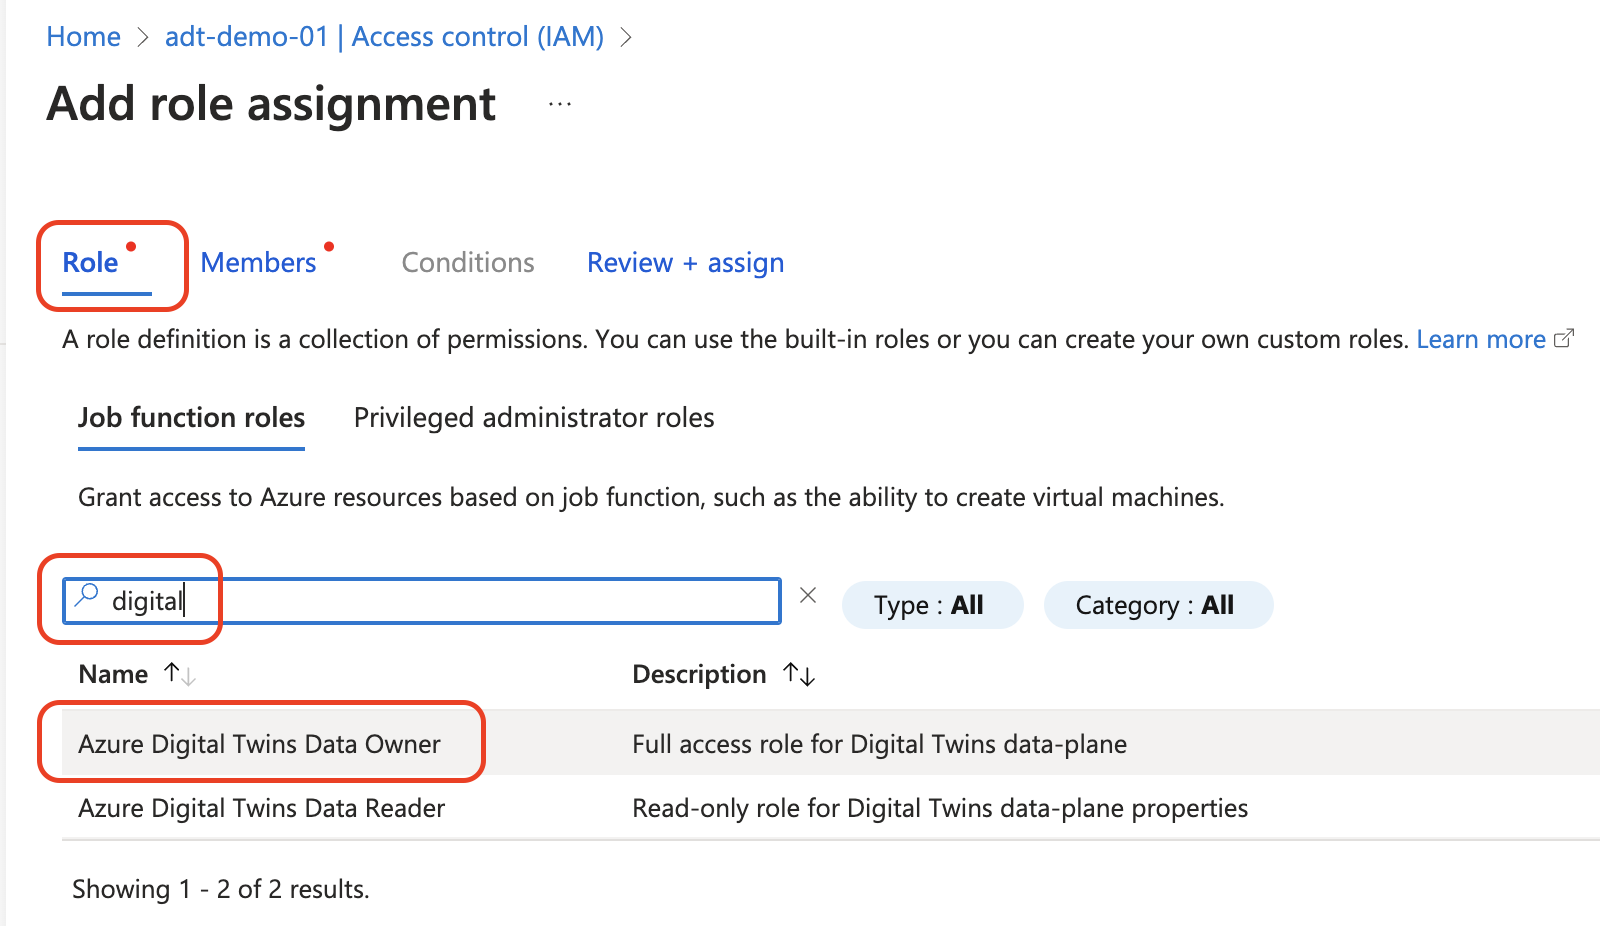
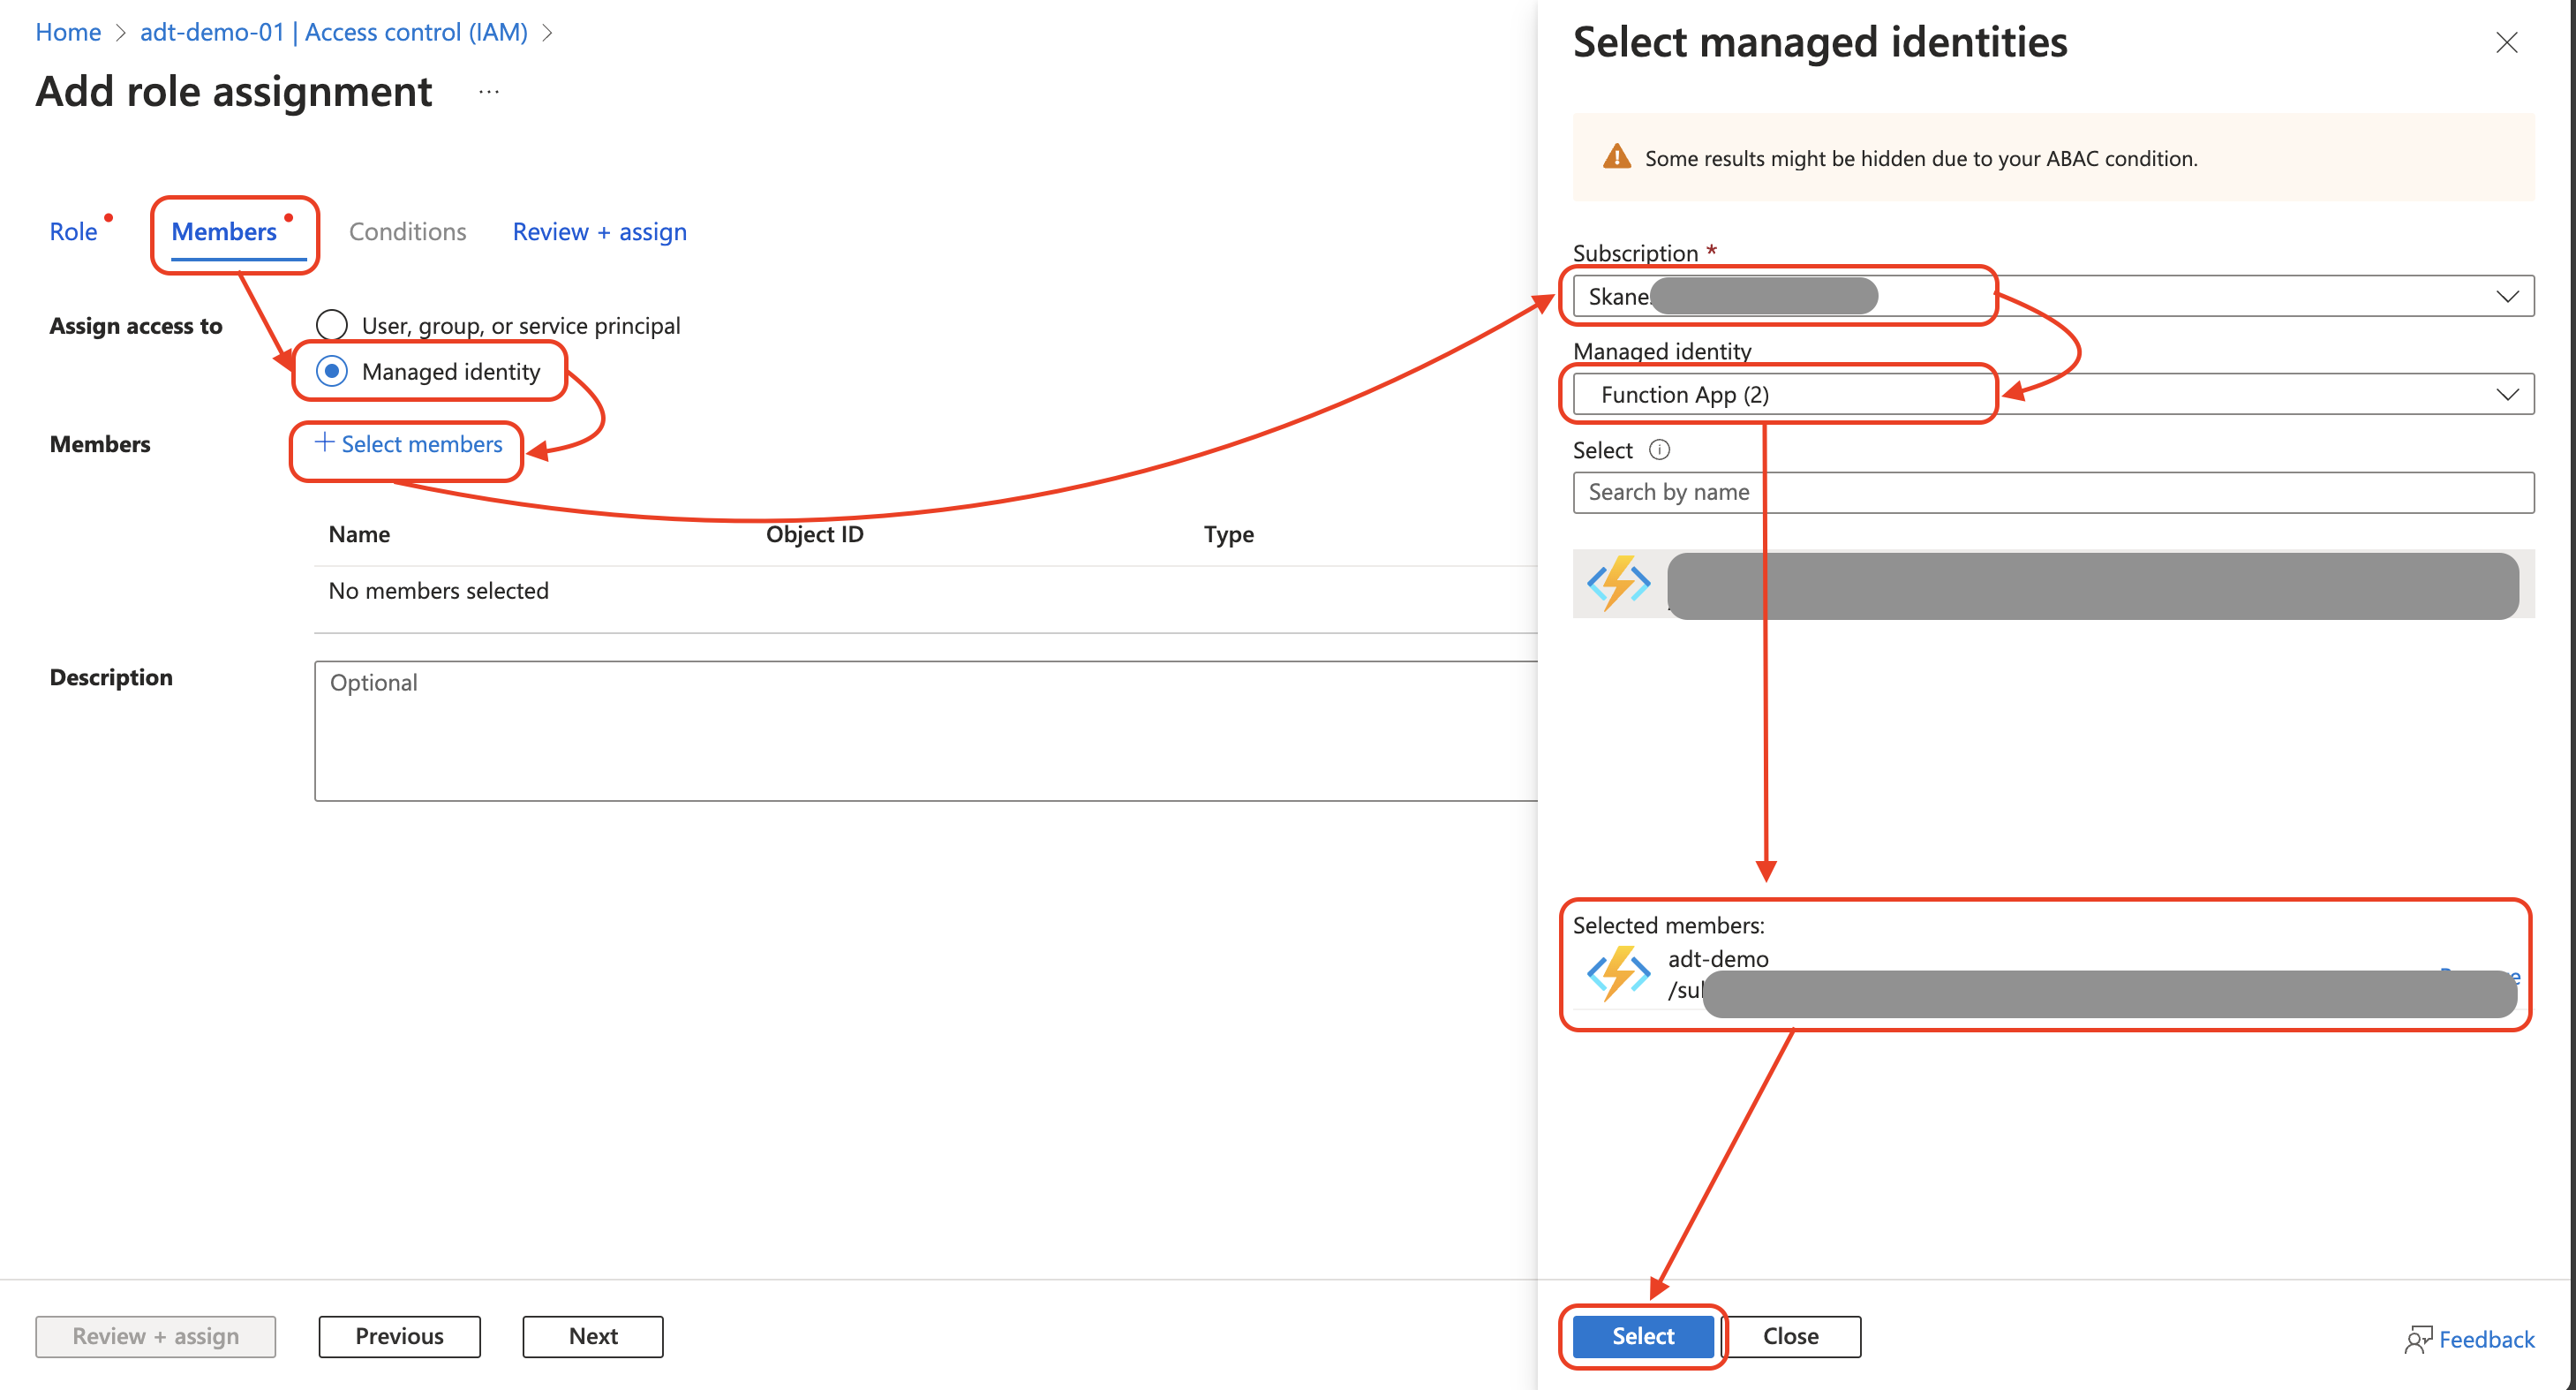
Follow the flow below to choose the Function App as a member.
↓
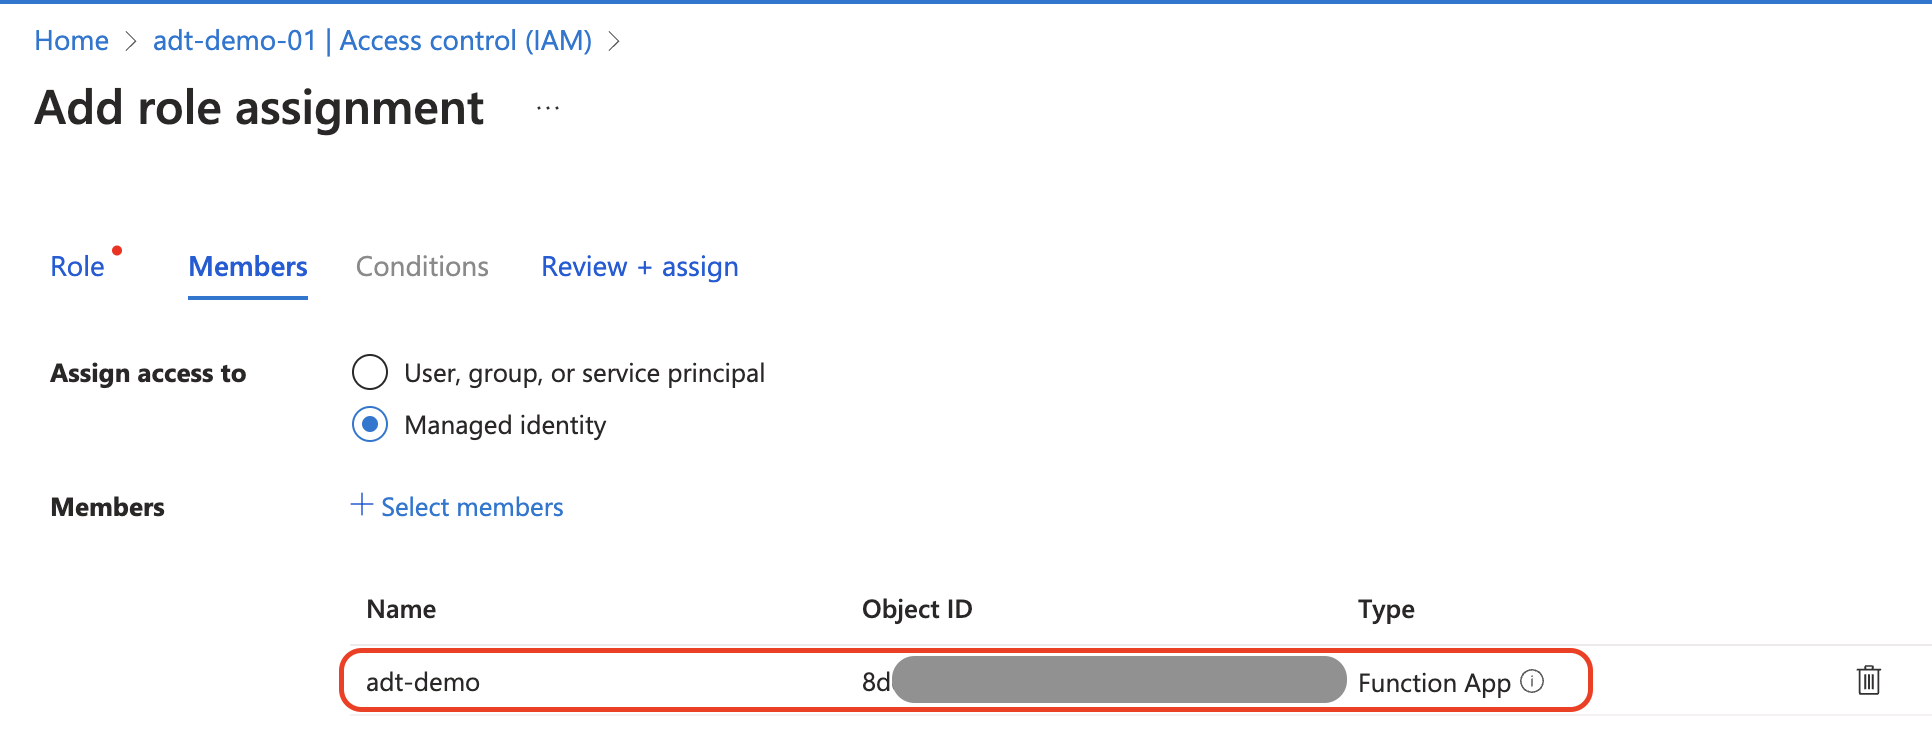
Click [Review + assign].

5. Operations on an Event Grid instance.
Now, we have the program for transporting the temperature data.
There is still one more thing we need to do, which is to deploy an Event-driven trigger. The trigger starts the program in the Function App when the IoT Hub receives telemetry data from an IoT device and then triggers the trigger.
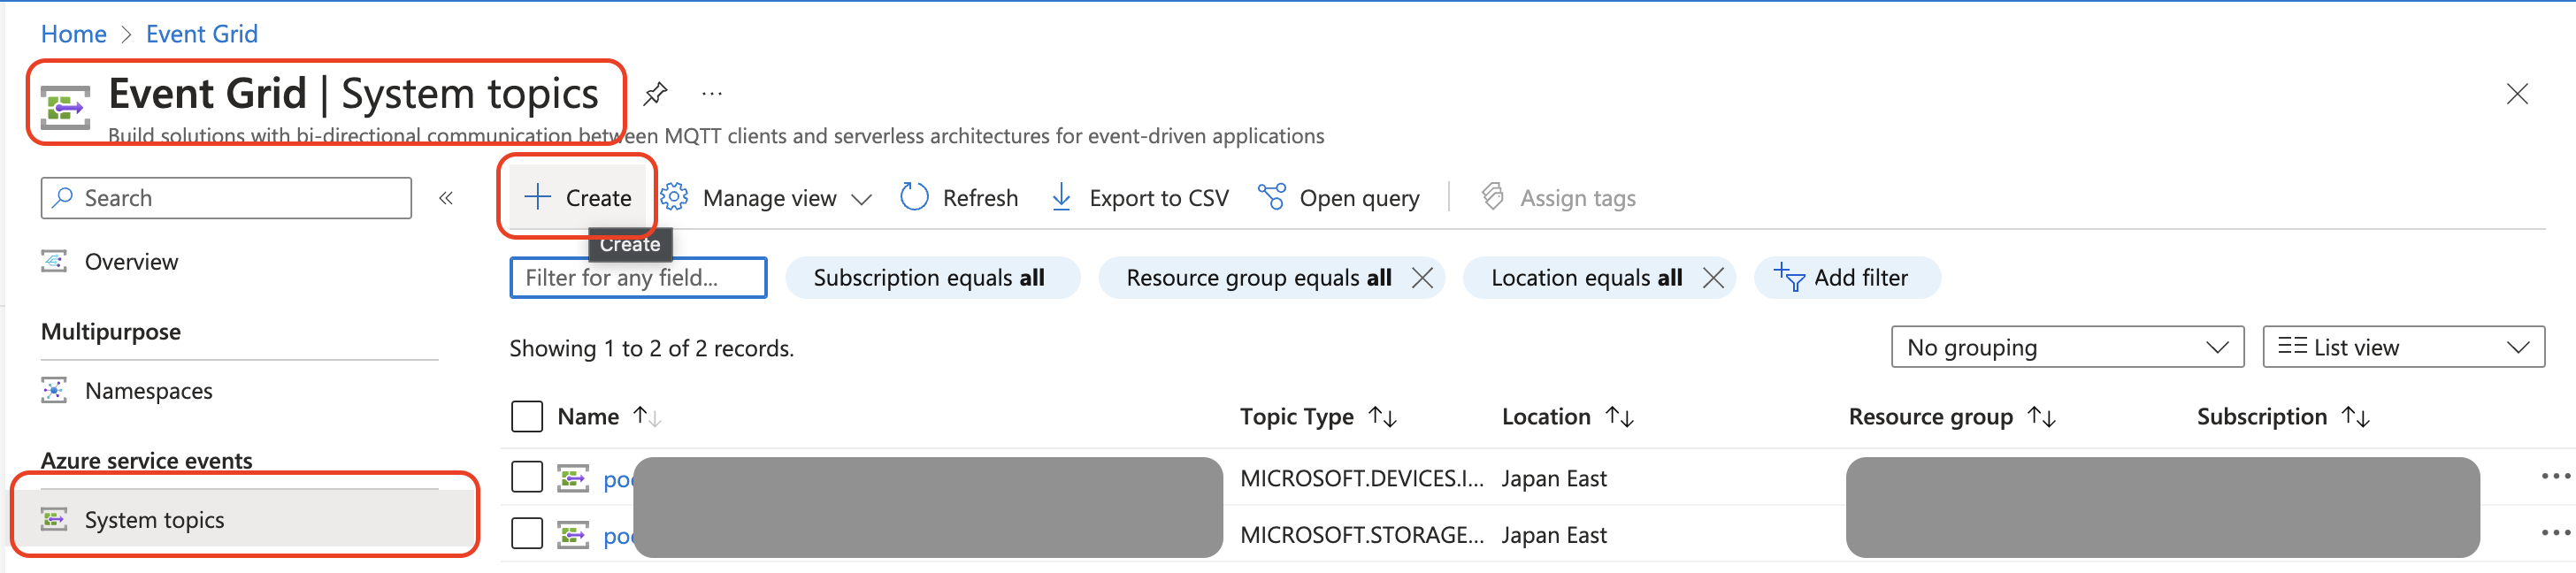
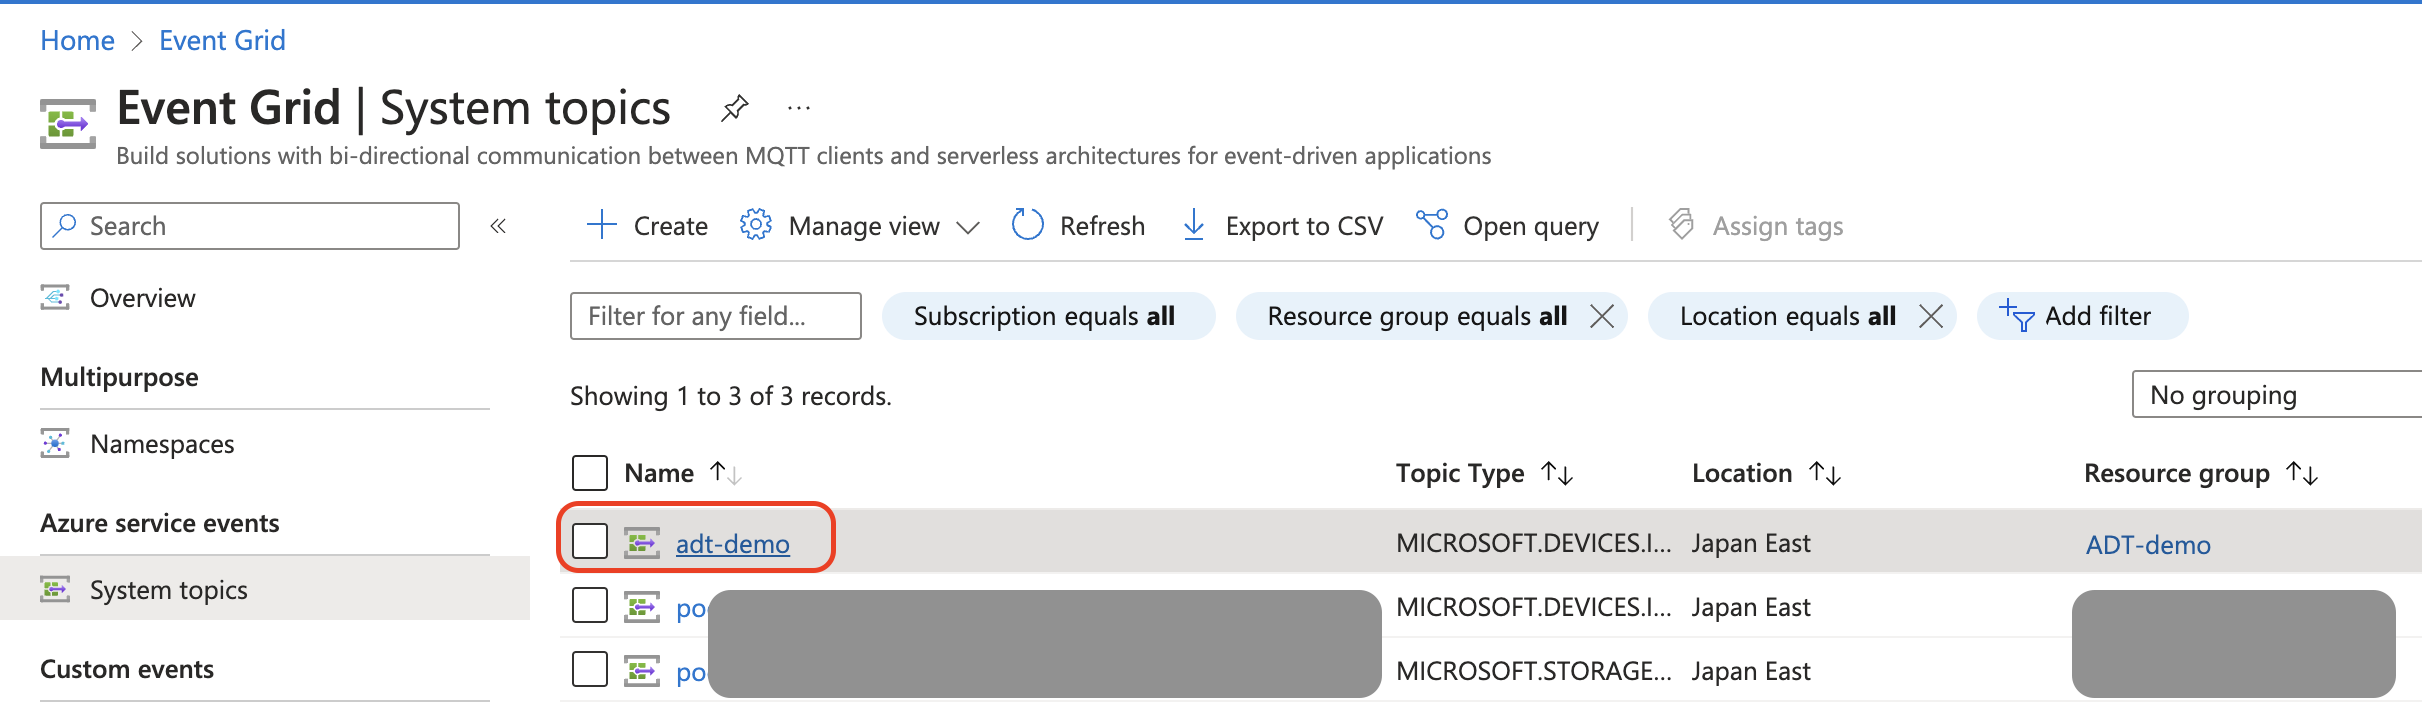
Select the [System topics] from the [Azure service events] menu for Event Grid and click [Create].
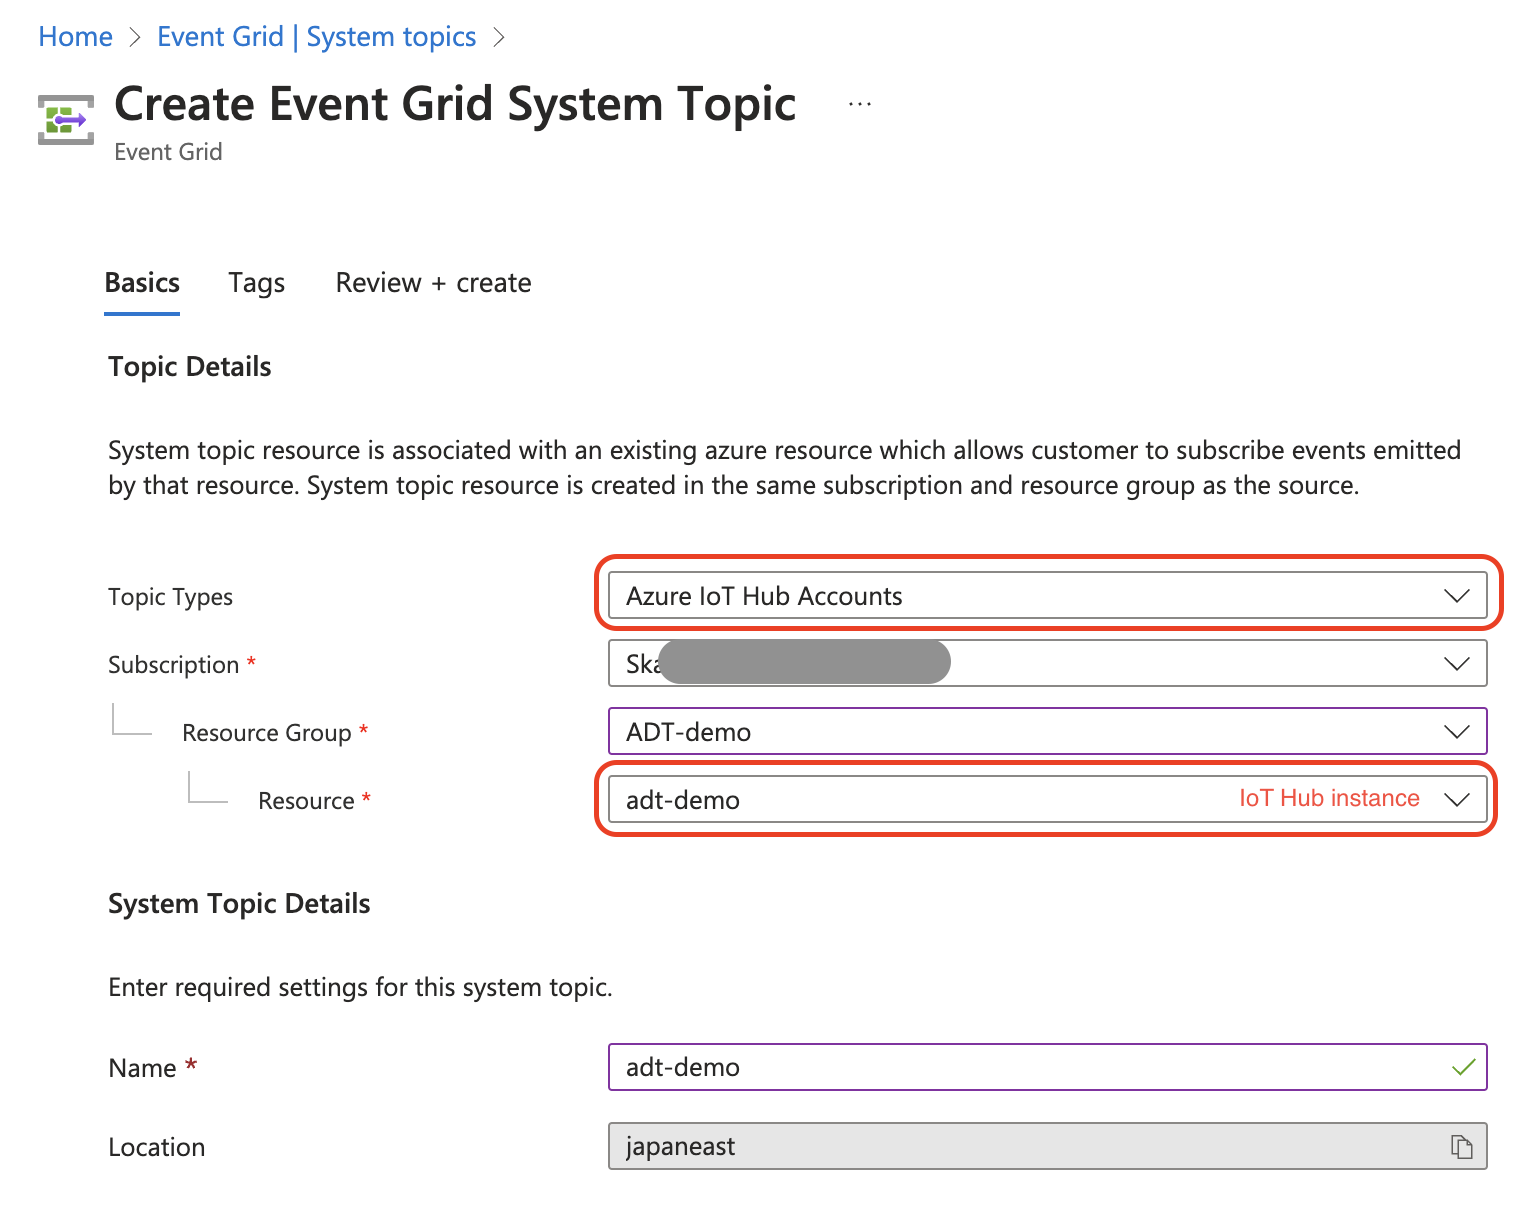
Select the [Topic Types] as "Azure IoT Hub Accounts" and choose the IoT Hub instance created in the previous step.
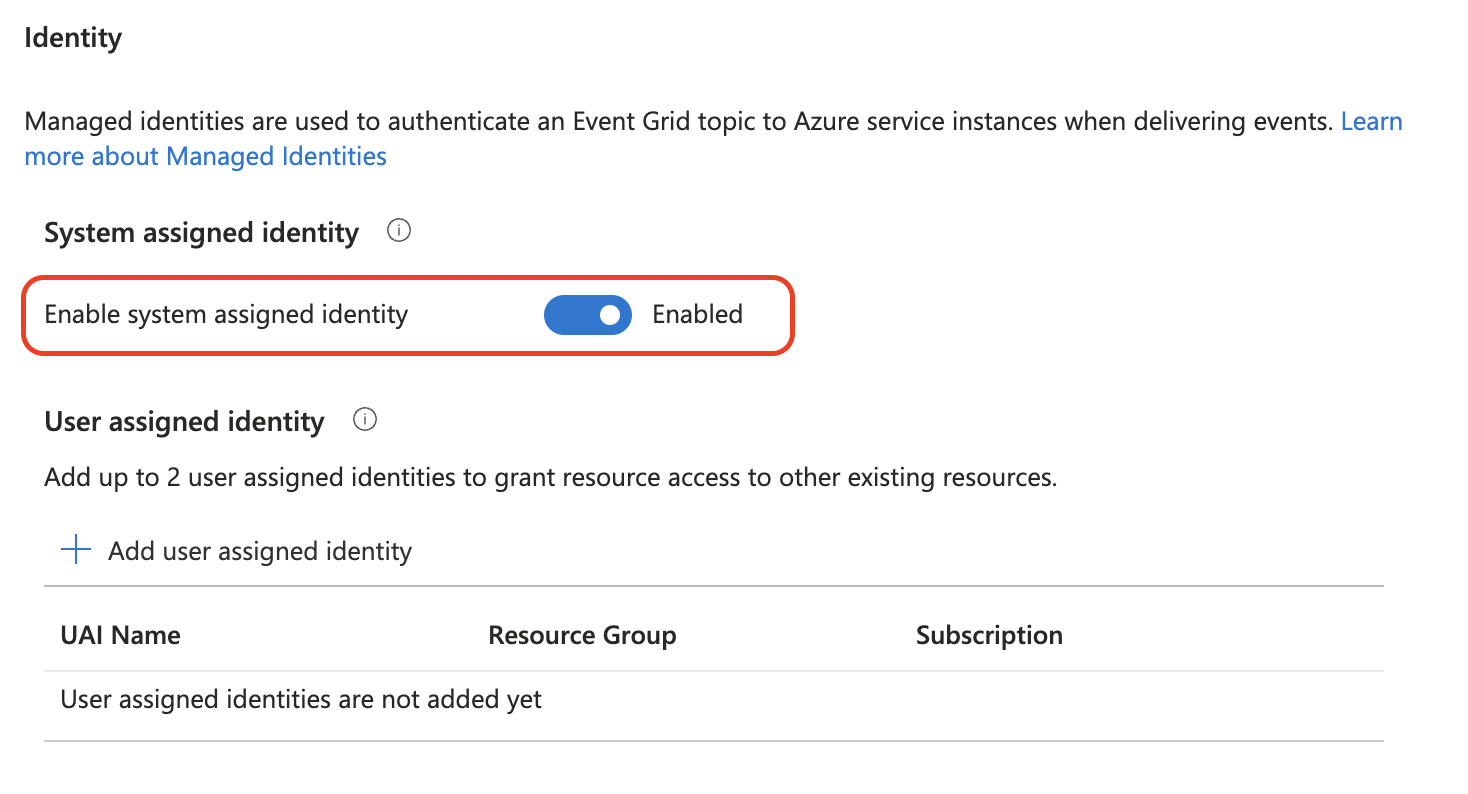
Enable the system-assigned identity to allow this resource to access the IoT Hub instance.
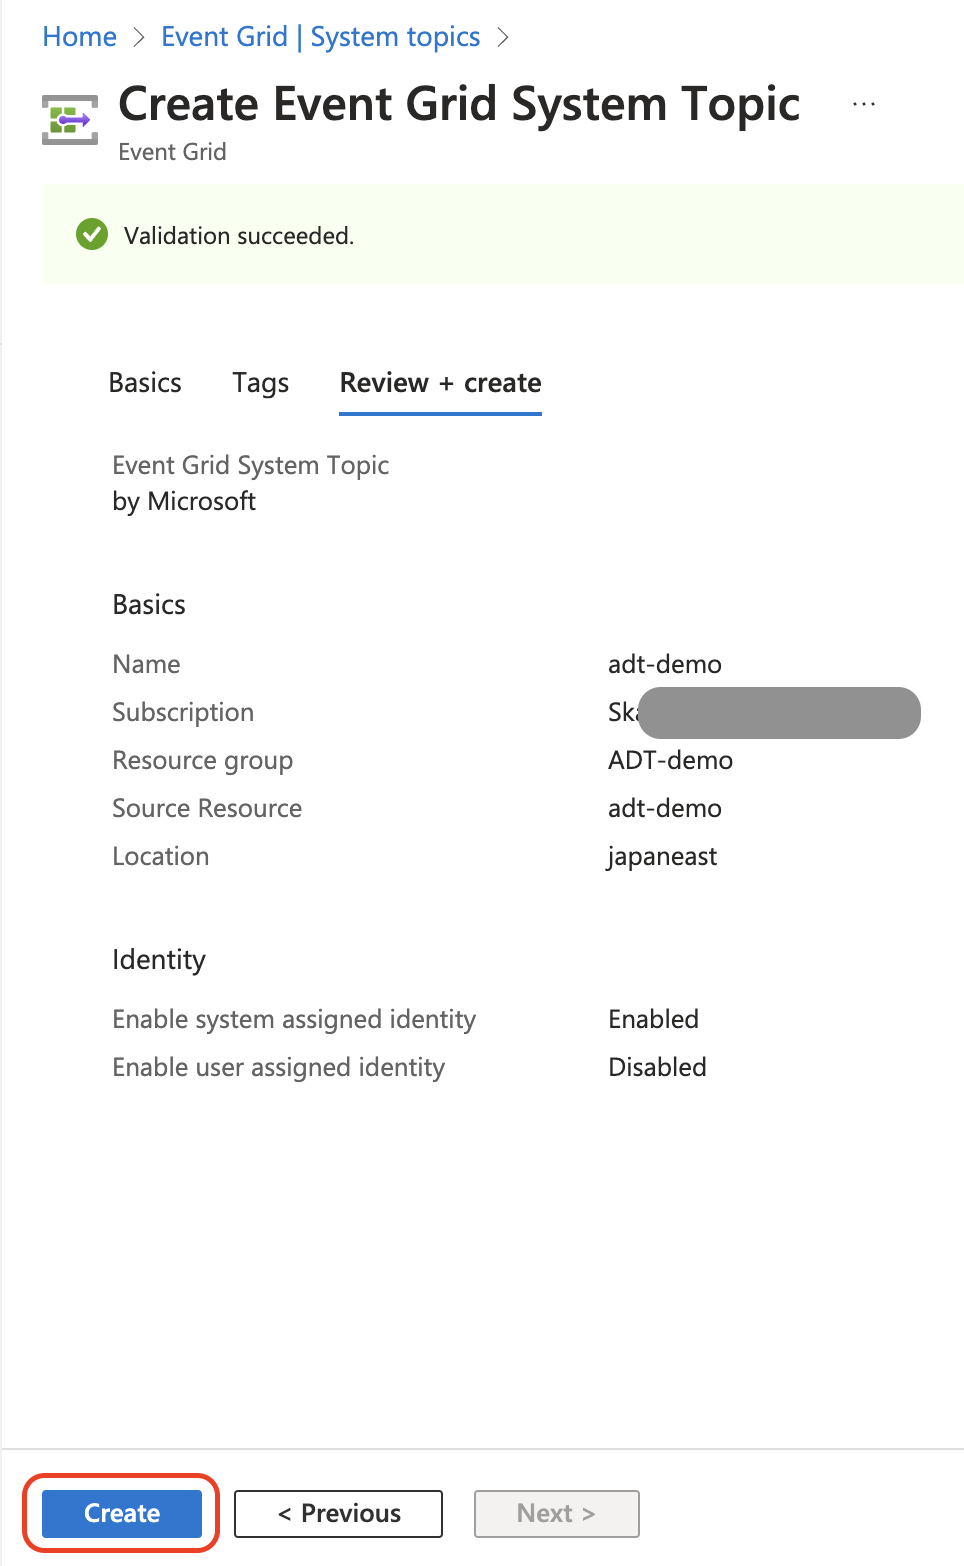
Click [Create].
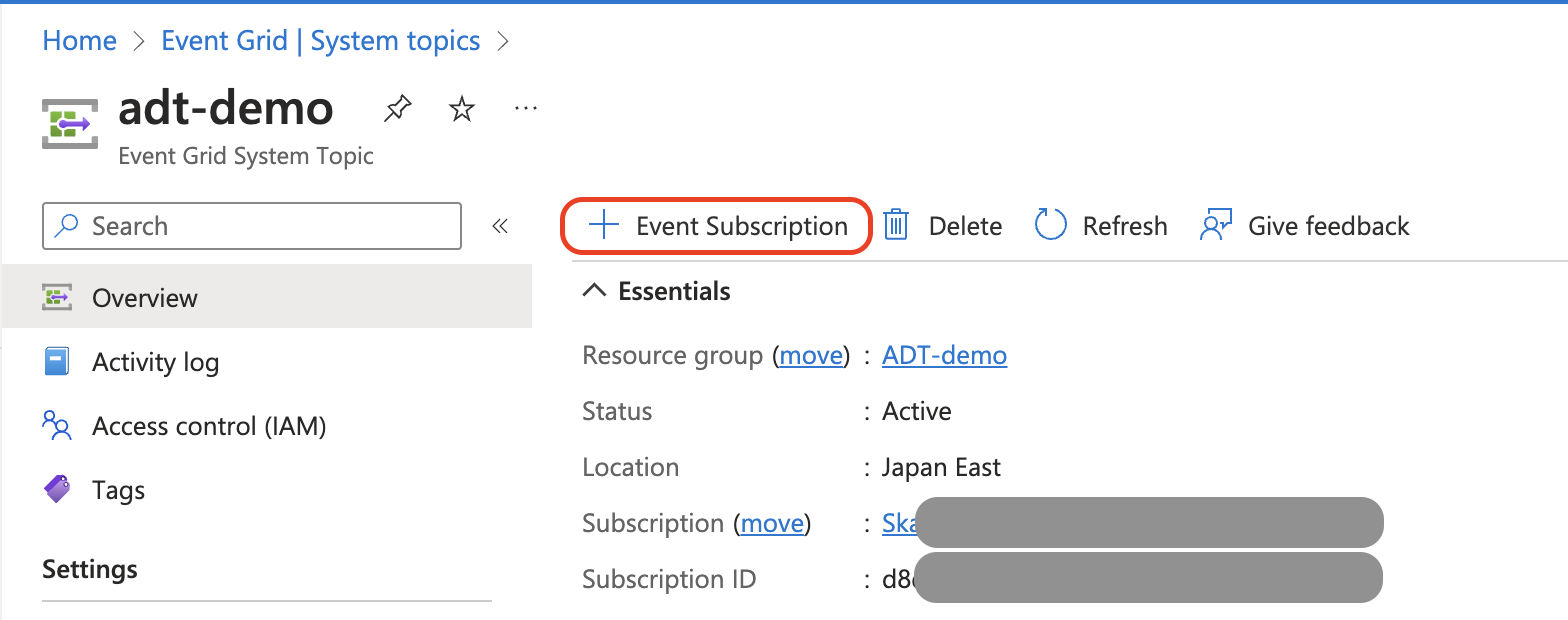
The system topic trigger can now receive commands from the IoT Hub. Then, deploy an [Event Subscription] to let the trigger be able to start the program in the Function App.
Click the system topic trigger created just now.
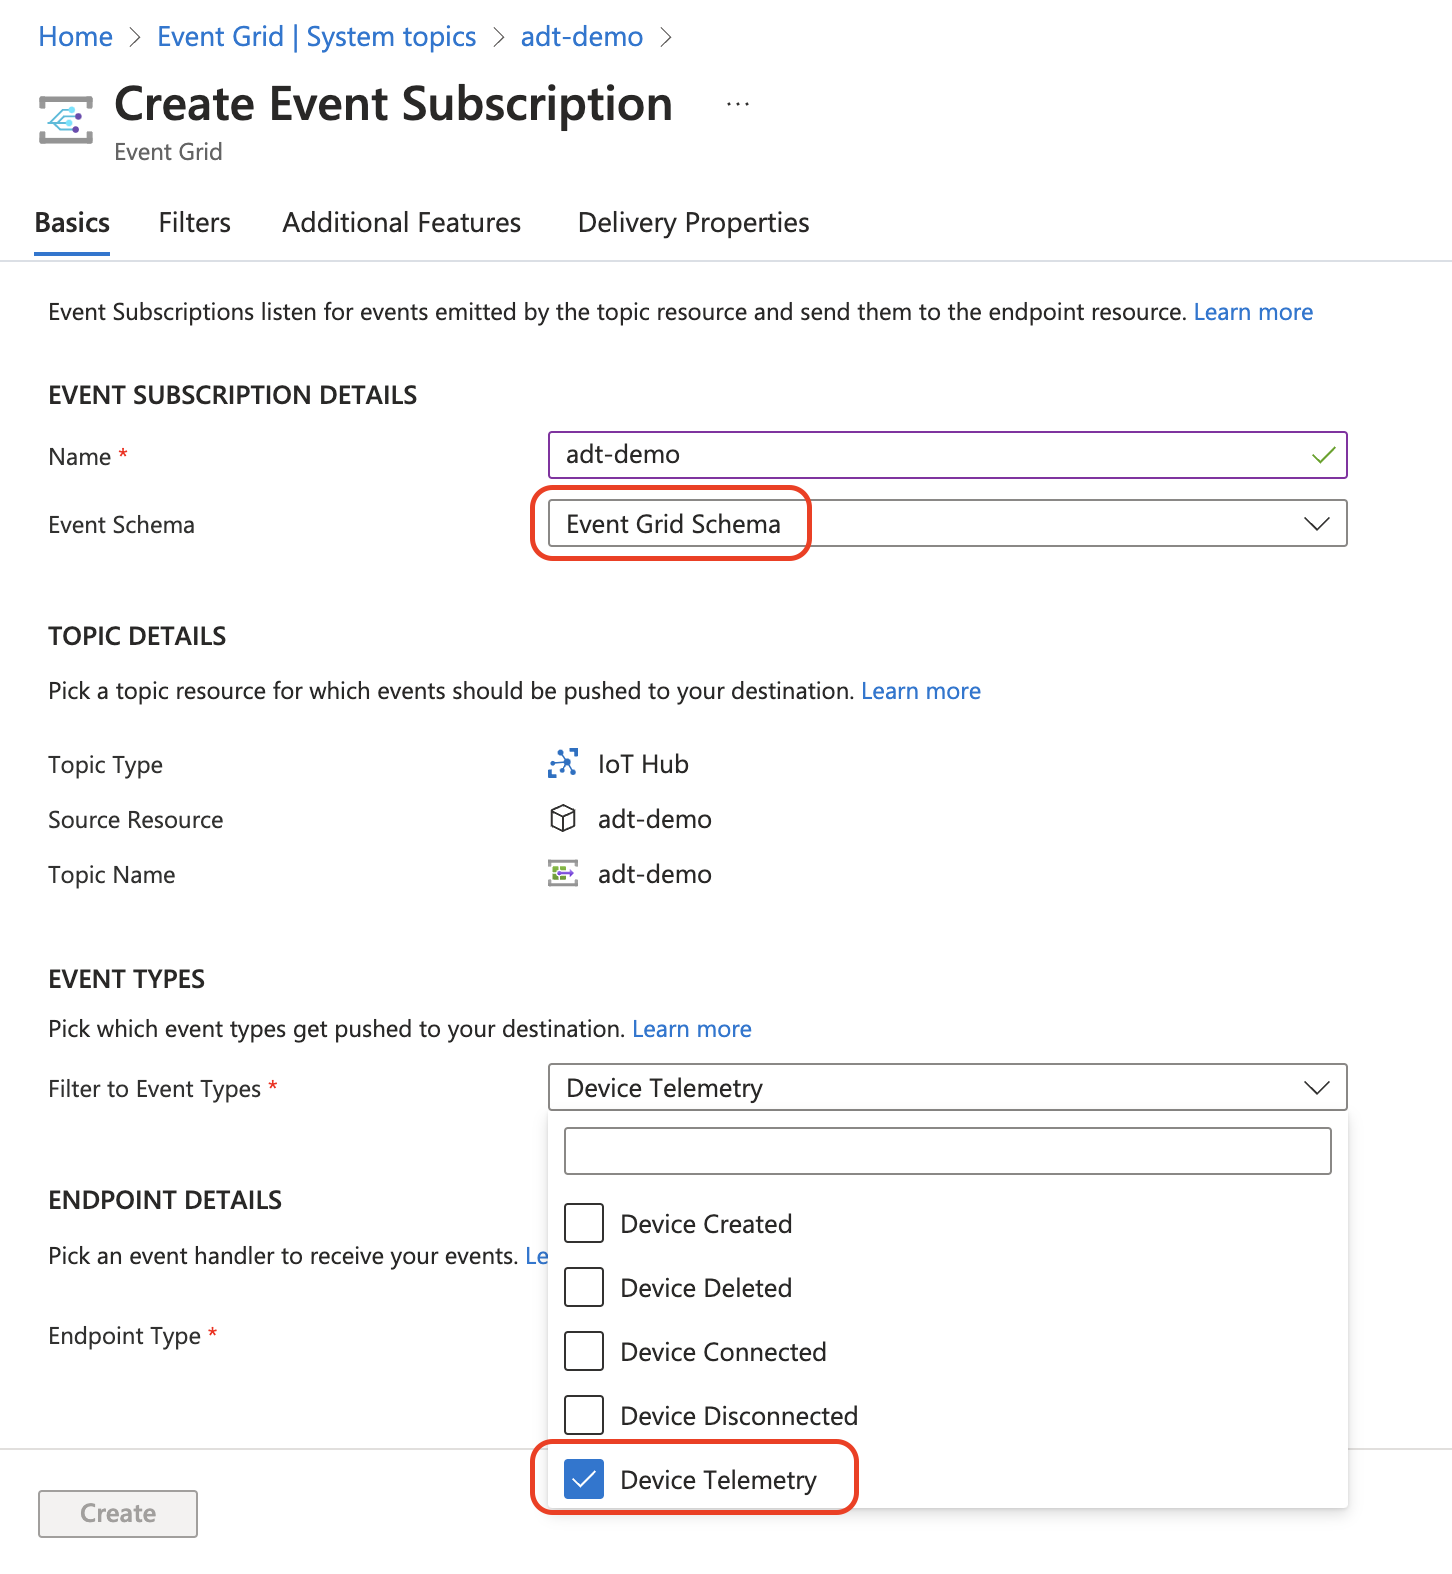
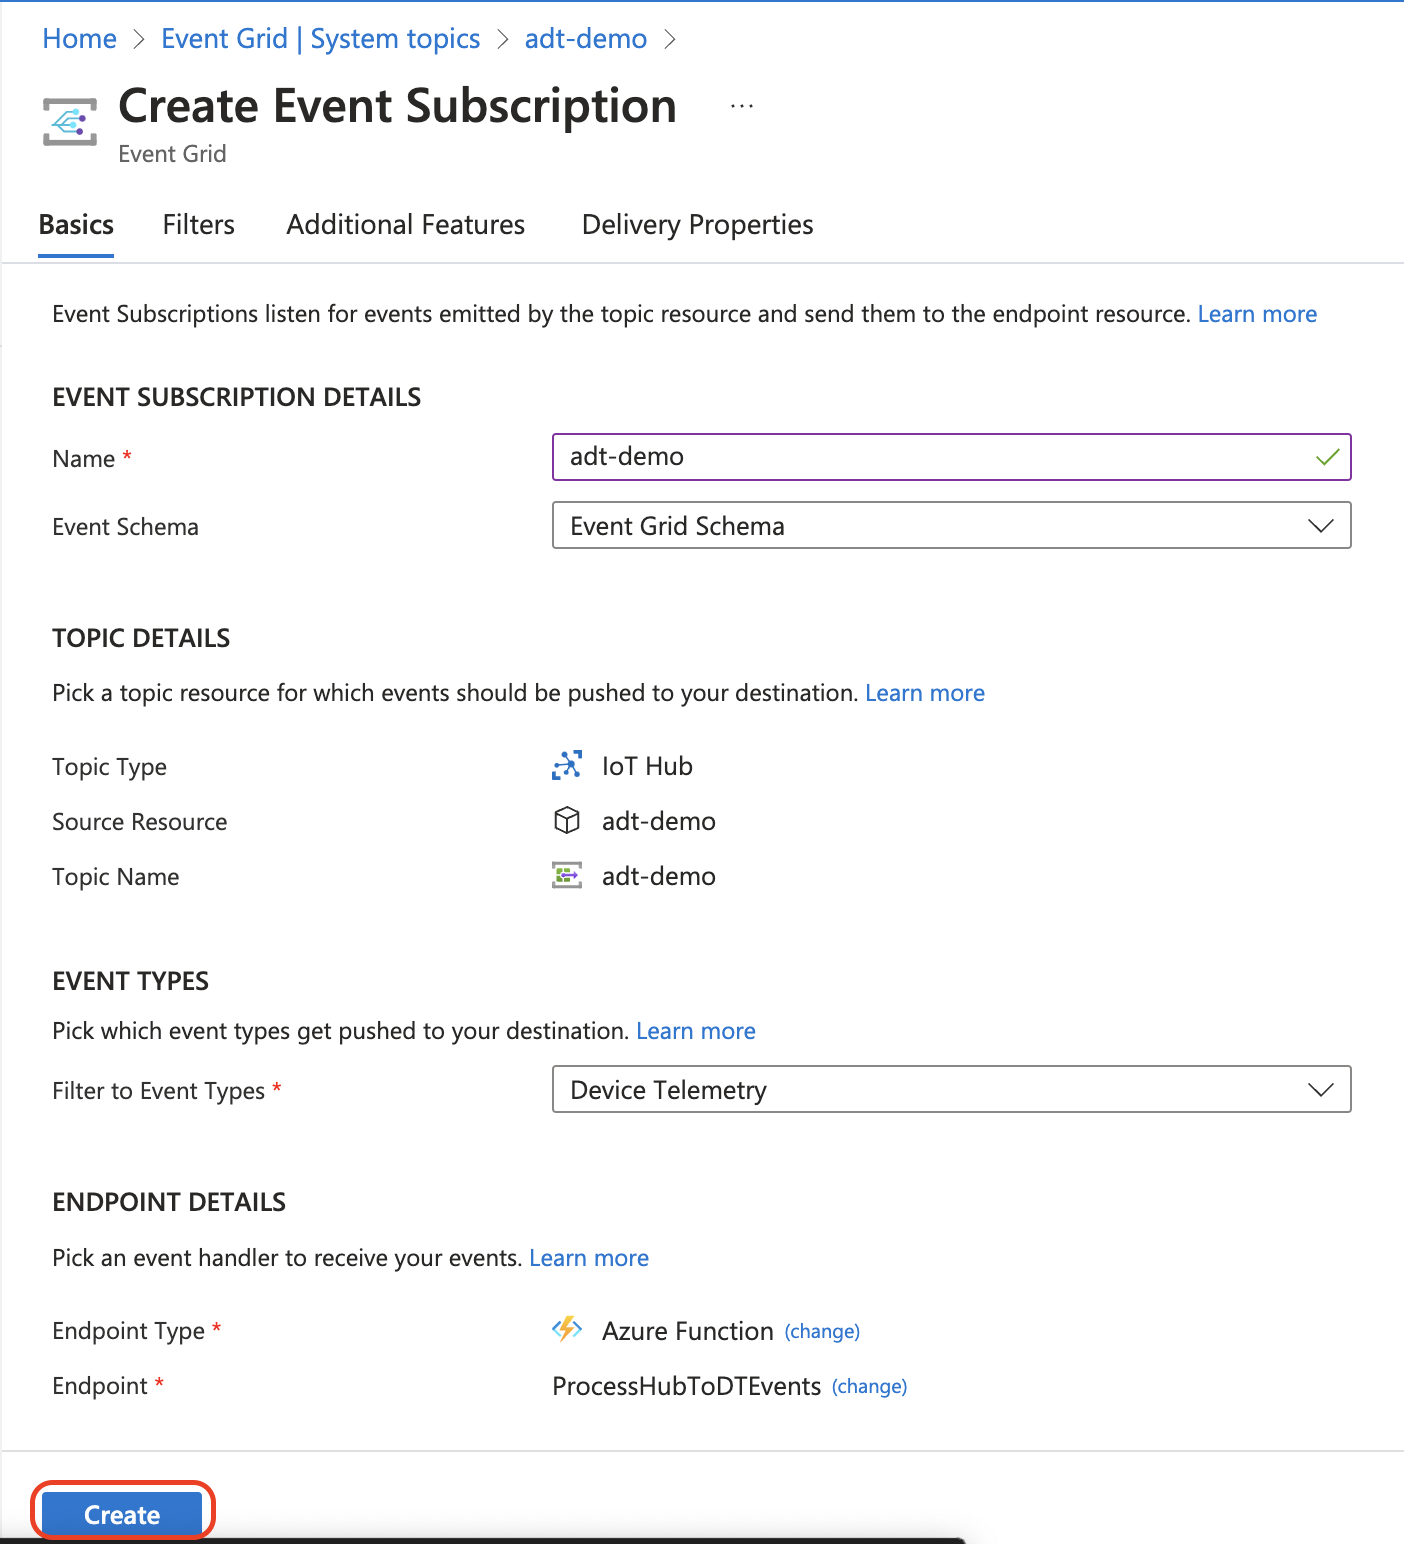
Select "Event Grid Schema" as the [Event Schema], and only check "Device Telemetry" in the [Filter to Event Types].
Select "Azure Function" in the [Endpoint Type] and follow the steps below to set the endpoint. In the Function App, make sure to select the correct function, "ProcessHubToDTEvent."
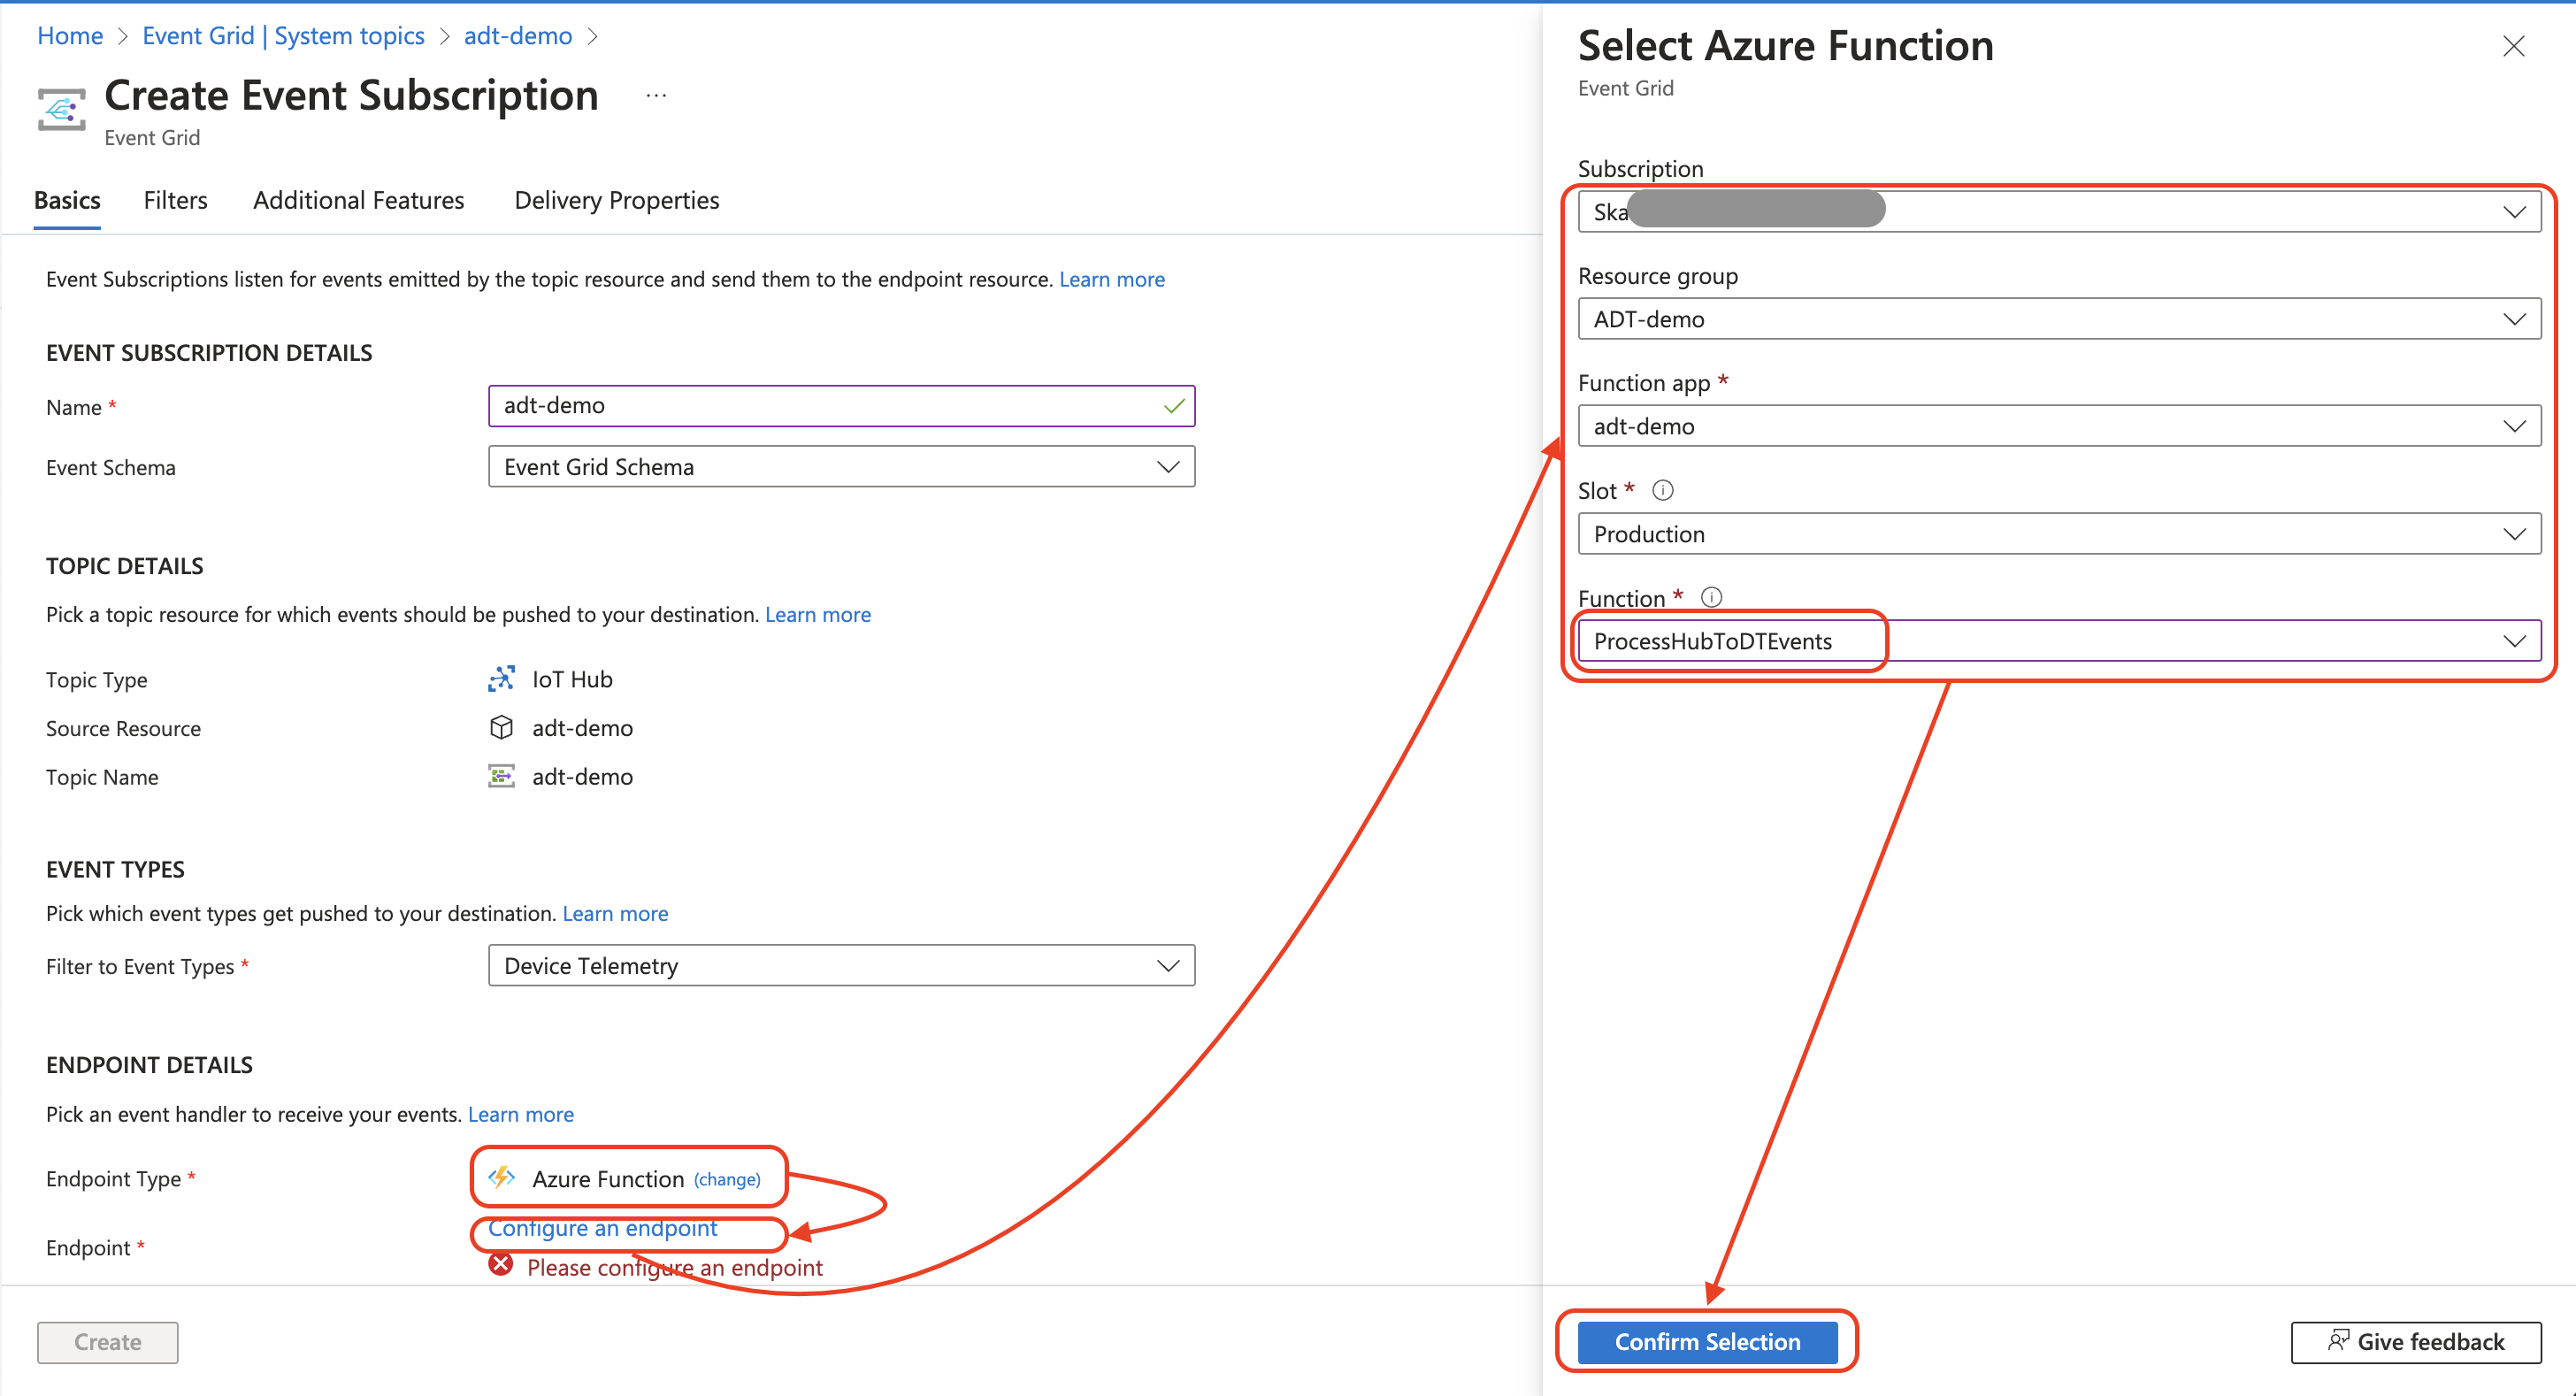
Click [Create].
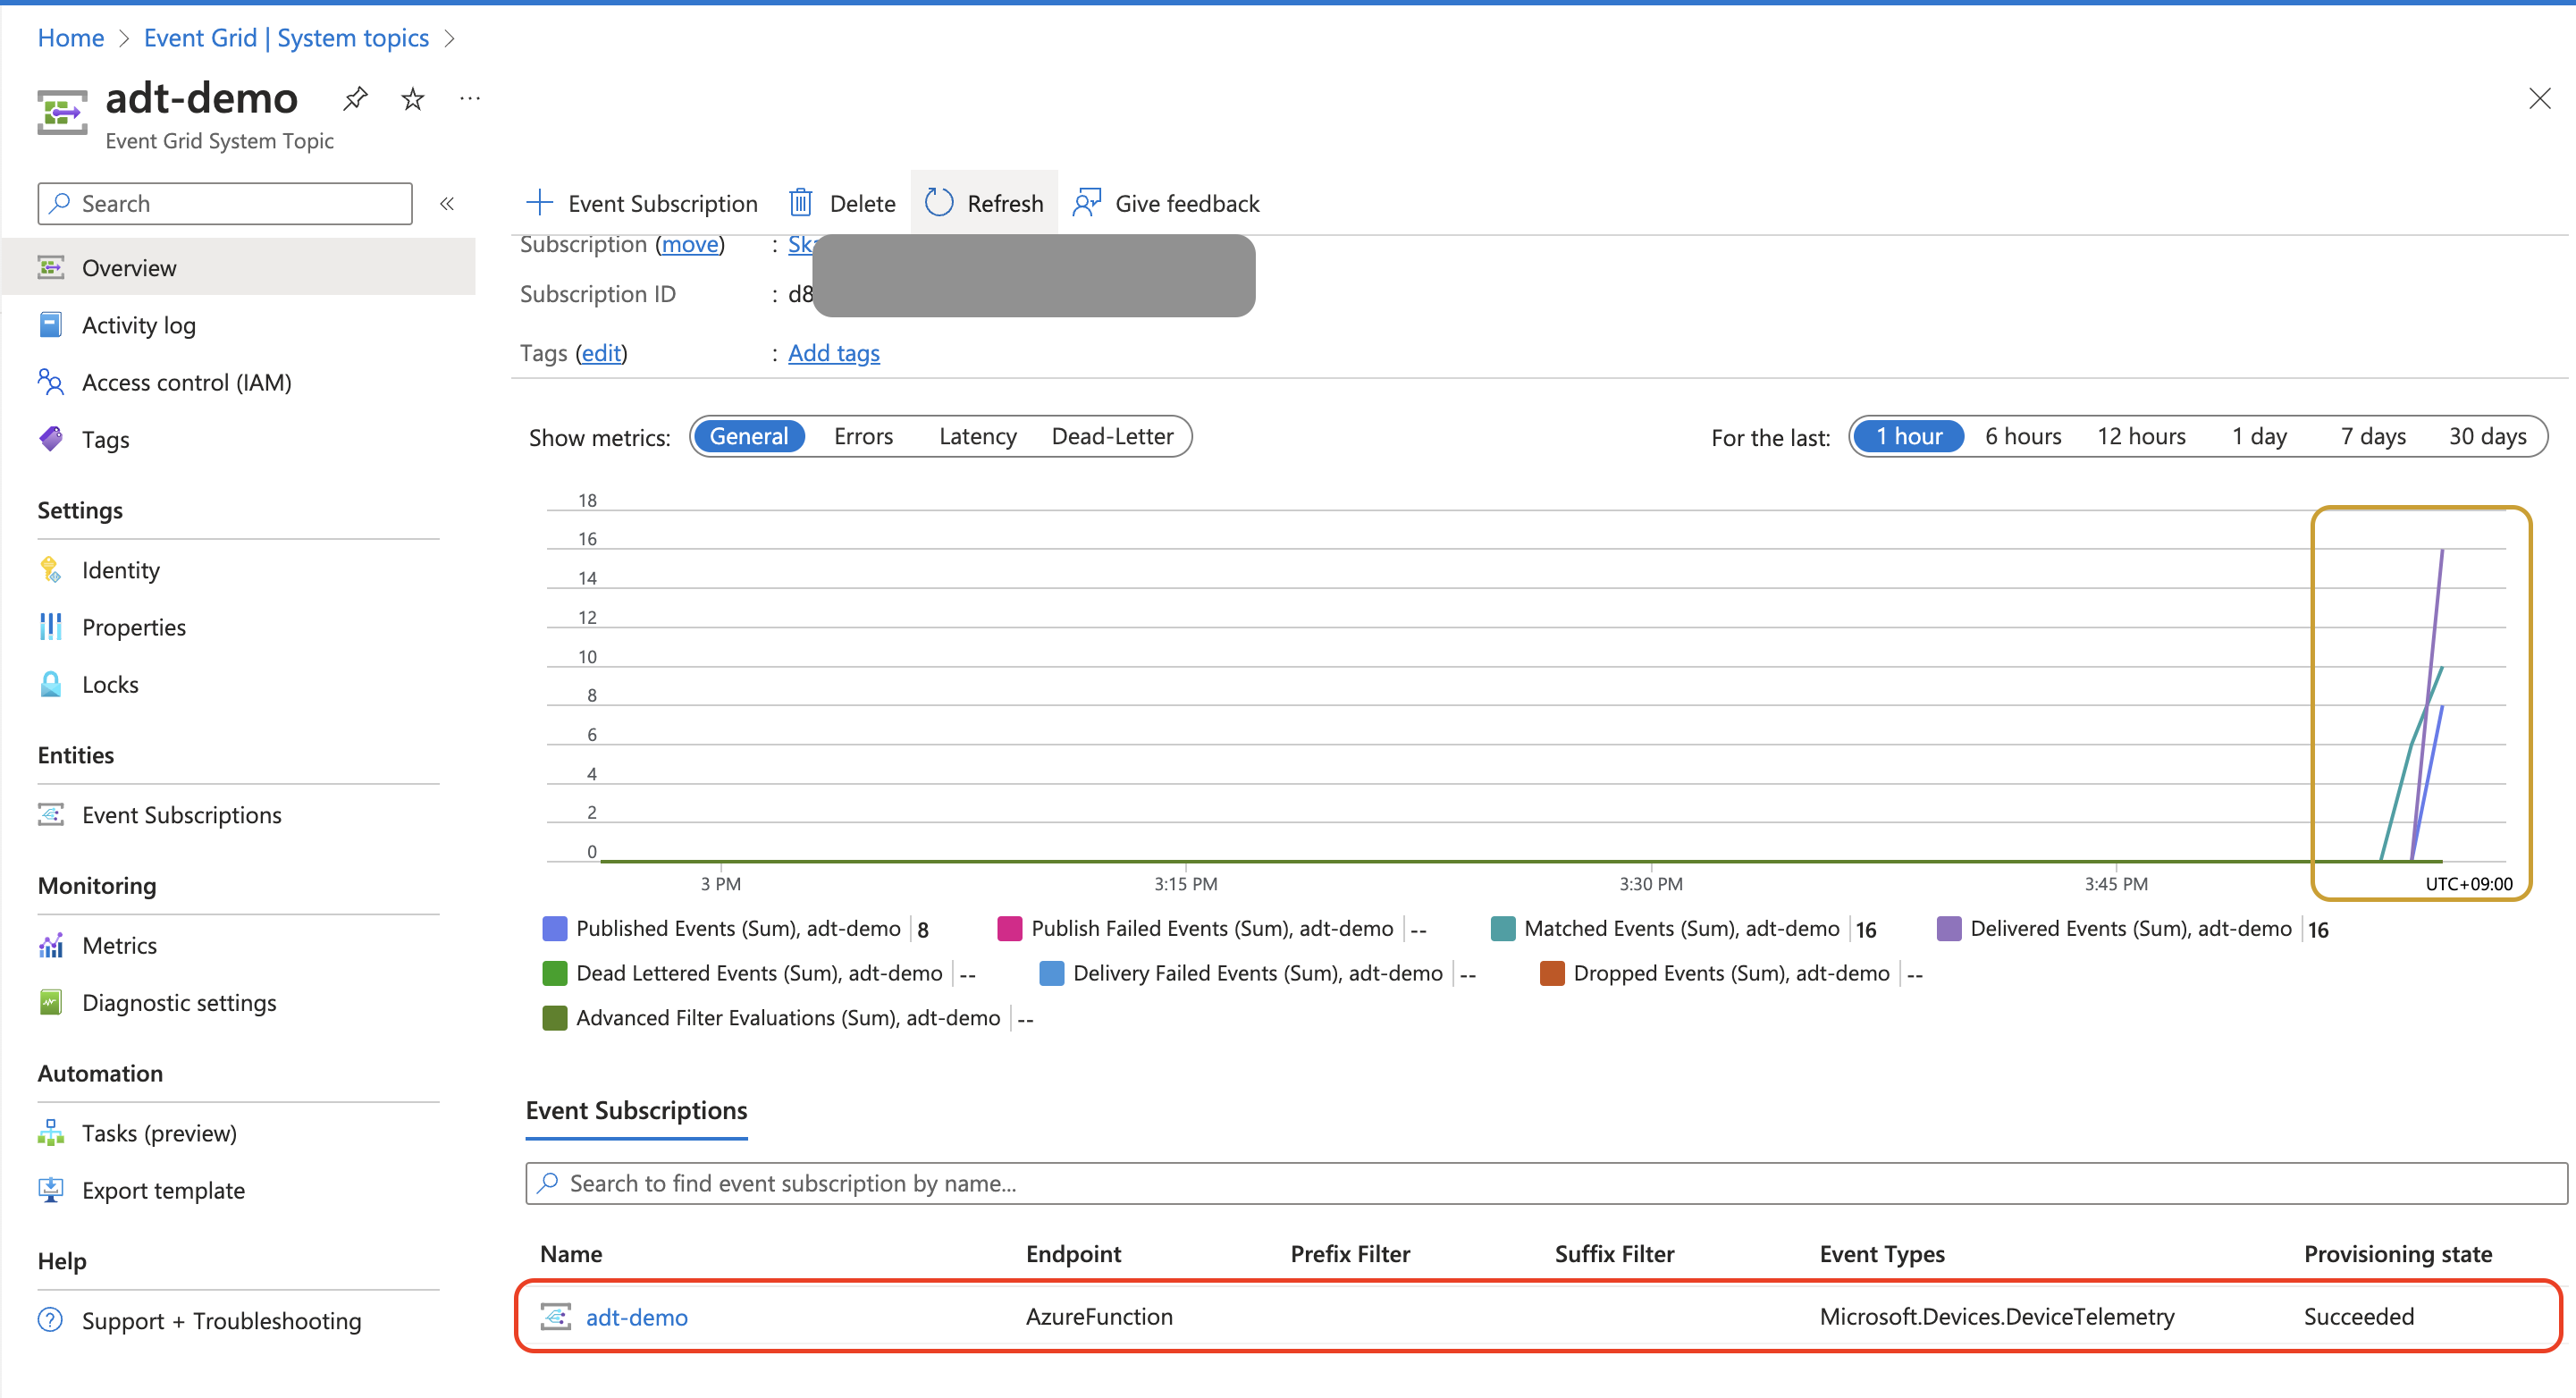
Confirm the event subscription has been properly created.
If your IoT device (Raspberry Pi) continuously sends telemetry data to the IoT Hub. Then, you may find out that the event subscription is already working on sending data to the Function App.
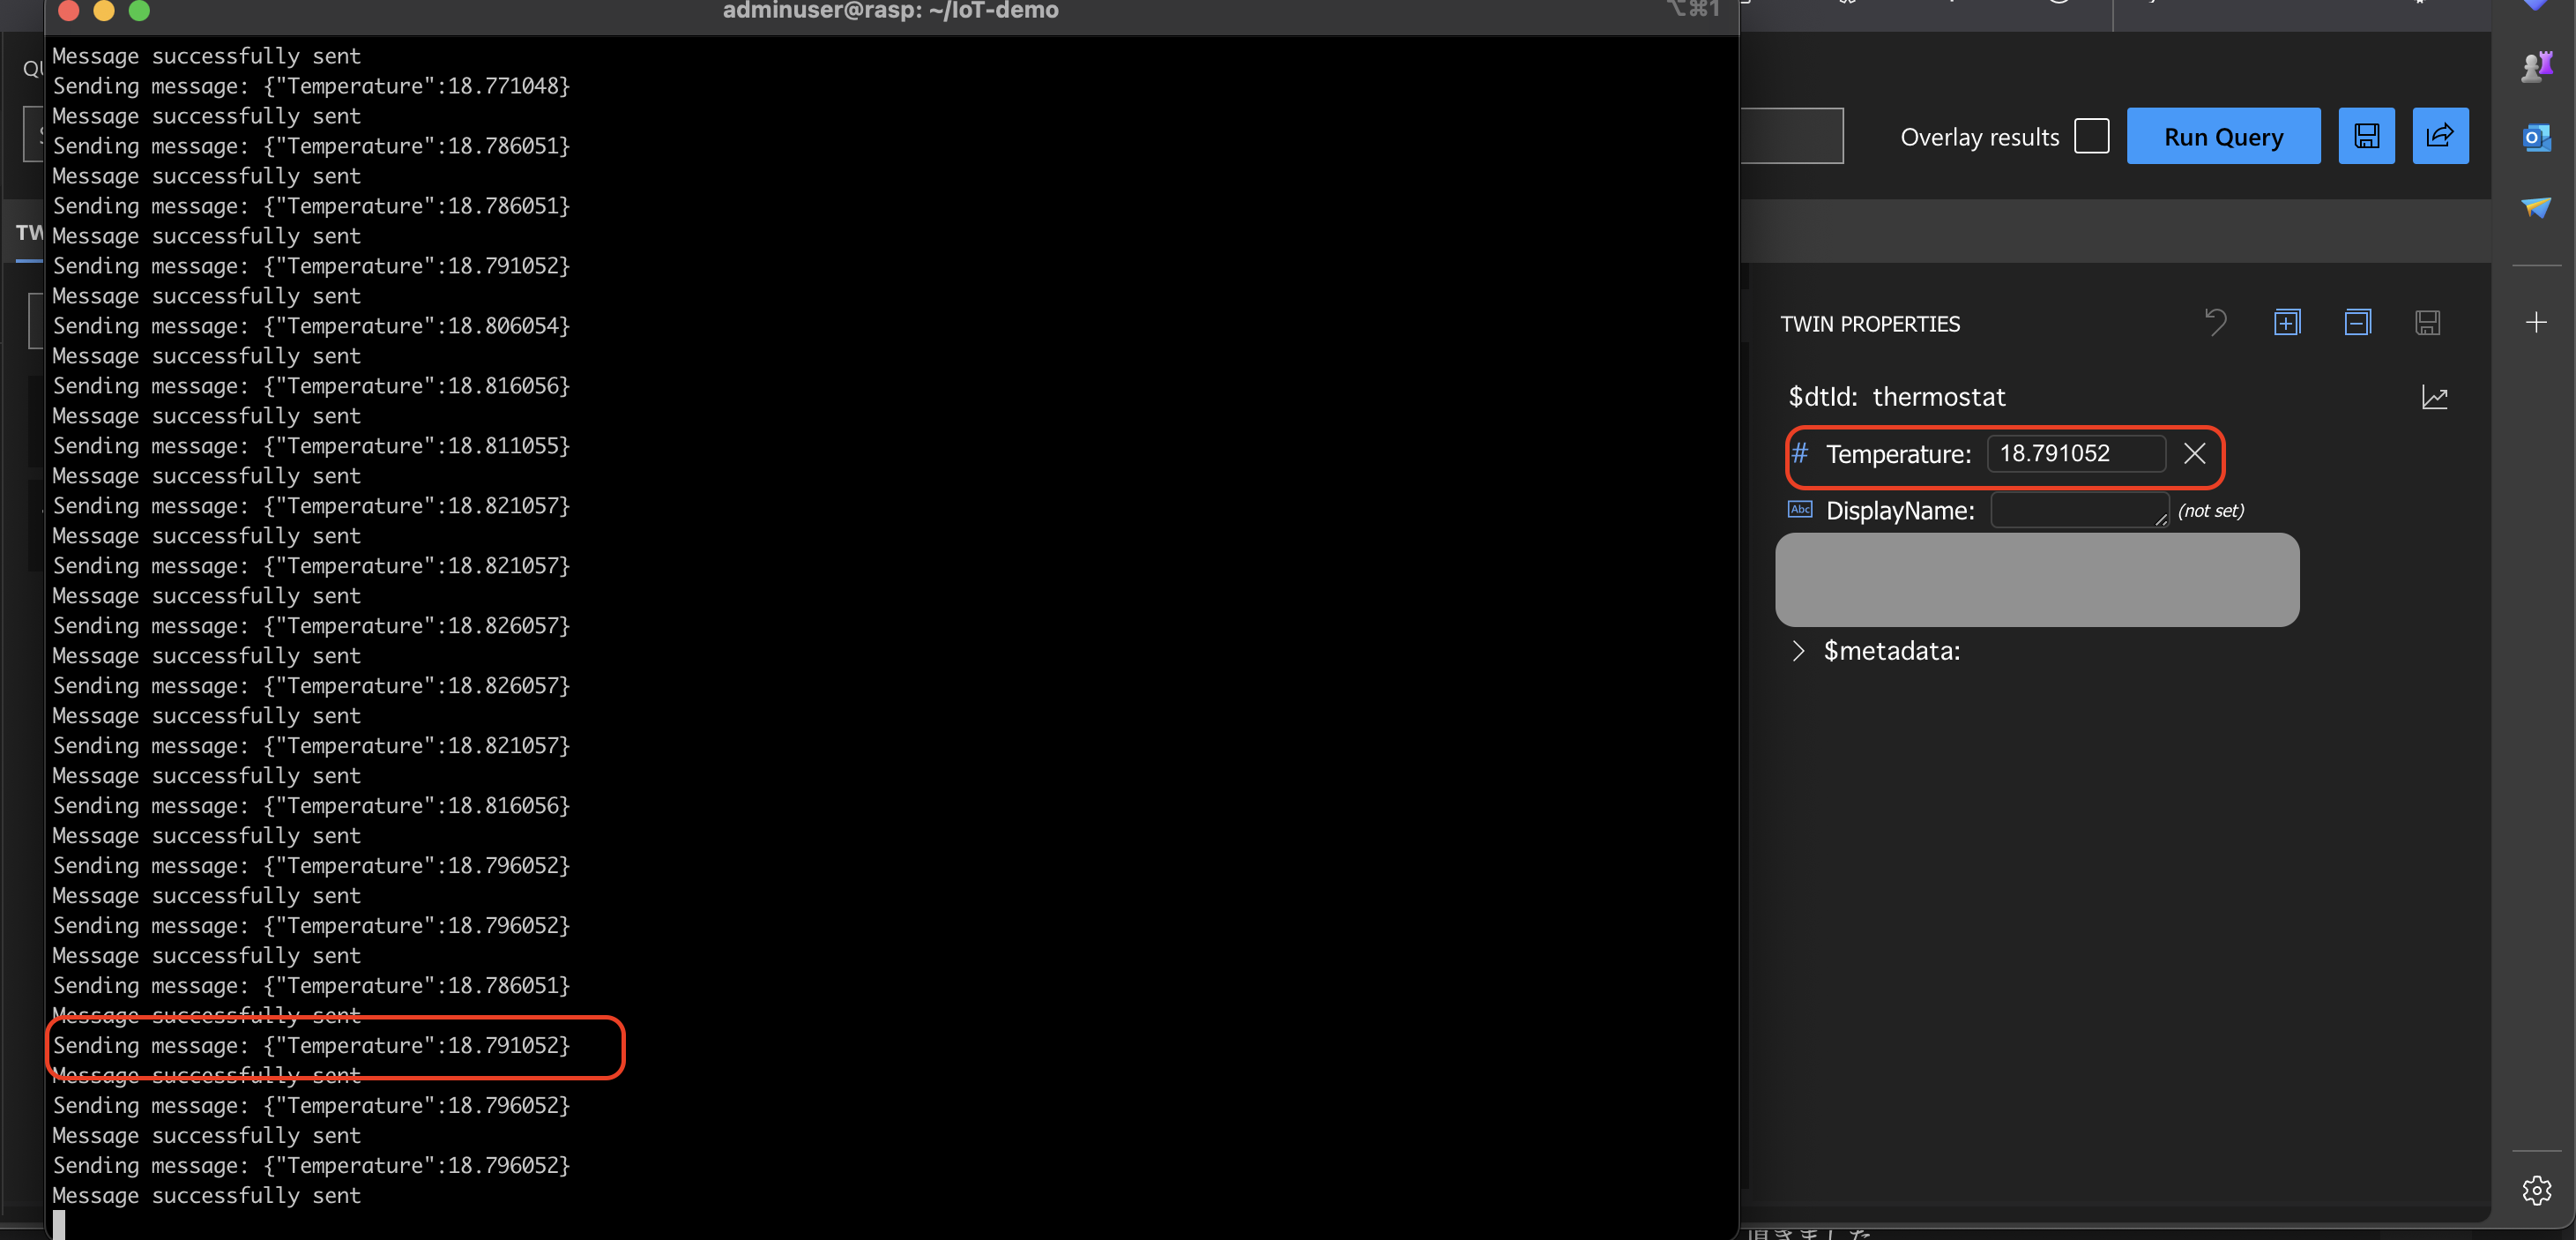
5. Confirm the temperature data is being correctly sent to the Azure Digital Twins.
Still, remember this page?
This is the Azure Digital Twins Explorer page. We previously initialized the property [temperature] with a 1(number).
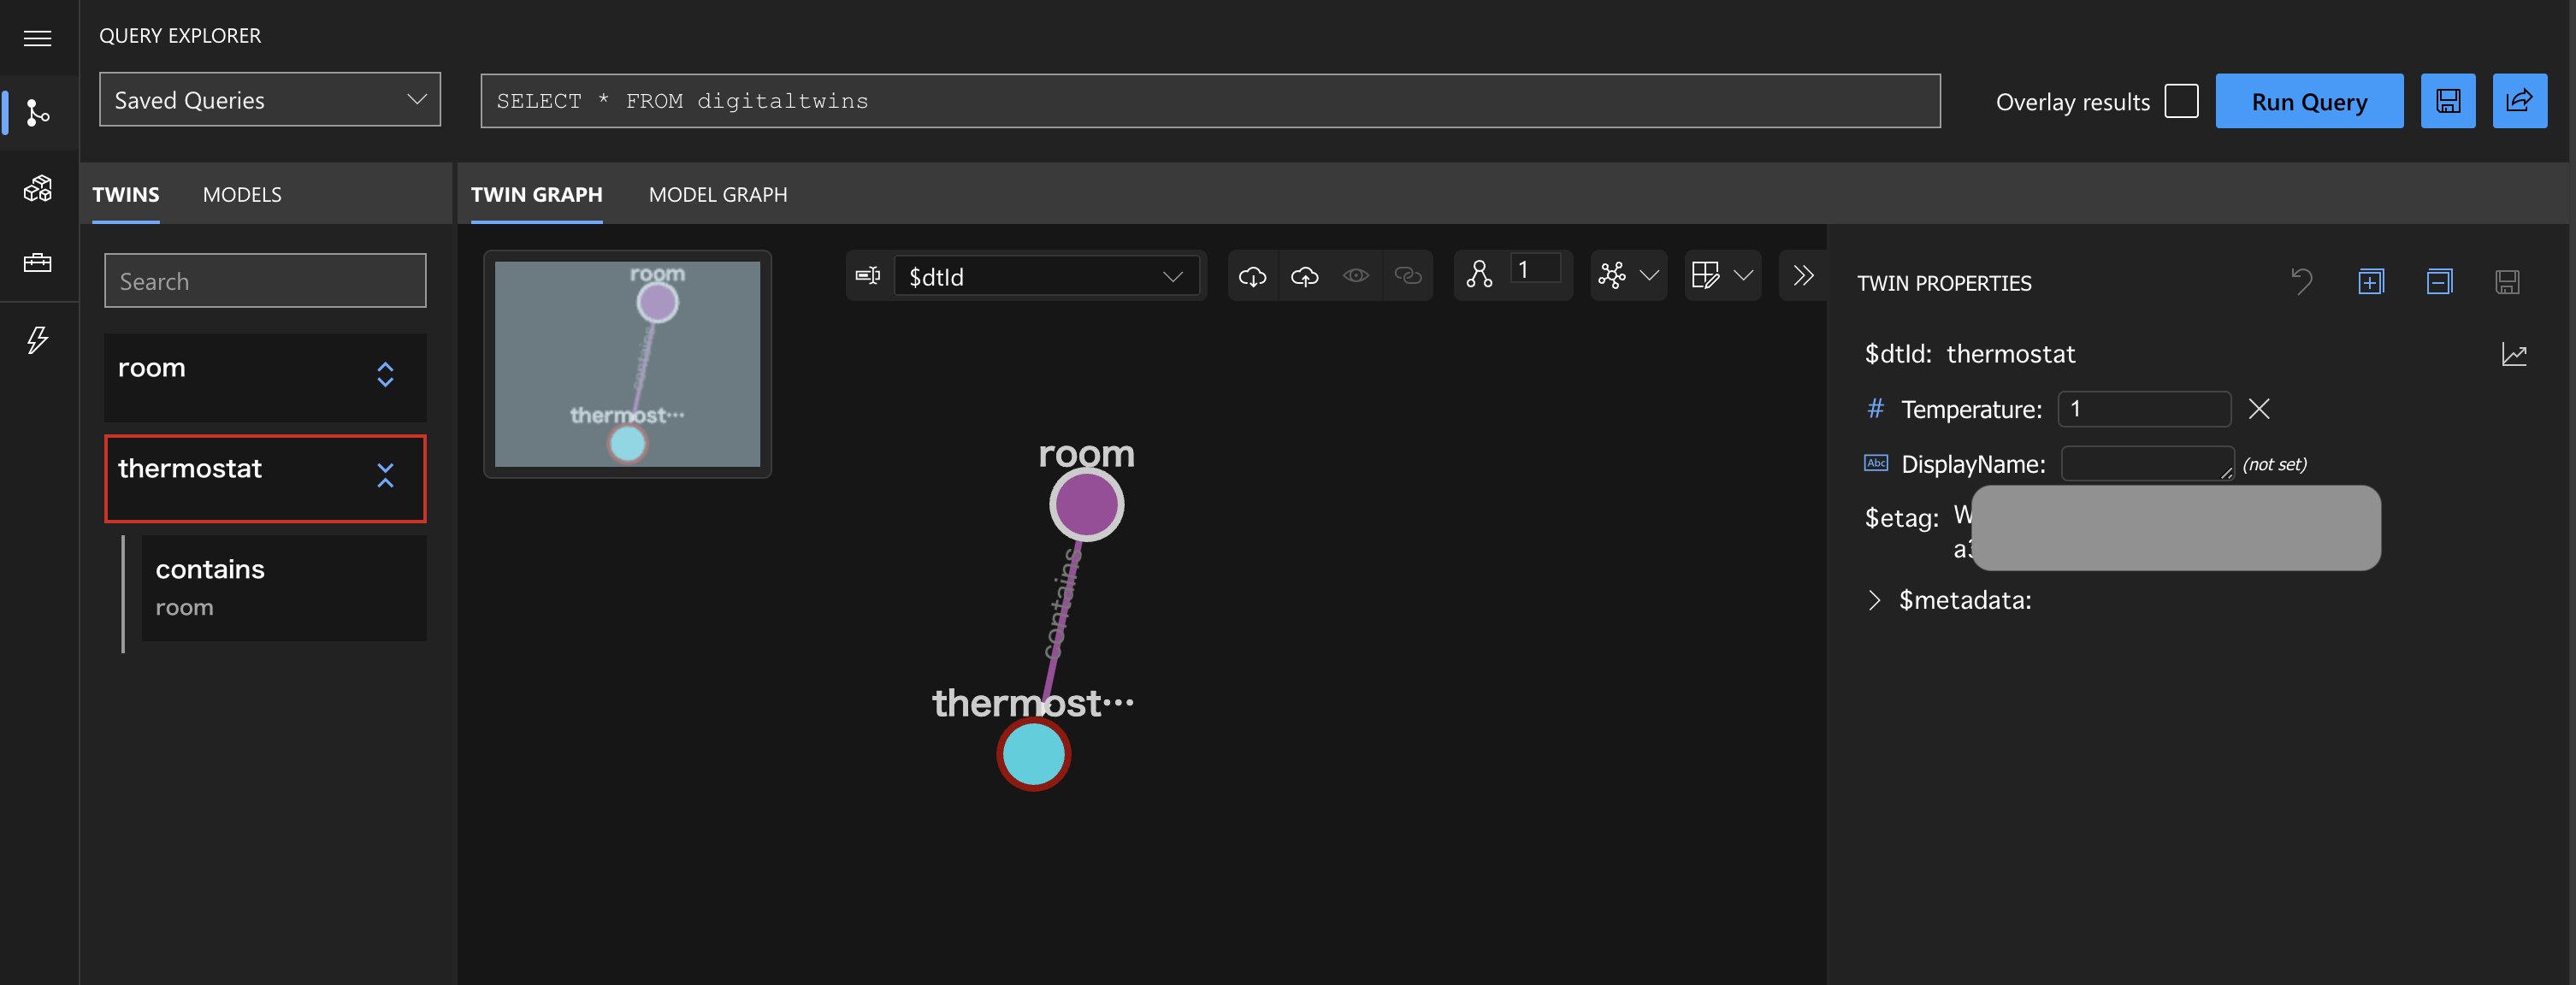
Click the [Run Query] button to refresh.
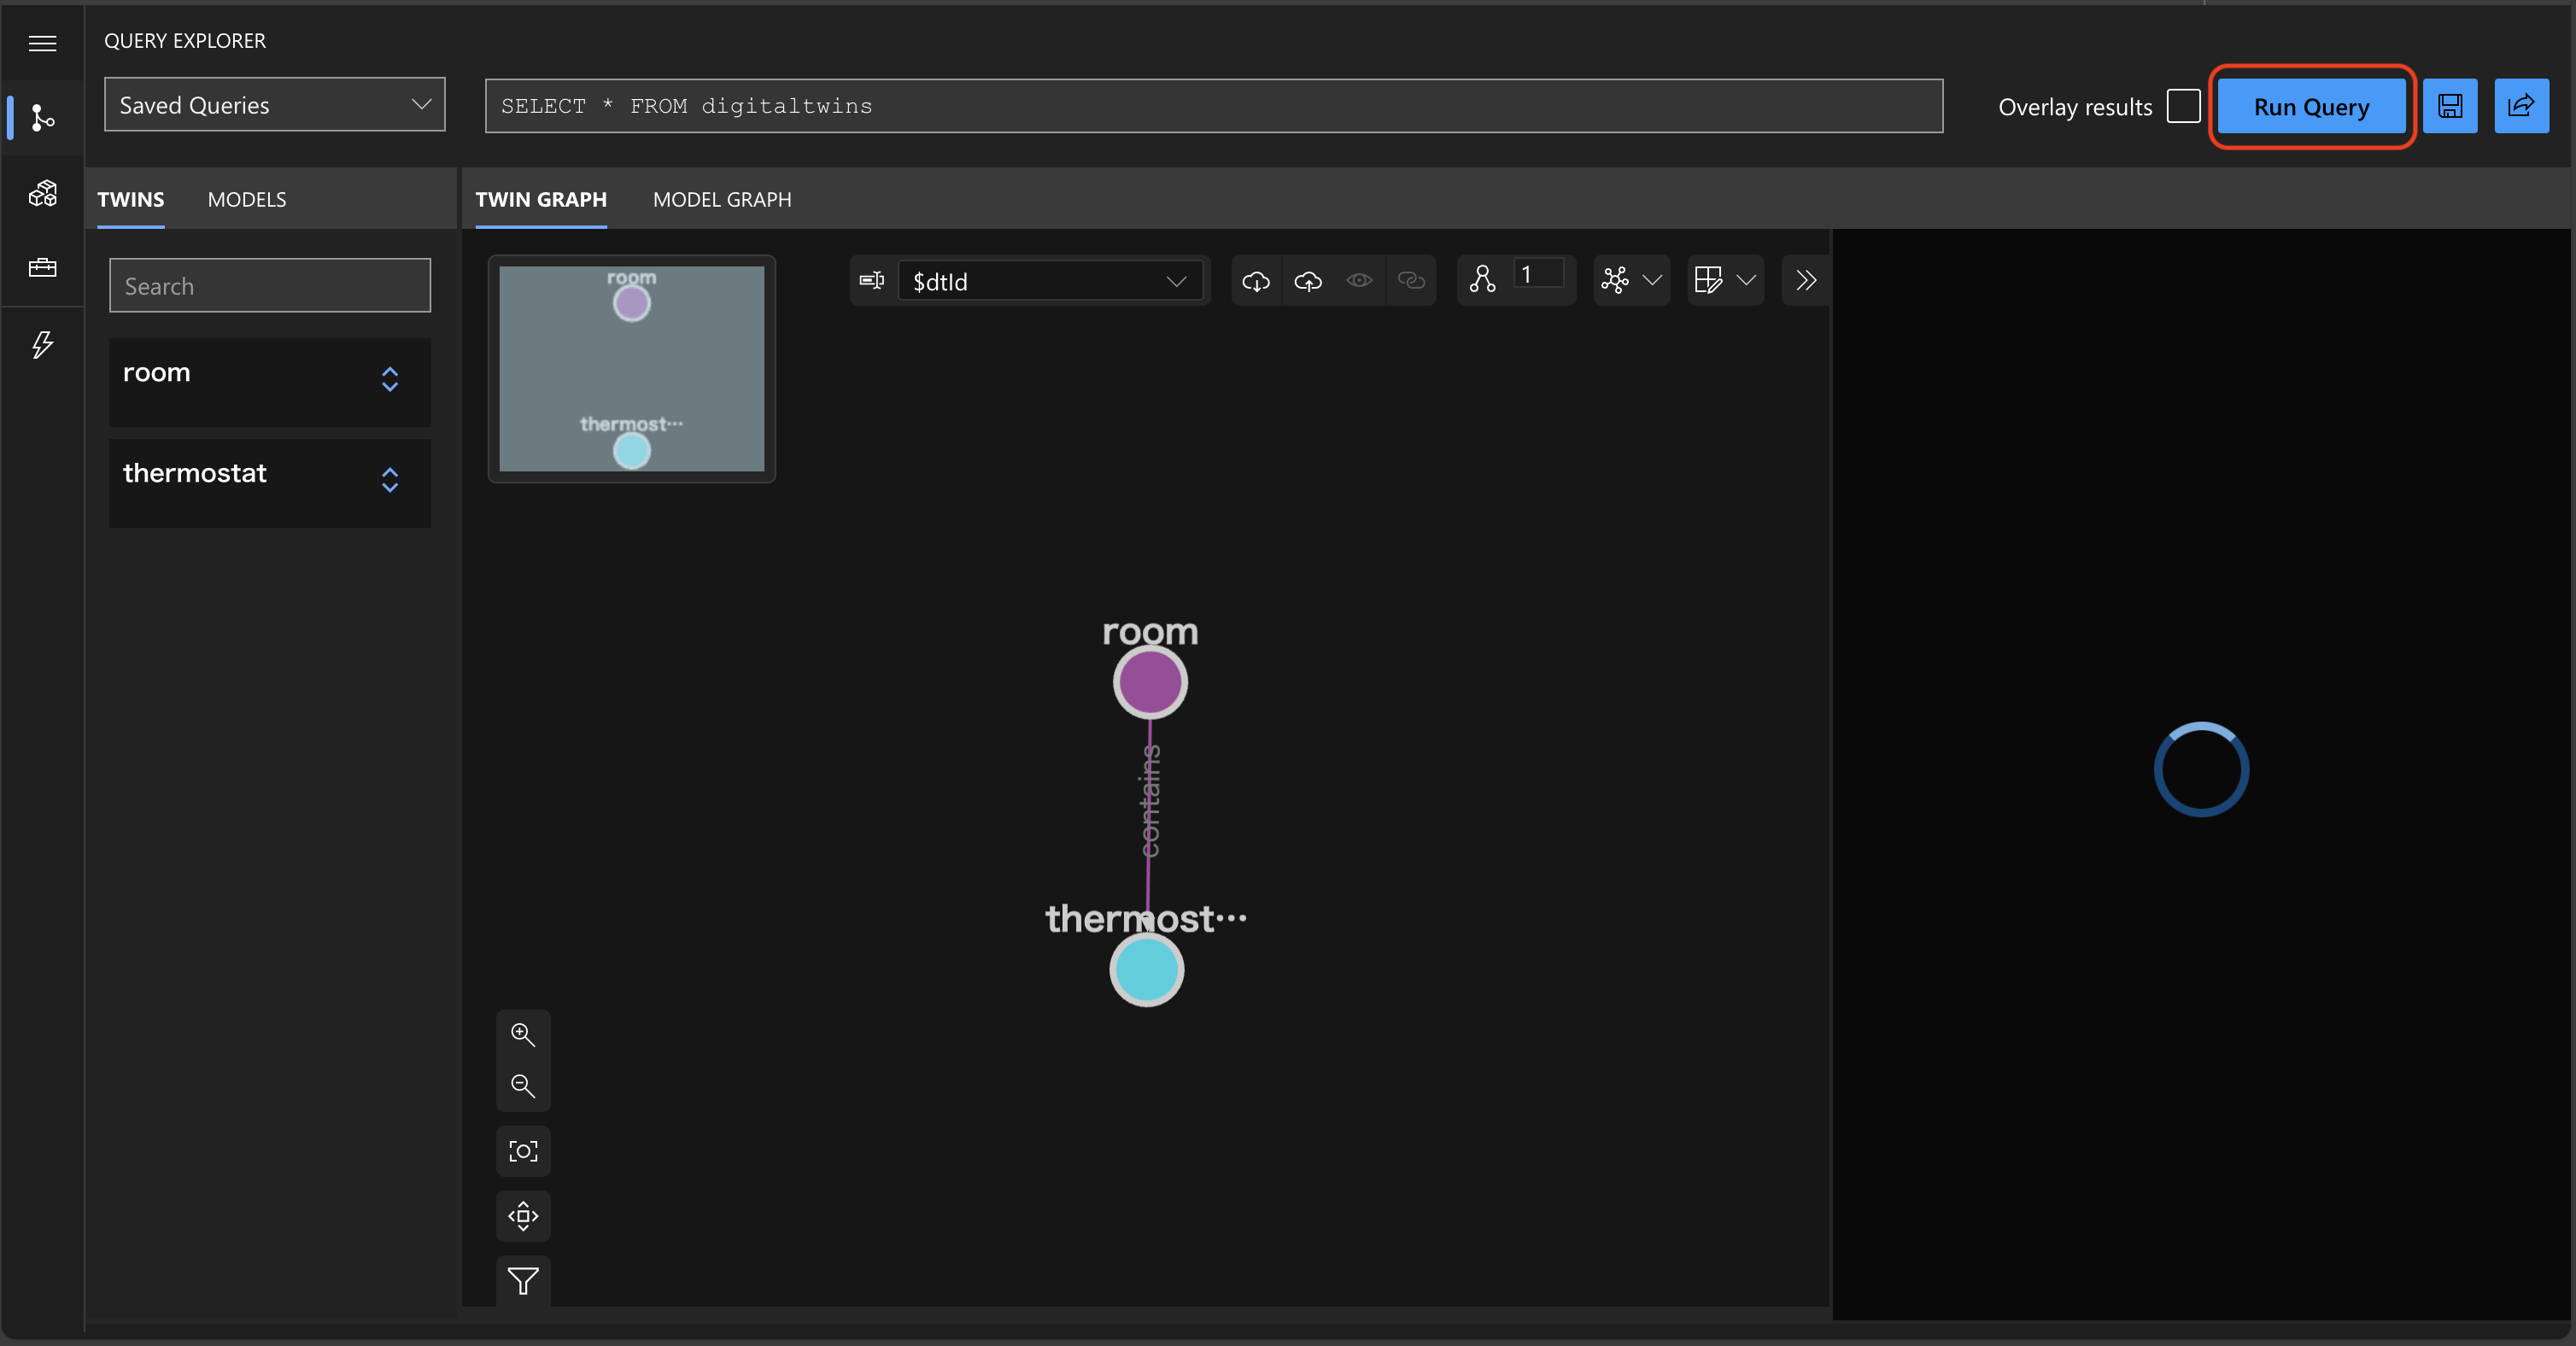
See!? The value of [temperature] has been updated with the current temperature.
When the [temperature] value is compared to the IoT device's data, there is an approximately 5-second delay. (The interval of sending data is three seconds)
It need to be better for real-time indication but more than enough for a near real-time model.
It is all for this demo.
Gathering data and showcasing them not just as a list but as models with relationships and images is fantastic.
Azure Digital Twins also provides a 3D-model environment to showcase the data. I will discuss this in another article.
See you soon!