はじめに
CreateMLで作ったCoreMLのモデルをONNXに変換していきまーす
開発環境
- MacBookPro 2018
- Python 3.9
導入
1.XCodeからCreateMLを開きます
2.前回の記事を参考に、PyCaretのdatasetsにあるinsurance.csvを使用して、回帰分析を行います
3.Targetにchargesを選択、Featuresにage,bmi,childrenを指定します(※今回は変換する際にカテゴリカルデータがあるとOne Hot Encodingのエラーが出たため外しています)
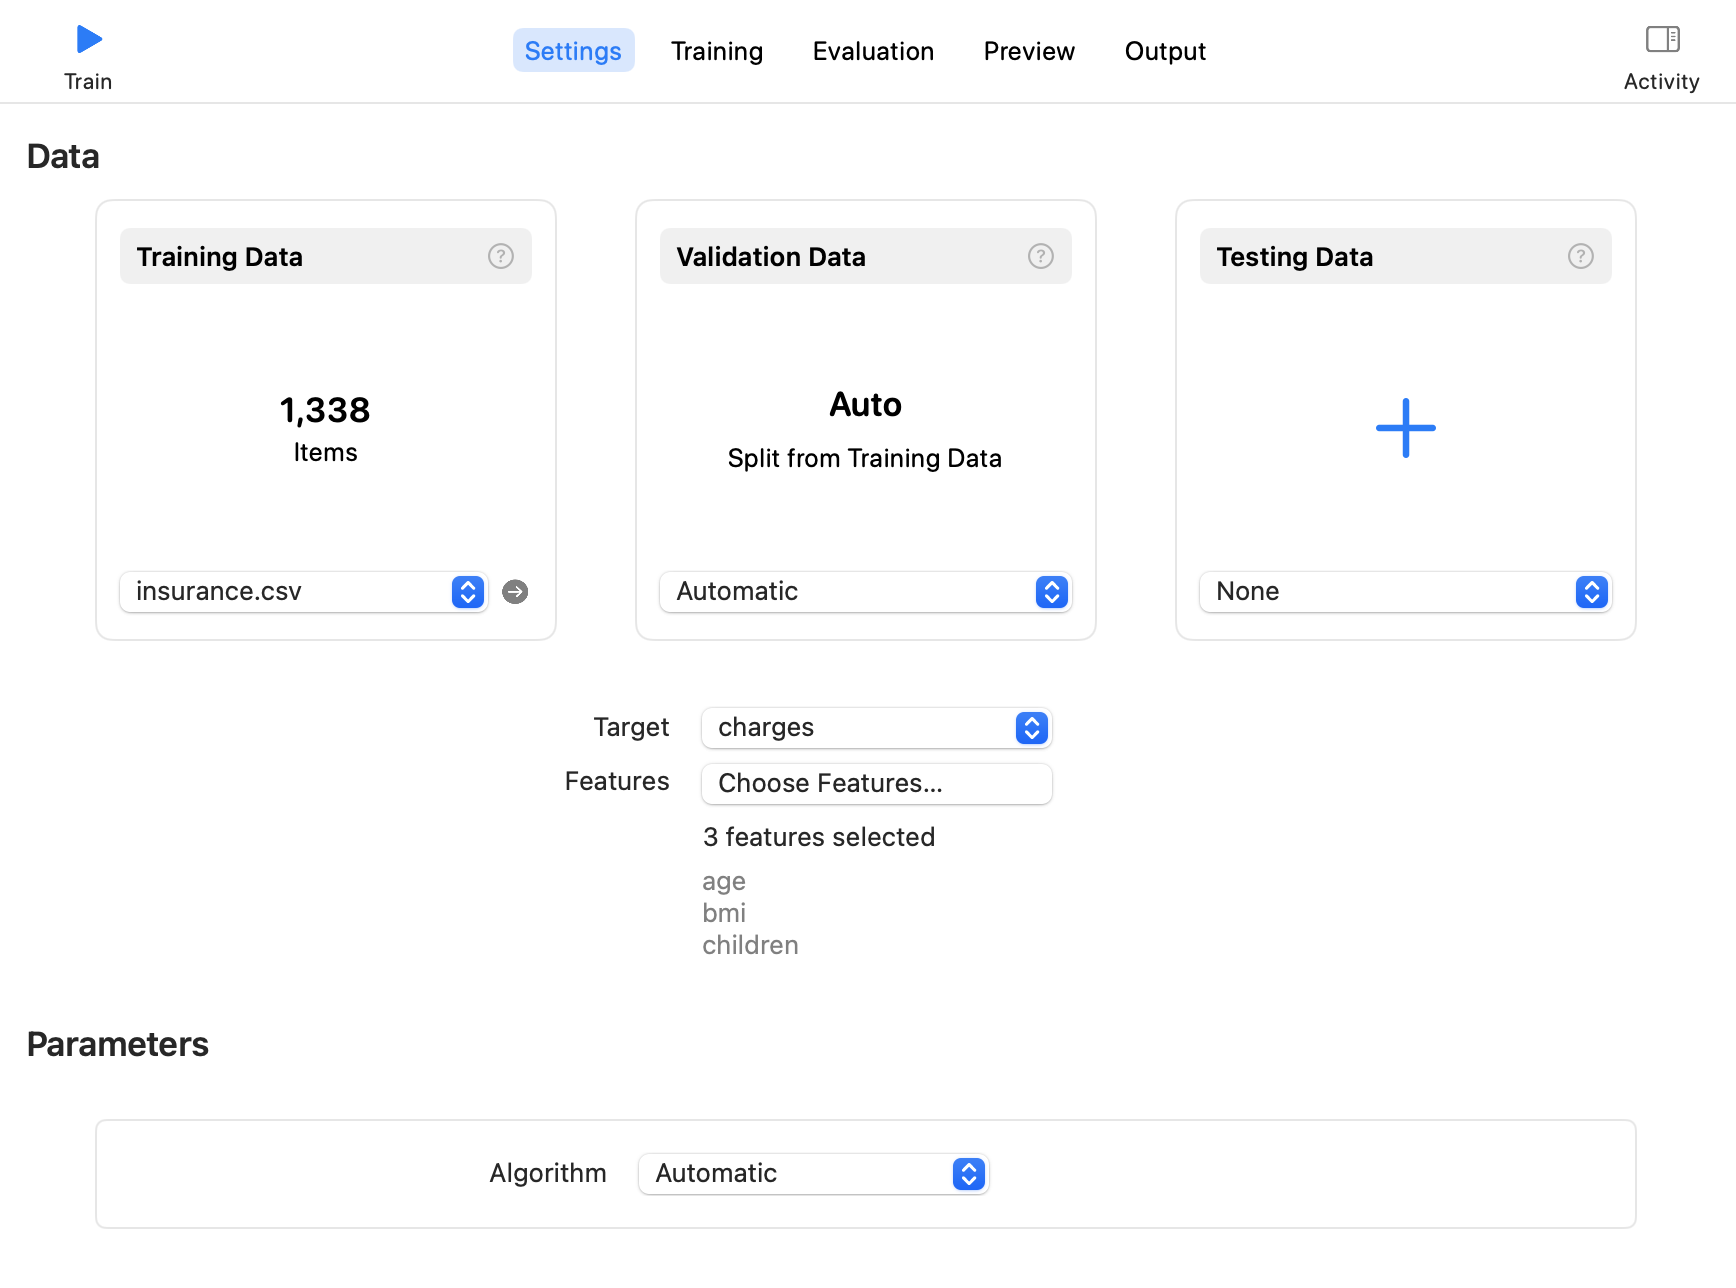
4.Trainボタンを押して、学習を開始します
5.Outputタブを開き、Getをクリックし、CoreMLモデル(.mlmodel)を保存します
6.ライブラリをインストールします
pip install onnxmltools
pip install coremltools
pip install onnxruntime
7.CoreMLのモデルをONNXに変換します
coreml2onnx.py
import onnxmltools
import coremltools

coreml_model = coremltools.utils.load_spec('insurance.mlmodel')
onnx_model = onnxmltools.convert_coreml(coreml_model, 'insurance')
onnxmltools.utils.save_model(onnx_model, 'insurance.onnx')
8.変換したONNXのモデルを用いて推論してみます
predict.py
import onnxruntime as rt
import numpy as np

session = rt.InferenceSession("insurance.onnx")

for input in session.get_inputs():
    print(input.name) # age, bmi, children

print(session.get_outputs()[0].name) # charges

outputs = session.run(["charges"], {'age':[np.float32(19.0)],'bmi':[np.float32(27.9)],'children':[np.float32(0.0)]})[0]
print(outputs[0][0])
9.推論結果が出ました
6744.545
10.netronを用いるとONNXの中身が見れます
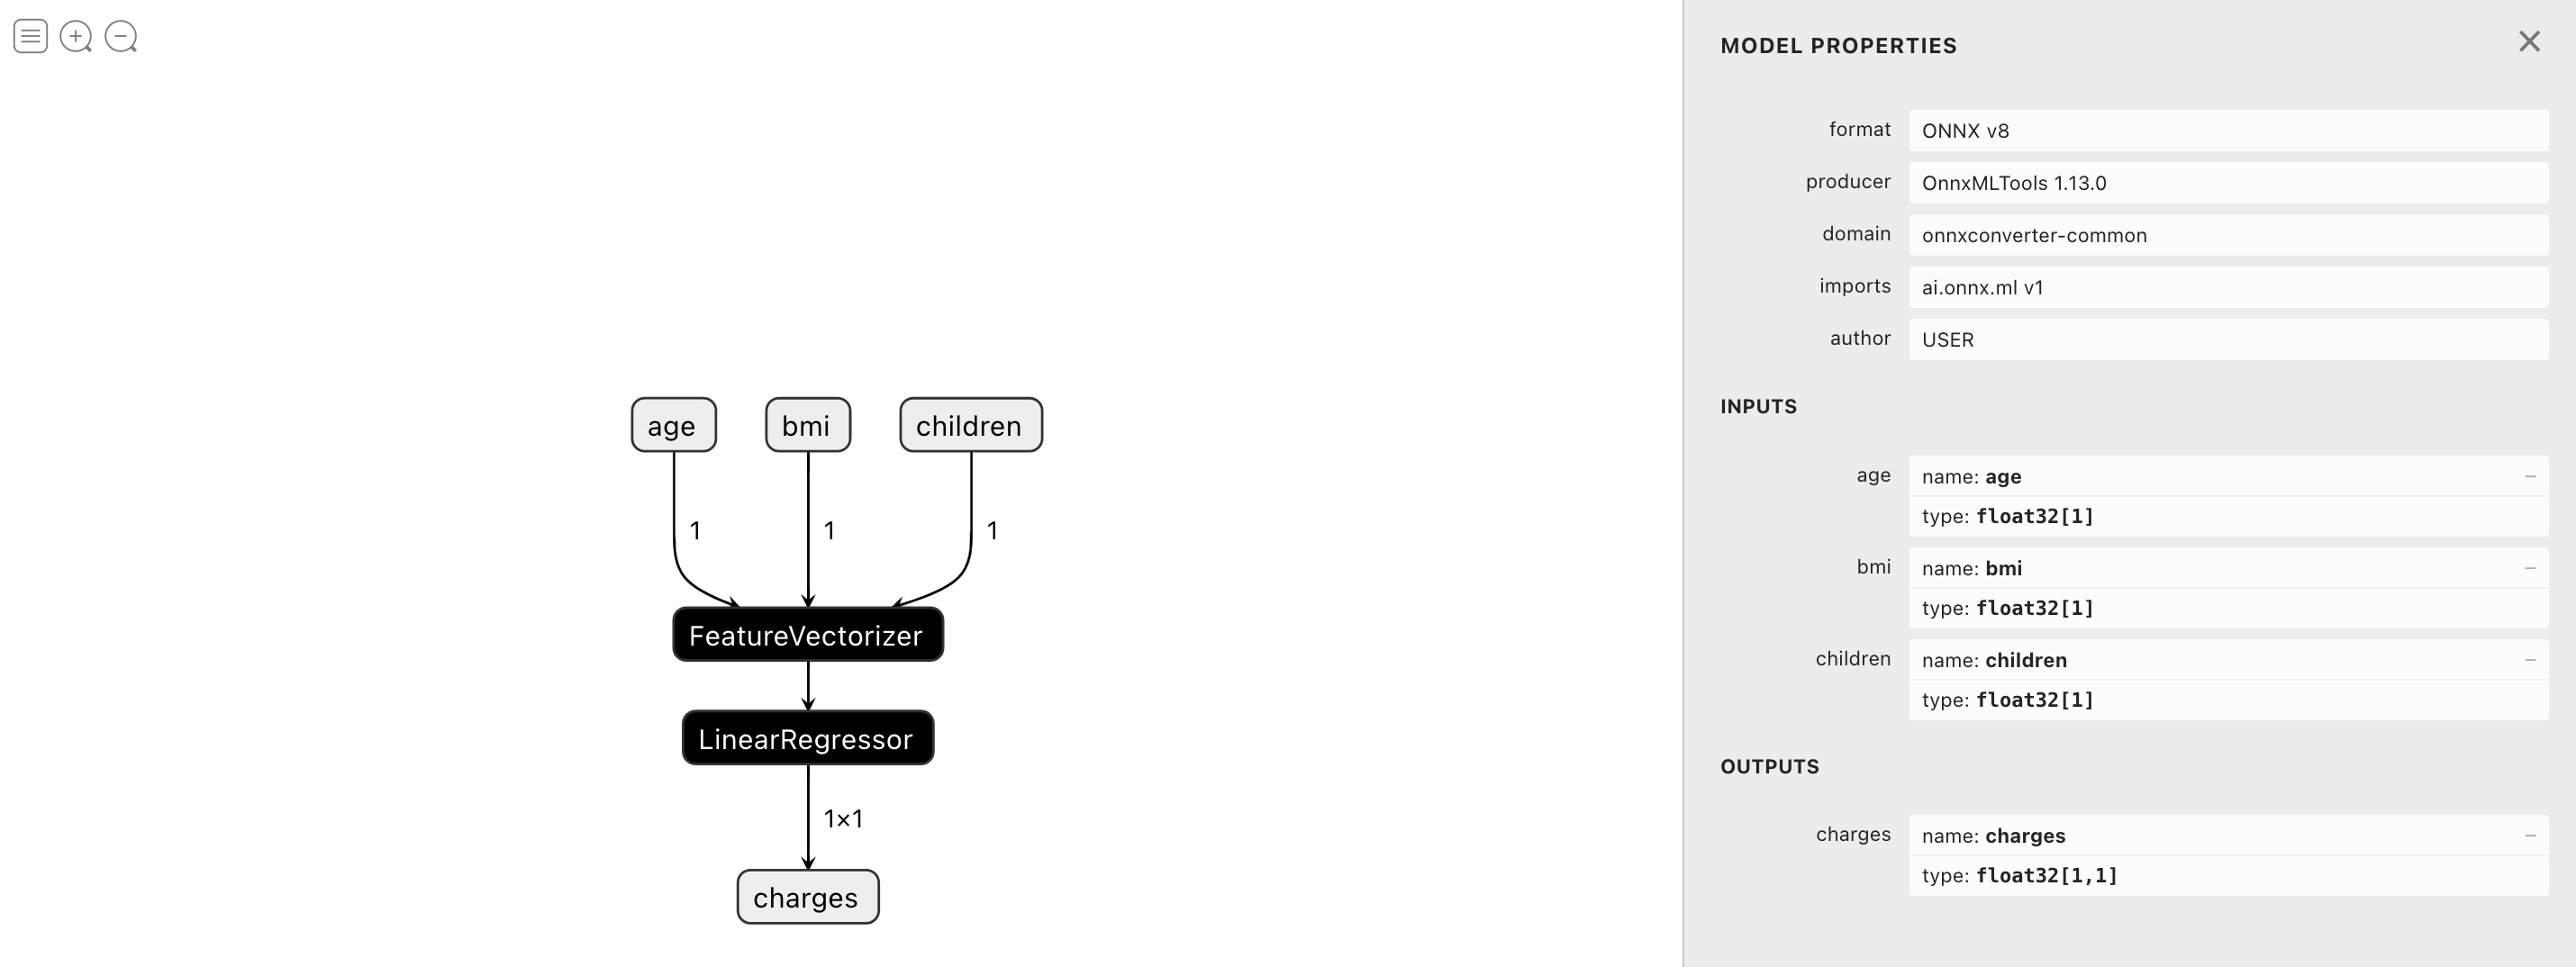
お疲れ様でした