クラッピーチャレンジ アドベントカレンダー2019の6日目の記事です。
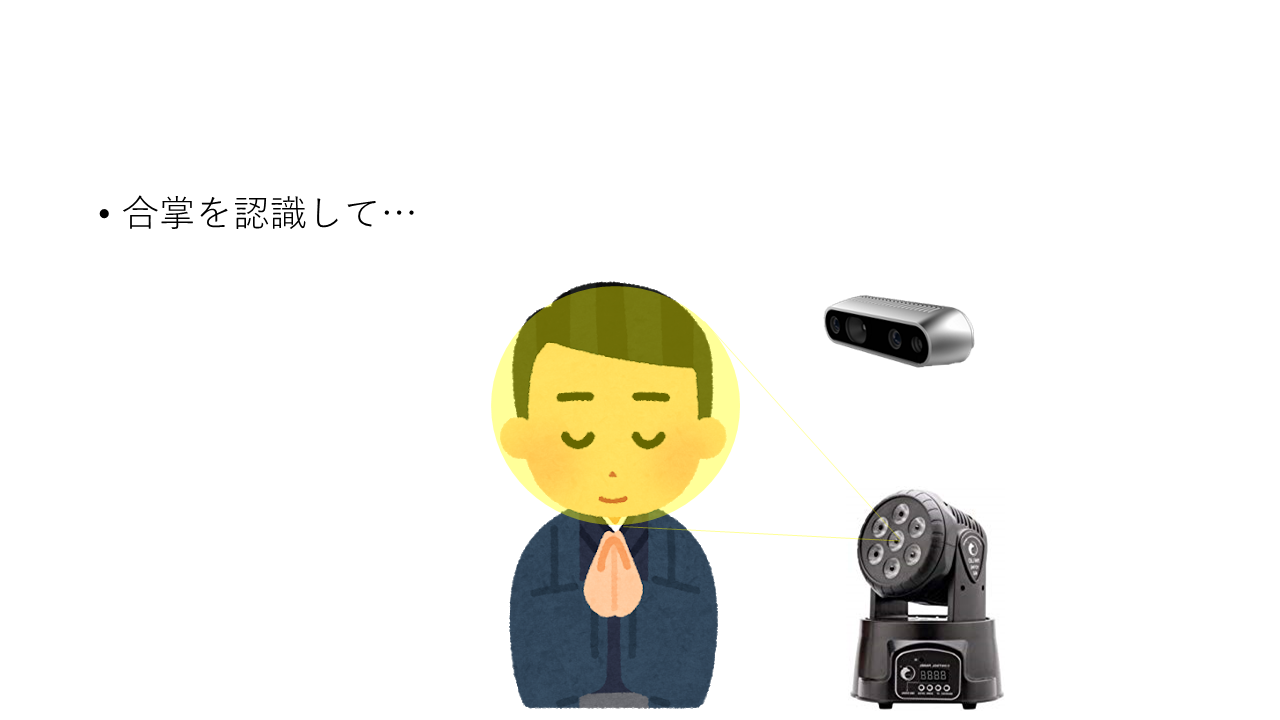
KuMAID2019というハッカソンで、合掌したら顔を照らすシステム「合照」を作りました。クラッピーみたいなので紹介します。
合掌したら顔照らす #kumaid2019 #ヒーローズリーグ pic.twitter.com/oZnTVFVmqy
— 藤本賢志(ガチ本)@MAリーグ2019決勝 (@sotongshi) November 3, 2019
開発環境
- ムービングライト
- QLC+(ムービングライトのソフト)
- ウェブカメラ
- Python 3.6.9
- Azure Custom Vision
- IBM Cloud
システム概要
Custom Visionを用いて合掌を認識する
1.CustomVisionのプロジェクトを作成し、合掌をしている画像を149枚くらい集めます。
モデルをあとからエクスポートしてローカルで推論したいので、ObjectDetectionのGeneral (compact)ドメインにします。

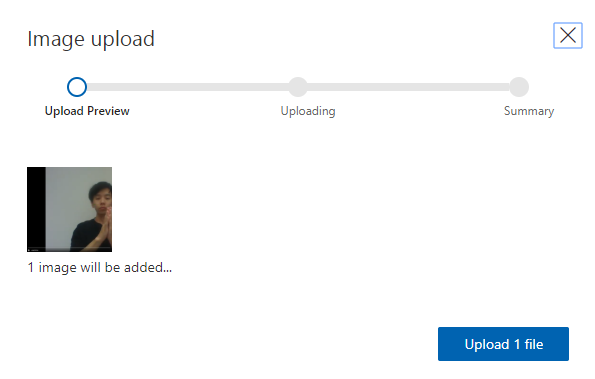
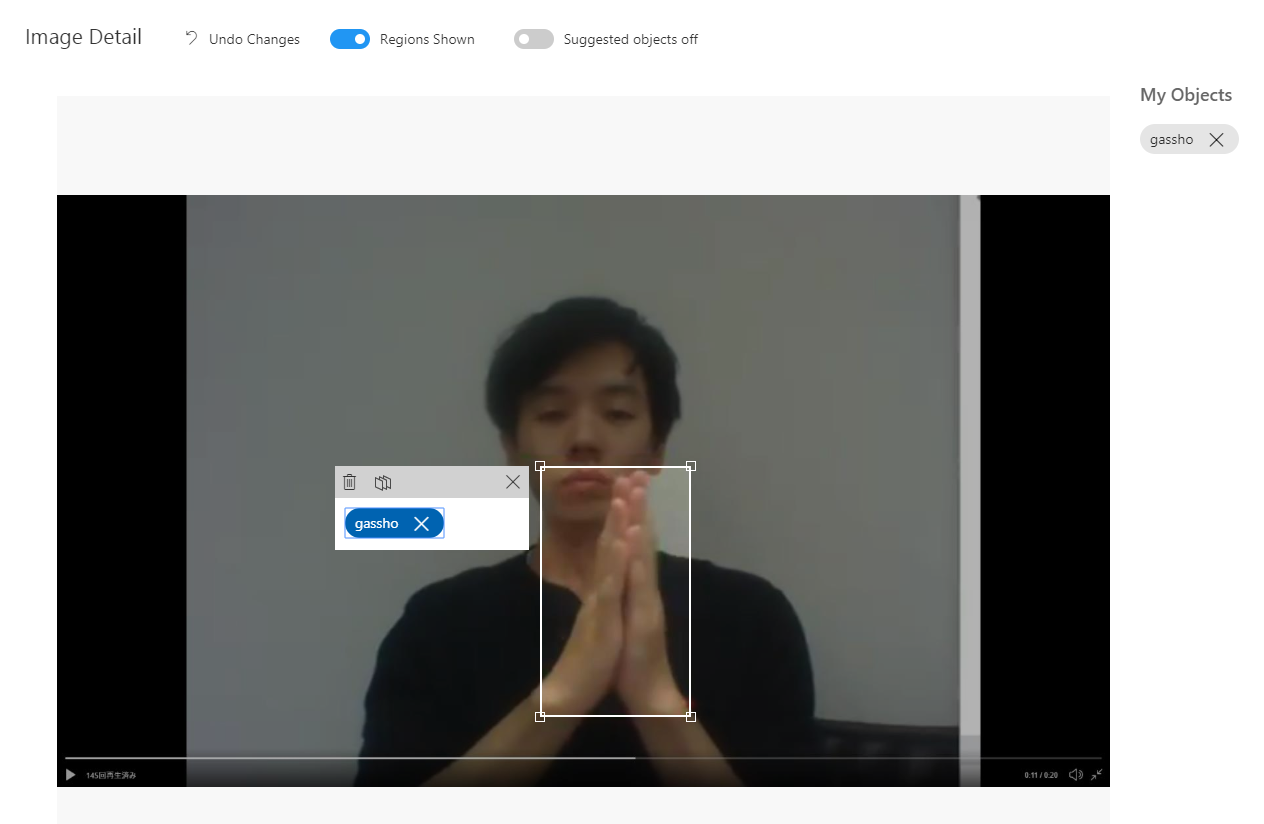
2.CustomVisionにアップロードしてアノテーションします。合掌しているところをドラッグして、タグをつけます。
3.Trainボタンをクリックして学習します。学習が完了したら結果が表示されます。
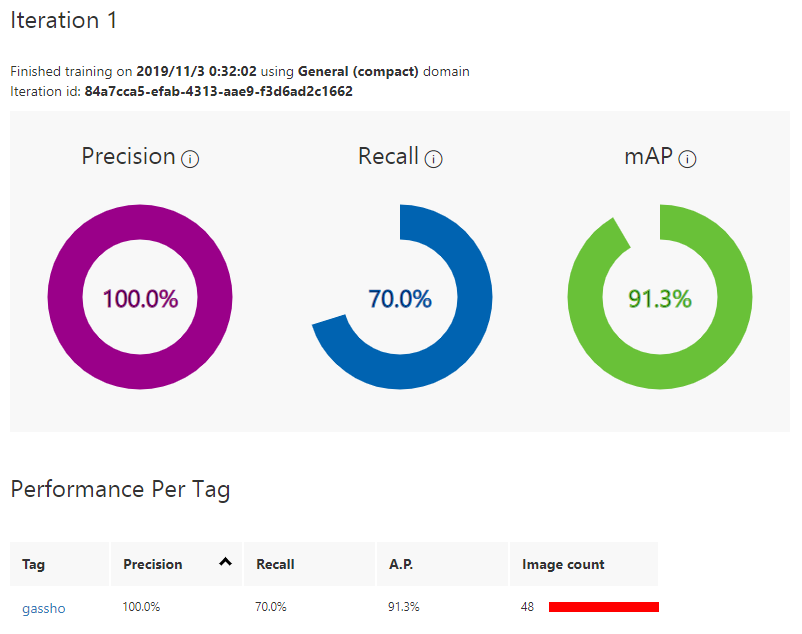
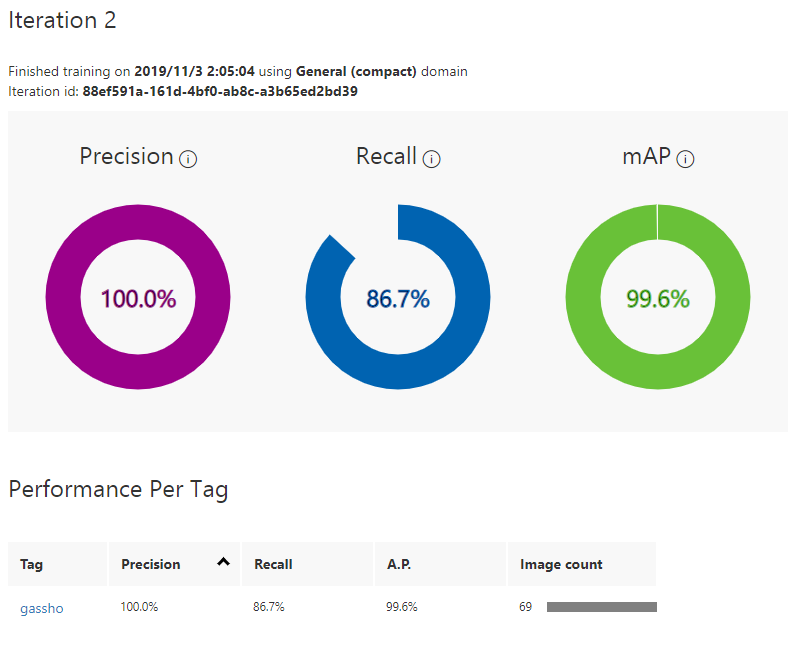
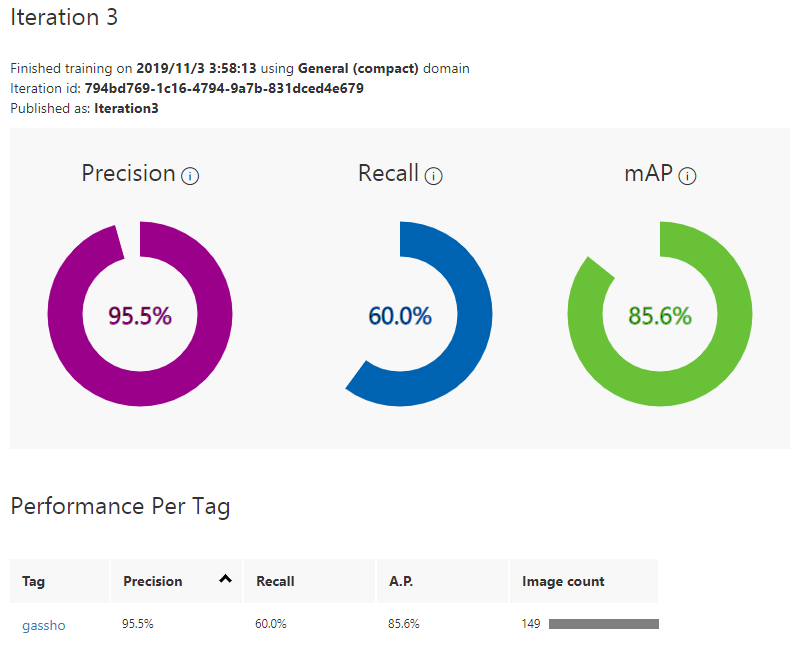
学習画像が多いほどいいというわけでもなさそうです。質が悪くなっています。
AdvancedTrainingのほうが精度良くなります!
4.Testボタンをクリックしてテスト画像をアップロードし推論してみましょう。
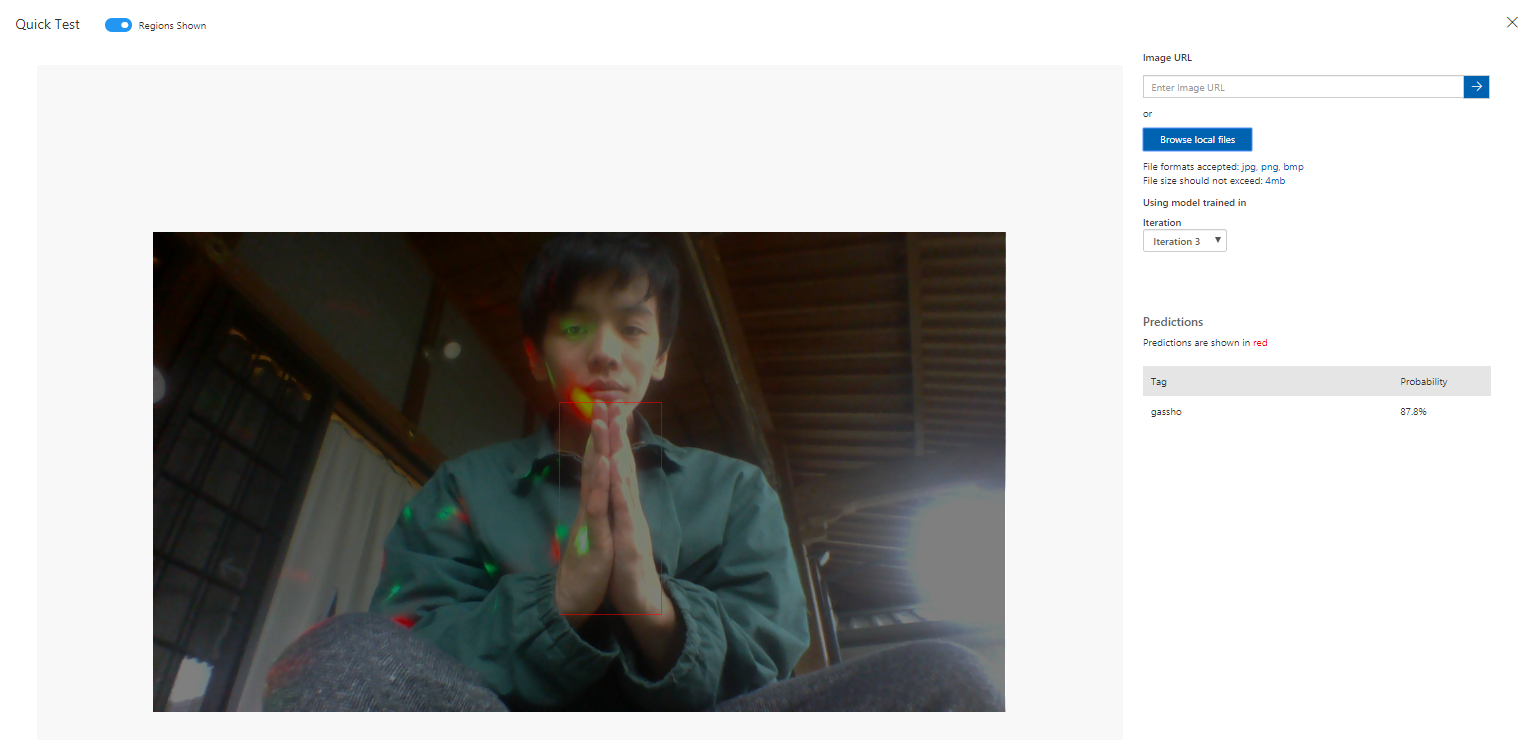
ちゃんと認識できています。
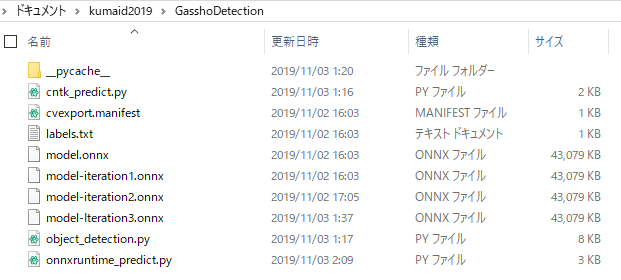
5.モデルをエクスポートし、ローカルで推論します。
エクスポートしたらサンプルプログラム(Python)が付いてきますよ。
object_detection.pyのDEFAULT_INPUT_SIZE を 512 * 512 から 416 * 416 へ変更します。
DEFAULT_INPUT_SIZE = 416 * 416 # 512 * 512
onnxruntime_predict.pyを実行して合掌が認識できることを確認してください。
Pythonでムービングライトを動かす
1.ムービングライトのドライバをインストールし、USBに繋ぎます
2.QLC+を用いて光るか確かめます
3.Pythonから動かすためpyserialをpip installし、下記のコードで光るか確かめます。
import serial

# start serial
ser = serial.Serial('COM6',baudrate=250000,bytesize=8,stopbits=2)

# make data
data = np.zeros([513],dtype='uint8')
data[0] = 0   # start
data[1] = 128 # x
data[2] = 5   # y
data[3] = 255 # LED Power
data[4] = 255 # R
data[5] = 255 # G
data[6] = 0   # B

# data[1:513]= np.random.rand(512)*255

for i in range(1, 20): # 繰り返し回数は適当
	print(i)
	ser.break_condition = True # Break
	time.sleep(176.0/1000000.0)
	ser.break_condition = False # MAB
	time.sleep(16.0/1000000.0)
	ser.write(bytearray(data)) # データ送信
	time.sleep(500.0/1000.0) # 一休み

ser.close()
合掌したら光り、さらに顔に追従してムービングライトを動かす
最終的なコードは以下です。
import serial
import time
import numpy as np
import cv2
import sys
import onnxruntime
import PIL
from PIL import Image, ImageDraw
from object_detection import ObjectDetection

MODEL_FILENAME = 'model.onnx'
LABELS_FILENAME = 'labels.txt'

class ONNXRuntimeObjectDetection(ObjectDetection):
    """Object Detection class for ONNX Runtime"""
    def __init__(self, model_filename, labels):
        super(ONNXRuntimeObjectDetection, self).__init__(labels)
        self.session = onnxruntime.InferenceSession(model_filename)
        self.input_name = self.session.get_inputs()[0].name
        self.is_fp16 = self.session.get_inputs()[0].type == 'tensor(float16)'

    def predict(self, preprocessed_image):
        inputs = np.array(preprocessed_image, dtype=np.float32)[np.newaxis,:,:,(2,1,0)] # RGB -> BGR
        inputs = np.ascontiguousarray(np.rollaxis(inputs, 3, 1))

        if self.is_fp16:
            inputs = inputs.astype(np.float16)

        outputs = self.session.run(None, {self.input_name: inputs})
        return np.squeeze(outputs).transpose((1,2,0)).astype(np.float32)


face_cascade_path = './haarcascades/haarcascade_frontalface_default.xml'
eye_cascade_path = './haarcascades/haarcascade_eye.xml'

face_cascade = cv2.CascadeClassifier(face_cascade_path)
eye_cascade = cv2.CascadeClassifier(eye_cascade_path)

cap = cv2.VideoCapture(0)

# 91.2° -45.5~45.5 112~144
# 65.5° -32.75~32.75 105~151
# 360:256=x:y
# y=128x/360+128
# 0 w 112 144   posx*32/w + 112
# 0 h 105 151   posy*46/h + 105

ser = serial.Serial('COM6',baudrate=250000,bytesize=8,stopbits=2)
data = np.zeros([513],dtype='uint8')
data[0] = 0   # start
data[1] = 128 # x
data[2] = 5   # y
data[3] = 0 # LED power
data[4] = 255 # R
data[5] = 255 # G
data[6] = 0   # B

with open(LABELS_FILENAME, 'r') as f:
    labels = [l.strip() for l in f.readlines()]

od_model = ONNXRuntimeObjectDetection(MODEL_FILENAME, labels)


while(True):
	ret, img = cap.read()
	gray = cv2.cvtColor(img, cv2.COLOR_BGR2GRAY)
	height, width, _ = img.shape
	print(width, height)
	faces = face_cascade.detectMultiScale(gray)

	for x, y, w, h in faces:
		cv2.rectangle(img, (x, y), (x + w, y + h), (255, 0, 0), 2)
		face = img[y: y + h, x: x + w]
		face_gray = gray[y: y + h, x: x + w]
		eyes = eye_cascade.detectMultiScale(face_gray)
		for (ex, ey, ew, eh) in eyes:
			cv2.rectangle(face, (ex, ey), (ex + ew, ey + eh), (0, 255, 0), 2)
		if len(eyes) > 1:
			data[1] = ( width/2-(x+w/2))*32/width+112
			data[2] = (height/2-(y+h/2))*46/height+105

	img_ = cv2.resize(img, (416,416))
	img_pil = PIL.Image.fromarray(img_)
	predictions = od_model.predict_image(img_pil)
	print(predictions)
	# [{'probability': 0.12643149, 'tagId': 0, 'tagName': 'gassho', 'boundingBox': {'left': 0.1650894, 'top': 0.07251995, 'width': 0.67652194, 'height': 1.00355426}}]
	if len(predictions) > 0 and predictions[0]['probability'] > 0.3:
		x = int(predictions[0]['boundingBox']['left']*width)
		y = int(predictions[0]['boundingBox']['top']*height)
		w = int(predictions[0]['boundingBox']['width']*width)
		h = int(predictions[0]['boundingBox']['height']*height)
		cv2.rectangle(img, (x,y),(x+w,y+h),(0,255,0),3)
		data[3] = 255
	else:
		data[3] = 0

	ser.break_condition = True # Break
	time.sleep(176.0/1000000.0)
	ser.break_condition = False # MAB
	time.sleep(16.0/1000000.0)
	ser.write(bytearray(data)) # データ送信
	time.sleep(100.0/1000.0) # 一休み

	cv2.imshow('img', img)
	if cv2.waitKey(1) & 0xFF == ord('q'):
		break

ser.close()
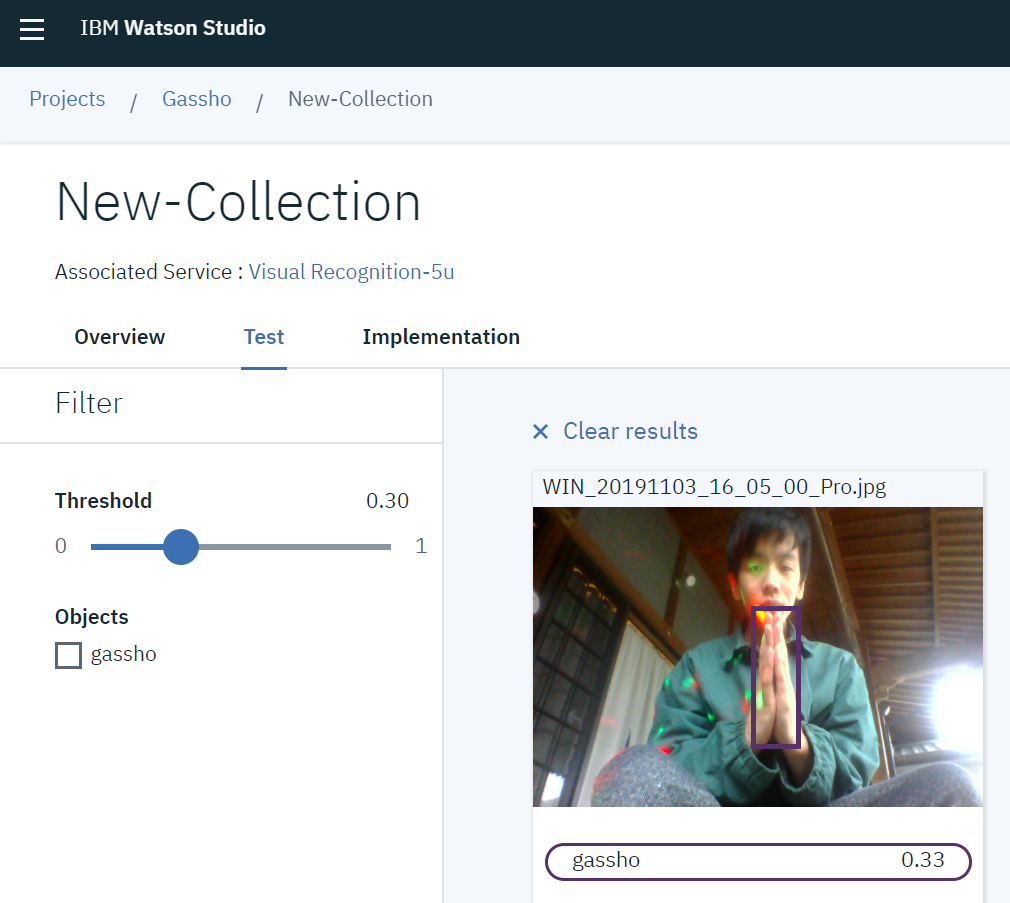
IBM Cloud Visual Recognition の Custom Object Detection を用いて合掌を認識する
CustomVisionの手順とほぼ同じです。
1.IBM Cloudに登録
2.Watson Studioを開き、データを準備
CustomVisionと同じデータを用います
3.データをアップロードし、アノテーション
4.学習
学習ボタンをクリックするだけ
5.テスト
テスト画像をアップロード
まとめ
ウェブカメラを用いて合掌を認識し、ムービングライトで顔を照らすシステムを作りました。
クラッピーのように人間がパチパチすると、ムービングライトが光り、顔を照らしてくれます。別に顔じゃなくてもいいんですけどねw
RealSenseを使えば暗闇で合掌しても認識できるかも!ということで開発を続けます。
MAリーグ2019決勝進出しました
断常ビート with 合照 https://t.co/P5L6ZgWmK7 @YouTubeより
— 藤本賢志(ガチ本)@pixivFANBOXはじめました (@sotongshi) December 3, 2020