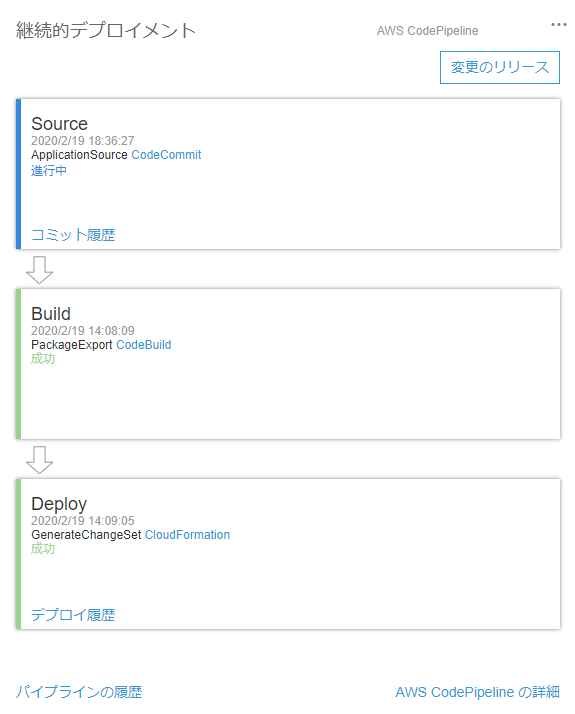
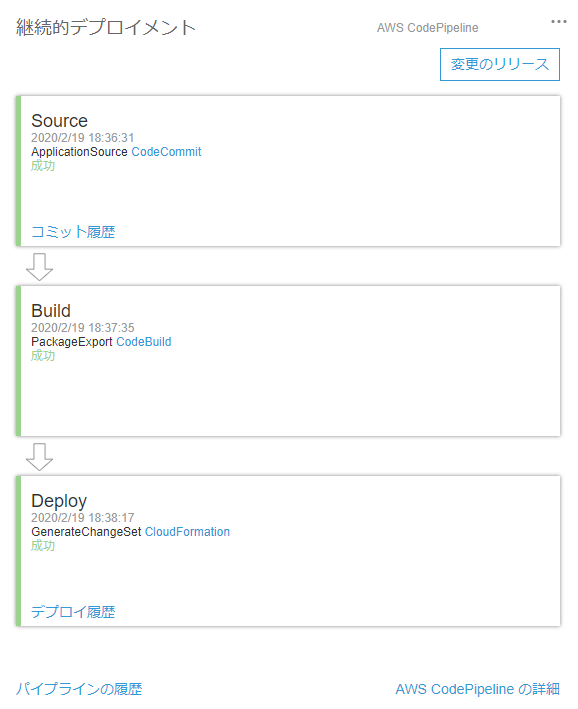
プロジェクトの新規作成
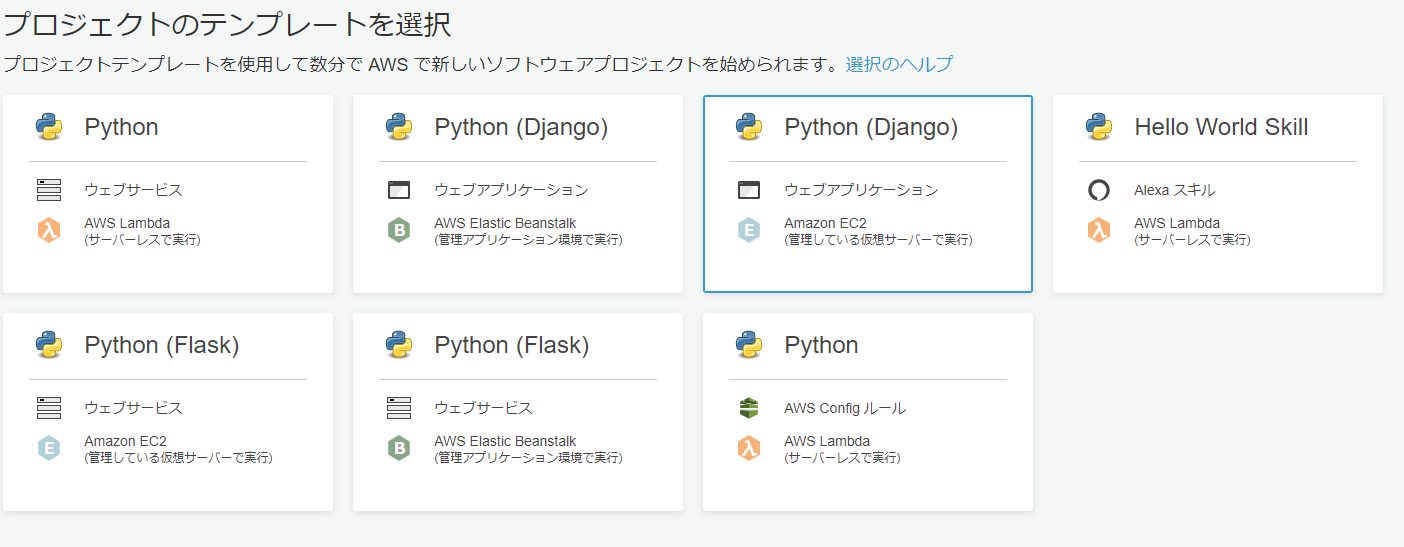
CodeStarでPython(Django)を選び、プロジェクトを作成します。レポジトリはCodeCommitを使用します。
CodeStarのダッシュボードが表示され、準備ができたら、アプリケーションのエンドポイントからDjangoのページが見れます。
IAMユーザーを作成し、AWSCodeCommitFullAccessをアタッチします。
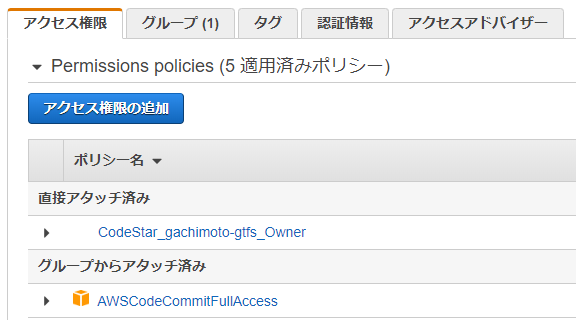
認証情報タブからAWS CodeCommit の HTTPS Git 認証情報、認証情報を生成し、ユーザー名とパスワードを保管しておきます。CodeCommitからURLクローンする際に必要になります。

CodeStarのプロジェクトチームに作成したIAMユーザーを追加してください。

プロジェクトの編集
AnacondaでPython3.8の環境を作ります。
$ conda create -n py38 python=3.8
$ conda activate py38
CodeCommitからURLをコピーし、gitでクローンします。
$ git clone https://username:password@git-codecommit.ap-northeast-1.amazonaws.com/v1/repos/gachimoto-gtfs
$ cd gachimoto-gtfs
必要なライブラリをインストールします。
$ pip install -r requirements.txt
.gitignoreを追加します。
# Byte-compiled / optimized / DLL files
__pycache__/
*.py[cod]
*$py.class

# C extensions
*.so

# Distribution / packaging
.Python
env/
build/
develop-eggs/
dist/
downloads/
eggs/
.eggs/
lib/
lib64/
parts/
sdist/
var/
wheels/
*.egg-info/
.installed.cfg
*.egg

# PyInstaller
#  Usually these files are written by a python script from a template
#  before PyInstaller builds the exe, so as to inject date/other infos into it.
*.manifest
*.spec

# Installer logs
pip-log.txt
pip-delete-this-directory.txt

# Unit test / coverage reports
htmlcov/
.tox/
.coverage
.coverage.*
.cache
nosetests.xml
coverage.xml
*.cover
.hypothesis/

# Translations
*.mo
*.pot

# Django stuff:
*.log
local_settings.py

# Flask stuff:
instance/
.webassets-cache

# Scrapy stuff:
.scrapy

# Sphinx documentation
docs/_build/

# PyBuilder
target/

# Jupyter Notebook
.ipynb_checkpoints

# pyenv
.python-version

# celery beat schedule file
celerybeat-schedule

# SageMath parsed files
*.sage.py

# dotenv
.env

# virtualenv
.venv
venv/
ENV/

# Spyder project settings
.spyderproject
.spyproject

# Rope project settings
.ropeproject

# mkdocs documentation
/site

# mypy
.mypy_cache/


.idea/
db.sqlite3
migrations/
buildspec.ymlの一部を編集します。
commands:
  # Install dependencies needed for running tests
  - pip install -r requirements/common.txt
 - python manage.py makemigrations helloworld
 - python manage.py migrate
 - python manage.py collectstatic --noinput
外部ライブラリをインストールしたら(例:requests)
$ pip install requests
common.txtも編集します。
# dependencies common to all environments
Django==2.1.15
requests==2.22.0
最初のページを作成
helloworld/views.py
# helloworld/views.py
from django.shortcuts import render
from django.views import generic
from django.views.generic import TemplateView
from django.views.generic import ListView

class Top(generic.TemplateView):
    template_name = 'top.html'
helloworld/urls.py
# helloworld/urls.py
from django.urls import path
from django.conf.urls import url
from django.conf.urls.static import static
from helloworld import views

urlpatterns = [
    # url(r'^$', views.HomePageView.as_view()),
    path('', views.Top.as_view(), name='top'),
]
helloworld/tests.py
from django.test import TestCase, RequestFactory
helloworld/templates/top.html
{% extends "base.html" %}
{% block content %}
<p> gachimoto-gtfsへようこそ </p>
{% endblock %}
helloworld/templates/base.html
<!doctype html>
{% load staticfiles %}
<html lang="ja">
  <head>
    <!-- Required meta tags -->
    <meta charset="utf-8">
    <meta name="viewport" content="width=device-width, initial-scale=1, shrink-to-fit=no">
    <!-- Bootstrap CSS -->
    <link rel="stylesheet" href="https://stackpath.bootstrapcdn.com/bootstrap/4.1.0/css/bootstrap.min.css"
          integrity="sha384-9gVQ4dYFwwWSjIDZnLEWnxCjeSWFphJiwGPXr1jddIhOegiu1FwO5qRGvFXOdJZ4" crossorigin="anonymous">
    <title>gachimoto gtfs api</title>
  </head>
  <body>
    <!-- ナビバー -->
    <nav class="navbar navbar-expand-lg navbar-light bg-light">
      <a class="navbar-brand" href="{% url 'top' %}">G</a>
      <button class="navbar-toggler" type="button" data-toggle="collapse" data-target="#navbarSupportedContent" aria-controls="navbarSupportedContent" aria-expanded="false" aria-label="Toggle navigation">
        <span class="navbar-toggler-icon"></span>
      </button>
      <div class="collapse navbar-collapse" id="navbarSupportedContent">
        <ul class="navbar-nav mr-auto">
        </ul>
      </div>
    </nav>

    <!-- メインコンテント -->
    <div class="container mt-3">
      {% block content %}{% endblock %}
    </div>

    <!-- Optional JavaScript -->
    <!-- jQuery first, then Popper.js, then Bootstrap JS -->
    <script src="https://code.jquery.com/jquery-3.3.1.slim.min.js"
            integrity="sha384-q8i/X+965DzO0rT7abK41JStQIAqVgRVzpbzo5smXKp4YfRvH+8abtTE1Pi6jizo"
            crossorigin="anonymous"></script>
    <script src="https://cdnjs.cloudflare.com/ajax/libs/popper.js/1.14.0/umd/popper.min.js"
            integrity="sha384-cs/chFZiN24E4KMATLdqdvsezGxaGsi4hLGOzlXwp5UZB1LY//20VyM2taTB4QvJ"
            crossorigin="anonymous"></script>
    <script src="https://stackpath.bootstrapcdn.com/bootstrap/4.1.0/js/bootstrap.min.js"
            integrity="sha384-uefMccjFJAIv6A+rW+L4AHf99KvxDjWSu1z9VI8SKNVmz4sk7buKt/6v9KI65qnm"
            crossorigin="anonymous"></script>
  </body>
</html>
ec2django/urls.py
""" ec2django URL Configuration

The `urlpatterns` list routes URLs to views. For more information please see:
    https://docs.djangoproject.com/en/2.1/topics/http/urls/
Examples:
Function views
    1. Add an import:  from my_app import views
    2. Add a URL to urlpatterns:  url(r'^$', views.home, name='home')
Class-based views
    1. Add an import:  from other_app.views import Home
    2. Add a URL to urlpatterns:  url(r'^$', Home.as_view(), name='home')
Including another URLconf
    1. Import the include() function: from django.conf.urls import url, include
    2. Add a URL to urlpatterns:  url(r'^blog/', include('blog.urls'))
"""
from django.conf import settings
from django.conf.urls.static import static
from django.conf.urls import include, url
from django.contrib import admin
from django.contrib.staticfiles.urls import staticfiles_urlpatterns
from django.urls import path, include

urlpatterns = [
    path('admin/', admin.site.urls),
    path('', include('helloworld.urls')),
]
ec2django/settings.py
"""
Django settings for ec2django project.

Generated by 'django-admin startproject' using Django 2.1.14.

For more information on this file, see
https://docs.djangoproject.com/en/2.1/topics/settings/

For the full list of settings and their values, see
https://docs.djangoproject.com/en/2.1/ref/settings/
"""

import os

# Build paths inside the project like this: os.path.join(BASE_DIR, ...)
BASE_DIR = os.path.dirname(os.path.dirname(os.path.abspath(__file__)))


# Quick-start development settings - unsuitable for production
# See https://docs.djangoproject.com/en/2.1/howto/deployment/checklist/

# SECURITY WARNING: keep the secret key used in production secret!
SECRET_KEY = 'CHANGE_ME' # 適当に変てね

# SECURITY WARNING: don't run with debug turned on in production!
DEBUG = True # bool( os.environ.get('DJANGO_DEBUG', False) )

ALLOWED_HOSTS = ['*']

# Application definition

INSTALLED_APPS = [
    'django.contrib.admin',
    'django.contrib.auth',
    'django.contrib.contenttypes',
    'django.contrib.sessions',
    'django.contrib.messages',
    'django.contrib.staticfiles',
    'helloworld.apps.HelloworldConfig', # 'helloworld',
]

MIDDLEWARE = [
    'django.middleware.security.SecurityMiddleware',
    'django.contrib.sessions.middleware.SessionMiddleware',
    'django.middleware.common.CommonMiddleware',
    'django.middleware.csrf.CsrfViewMiddleware',
    'django.contrib.auth.middleware.AuthenticationMiddleware',
    'django.contrib.messages.middleware.MessageMiddleware',
    'django.middleware.clickjacking.XFrameOptionsMiddleware',
]

ROOT_URLCONF = 'ec2django.urls'

TEMPLATES = [
    {
        'BACKEND': 'django.template.backends.django.DjangoTemplates',
        'DIRS': [
            os.path.join(BASE_DIR,'templates')
        ],
        'APP_DIRS': True,
        'OPTIONS': {
            'context_processors': [
                'django.template.context_processors.debug',
                'django.template.context_processors.request',
                'django.contrib.auth.context_processors.auth',
                'django.contrib.messages.context_processors.messages',
            ],
        },
    },
]

WSGI_APPLICATION = 'ec2django.wsgi.application'


# Database
# https://docs.djangoproject.com/en/2.1/ref/settings/#databases

DATABASES = {
    'default': {
        'ENGINE': 'django.db.backends.sqlite3',
        'NAME': os.path.join(BASE_DIR, 'db.sqlite3'),
    }
}


# Password validation
# https://docs.djangoproject.com/en/2.1/ref/settings/#auth-password-validators

AUTH_PASSWORD_VALIDATORS = [
    {
        'NAME': 'django.contrib.auth.password_validation.UserAttributeSimilarityValidator',
    },
    {
        'NAME': 'django.contrib.auth.password_validation.MinimumLengthValidator',
    },
    {
        'NAME': 'django.contrib.auth.password_validation.CommonPasswordValidator',
    },
    {
        'NAME': 'django.contrib.auth.password_validation.NumericPasswordValidator',
    },
]


# Internationalization
# https://docs.djangoproject.com/en/2.1/topics/i18n/

LANGUAGE_CODE = 'ja' # 'en-us'

TIME_ZONE = 'Asia/Tokyo' # 'UTC'

USE_I18N = True

USE_L10N = True

USE_TZ = True


# Static files (CSS, JavaScript, Images)
# https://docs.djangoproject.com/en/2.1/howto/static-files/

STATIC_URL = '/static/'
STATIC_ROOT = 'static'
プロジェクトのデプロイ
ページを確認します。
$ python manage.py migrate
$ python manage.py runserver
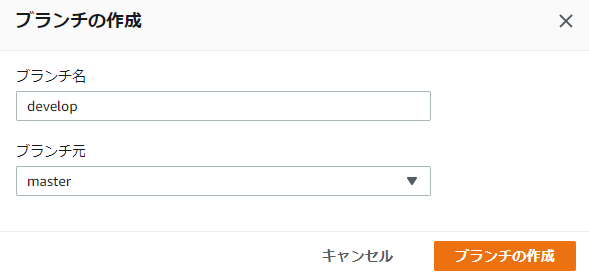
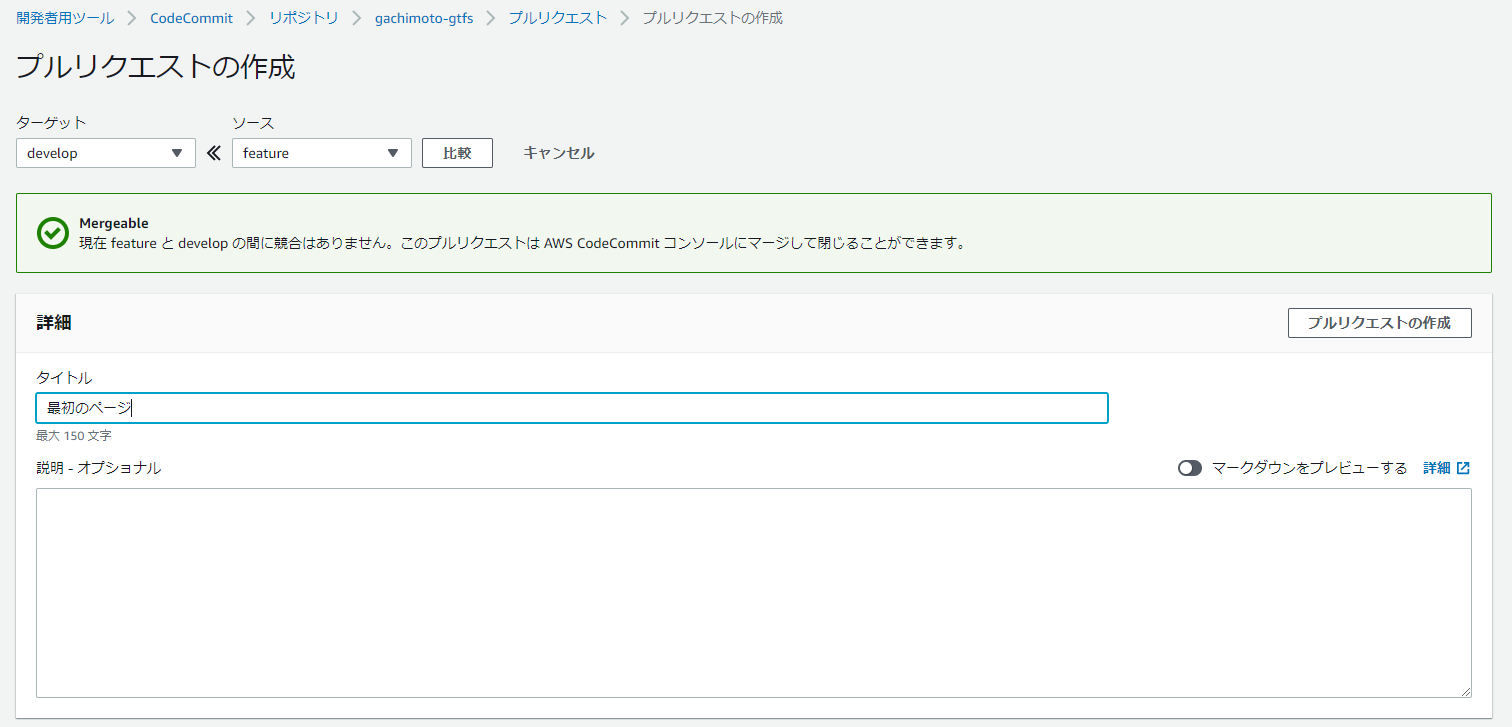
featureブランチを作成し、コミットします。
$ git branch feature
$ git checkout feature
$ git status
$ git add .
$ git commit -m "最初のページ"
$ git push origin feature
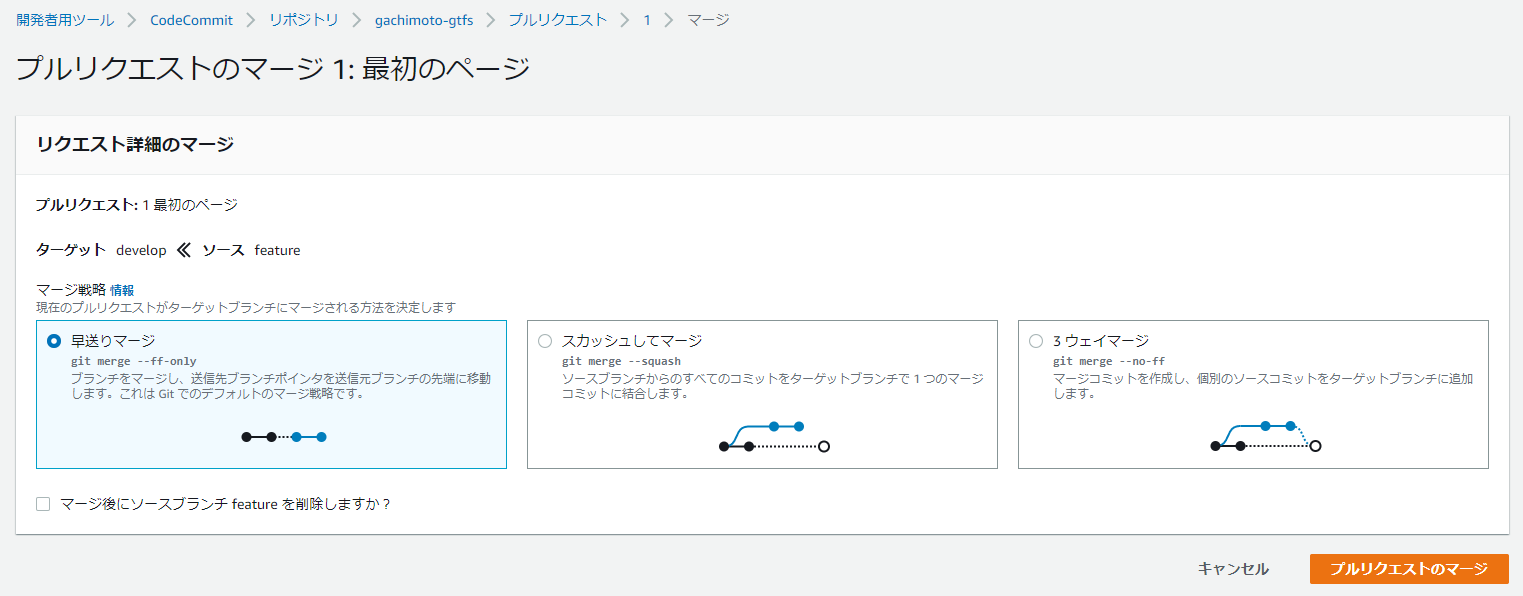
同様にdevelopからmasterへマージします。するとCodePiplineが起動し、勝手にデプロイしてくれます。
EC2再起動時にDjangoを起動するように設定を行います。
お疲れ様でした。これでサクッとDjangoアプリが作れますね!
追記
staticファイルの読み込みと本番設定(Debug=False)
staticファイルを集める。
$ python manage.py collectstatic --noinput
$ python manage.py runserver
settings.py
DEBUGモードをFalseにします。
DEBUG = False
urls.py
staticフォルダ設定を追加します。
urlpatterns = [
    path('admin/', admin.site.urls),
    path('', include('helloworld.urls')),
] + static(settings.STATIC_URL, document_root=settings.STATIC_ROOT)
画像追加
helloworld/static/helloworld/img/とstatic/helloworld/img/に任意の画像追加します。cssなども追加した場合、staticフォルダ以下を統一しておく必要があります。DEBUG=False時に正しく読み込めない場合があります。
画像表示例(base.html)
<a class="navbar-brand" href="{% url 'top' %}"><img src="{% static 'helloworld/img/G.svg' %}" width="11%" /></a>
