はじめに
GCP Cloud Vision APIで画像からテキスト抽出やってみました
開発環境
- Windows 10
- Anaconda
- Python 3.6
- OpenCV 4.4.0
導入
画像内のテキストを検出するを参考にします。
1.Cloud Consoleからプロジェクトを作成します。
2.課金が有効になっていることを確認します。
3.Vision API を有効にします。
4.認証の設定をし、JSONファイルがPCにダウンロードされます。
5.環境変数 GOOGLE_APPLICATION_CREDENTIALS にJSONファイルのパスを設定します。
6.anaconda promptを開き、Python 3.6環境を作成します。
$ conda create -n py36 python=3.6
$ conda activate py36
7.ライブラリをインストールします
$ pip install numpy
$ pip install pillow
$ pip install opencv-python
$ pip install --upgrade google-cloud-vision
8.下記のコードを実行してみましょう
from google.cloud import vision
import io
import os
import cv2
import numpy as np
from PIL import ImageFont, ImageDraw, Image

def detect_text(image):
    """Detects text in the file."""
    client = vision.ImageAnnotatorClient()

    content = cv2.imencode(".png", image)[1].tostring()
    tmp = vision.Image(content=content)
    response = client.text_detection(image=tmp)
    texts = response.text_annotations
    if response.error.message:
        raise Exception(
            '{}\nFor more info on error messages, check: '
            'https://cloud.google.com/apis/design/errors'.format(
                response.error.message))
    return texts

filename = "338px-Atomist_quote_from_Democritus.png"
root, ext = os.path.splitext(filename)
image = cv2.imread(filename, cv2.IMREAD_COLOR)
texts = detect_text(image)
fontpath ='C:\Windows\Fonts\meiryo.ttc'
font = ImageFont.truetype(fontpath, 10)
image_pil = Image.fromarray(image)
for text in texts:
    print(text.description)
    vertices = [(vertex.x, vertex.y) for vertex in text.bounding_poly.vertices]
    # cv2.putText(image, text.description, vertices[0], cv2.FONT_HERSHEY_PLAIN, 1, (255, 255, 255), 1, cv2.LINE_AA)
    # cv2.rectangle(image, vertices[0], vertices[2], (0, 255, 0))
    draw = ImageDraw.Draw(image_pil)
    w, h = draw.textsize(text.description, font = font)
    draw.text((vertices[0][0], vertices[0][1]-h), text.description, font=font, fill=(255, 255, 255, 0))
    # draw.text(vertices[0], text.description, font=font, fill=(255, 255, 255, 0))
    draw.rectangle((vertices[0], vertices[2]), outline=(0, 255, 0))
image = np.array(image_pil)
cv2.imshow("image", image)
cv2.imwrite(root+"_ocr"+ext, image)
cv2.waitKey(0)
| input | PIL | PIL(OpenCV風) | OpenCV |
|---|---|---|---|
 |
 |
 |
 |
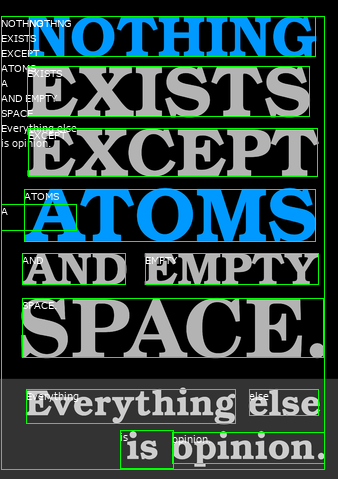
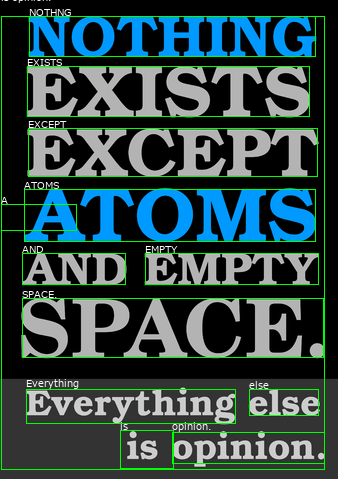
OpenCVだと全角英語(日本語)が文字化けするのでPILを用いてテキスト表示しました。
お疲れ様でした。