開発環境
- Windows10 64bit
- Anaconda 2018.12
- Python 2.7.15
- Python 3.6.5
- Open3D v0.4.0
準備
1.RGB-D Datasetとrgbd_benchmark_toolsをダウンロードしてください。
2.AnacondaでPython2.7環境を作ります。こちらを参考にしてください。
3.下記コマンド(例)でrgbd_benchmark_toolsのassociate.pyを実行すると、タイムスタンプ、RGBとDepthのリストがassociations.txtに保存されます。RGBとDepthは非同期で取得されているため、タイムスタンプが近いRGBとDepthの組を生成しています。
python associate.py D:/TUM/rgbd_dataset_freiburg1_360/rgb.txt D:/TUM/rgbd_dataset_freiburg1_360/depth.txt > D:/TUM/rgbd_dataset_freiburg1_360/associations.txt
4.各シーンについてassociation.pyを実行します。
# associate_auto.py
import glob
import subprocess
import shutil

dirnames = glob.glob("../TUM/rgbd_dataset_freiburg*/")

for dirname in dirnames:
    cmd = "python associate.py " + dirname + "rgb.txt " + dirname + "depth.txt > " + dirname + "associations.txt"
    print(cmd)
    res = subprocess.call(cmd, shell=True)
実行
1.Open3DのRGBD Odometryを用いて、カメラ軌跡を求めるプログラムを作成しました。Python3.6.5およびOpen3D v0.4.0を用いています。Open3Dの導入方法はこちら。
# rgbd_odometry_tum.py
from open3d import *
import numpy as np
import matplotlib.pyplot as plt
import cv2
import time
import math
import sys

# python rgbd_odometry_tum.py "../../TestData/camera_tum_1.json" "D:/TUM/rgbd_dataset_freiburg1_xyz/" "HybridRGB-DOdometryResult.txt"
if __name__ == "__main__":
    print(len(sys.argv))
    if len(sys.argv) != 4:
        sys.exit()

    pinhole_camera_intrinsic = read_pinhole_camera_intrinsic(sys.argv[1])
    print(pinhole_camera_intrinsic.intrinsic_matrix)

    dirname = sys.argv[2]
    with open(dirname + "associations.txt", "r") as f:
        line = f.readline()
        lines = f.readlines()
        # print (lines)

    timestamps = []
    Rts = []
    Rts.append(np.eye(4,4))

    elapsed_times = []
    vis = Visualizer()
    vis.create_window()

    filename = line.replace('\n', '').split(" ")
    timestamps.append(filename[0])

    target_color = read_image(dirname + filename[1])
    target_depth = read_image(dirname + filename[3])
    target_rgbd_image = create_rgbd_image_from_tum_format(
            target_color, target_depth)

    cv2.imshow("image", cv2.cvtColor(np.array(target_color), cv2.COLOR_RGB2BGR))
    cv2.imshow("depth", np.array(target_depth))
    # cv2.waitKey(0)

    option = OdometryOption()
    odo_init = np.identity(4)
    print(option)

    flip_transform = [[1,0,0,0],[0,-1,0,0],[0,0,-1,0],[0,0,0,1]]

    for num, line in enumerate(lines, start = 1):
        start = time.time()
        print("frame:", num)

        filename = line.replace('\n', '').split(" ") #depthのファイル名に\nが含まれていた
        timestamps.append(filename[0])

        source_color = read_image(dirname + filename[1])
        source_depth = read_image(dirname + filename[3])
        source_rgbd_image = create_rgbd_image_from_tum_format(source_color, source_depth);
        target_pcd = create_point_cloud_from_rgbd_image(
                target_rgbd_image, pinhole_camera_intrinsic)
        # source_rgbd_image = create_rgbd_image_from_color_and_depth(source_color, source_depth);
        # plt.subplot(1, 2, 1)
        # plt.title('TUM grayscale image')
        # plt.imshow(source_rgbd_image.color)
        # plt.subplot(1, 2, 2)
        # plt.title('TUM depth image')
        # plt.imshow(source_rgbd_image.depth)
        # plt.show() # plt.pause(.01)
        # cv2.imshow("image", np.array(source_rgbd_image.color))
        # cv2.imshow("depth", np.array(source_rgbd_image.depth))

        prevRt = Rts[-1]
        print (Rts[-1])

        # [success_color_term, trans_color_term, info] = compute_rgbd_odometry(
        #         source_rgbd_image, target_rgbd_image,
        #         pinhole_camera_intrinsic, odo_init,
        #         RGBDOdometryJacobianFromColorTerm(), option)
        # if success_color_term:
        #     Rts.append(np.dot(prevRt, trans_color_term))
        #     print("Using RGB-D Odometry")
        #     print(trans_color_term)
        #
        #     if num%30 == 1:
        #         source_pcd_color_term = create_point_cloud_from_rgbd_image(
        #                 source_rgbd_image, pinhole_camera_intrinsic)
        #         source_pcd_color_term.transform(Rts[-1])
        #         source_pcd_color_term.transform(flip_transform)
        #         mesh_frame = create_mesh_coordinate_frame(size = 0.1, origin = [0,0,0])
        #         mesh_frame.transform(Rts[-1])
        #         mesh_frame.transform(flip_transform)
        #         vis.add_geometry(mesh_frame)
        #         vis.add_geometry(source_pcd_color_term)
        #         vis.run()
        #     # draw_geometries([target_pcd, source_pcd_color_term])
        # else :
        #     trans_color_term = np.eye(4)
        #     Rts.append(np.dot(prevRt, trans_color_term))

        [success_hybrid_term, trans_hybrid_term, info] = compute_rgbd_odometry(
                source_rgbd_image, target_rgbd_image,
                pinhole_camera_intrinsic, odo_init,
                RGBDOdometryJacobianFromHybridTerm(), option)
        if success_hybrid_term:
            Rts.append(np.dot(prevRt, trans_hybrid_term))
            print("Using Hybrid RGB-D Odometry")
            print(trans_hybrid_term)

            if num%30 == 1:
                source_pcd_hybrid_term = create_point_cloud_from_rgbd_image(
                        source_rgbd_image, pinhole_camera_intrinsic)
                # source_pcd_hybrid_term = voxel_down_sample(source_pcd_hybrid_term, voxel_size = 0.02)
                source_pcd_hybrid_term.transform(Rts[-1])
                source_pcd_hybrid_term.transform(flip_transform)
                vis.add_geometry(source_pcd_hybrid_term)
                mesh_frame = create_mesh_coordinate_frame(size = 0.1, origin = [0,0,0])
                mesh_frame.transform(Rts[-1])
                mesh_frame.transform(flip_transform)
                vis.add_geometry(mesh_frame)
            # draw_geometries([target_pcd, source_pcd_hybrid_term])
        else :
            trans_hybrid_term = np.eye(4)
            Rts.append(np.dot(prevRt, trans_hybrid_term))

        # mesh_frame = create_mesh_coordinate_frame(size = 0.1, origin = [0,0,0])
        # mesh_frame.transform(Rts[-1])
        # mesh_frame.transform([[1,0,0,0],[0,-1,0,0],[0,0,-1,0],[0,0,0,1]])
        # vis.add_geometry(mesh_frame)
        vis.update_geometry()
        vis.poll_events()
        vis.update_renderer()
        # vis.run()

        elapsed_time = time.time() - start
        elapsed_times.append(elapsed_time)
        print(elapsed_time*1000,"[ms]")
        target_rgbd_image = source_rgbd_image

        cv2.imshow("image", cv2.cvtColor(np.array(source_color), cv2.COLOR_RGB2BGR))
        cv2.imshow("depth", np.array(source_depth))
        c = cv2.waitKey(1) & 0xFF
        if c == ord('q'):
            break

    with open(dirname + sys.argv[3], "w") as f:
        for i, timestamp in enumerate(timestamps):
            Rt = Rts[i]
            rvec = cv2.Rodrigues(Rt[0:3,0:3])[0]
            alpha = cv2.norm(rvec)
            if alpha > sys.float_info.min:
                rvec = rvec / alpha
            alpha = 0.5 * alpha
            cos_a = math.cos(alpha)
            sin_a = math.sin(alpha)
            rvec = rvec*sin_a
            f.write(str(timestamp) + " " + " ".join(map(str, Rt[0:3,3])) + " " + " ".join(map(str,rvec[0,0:3])) + " " + str(cos_a) + " " + "\n")
    vis.destroy_window()
    print("mean:",np.mean(elapsed_times)*1000,"[ms]")
2.各シーンについて、カメラの軌跡を求めます。
# rgbd_odometry_tum_auto.py
import subprocess
import glob

dirnames = glob.glob("D:/TUM/*/")
# python rgbd_odometry_tum.py "../../TestData/camera_tum_1.json" "D:/TUM/rgbd_dataset_freiburg1_xyz/" "HybridRGB-DOdometryResult.txt"
for dirname in dirnames:
    res = subprocess.call("python rgbd_odometry_tum.py ../../TestData/camera_tum_default.json " + dirname + " HybridRGB-DOdometryResult.txt", shell=True)
評価
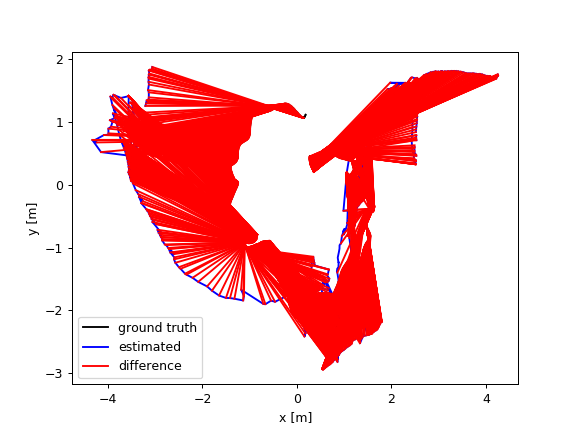
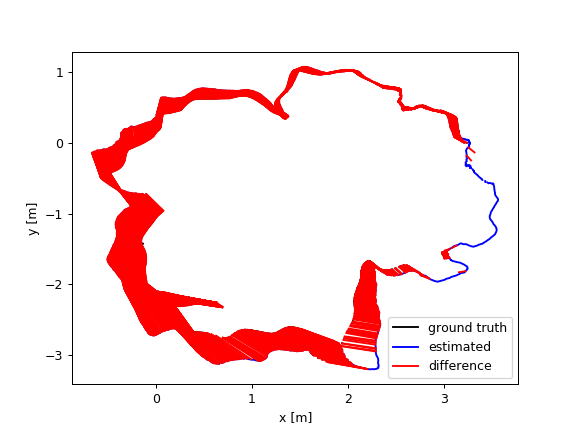
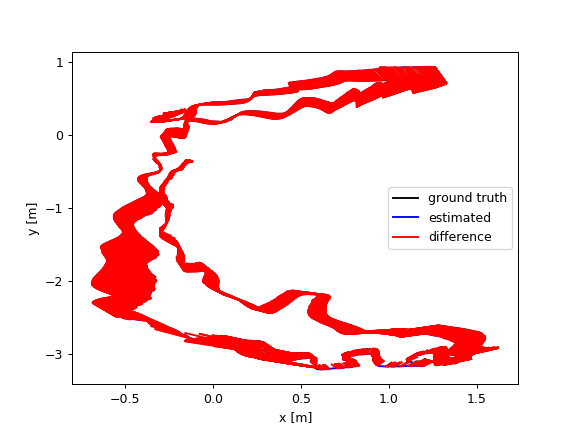
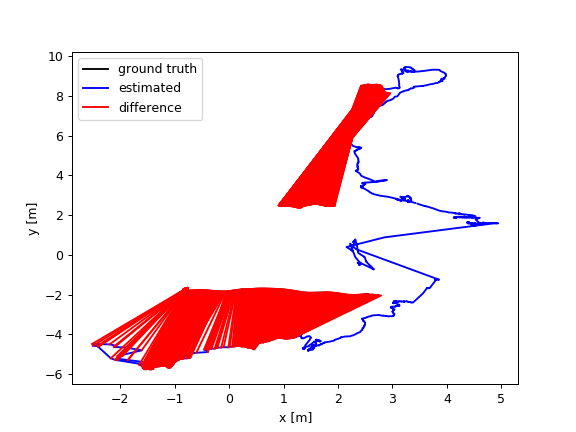
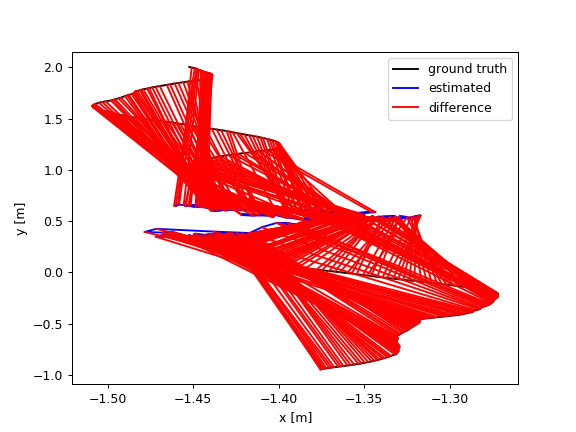
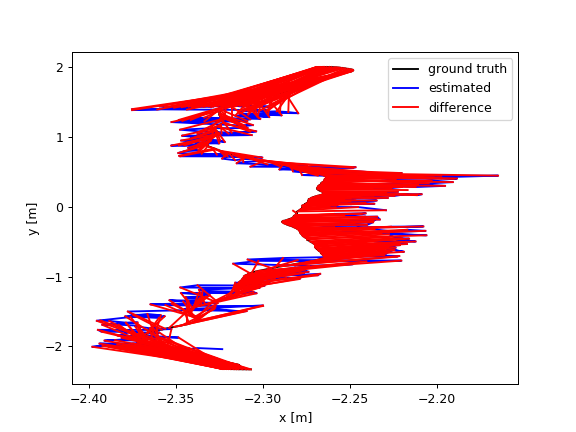
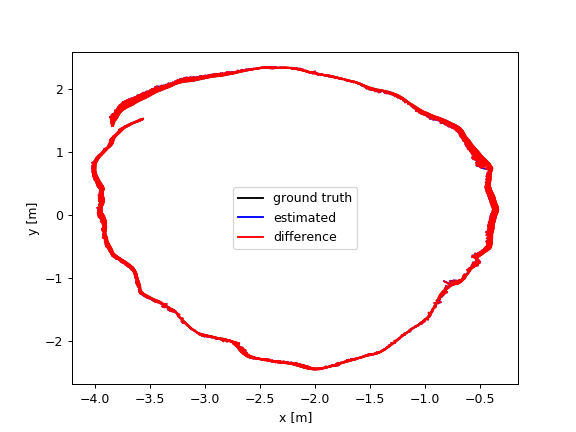
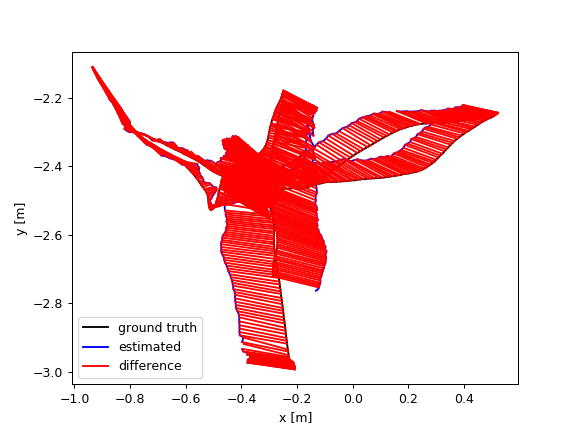
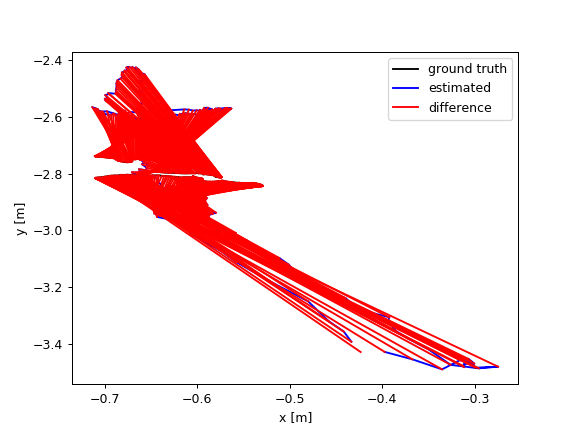
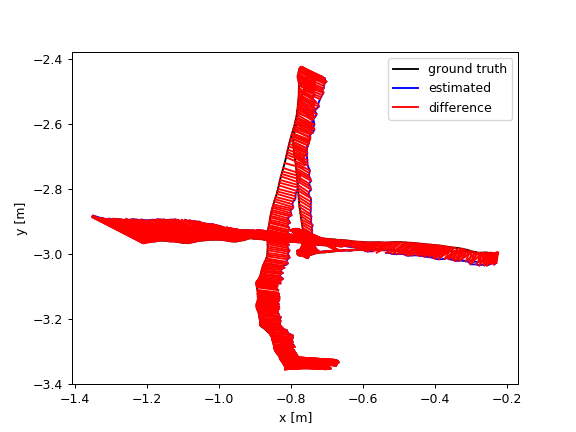
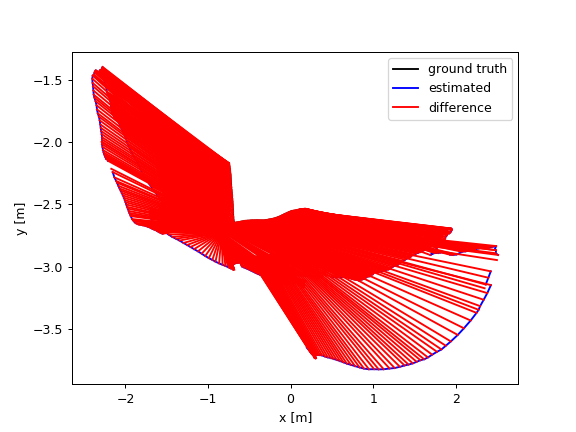
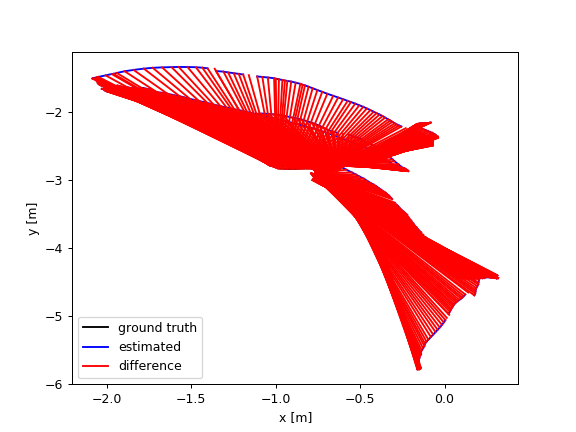
1.ATE(絶対軌跡誤差)を求めるには、下記コマンド(例)でrgbd_benchmark_toolsのevaluate_ate.pyを実行します。Python2.7.xを用います。
python evaluate_ate.py D:\TUM\rgbd_dataset_freiburg1_360\groundtruth.txt D:\TUM\rgbd_dataset_freiburg1_360\HybridRGB-DOdometryResult.txt --plot D:\TUM\rgbd_dataset_freiburg1_360\HybridRGB-DOdometryResult.png --verbose > D:\TUM\rgbd_dataset_freiburg1_360\HybridRGB-DOdometryEval.txt
2.各シーンについてATEを求めます。
# evaluate_ate_auto.py
import subprocess
import glob

dirnames = glob.glob("D:/TUM/*/")

# python evaluate_ate.py D:\TUM\rgbd_dataset_freiburg1_desk\groundtruth.txt D:\TUM\rgbd_dataset_freiburg1_desk\HybridRGB-DOdometryResult.txt --plot D:\TUM\rgbd_dataset_freiburg1_desk\HybridRGB-DOdometryResult.png --verbose > D:\TUM\rgbd_dataset_freiburg1_desk\HybridRGB-DOdometryEval.txt
for dirname in dirnames:
    print(dirname)
    groundtruth = dirname + "groundtruth.txt"
    result = dirname + "HybridRGB-DOdometryResult.txt"
    png = dirname + "HybridRGB-DOdometryResult.png"
    evaluation = dirname + "HybridRGB-DOdometryEval.txt"
    res = subprocess.call("python evaluate_ate.py " + groundtruth + " " + result + " --plot " + png + " --verbose > " + evaluation, shell=True )
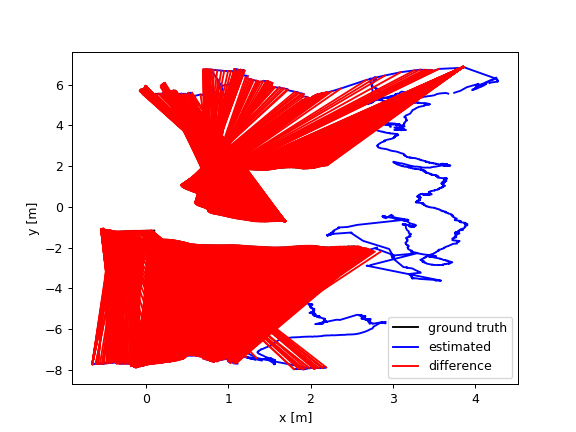
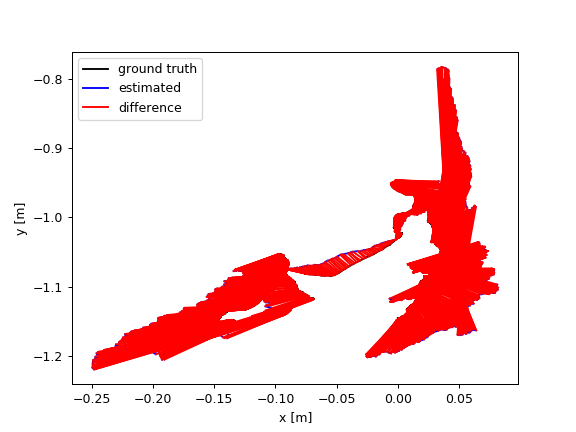
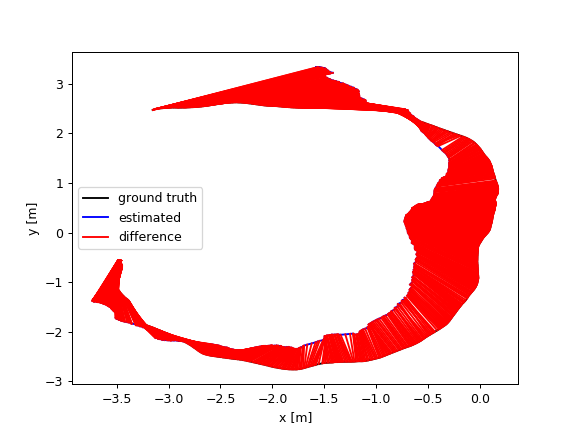
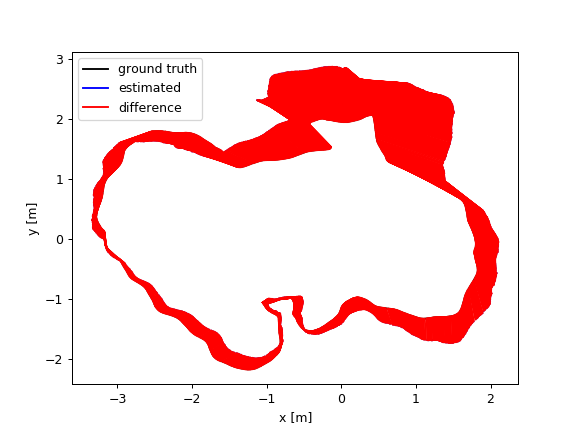
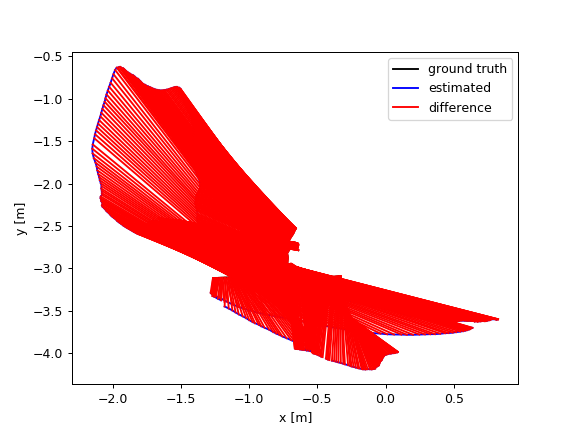
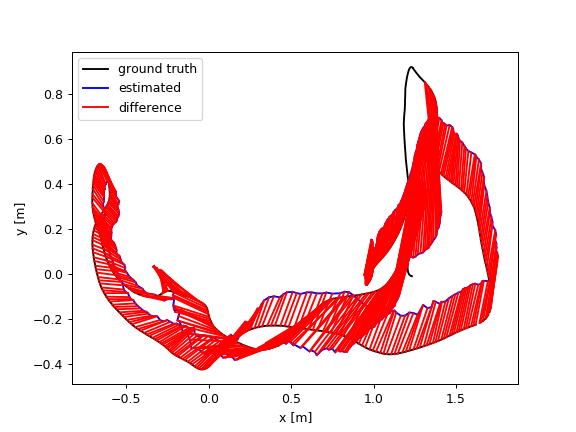
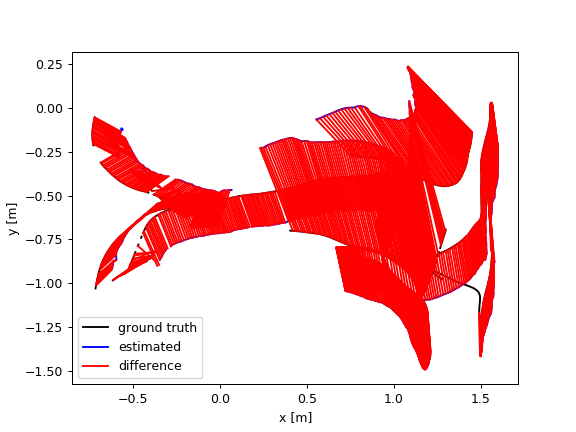
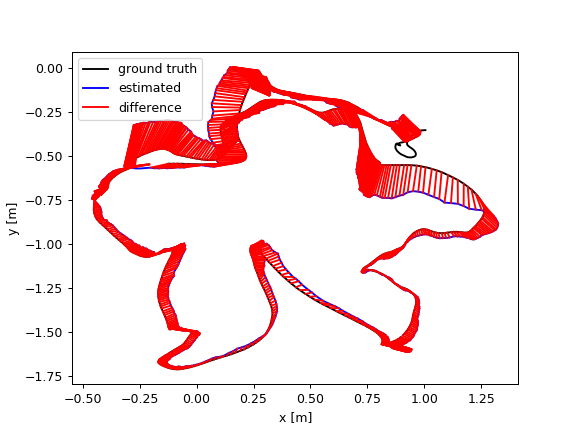
3.各シーンのATEの結果です。
| a | b | c |
|---|---|---|
| freiburg1_360 | freiburg1_desk | freiburg1_desk2 |
 |
 |
 |
| freiburg1_floor | freiburg1_plant | freiburg1_room |
 |
 |
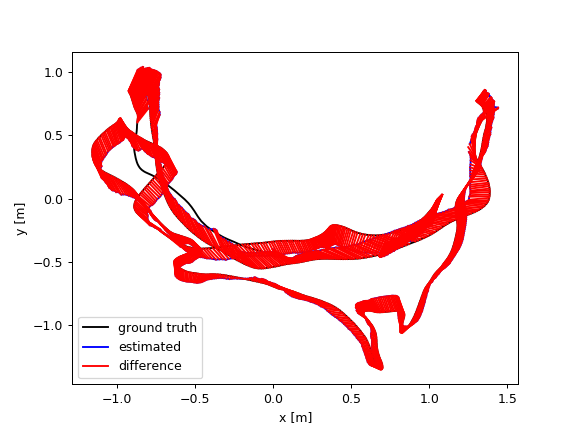 |
| freiburg1_rpy | freiburg1_teddy | freiburg1_xyz |
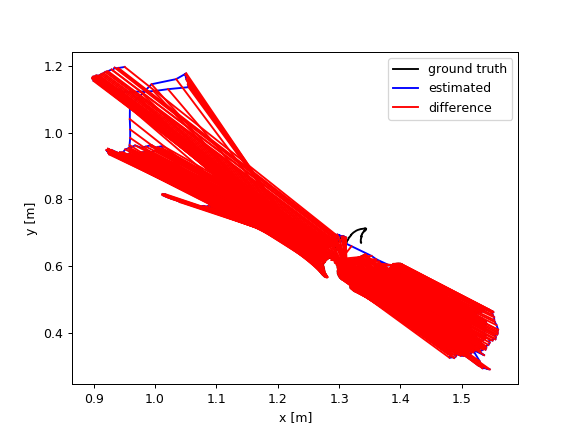 |
 |
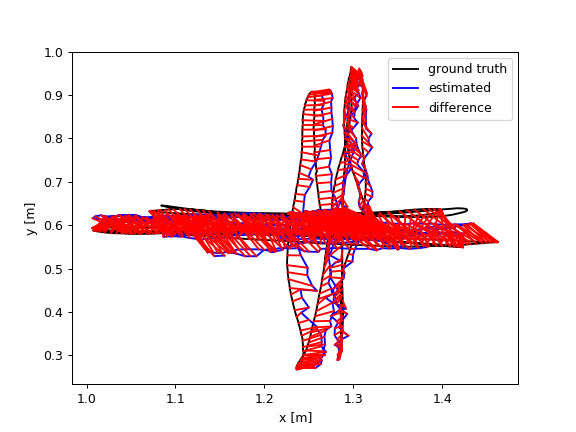 |
まとめ
- TUM RGB-D SLAM Dataset and Benchmarkの導入をしました。
- Open3DのRGB-D Odometryを用いてカメラの軌跡を求めるプログラムを作成しました。
- 評価ツールを用いて、ATEの結果をまとめました。
- これでSLAMの評価ができるようになりました。

