はじめに
SharePoint にリストを作成する手順を説明していきます!
手順
1. Micosoft365 にサインイン
2. Share Point を開く
左側のメニューから Share Point を選択しリストを作成したいサイトを開きます。

3. リストを作成
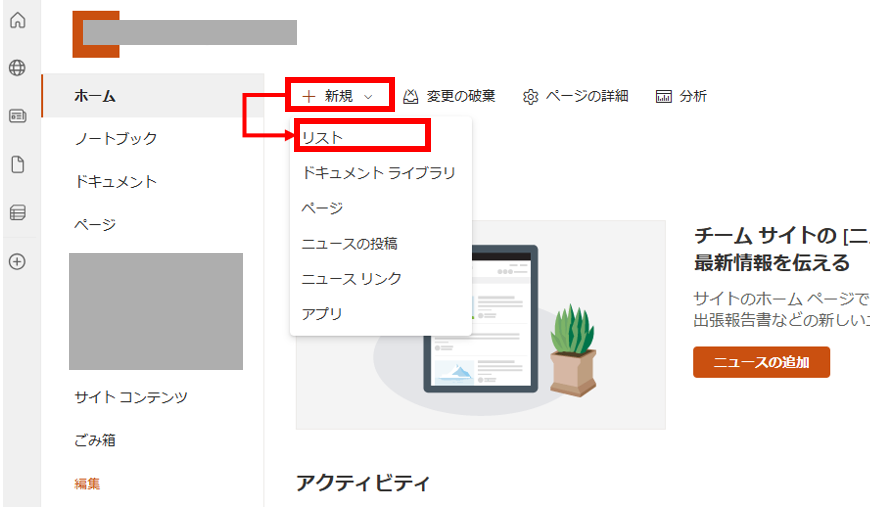
サイトのホームにある + 新規 を選択して リスト を選びます。
以下のいずれかからリストを作成できます。
今回は 空白のリスト を選択し、リスト名を入力後 作成 を選択します。

4. カラム(列)を追加
追加したいデータの種類を選択します。
種類の選択後、列名を入力し 保存 を選択します。

データの種類例は以下になります。
| 種類 | 使用例 |
|---|---|
| 1行テキスト | 氏名、商品名など |
| 選択肢 | カテゴリ、ステータスなど |
| 日付と時刻 | 申請日や承認日など |
| 複数行テキスト | 備考など |
| ユーザー | 組織内のユーザーまたはグループ名 |
| 数値 | 価格、数量など |
| はい/いいえ | フラグ |
4 の工程を必要列数、繰り返していきます。
5. データを作成してみる
リスト内の + 新しいアイテムを追加 を選択します。

4 の工程で作成した列の入力リストが表示されるので
必要事項を入力したら 保存 を押します。

保存が完了すると以下のように新しくアイテムが追加されました。

さいごに
以上が Share Point でのリストの作成方法になります!
リストが作成できたら Power Apps や Power Automate を活用して
各種申請状況や在庫状況の管理アプリなどを作成していくとデータ管理や業務がスムーズになります!!
Power Automate や Power Apps の連携については随時更新していきます!
ご覧いただきありがとうございました![]()