Introduction
This work is using a high-performance one-board microcomputer called obniz.
I wanted to use it, so I tried this.
I've always wanted to make something with the combination of intelligent microcomputer and Radio-Control model, so I decided to expand the function one by one while enjoying it.
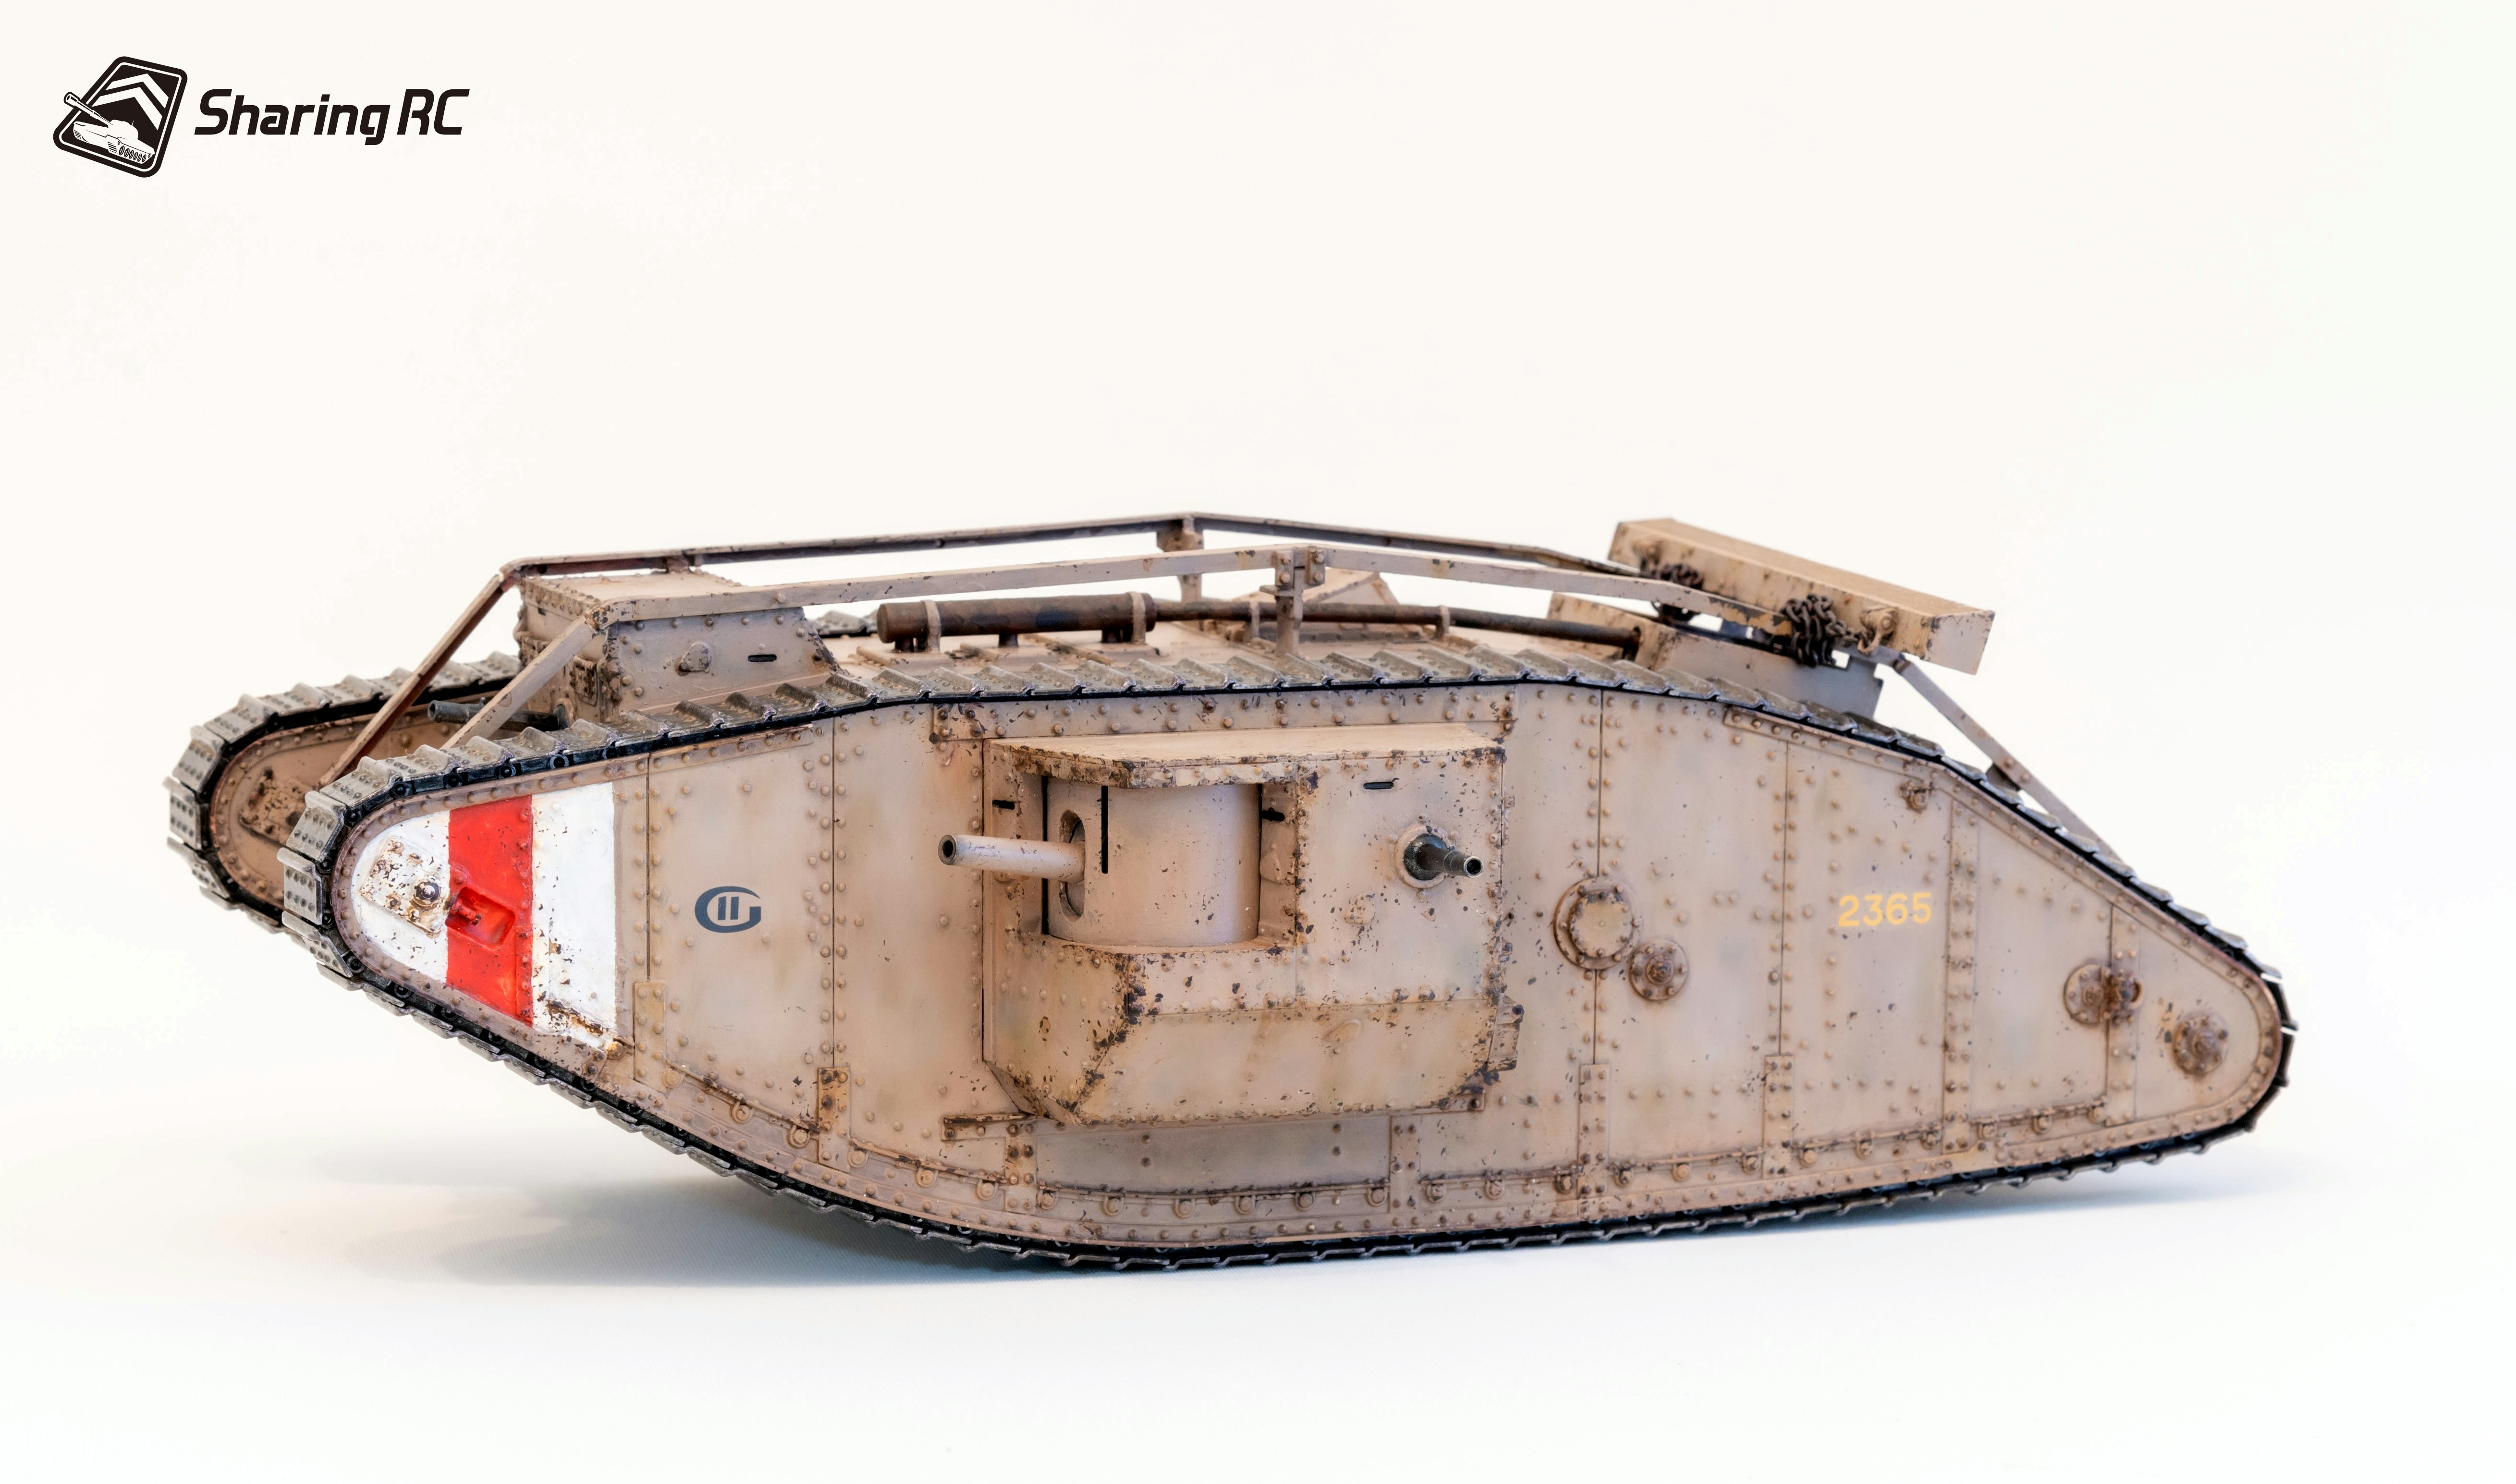
In realizing the specification RC in a selfish flow, because it was one of the policies that do not compromise on the appearance, I Emphasized the realistic appearance of the 1/35 scale tank model of Tamiya.
Basic policy:
- Focus on appearance
- Challenge to the small space of 1/35 scale
- Control the tanks with the tilt and angle of the browser and smartphone
- Realizing the idea of "Sharing Radio-Control"
- Pursuing the specifications I want
Photos
I made also the second tank like this.
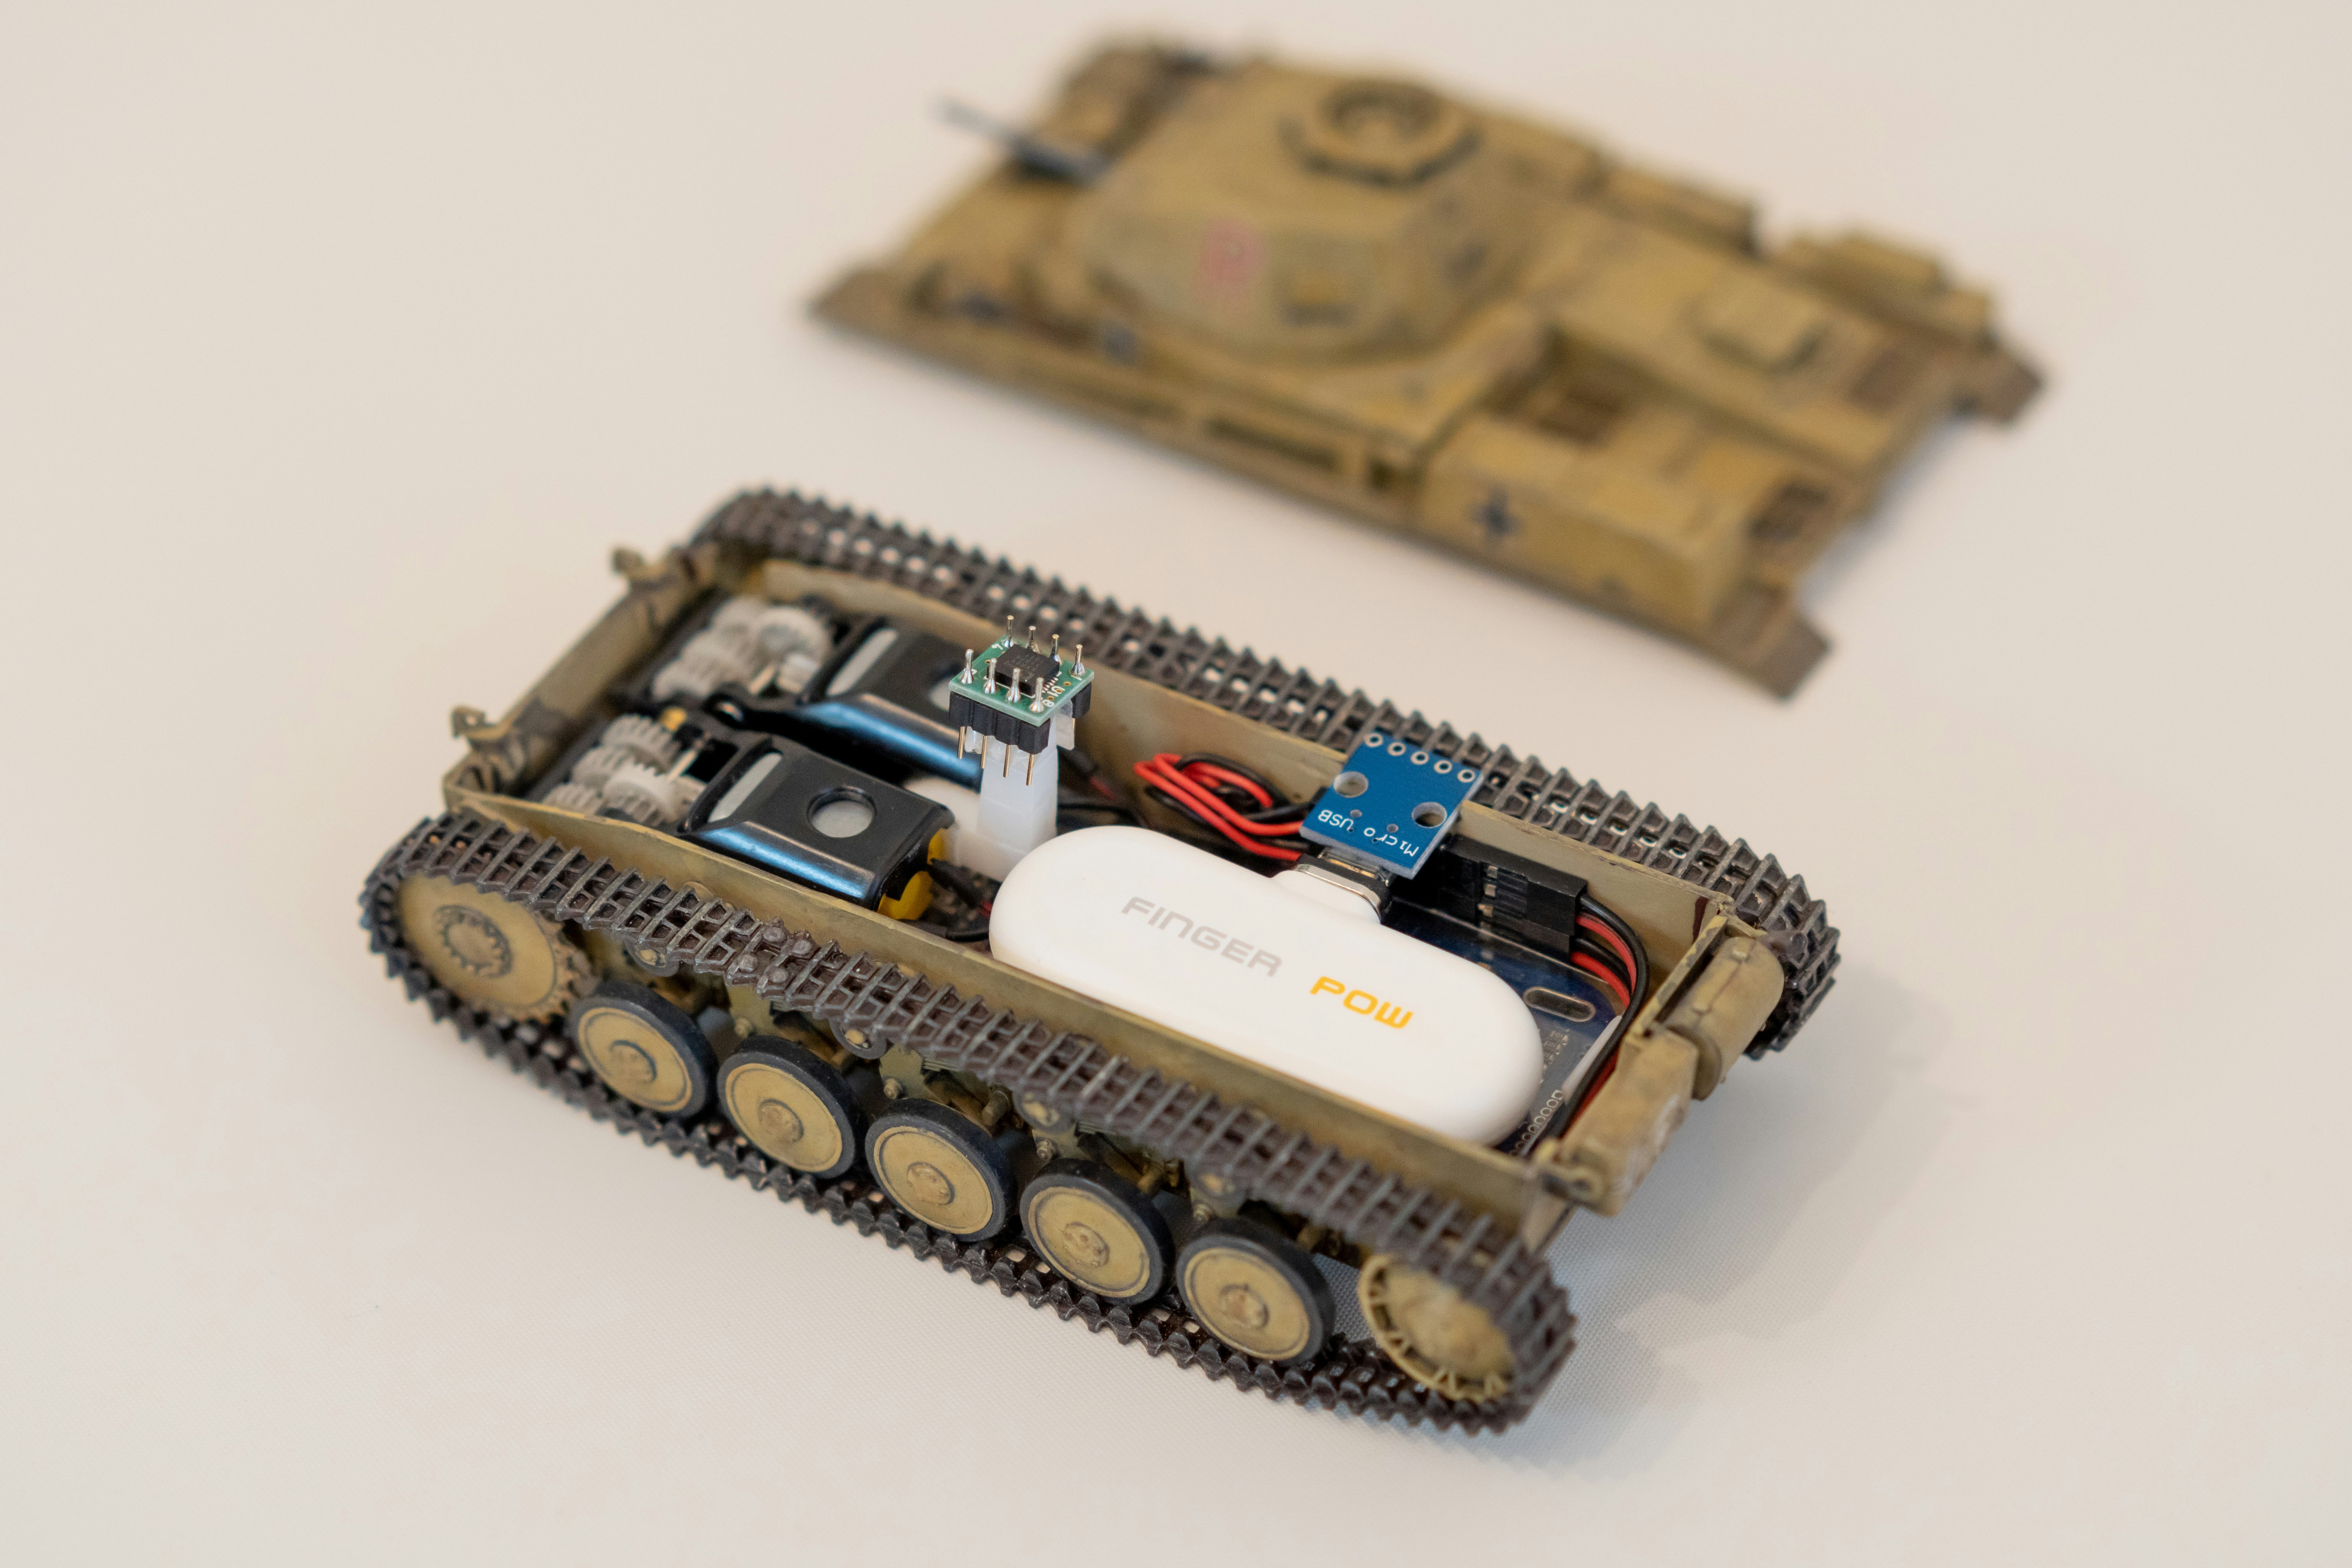
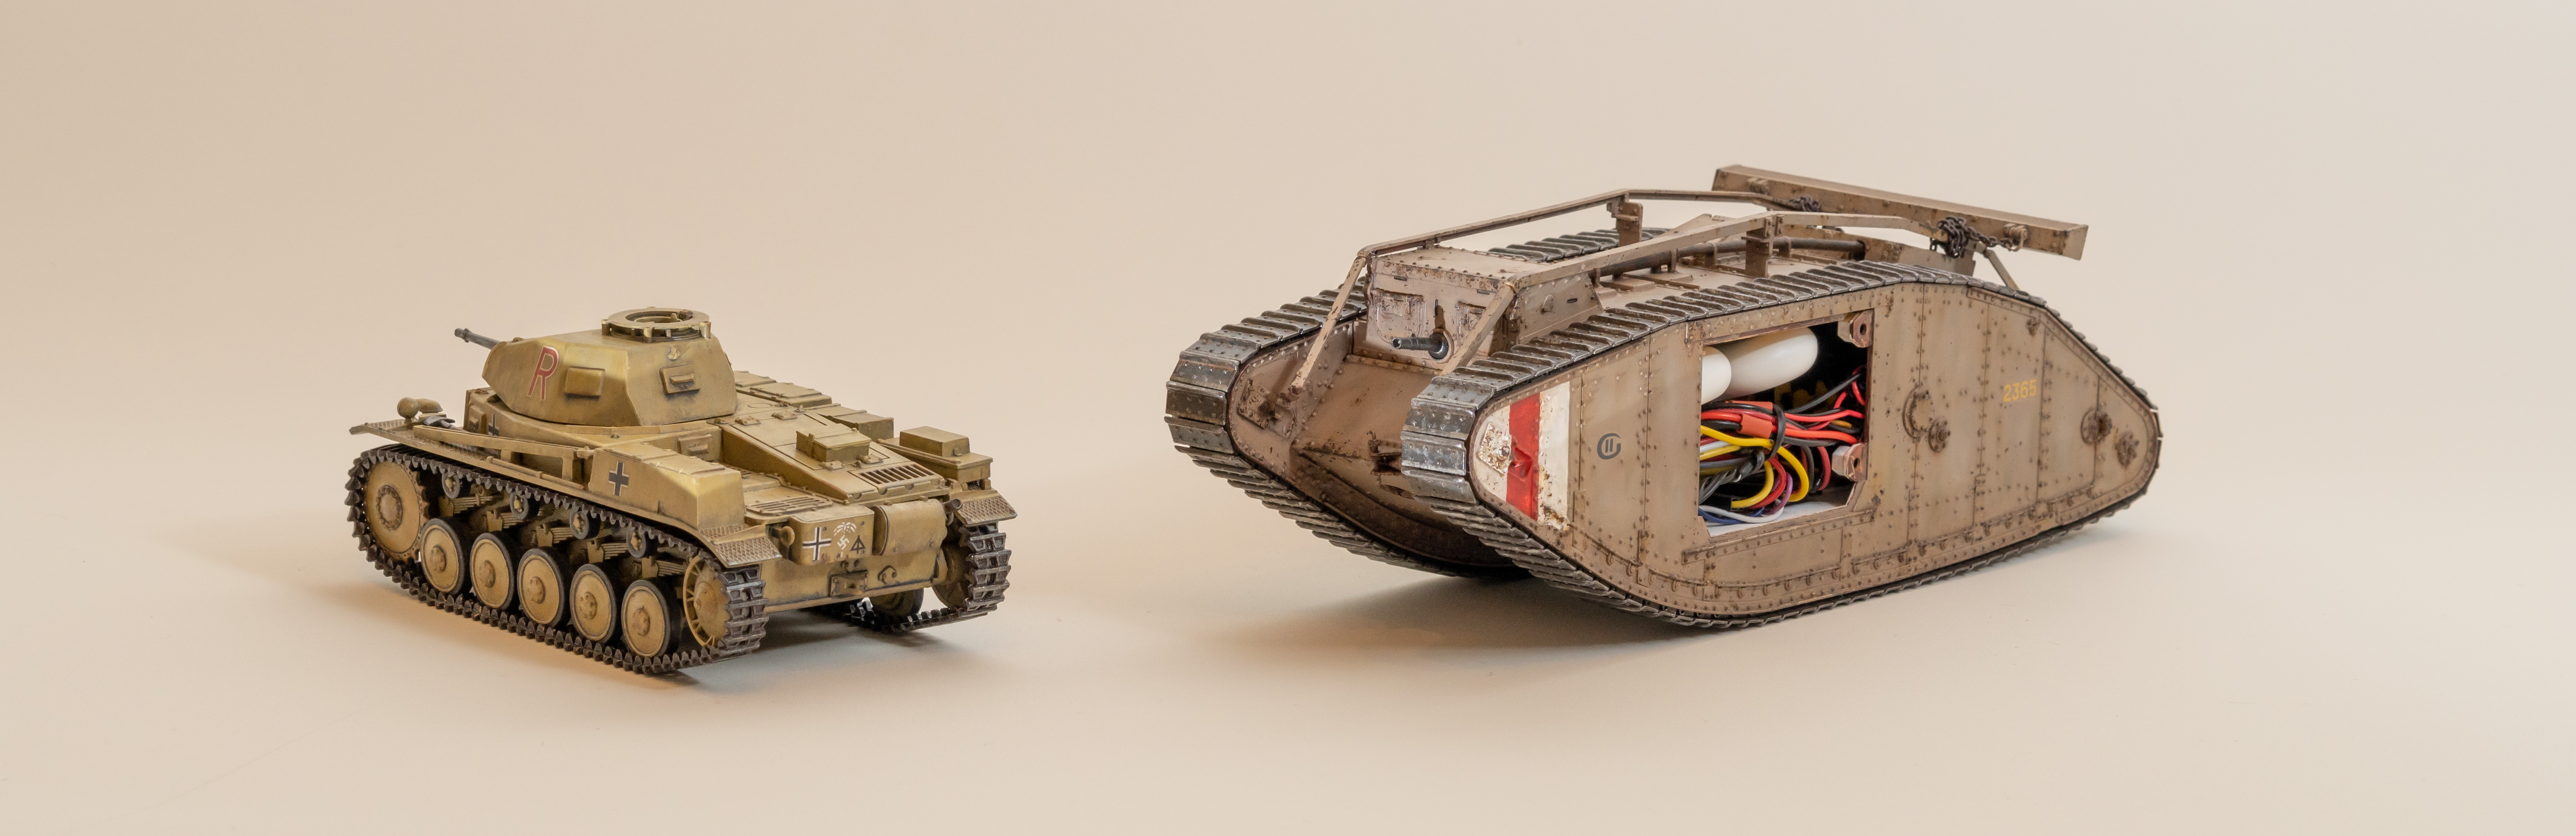
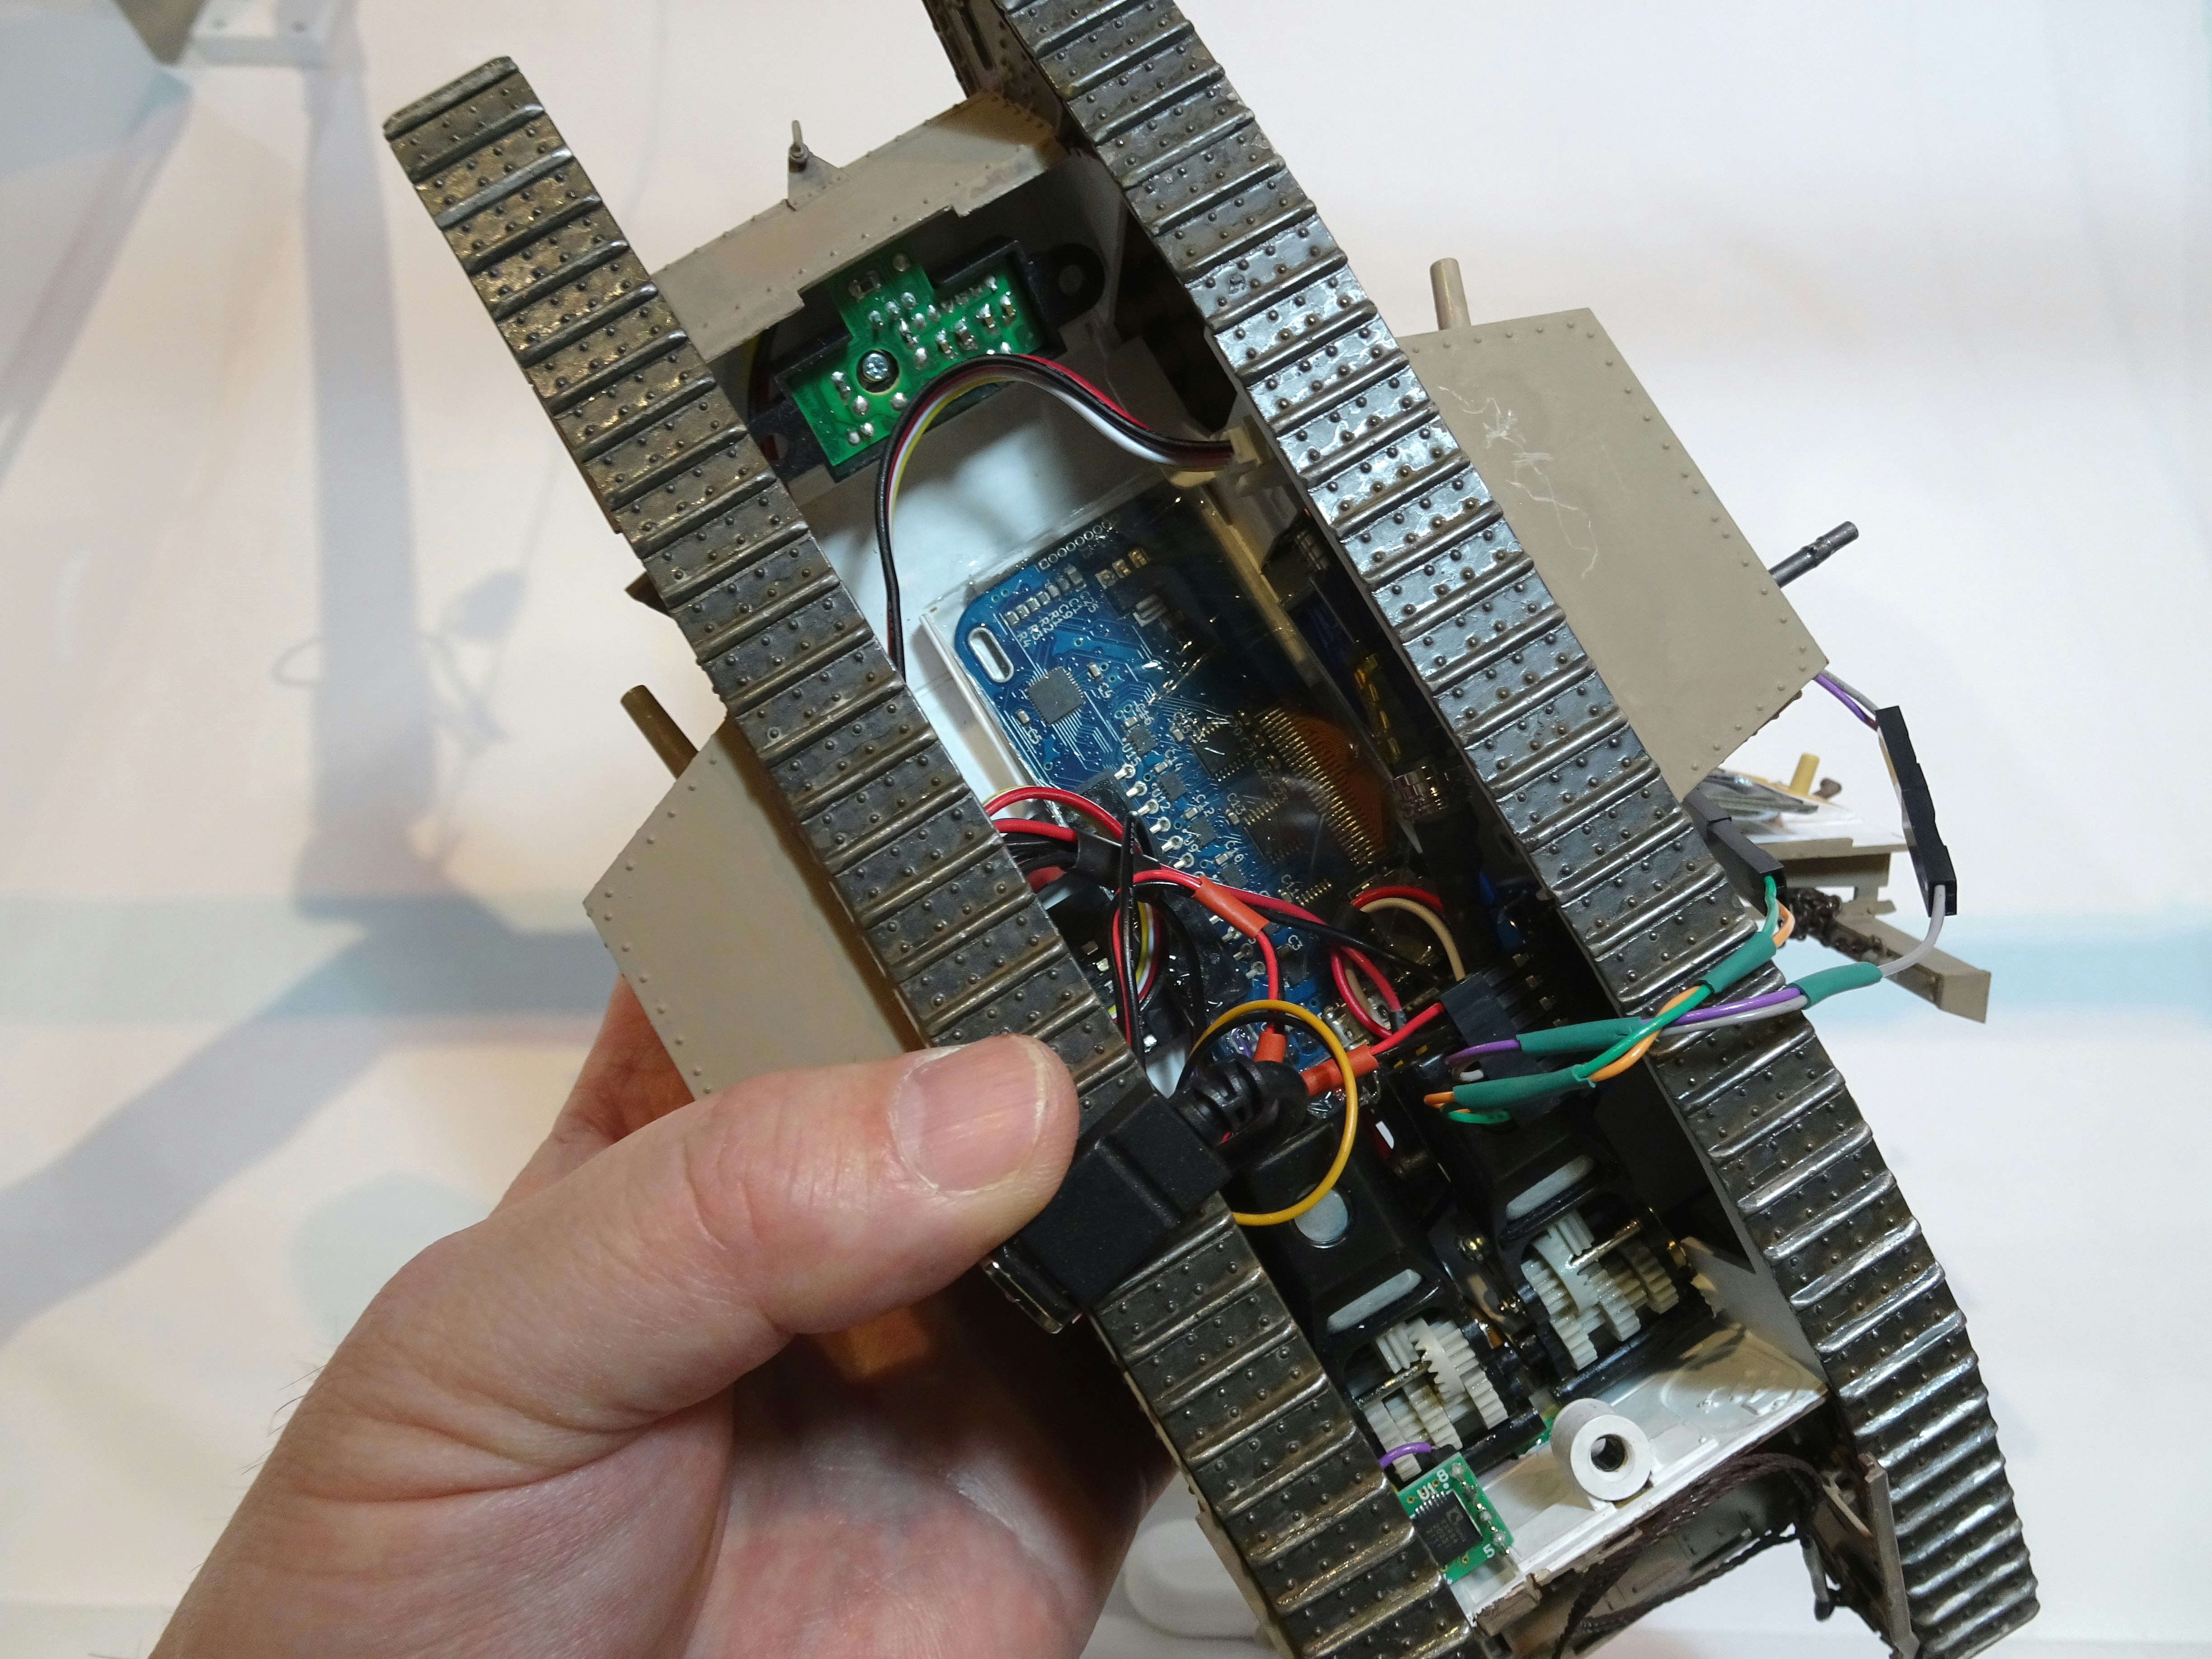
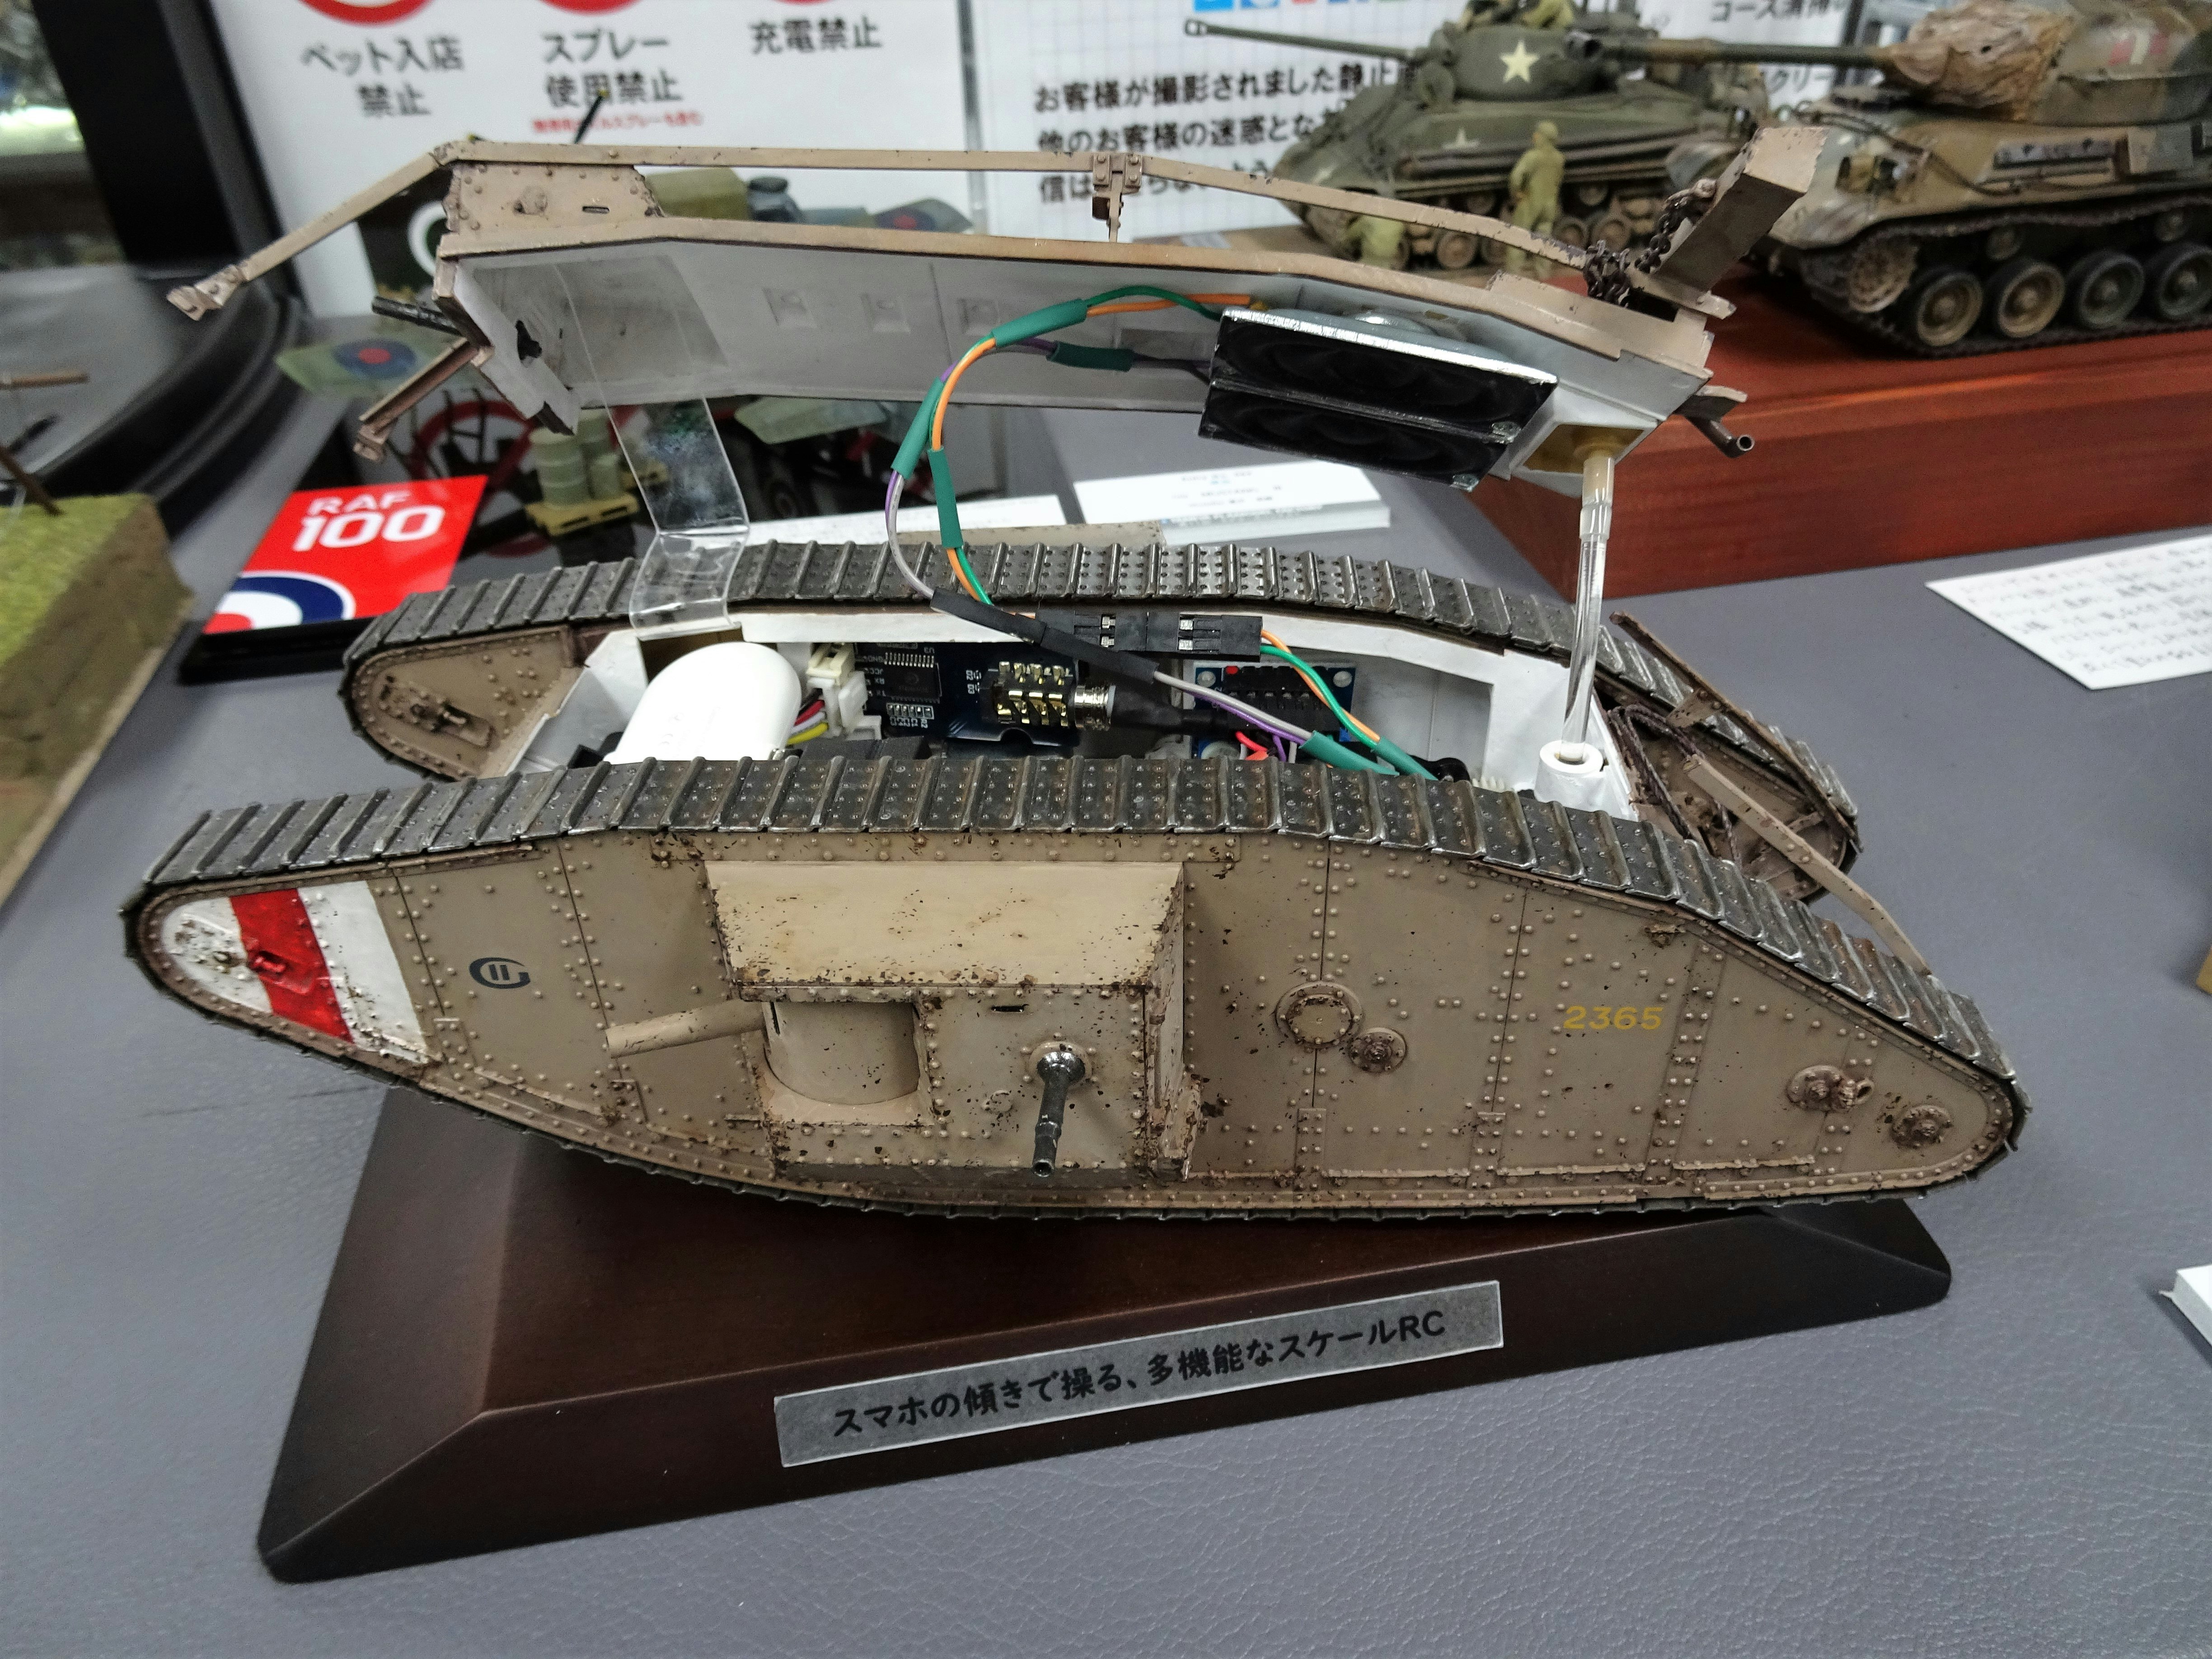
Inside:
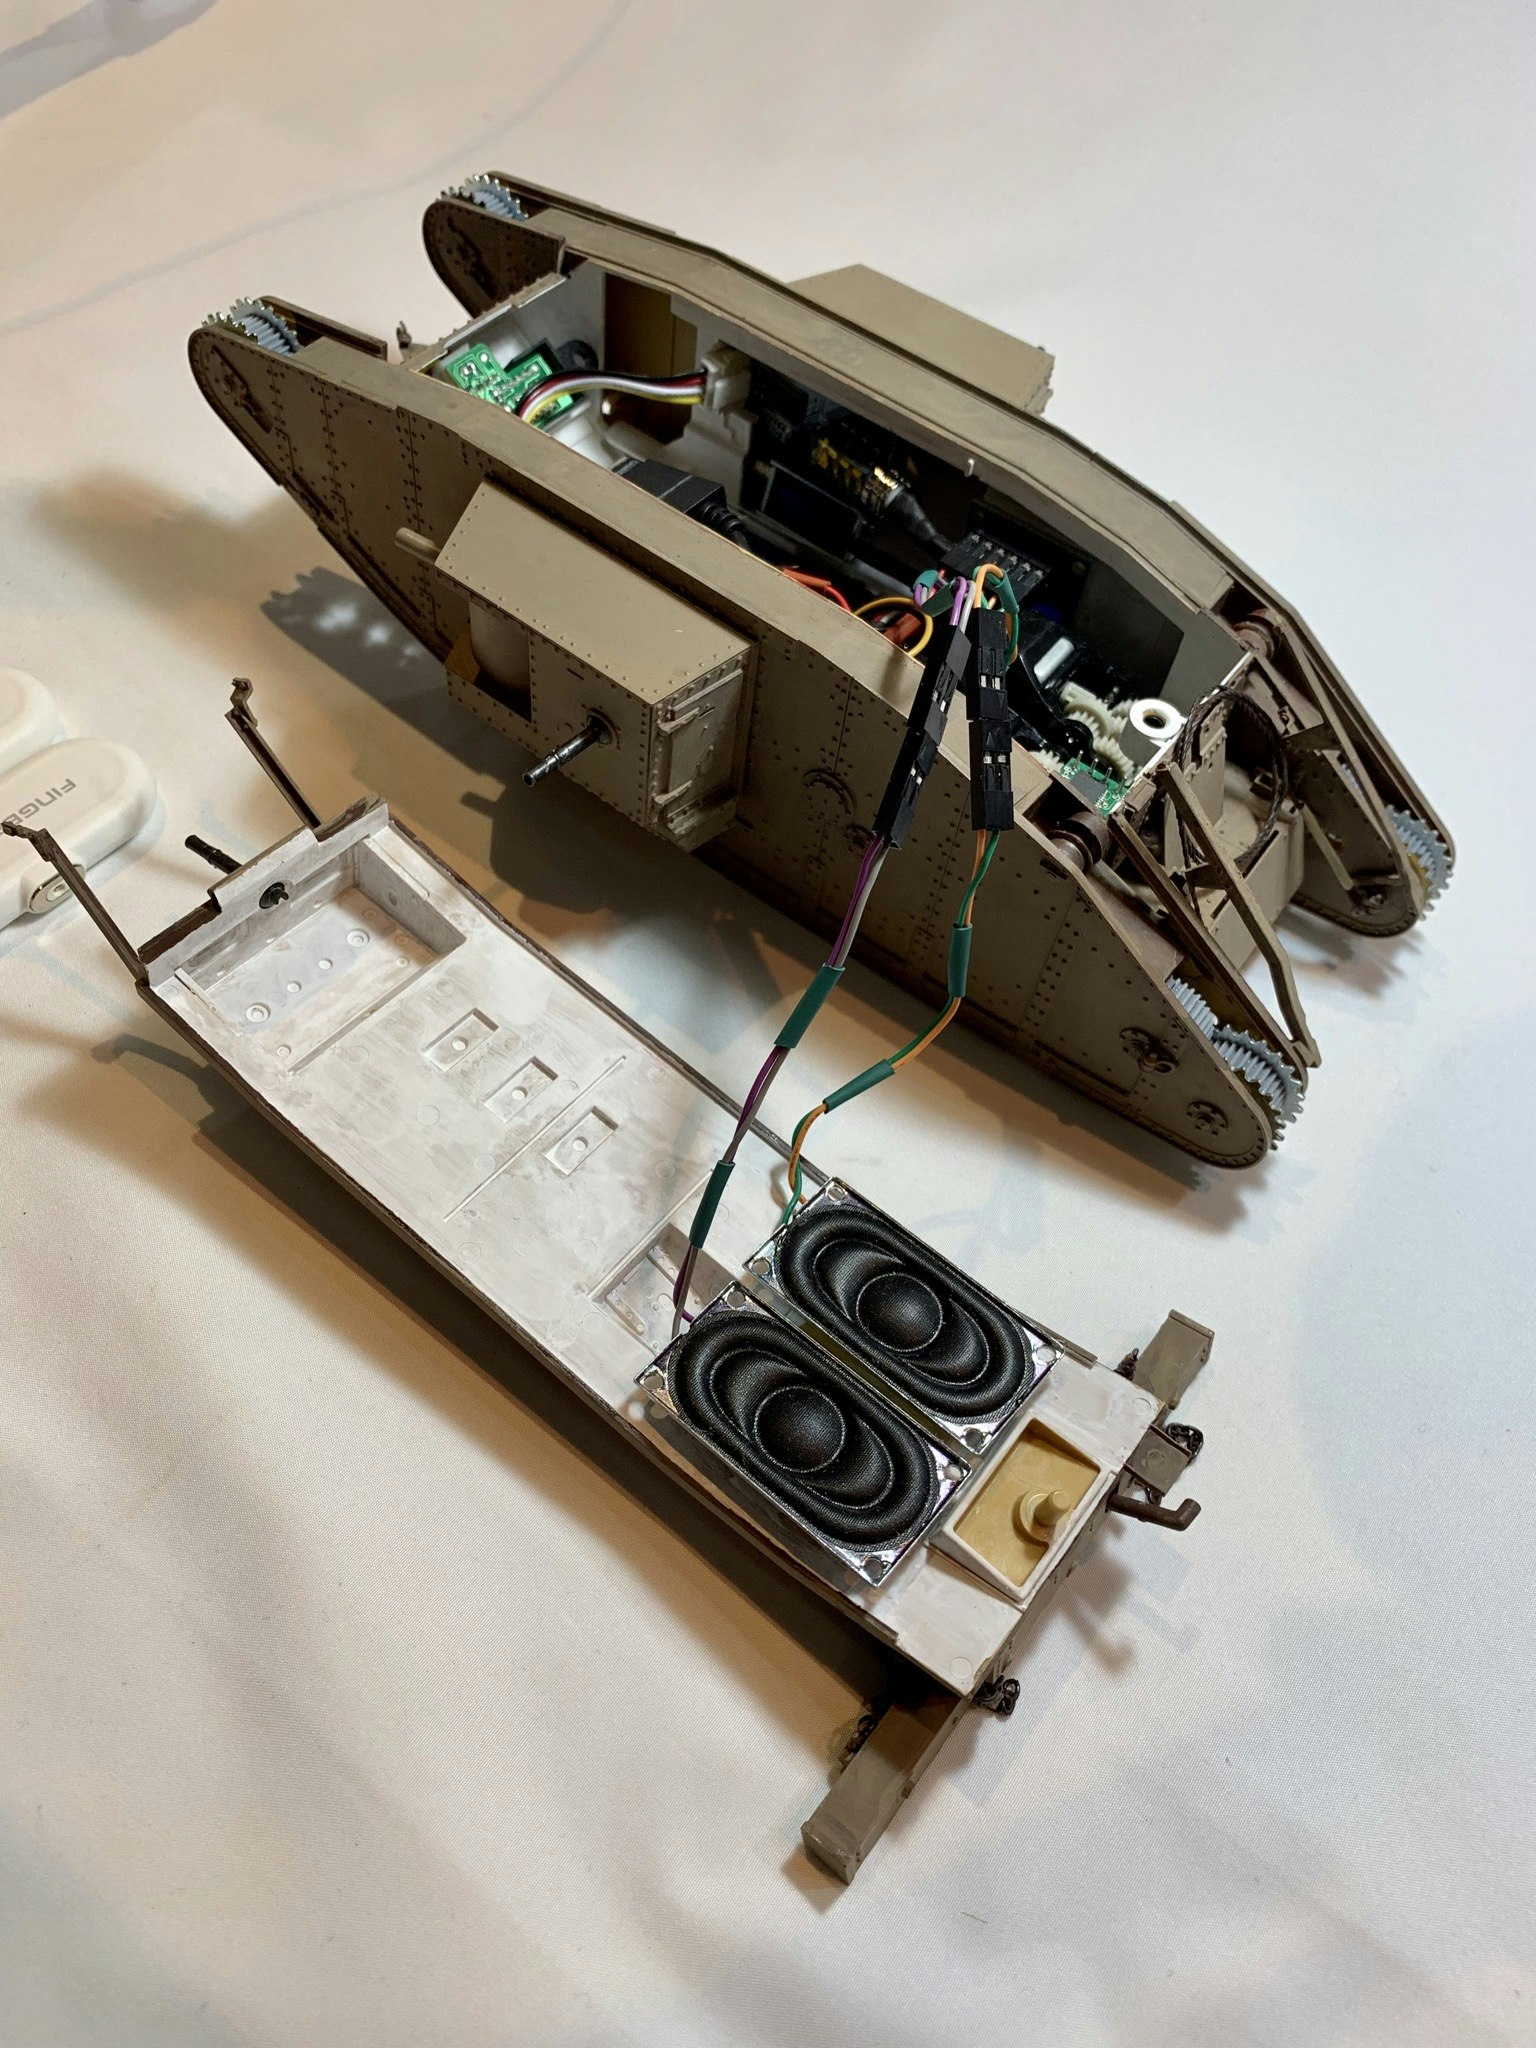
The white oval object is a tiny mobile battery called "Finger Pow".
And the two pins that pop out on top are for connecting to the stereo speakers on the top of the vehicle.
The blue board visible in the center of the vehicle is the "obniz".
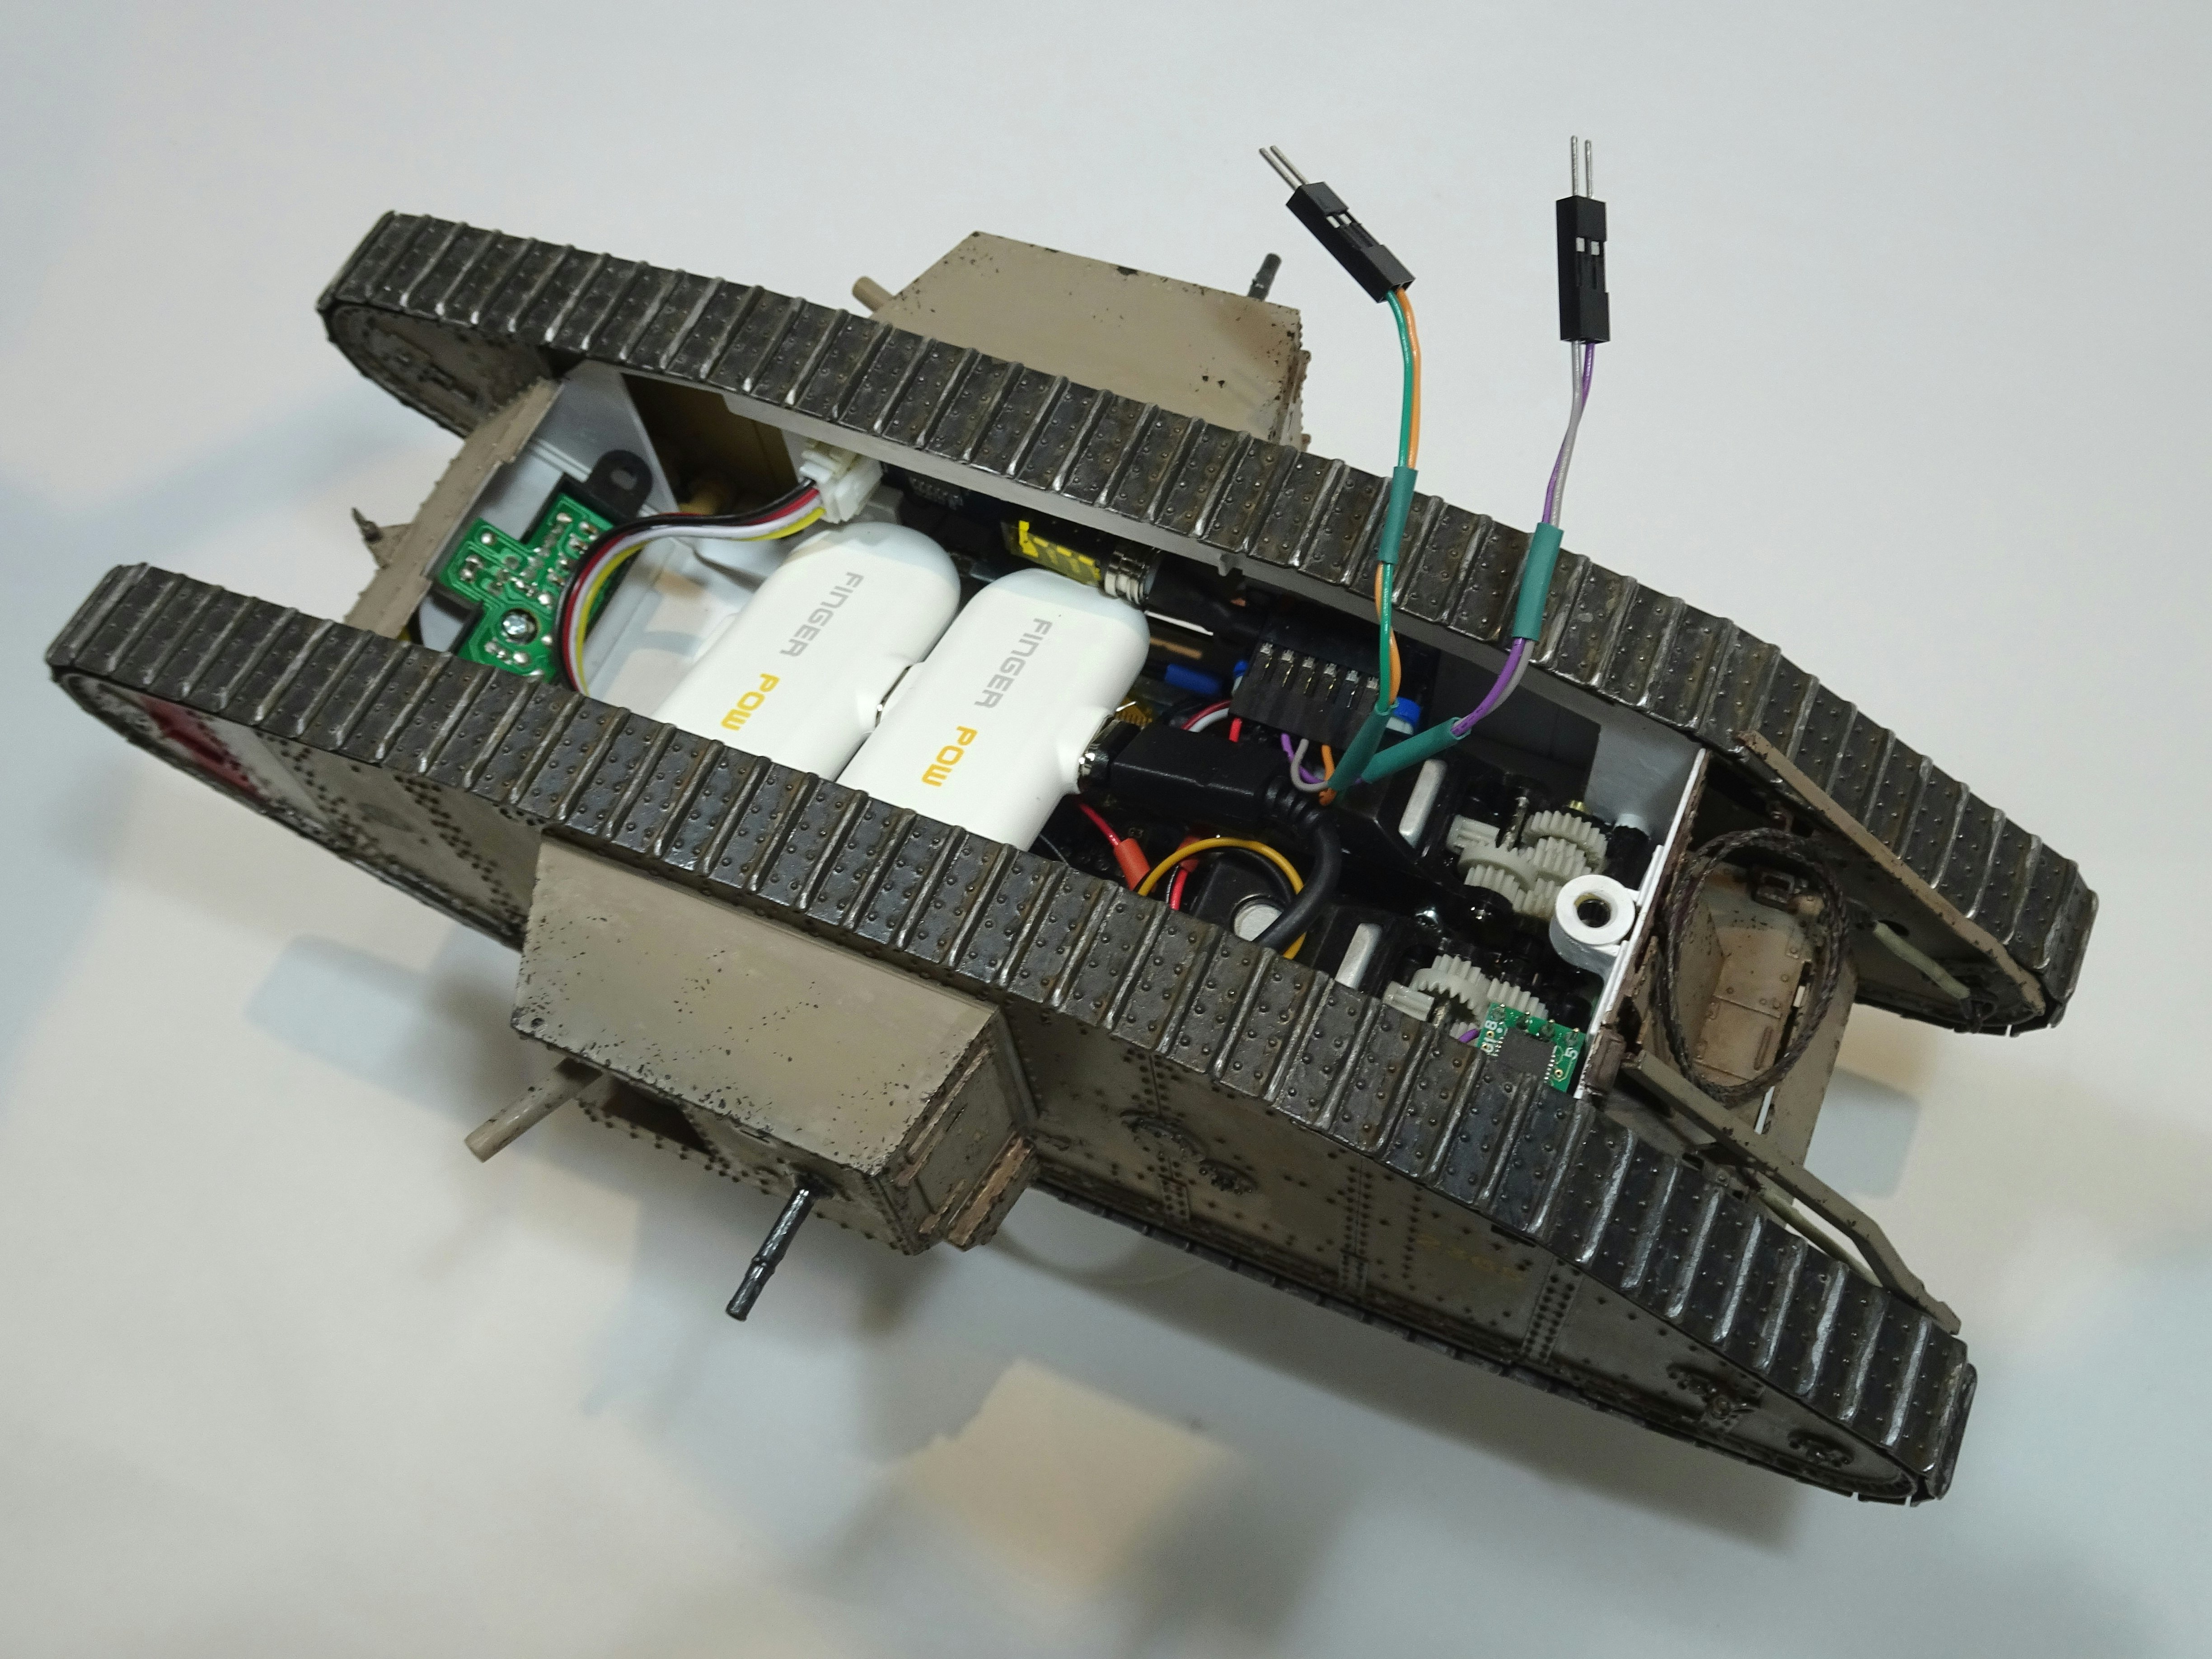
Back side:
You can see the "obniz" display in the center and two holes for each distance sensor in front and rear respectively.

Videos
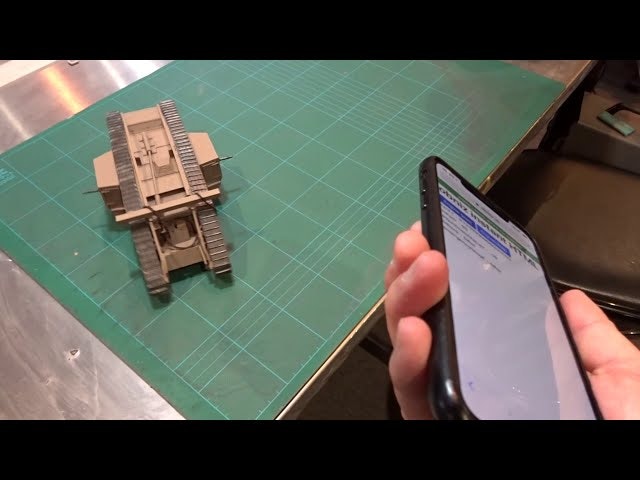
Version 2: Painted version (no sound effects because I forgot to connect the speakers)

Numerous features that I really wanted specifications
This work is equipped with a microcomputer board with ease of use called obniz, I tried to make various specifications to take advantages.
-
As a result of seeking an intuitive operation feel that transcends the GUI, it is now possible to perform forward/backward/left-right movement/spin turn only by the inclination of the smartphone. Furthermore, the output of the motor is adjusted to 0% to 100% in the amount of inclination (angle).
-
The idea of "sharing RC" that anyone in the place can control one vehicle using their smartphone is embodied.
-
Equipped with Three-axis sensor. If the tank detects that it has been turned over, cancel all movements.
-
Equipped with a fall prevention function for playing on a table or desk. Equipped with a distance sensor in front and behind the vehicle, it automatically stops when the edge is detected when moving forward or backward.
-
It has a stereo speaker with a maximum output of 4 watts. The idling sound is played when it is stopped, and the running sound is played at a sampling rate of 44,100Hz / 32 bit when driving. The volume of the running sound also changes in real-time according to the motor output.
-
Equipped with the solenoid. When start/stop/turnover it, I tried to express click sound and feel as motion feedback from the vehicle.
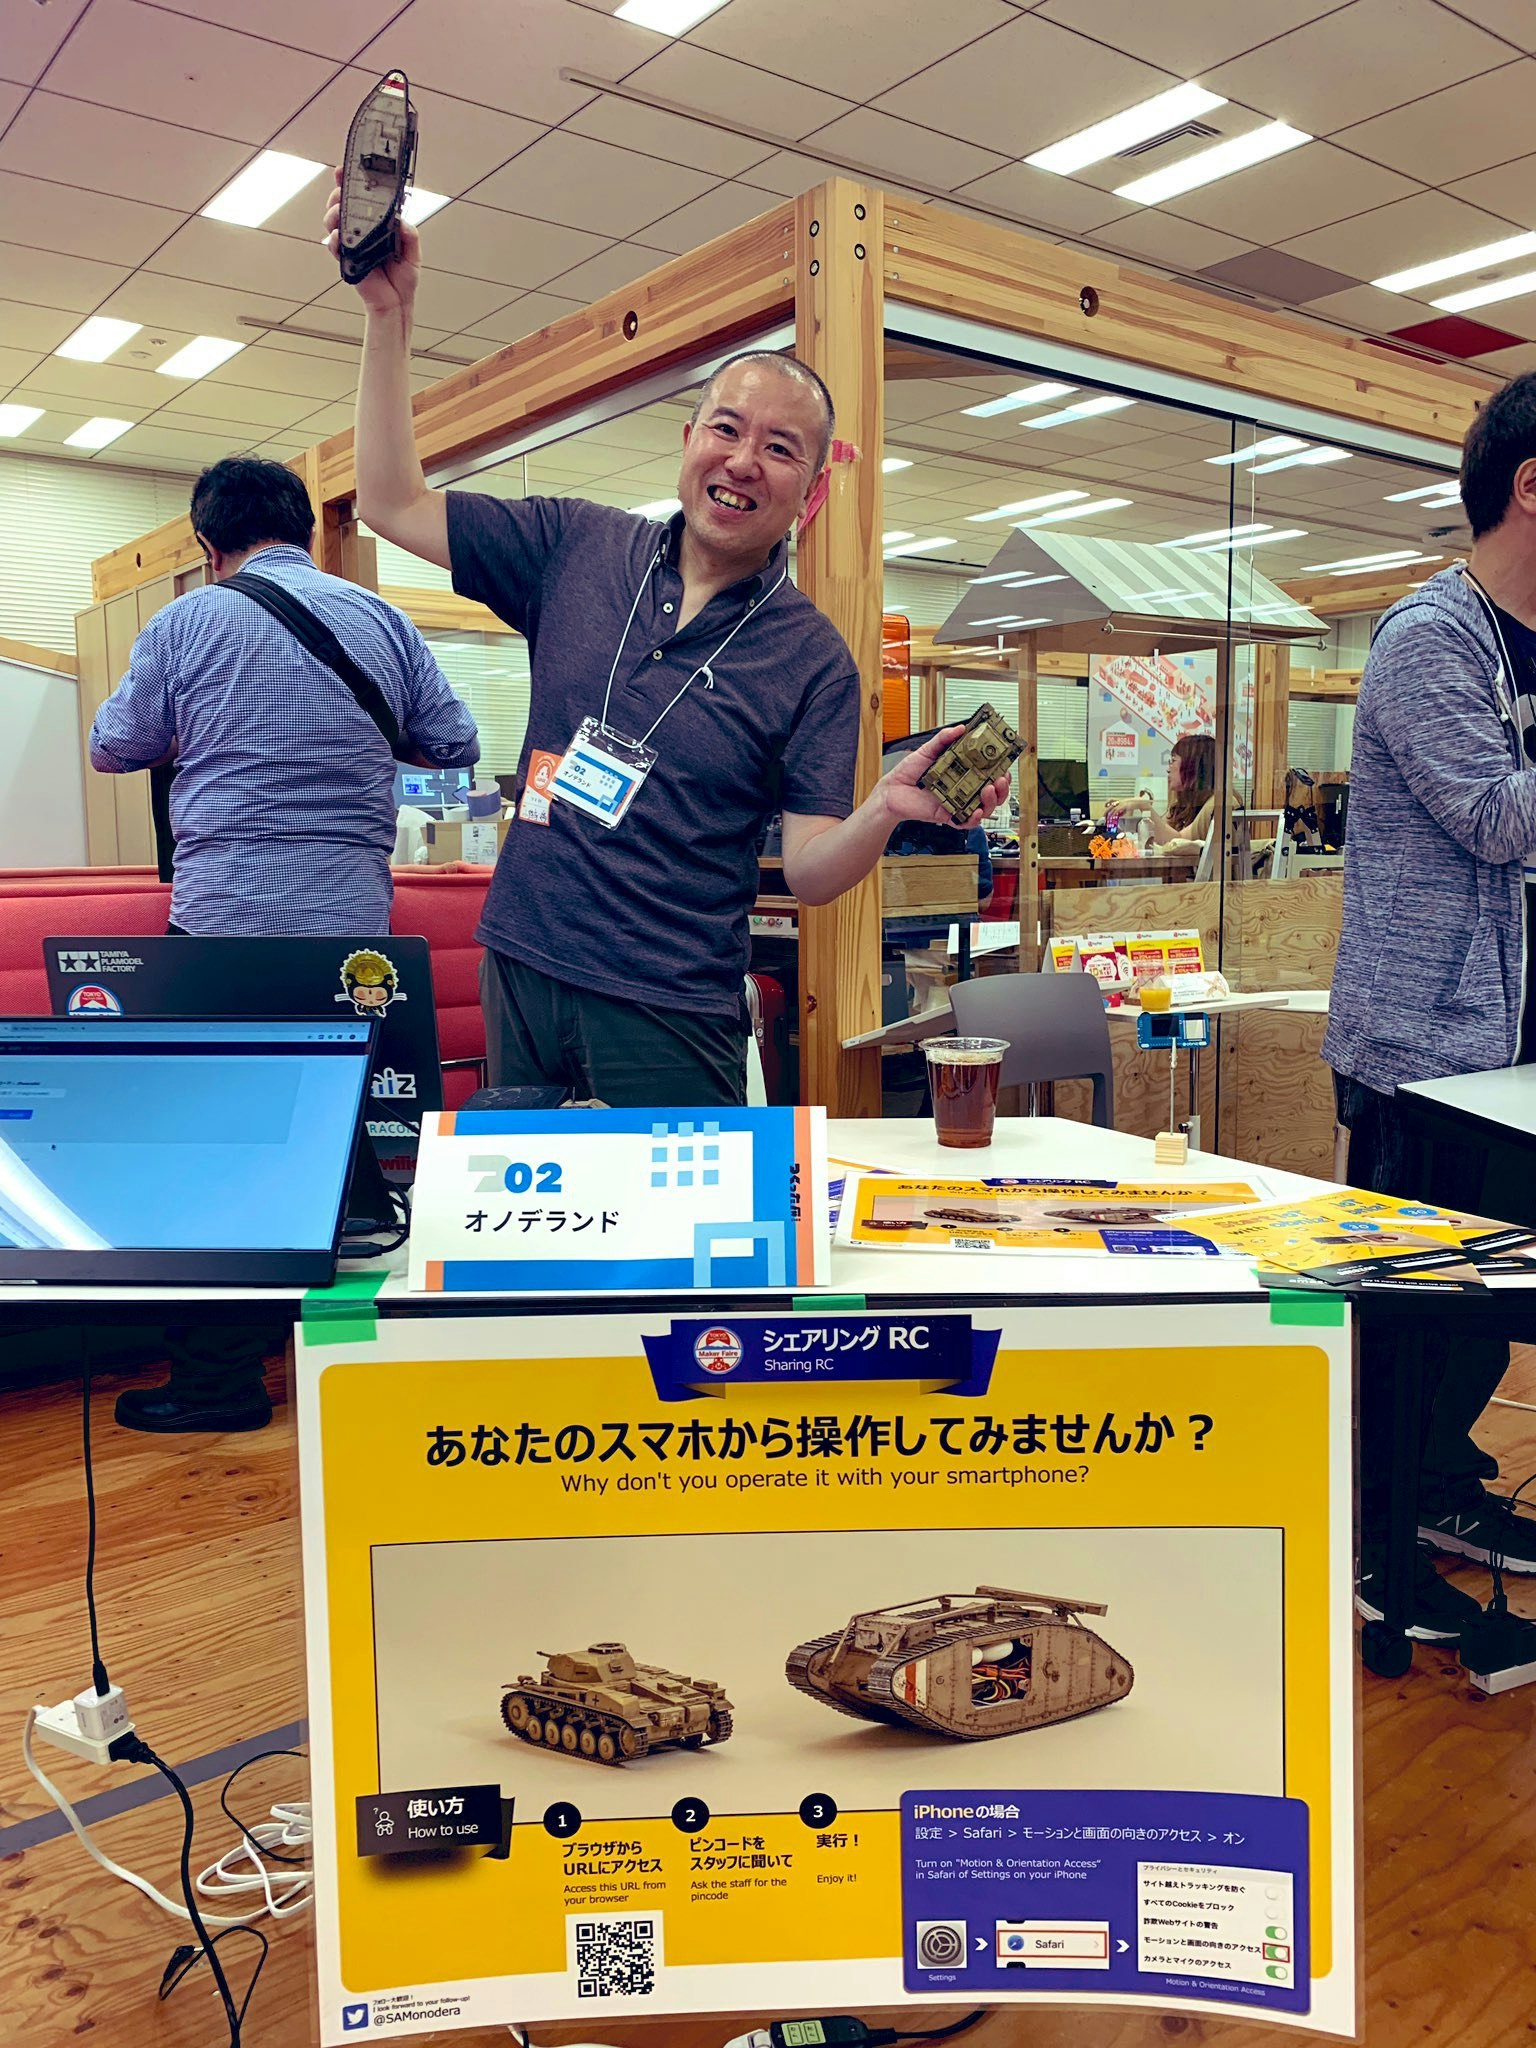
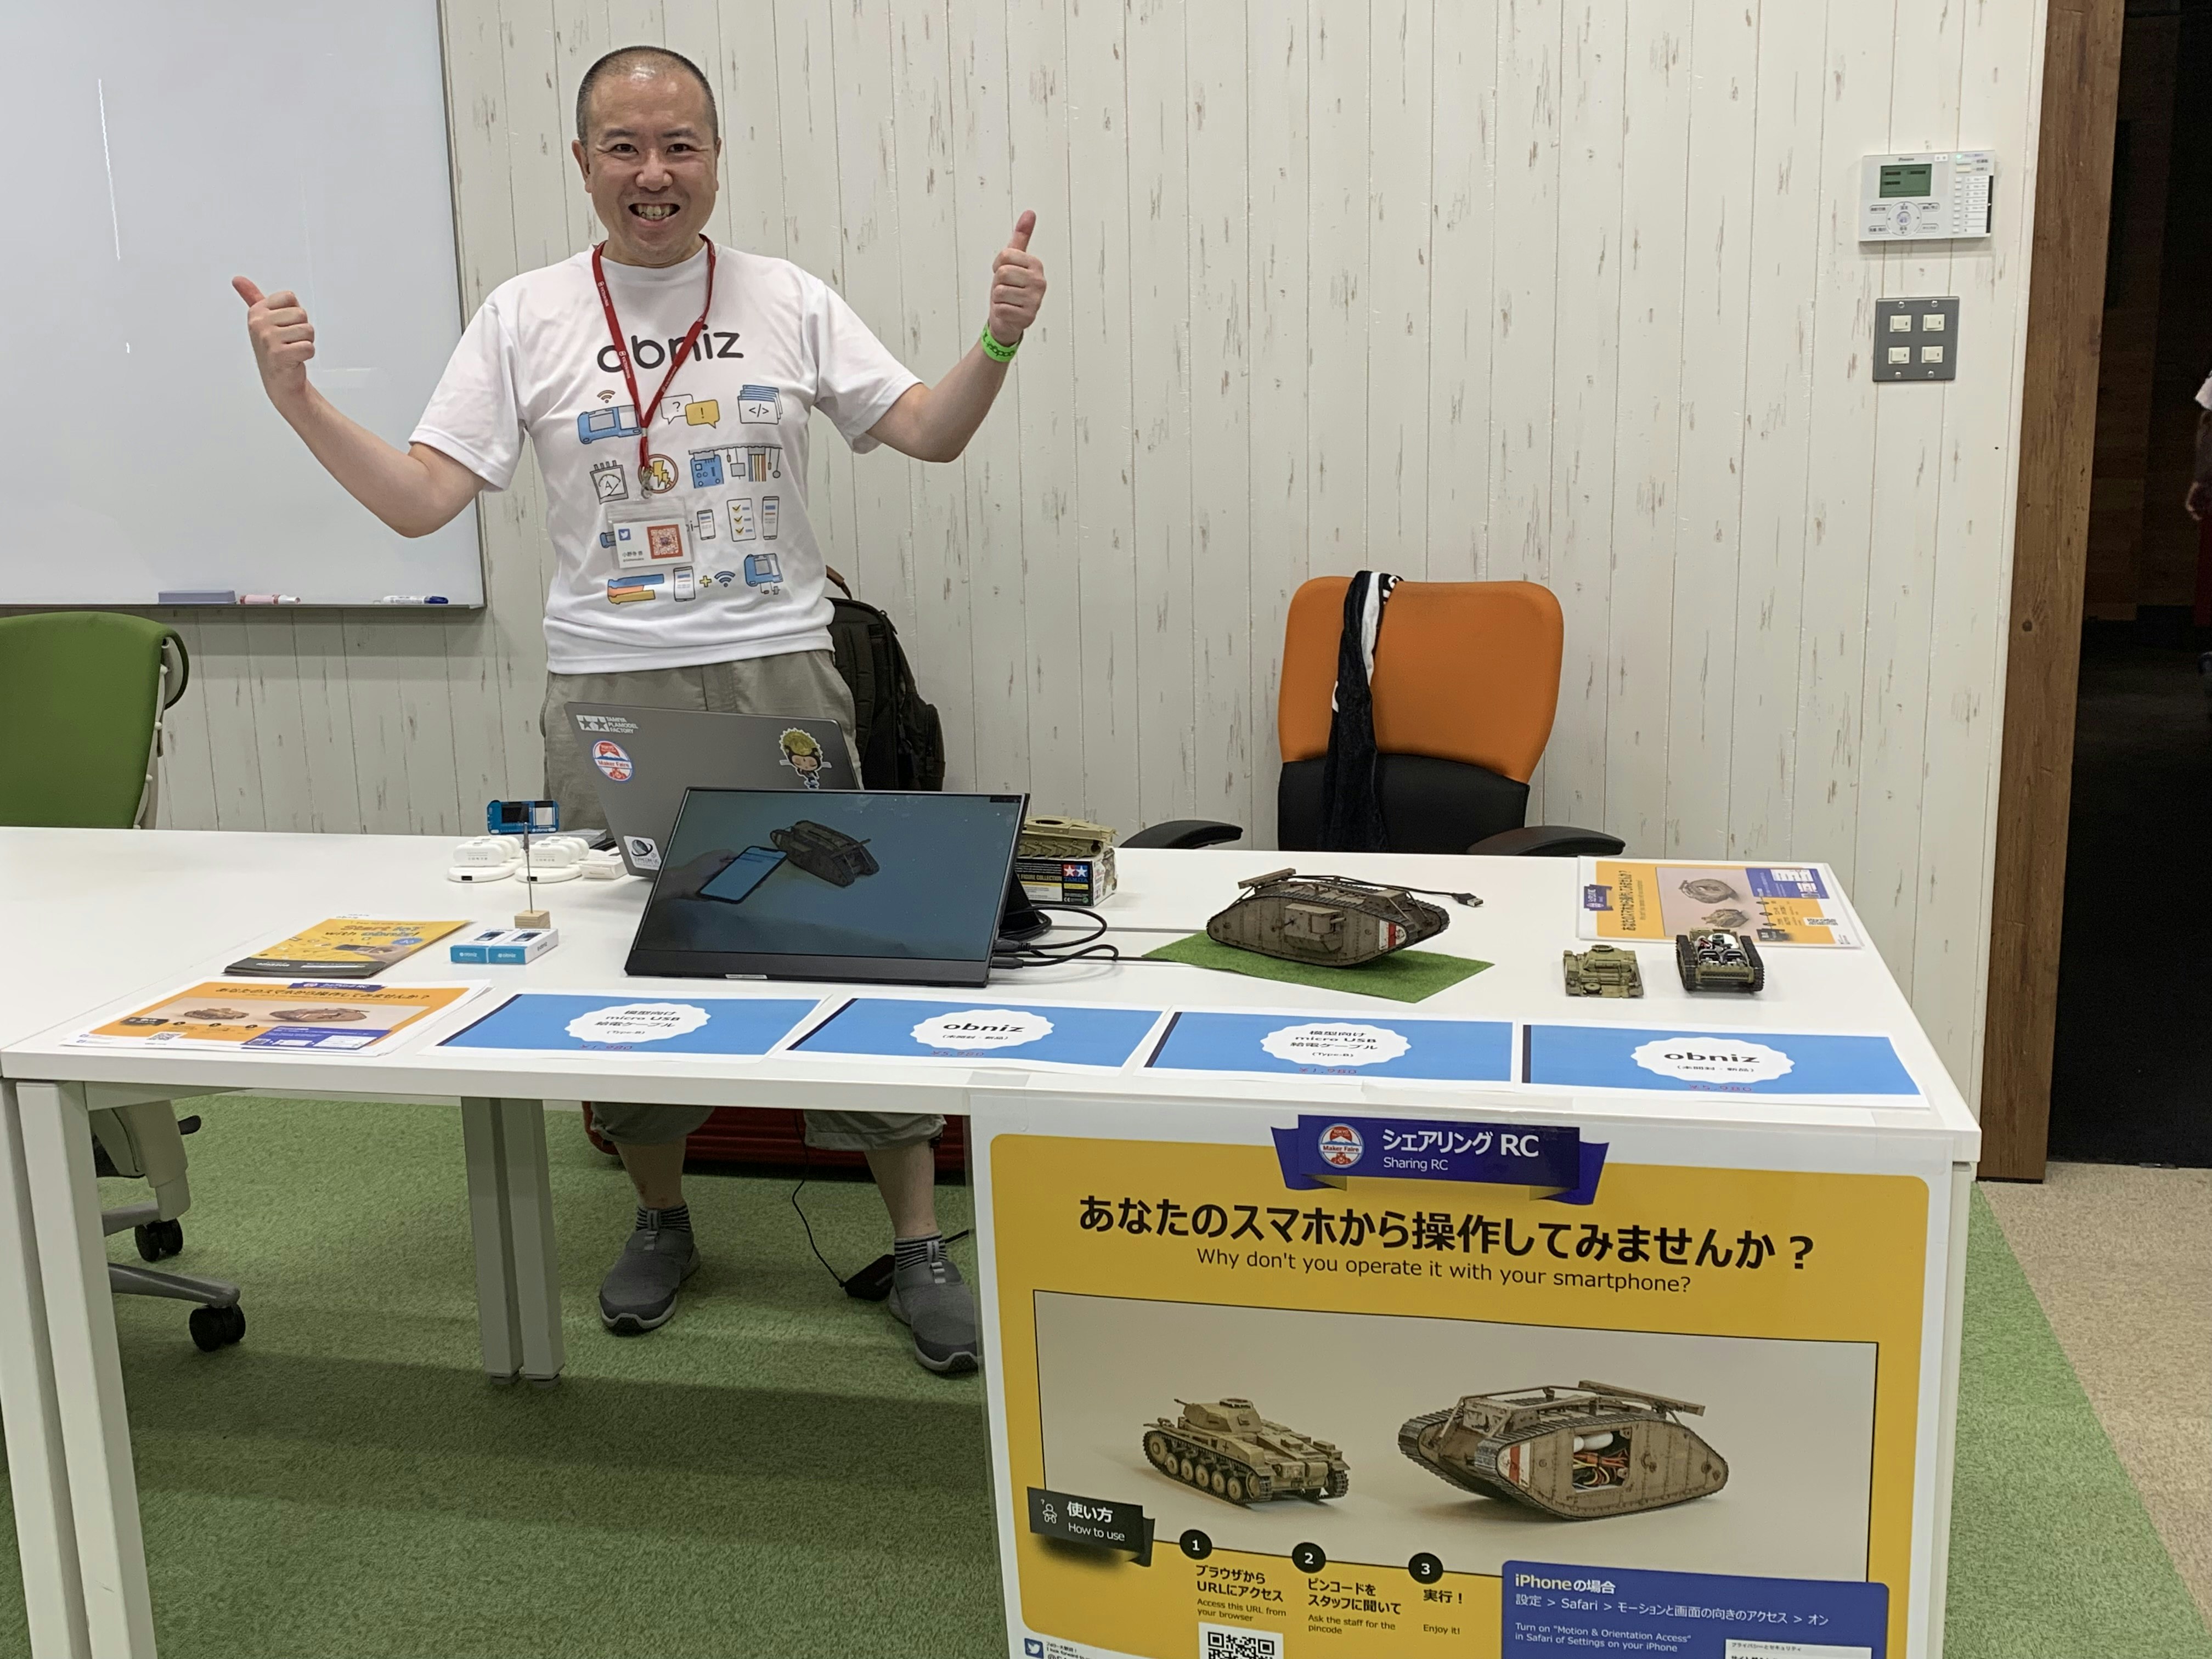
What's "Sharing Radio-Control tanks"
This work is implementing several things that we want to achieve as an intelligent Radio-Control tank, but the core of most important is the idea of "Sharing RC".
Anyone on the spot can control this single Radio-Control tank using their smartphone.
And you don't need a dedicated controller.
However, if it takes time for certification, it will be a boring idea, so we have made the procedure as simple as possible like this.
How to use:
① Access this URL from your browser
② Enter the 3-digit PIN code displayed on the backside display to the website
③ Enjoy it!
With this alone, the model is ready for you to control (until other people make similar settings).
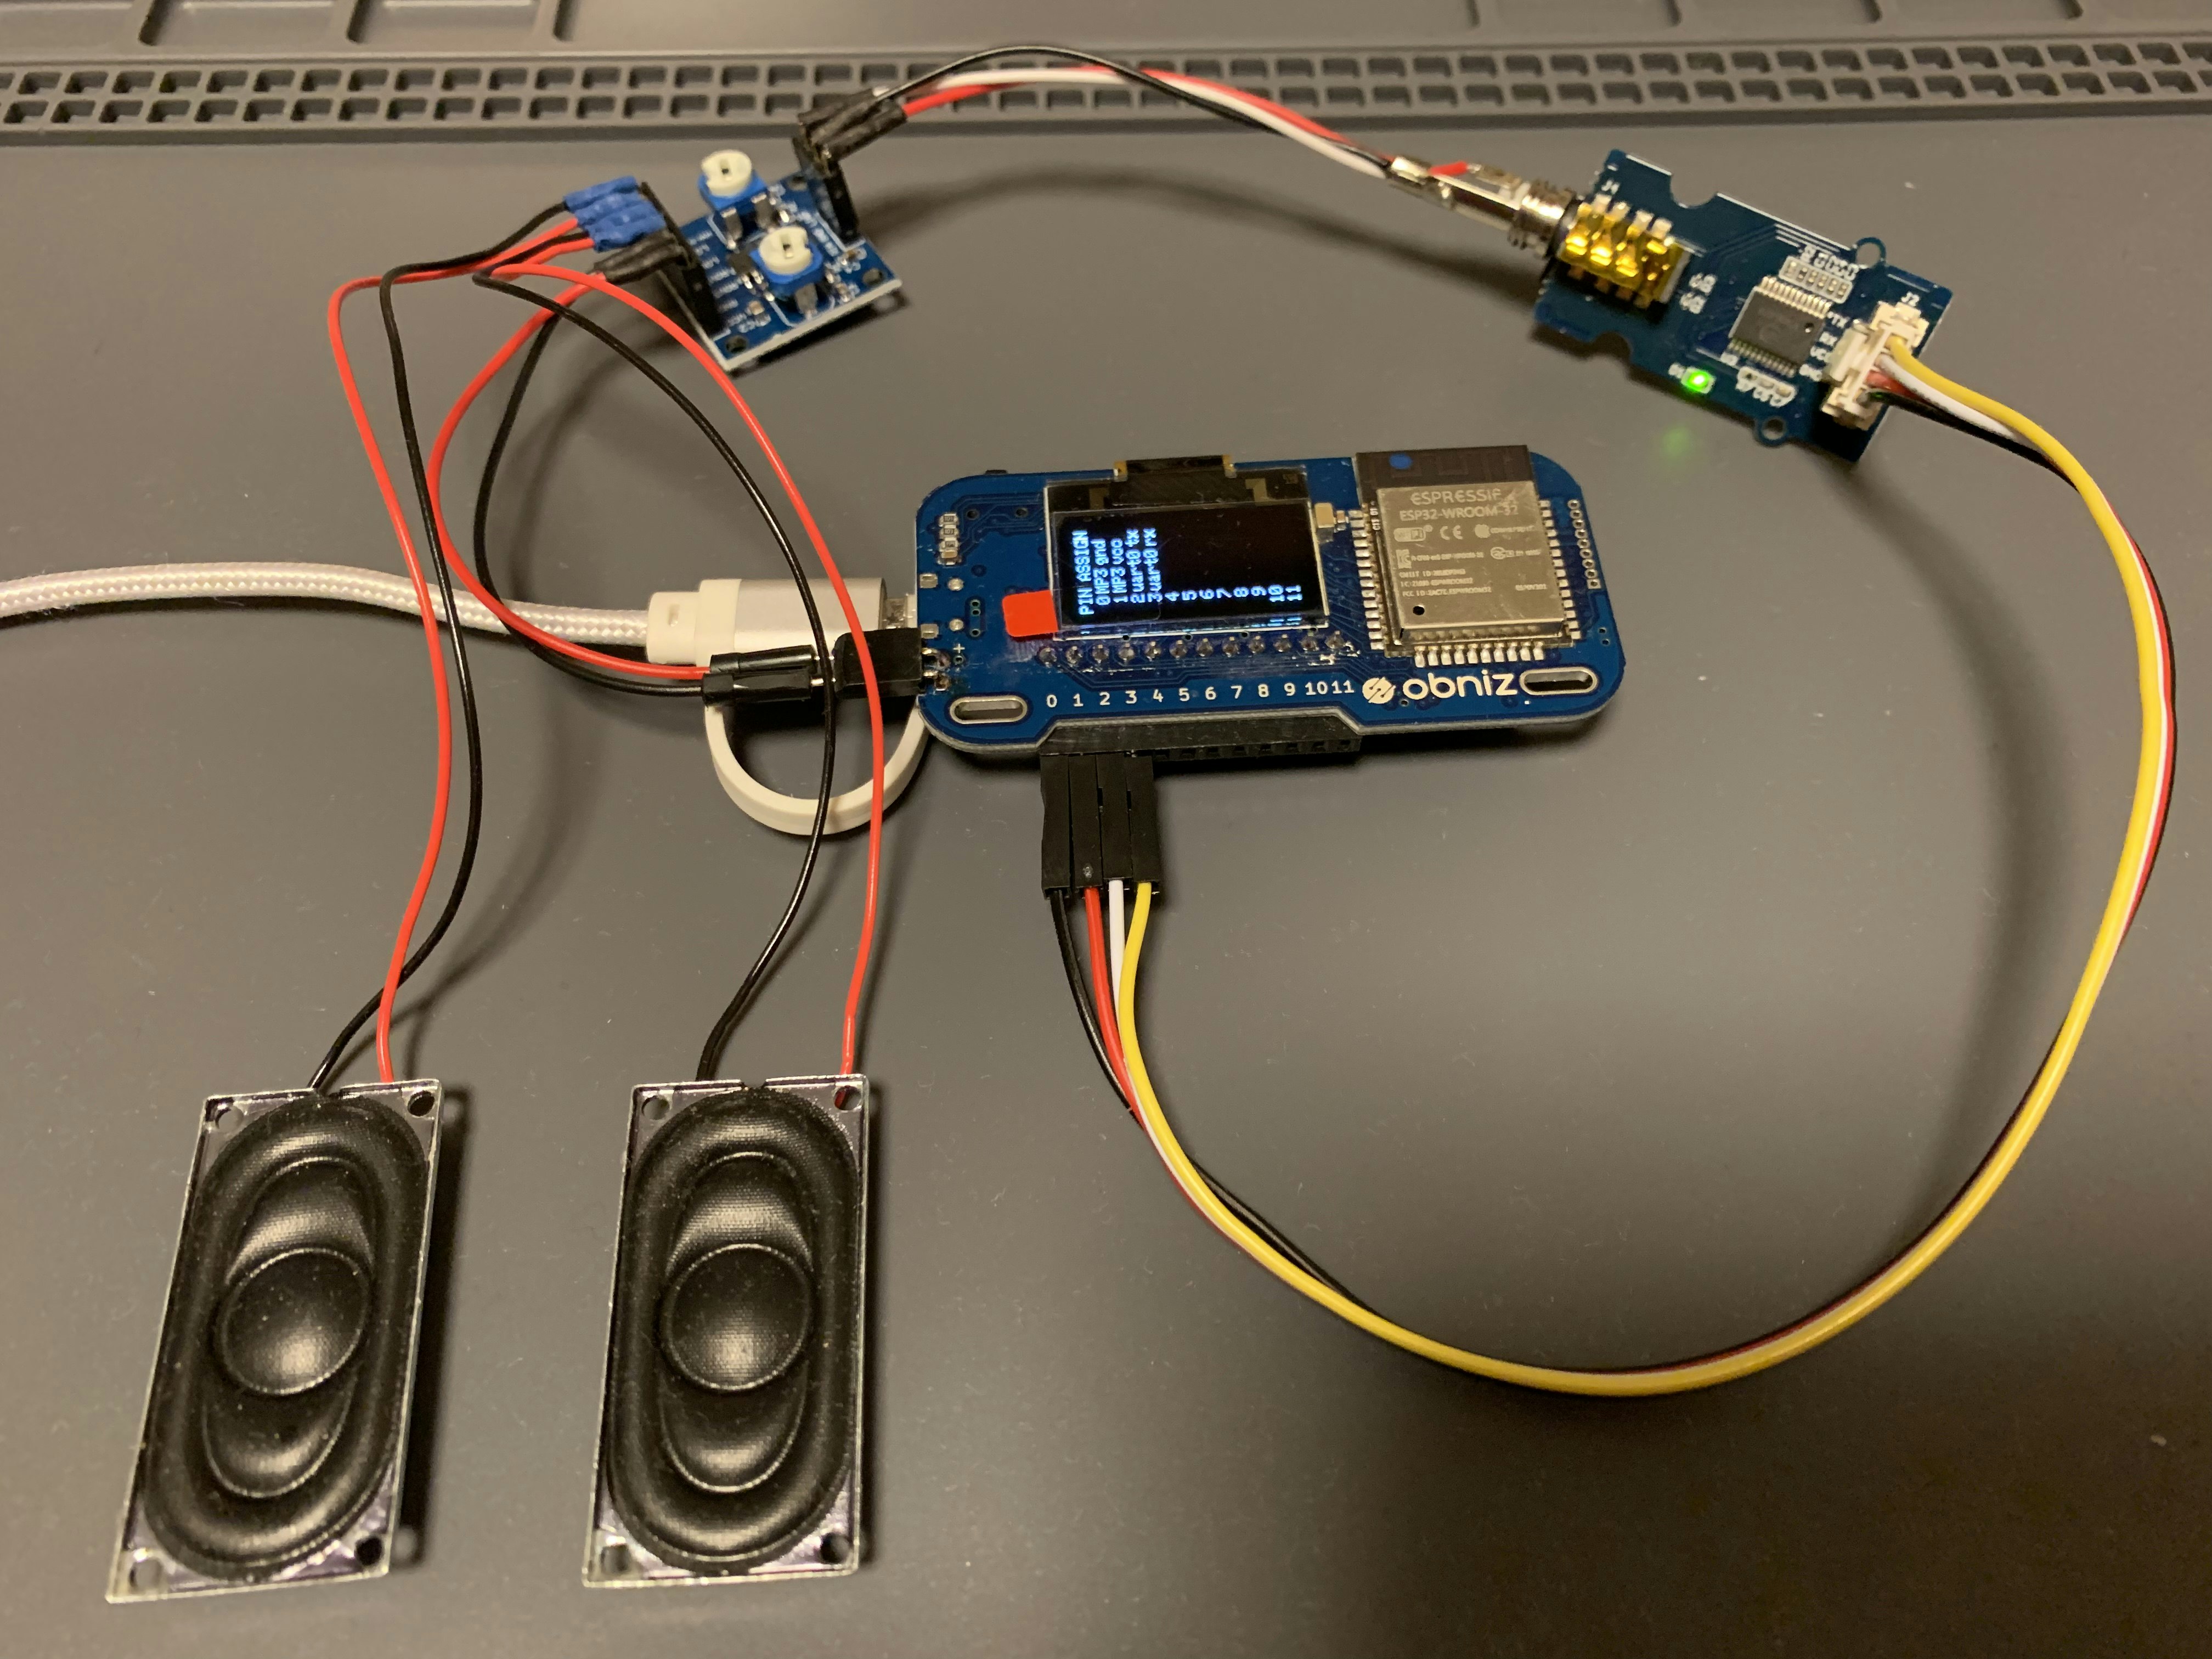
What I used this time
- Tamiya's plastic model "WWI British Tank Mk.IV Male (w/Single Motor)"
- DC motor and gearbox set (2pcs.)
- Hardware "obniz" that can be operated from the web
- Distance sensor "GP2Y0A21YK0F" (2pcs.)
- Three-axis sensor "KXR94-2050"
- MP3 Player Module "Grove MP3 v2.0"
- Stereo Amplifier Module "KKHMF PAM8406"
- Speaker (8Ω 2W)
- Solenoid "5V ZHO-0420S-05A4.5"
- Smallest power bank "Finger Pow"
Structure
Hardware side:
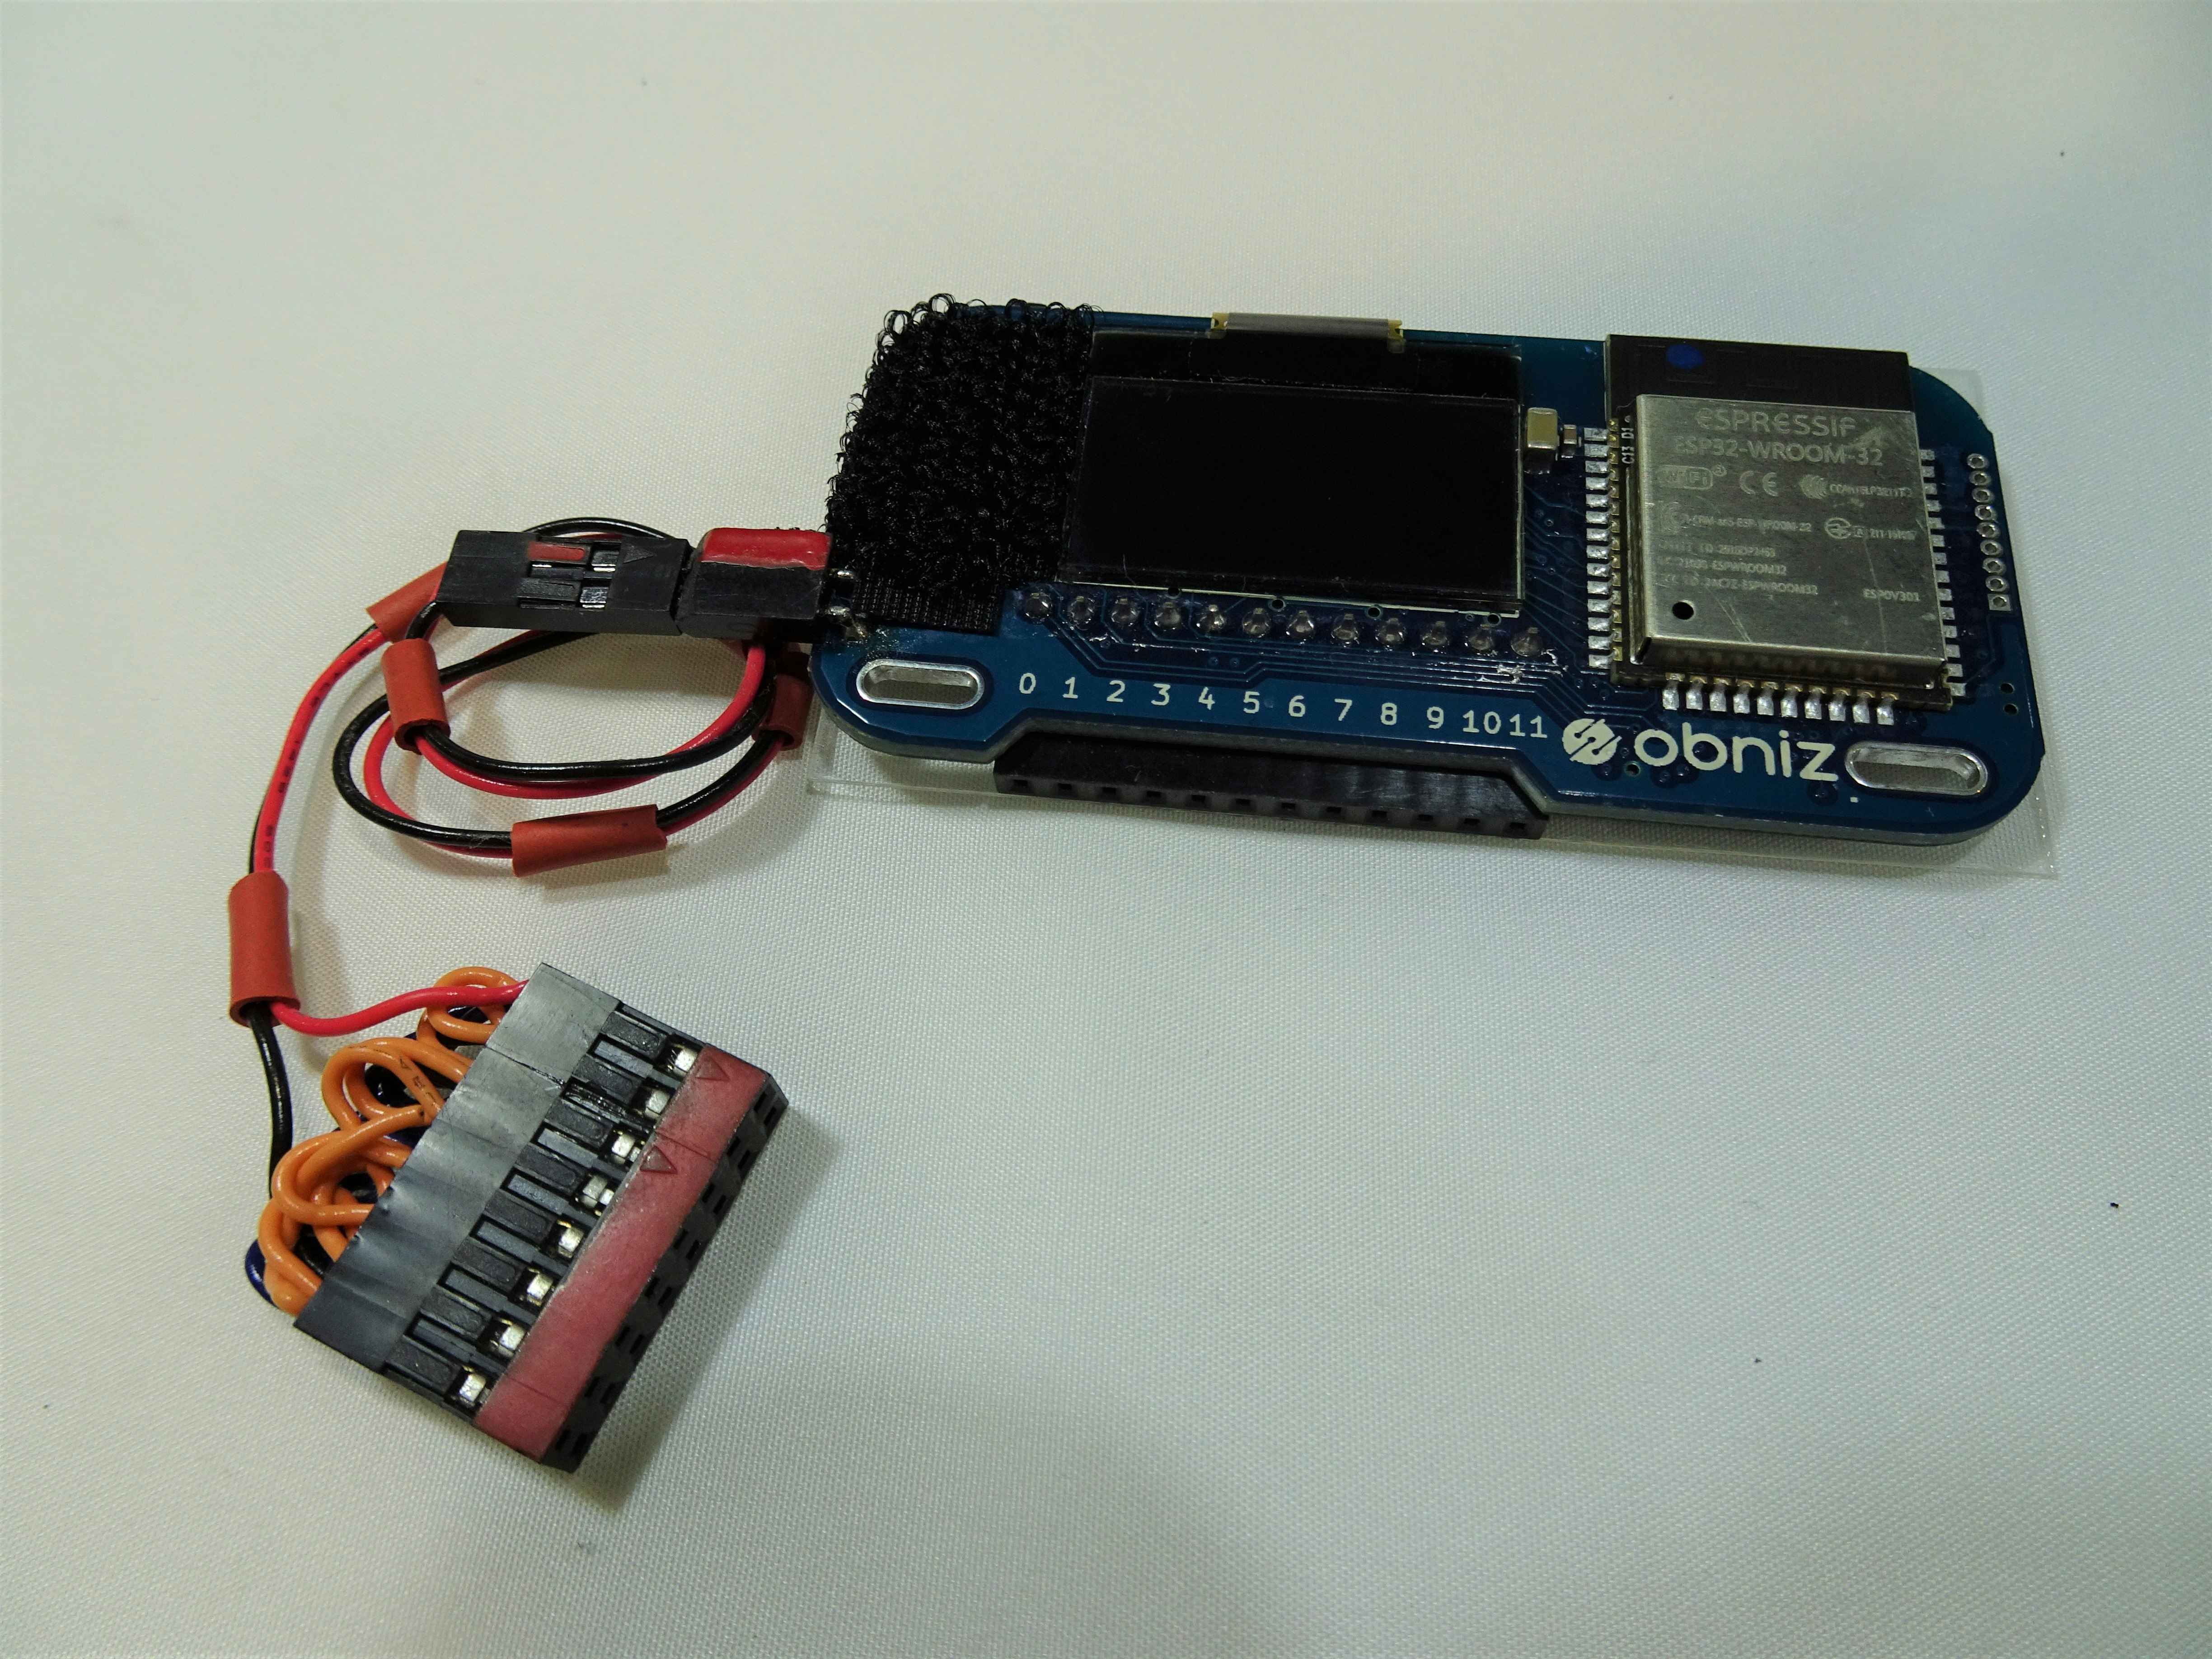
obniz is equipped with as many as 12 I/O pins as standard, and each pin can also be supplied with a power supply of up to 5V1A, so if it is normal to use, it is sufficient only for the main body.
However, since this work connects many parts, the number of 12 pins is not enough.
So, in order to save the pins for supplying power to each part, we decided to add a separate 8-pin x 2-column pin socket for power distribution.

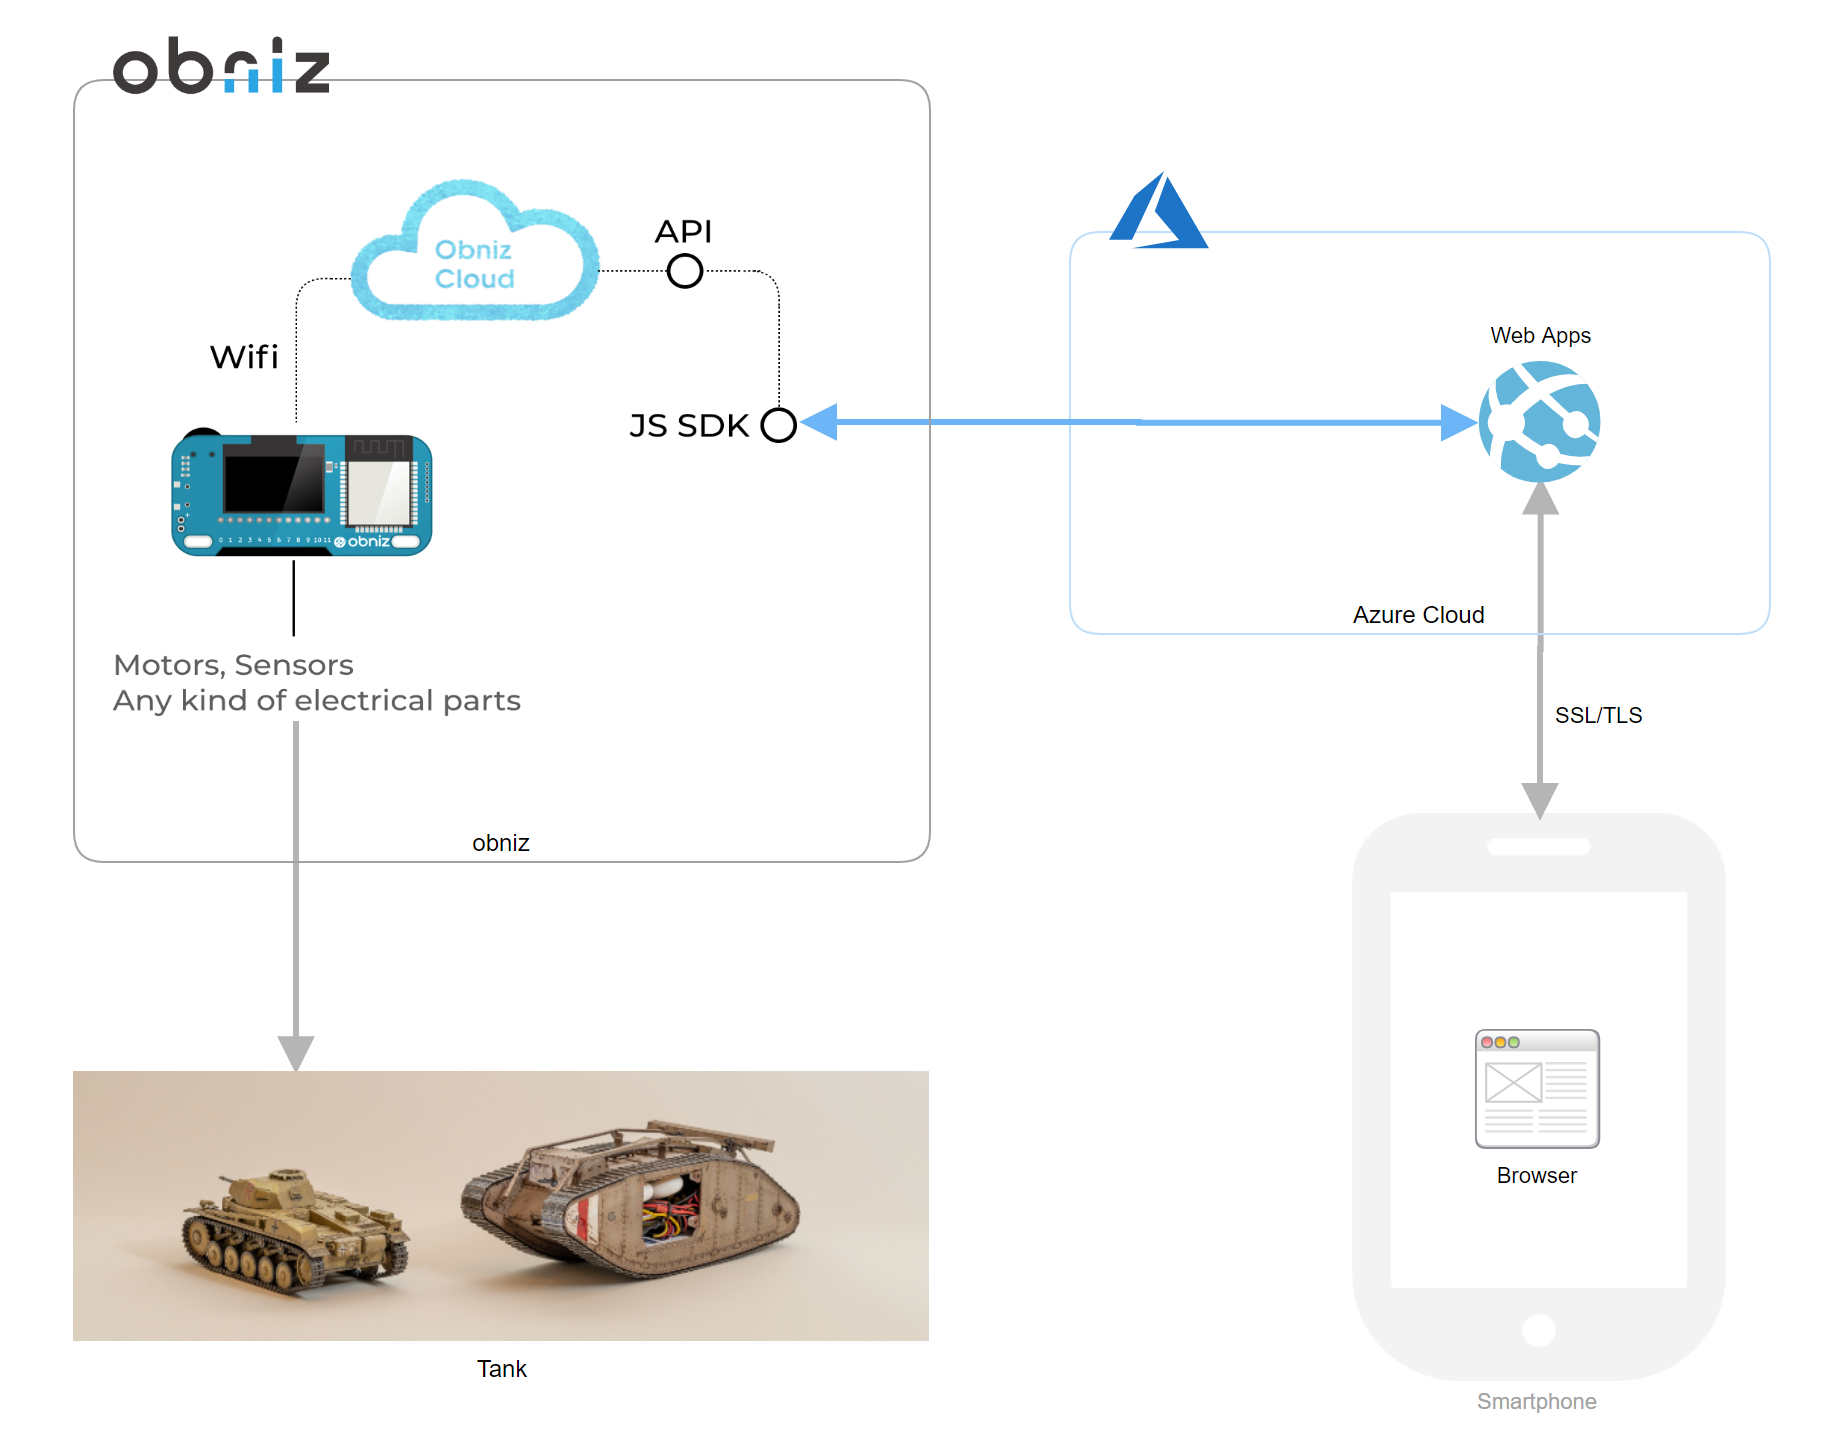
Software side:
The overall configuration is as follows.
Program
*The following is a description of only the part that drives obniz (JavaScript). We plan to add it in the future.
The following programs can be edited and run directly in the web editor provided by "obniz".
And there is some ingenuity in the program. Details are given in the next section.
<html>
  <head>
    <meta charset="utf-8">
    <meta name="viewport" content="width=device-width, initial-scale=1">
    <script src="https://obniz.io/js/jquery-3.2.1.min.js"></script>
    <script src="https://unpkg.com/obniz@2.2.0/obniz.js" crossorigin="anonymous"></script>

    <script>
      const thresholdValueY = 10, thresholdValueX = 10; // Threshold of horizontal position of smartphone
      const thresholdDistanceF = 100, thresholdDistanceB = 150; // Distance sensor threshold in the front and rear
      const thresholdTankZ = -0.5; // Threshold for watching turn over of the tank body
      const maxLimitY = 20, maxLimitX = 40; // The maximum amount of inclination admitted by the smartphone side
      const soundBaseLevel = 20; // Volume at standard (when started)
      const perVolume = (31-soundBaseLevel)/100; // A unit of volume
      var emergencyStopF = true, emergencyStopB = true; // "true" means emergency stop
      var canMove = false;
      var startedY = 0, startedX = 0; // Horizontal position that started driving with smartphone (for adjust the excess play)
      // Event definition for smartphone tilt sensing
      var alpha = 0, beta = 0, gamma = 0;
      window.addEventListener('deviceorientation', function (event) {
        alpha = event.alpha;
        beta = event.beta;
        gamma = event.gamma;
      }, true);
    </script>

    <link rel="stylesheet" href="https://stackpath.bootstrapcdn.com/bootstrap/4.1.1/css/bootstrap.min.css"
          integrity="sha384-WskhaSGFgHYWDcbwN70/dfYBj47jz9qbsMId/iRN3ewGhXQFZCSftd1LZCfmhktB" crossorigin="anonymous">
    <style>
      #button1 {
        padding: 50px;
      }
    </style>
  </head>

  <body>
    <div id="obniz-debug"></div>
    <h1>obniz instant HTML</h1>
    <button id="on" class="btn btn-primary">Engine Start</button>
    <button id="off" class="btn btn-primary">Engine Stop</button>
    <div id="print"></div>
    <div id="result1"></div>
    <div id="result2"></div>

    <script>
      var allowedAngleY = false, allowedAngleX = false
      var phoneY = 0, phoneX = 0;
      var alreadySoundStarted = false;
      var distanceF = 0, distanceFpast = 0, distanceFpastest = 0;
      var distanceB = 0, distanceBpast = 0, distanceBpastest = 0;
      var tankZ = 0, tankZpast = 0, tankZpastest = 0;

      var obniz = new Obniz("OBNIZ_ID_HERE");
      obniz.onconnect = async function () {
        // Defining sensors and pin assignments
        var motorL = obniz.wired("DCMotor", { forward: 0, back: 1 });
        var motorR = obniz.wired("DCMotor", { forward: 2, back: 3 });
        var distanceSensorF = obniz.wired("GP2Y0A21YK0F", {signal:4});
        var distanceSensorB = obniz.wired("GP2Y0A21YK0F", {signal:5});
        var triaxialSensor = obniz.wired("KXR94-2050", { x:6, y:6, z:6 }); // check just the value of Z-axis when want to save the number of pins.
        var solenoid = obniz.wired('Solenoid', {signal:7});
        var mp3 = obniz.wired("Grove_MP3", { vcc:9, mp3_rx:10, mp3_tx:11});
        await mp3.initWait();
        // Emergency stop determination of the front and rear distance sensor
        distanceSensorF.start(function( distance ){
          distanceFpastest=distanceFpast;
          distanceFpast=distanceF;
          distanceF=distance;
          emergencyStopF = distanceF > thresholdDistanceF && distanceFpast > thresholdDistanceF && distanceFpastest > thresholdDistanceF;
        })
        distanceSensorB.start(function( distance ){
          distanceBpastest=distanceBpast;
          distanceBpast=distanceB;
          distanceB=distance;
          emergencyStopB = distanceB > thresholdDistanceB && distanceBpast > thresholdDistanceB && distanceBpastest > thresholdDistanceB;
        })

        // When you press the "Engine Start" button on your smartphone
        $('#on').click(function () {
          obniz.display.clear();
          if (allowedAngleY && allowedAngleX) {
            solenoid.click();
            obniz.display.print("Go, go, go!");
            startedY = phoneY;
            startedX = phoneX;
            emergencyStopF=false;
            canMove = true;
            mp3.setVolume(soundBaseLevel);
            mp3.play(1); // The idling sound
          } else {
            obniz.display.print("Check your phone");
          }
        });

        // When you press the "Engine Stop" button on your smartphone
        $('#off').click(function () {
          blackOut(motorL,motorR,mp3,solenoid);
        });
        obniz.display.clear();
        obniz.display.print("Ready!");

        // Main loop
        obniz.repeat(async function () {
          phoneY =Math.floor(beta);
          phoneX = Math.floor(gamma);
          allowedAngleY = phoneY<20 && phoneY>-20; // Start when it's roughly level (for X-axis)
          allowedAngleX = phoneX<20 && phoneX>-20; // Start when it's roughly level (for Y-axis)
          let AllowedHighAngleY = phoneY<80 && phoneY>-80; // Dealing with 90 degree reversal
          if (canMove && AllowedHighAngleY) {
            let motionY = phoneY - startedY;
            let isBack = (motionY >= 0);
            let adjustmentValueY = motionY + thresholdValueY * (isBack ? -1 : 1);
            var valueY = (adjustmentValueY * (isBack ? 1 : -1) / maxLimitY * 100);
            valueY = (isBack ? emergencyStopB || adjustmentValueY <= 0 : emergencyStopF || adjustmentValueY >= 0) ? 0 : (valueY > 100 ? 100 : Math.floor(valueY));
            moterControl(motorL,motorR,valueY,adjustmentValueY);
            soundControl(mp3,valueY);
            // Was turn over of the tank body?
            if (isTankFlip(triaxialSensor)){
              blackOut(motorL,motorR,mp3,solenoid);
              solenoid.click();
            }
            result1.innerHTML = "Output: " + valueY;
            result2.innerHTML = "Emergency stop of moving forward: " + emergencyStopF + "<br>" + "Emergency stop of moving backward: " + emergencyStopB;
          } else {
            result1.innerHTML = (allowedAngleX?"":"The angle of X-axis is too much");
            result2.innerHTML = (allowedAngleY?"":"The angle of Y-axis is too much");
          }
        },150)
        mp3.stop();
      }

      // Controlling DC motors
      function moterControl(motorL,motorR,Y,adjustmentY){
        var powerL = Y;
        var powerR = Y;
        var spinTurn = false;
        var forwordOrBackL = adjustmentY >= 0;
        var forwordOrBackR = adjustmentY >= 0;
        let motionX = Math.floor(gamma) - startedX;
        let LeftOrRightX = (motionX < 0);
        let AdjustmentValueX = motionX + thresholdValueX * (LeftOrRightX ? 1 : -1);
        var X = (AdjustmentValueX * (LeftOrRightX ? -1 : 1) / maxLimitX * 100);
        if (LeftOrRightX) { // Is left
          X = AdjustmentValueX >= 0 ? 0 : (X > 100 ? 100 : Math.floor(X));
          spinTurn = X == 100;
          powerL = Y - Math.floor(Y * X / 100);
          if (spinTurn) {
            powerL = Math.floor(Y * X / 100);
            forwordOrBackL = !forwordOrBackL;
          }
        } else { // Is right
          X = AdjustmentValueX <= 0 ? 0 : (X > 100 ? 100 : Math.floor(X));
          powerR = Y - Math.floor(Y * X / 100);
          spinTurn = X == 100;
          if (spinTurn) {
            powerR = Math.floor(Y * X / 100);
            forwordOrBackR = !forwordOrBackR;
          }
        }
        motorL.power(powerL);
        motorR.power(powerR);
        motorL.move(forwordOrBackL);
        motorR.move(forwordOrBackR);
      }

      // Controlling sound
      function soundControl(mp3,Y){
        mp3.setVolume(Math.floor(Y * perVolume)+soundBaseLevel); // Control of volume
        // Switch the kind of playing sound
        if (Y==0){
          if (alreadySoundStarted) {
            alreadySoundStarted=false;
            mp3.play(1); // The idling sound
          }
        } else {
          if (!alreadySoundStarted) {
            alreadySoundStarted=true;
            mp3.play(2); // The running sound
          }
        }
      }

      // Watching situation of turn over of the tank body
      function isTankFlip(triaxialSensor){
        let values = triaxialSensor.get();
        tankZpastest = tankZpast;
        tankZpast = tankZ;
        tankZ = values.z;
        return tankZ < thresholdTankZ && tankZpast < thresholdTankZ && tankZpastest < thresholdTankZ;
      }

      // Doing emergency stop.
      function blackOut(motorL,motorR,mp3,solenoid) {
        solenoid.click();
        emergencyStopF = true;
        emergencyStopB = true;
        motorL.stop();
        motorR.stop();
        obniz.display.clear();
        obniz.display.print("Emergency stoped!");
        canMove = false;
        mp3.stop();
      }
    </script>
  </body>
</html>
Commentary
Below is a description of the parts and programs used this time.
About obniz:
It is a new generation of one-board microcomputers that operate using cloud computing.
This alone allows it to display Kanji-character on the included display and be moved also the motor directly, not to mention communication by Wifi and BLE.
In addition, I/O pins of the obniz are programmable and can handle currents up to 1A, allowing for a compact and flexible implementation.
The big difference between the obniz and other microcomputer boards is that your program isn't stored inside.
This means that the program is stored in the connected cloud and that the program is also running there.
In other words, only program instructions and results are always exchanged between the obniz and the cloud.
It is a product with a very unique view of the world.
The disadvantage of choosing such a design is that you must be connected at all times while moving.
However, there are many advantages, such as easy to update even after it is incorporated into an IoT system, and easy to operate securely.
With the rapid transition to the 5G world, it is likely that communication will no longer be interrupted.
Then, near the future, the presence of obniz is likely to grow.
Control of the tank operation and motor output by simply tilting the smartphone
In this work, the type of motion (forward/backward/left-right movement/spin-turn) and the power of the motor are determined by sensing the tilt and quantity of the smartphone.
However, since the specification starting from the absolute horizontal position does not suitable the Human-Machine-Interface of human beings, which tends to have a rough sense, the position at the time of pressing the "Engine Start" button is regarded as the horizontal starting point.
In this way, I was able to realize a natural feeling of operation close to the sense of the operator's.
However, because there is an ergonomic limit in the amount of tilting the smartphone even if it says so, the angle at the start which can be permitted in the program is calculated backward, and the limit of the angle to tilt was set.
And in order to realize all the movements with only the smartphone tilt, the direction and movement of the tilt were mapped as follows.
| Tilt | (Left) | (Neutral) | (Right) |
|---|---|---|---|
| (Front) | Left Forward | Forward | Right Forward |
| (Neutral) | Left spin turn | Stop | Right spin turn |
| (Back) | Left Backward | Backward | Right Backward |
About changes in motor output
The motor power fluctuates linearly from 0% to 100% in conjunction with the tilt angle (amount).
However, because there is a limit on the angle of the wrist which is easy to move, I decided to set a moderate range based on the verification result.
Therefore, as a result of observing the movement of the wrist, paying attention to the fact that the movement in the horizontal direction (X-axis) is rougher than the movement in the vertical direction (Y-axis), the ratio of the vertical and horizontal movable allowable amounts each adjusted to 1:2.
When the tank moves left and right, the output balance is adjusted to left and right according to the horizontal inclination of the smartphone.
The only exception is when the spin turn is activated only when the smartphone is shaken to the left or right justified.
How to distribute power
The power is distributed directly from the power terminal of the obniz to the pin socket of 8 pins x 2 rows.
And, the upper and lower columns of the pin socket are divided into + and - respectively and uses it.
Front side of obniz (On the left side of the obniz, you can see velcro to fix to the vehicle)
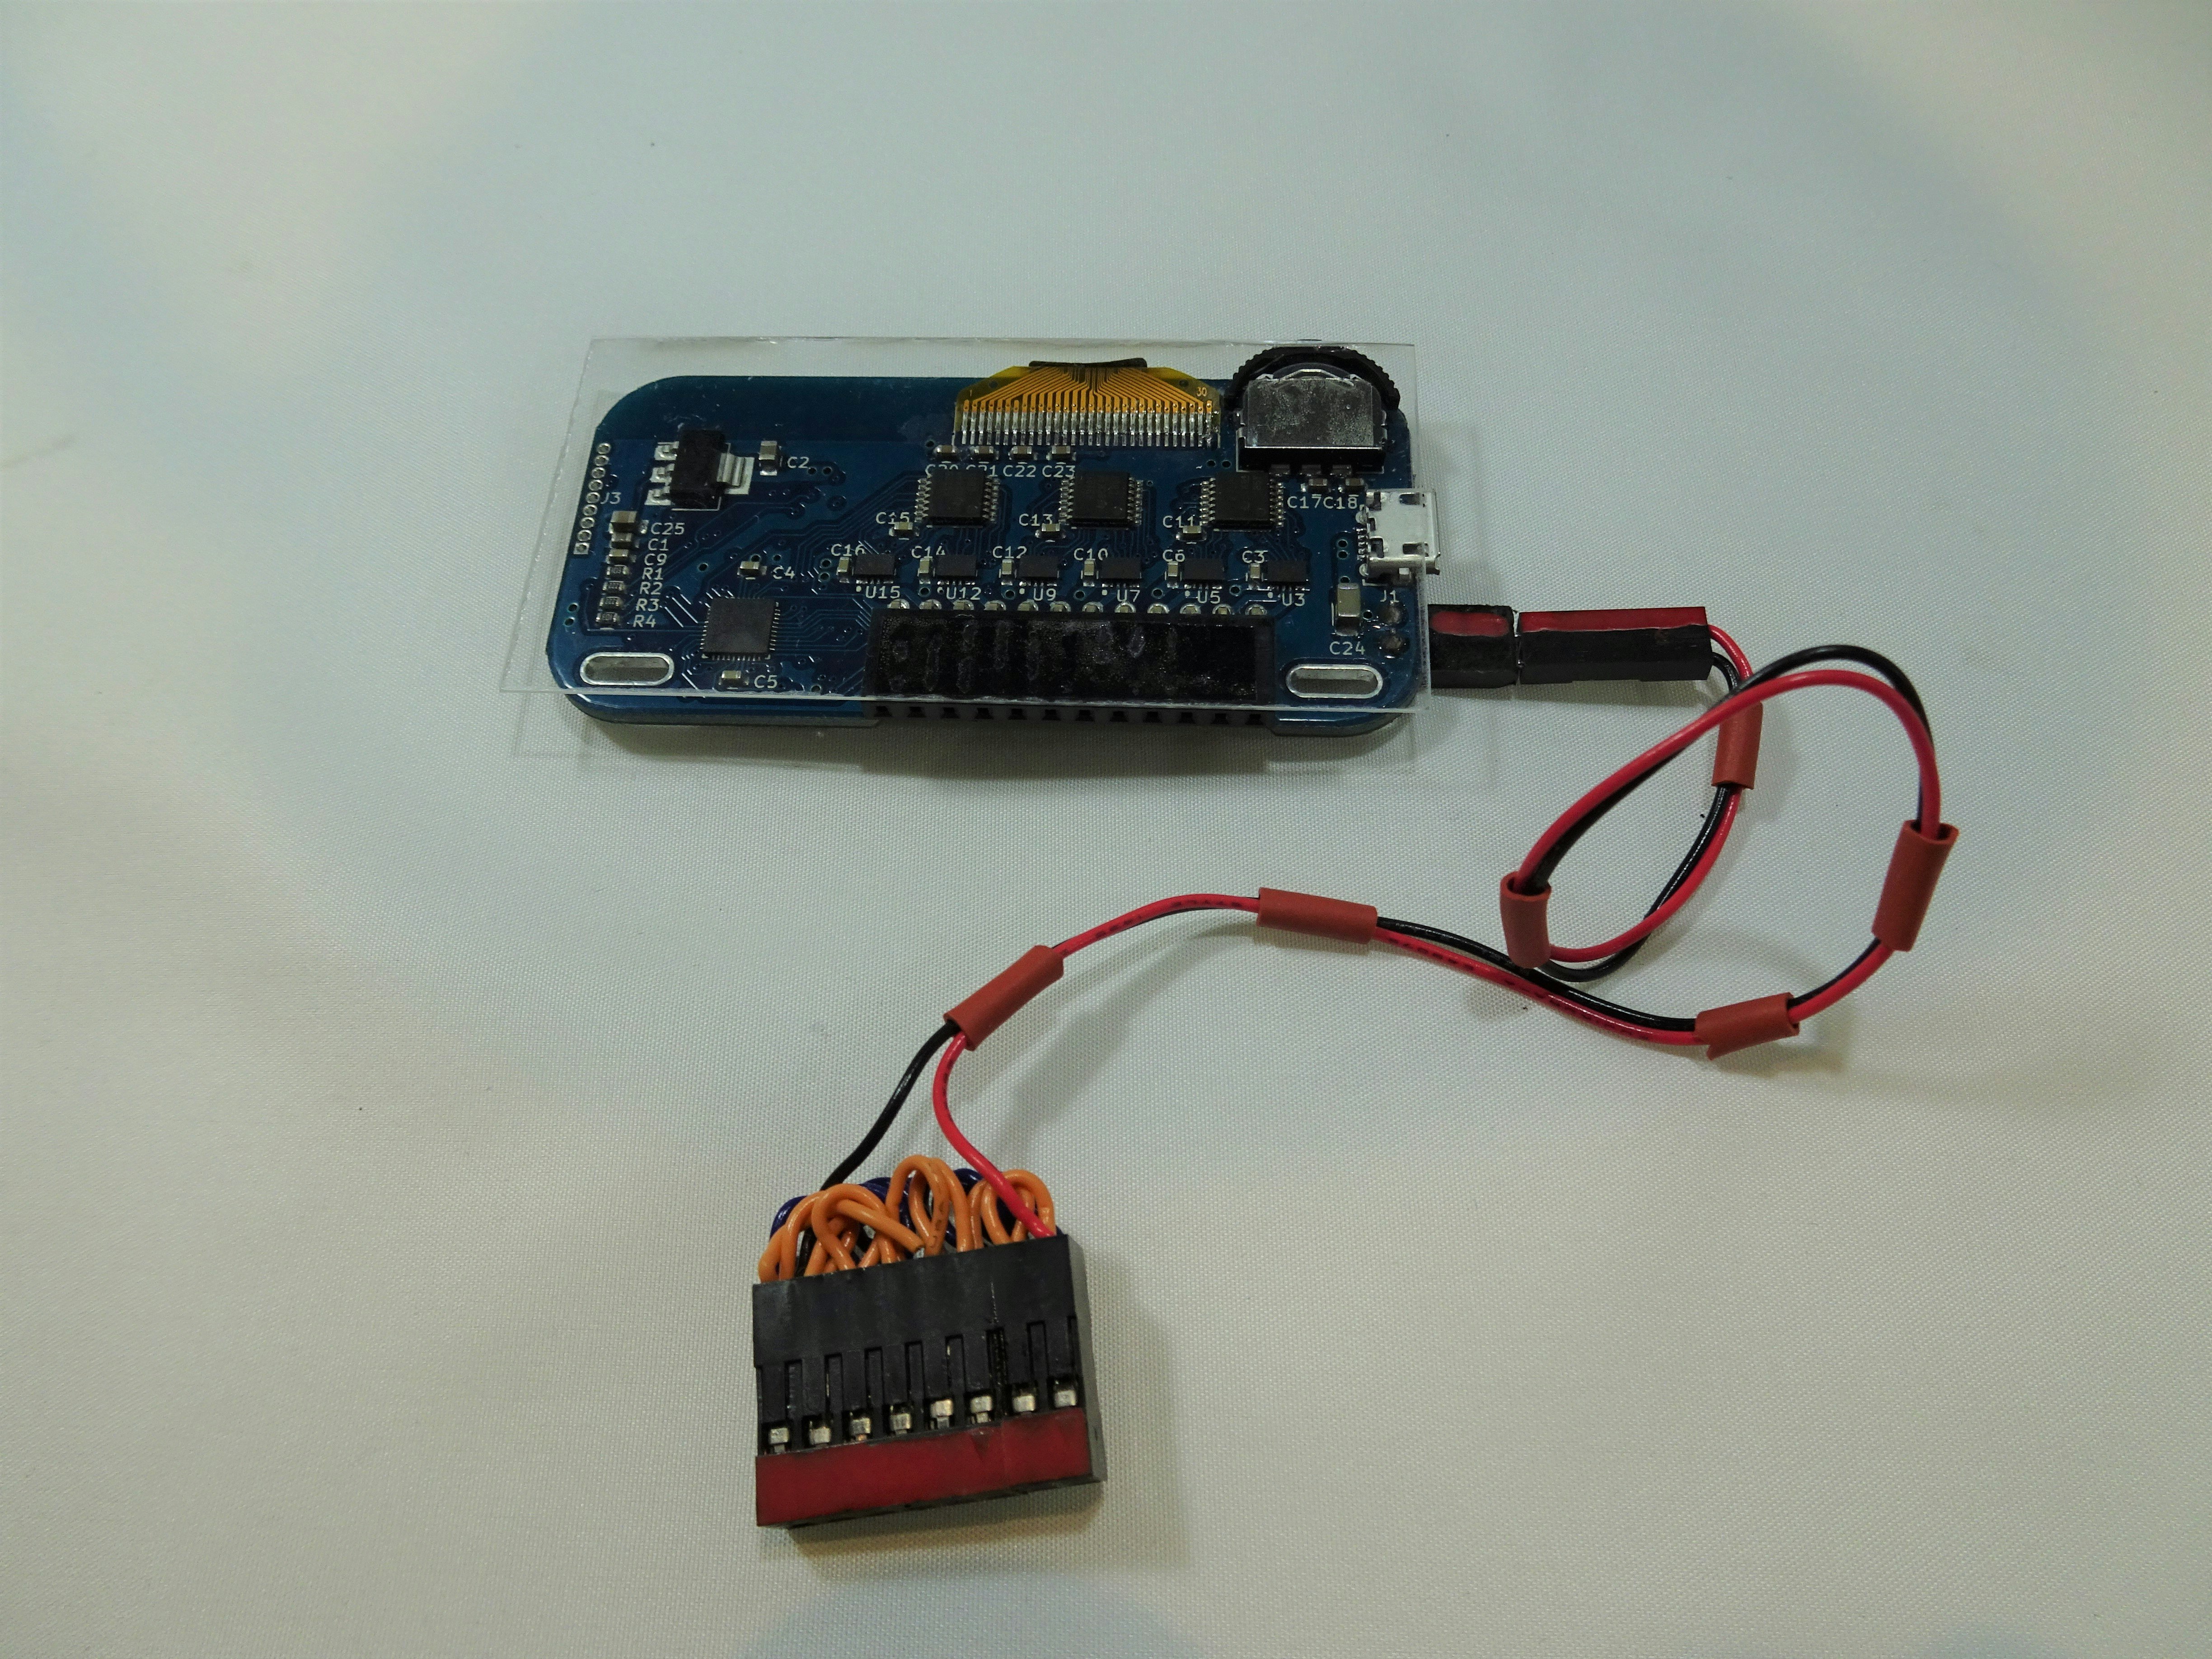
Back side of obniz (On the back side of the obniz, a transparent plastic plate is attached for circuit protection, etc.)
Distance sensor "GP2Y0A21YK0F":
It is implemented before and after the vehicle to prevent the mistake of dropping down when playing on the desk.
Because the housing is made of plastic, this sensor is light and easy to process, the size is relatively small, and the accuracy is moderate, so I chose it.
Reference: Collision avoidance game using distance sensors
The pin placement is as follows.
Front sensor
| (Terminal) | GP2Y0A21YK0F | obniz |
|---|---|---|
| Vo | 1 | 4 |
| VCC | 3 | Power+ |
| GND | 2 | Power- |
Rear sensor
| (Terminal) | GP2Y0A21YK0F | obniz |
|---|---|---|
| Vo | 1 | 5 |
| VCC | 3 | Power+ |
| GND | 2 | Power- |
The sensor at the front of the tank was able to be mounted diagonally, so we were able to earn a little distance between the ground and the sensor, but for the rear sensor of the tank, but the distance at the sensor has only 1cm.
"The good range is 10cm to 80cm"
"Cannot use range closer than 10cm"
For this sensor, I was at a loss to use it at first because I took information like those.
However, as a result of repeating the experiment, I found that it would be possible to use for if it was an application where a threshold value was set and binarized.
In addition, for measurements within a few centimeters, I will note in advance that it is not suitable for other than rough applications such as this time.
By the way, in this program, thresholds are individually set based on the numerical values derived from the experimental results.
The front threshold is set to “100cm” and the rear threshold is set to “150cm”.
Three-axis sensor "KXR94-2050":
This is used to determine if the body of the tank is turned over.
Although this sensor can acquire the X/Y/Z triaxial state, this time it specializes in obtaining the Z-axis value, so the pin arrangement is as follows.
| (Terminal) | KXR94-2050 | obniz |
|---|---|---|
| Z | 8 | 6 |
| VCC | 1 | Power+ |
| PSD | 2 | Power+ |
| GND | 3 | Power- |
The KXR94-2050 pins 1 and 2 are shorted.
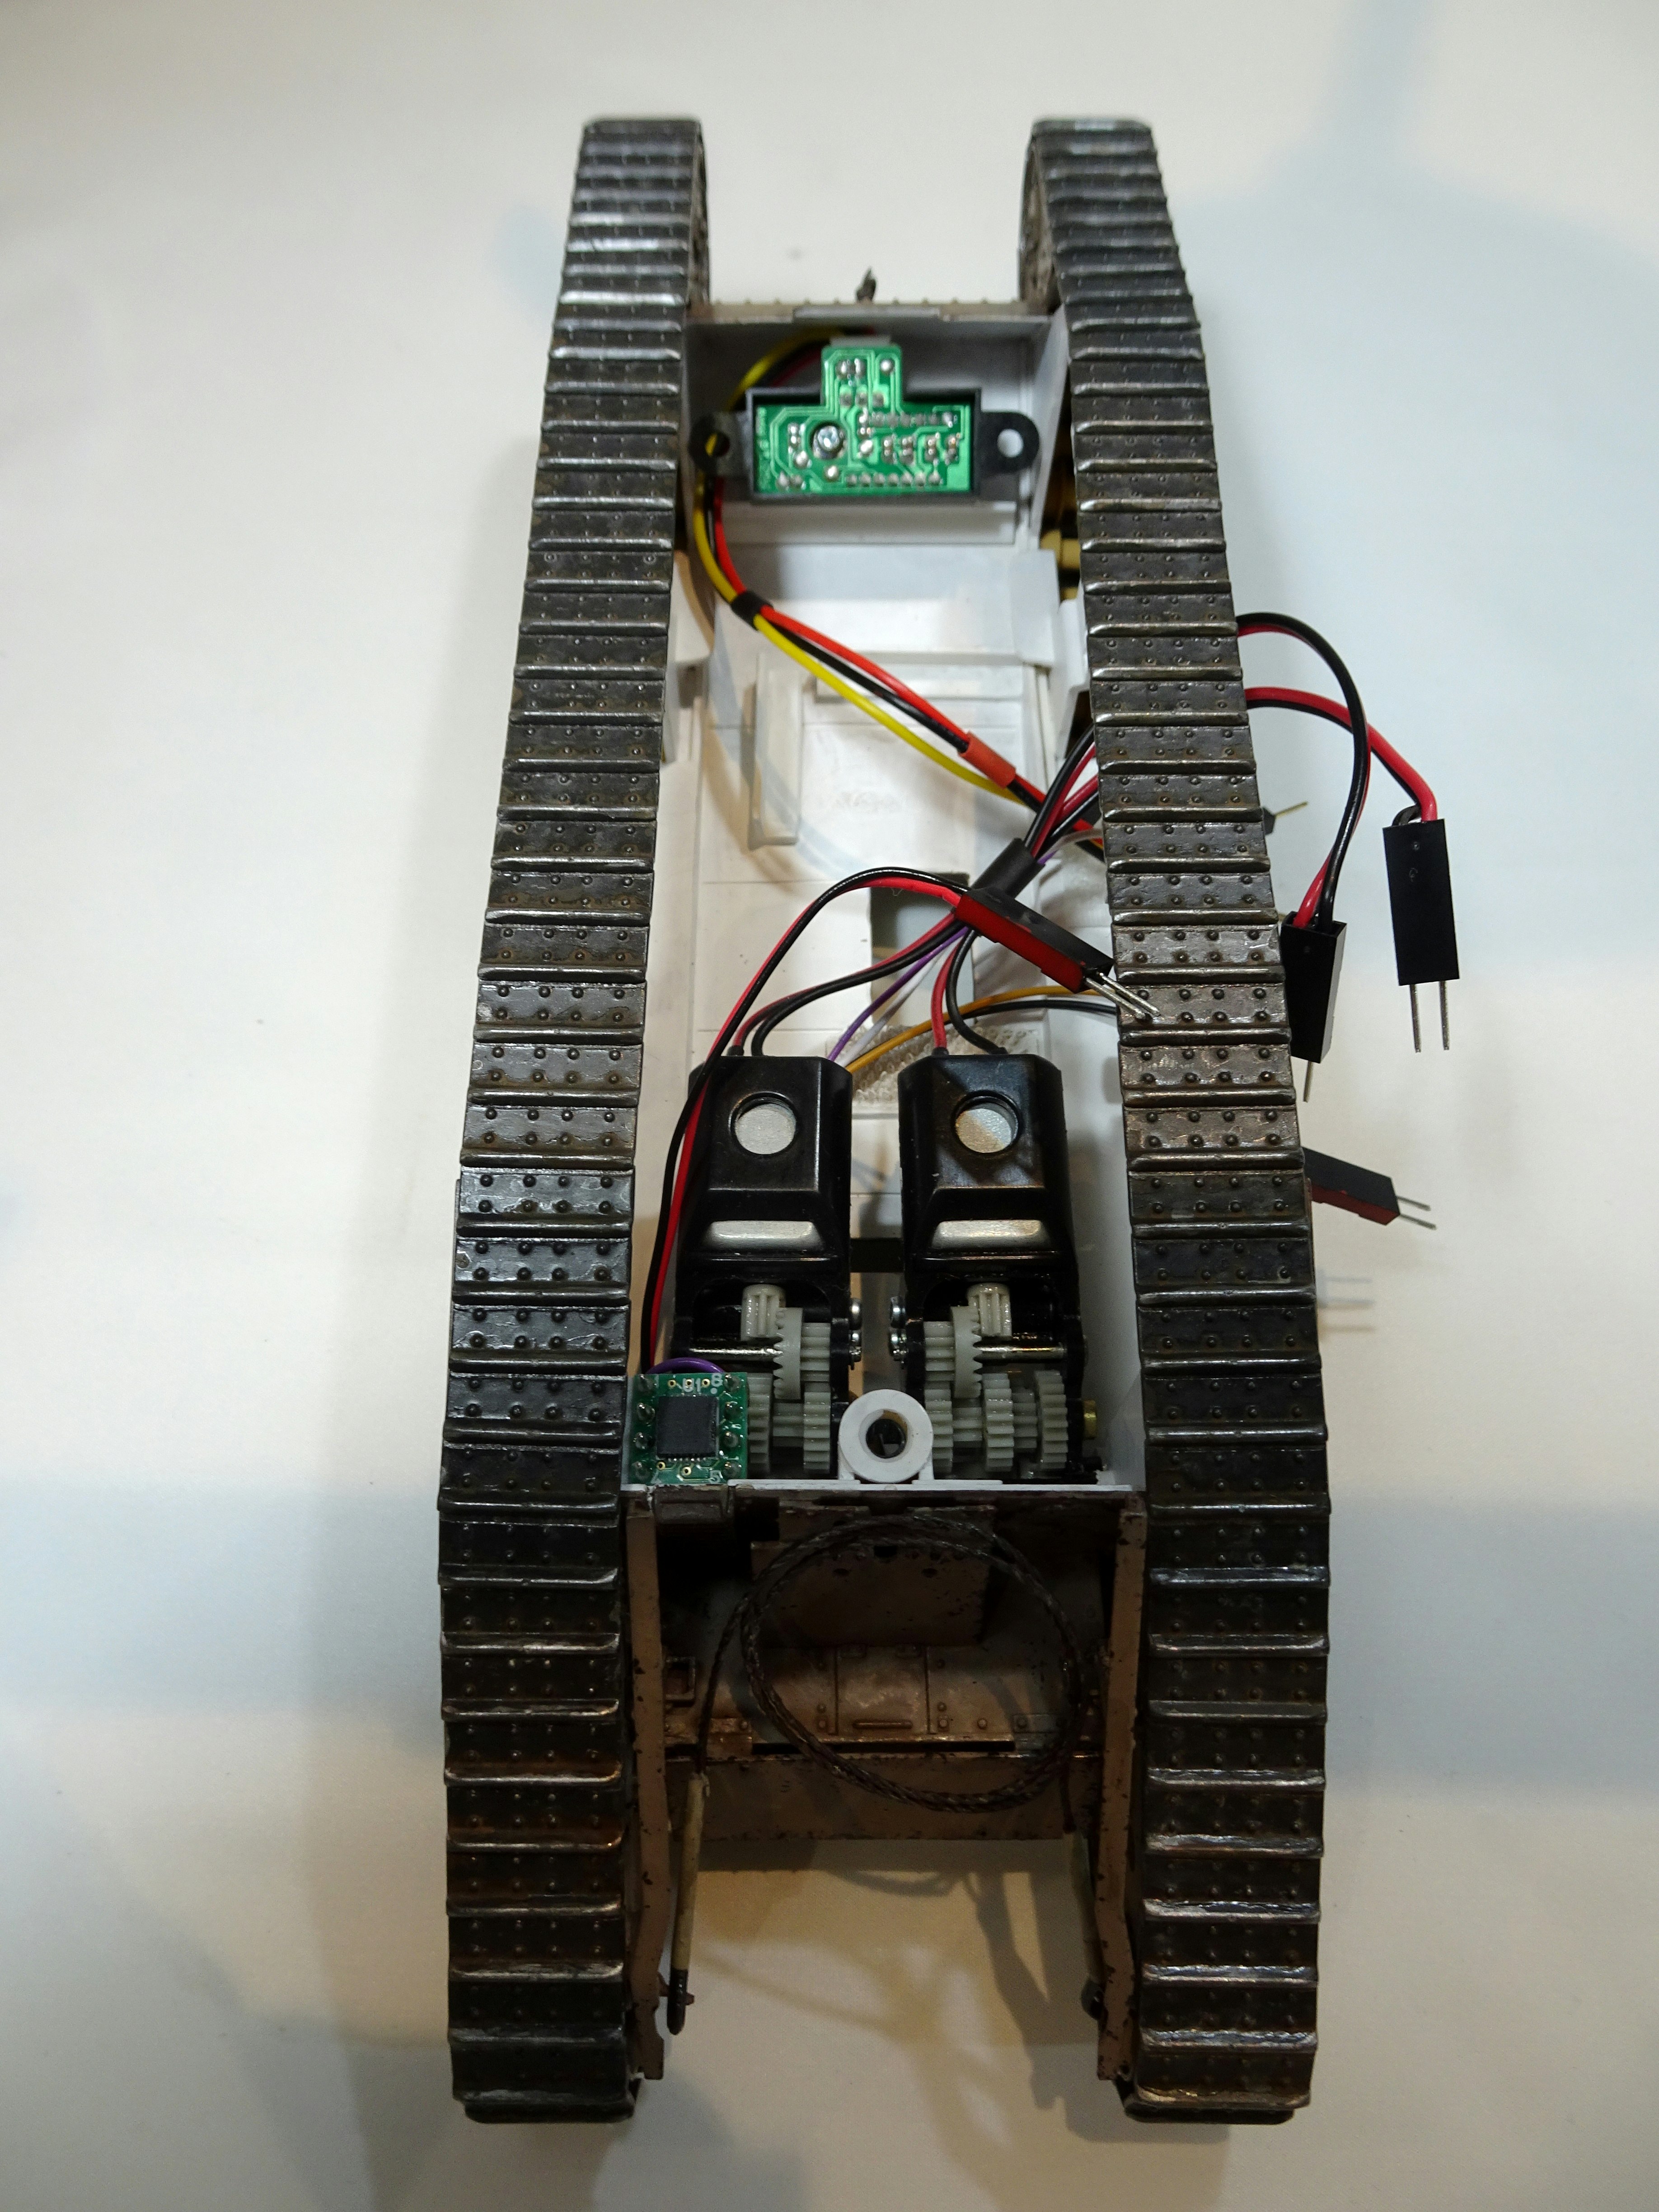
In the photo below, the small sensor in the lower-left corner of the interior of the tank body is the KXR94-2050.
By the way, you can see the left and right DC motors at the bottom, and the front side distance sensor "GP2Y0A21YK0F" at the top.
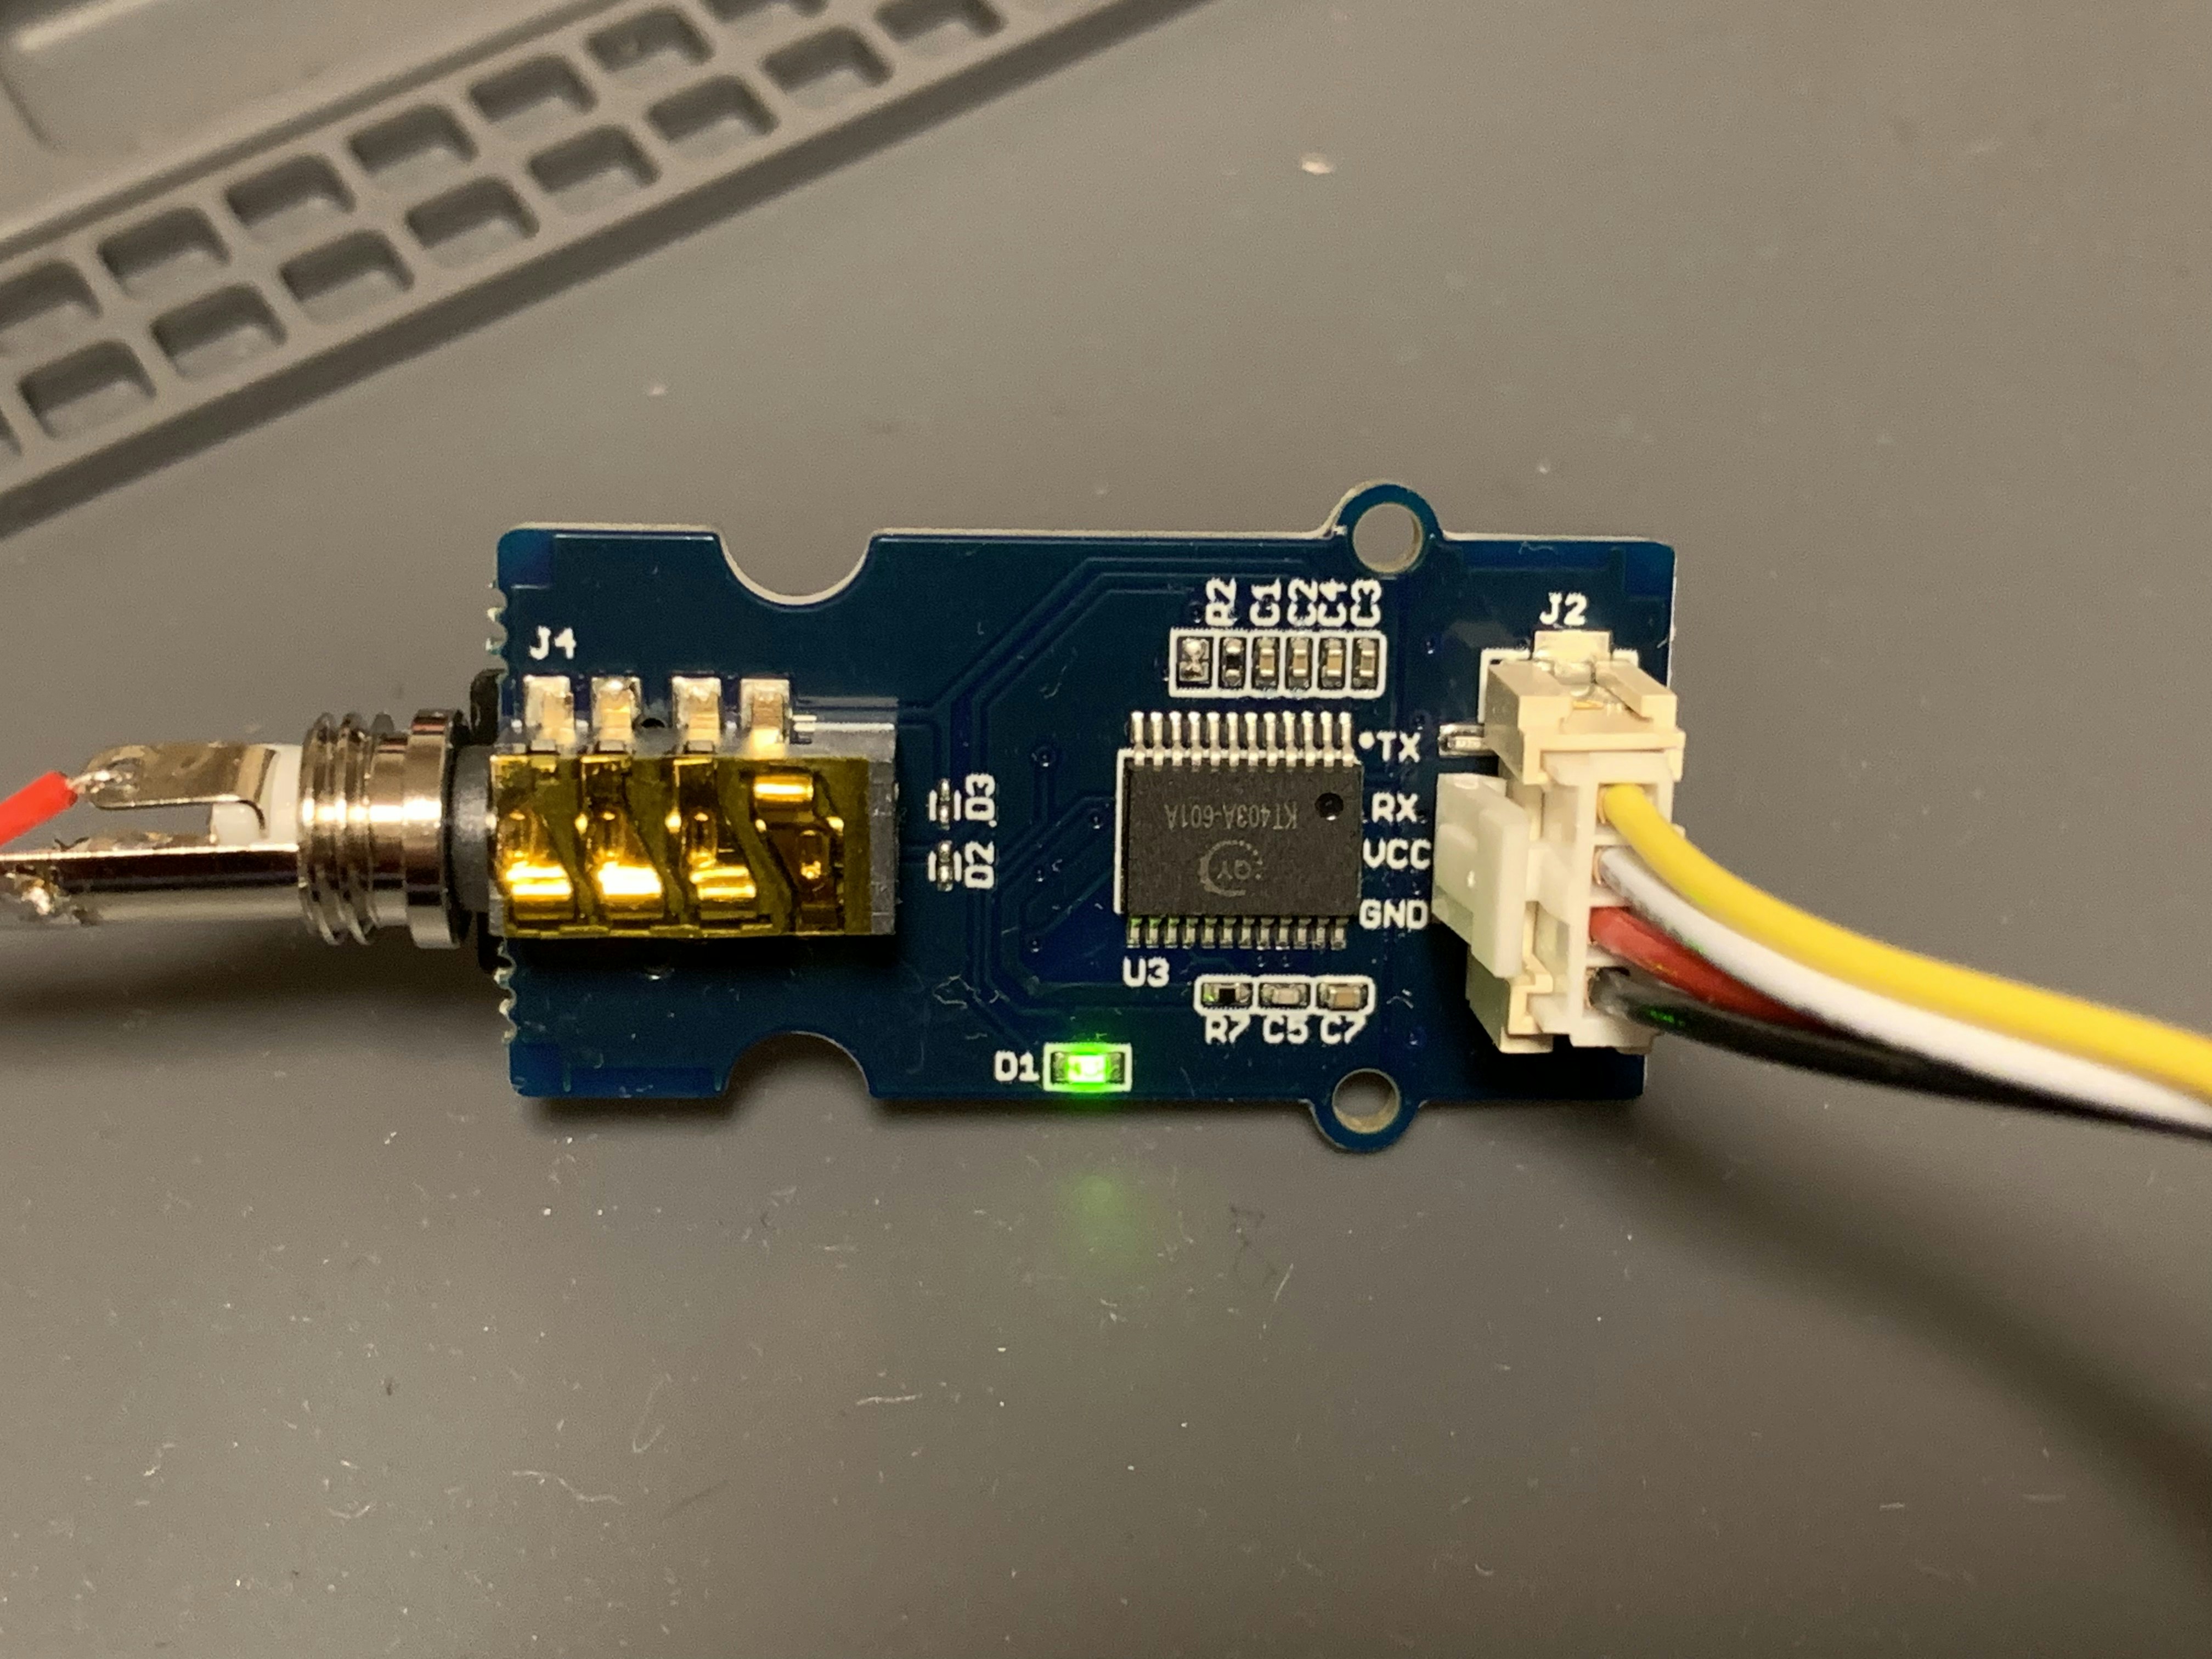
MP3 Player Module "Grove MP3 v2.0":
It reproduces engine idling sound when stopped and driving sound mixed with caterpillar noise when driving.
In this way, the sound source to be played is switched depending on the state.
Furthermore, the sound volume is changed in direct proportion to the motor power.
You should pay attention to both hardware and software when using this module.
I strongly recommend that you load the following pages first.
Note that the SD card capacity, file name, and folder name naming rules are important.
The pin placement is as follows.
| Grove MP3 | obniz |
|---|---|
| mp3_tx | 11 |
| mp3_rx | 10 |
| VCC | 9 |
| GND | Power- |
The reason for obtaining VCC from obniz itself is that if the MP3 module is turned on when obniz is started, the possibility of an error is reduced.
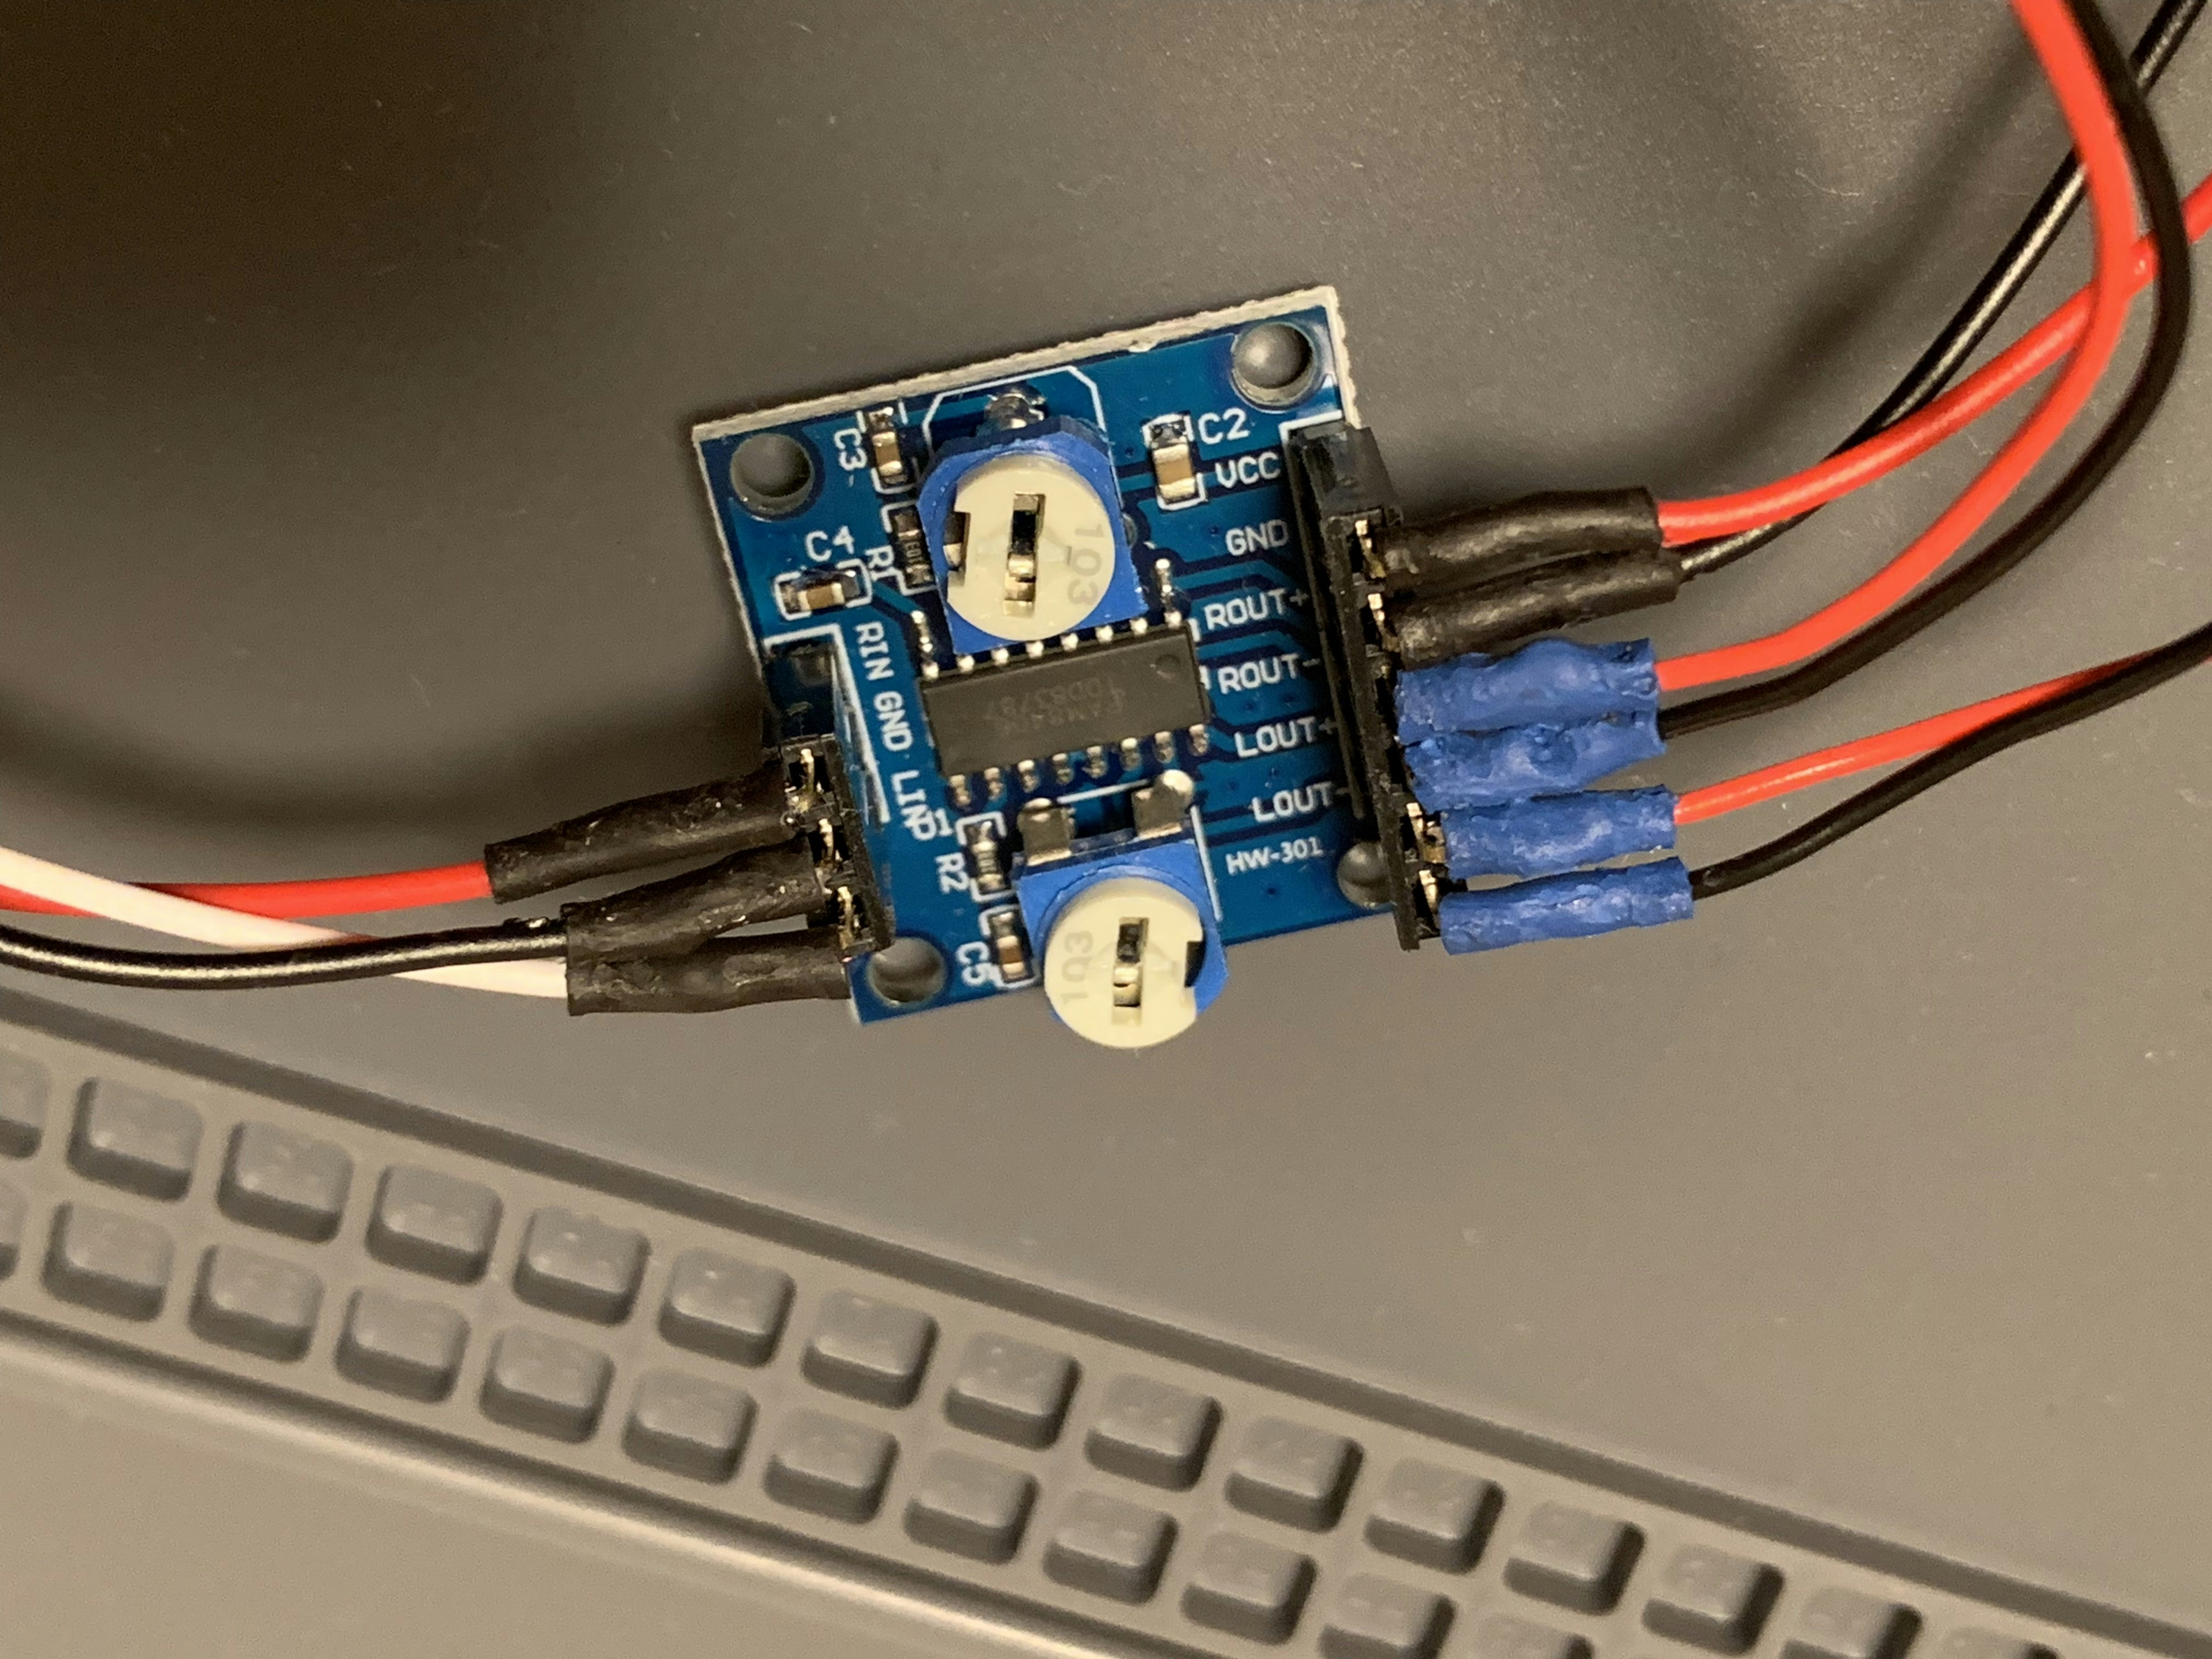
Stereo Amplifier Module "KKHMF PAM8406":
If the speaker standard is 8Ω, the output of about 2W + 2W can be played in stereo.
The pin placement is as follows.
| KKHMF PAM8406 | (Connect to) |
|---|---|
| VCC | Power+ |
| GND | Power- |
| ROUT+ | Right speaker polarity+ |
| ROUT- | Right speaker polarity- |
| LOUT+ | Left speaker polarity+ |
| LOUT- | Left speaker polarity- |
| RIN | Stereo Mini Plug right signal |
| GND | Stereo Mini Plug ground |
| LIN | Stereo Mini Plug left signal |
Speaker (8Ω 2W):
After experimenting with a few small, light, yet well-powered speakers, I settled on this one.
However, it took a while to get it for order from China.
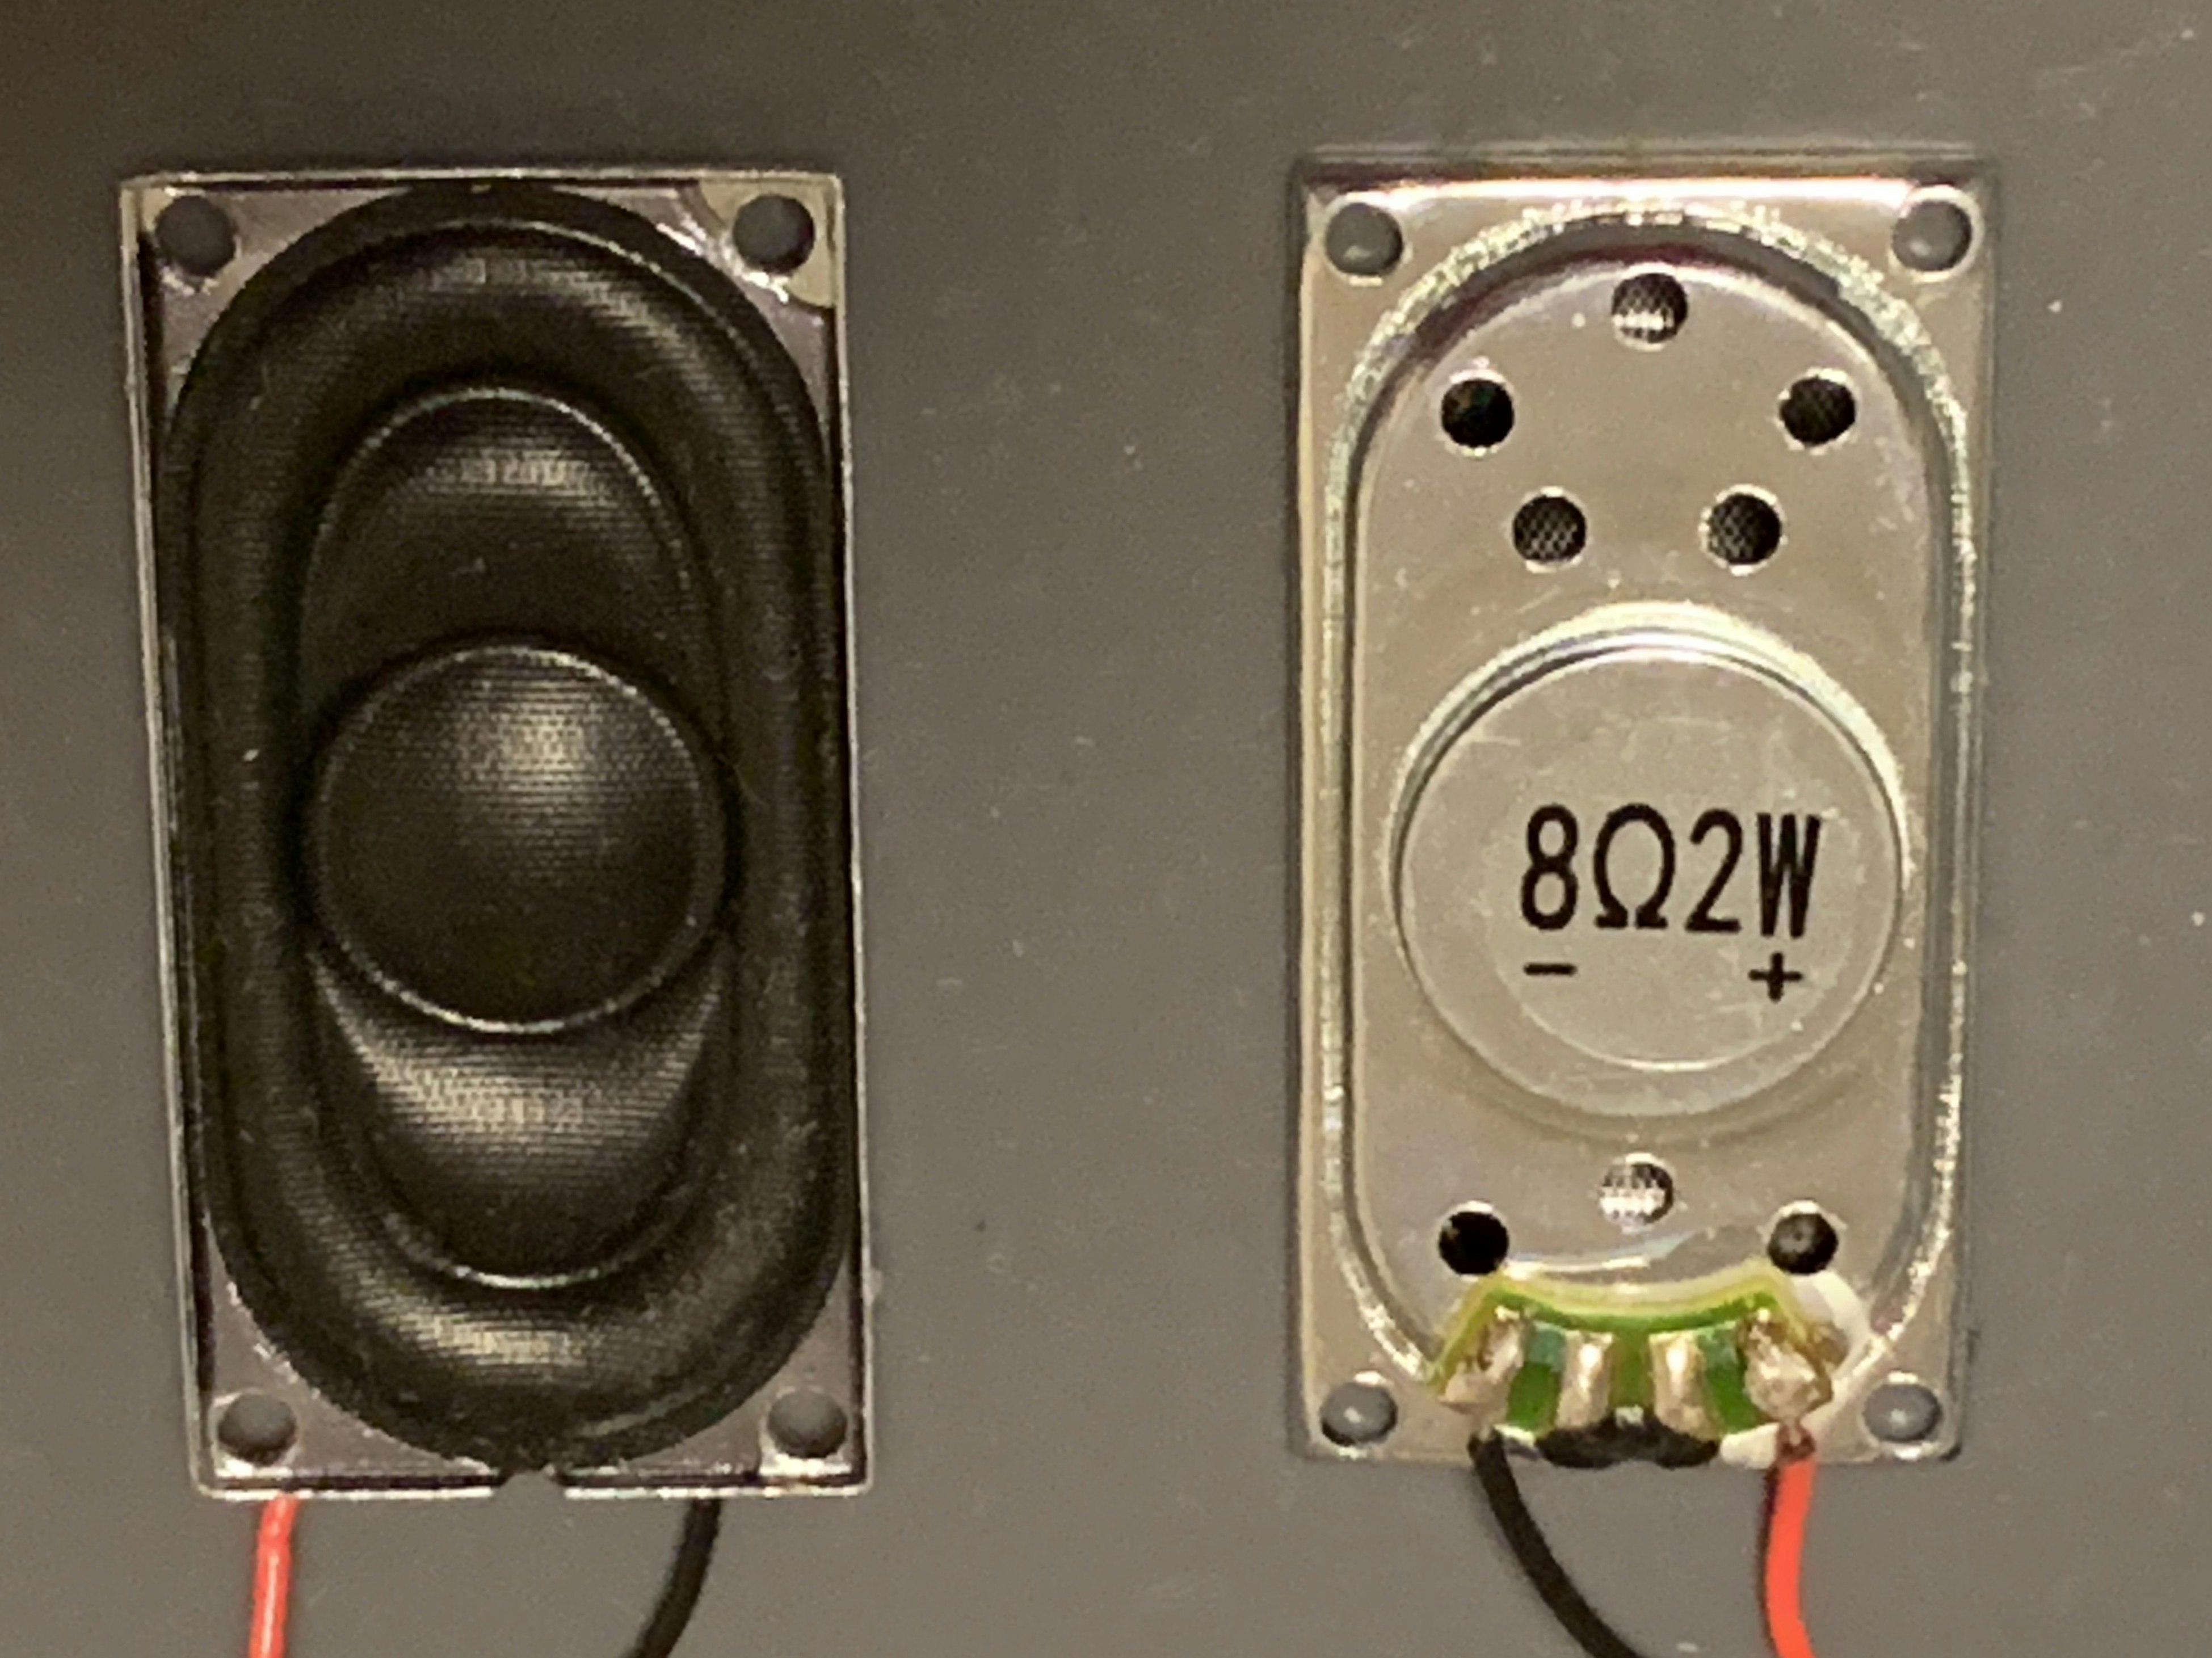
The photo below is testing about connecting the MP3 player to the stereo amplifier and speakers.
Solenoid "5V ZHO-0420S-05A4.5":
There is an obniz display as a device for feedback from the tank side, but in this work, it is placed on the back of the body.
However, with this, the command of motion of starting/stop the tank from the smartphone, it has to check from the backside of the tank every time.
Therefore, I decided to express the feedback by sound and touch using a small solenoid that can be operated by supplying power from the obniz.
When actually used, there was a real click feeling and it was very effective.
By the way, using this solenoid, "engine start" and "engine stop" actions are expressed by single-click, and turn over action is expressed by double-click.
Smallest power bank "Finger Pow":
I found it when I was looking for a USB battery of a very small size.
Lithium polymer batteries, which are often used by Radio-Control, are difficult to handle, so they become cautious about the introduction, but this battery allows you to use them casually without any worries.
Tamiya's plastic model "WWI British Tank Mk.IV Male (w/Single Motor)":
This kit is a single motorized specification, and it has only one set of DC motor and gear to drive the caterpillar.
This is enough if it is controlled only of forward / backward only, but to achieve a full operation including the movement of the left and right this time, it added another set of motor and gear.
When using this kit, the screw holes for attaching the second gear set are not pre-made on the tank side, so additional processing is required.
From these things, it can be said that it was a safer bet to use this model based on Radio-Control model specification from the beginning.
In conclusion
“IoT is like a mixed martial art”.
Recently, it has been expressed that way in the Japanese engineering community.
Certainly, the fact that IoT is a close combination of software and hardware can be understood as soon as you finish any tutorial and start creating something yourself.
And in the case of IoT works using precision scale models like this case, one layer increases further, and it becomes "Software × Hardware × Model build”.
This is already a heterogeneous martial arts battle.
It is possible to understand it immediately if you actually experience it, but if I think whether I was hitting a keyboard now, held a soldering iron with that hands soon, and I replaced it with a paintbrush soon also...
Especially in the second half of the work, I was spinning a lean cycle like this by high speed.
And it seems that the parts of the brain that are used in each of these layers seem to be different, so I use a little bit of energy (or determination) every time I switch between the tasks.
So I thought I wouldn't continue unless basically like making.
But...
If you like coding, like electronic crafts, and like modeling, I guarantee you'll be able to enjoy a very happy time.
I hope this article will help you to do something for you.
I'd like your follow on Twitter!
Exhibited at "Tamiya's modelers contest the 11th"

Exhibited at "Maker Faire Tokyo 2019"
Exhibited at "Tsukutta-ten 2019"
Exhibited at "Engadget summer festival 2019"
Exhibited at "builderscon tokyo 2019"
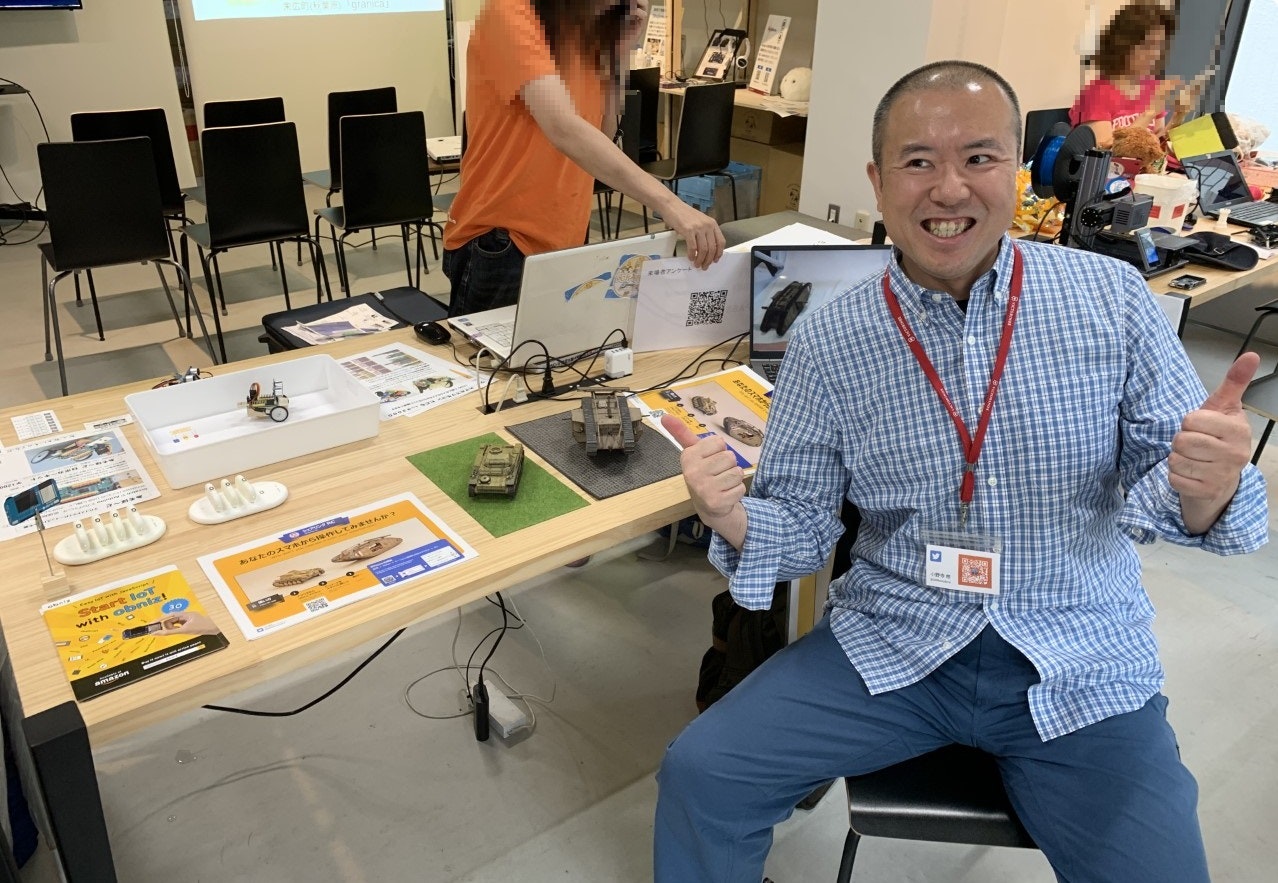
Exhibited at "Open Source Hard Ware Conference 2019 Tokyo/Fall"
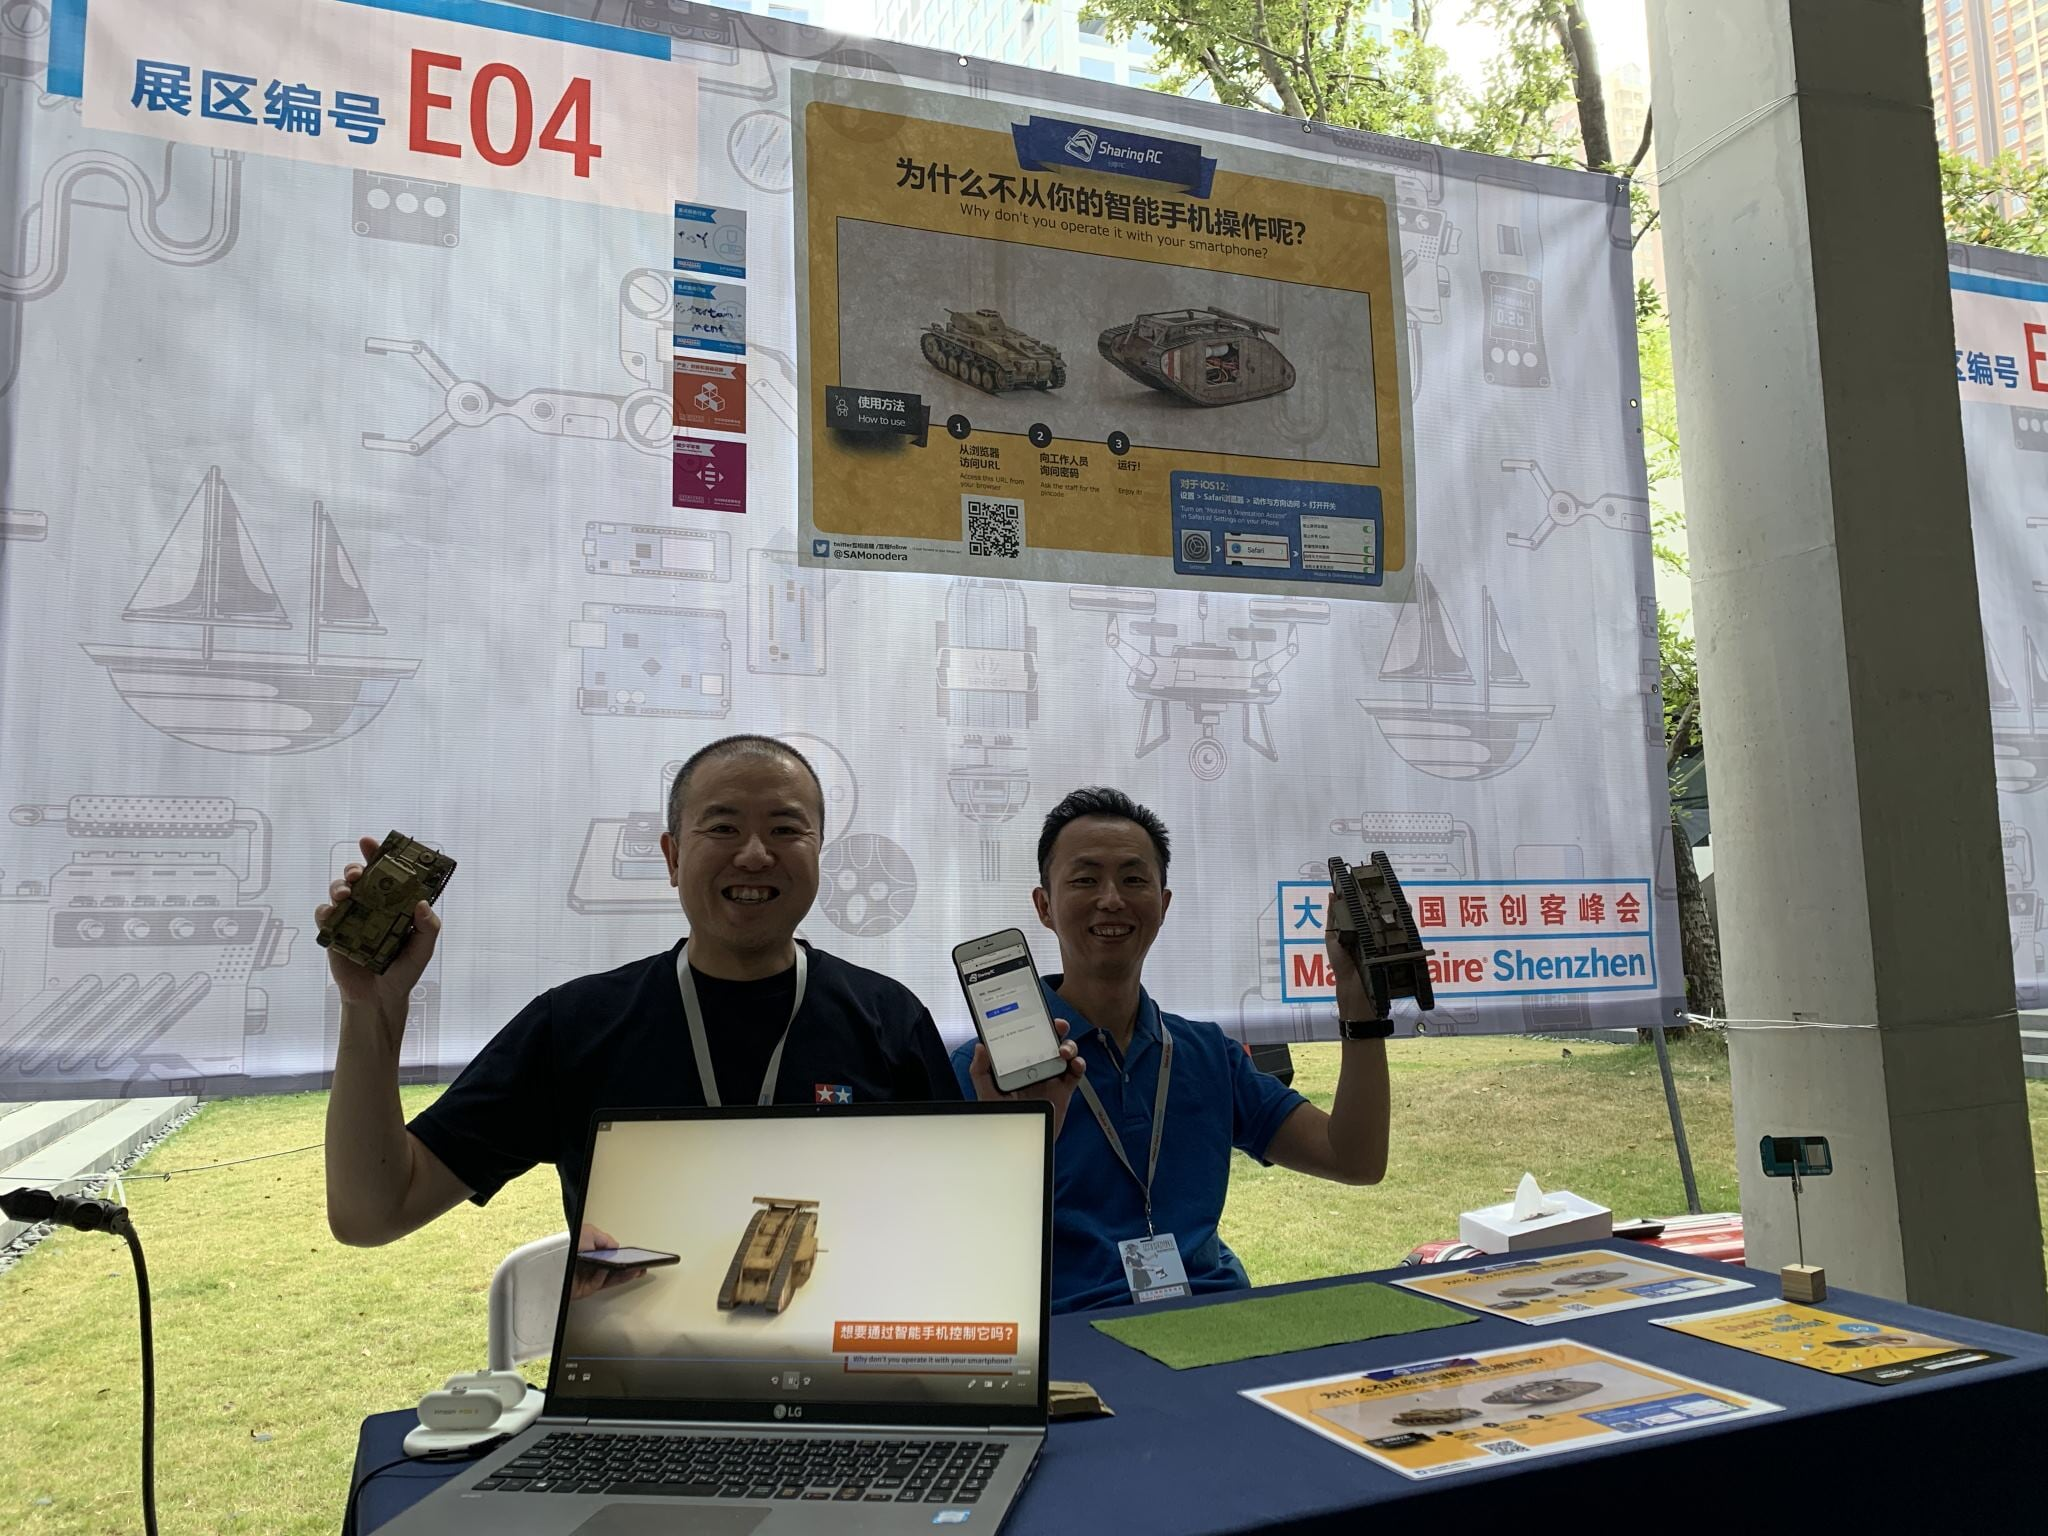
Exhibited at "Maker Faire Shenzhen 2019"
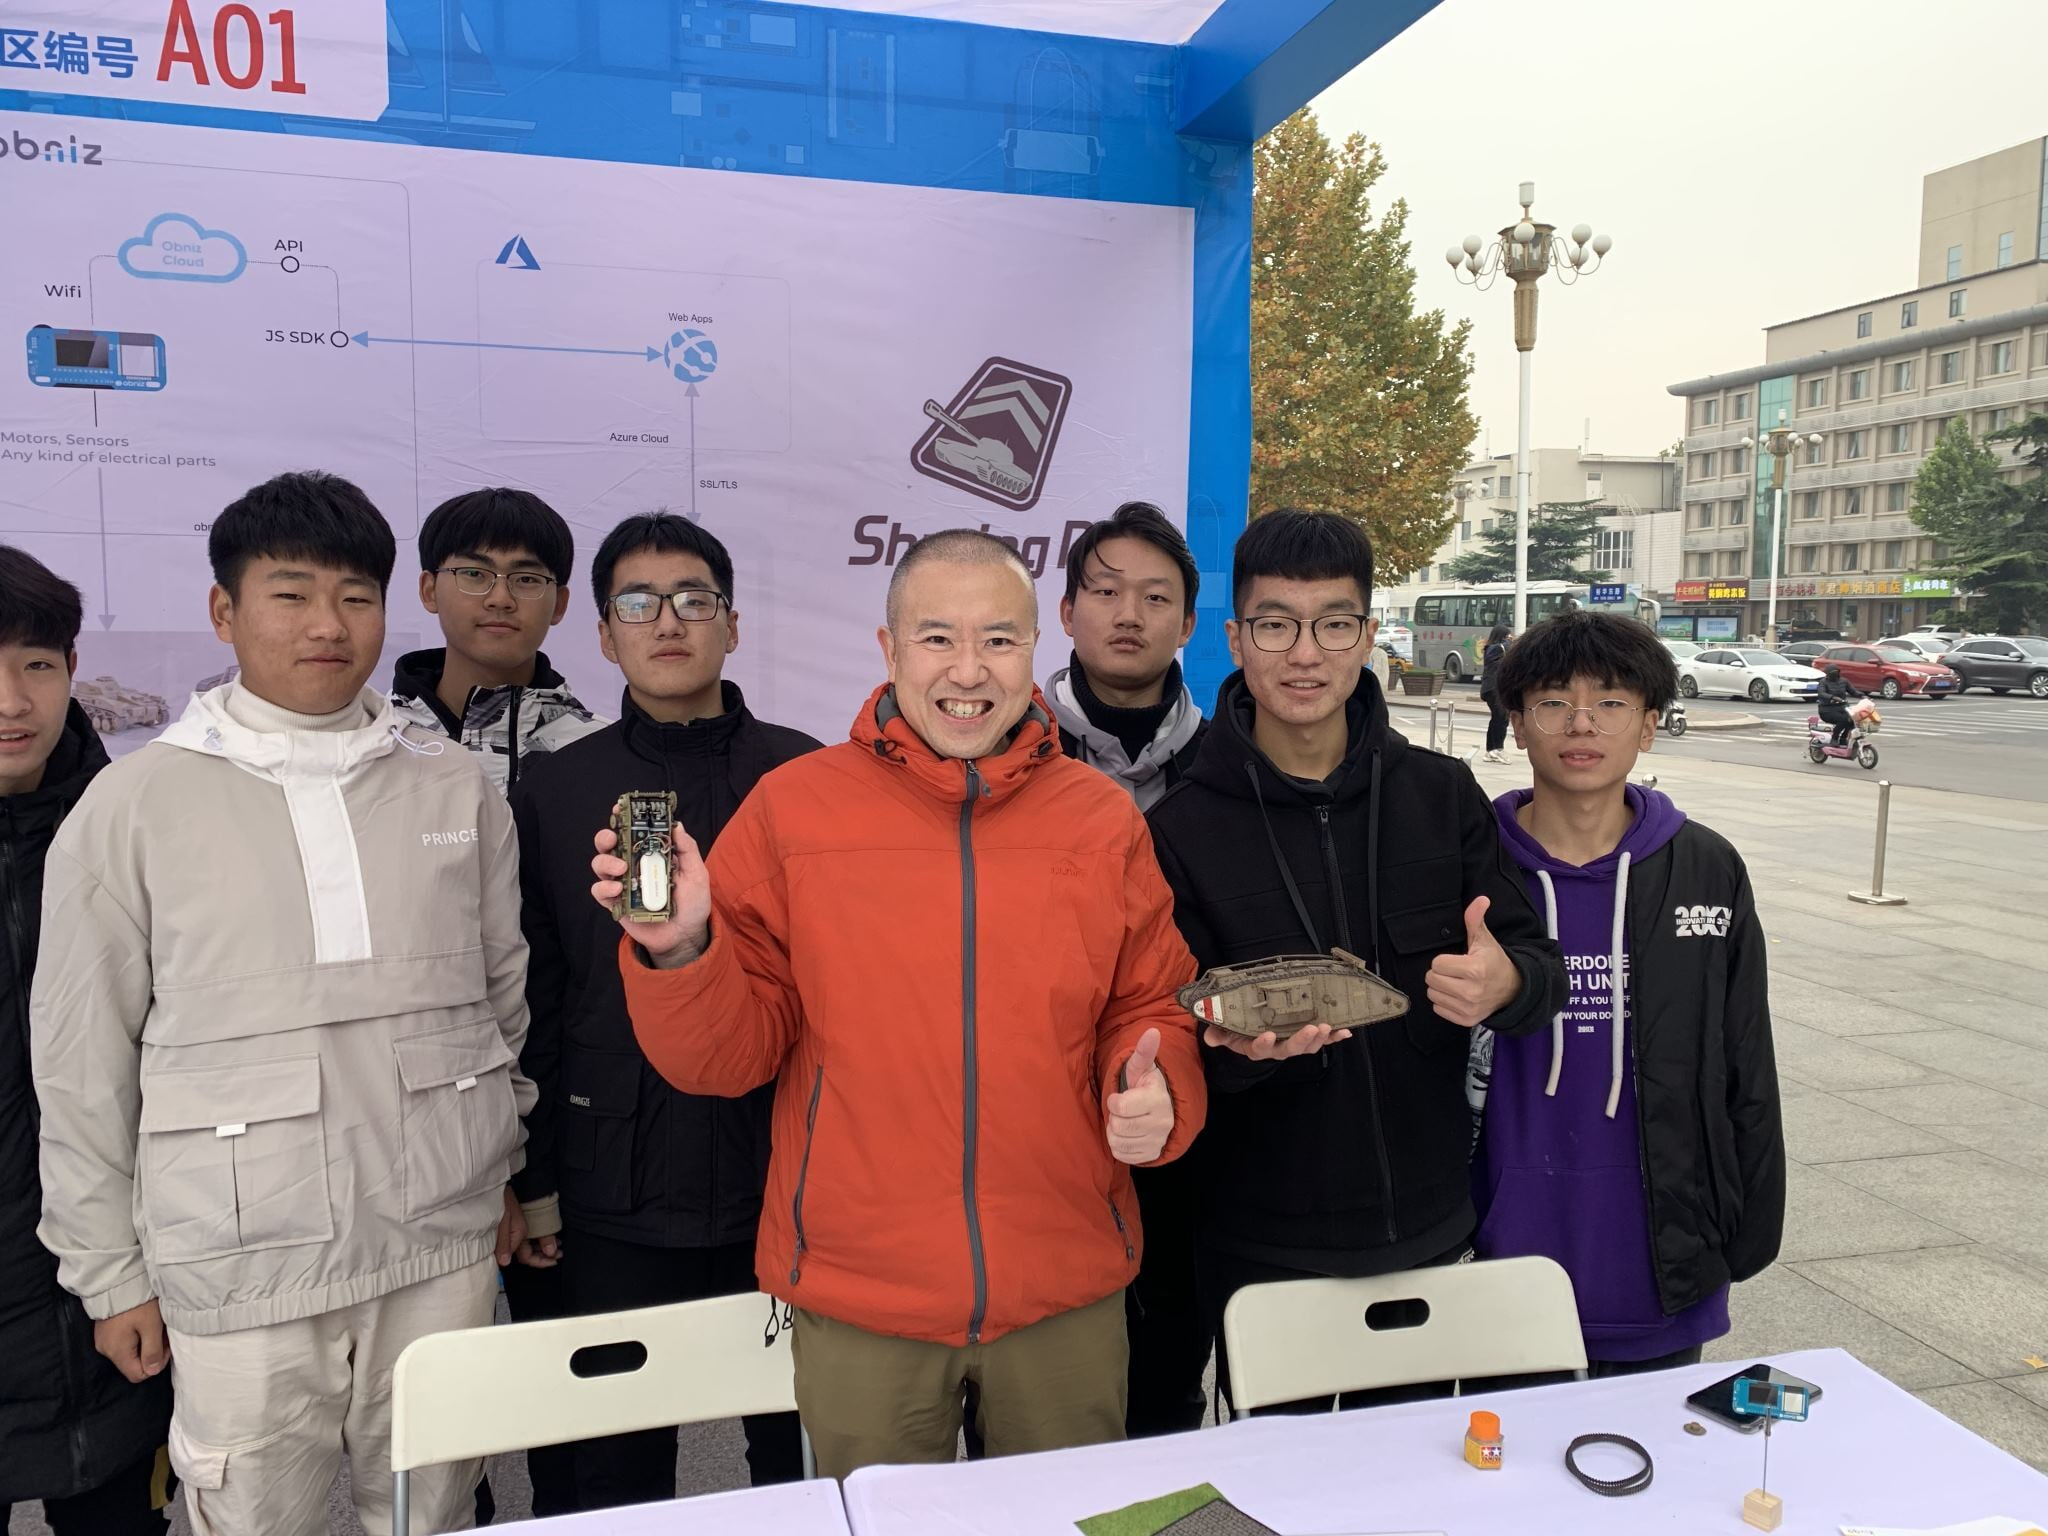
Exhibited at "Beijing-Tianjin-Hebei Maker Summit 2019"
Exhibited at "Tsukuruyo!2"
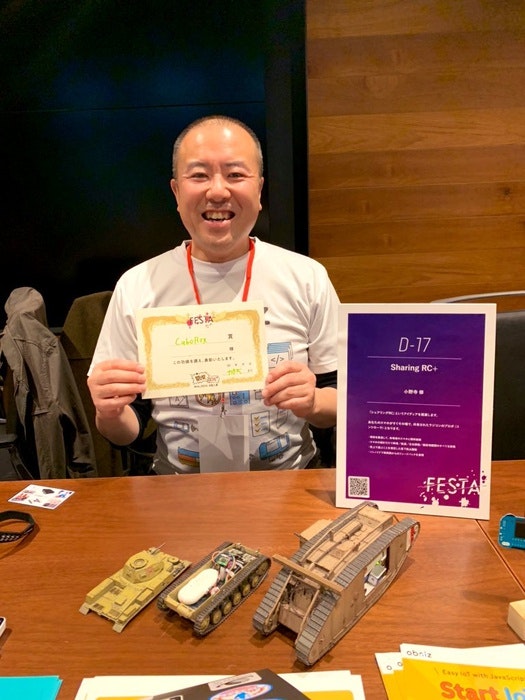
Exhibited at "FESTA2019" (Won a personal award)
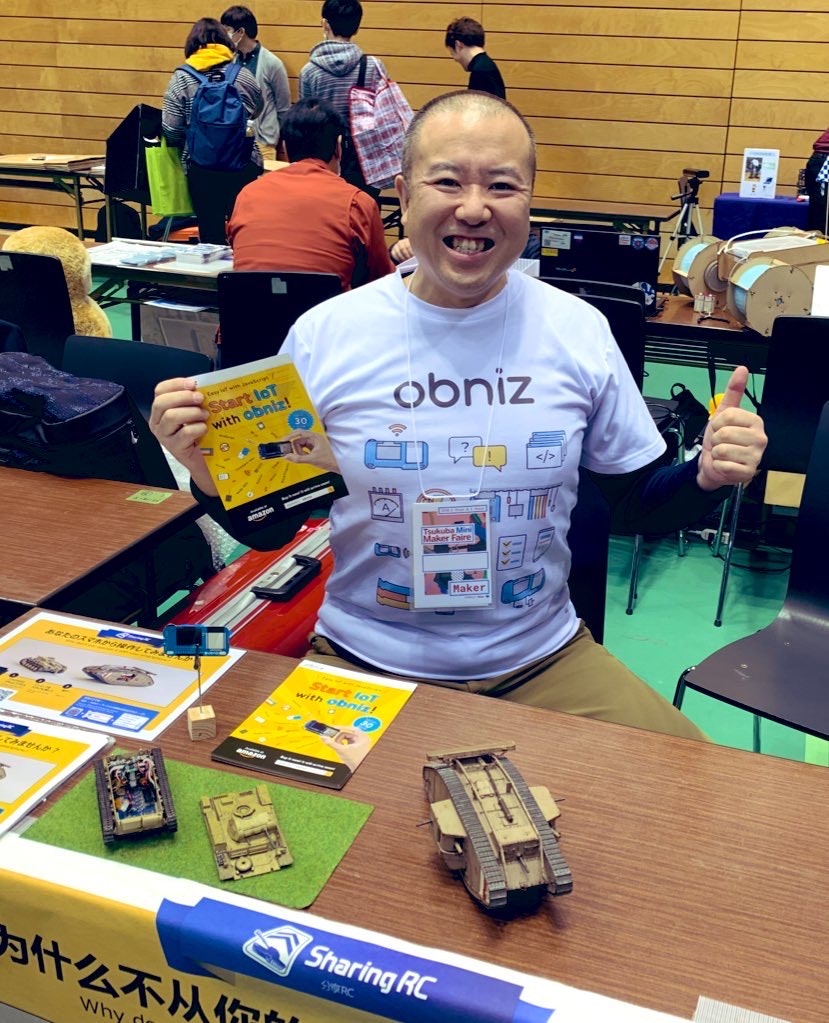
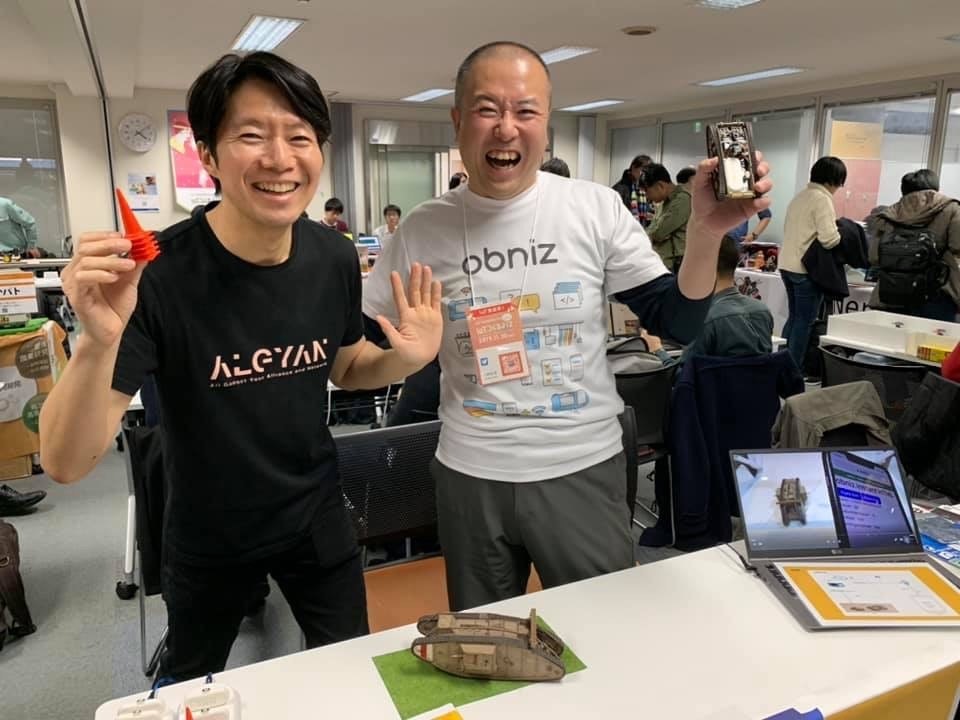
Exhibited at "Tsukuba Mini Maker Faire 2020"
Bibliography
obniz official page:
obniz - Objectify The Real World
Parts Library