はじめに
今回は Python でデータ分析を行うための環境を仮想環境上に構築する。
具体的には以下のものを利用する。
| 名称 | 説明 |
|---|---|
| VirtualBox | 仮想マシン実行環境 |
| Vagrant | コンソールから仮想マシンを管理するためのツール |
| IPython (+notebook) | Python 開発 & 実行環境 |
| Pandas | 分析用ライブラリ |
VirtualBox とは
VirtualBox は x86 仮想化(その辺に転がっている普通のPC・サーバ)を仮想化するためのソフトウェア。
正式名称は Oracle VM VirtualBox。現在は Oracle が開発を行っている。
既存の環境に影響を与えずに、色々実験する際にはとっても便利なツール。
Vagrant とは
Vagrant は仮想環境の管理をコンソールから行い易くするためのツール。
また、有志が作ってくれた Box を利用することで楽にテスト環境を構築することも出来る。
これを導入しておくと、各種環境を構築する際の手間が省けることが多い。
IPython とは
IPython は既存の Python の対話型インタプリタを大幅に拡張したもの。
入力時の補完機能、クラスタ環境における並列処理、コマンドラインシェル機能、
GUI周りのツールキットなどの拡張が行われている。
アドホックに分析する際の対話型インタプリタとしてとても便利。
IPython notebook とは
IPython notebook は IPythonを、Webブラウザから利用できるようにしたもの。
GUIが絡む部分、特にグラフのプロット等で便利。
マシン単体で完結させることも可能だが、スペックの良いサーバー上にインストールして、
非力なクライントから分析を行ったり、皆で結果の共有等が楽に行えるようになる。
Pandas とは
Pandas は Python のデータ分析用ライブラリ。
数値や行列を操作しやすくするデータ構造と、その操作をまとめたもの。
裏で numpy や scipy といった、Python 用の数値計算ライブラリを利用している。
そのおかげか、数値計算の速度は早い。
各種環境とツールの導入
作業環境
今回は以下の環境で行った。
- MacBookPro Retina 13 (Late 2013)
- OSX Yosemite
- CPU: Core i5 2.6GHz
- メモリ: 16GB
仮想環境のOSとして、Debian 7.6.0 (64bit)を選択した。
VirtualBox の導入
このページから自分の環境に合ったファイルをダウンロードし、インストールする。
Windows, Mac, Linux など、メジャーな OS にはひと通り対応している。
インストーラーの指示に従えば、特に問題ないはず。
Vagrant の導入
このページから自分の環境に合ったファイルをダウンロードし、インストールする。
Windows, Mac, Linux (RedHat, Debian 系) のOSに対応している。
仮想環境の構築
このページ からBoxファイルを選ぶ。
今回は Debian 7.6.0 (64bit) を選択した。
https://github.com/jose-lpa/packer-debian_7.6.0/releases/download/1.0/packer_virtualbox-iso_virtualbox.box
以下のコマンドを実行していく。
$ vagrant box add debian-7.6 https://github.com/jose-lpa/packer-debian_7.6.0/releases/download/1.0/packer_virtualbox-iso_virtualbox.box
$ vagrant list
...
debian-7.6       (virtualbox, 0)
...
$ mkdir -p ~/vagrant/debian7.6 # 仮想環境をインストールしたい場所を作る
$ cd ~/vagrant/debian7.6
$ vagrant init debian-7.6
$ ls
Vagrantfile
作成された Vagrantfile を次のように編集する。
# -*- mode: ruby -*-
# vi: set ft=ruby :

VAGRANTFILE_API_VERSION = "2"

Vagrant.configure(VAGRANTFILE_API_VERSION) do |config|
  config.vm.box = "debian-7.6"
  config.vm.network "private_network", ip: "192.168.20.10"
  config.vm.provider "virtualbox" do |vb|
    vb.customize ["modifyvm", :id, "--memory", "2048"]
  end
end
これで仮想マシンのプライベートIPが 192.168.20.10 に、
メモリの割り当てが2GBに設定できる。
以下のコマンドで仮想マシンを起動し、SSHで接続する。
$ vagrant up
Bringing machine 'default' up with 'virtualbox' provider...
==> default: Importing base box 'debian-7.6'...
...

$ vagrant ssh
Linux packer-virtualbox-iso-1411922062 3.2.0-4-amd64 #1 SMP Debian 3.2.57-3 x86_64

The programs included with the Debian GNU/Linux system are free software;
the exact distribution terms for each program are described in the
individual files in /usr/share/doc/*/copyright.

Debian GNU/Linux comes with ABSOLUTELY NO WARRANTY, to the extent
permitted by applicable law.
Last login: Sun Sep 28 16:43:22 2014 from 10.0.2.2
vagrant@packer-virtualbox-iso-1411922062:~$
これで仮想環境にログインできた。
$ logout or Ctrl+D でローカル環境に戻れる。
仮想マシンを終了する際は
$ vagrant halt
で終了できる。
Pandas の導入
今回は、システムの Python2.7 系を使用する。
仮想マシンなので、パッケージ管理には pip のみを利用し、
virtualenv などによるパッケージ管理は特に行わなわずに、
システムの Python にインストールしていく。
次のコマンドを実行し、分析に必要になるモジュールをひと通りインストールしておく。
$ sudo apt-get update
$ sudo apt-get upgrade
...
Do you want to continue [Y/n]? Y
...

$ sudo apt-get install -y gcc g++ libpyside-dev python2.7-dev libevent-dev python-all-dev build-essential python-numpy python-scipy python-matplotlib libatlas-dev libatlas3gf-base python-pandas emacs
$ pip install --user --install-option="--prefix=" -U scikit-learn
IPython + IPython notebook の導入
以下のコマンドで IPython を導入する。
$ sudo pip install "ipython[all]"
設定ファイルの作成し、設定ファイルの頭の部分に次のような内容を記述する。
$ ipython profile create nbserver
$ emacs /home/vagrant/.ipython/profile_nbserver/ipython_notebook_config.py
# Configuration file for ipython-notebook.

c = get_config()

c.IPKernelApp.pylab = 'inline'
c.NotebookApp.ip = '*'
c.NotebookApp.open_browser = False
c.NotebookApp.port = 9999

...
次のコマンドでサーバとして起動する。
$ ipython notebook --profile=nbserver &
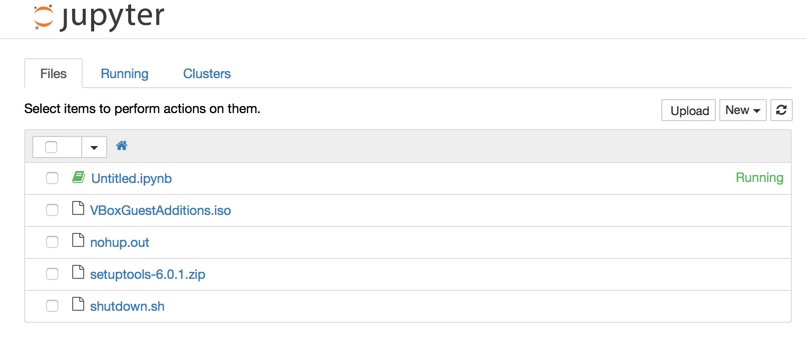
http://192.168.20.10:9999/ にアクセスすると、次のような画面が見える。
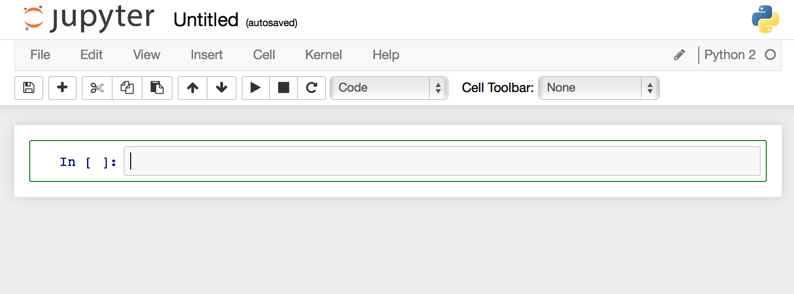
ここで、右上の New -> Python2 を選ぶと、対話式インタプリタが現れる。
今回は仮想環境なので問題ないが、実環境で使う際は下記ページを参考にして、
パスワードをかけてやると良い。
IPython notebook サーバーを立ち上げる - パスワードを設定してアクセス制限をする
実行サンプル
%matplotlib inline
import matplotlib.pyplot as plt

plt.plot(range(100))
上記コードを入力し、▶ をクリックすると実行される。
おわりに
これで、Python による分析環境が整った。


