これなに
たくさんの人が歩くアニメーションを作りたいとします。このとき、個々の人は、同じ動きで良いとします。
1人作成して、それをリンク複製していけばできますが、ジオメトリーノードだと頂点でもできるのではないかと思って試してみました。
できたもの

手順
モデルの入手
まず歩く人が必要になります。今回は、mixamoからFBXでダウンロードすることにします。
- mixamoにログイン
- 上部のCharactersをクリックし、キャラクターを適宜選択(ここでは「X Bot」を選択)
- 上部のAnimationsをクリックし、「Standard Walk」で検索し、「Standard Walk」を選択
- 右側の「In Place」をチェックし、ダウンロードする。
FBXインポート
Blender3.4を起動します。
ファイルメニューのインポートのFBXから、ダウンロードしたファイルを読み込んでください。
選択された状態で、M(コレクションに移動)の新規コレクションで、botと名前をつけてください。この名前は後で使います。
繰り返し設定
アニメーションは1サイクル分しかないので、繰り返すようにします。
適当な画面(たとえば、下部のタイムライン)をノンリニアアニメーションに変えて、下図の中央付近の「アクションのストリップ化」を押します。

サイドバーのストリップタブのアクションクリップのリピートを7にします。これで7サイクル繰り返すようになります(サイドバーはNキーで表示/非表示が切り替わります)。

ノンリニアアニメーション画面はもう使わないので、別の画面に切り替えてOKです。
マテリアル設定
アウトライナーでsimの中のArmatureの中のBeta_Surfaceオブジェクトを選択し、Shadingワークスペースを開きます(Beta_Surfaceは、キャラクター「X Bot」のオブジェクトです)。
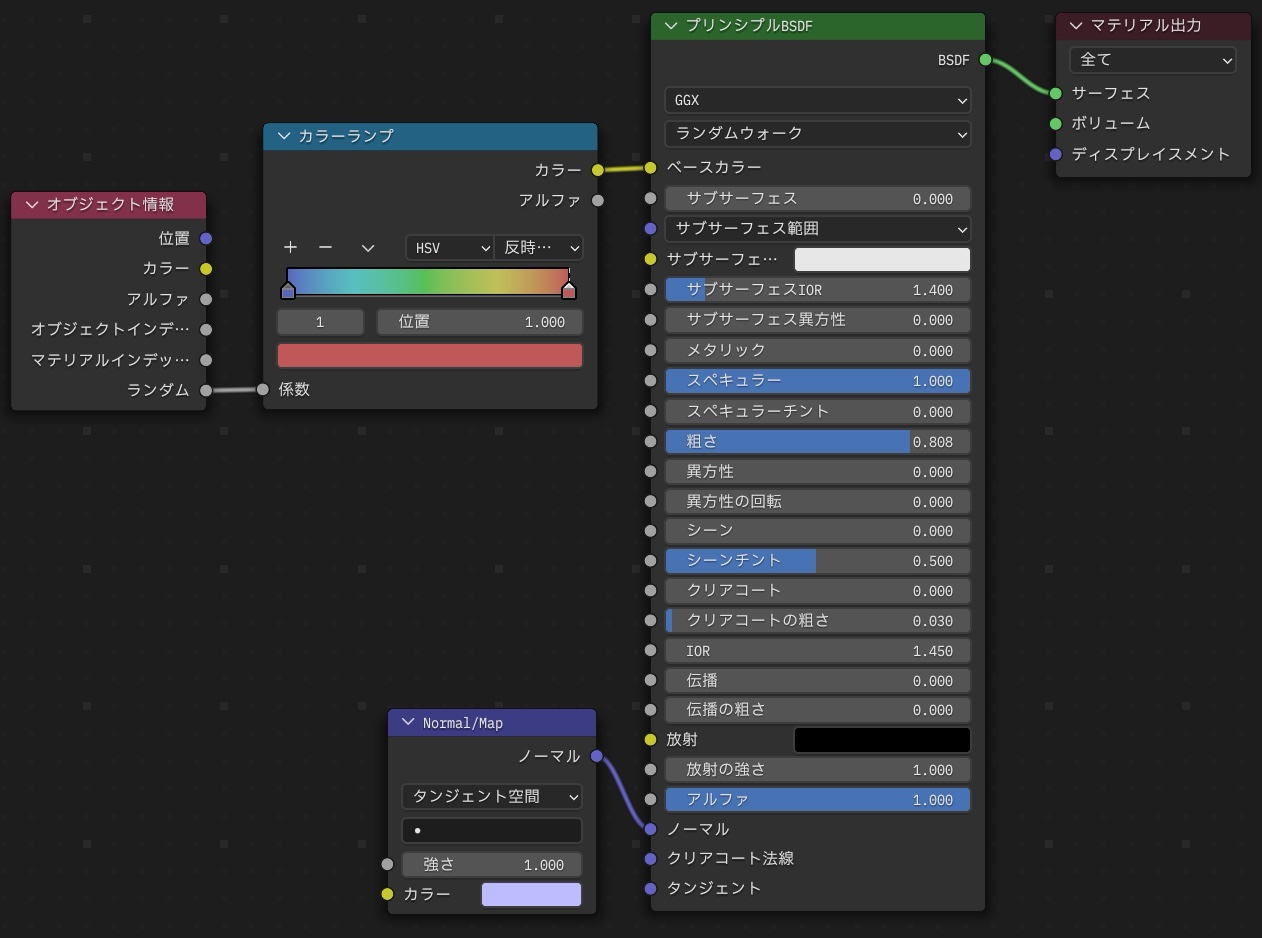
下図のようにマテリアルを変更します。これにより、個々の色をランダムにします。
※ マテリアルを変更しなくてもアニメーション作成できます。
simは直接レンダリングしないので、アウトライナーのチェックを外して、非表示にしてしまいましょう。
ジオメトリーノードとオブジェクト作成
Pythonで一気に作成します。下記を実行すると、ジオメトリーノードとオブジェクトが作成されます。
from math import cos, pi, sin

import bpy
import numpy as np


def make_geometry_node(obj):
    modifier = obj.modifiers.new("GeometryNodes", "NODES")
    node_group = bpy.data.node_groups.new("Geometry Nodes", "GeometryNodeTree")
    modifier.node_group = node_group
    node_group.inputs.new("NodeSocketGeometry", "Geometry")
    node_group.outputs.new("NodeSocketGeometry", "Geometry")
    ndgi = node_group.nodes.new("NodeGroupInput")
    ndgi.location = -140, 0
    ndci = node_group.nodes.new("GeometryNodeCollectionInfo")
    ndci.location = -140, -100
    ndci.inputs[0].default_value = bpy.data.collections["bot"]
    ndio = node_group.nodes.new("GeometryNodeInstanceOnPoints")
    ndio.location = 30, 0
    ndio.inputs[5].default_value.z = 2.36
    ndgo = node_group.nodes.new("NodeGroupOutput")
    ndgo.location = 200, 0
    node_group.links.new(ndgi.outputs[0], ndio.inputs[0])
    node_group.links.new(ndci.outputs[0], ndio.inputs[2])
    node_group.links.new(ndio.outputs[0], ndgo.inputs[0])


# シミュレーションオブジェクト作成
def make_object(npeople, nframe, tick):
    mesh = bpy.data.meshes.new(name="sim")
    mesh.from_pydata([[0, 0, 0]] * npeople, [], [])
    obj = bpy.data.objects.new(mesh.name, mesh)
    bpy.context.scene.collection.objects.link(obj)

    rnd = np.random.default_rng(1)
    for vtx in obj.data.vertices:  # 頂点のアニメーション
        x, y = 0.0, 0.0  # 初期位置
        r = pi / 4 * rnd.uniform(0.7, 1.3)  # 向き
        speed = rnd.uniform(0.1, 0.2)
        for i in range(nframe):
            vtx.co = x, y, 0
            vtx.keyframe_insert("co", frame=i * tick + 1)
            r += rnd.uniform(-0.1, 0.1)  # 向きを変える
            x += speed * sin(r)
            y += speed * cos(r)

    make_geometry_node(obj)
    bpy.context.scene.frame_end = nframe * tick


npeople = 20  # 人数
nframe = 50  # キー数
tick = 5  # フレーム/キー
make_object(npeople, nframe, tick)
頂点をバラけさせながら動かして、キーフレームを作成してアニメーションしています。
作成されたジオメトリーノードは下記のようになっています。

感想
作ってはみたものの、いまいちでした。
頂点だと向きを持ってないので、アニメーション中で方向を変更できず不自然です。また、アニメーションも同期していて不自然です。
自然なアニメーションをさせるには、頂点を使うのは難しそうです。
以上