はじめに
Blender 4.2で、ジオメトリーノードを使って卵を作成してみました。
また、すべての操作をPythonで記述することで、簡単に再現できるようにしています。
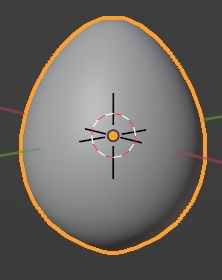
作成した卵とジオメトリーノードは下記になります。

ジオメトリーノードの説明
-
グループ入力: UV球を元にしています。XYZが±1の範囲にあります -
位置: 位置属性を取り出し、「XYZ分離」と「乗算」の入力にします。「XYZ分離」の方で卵型に変形を計算します -
XYZ分離:Zだけ取得します -
範囲マッピング: 入力が±1なので、0-1の範囲になるようにします -
Floatカーブ: カラーランプのように0-1の範囲を0-1に変換します。ここでは、Zを「卵型への係数」に変換します -
XYZ合成: 「Floatカーブ」からXとYにつなぎます。Zは1です -
乗算: ベクトルの掛け算をします。ここで、球を卵型にします -
位置設定: 位置を設定します。これによりジオメトリーが卵型になります -
スムーズシェード設定: スムーズをかけます
このジオメトリーノードは、下記のBlender 3.4の記事を参考にBlender 4.2用にアレンジしたものです。
Pythonで実行
下記のコードをコピペして実行すると、卵を作成できます。
import bpy

ATTRIBUTES = {"name": str, "location": list, "mapping": list, "operation": str}


def new(nodes, bl_idname, inputs=None, **kwargs):
    nd = nodes.new(bl_idname)
    for name, value in kwargs.items():
        typ = ATTRIBUTES.get(name)
        if value and typ and isinstance(value, typ):
            if name == "mapping":
                crv = nd.mapping.curves[0]
                for _ in value[2:]:
                    crv.points.new(0, 0)
                for pnt, s in zip(crv.points, value):
                    pnt.handle_type, *pnt.location = s
            else:
                setattr(nd, name, value)
    for name, value in (inputs or {}).items():
        nd.inputs[name].default_value = value


bpy.ops.mesh.primitive_uv_sphere_add()
obj = bpy.context.object
node_group = bpy.data.node_groups.new("Geometry Nodes", "GeometryNodeTree")
mod = obj.modifiers.new("GeometryNodes", "NODES")
mod.node_group = node_group
node_group.is_modifier = True
nodes = node_group.nodes
node_group.interface.new_socket("Geometry", in_out="OUTPUT", socket_type="NodeSocketGeometry")
node_group.interface.new_socket("Geometry", in_out="INPUT", socket_type="NodeSocketGeometry")
new(nodes, "NodeGroupOutput", name="Group Output", location=[910, 6])
new(nodes, "GeometryNodeSetPosition", name="Set Position", location=[756, 4])
new(nodes, "GeometryNodeSetShadeSmooth", name="Set Shade Smooth", location=[756, -200])
new(nodes, "ShaderNodeVectorMath", name="Vector Math", location=[600, -200], operation="MULTIPLY")
new(nodes, "ShaderNodeCombineXYZ", {"Z": 1.0}, name="Combine XYZ", location=[600, 4])
new(nodes, "ShaderNodeSeparateXYZ", name="Separate XYZ", location=[24, -200])
new(nodes, "GeometryNodeInputPosition", name="Position", location=[24, -110])
new(nodes, "NodeGroupInput", name="Group Input", location=[24, 2])
new(nodes, "ShaderNodeMapRange", {"From Min": -1}, name="Map Range", location=[184, 3])
mapping = [("AUTO", 0, 0.8), ("AUTO", 1, 0.7)]
new(nodes, "ShaderNodeFloatCurve", name="Float Curve", location=[342, 2], mapping=mapping)
node_group.links.new(nodes["Set Shade Smooth"].outputs[0], nodes["Group Output"].inputs[0])
node_group.links.new(nodes["Group Input"].outputs[0], nodes["Set Position"].inputs[0])
node_group.links.new(nodes["Position"].outputs["Position"], nodes["Separate XYZ"].inputs[0])
node_group.links.new(nodes["Vector Math"].outputs[0], nodes["Set Position"].inputs["Position"])
node_group.links.new(nodes["Set Position"].outputs[0], nodes["Set Shade Smooth"].inputs[0])
node_group.links.new(nodes["Separate XYZ"].outputs["Z"], nodes["Map Range"].inputs[0])
node_group.links.new(nodes["Combine XYZ"].outputs[0], nodes["Vector Math"].inputs[0])
node_group.links.new(nodes["Position"].outputs["Position"], nodes["Vector Math"].inputs[1])
node_group.links.new(nodes["Map Range"].outputs["Result"], nodes["Float Curve"].inputs["Factor"])
node_group.links.new(nodes["Float Curve"].outputs[0], nodes["Combine XYZ"].inputs["X"])
node_group.links.new(nodes["Float Curve"].outputs[0], nodes["Combine XYZ"].inputs["Y"])
BlenderでPythonを実行するには、下記を参考にしてください。
Pythonコードの作成について
下記の記事では、アドオンを使って、YAMLからジオメトリーノードを作成しました。
本記事では、アドオンを使わずに手軽に実行できるように、Pythonでジオメトリーノードを作成するようにしました。
さらに、ジオメトリーノードからPythonコードへの変換用するために、下記のアドオンを使用しています。
なお、アドオンで作成したコードは完璧ではないため、本記事では手動で調整しています。
以上