はじめに
Nextcloudは、自前のサーバを使って手軽にセキュアなファイル共有環境を実現できるオンラインストレージです。
前回は、Ubuntu Server 20.04 に Apache を利用した Nextcloud 環境を構築する手順をご紹介しましたが、今回は Nginx を利用した Nextcloud 環境を構築する手順をご紹介します。
# Ubuntu Server は普段あまり触る機会がないので、手順に変なところがありましたら、やさしくツッコミをお願いします。
今回構築する環境
構成イメージ
こんな感じで、いたってシンプルです。イントラネット環境のイメージですが、Amazon EC2等のクラウドサーバー上でも構築できます。この記事の検証では Amazon EC2 を利用しています。

利用するOS、ミドルウェア
サーバOS(Ubuntu Server)
今回は Ubuntu Server 20.04 LTS を利用します。VirtualBox や Vagrant、Hyper-V などで準備いただいても問題ありません。
ここで展開している手順の環境は以下のとおりです。
$ cat /etc/os-release | grep VERSION
VERSION="20.04.2 LTS (Focal Fossa)"
VERSION_ID="20.04"
VERSION_CODENAME=focal
$ uname -a
Linux ip-10-0-2-232 5.4.0-1045-aws #47-Ubuntu SMP Tue Apr 13 07:02:25 UTC 2021 x86_64 x86_64 x86_64 GNU/Linux
Nextcloud本体
もちろんこれがないと Nextcloud が使えません。
Nextcloud のバージョンはいろいろありますが、2021/4/30 時点の最新版である 21.0.1 を使います。
Webサーバ(Nginx)
NextcloudはWebベースで動作しますので、Webサーバが動作する環境が必要です。今回はNginxを使います。
ここで展開している手順でのNginxのバージョンは以下のとおりです。
$ nginx -v
nginx version: nginx/1.18.0
PHP(PHP-FPM)
NextcloudはPHPで動作します。
今回はWebサーバーとしてNginxを使いますので、PHP-FPMも利用します。
ここで展開している手順でのPHPのバージョンは以下のとおりです。
$ php -v
PHP 7.4.16 (cli) (built: Mar  5 2021 07:54:38) ( NTS )
Copyright (c) The PHP Group
Zend Engine v3.4.0, Copyright (c) Zend Technologies
    with Zend OPcache v7.4.16, Copyright (c), by Zend Technologies
データベース(MariaDB)
Nextcloudではデータベースを利用します。本格的な運用ではMariaDB/MySQLといったデータベースを利用することが推奨されます。今回はMariaDBを利用します。
ここで展開している手順でのMariaDBのバージョンは以下のとおりです。
$ mariadb --version
mariadb  Ver 15.1 Distrib 10.5.9-MariaDB, for debian-linux-gnu (x86_64) using readline 5.2
インメモリキャッシュサーバ(Redis)
Nextcloudではファイルのロック管理をしておりますが、このデータ管理にインメモリキャッシュサーバを使うことによりパフォーマンス向上が期待できます。今回はRedisを利用します。
今回は、PHPのセッション管理もRedisで行うことができるようにします。
ここで展開している手順でのRedisのバージョンは以下のとおりです。
$ redis-server --version
Redis server v=6.2.2 sha=00000000:0 malloc=jemalloc-5.1.0 bits=64 build=bccb1d29329b587d
構築手順
ほぼほぼNextcloud公式ドキュメントに基づいて進めていきます。
前準備
①パッケージの最新化をします。
sudo apt update;sudo apt upgrade -y
②インストール作業に必要なパッケージをインストールします。
sudo apt install build-essential pkg-config tcl -y
Webサーバー(Nginx)のインストール
①Nginxをインストールします。
sudo apt install nginx -y
②設定ファイルを追加します。
sudo vi /etc/nginx/sites-available/nextcloud
【設定内容】
upstream php-handler {
    server unix:/run/php/php7.4-fpm.sock;
}

server {
    listen 80;
    listen [::]:80;
    server_name 【サーバーのIPアドレス】;

    # Use Mozilla's guidelines for SSL/TLS settings
    # https://mozilla.github.io/server-side-tls/ssl-config-generator/
#    ssl_certificate     /etc/ssl/nginx/cloud.example.com.crt;
#    ssl_certificate_key /etc/ssl/nginx/cloud.example.com.key;

    # HSTS settings
    # WARNING: Only add the preload option once you read about
    # the consequences in https://hstspreload.org/. This option
    # will add the domain to a hardcoded list that is shipped
    # in all major browsers and getting removed from this list
    # could take several months.
    #add_header Strict-Transport-Security "max-age=15768000; includeSubDomains; preload;" always;

    # set max upload size
    client_max_body_size 512M;
    fastcgi_buffers 64 4K;
    fastcgi_read_timeout 3600;
    proxy_read_timeout 3600;

    # Enable gzip but do not remove ETag headers
    gzip on;
    gzip_vary on;
    gzip_comp_level 4;
    gzip_min_length 256;
    gzip_proxied expired no-cache no-store private no_last_modified no_etag auth;
    gzip_types application/atom+xml application/javascript application/json application/ld+json application/manifest+json application/rss+xml application/vnd.geo+json application/vnd.ms-fontobject application/x-font-ttf application/x-web-app-manifest+json application/xhtml+xml application/xml font/opentype image/bmp image/svg+xml image/x-icon text/cache-manifest text/css text/plain text/vcard text/vnd.rim.location.xloc text/vtt text/x-component text/x-cross-domain-policy;

    # Pagespeed is not supported by Nextcloud, so if your server is built
    # with the `ngx_pagespeed` module, uncomment this line to disable it.
    #pagespeed off;

    # HTTP response headers borrowed from Nextcloud `.htaccess`
    add_header Referrer-Policy                      "no-referrer"   always;
    add_header X-Content-Type-Options               "nosniff"       always;
    add_header X-Download-Options                   "noopen"        always;
    add_header X-Frame-Options                      "SAMEORIGIN"    always;
    add_header X-Permitted-Cross-Domain-Policies    "none"          always;
    add_header X-Robots-Tag                         "none"          always;
    add_header X-XSS-Protection                     "1; mode=block" always;

    # Remove X-Powered-By, which is an information leak
    fastcgi_hide_header X-Powered-By;

    # Path to the root of your installation
    root /var/www/html/nextcloud;

    # Specify how to handle directories -- specifying `/index.php$request_uri`
    # here as the fallback means that Nginx always exhibits the desired behaviour
    # when a client requests a path that corresponds to a directory that exists
    # on the server. In particular, if that directory contains an index.php file,
    # that file is correctly served; if it doesn't, then the request is passed to
    # the front-end controller. This consistent behaviour means that we don't need
    # to specify custom rules for certain paths (e.g. images and other assets,
    # `/updater`, `/ocm-provider`, `/ocs-provider`), and thus
    # `try_files $uri $uri/ /index.php$request_uri`
    # always provides the desired behaviour.
    index index.php index.html /index.php$request_uri;

    # Rule borrowed from `.htaccess` to handle Microsoft DAV clients
    location = / {
        if ( $http_user_agent ~ ^DavClnt ) {
            return 302 /remote.php/webdav/$is_args$args;
        }
    }

    location = /robots.txt {
        allow all;
        log_not_found off;
        access_log off;
    }

    # Make a regex exception for `/.well-known` so that clients can still
    # access it despite the existence of the regex rule
    # `location ~ /(\.|autotest|...)` which would otherwise handle requests
    # for `/.well-known`.
    location ^~ /.well-known {
        # The following 6 rules are borrowed from `.htaccess`

        location = /.well-known/carddav     { return 301 /remote.php/dav/; }
        location = /.well-known/caldav      { return 301 /remote.php/dav/; }
        # Anything else is dynamically handled by Nextcloud
        location ^~ /.well-known            { return 301 /index.php$uri; }

        try_files $uri $uri/ =404;
    }

    # Rules borrowed from `.htaccess` to hide certain paths from clients
    location ~ ^/(?:build|tests|config|lib|3rdparty|templates|data)(?:$|/)  { return 404; }
    location ~ ^/(?:\.|autotest|occ|issue|indie|db_|console)              { return 404; }

    # Ensure this block, which passes PHP files to the PHP process, is above the blocks
    # which handle static assets (as seen below). If this block is not declared first,
    # then Nginx will encounter an infinite rewriting loop when it prepends `/index.php`
    # to the URI, resulting in a HTTP 500 error response.
    location ~ \.php(?:$|/) {
        fastcgi_split_path_info ^(.+?\.php)(/.*)$;
        set $path_info $fastcgi_path_info;

        try_files $fastcgi_script_name =404;

        include fastcgi_params;
        fastcgi_param SCRIPT_FILENAME $document_root$fastcgi_script_name;
        fastcgi_param PATH_INFO $path_info;
#        fastcgi_param HTTPS on;

        fastcgi_param modHeadersAvailable true;         # Avoid sending the security headers twice
        fastcgi_param front_controller_active true;     # Enable pretty urls
        fastcgi_pass php-handler;

        fastcgi_intercept_errors on;
        fastcgi_request_buffering off;
    }

    location ~ \.(?:css|js|svg|gif)$ {
        try_files $uri /index.php$request_uri;
        expires 6M;         # Cache-Control policy borrowed from `.htaccess`
        access_log off;     # Optional: Don't log access to assets
    }

    location ~ \.woff2?$ {
        try_files $uri /index.php$request_uri;
        expires 7d;         # Cache-Control policy borrowed from `.htaccess`
        access_log off;     # Optional: Don't log access to assets
    }

    location / {
        try_files $uri $uri/ /index.php$request_uri;
    }
}
③追加した設定ファイルを有効にします。あわせてデフォルトの設定ファイルを無効にします。
sudo ln -s /etc/nginx/sites-available/nextcloud /etc/nginx/sites-enabled/nextcloud
sudo unlink /etc/nginx/sites-enabled/default
④Nginxを自動起動するように設定し、Nginxを起動します。
sudo systemctl enable nginx
sudo systemctl start nginx
PHPのインストール
①今回はPHP 7.4を使います。最新のPHPバージョンを取得できるようにリポジトリを追加します。
sudo add-apt-repository ppa:ondrej/php
sudo add-apt-repository ppa:ondrej/nginx -y
②PHPならびに関連モジュールをインストールします。
sudo apt install php7.4 php7.4-curl php7.4-dom php7.4-gd php7.4-mbstring php7.4-zip php7.4-mysql php7.4-bz2 php7.4-intl php7.4-apcu php7.4-redis php7.4-imagick php7.4-bcmath php7.4-gmp -y
③PHPの設定を一部修正します。
sudo sed -i "s/^max_execution_time = 30/max_execution_time = 60/" /etc/php/7.4/fpm/php.ini
sudo sed -i "s/^memory_limit = 128M/memory_limit = 512M/" /etc/php/7.4/fpm/php.ini
sudo sed -i "s/^session.save_handler = files/session.save_handler = redis/" /etc/php/7.4/fpm/php.ini
sudo sed -i "s@^;session.save_path = \"/var/lib/php/sessions\"@session.save_path = \"tcp://localhost:6379\"@" /etc/php/7.4/fpm/php.ini
sudo sed -i "s/^;env\[HOSTNAME\] = \$HOSTNAME/env\[HOSTNAME\] = \$HOSTNAME/" /etc/php/7.4/fpm/pool.d/www.conf
sudo sed -i "s@^;env\[PATH\] = /usr/local/bin:/usr/bin:/bin@env\[PATH\] = $PATH@" /etc/php/7.4/fpm/pool.d/www.conf
sudo sed -i "s@^;env\[TMP\] = /tmp@env\[TMP\] = /tmp@" /etc/php/7.4/fpm/pool.d/www.conf
sudo sed -i "s@^;env\[TMPDIR\] = /tmp@env\[TMPDIR\] = /tmp@" /etc/php/7.4/fpm/pool.d/www.conf
sudo sed -i "s@^;env\[TEMP\] = /tmp@env\[TEMP\] = /tmp@" /etc/php/7.4/fpm/pool.d/www.conf
MariaDBのインストール
①今回はMariaDB 10.5を使います。最新のMariaDBバージョンを取得できるようにリポジトリを追加します。
sudo apt-key adv --fetch-keys 'https://mariadb.org/mariadb_release_signing_key.asc'
sudo add-apt-repository 'deb [arch=amd64] http://mariadb.mirror.globo.tech/repo/10.5/ubuntu focal main'
②MariaDBをインストールします。
sudo apt install mariadb-server mariadb-client -y
③MariaDBを自動起動するように設定し、MariaDBを起動します。
sudo systemctl enable mariadb.service
sudo systemctl start mariadb.service
④MariaDBの基本セットアップを行います。いくつか質問されますが New password: 、Re-enter new password:で MariaDBのrootユーザのパスワードを設定する以外は全て[Enter]キーを押しておきます。
sudo mysql_secure_installation
⑤MariaDBコンソールを使い、引き続きNextcloudで使用するユーザ、データベース、権限の追加をします。ここではそれぞれ以下のとおり設定します。
- ユーザ: nextcloud
- データベース名: nextcloud
sudo mysql -uroot

CREATE DATABASE nextcloud DEFAULT CHARACTER SET utf8mb4;
CREATE USER 'nextcloud'@'localhost' IDENTIFIED BY '[nextcloudユーザに対して設定したいパスワード]';
GRANT ALL ON nextcloud.* TO "nextcloud"@"localhost";
SHOW GRANTS FOR 'nextcloud'@'localhost';
quit;
【SHOW GRANTS ~の実行結果例】
MariaDB [(none)]> SHOW GRANTS FOR 'nextcloud'@'localhost';
+------------------------------------------------------------------------------------------------------------------+
| Grants for nextcloud@localhost                                                                                   |
+------------------------------------------------------------------------------------------------------------------+
| GRANT USAGE ON *.* TO `nextcloud`@`localhost` IDENTIFIED BY PASSWORD '*********'                                 |
| GRANT ALL PRIVILEGES ON `nextcloud`.* TO `nextcloud`@`localhost`                                                 |
+------------------------------------------------------------------------------------------------------------------+
2 rows in set (0.002 sec)
Redisのインストール
①今回は2021/4/30現在でstableの最新版であるRedis 6.2を使います。普通にパッケージインストールするとバージョンが古くなってしまうため、ソースからコンパイルしてインストールします。Redisのソースファイル群を取得します。
cd /tmp
wget http://download.redis.io/redis-stable.tar.gz
tar xf redis-stable.tar.gz
②makeし、インストールします。
cd redis-stable
make
sudo make install
③必要なユーザー、ディレクトリを準備します。
sudo adduser --system --group --no-create-home redis
sudo mkdir /etc/redis
sudo mkdir /var/log/redis
sudo mkdir /var/lib/redis
sudo chown redis:redis /etc/redis
sudo chown redis:redis /var/log/redis
sudo chown redis:redis /var/lib/redis
sudo chmod 770 /var/lib/redis
④Redisの設定ファイルのテンプレートをコピー、編集して設定ファイルを作成します。
sudo cp redis.conf /etc/redis
sudo su -c "sed -e 's/^logfile .*$/logfile \"\/var\/log\/redis\/redis.log\"/' -e 's/^dir .*$/dir \/var\/lib\/redis\//' ./redis.conf > /etc/redis/redis.conf"
⑤自動起動設定ファイルを作成します。
sudo vi /etc/systemd/system/redis.service
【redis.serviceの内容】
[Unit]
Description=Redis In-Memory Data Store
After=network.target

[Service]
User=redis
Group=redis
ExecStart=/usr/local/bin/redis-server /etc/redis/redis.conf
ExecStop=/usr/local/bin/redis-cli shutdown
Restart=always

[Install]
WantedBy=multi-user.target
⑥Redisを自動起動するように設定し、Redisを起動します。
sudo systemctl enable redis.service
sudo systemctl start redis.service
Nextcloudのインストール
①Nextcloudパッケージ本体とチェックサムファイル(Nextcloudパッケージ本体が正しくダウンロードされているかをチェックするためのファイル)をダウンロードします。
cd /tmp
wget https://download.nextcloud.com/server/releases/nextcloud-21.0.1.tar.bz2
wget https://download.nextcloud.com/server/releases/nextcloud-21.0.1.tar.bz2.md5
②チェックサムファイルを利用してNextcloudパッケージが正しくダウンロードされているか確認します。
md5sum -c nextcloud-21.0.1.tar.bz2.md5 < nextcloud-21.0.1.tar.bz2
※nextcloud-21.0.1.tar.bz2: OK または nextcloud-21.0.1.tar.bz2: 完了 と表示されれば OK です
③ダウンロードしたNextcloudパッケージを展開します。
tar xf nextcloud-21.0.1.tar.bz2
④展開したNextcloudをWebサーバをインストールします。
sudo mv nextcloud/ /var/www/html/
⑤Nextcloudのデータディレクトリを作成します。
sudo mkdir /var/www/html/nextcloud/data
⑥セットアップに必要な最低限のconfigファイルを準備します。
sudo vi /var/www/html/nextcloud/config/config.php
【config.phpの内容】
<?php
$CONFIG = array(
  'default_phone_region' => 'JP',
  'memcache.distributed' => '\\OC\\Memcache\\Redis',
  'memcache.locking' => '\\OC\\Memcache\\Redis',
  'memcache.local' => '\\OC\\Memcache\\APCu',
  'redis' =>
  array (
    'host' => 'localhost',
    'port' => 6379,
  ),
  'overwriteprotocol' => 'http',
);
⑦Nextcloudのディレクトリ全体で読み書きができるように所有者情報を変更します。
sudo chown -R www-data:www-data /var/www/html/nextcloud
⑧PHP-FPMとNginxを再起動します。
sudo systemctl restart php7.4-fpm
sudo systemctl restart nginx
Nextcloudの初期設定
①ブラウザで http://(サーバのIPアドレス)/ にアクセスします。下のような画面が出ればOKです。この画面で以下のとおり入力し、「セットアップを完了します」をクリックします。
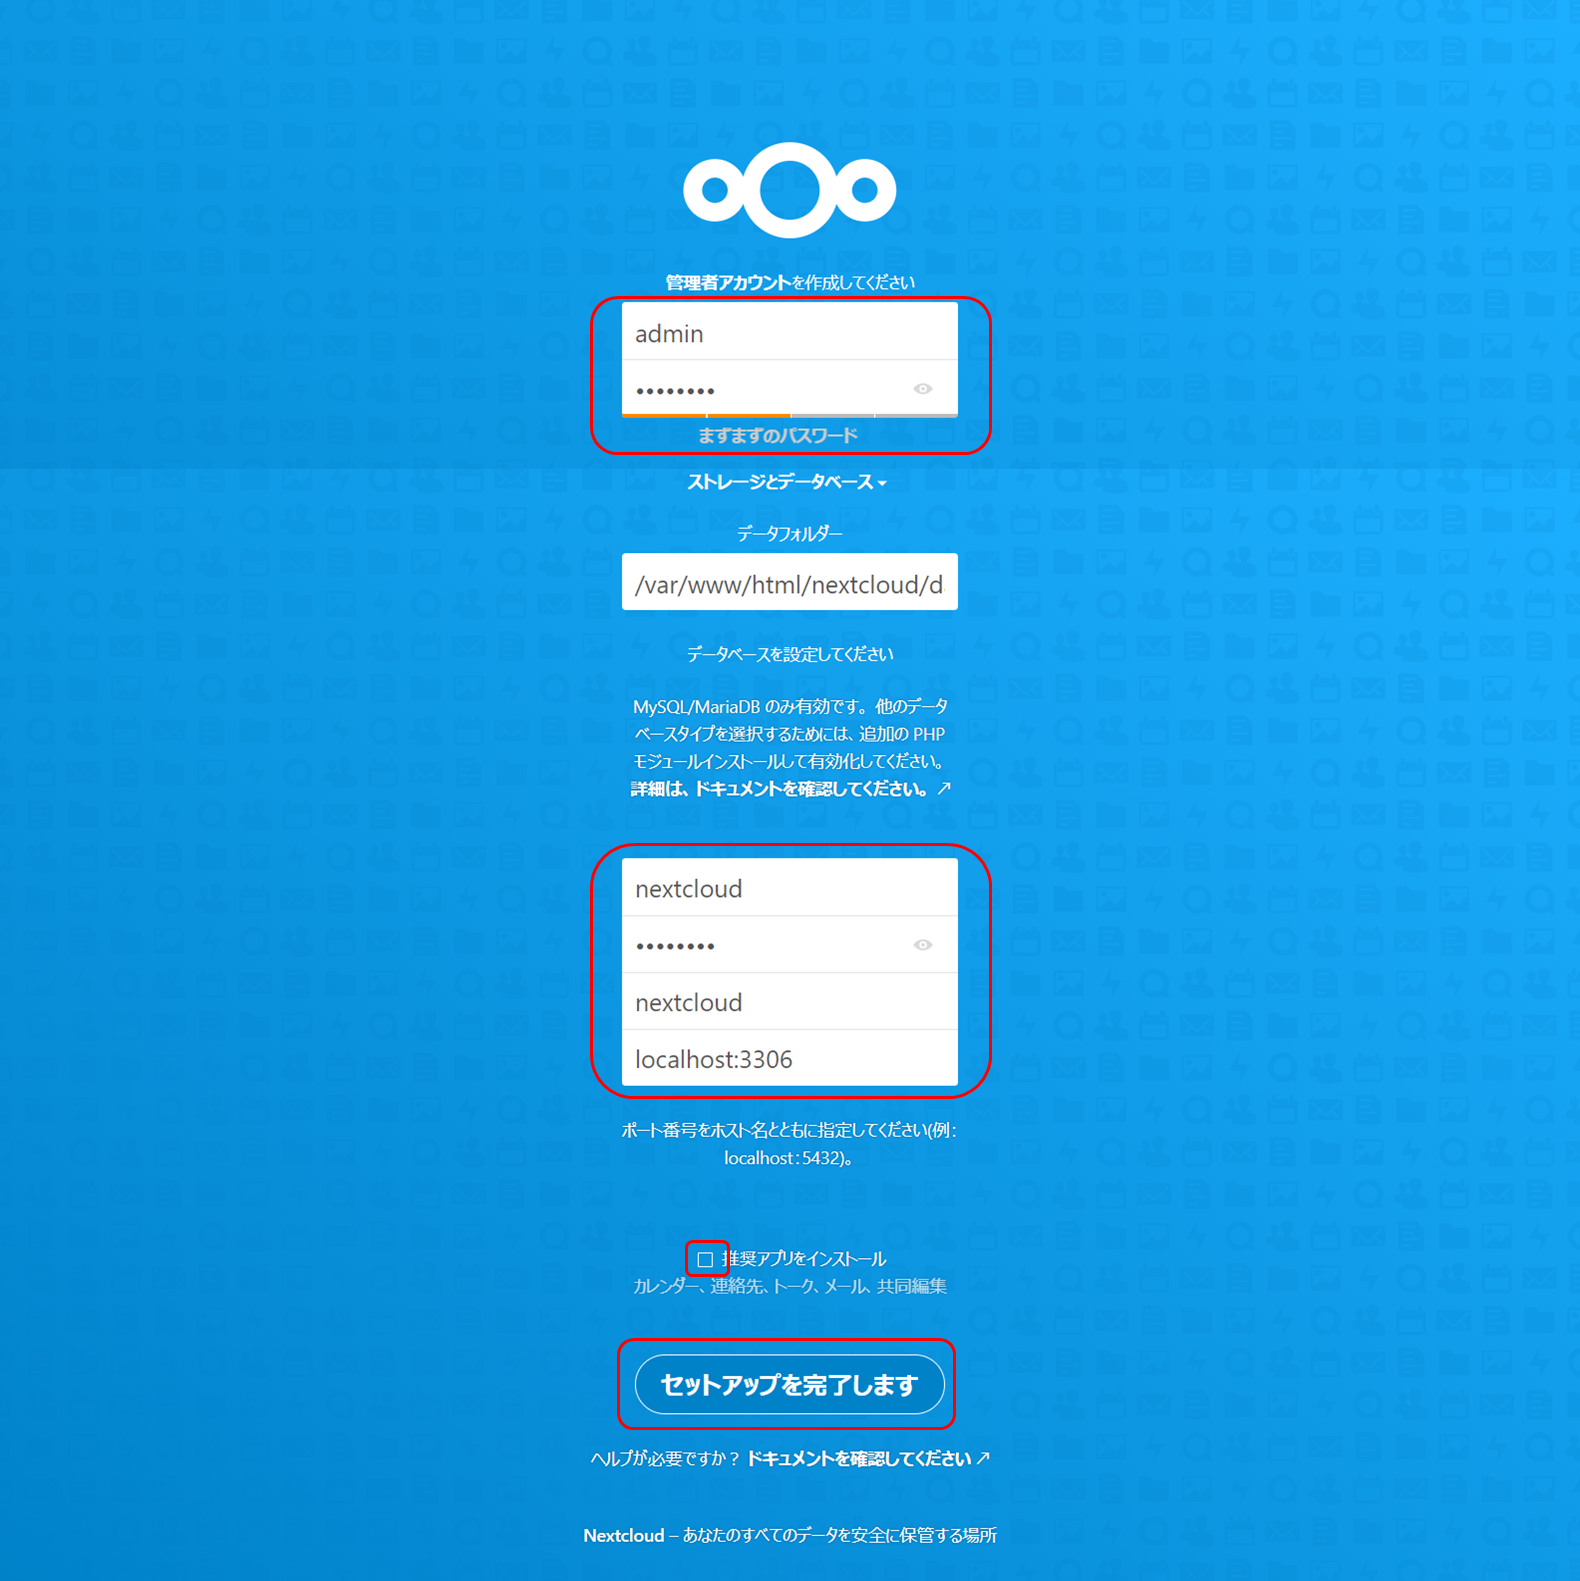
| 項目 | 入力値 |
|---|---|
| ユーザー名 | 初期の管理者ユーザー名 |
| パスワード | このユーザーのパスワード |
| データベースのユーザー名 | nextcloud |
| データベースのパスワード | nextcloudユーザーに設定したパスワード |
| データベース名 | nextcloud |
| データベースのホスト名 | localhost:3306 |
| 推奨アプリをインストール | チェックを外す |
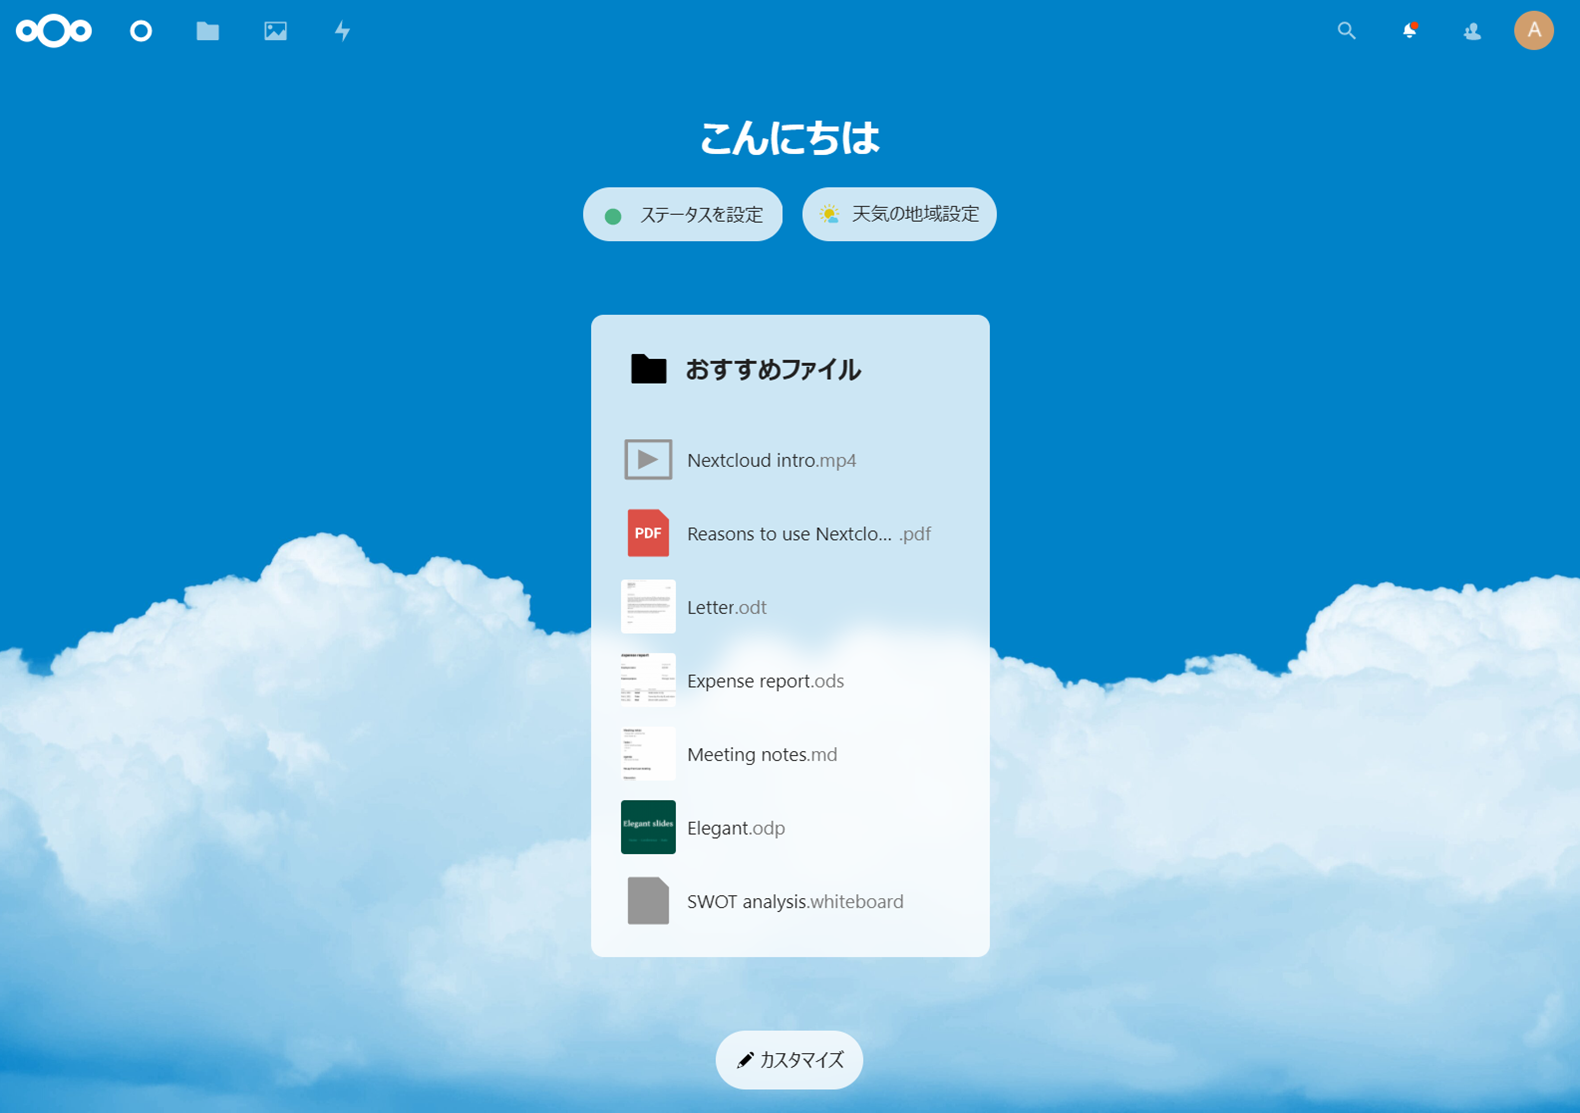
②データベースに必要なテーブルなどが自動作成され、このような画面が表示され、Nextcloudが動作します。
⑤データベースにテーブルができていることを確認します。これでデータベース周りの設定は終わりです。
sudo mysql -u root nextcloud
SHOW TABLES;
quit;
【SHOW TABLES; の実行結果】
+-----------------------------+
| Tables_in_nextcloud         |
+-----------------------------+
| oc_accounts                 |
| oc_accounts_data            |
| oc_activity                 |

~~~ (中略) ~~~

| oc_vcategory_to_object      |
| oc_webauthn                 |
| oc_whats_new                |
+-----------------------------+
⑥Nextcloud セットアップ警告対応のためにパッケージを追加インストールします。
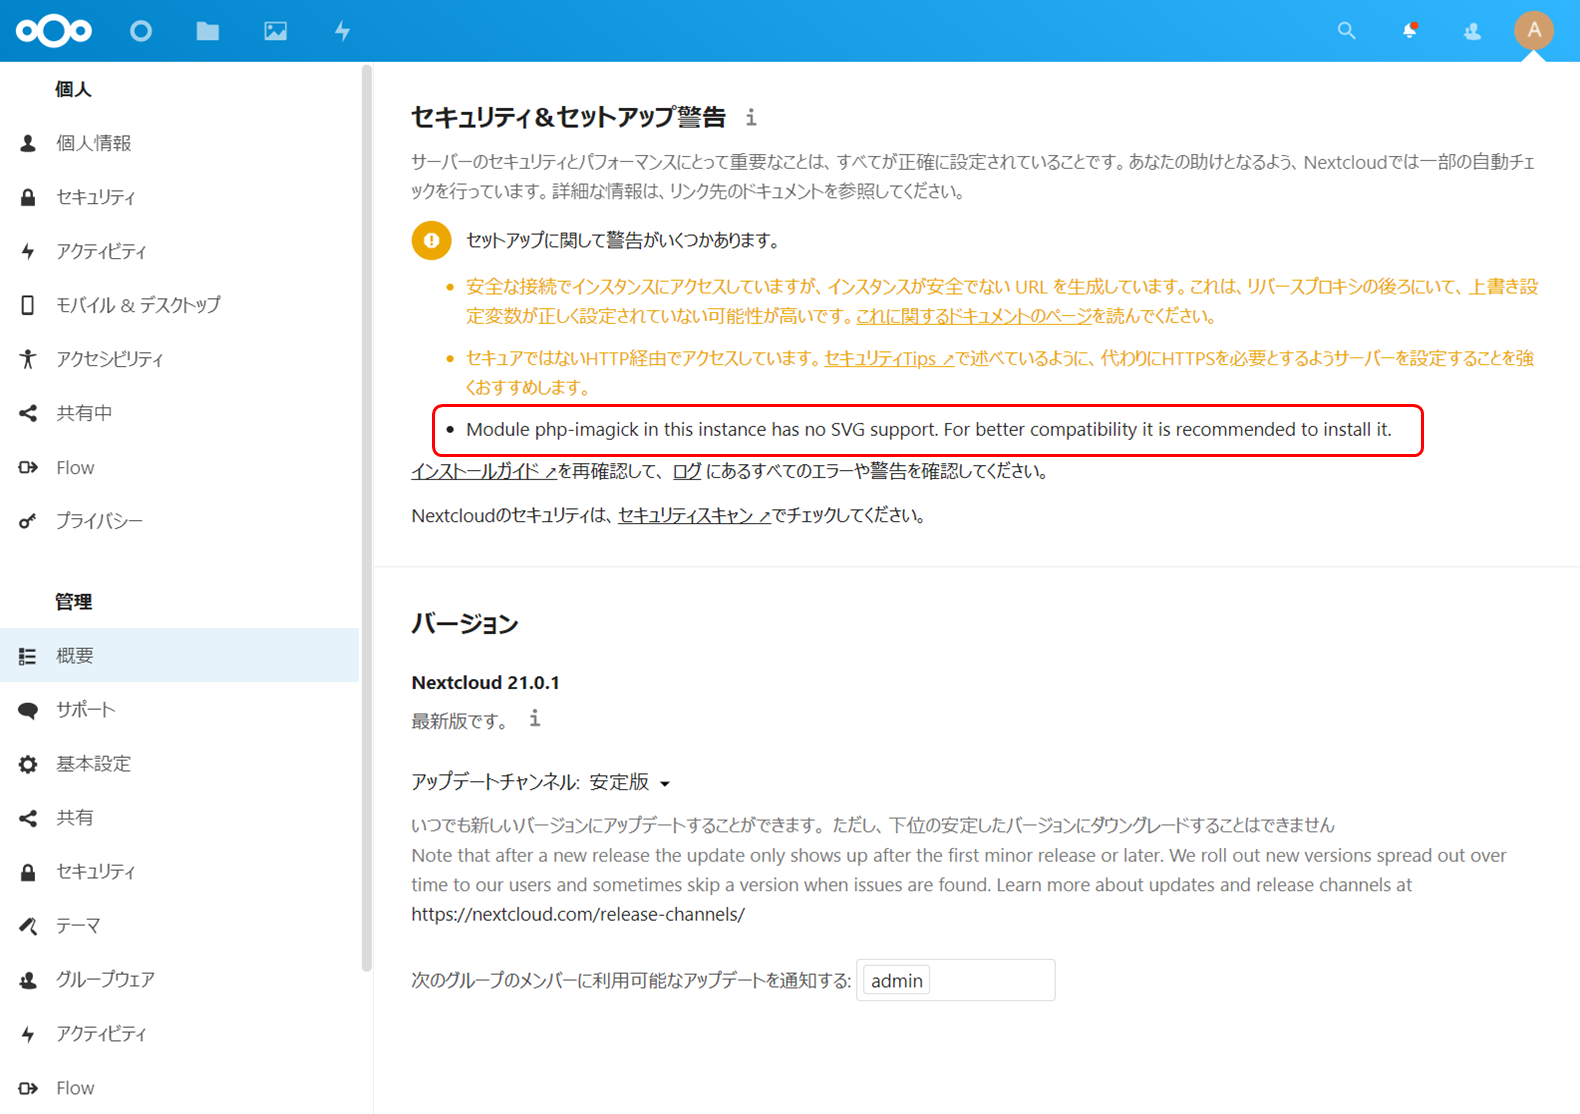
sudo apt install libmagickcore-6.q16-6-extra -y
⑨変更した設定を反映させるためにPHP-FPMを再起動します。
sudo systemctl restart php7.4-fpm
あとがき
Nextcloudはサーバー1つあれば気軽に試せますので、使い勝手とかいろいろ試してみてください。
更新履歴
- 2021/4/30: 初版。