はじめに
Apache CXFに含まれるWSDLファイルからJavaコードを生成するMavenプラグインの使用方法を記す。
実行環境
- Eclipse (4.32.0)
- Maven (3.9.7)
POMの設定
<project xmlns="http://maven.apache.org/POM/4.0.0"
	xmlns:xsi="http://www.w3.org/2001/XMLSchema-instance"
	xsi:schemaLocation="http://maven.apache.org/POM/4.0.0 https://maven.apache.org/xsd/maven-4.0.0.xsd">
	<modelVersion>4.0.0</modelVersion>
	<groupId>java.camel.soap.example</groupId>
	<artifactId>java.camel.wsdl2java.example</artifactId>
	<version>0.0.1-SNAPSHOT</version>

	<properties>
		<maven.compiler.source>17</maven.compiler.source>
		<maven.compiler.target>17</maven.compiler.target>
		<cxf.version>4.0.4</cxf.version>
	</properties>
	<dependencies>
		<!-- Apache CXF dependencies -->
		<!-- https://cxf.apache.org/docs/using-cxf-with-maven.html -->
		<dependency>
			<groupId>org.apache.cxf</groupId>
			<artifactId>cxf-rt-frontend-jaxws</artifactId>
			<version>${cxf.version}</version>
		</dependency>
		<dependency>
			<groupId>org.apache.cxf</groupId>
			<artifactId>cxf-rt-transports-http</artifactId>
			<version>${cxf.version}</version>
		</dependency>
	</dependencies>
	<build>
		<!--
		https://cxf.apache.org/docs/maven-cxf-codegen-plugin-wsdl-to-java.html -->
		<plugins>
			<plugin>
				<groupId>org.apache.cxf</groupId>
				<artifactId>cxf-codegen-plugin</artifactId>
				<version>${cxf.version}</version>
				<executions>
					<execution>
						<id>generate-sources</id>
						<phase>generate-sources</phase>
						<configuration>
							<sourceRoot>
								${project.build.directory}/generated-sources/cxf</sourceRoot>
							<wsdlOptions>
								<wsdlOption>
									<!-- WSDLファイルの定義は必要に応じて変更すること -->
									<wsdl>
										${basedir}/src/main/resources/soapSampleHello.wsdl</wsdl>
								</wsdlOption>
							</wsdlOptions>
						</configuration>
						<goals>
							<goal>wsdl2java</goal>
						</goals>
					</execution>
				</executions>
			</plugin>
		</plugins>
	</build>
</project>
propertiesタグについて
- EclipseのデフォルトのランタイムがJava 8のため、Java 17を使用するようにコンパイラ設定を追加
(参考)
dependenciesタグについて
- Apache CXF>Maven POM Informationに則り、依存関係を設定した。
pluginタグについて
- Maven cxf-codegen-plugin (WSDL to Java)のIntroductionに従い、pluginを設定する。
WSDLファイルについて
以下記事で生成したWSDLファイルを転用する。
https://qiita.com/SY81517/items/3ed787f5c32d79d1fbca
WSDLファイルの中身は、以下の通り。
soapSampleHello.wsdl
<?xml version='1.0' encoding='UTF-8'?><wsdl:definitions xmlns:xsd="http://www.w3.org/2001/XMLSchema" xmlns:wsdl="http://schemas.xmlsoap.org/wsdl/" xmlns:tns="http://example/" xmlns:soap="http://schemas.xmlsoap.org/wsdl/soap/" xmlns:ns1="http://schemas.xmlsoap.org/soap/http" name="HelloWorldService" targetNamespace="http://example/">
  <wsdl:types>
<xs:schema xmlns:xs="http://www.w3.org/2001/XMLSchema" xmlns:tns="http://example/" elementFormDefault="unqualified" targetNamespace="http://example/" version="1.0">

  <xs:element name="sayHi" type="tns:sayHi"/>

  <xs:element name="sayHiResponse" type="tns:sayHiResponse"/>

  <xs:complexType name="sayHi">
    <xs:sequence>
      <xs:element minOccurs="0" name="text" type="xs:string"/>
    </xs:sequence>
  </xs:complexType>

  <xs:complexType name="sayHiResponse">
    <xs:sequence>
      <xs:element minOccurs="0" name="return" type="xs:string"/>
    </xs:sequence>
  </xs:complexType>

</xs:schema>
  </wsdl:types>
  <wsdl:message name="sayHiResponse">
    <wsdl:part element="tns:sayHiResponse" name="parameters">
    </wsdl:part>
  </wsdl:message>
  <wsdl:message name="sayHi">
    <wsdl:part element="tns:sayHi" name="parameters">
    </wsdl:part>
  </wsdl:message>
  <wsdl:portType name="HelloWorld">
    <wsdl:operation name="sayHi">
      <wsdl:input message="tns:sayHi" name="sayHi">
    </wsdl:input>
      <wsdl:output message="tns:sayHiResponse" name="sayHiResponse">
    </wsdl:output>
    </wsdl:operation>
  </wsdl:portType>
  <wsdl:binding name="HelloWorldServiceSoapBinding" type="tns:HelloWorld">
    <soap:binding style="document" transport="http://schemas.xmlsoap.org/soap/http"/>
    <wsdl:operation name="sayHi">
      <soap:operation soapAction="" style="document"/>
      <wsdl:input name="sayHi">
        <soap:body use="literal"/>
      </wsdl:input>
      <wsdl:output name="sayHiResponse">
        <soap:body use="literal"/>
      </wsdl:output>
    </wsdl:operation>
  </wsdl:binding>
  <wsdl:service name="HelloWorldService">
    <wsdl:port binding="tns:HelloWorldServiceSoapBinding" name="HelloWorldPort">
      <soap:address location="http://localhost:9006/soap"/>
    </wsdl:port>
  </wsdl:service>
</wsdl:definitions>
WSDLからJavaコードを生成する手順
Eclipseで自動ビルドを有効にしていると、ビルドと同時にコード生成が実行される。
明示的にコード実行するための手順は、以下の通り。
(1)[実行構成]を開く。
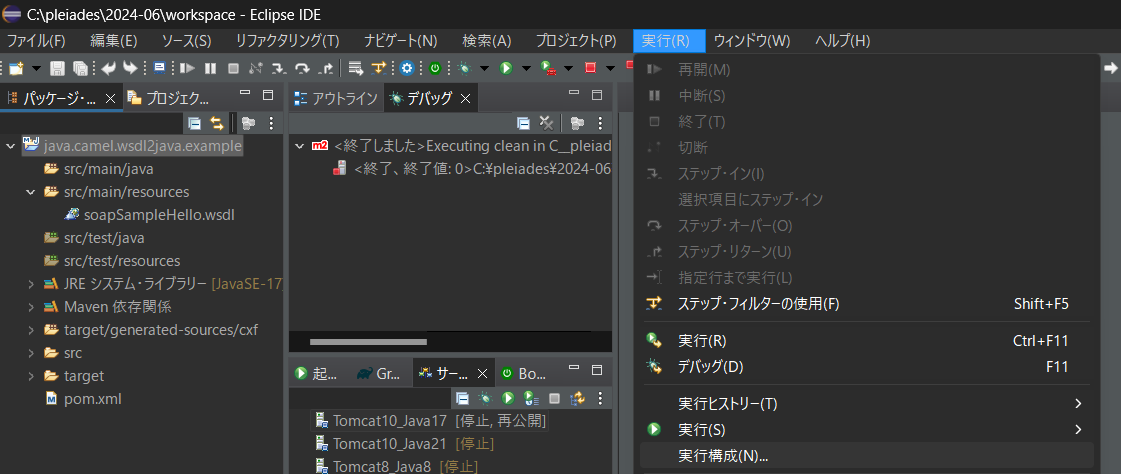
(2)[Mavenビルド]>[新規作成]>[メインタブ]のゴールに、「generate-sources」と入力する。

(3)[実行]を押下する。
実行結果
[INFO] Scanning for projects...
[INFO]
[INFO] [1m--------< [0;36mjava.camel.soap.example:java.camel.wsdl2java.example[0;1m >--------[m
[INFO] [1mBuilding java.camel.wsdl2java.example 0.0.1-SNAPSHOT[m
[INFO]   from pom.xml
[INFO] [1m--------------------------------[ jar ]---------------------------------[m
[INFO]
[INFO] [1m--- [0;32mcxf-codegen:4.0.4:wsdl2java[m [1m(generate-sources)[m @ [36mjava.camel.wsdl2java.example[0;1m ---[m
[INFO] [1m------------------------------------------------------------------------[m
[INFO] [1;32mBUILD SUCCESS[m
[INFO] [1m------------------------------------------------------------------------[m
[INFO] Total time:  0.912 s
[INFO] Finished at: 2024-09-01T22:16:27+09:00
[INFO] [1m------------------------------------------------------------------------[m
ビルドに成功すると、targetフォルダ直下が以下構成となる。
generated-sources/cxf/example配下に、自動生成されたコードが格納される。
target
├─classes
│  ├─example
│  └─META-INF
│      └─maven
│          └─java.camel.soap.example
│              └─java.camel.wsdl2java.example
├─cxf-codegen-plugin-markers
├─generated-sources
│  └─cxf
│      └─example ★自動生成コードの出力先
└─test-classes
本記事で使用したMavenプロジェクトの格納場所
参考
| No | リンク | 備考 |
|---|---|---|
| 1 | Apache CXF>Maven cxf-codegen-plugin (WSDL to Java) | Apache CXFでWSDLからJavaコードを生成する手順を記載した公式ページ |
| 2 | Apache CXF with WSDL First | Apache CXFでWSDLからJavaコードを生成する手順を記載した公式ページ |
| 3 | Apache CXF>Maven POM Information | Apache CXFの依存関係に関する説明 |
| 4 | Apache Maven>POM Reference | POMのリファレンス |