はじめに
案件内でGoogleMapの埋め込みではなく、画像化したものをスプレッドシート上に挿入する、という工程がありました。Maps.StaticMapを使えばよいのですが、その際、任意の2地点間のルートも描画する必要があったため、ルート検索にはMaps.DirectionFinderを使いました。本記事はその備忘録です。
実行サンプル
出発地と目的地を入力し、スクリプトを実行すると、枠外配置でマップ画像が挿入されます。
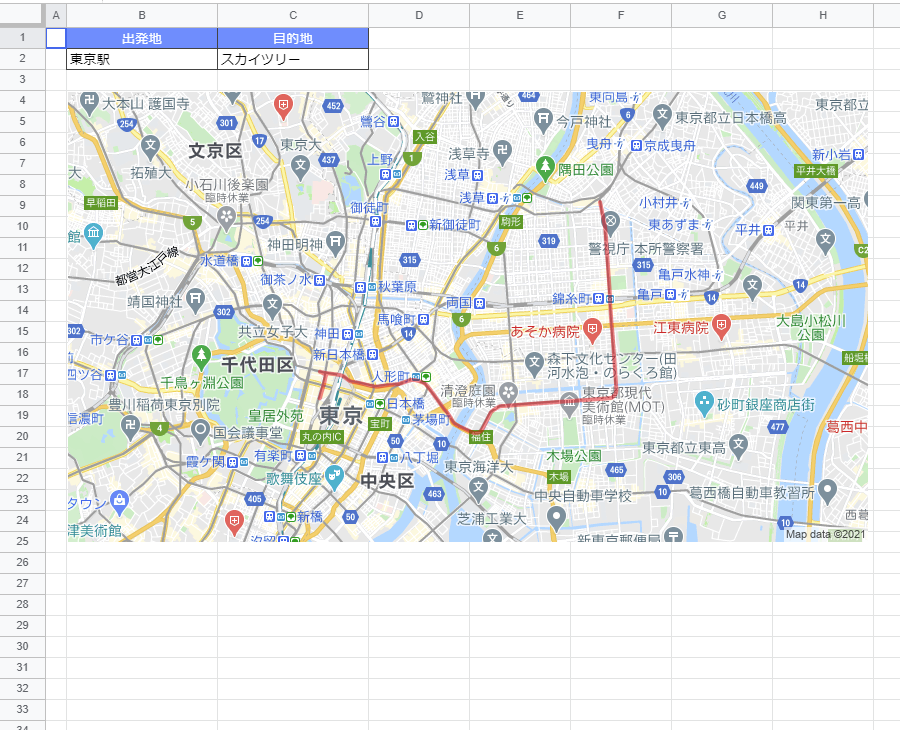
上記は出発地に東京駅、目的地にスカイツリーを指定しています。サンプルのため、ルート検索の移動手段に関しては公共交通利用のTRANSIT固定とし1、複数候補のうちの1つ目のみを描画しています。
ロジック
1-Maps.DirectionFinderで2地点間のルートを取得
const directions = Maps.newDirectionFinder()
      .setLanguage('ja')
      .setOrigin(start)
      .setDestination(end)
      .setMode(Maps.DirectionFinder.Mode.TRANSIT) // 公共交通
      .setDepart(new Date())
      .getDirections()

const route = directions.routes[0].overview_polyline.points // エンコードされたルート情報取得
コード中startとendには事前に取得してある出発地と目的地の値が入ります(今回は東京駅とスカイツリー)。
directionsはJSON形式で、今回必要なデータがroutesという配列で取得2 できます。候補が複数あっても最初の候補のみを取得するようにしています。この内、overview_polyline.pointsというのが、出発地から目的地までのルート描画に必要な経由ポイントの緯度経度情報を文字列化したもの3 となります。
2-Mapの設定
const map = new Maps.newStaticMap()
/* 省略 */

map.setSize(800, 450)
  .setLanguage('ja')
  .setPathStyle(4, Maps.StaticMap.Color.RED, null)
  .addPath(route)
Maps.StaticMapを利用します。
setPathStyle(4, Maps.StaticMap.Color.RED, null)でルートの描画設定をします。今回は赤で描画します。今回のようなエンコードされたデータ3 がある場合、addPath(route)でルートを描画します。適切な形式の緯度経度情報配列4 でも描画されます。
単純に2地点間を直線で描画する場合には以下の様なコードになります。
map.setSize(800, 450)
  /* 省略 */
  .beginPath()
  .addPoint(start)
  .addPoint(end)
  .endPath()
3 -PINGとして指定セル上に挿入
const Sh  = SpreadsheetApp.getActiveSheet()
const Rng = Sh.getRange('B2:C2')
/* 省略 */

const png = Utilities.newBlob(map.getMapImage(), 'image/png', 'map.png')
const pos = Rng.offset(2,0,1,1)
Sh.insertImage(png, pos.getColumn(), pos.getRow())
Utilities.newBlob()でPING画像に変換し、insertImage()で指定したセルの左上を起点として挿入します。
余談ですが、insertImage()はRangeではなくSheetのメソッドですね。感覚的には前者なので、リファレンスを見て慌てることがあります。
なお、変換した画像のリンクURLを取得するには、Maps Static APIを利用するためのAPIキーが必要になります。
今回のコード
function insertStaticMap(){
  const map = new Maps.newStaticMap()
  const Sh  = SpreadsheetApp.getActiveSheet()
  const Rng = Sh.getRange('B2:C2') // 出発地と目的地の取得
  const [start, end] = [...Rng.getValues()[0]]

  // 2地点間ルート取得
  const directions = Maps
      .newDirectionFinder()
      .setLanguage('ja')
      .setOrigin(start)
      .setDestination(end)
      .setMode(Maps.DirectionFinder.Mode.TRANSIT) // 公共交通
      .setDepart(new Date())
      .getDirections()

  const route = directions.routes[0].overview_polyline.points // エンコードされたルート情報取得

  // Mapの設定
  map.setSize(800, 450)
  .setLanguage('ja')
  .setPathStyle(4, Maps.StaticMap.Color.RED, null)
  .addPath(route)

  // PINGとして指定セル上に挿入
  const png = Utilities.newBlob(map.getMapImage(), 'image/png', 'map.png')
  const pos = Rng.offset(2,0,1,1)
  Sh.insertImage(png, pos.getColumn(), pos.getRow())
}
入力された施設名や住所に対してエラー判定は行っていませんので、参考にする場合は必要に応じて処理を実装してください。また、続けて処理を実行する場合、新たに挿入した画像は重ねて表示されますので、以下のような事前処理が必要です。
const img = Sh.getImages()[0]
if(img)img.remove()
最後に
ルート描画の必要がなければMaps.DirectionFinderを利用した処理は不要です。その他マーカースタイルやズーム、中心設定などMaps.StaticMapでカスタマイズできる内容は公式リファレンスを参照してください。
[参考]
- Class StaticMap | Apps Script | Google Developers
- Overview | Maps Static API | Google Developers
- Class DirectionFinder | Apps Script | Google Developers
- The Directions API quickstart | Google Developers
- Encoded Polyline Algorithm Format | Google Maps Platform