はじめに
[僕のlonicでスマホアプリ開発]#1 環境準備とプロジェクト作成の続きです。
アプリのひな型作成までは出来たので、ここからは開発らしきことを進めていければなと。
今回はrouterの設定を作成予定の画面分やっていきます。
参考はこちらの公式ドキュメント。
作成予定の画面
画面は以前にandroid studioで作ったとき同様下記をイメージ
- 残高確認画面
- 残高登録画面
- 口座登録画面
- データインポート/エクスポート画面
ルーティング周りの修正
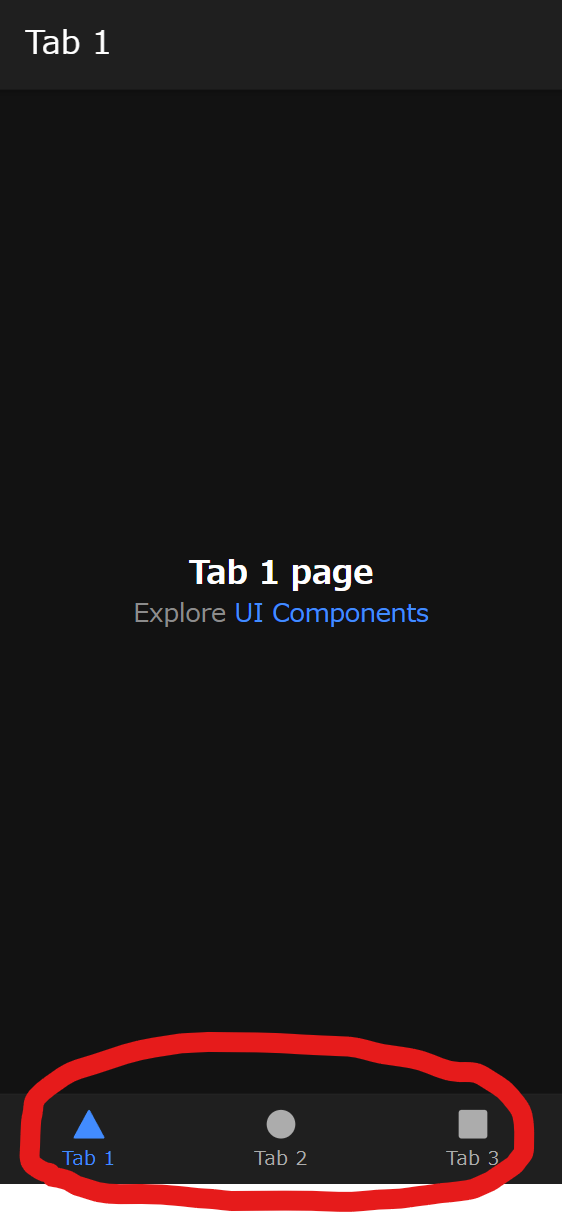
タブ画面コンポーネント修正
src/views/TabsPage.vueが下記のタブ部分になるので、こちらを修正します。
icon属性で指定している各アイコンはこちらから選べば良いそう。
もちろん自分で作成した画像ファイルも設定できます。
src/views/TabsPage.vue
<template>
  <ion-page>
    <ion-tabs>
      <ion-router-outlet></ion-router-outlet>
      <ion-tab-bar slot="bottom">
        <!-- 残高確認画面 -->
        <ion-tab-button tab="view" href="/tabs/view">
          <ion-icon aria-hidden="true" :icon="eyeOutline" />
          <ion-label>VIEW</ion-label>
        </ion-tab-button>

        <!-- 残高登録画面 -->
        <ion-tab-button tab="registBalance" href="/tabs/regist">
          <ion-icon aria-hidden="true" :icon="pencilOutline" />
          <ion-label>BALANCE</ion-label>
        </ion-tab-button>

        <!--口座登録画面 -->
        <ion-tab-button tab="EditAccount" href="/tabs/EditAccount">
          <ion-icon aria-hidden="true" :icon="personAddOutline" />
          <ion-label>ACCOUNT</ion-label>
        </ion-tab-button>

        <!-- データインポート/エクスポート画面 -->
        <ion-tab-button tab="importExport" href="/tabs/importExport">
          <ion-icon aria-hidden="true" :icon="swapVerticalOutline" />
          <ion-label>IM/EX</ion-label>
        </ion-tab-button>
      </ion-tab-bar>
    </ion-tabs>
  </ion-page>
</template>

<script setup>
import { IonTabBar, IonTabButton, IonTabs, IonLabel, IonIcon, IonPage, IonRouterOutlet } from '@ionic/vue';
import { eyeOutline, pencilOutline, personAddOutline, swapVerticalOutline} from 'ionicons/icons';
</script>
ルーティングの修正
src/router/index.js
import { createRouter, createWebHistory } from '@ionic/vue-router';
import TabsPage from '../views/TabsPage.vue'

const routes = [
  {
    path: '/',
    redirect: '/tabs/view'
  },
  {
    path: '/tabs/',
    component: TabsPage,
    children: [
      {
        path: '',
        redirect: '/tabs/view'
      },
      {
        path: 'view',
        component: () => import('@/views/View.vue')
      },
      {
        path: 'balance',
        component: () => import('@/views/Balance.vue')
      },
      {
        path: 'account',
        component: () => import('@/views/Account.vue')
      },
      {
        path: 'importExport',
        component: () => import('@/views/importExport.vue')
      }
    ]
  }
]

const router = createRouter({
  history: createWebHistory(import.meta.env.BASE_URL),
  routes
})

export default router
各画面の修正
こちらは別に必須ではないんですが、画面がちゃんと遷移してるよねが分かるようにsrc/views配下の各ファイルをちょっと書き換えておきます。
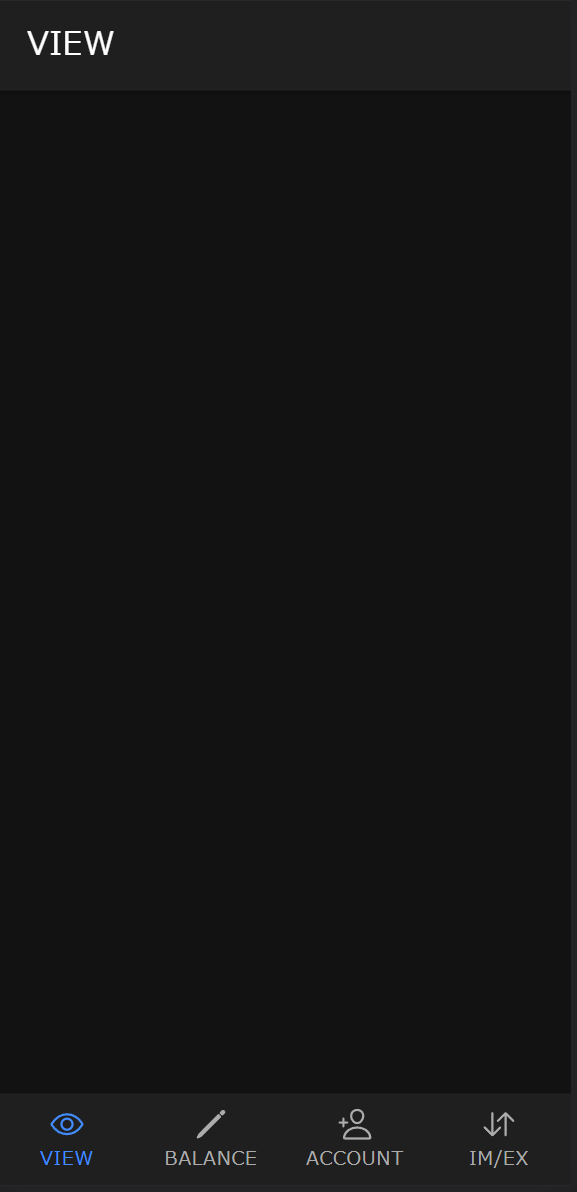
修正後の画面
ちょっと画面ヘッダー部分のフォントが気に入らないですが、画面の下準備は完了ですね。