
フルソースコード
https://github.com/Ohtsu/ng8-bootstrap4-initial
ビデオ解説(日本語)
https://youtu.be/gFxuSi4IZjM
ビデオ解説(英語)
https://www.youtube.com/watch?v=NoSkIVvf5o8
Angular8におけるBootstrap4環境の設定方法
以前、Angular5のためのBootstrap4環境の設定方法https://youtu.be/ndk2Hqd8P7Iをご紹介いたしましたが、だいぶAngularの環境も変わりましたので、今回は、Angular8におけるBootstrap4環境の設定方法をご紹介いたします。
Angular8のプロジェクトの生成
まず、Angular8のプロジェクトを生成します。
コマンド・プロンプトで
ng new ng8-bootstrap4-initial
と入力します。
_ng8-bootstrap4-initial_はプロジェクト名であり、その名前は任意です。
すると、ルーティング機能を組み込むか否かの問い合わせがありますので、ここでは_yes_を選択しておきます。
次にスタイルシートのフォーマットの選択の問い合わせがありますので、_SCSS_を選択します。
するとプロジェクトの生成が開始されます。
このプロセスには若干時間を要します。
Visual Studio Codeの起動
次に、生成されたプロジェクトのディレクトリに入り、
cd ng8-bootstrap4-initial
Visual Studio Codeを起動します。
code .
と入力します。
VSCodeが起動しましたら、
Ctrl+@キーを押し、ターミナル・ウィンドウを開きます。
Bootstrap4のインストール
次に、ターミナル・ウィンドウで、
npm i --save bootstrap
と入力し、Bootstrap4をインストールします。
ng-bootstrapのインストール
次に、_ng-bootstrap_をインストールします。
npm i --save @ng-bootstrap/ng-bootstrap
と入力します。
app.module.tsの修正
次に、app.module.tsファイルを修正し、_ng-bootstrap_のモジュールをインストールすることにします。
src/appディレクトリ内のapp.module.tsファイルを開き、ここで利用するNgbModuleをインポートします。
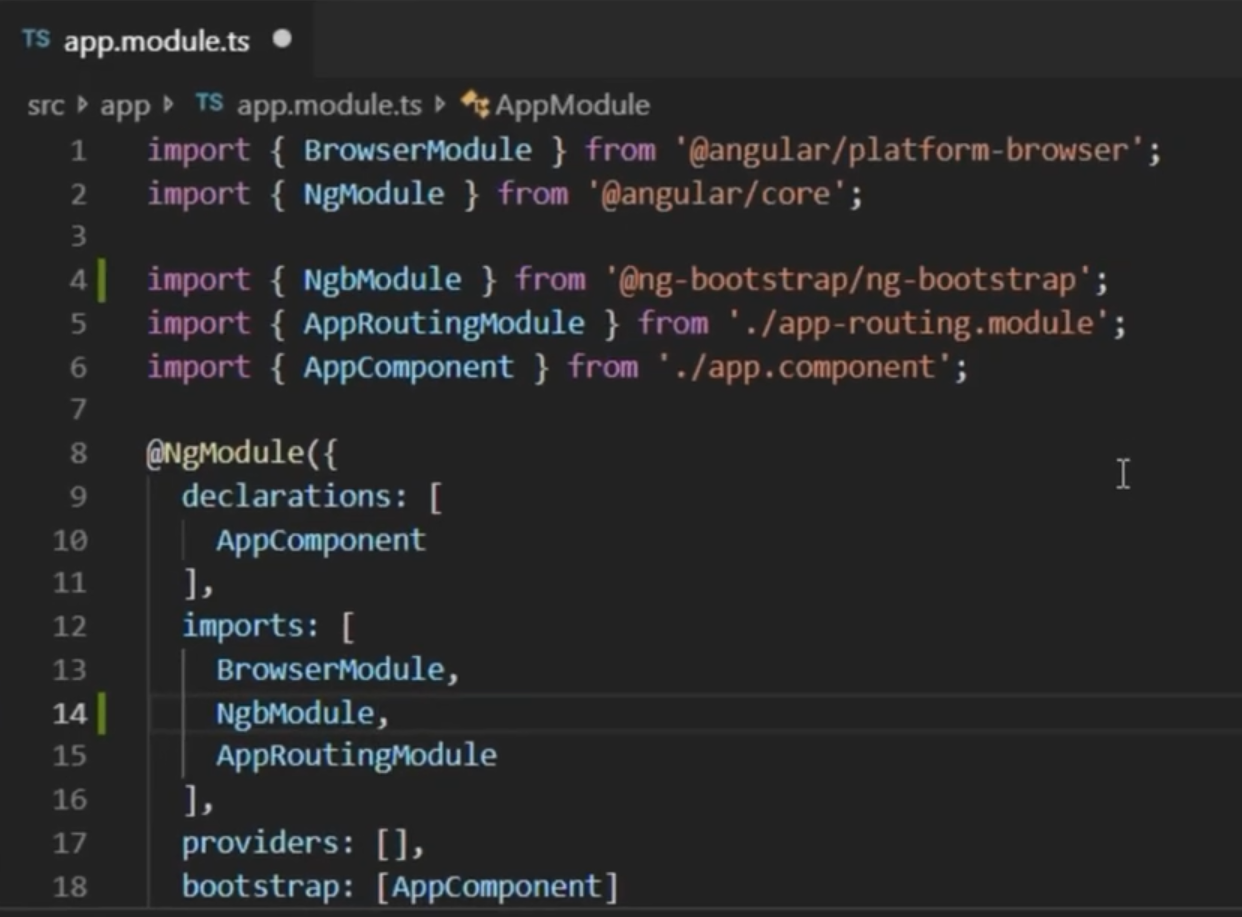
import { BrowserModule } from '@angular/platform-browser';
import { NgModule } from '@angular/core';

import { AppRoutingModule } from './app-routing.module';

import { NgbModule } from '@ng-bootstrap/ng-bootstrap';

import { AppComponent } from './app.component';

@NgModule({
  declarations: [
    AppComponent
  ],
  imports: [
    BrowserModule,
    NgbModule,
    AppRoutingModule
  ],
  providers: [],
  bootstrap: [AppComponent]
})
export class AppModule { }
angular.jsonの修正
次にプロジェクトのルートディレクトリ内の_angular.json_ファイルを開き、インストールされたBootstrap4のcssファイルを追加します。
具体的には、_angular.json_ファイルの中の projects -- architect -- build -- styles に、
"./node_modules/bootstrap/dist/css/bootstrap.min.css",
を追加します。

{
  "$schema": "./node_modules/@angular/cli/lib/config/schema.json",
  "version": 1,
  "newProjectRoot": "projects",
  "projects": {
    "ng8-bootstrap4-initial": {
      "projectType": "application",
      "schematics": {
        "@schematics/angular:component": {
          "style": "scss"
        }
      },
      "root": "",
      "sourceRoot": "src",
      "prefix": "app",
      "architect": {
        "build": {
          "builder": "@angular-devkit/build-angular:browser",
          "options": {
            "outputPath": "dist/ng8-bootstrap4-initial",
            "index": "src/index.html",
            "main": "src/main.ts",
            "polyfills": "src/polyfills.ts",
            "tsConfig": "tsconfig.app.json",
            "assets": [
              "src/favicon.ico",
              "src/assets"
            ],
            "styles": [
              "./node_modules/bootstrap/dist/css/bootstrap.min.css",
              "src/styles.scss"
            ],
            "scripts": []
          },
プロジェクトの起動のチェック
この段階で、まずプロジェクトが起動できるか否かをチェックしておきます。
ターミナル・ウィンドウで、
ng s -o
と入力します。
ブラウザが自動的に開き、Angularのデフォルトページが表示されます。
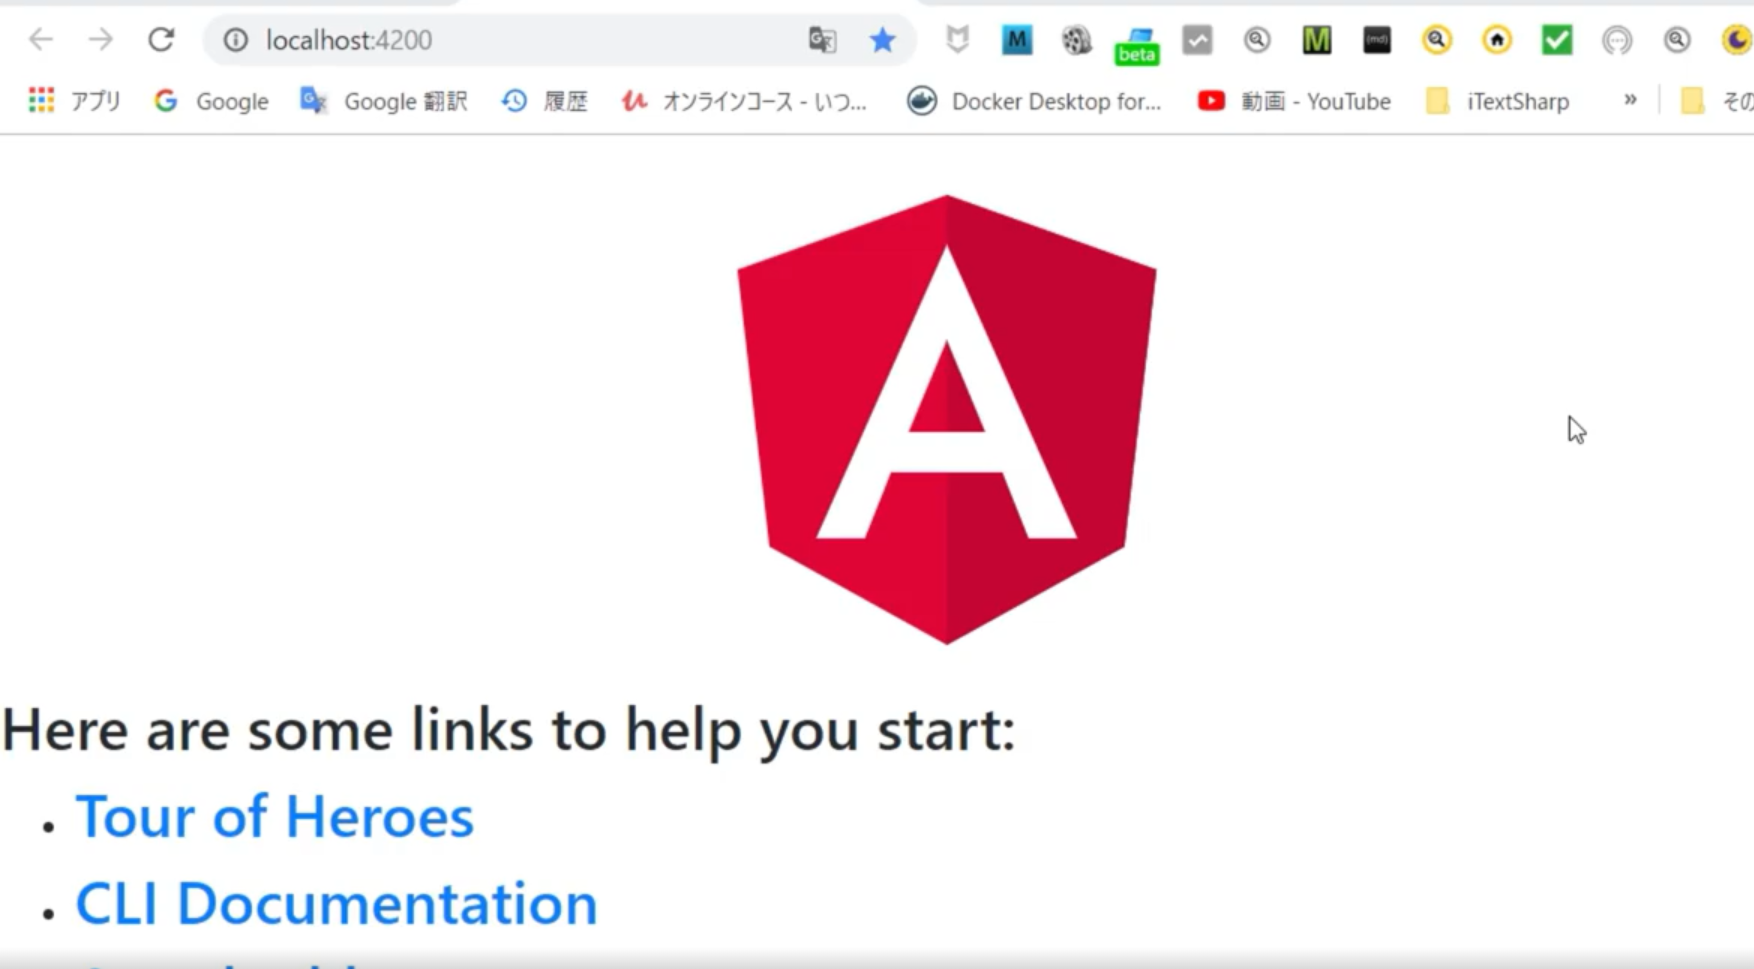
OKです。
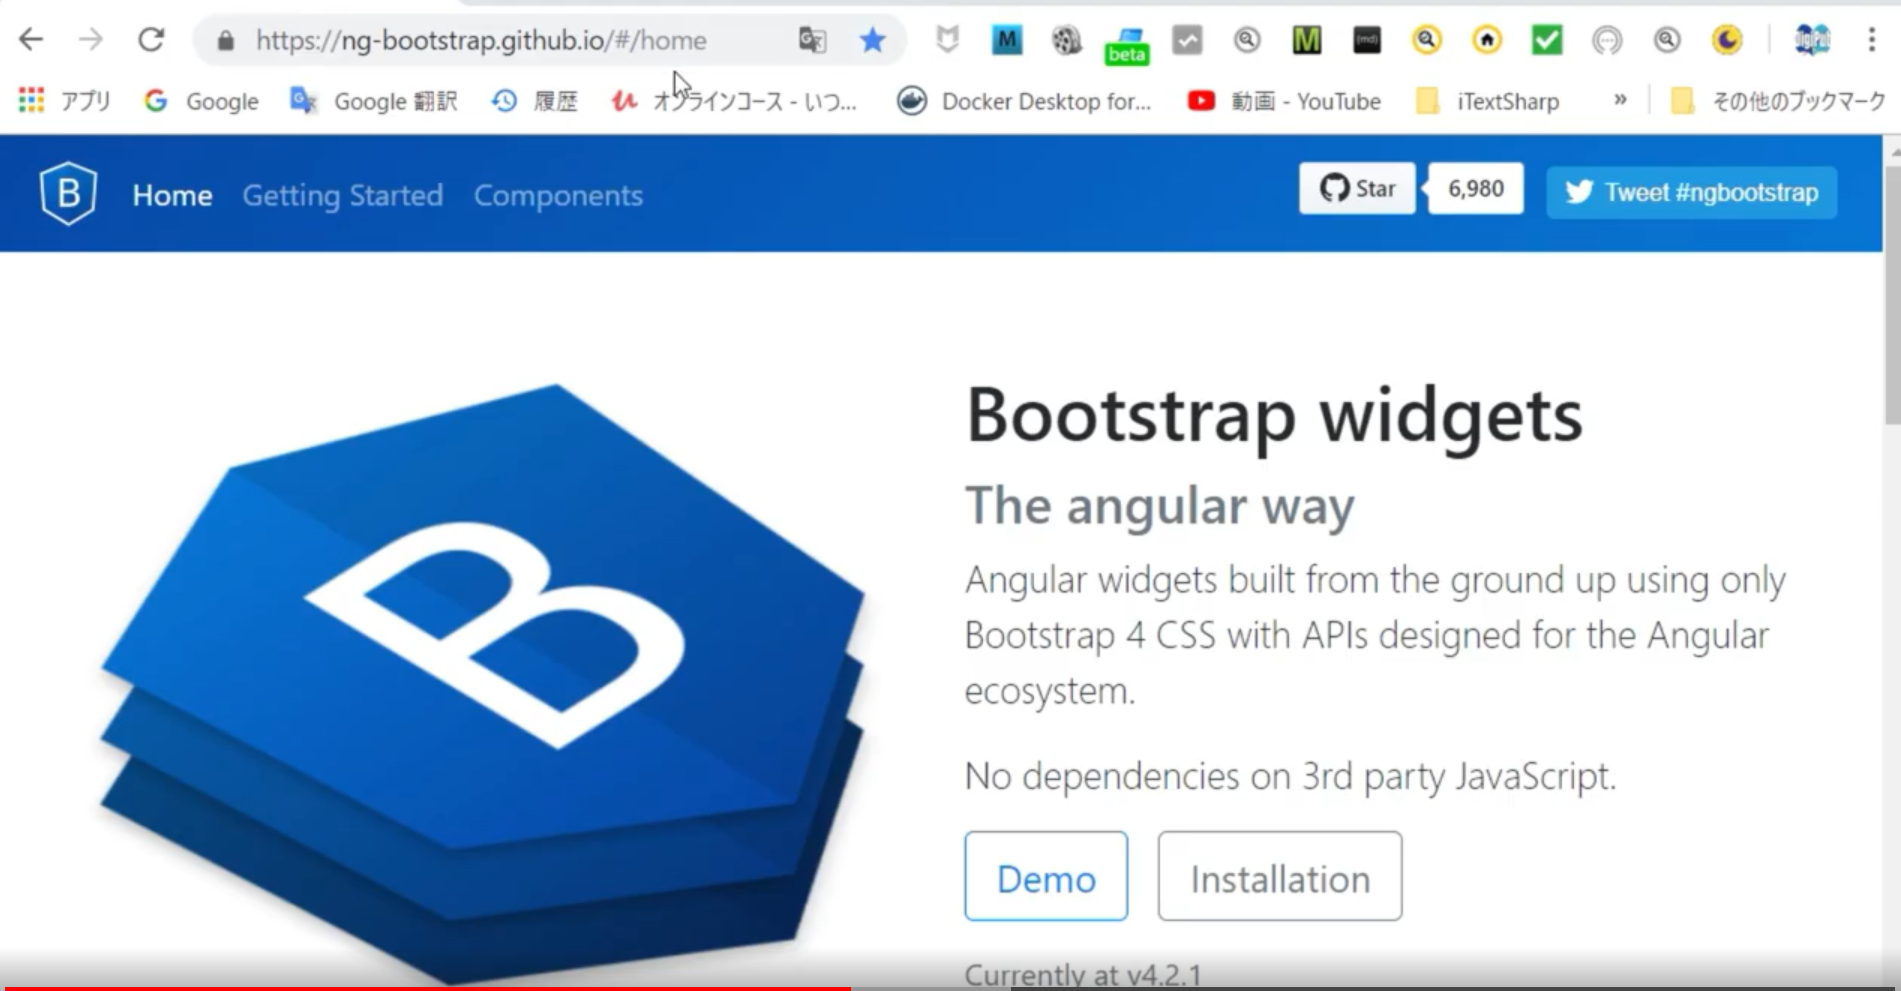
_ng-bootstrap_サイトの表示
次にBootstrap4の機能が実現しているかを確認するために、
_ng-bootstrap_サイトのデモプログラムを利用することにします。
_ng-bootstrap_サイトを開きます。
そのURLは、
https://ng-bootstrap.github.io/#/home
です。
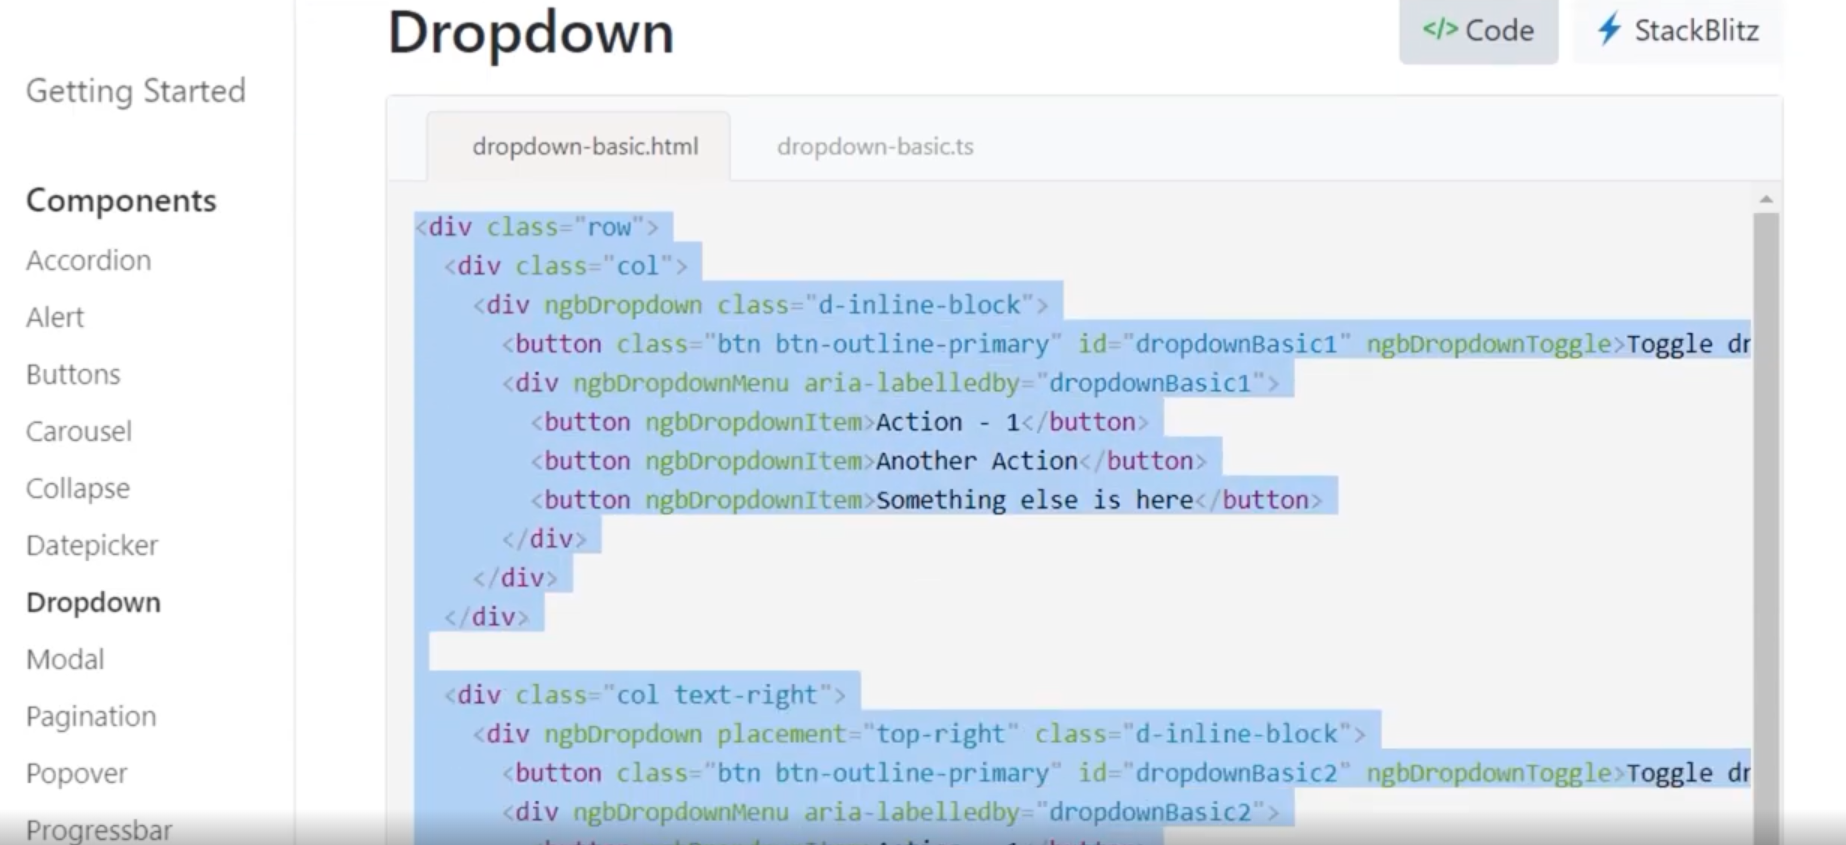
ここでは、一般によく使われるドロップ・ダウン・リストを選択することにします。
左のメニューから_Dropdown_を選択します。
すると_Examples_タブを開くことにより、ドロップダウン並びにドロップアップを試すことができます。

この機能をAngular8のプロジェクト上で実現してみることにします。
まず、_Code_ボタンをクリックし、そのソースを表示します。
そして、このソースをコピーします。
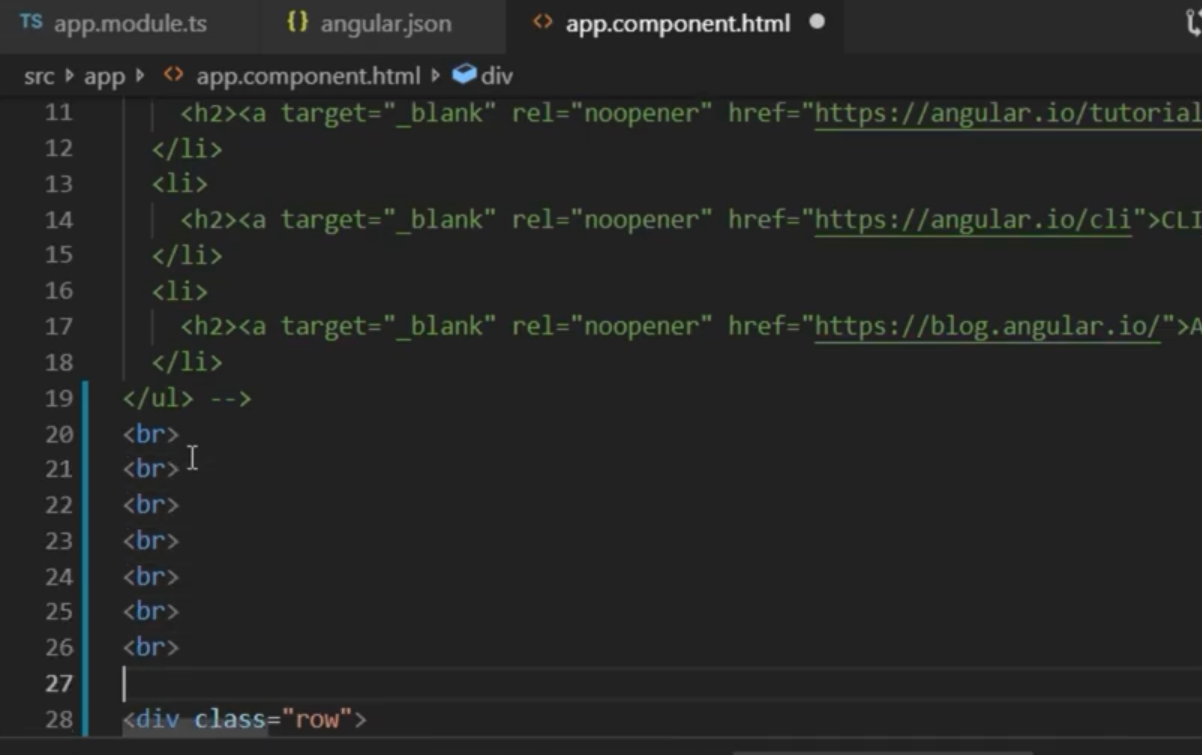
_app.component.html_の修正
VSCodeに戻り、src/appディレクトリ上の_app.component.html_ファイルを開き、コピーしたドロップダウンのサンプルソースを貼り付けます。

ブラウザで確認
ローカルサーバを起動したままであれば、_app.component.html_ファイルを変更した時点で、ブラウザでhttp://localhost:4200を開くことにより、その反映を確認することができます。
表示画面が小さいために、ドロップダウンがドロップアップになってしまっています。

そこで、_app.component.html_ファイルを若干修正します。
デフォルトの表示の一部をコメントアウトし、表示領域を拡大します。

ドロップダウンは、確認できましたが、ドロップアップの表示領域が少ないので、さらに_app.component.html_ファイルをさらに修正します。

改行コードを挿入し、タイトルとの間を広げることにします。
Angular8のプロジェクト上で、Bootstrap4のドロップダウンおよびドロップアップの機能を確認することができました。
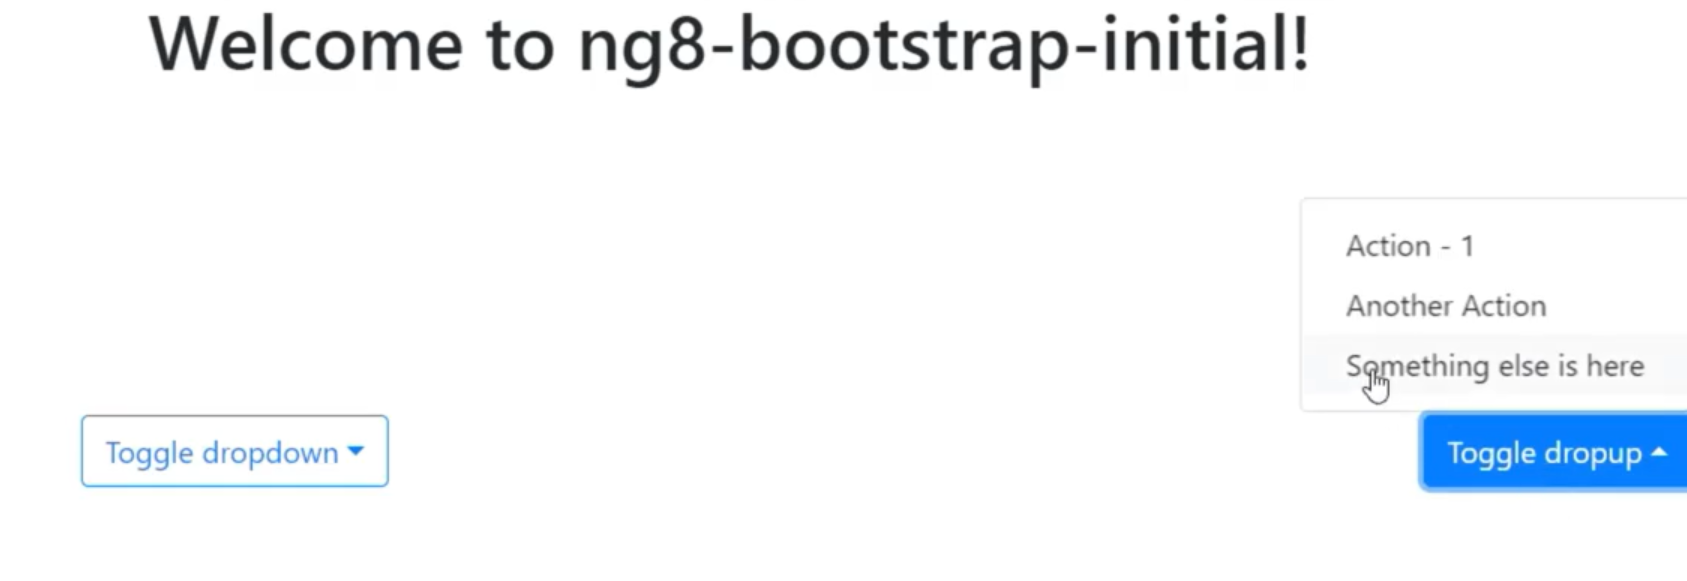
OKです。
Reference
-
"Angular 7 Bootstrap 4 UIs: ng-bootstrap and ngx-bootstrap [Part 1]",
https://www.techiediaries.com/angular-bootstrap-ui/ -
"Angular5, Angular6, Angular7 Custom Library: Step-by-step guide",
https://www.udemy.com/angular5-custom-library-the-definitive-step-by-step-guide/ -
"Angular5, Angular6, Angular7用 カスタムライブラリの作成: 完全ステップ・バイ・ステップ・ガイド",
https://www.udemy.com/angular5-l/