はじめに
最近、マルチモジュール構成のやり方を知ったので記録しておきます。
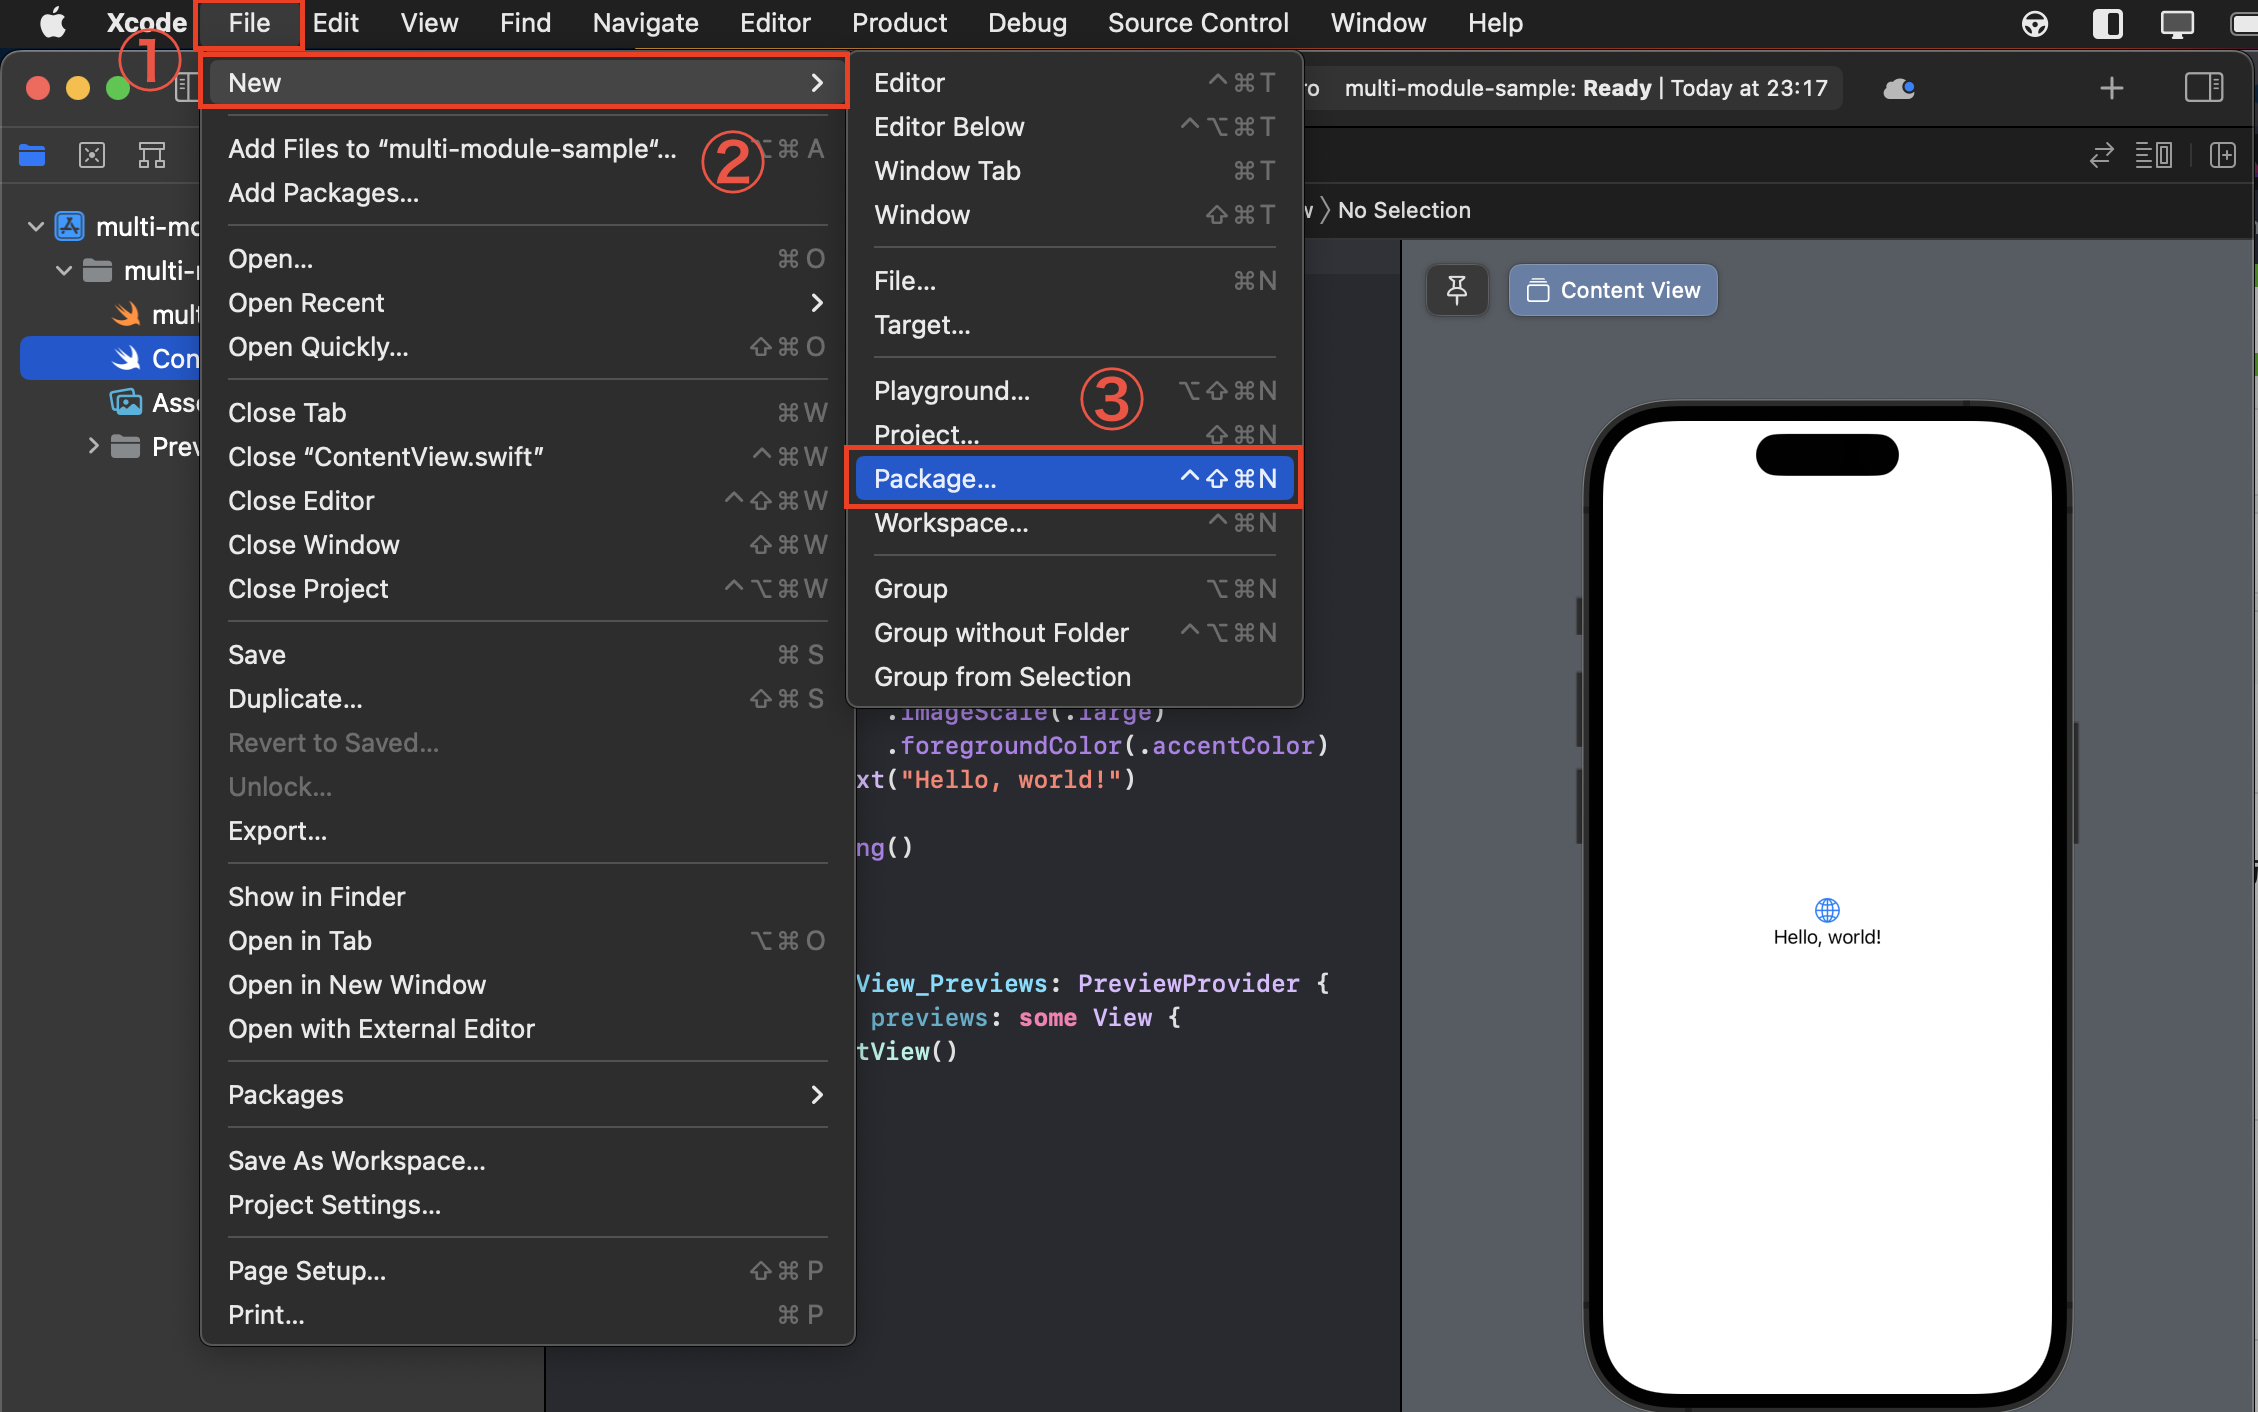
Packageを作成する
① 「File」を選択します
② 「New」を選択します
③ 「Package...」を選択します
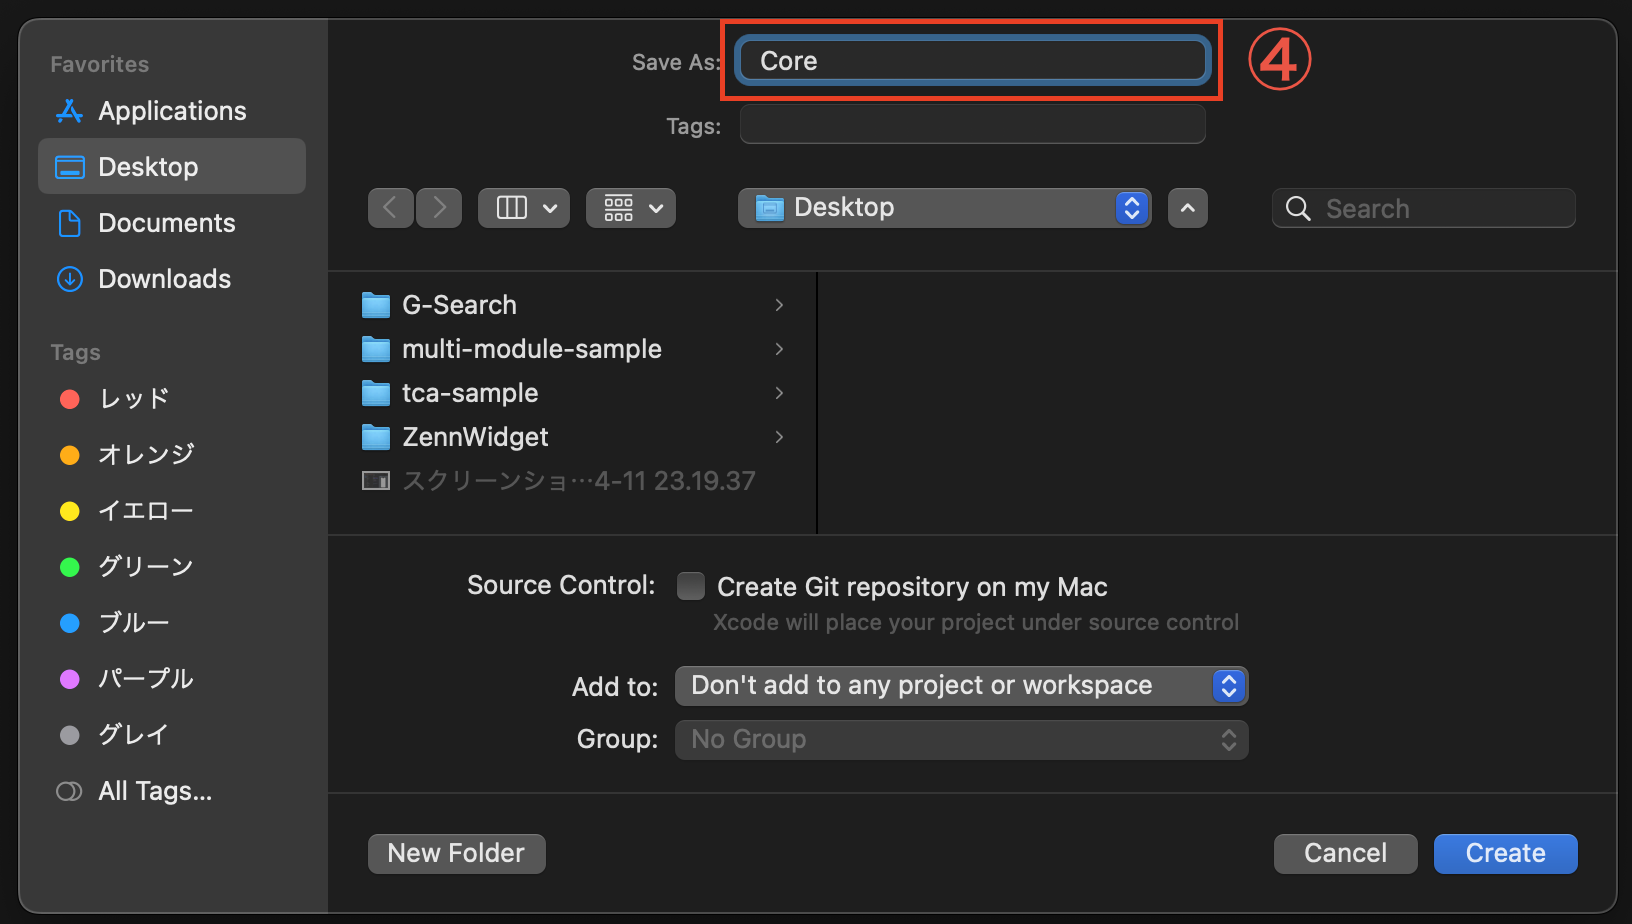
④ パッケージ名を入力します(今回はCoreにしました)
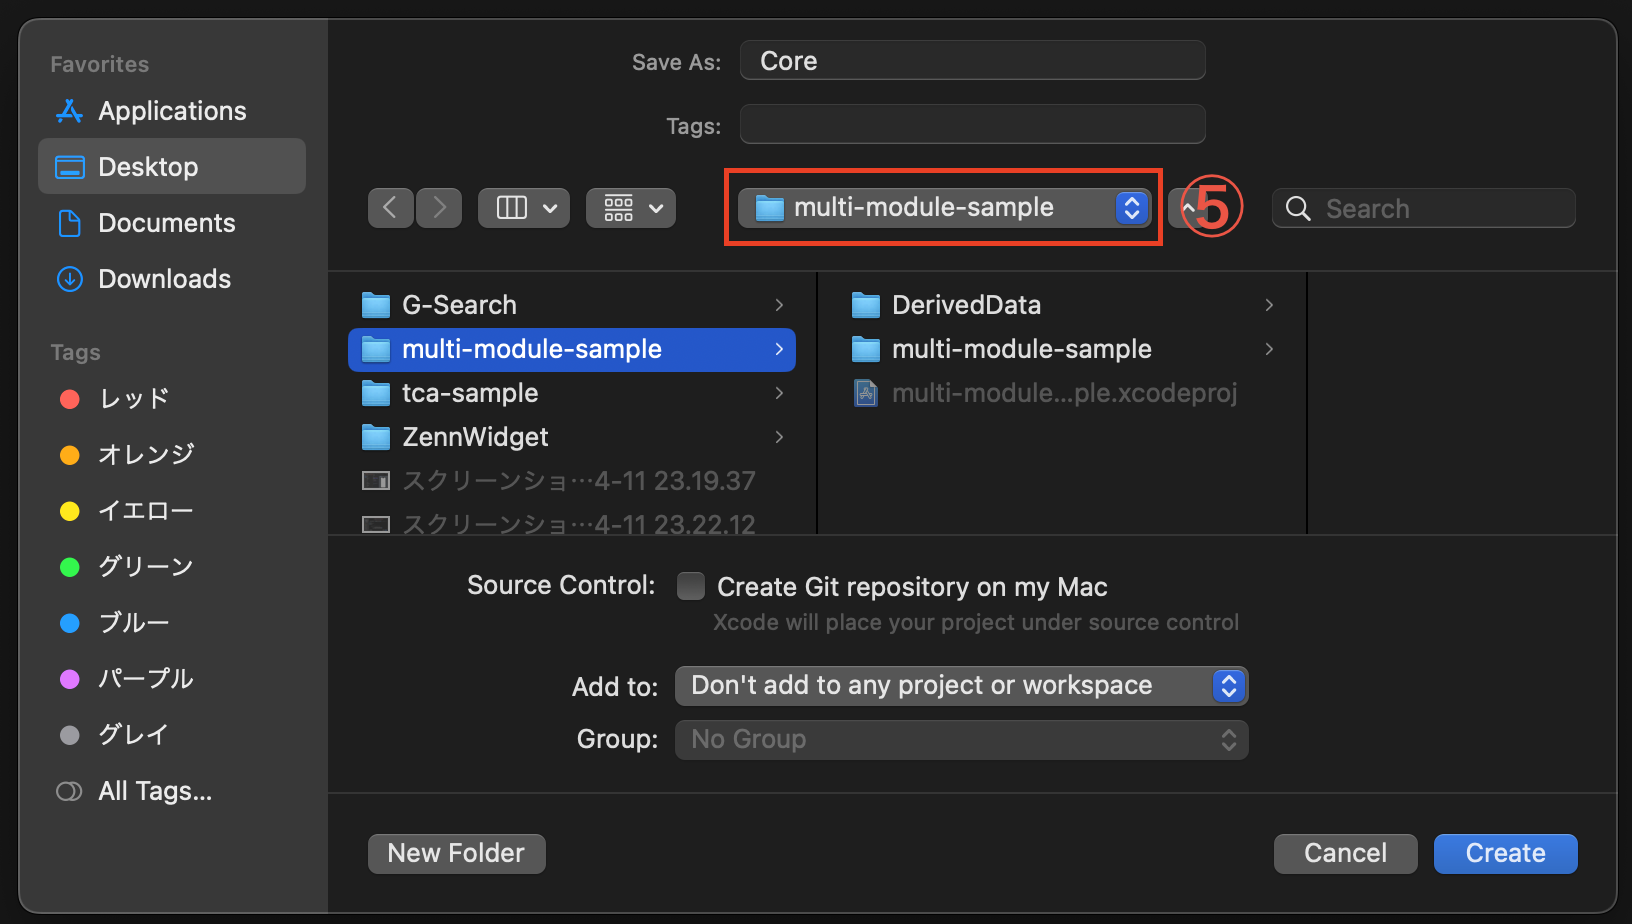
⑤ 保存したいディレクトリを選択します
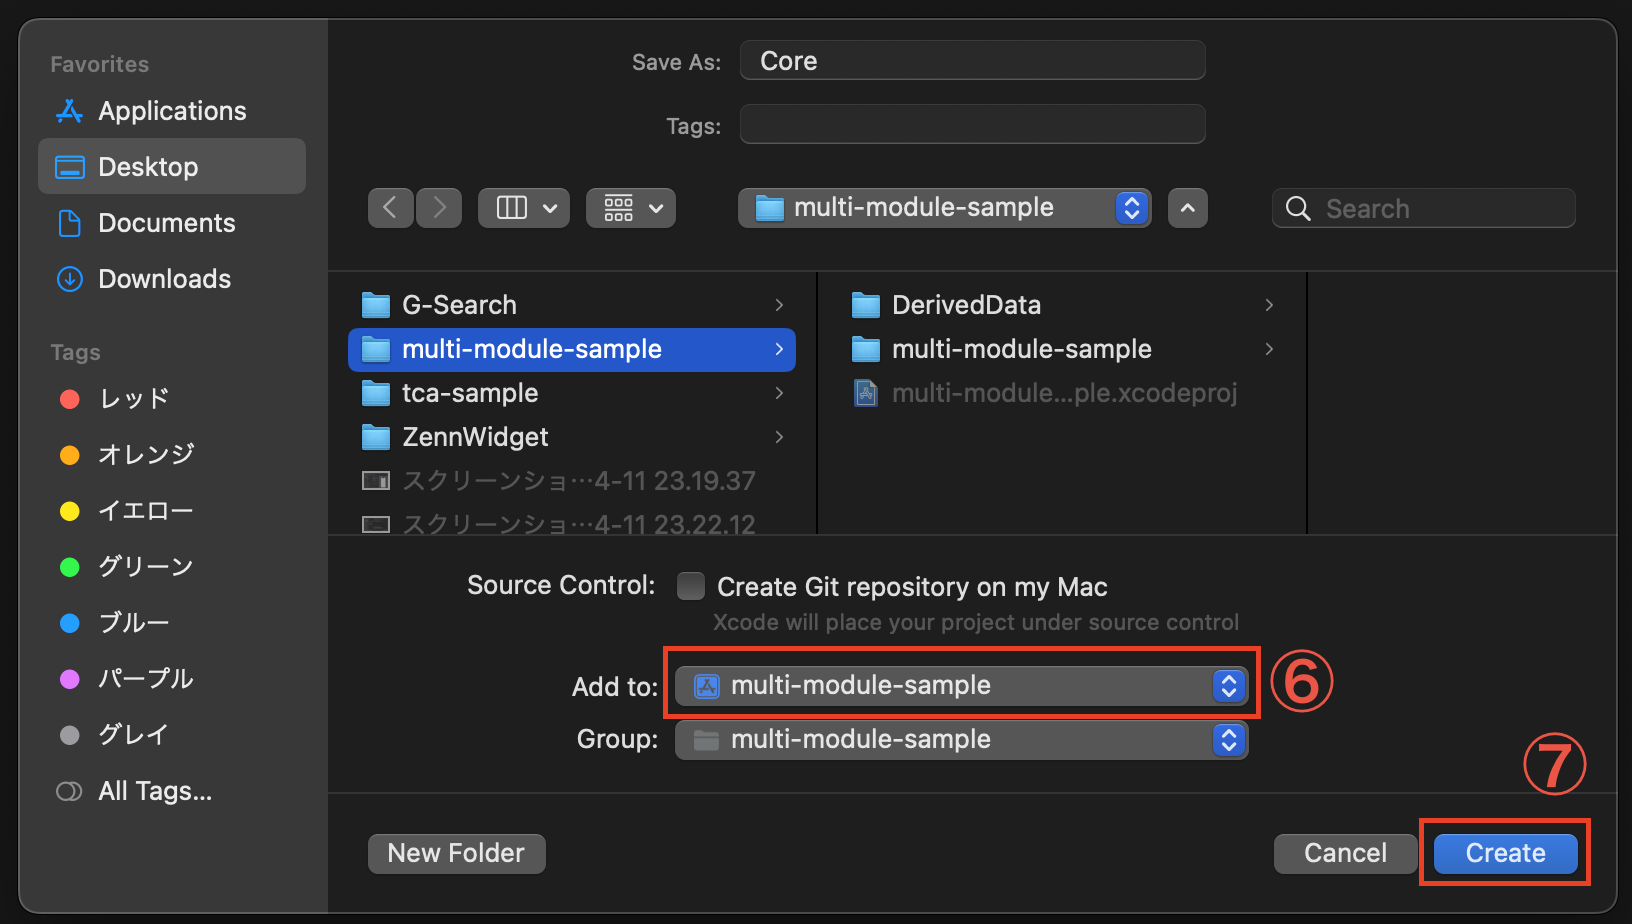
⑥ プロジェクトを選択します
⑦ 「Create」を選択します
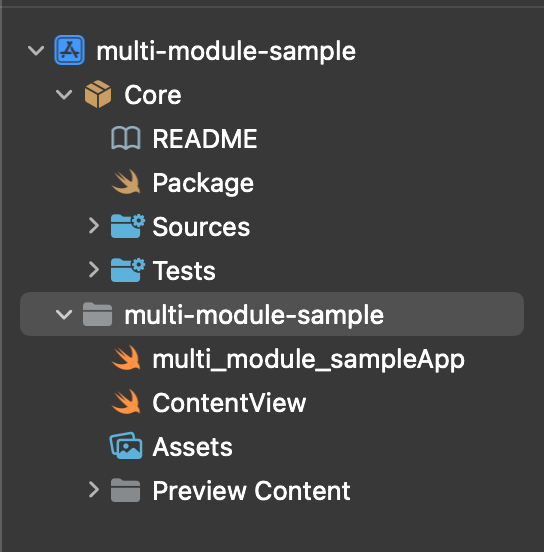
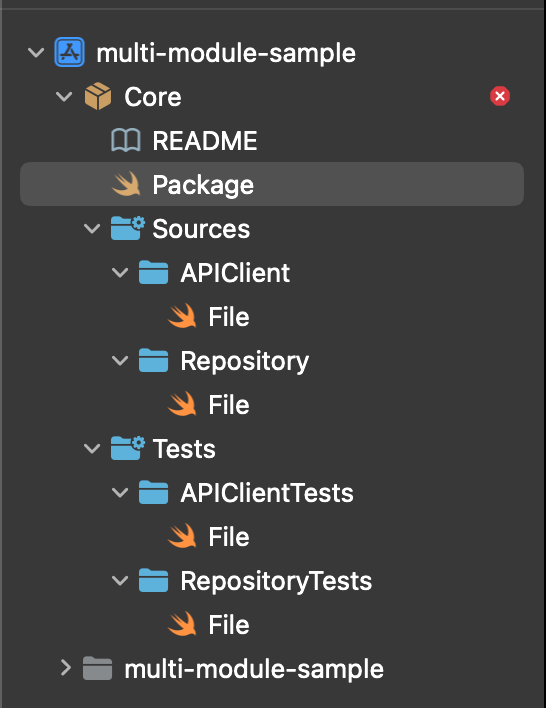
このようになりました。
モジュールを作成する
今回はサンプルとしてAPIClientとRepositoryのモジュールを作成してみようと思います。
① CoreとCoreTestsを選択します(コマンド押しながら選択すると複数選択できる)
② 右クリックをして「Delete」を選択します
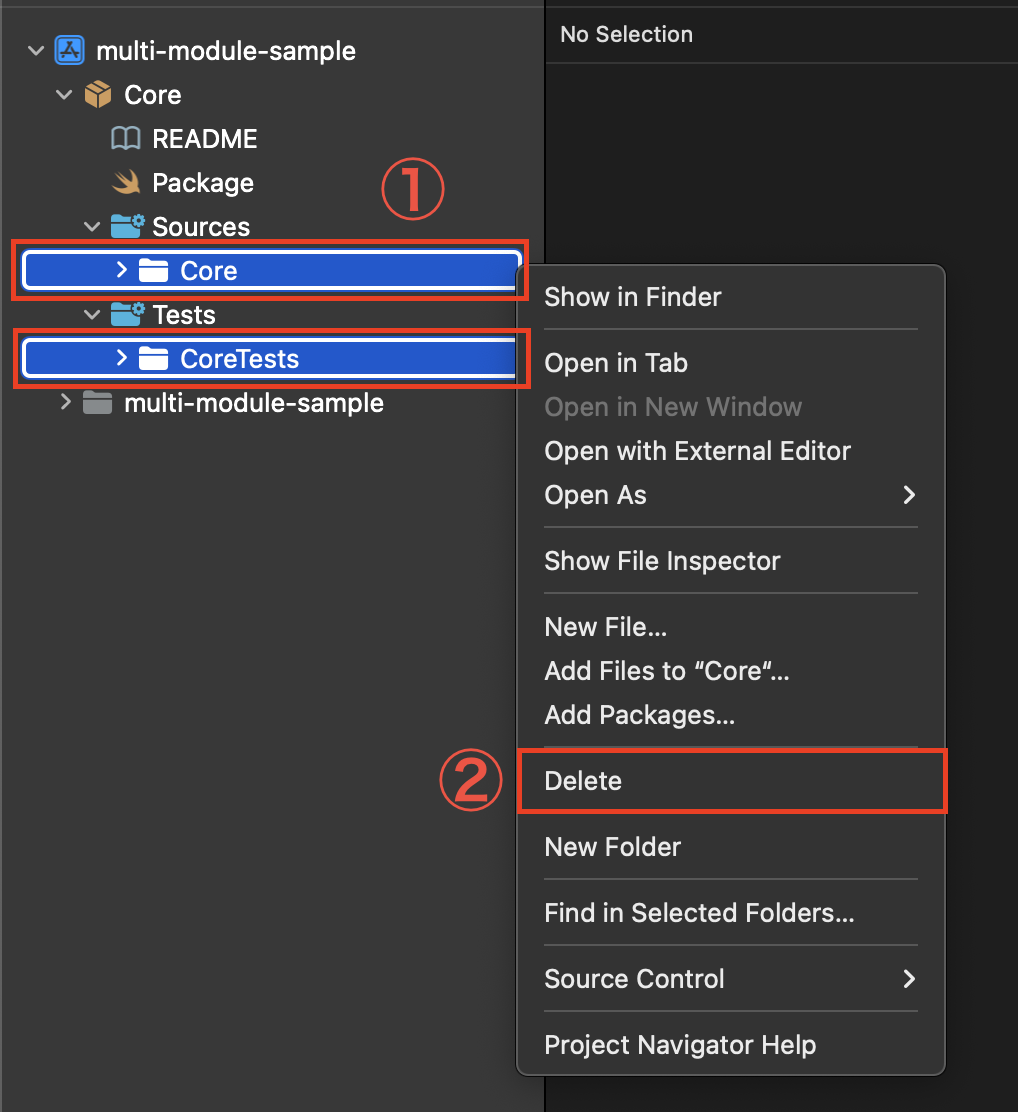
③ 「Move to Trash」を選択します

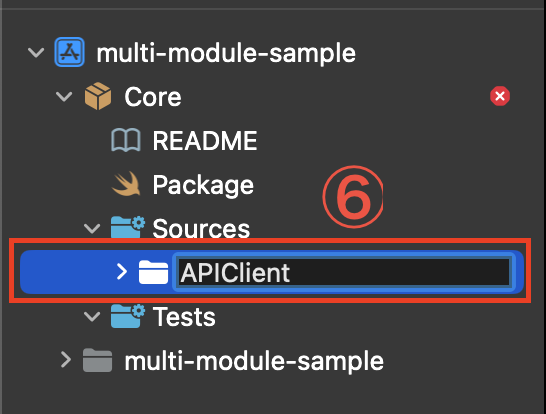
④ 「Sources」を右クリックします
⑤ 「New Folder」を選択します

⑥ APIClientと入力します
上記の手順であと3つほどフォルダを作成します。
- APIClient
- Repository
- APIClientTests
- RepositoryTests
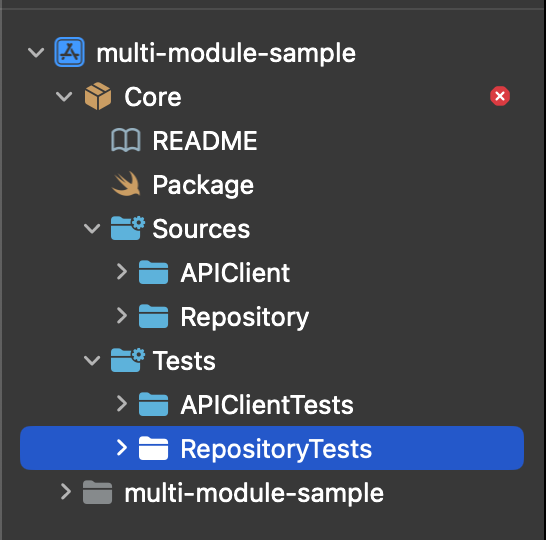
フォルダ内にファイルがないとエラーになるので適当なファイルを作成します。
Package.swiftの編集
Package.swift
import PackageDescription

let package = Package(
    name: "Core",
    products: [
        // Products define the executables and libraries a package produces, and make them visible to other packages.
        .library(
            name: "APIClient",
            targets: ["APIClient"]
        ),
        .library(
            name: "Repository",
            targets: ["Repository"]
        ),
    ],
    dependencies: [
        // Dependencies declare other packages that this package depends on.
        // .package(url: /* package url */, from: "1.0.0"),
    ],
    targets: [
        // Targets are the basic building blocks of a package. A target can define a module or a test suite.
        // Targets can depend on other targets in this package, and on products in packages this package depends on.
        .target(
            name: "APIClient",
            dependencies: []
        ),
        .target(
            name: "Repository",
            dependencies: []
        ),
        .testTarget(
            name: "APIClientTests",
            dependencies: ["APIClient"]
        ),
        .testTarget(
            name: "RepositoryTests",
            dependencies: ["Repository"]
        ),
    ]
)
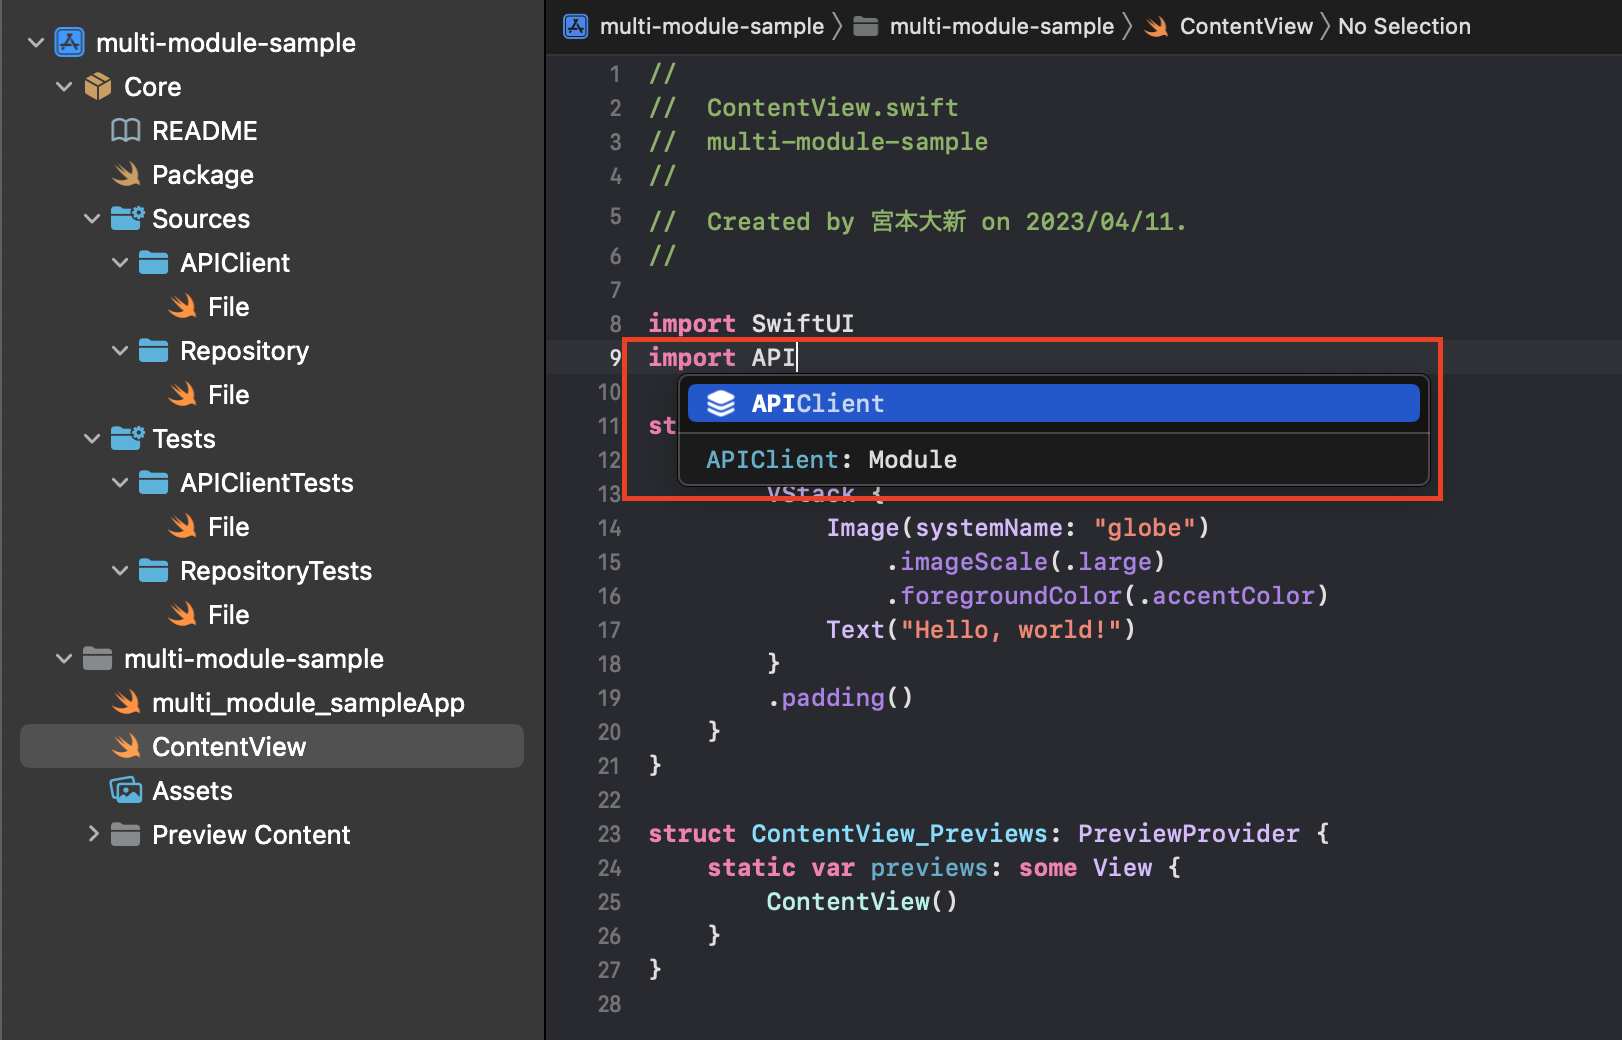
使う
このようにインポートできるようになリます。
おわり
さっそく個人開発アプリに導入してみました